

Well it's finally began. I asked a lot of opinions recently as I had originally just planned on throwing the cheapest lift and tires on it possible just to have something to play with but soon changed my mind. While some of you may have done things differently, I went with what I thought was the best setup for myself.
A little background. This was my Moms XJ that I found for her a while back as she needed something reliable and 4wd on a budget, found this clean 2 owner with 170k for $3200.
Long story short, someone pulled out in front of her a year later and did a little front end damage, nothing major. Front bumper, fender, grill, some busted turn signal lenses. The insurance company ended up totaling it out. I buy it back for $495 (Actually didnt' have anything out of pocket, recently purchased new bedroom furniture and spent enough money that we received a free 50" LCD and Blu Ray player so I just traded her that for the Jeep). Oh and I almost forgot, the insurance company never did anything with the title so I have a clean title in my name
So I buy new lenses, pull the fender out by hand and drive it home. Found out after that drive the radiator was also damaged and had a small leak, so I put a new radiator in it. Since then, no issues at all other than a dead battery. Total out of pocket $270. That brings us up to yesterday!
Things to get it all started:
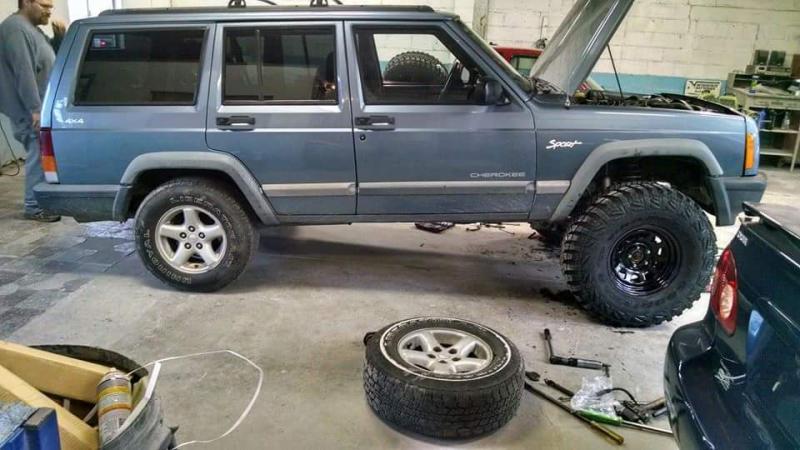
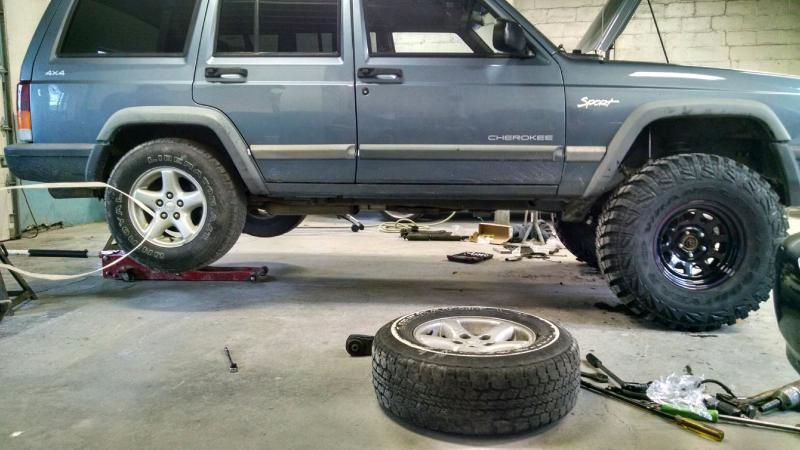
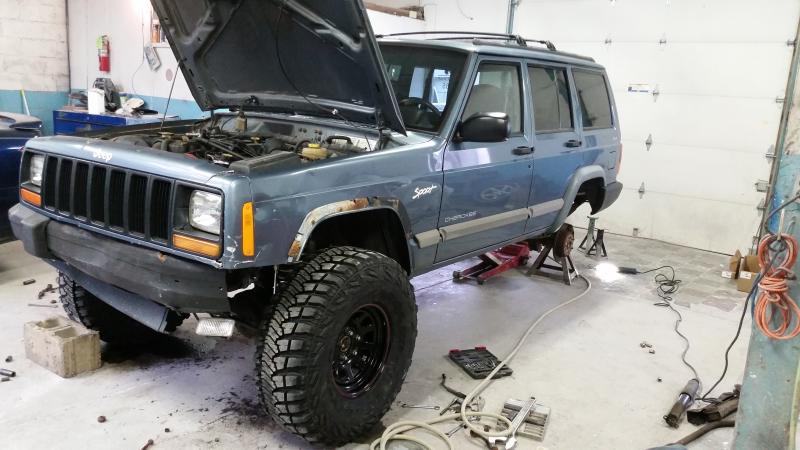
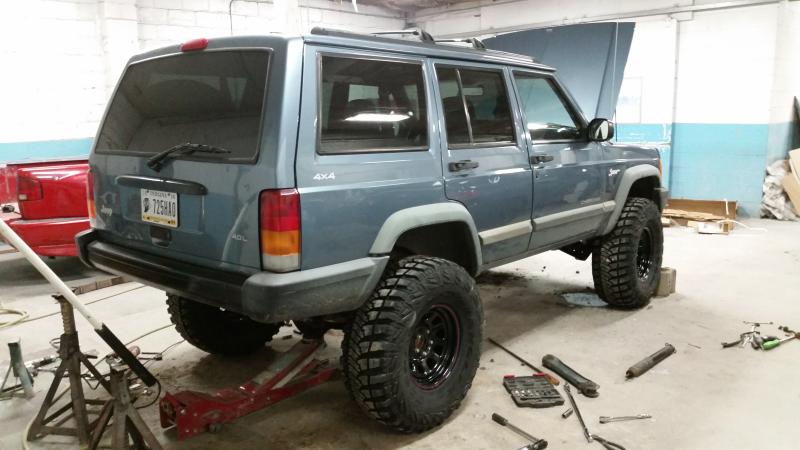
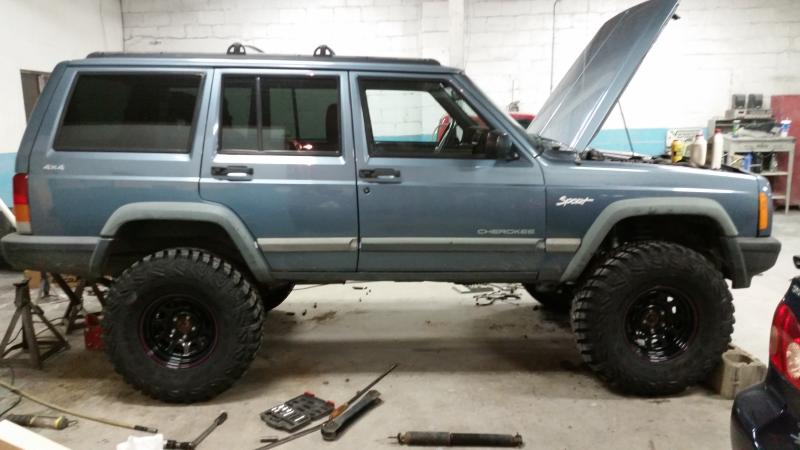
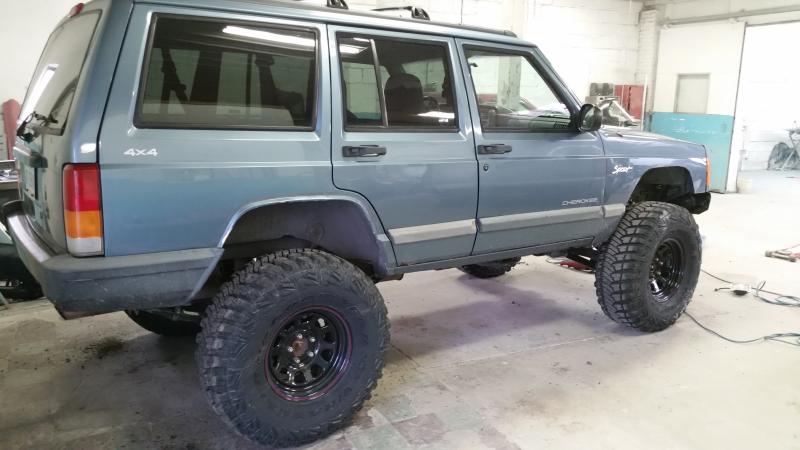
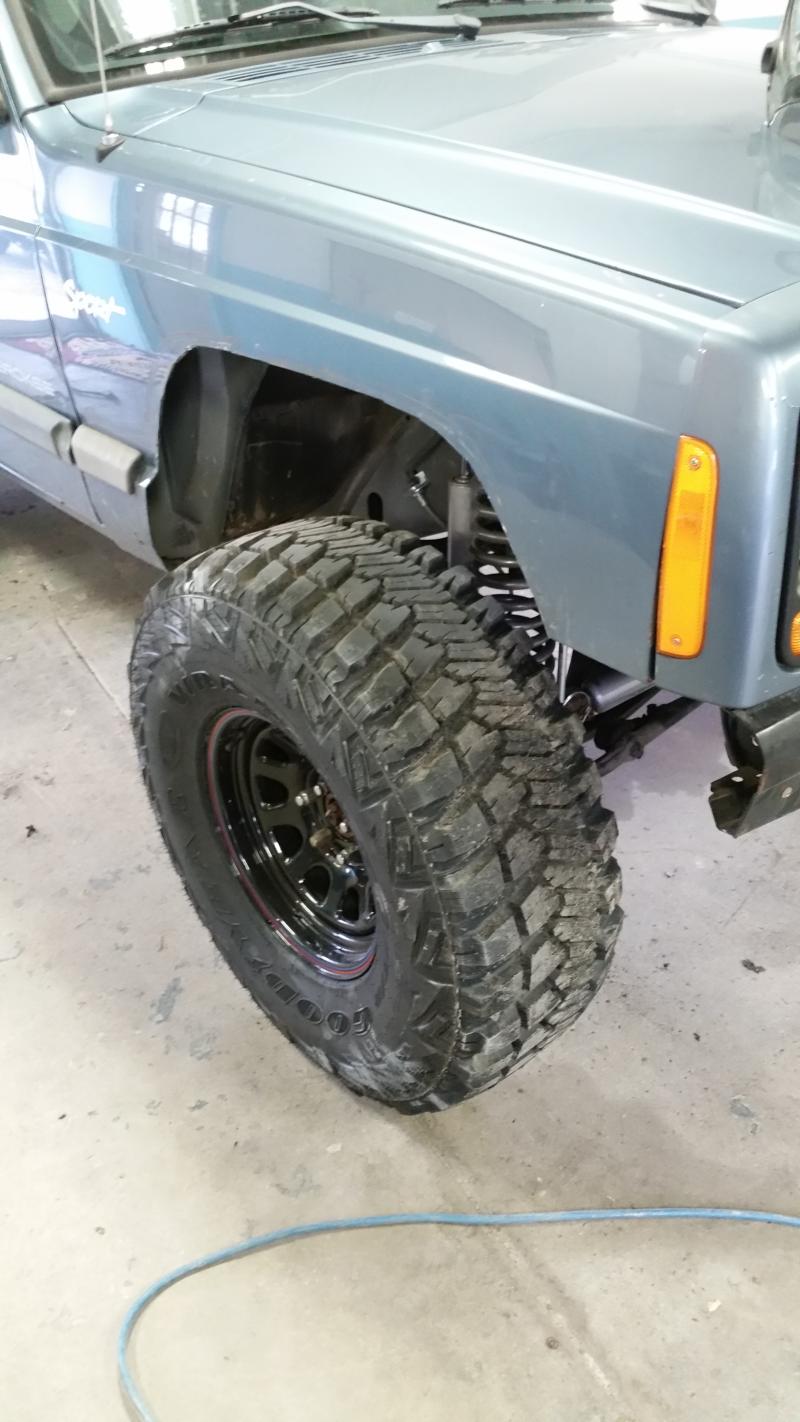
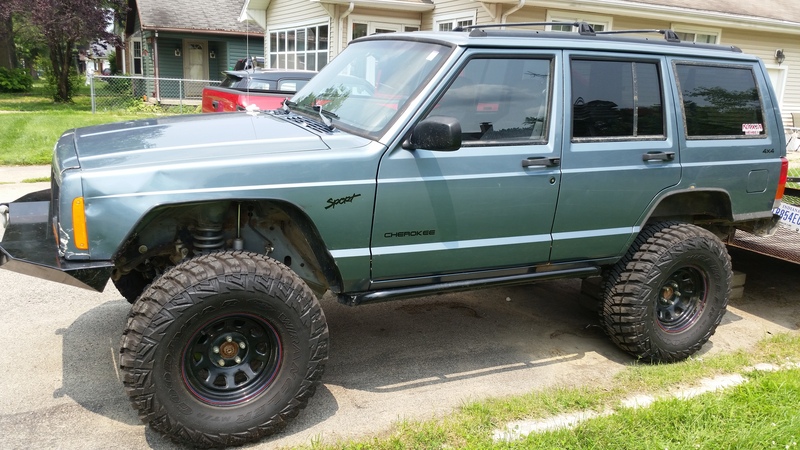
4.5" Rough Country X-Series lift $830 shipped - http://www.roughcountry.com/jeep-sus...it-633xn2.html
Came with a few extra things that I'd end up needing to purchase very soon so I figured it was worth saving the extra money up front.
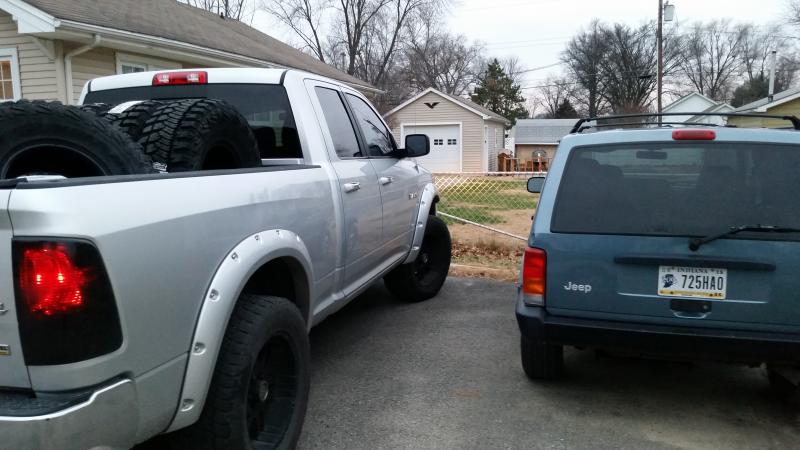
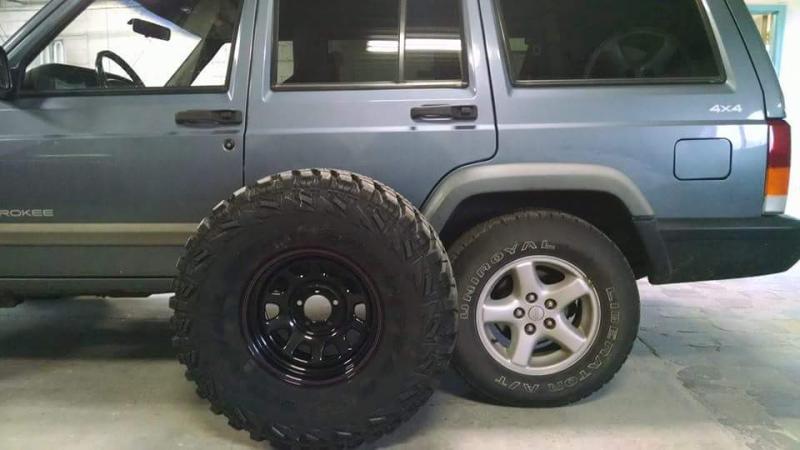
15x8 4" BS Cragar D Windows (5) - eBay from Summit for $290 shipped
33x12.50 Goodyear Wrangler MT/R w/Kevlar
Ended up getting these from 4wd.com for like $1175~ish shipped
Rough Country Steering Stabilizer is on the way, and I'm on the hunt for a SYE.. then bumpers are next.
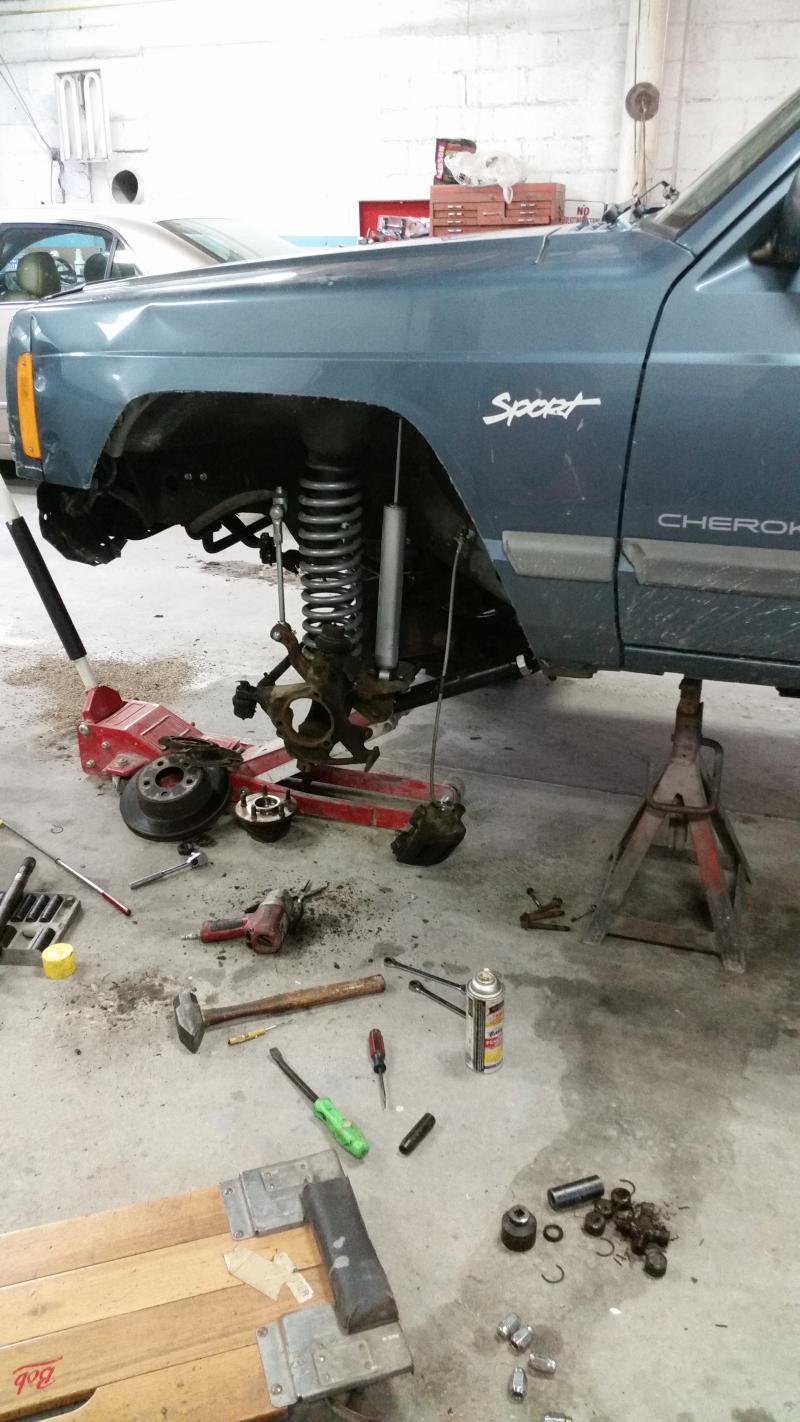
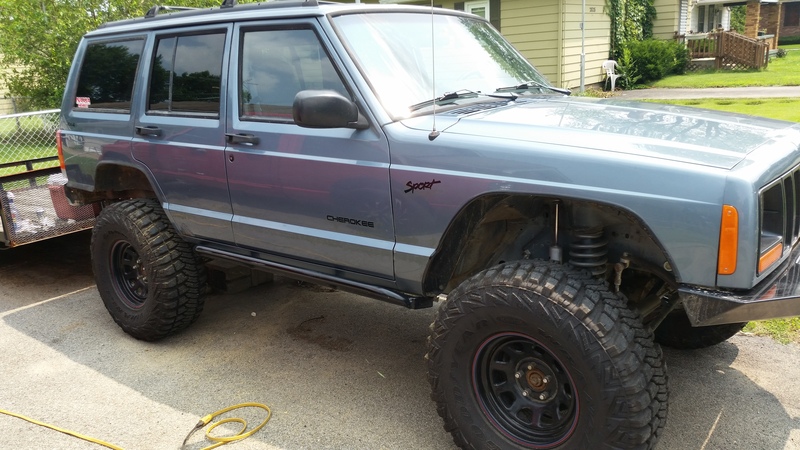
Started on it yesterday.. really happy with the quality of the parts and the fitment of everything so far. The only things we have left to do at the moment is the rear shocks and rear brake lines. The rear shocks have been replaced some time before, they didn't do a very good job with the top bolts and we're having some problems getting them out. We have one more idea before we have to resort to cutting a couple holes in the hatch.
Once we get that all sorted out we'll probably go ahead and pull whats left of the bottom of the front bumper and trim the front fenders today.
A little background. This was my Moms XJ that I found for her a while back as she needed something reliable and 4wd on a budget, found this clean 2 owner with 170k for $3200.
Long story short, someone pulled out in front of her a year later and did a little front end damage, nothing major. Front bumper, fender, grill, some busted turn signal lenses. The insurance company ended up totaling it out. I buy it back for $495 (Actually didnt' have anything out of pocket, recently purchased new bedroom furniture and spent enough money that we received a free 50" LCD and Blu Ray player so I just traded her that for the Jeep). Oh and I almost forgot, the insurance company never did anything with the title so I have a clean title in my name
So I buy new lenses, pull the fender out by hand and drive it home. Found out after that drive the radiator was also damaged and had a small leak, so I put a new radiator in it. Since then, no issues at all other than a dead battery. Total out of pocket $270. That brings us up to yesterday!
Things to get it all started:
4.5" Rough Country X-Series lift $830 shipped - http://www.roughcountry.com/jeep-sus...it-633xn2.html
Came with a few extra things that I'd end up needing to purchase very soon so I figured it was worth saving the extra money up front.
15x8 4" BS Cragar D Windows (5) - eBay from Summit for $290 shipped
33x12.50 Goodyear Wrangler MT/R w/Kevlar
Ended up getting these from 4wd.com for like $1175~ish shipped
Rough Country Steering Stabilizer is on the way, and I'm on the hunt for a SYE.. then bumpers are next.
Started on it yesterday.. really happy with the quality of the parts and the fitment of everything so far. The only things we have left to do at the moment is the rear shocks and rear brake lines. The rear shocks have been replaced some time before, they didn't do a very good job with the top bolts and we're having some problems getting them out. We have one more idea before we have to resort to cutting a couple holes in the hatch.
Once we get that all sorted out we'll probably go ahead and pull whats left of the bottom of the front bumper and trim the front fenders today.


Any thoughts on running a SYE along with the tcase drop? I went ahead and put the drop in but plan on getting a SYE in the near future, just wasn't sure if there were any issues with having both.

Member
You would remove the t case drop when you install the sye.. Truck looks great especially for the $ invested.... I have the same color and I'm doing my bushwacker flat flare install now... What a *****.
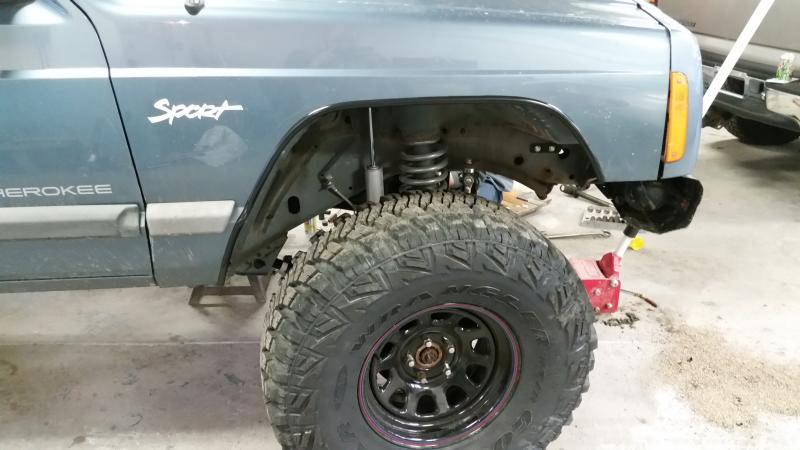
Steering stabilizer is here, that will go on Saturday along with doing the front and rear fenders then it's off to be aligned Monday. That'll get me by until the next round of mods... front bumper, rear bumper or just a hitch for a recovery point, and a SYE.. that'll get me where I need to be to get out on the trails. I'll do a few other small things along the way, then start putting everything together for the 8.8 I have.
-Steering stabilizer is on
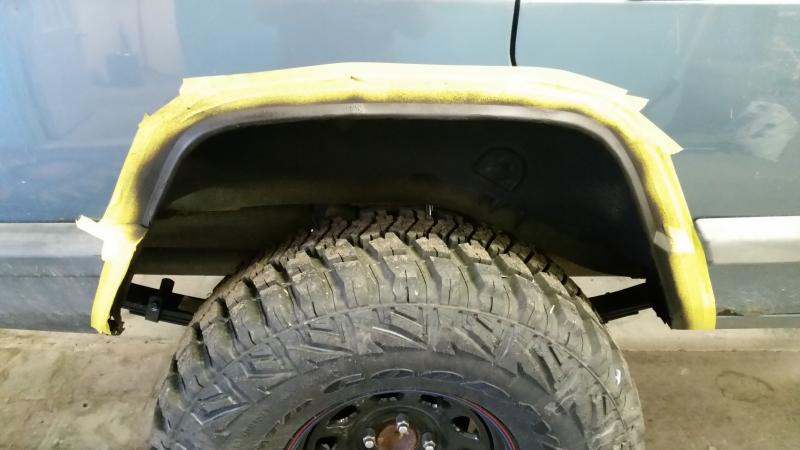
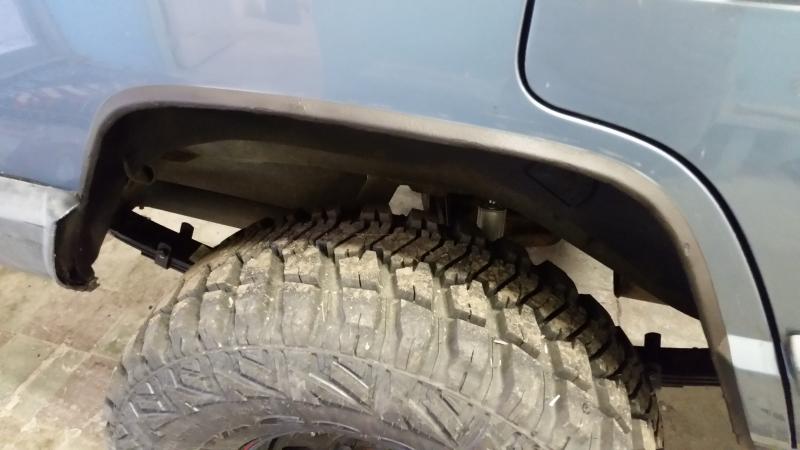
-Front fenders are trimmed, just waiting on the molding.
-Rear fenders cut and folded, picking up some underbody spray from the paint shop tomorrow or Tuesday. Just going to tape them off and spray them rather than the molding.
-Front bumper trimmed, horns relocated in a bit and out of the way
Next up, front tow hooks and a rear hitch for now until I can swing the cash for bumpers.. SYE is the next bigger mod. I was going to do the Hack-n-Tap but I think I'm just going to go with the full HD SYE Kit.
It's getting closer!


Finally got this thing back in the garage today.
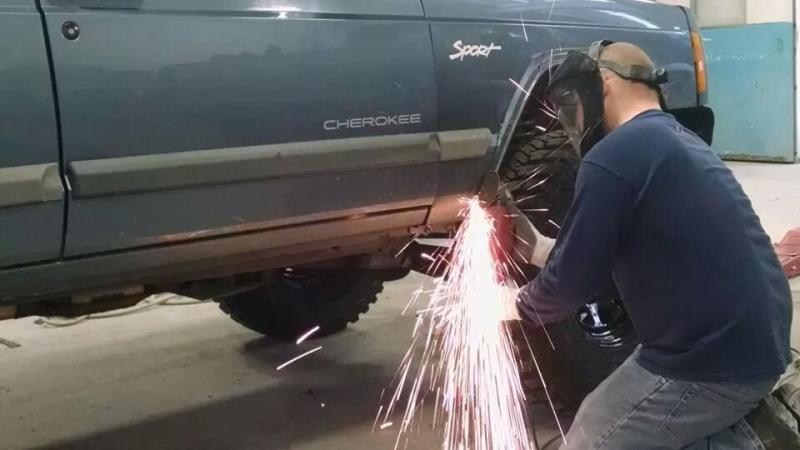
First job on order was the u-joint on the drivers side wheel/axle. Once we had it all apart we realized the ball joint was trashed, so went another trip to AutoZone to do that since it was all apart. Got those buttoned up then finished up the fenders.. undercoating spray on the back fenders and ProtektoTrim on the front.
Let me add, the ProtektoTrim wasn't exactly what I thought it would be. I was pointed in the direction of the 5/8" band wheel well modling and I was under the impression it would sort of wrap around the edge like a door edge guard and that wasn't the case, it just sticks to the outside of the fender. Looks decent, but kind of pointless other than cosmetic really. I went ahead and put it on and just used a body hammer to smooth out the edge of the fender as best as I could, came out decent actually.
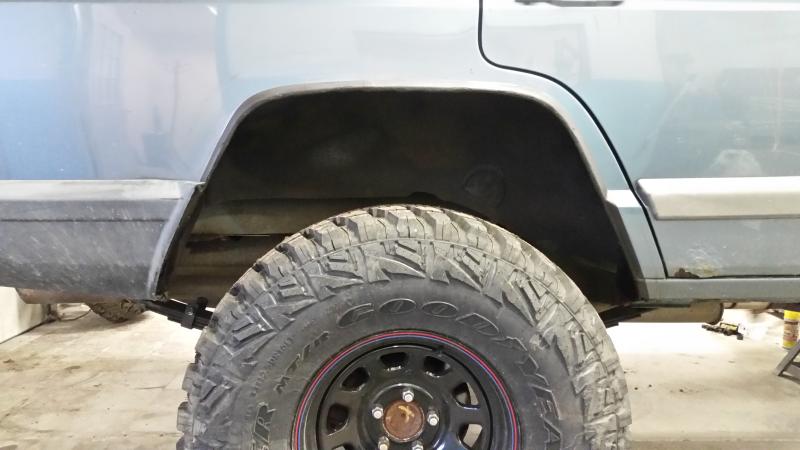
Finished Product
First job on order was the u-joint on the drivers side wheel/axle. Once we had it all apart we realized the ball joint was trashed, so went another trip to AutoZone to do that since it was all apart. Got those buttoned up then finished up the fenders.. undercoating spray on the back fenders and ProtektoTrim on the front.
Let me add, the ProtektoTrim wasn't exactly what I thought it would be. I was pointed in the direction of the 5/8" band wheel well modling and I was under the impression it would sort of wrap around the edge like a door edge guard and that wasn't the case, it just sticks to the outside of the fender. Looks decent, but kind of pointless other than cosmetic really. I went ahead and put it on and just used a body hammer to smooth out the edge of the fender as best as I could, came out decent actually.


Finished Product

Back up top!
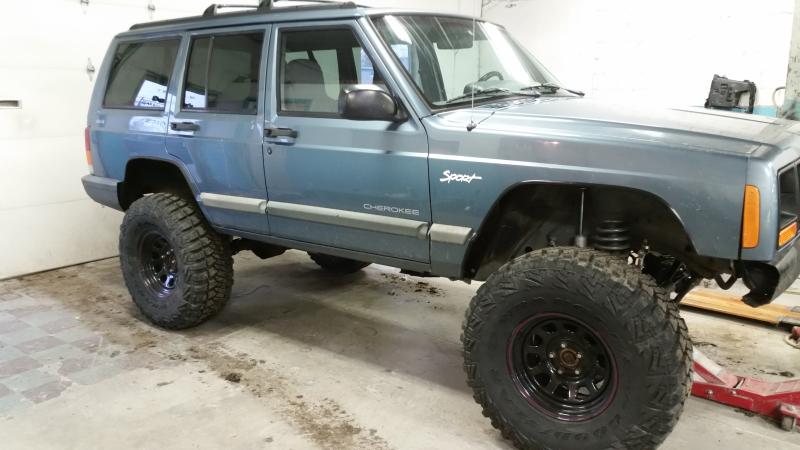
Logans Metal front winch bumper now on, Iron Rock Off Road premium sliders on, cut/fold the rear lower quarters, hitch installed, all side moldings removed, stock grey/white decals removed in favor of black..
I went through Winterfest @ Badlands without a hitch running with the Orange trail group. I've been back a couple times since as well as a trip to Redbird for a NAXJA spring trail cleanup, its been a beast!
I still need to pick up a winch, the next big project is gathering parts to swap this 8.8 that I have along with 4.56's and some sort of locker setup.


I make garbage
Seeing this makes me want to get the lift for mine even more 

Banned
Looks good. Do yourself a favor and remove that tc drop and do it right with an sye. Transfer case drops cause more and more problems down the road that end up costing more money. Ask me how I know.
Thanks fellas. Forgot to mention that in the update it had been so long haha.. TC drop was removed, HD SYE kit was installed with a front drive shaft I picked up at a local yard, its performed great. I also picked up a nice Reese hitch setup from the same donor Jeep at the same time I grabbed the driveshaft.
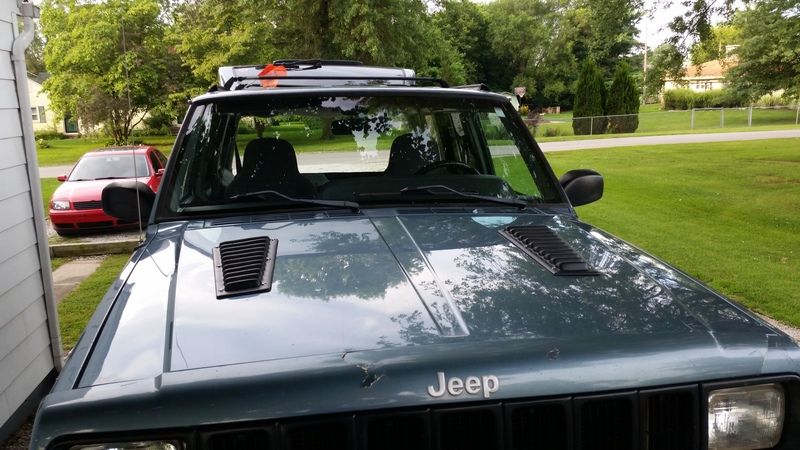
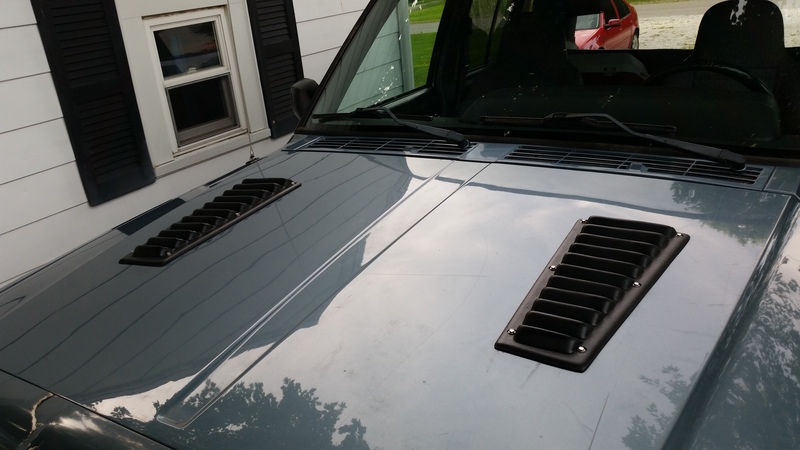
I actually ended up deciding to stick with the 8.25 and sold the 8.8 back to my buddy last night and ordered front and rear Aussie lockers! I picked up a set of hood vents on eBay today as well.
I actually ended up deciding to stick with the 8.25 and sold the 8.8 back to my buddy last night and ordered front and rear Aussie lockers! I picked up a set of hood vents on eBay today as well.
Ehh I only have 30 bucks in some decent aluminum ones, saves me time. I'm trying to get as much done as I can before a wheeling trip on the 18th.
Lockers are in and were put to the test yesterday, success! Also threw these vents on Friday night before loading up.


Former Sponsor
Such a transformation, looking good!