When you click on links to various merchants on this site and make a purchase, this can result in this site earning a commission. Affiliate programs and affiliations include, but are not limited to, the eBay Partner Network.
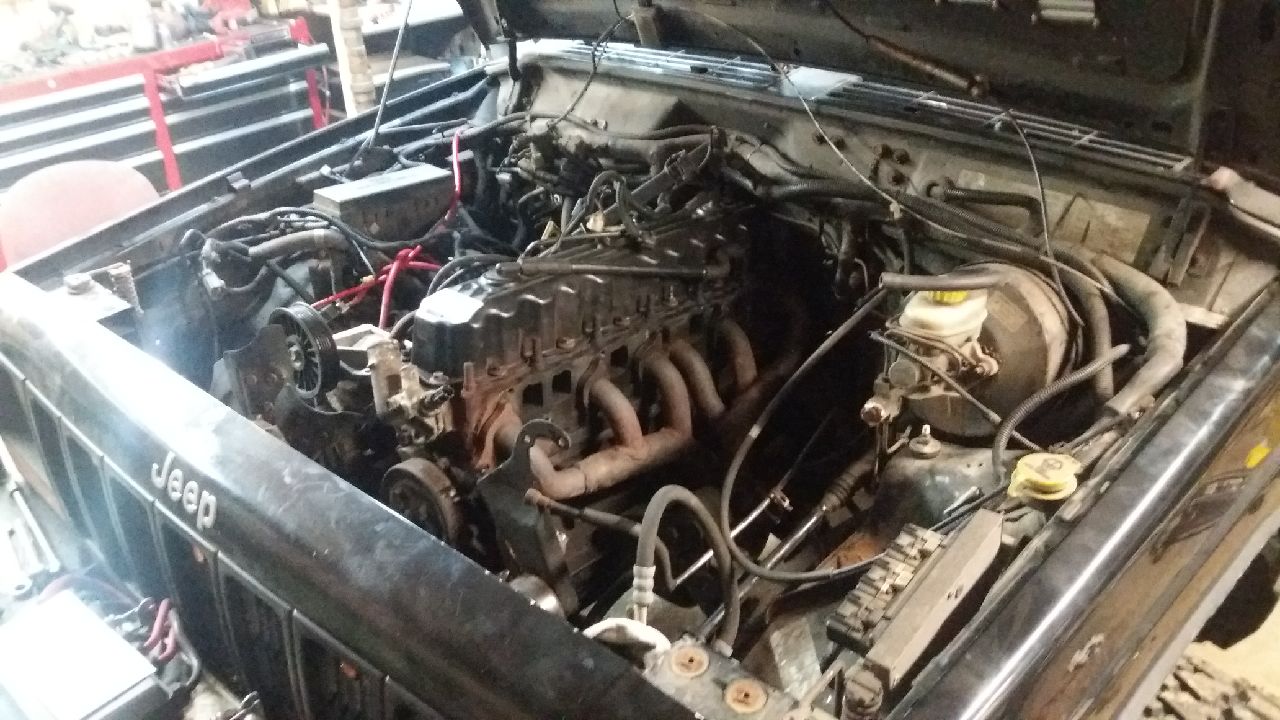
Motor is about ready to go back in. Replacing oil filter adapter o-ring and some more oil and grime cleanup.
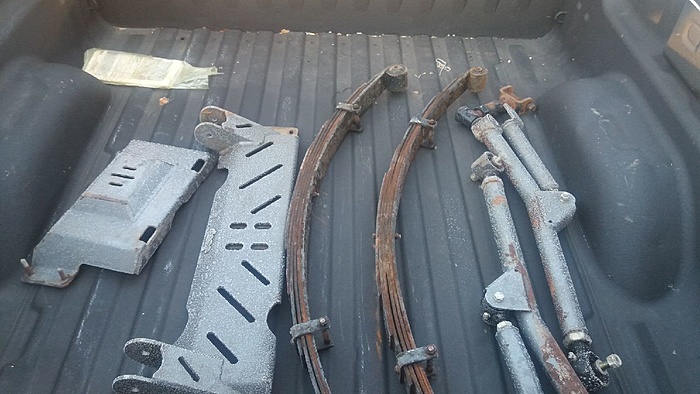
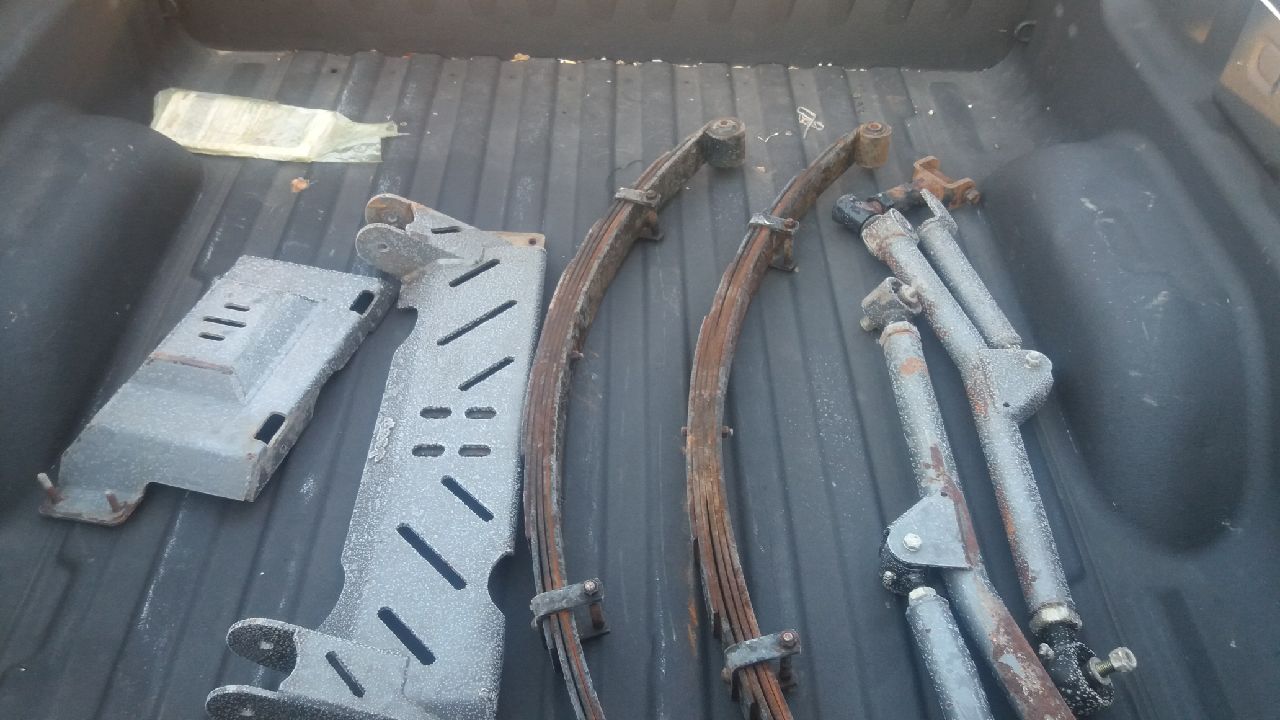
Now it comes a little sooner than I planned but I happened upon a decent deal for a bolt in long arm setup. I planned to build my own but for the price it was hard to ignore.
The leafs I won't be needing so after selling them to a friend i'm only into this for $270... Not too bad if you ask me!
Motor is about ready to go back in. Replacing oil filter adapter o-ring and some more oil and grime cleanup.
Now it comes a little sooner than I planned but I happened upon a decent deal for a bolt in long arm setup. I planned to build my own but for the price it was hard to ignore. Attachment 401396
The leafs I won't be needing so after selling them to a friend i'm only into this for $270... Not too bad if you ask me!
Im right there with ya I got the exact same long arm kit on mine and it was a sweet deal
The leafs I won't be needing so after selling them to a friend i'm only into this for $270... Not too bad if you ask me!
Originally Posted by unidentifiedbomb
RC radius arms. Hope you got them cheap and replace the bushings before installing.
Rough Country isn't my first choice typically but like stated, for the price and a bolt in setup it was hard to ignore. I'd be spending the same amount just buying Johnny Joints if I built custom arms.
Motor is in btw...
Been a while since I've done a solo install of a motor but this one went fairly easy
Went to use the cherokee and its winch to help load a donor shell on the trailer and the alternator was locked up; destroyed the serpentine belt. Instead of forking over more than $100 for a new alternator I decided to upgrade it with a 120amp junkyard alternator. I've long wanted to put a bigger alt. in one of my jeeps and for about $30 and some time it was as simple as replacing it with a new one. Besides swapping out the black isolators and a little grinding of the alternator bracket(s) it was a direct swap. The battery gauge shining back to me at a solid 14 was a welcomed sight.
I took some video during the swap pointing out the differences and also the grinding involved. I'll be trying to make a sensible youtube clip here soon enough.
Last edited by That Jeep Guy XJMJ; Oct 28, 2018 at 09:48 PM.
So i've had the 125 amp alternator in the jeep for almost a month now. Battery gauge never comes off 14 volts even with the winch and booming subs. Very satisfied with the upgrade, should have done this years ago!
While i have been DD'ing the XJ for the last few weeks I have definitely found some things that need attention from sitting so long. For starters i believe the rear driveshaft u-joints have dried up and are worn out as there is some slight vibes coming from the rear. The rear windows still don't work and i've told myself many times that i would fix that. Jeep has had a slight rough idle for far too long and im pretty sure it could use a new front O2 sensor. Its getting horrible gas mileage even considering tires and gear ratio i feel it should be getting better than 125miles for the tank. The passenger headlight acquired this dim setting despite trying 3 different headlights and cleaning the contacts on the headlight and wire harness. Not sure what has caused this issue wiring wise but its rather annoying. Rocker panels have become soft and are finally starting to fall apart so some rock sliders are definitely in its future.
Well here we go, not gonna fix the little qwerks but instead going to make upgrades. (that's right the fun stuff, not that boring proper upkeep) I'll just want to fix them later when they start bugging me again i suppose. We've planned a trip to Drummond Island in Michigan's upper peninsula this fall and while we've also decided to make it our little guys first long wheeling trip. To wheel with some ease over my current under-geared and open diff'd axles i'm finally installing a pair of Rubicon Dana 44's that have already been built and are almost ready for abuse. Also tossing some long arms under there to keep up with the jones'.
A TJ owner somewhere will cry when this is done No mo mounts
So i botched my progress plan for you guys - like i seem to do from time to time on these projects.
But i can recap! Rear axle got Barnes4wd U-bolt eliminators and high clearance shock mounts. Wanted to try something new and also be cheap (thats why i chose u-bolt eliminators) and honestly i was a dummy and welded both rear shock mounts on the back side of the axle and it wasn't until i was installing my new shocks that i found my mishap. :O So another call down to Barnes4wd and a special order of 1 single friggin bracket and i was back on track.
The front D44 found itself a new track bar mount, new passenger upper control arm mount and lower control arm guards/plates to box the mounts - add a little strength.
With the axles installed it was time to play with some flex and find the limitations and also shock lengths. The rears were easy as with the high clearance shock mounts and the amount of lift it has I was able to use factory shocks. Wont be the smoothest ride nor will they prolly last long but i'm ok with that for now. The fronts weren't looking too hot as i was in a time crunch and on a tight budget for all my repairs/upgrades so i dug through my shed and found some perfect fit shocks from someone's leftovers from years ago.
Bump stops are again something i never really use to bother with but now-a-days im a little more conscious of the potential damage and issues it can cause. So i nabbed a pair of factory jeep comanche rear bump stops because they are a few inches longer than the factory XJ bump pads. The front bump stops I went with some daystar extended bump stops which also worked out perfect. Simple install as well! Just toss some grease on the ball end and then drop the front end down and they pop into place.
RC long arm kit spiffied up a bit with some fresh paint and everything mashed together sitting on bump stops i have 1" of remaining up travel on the shocks and still no contact from any of the concerned areas. Made some custom post mount eliminators to save myself the $30-$40 on amazon ones.
So if i didn't mention before this front axle already had the "spin free lockout hub kit" installed and while I was really excited to see them - I wasn't excited to see that the driver side had some issues with a splined washer. Had to use a cutoff wheel to finally free the spindle nuts and hub assy which then left me on the hunt for some parts. Long story short - can replace everything here EXCEPT the splined washer! Luckily a buddy of mine had one on the shelf which brought me immensely relieved as it took a couple days to source one.
Brand new rotors needed the centers opened up a little bit to clear the lockout cap.
Splined washer is 2nd from the top, happens to be the same part used in the early to mid ford light duty auto/manual lockouts that came in the explorers and rangers.
Not the $ i wanted to spend but damn it sure looks like! Bearings actually had rust pitting on them so as much as i just wanted to do a quick fix and move along with other things I wound up replacing everything for the Hubs.
So these rockers are something i've wanted to do for some time now. Year ago i fixed the rockers on my 87 Comanche project with some pallet racking cross beams and while i liked to outcome then - i wish i would've went a different route. Something more along the lines of what i was/have achieved here.
For as "bad" as these rockers are they are actually prolly the best rockers i've had on any XJ i've owned. The passenger side was actually almost completely solid and as you can see, the drivers side is not as nice.
No more rusted rocker panel. Trimmed it to within 1/8" from the lip just below the door and also the same at the seam of the floor board and inside surface or rocker panel. Oh and nevermind the visible hole from rust - thats not important at the moment
a 59" chunk of 2x6 steel with 3/16 wall fills the void very well!
Tacked into place at the moment.
Fully seamed top and bottom, notched front and back sections.
Ran 3 stringers from the middle area of the new rocker/rock sliders into the frame. These are actually pieces i cut up from the leftover sections of 2x6 that i bought for this project.
A gas tank skid plate is another little something i've been wanting to build for the cherokee. Some would say i should just get a factory one but with the way my rear bumper was built and how its currently mounted to fit - it wasn't an option for me. Oh darn Another fab project. Did this all with 1/8" sheet steel
This rear bumper was built mostly from 1/4" material giving me lots of sturdy mounting points to tie into. I went a simple route i feel and just mounted it to the bumper as its securely mounted to the frame and unibody. There are 9 bolts in total that hold it in place. Thats 3 for either side and also 3 on the back. If you are entertained by the old Where's Waldo books you can spot a few of the bolts i used in mock-up.
Yes its flux core and no i don't mind it
Cleaned up and hit it with some primer
A few coats of black semi gloss and then install
Overall it went together very easy just 1 piece at a time. We shall see how the 1/8" material will hold up over time. I'm not ruling out doubling the thickness on the very bottom if it becomes obvious its not holding up to the abuse.
Nice update. I like how the rear gas tank skid came out and it should take up some mild abuse for sure. Reminds me of my gas tank skid that is OEM that I reinforced with 1/8" plating to make it just around of not a hair thicker than 3/16". Out of curiosity why did you not go full length on the 2x6? Room to open up the wheel well some more in the future?
Nice update. I like how the rear gas tank skid came out and it should take up some mild abuse for sure. Reminds me of my gas tank skid that is OEM that I reinforced with 1/8" plating to make it just around of not a hair thicker than 3/16". Out of curiosity why did you not go full length on the 2x6? Room to open up the wheel well some more in the future?
Mild abuse for sure, this rig being my family wheeling/tinker toy, it should suffice.
Our trip to Drummond Island is only 2 weeks away and its the key motivation into building one just because of the terrain of rocks throughout the island.
Full length? I really couldn't come up something i liked for how i would re-secure the front fenders at the bottom. So i just went with capping them and using the front of the rocker panel.