
97 ZJ IROR 5.5 Critical Path Build

Thread Starter
Member
Joined: Aug 2013
Posts: 236
Likes: 1
From: Stockton CA
Year: 1990
Model: Cherokee
Engine: I6
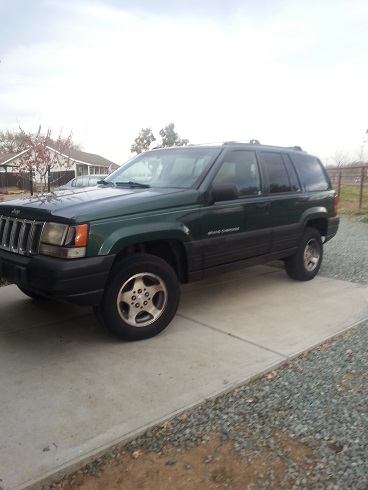
Hey everyone!! I have not been on here in awhile as my last XJ I built I had to sell for financial purposes.. BUT!! I just picked up a 97 ZJ with a 4.0 and 100k on the rebuilt motor and trans for under 1k!!!! I just picked up some 33" BFG's and ordered in the Iron Rock Off Road 5.5 Critical path long arm kit for her...
I wanted to get this up and going and see if anyone out there has any suggestions or comments if they know this kit/install. I put a 6" Long Arm on my XJ alone and went pretty well so I am hoping the ZJ goes the same.
I will start the building thread in the next few days when the kit arrives..
Cheers!!
Thread Starter
Member
Joined: Aug 2013
Posts: 236
Likes: 1
From: Stockton CA
Year: 1990
Model: Cherokee
Engine: I6
So my lift was backordered and finally will be here tomorrow! I regret not doing a good build thread for my last XJ so I will try and make this one as detailed as possible on the ZJ.. What will be covered/installed in this build thread..
-Iron Rock 5.5 Critical Path Long Arm Kit
-Safari Snorkel System
-Iron Rock OTK Steering System (Also backordered, should be here next week but I will keep that install in this thread as well)
The past two days I have blown through 2 large cans of PB on all the components so I am hoping for a decent tear down. Pics to follow tomorrow when the Fed Ex man arrives!
Thread Starter
Member
Joined: Aug 2013
Posts: 236
Likes: 1
From: Stockton CA
Year: 1990
Model: Cherokee
Engine: I6
So I got tired of waiting for the Fed Ex guy so I began my Snorkel install. This is one of those weird China snorkels but very impressed with the quality.
1. Pull air cleaner box and trash the stock rubber air duct that leads into air box.
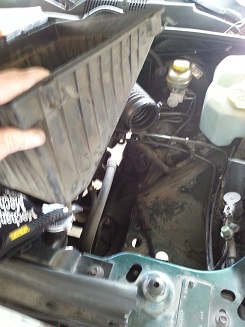
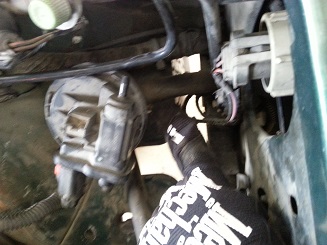
2. Remove the rubber case in the fender well that protects the TPS and trash it.
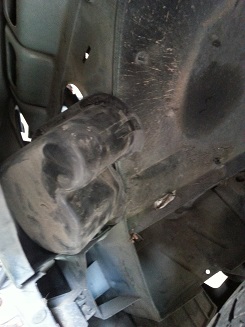
3. You have to relocate the TPS to the front of the air box to allow room for hose to pass through fender. Easy enough, just remove the bracket and trash it, the TPS fits very well where the old rubber air intake duct used to be.
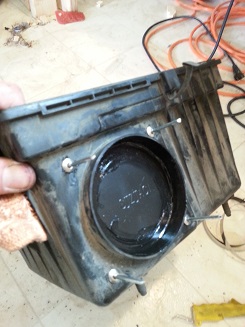
4. On to the airbox. Kit comes with a metal cover to close the original hole. Comes with template for drilling and rivots. Use ALOT of waterproof sealant.

1. Pull air cleaner box and trash the stock rubber air duct that leads into air box.
2. Remove the rubber case in the fender well that protects the TPS and trash it.
3. You have to relocate the TPS to the front of the air box to allow room for hose to pass through fender. Easy enough, just remove the bracket and trash it, the TPS fits very well where the old rubber air intake duct used to be.
4. On to the airbox. Kit comes with a metal cover to close the original hole. Comes with template for drilling and rivots. Use ALOT of waterproof sealant.
Thread Starter
Member
Joined: Aug 2013
Posts: 236
Likes: 1
From: Stockton CA
Year: 1990
Model: Cherokee
Engine: I6
After the cover is sealed in place..
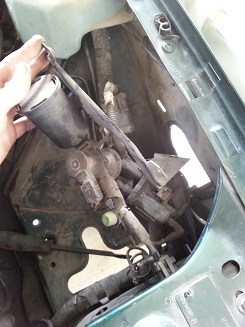
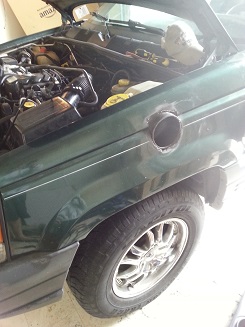
Next is the hole drilling in the fender. The kit comes with a template and I used a hole drill until it crapped out, then just broke out the grinder. The good thing about these kits is the air tube that connects under the fender is solid and not that plastic moveable tubing crap..
Airbox back in and relocated TPS
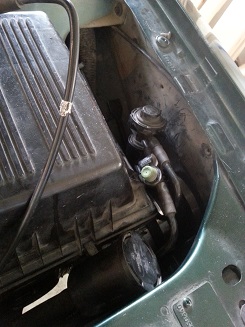
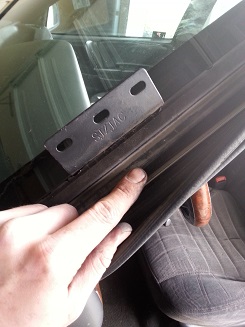
Next make sure to use the template and drill holes snorkel outer fitment. It WILL be tight.. But that is a good thing. The mounting bracket that goes on the A pillar needs to go under the weatherstriping AND under the winsheild holder piece that uses Phillips screws to hold in place.
And it is DONE!
Now on to the lift..
Next is the hole drilling in the fender. The kit comes with a template and I used a hole drill until it crapped out, then just broke out the grinder. The good thing about these kits is the air tube that connects under the fender is solid and not that plastic moveable tubing crap..
Airbox back in and relocated TPS
Next make sure to use the template and drill holes snorkel outer fitment. It WILL be tight.. But that is a good thing. The mounting bracket that goes on the A pillar needs to go under the weatherstriping AND under the winsheild holder piece that uses Phillips screws to hold in place.
And it is DONE!
Now on to the lift..
Thread Starter
Member
Joined: Aug 2013
Posts: 236
Likes: 1
From: Stockton CA
Year: 1990
Model: Cherokee
Engine: I6
Here is the Iron Rock Off Road 5.5 Critical Path Long Arm Kit.
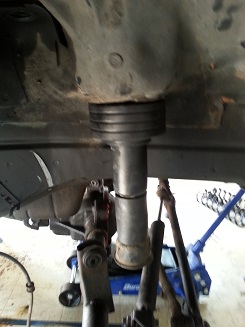
The first step after making sure you have everything is to change out the crossmember under the ol' beast. The IRO member is beastly compared to stock..
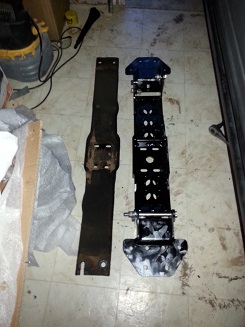
While I was there I changed out my old Tranny mount as well.. The crossmember uses the two stock holes and bolts on each side, then you drill 4 more 7/16 holes on each side and use provided bolts for added strength..
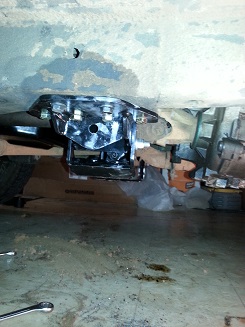
This is where I got to last night.... I will be continuing today when I get home!!
The first step after making sure you have everything is to change out the crossmember under the ol' beast. The IRO member is beastly compared to stock..
While I was there I changed out my old Tranny mount as well.. The crossmember uses the two stock holes and bolts on each side, then you drill 4 more 7/16 holes on each side and use provided bolts for added strength..
This is where I got to last night.... I will be continuing today when I get home!!
Trending Topics
Thread Starter
Member
Joined: Aug 2013
Posts: 236
Likes: 1
From: Stockton CA
Year: 1990
Model: Cherokee
Engine: I6
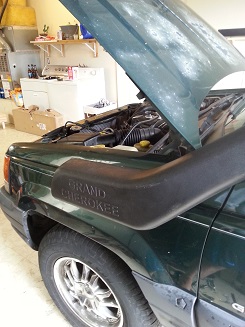
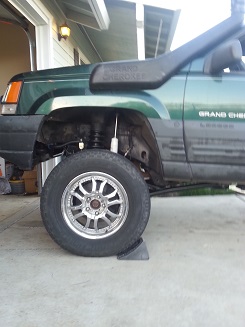
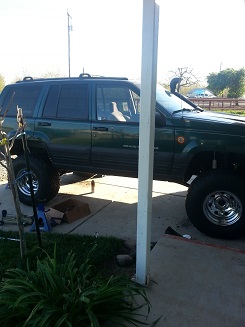
Ok so I finally got some time to post up some pics of the Lift build. After the crossmember was on you start by pretty much tearing apart the front end. I had the most success using a combo of 6-ton jacks under the unibody and used 2-ton for axle support.
Everyone knows this (or should) but I am telling you once again.. PB BLASTER!!! I sprayed down everything for three days prior and the suspension pretty much fell apart, front and rear.. so easily that I missed some pics because I didn't want to loose momentum! This ZJ has nearly 300k on the suspension as well so stuff was tight and corroded pretty bad.
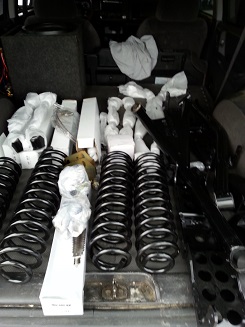
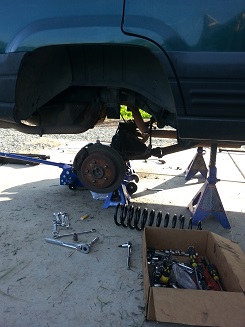
With the ZJ up on the 6-ton stands, it allowed me enough droop that I didn't even need to use the spring compressors to remove or INSTALL the new springs.
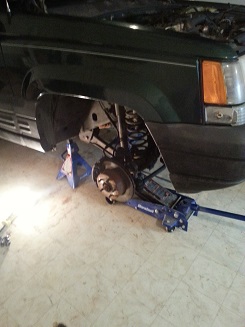
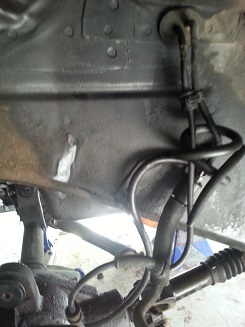
You can see how worn out the suspension was, so bad the shocks were rubbing the metal on the unibody!! Like I said, everything came out so easily, I didn't even have time for pics on the decon.. PB BLASTER!
Everyone knows this (or should) but I am telling you once again.. PB BLASTER!!! I sprayed down everything for three days prior and the suspension pretty much fell apart, front and rear.. so easily that I missed some pics because I didn't want to loose momentum! This ZJ has nearly 300k on the suspension as well so stuff was tight and corroded pretty bad.
With the ZJ up on the 6-ton stands, it allowed me enough droop that I didn't even need to use the spring compressors to remove or INSTALL the new springs.
You can see how worn out the suspension was, so bad the shocks were rubbing the metal on the unibody!! Like I said, everything came out so easily, I didn't even have time for pics on the decon.. PB BLASTER!
Thread Starter
Member
Joined: Aug 2013
Posts: 236
Likes: 1
From: Stockton CA
Year: 1990
Model: Cherokee
Engine: I6
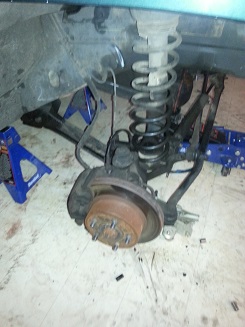
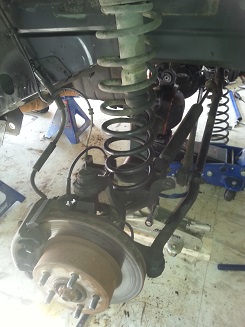
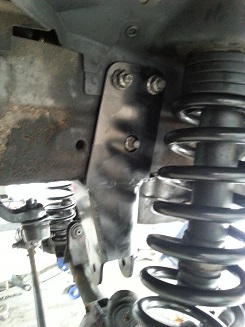
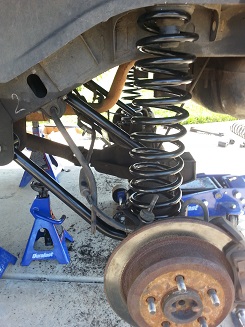
Next the install part begins. First move is to remove the bump stops and cup to add the 3" spacer and re-install with supplied hardware. I also removed the stock coil isolators and replaced the 5/8 stock with 1 3/4 energy suspension isolators. Gives me a little over 6" in the front and support for the upcoming bumper.
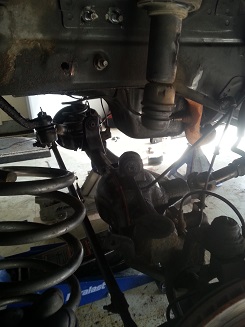
The new double shear track bar bracket went in without a hitch, and I believe the starting length on the front was 33 1/2 inches from center to center on the track bar.
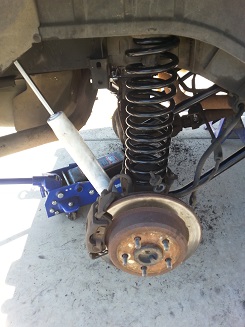
Next was the springs (which went right in, shocks, and control arm) The control arm was the only thing that gave me problems but after talking with IRO I was able move the upper axle mount bushing just enough to finally squeeze in the bolt. The upper arm munts get tightened to 60 ft lbs and the lowers to 120 ft lbs.
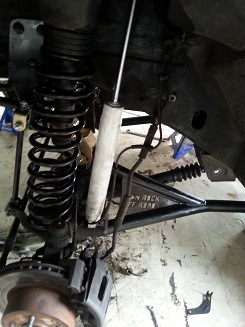
With the front done on stock tires.
I began the rear next with the same giant jack stand idea and it worked great. Once again, suspension pretty much fell out of the Jeep.
The new double shear track bar bracket went in without a hitch, and I believe the starting length on the front was 33 1/2 inches from center to center on the track bar.
Next was the springs (which went right in, shocks, and control arm) The control arm was the only thing that gave me problems but after talking with IRO I was able move the upper axle mount bushing just enough to finally squeeze in the bolt. The upper arm munts get tightened to 60 ft lbs and the lowers to 120 ft lbs.
With the front done on stock tires.
I began the rear next with the same giant jack stand idea and it worked great. Once again, suspension pretty much fell out of the Jeep.
Thread Starter
Member
Joined: Aug 2013
Posts: 236
Likes: 1
From: Stockton CA
Year: 1990
Model: Cherokee
Engine: I6
This part went so quick as well I didn't get many pics.. Pretty self guided deconstruction though.. The rear track bar is set to 30 1/2 to start. Both the front and rear axles centered themselves pretty good with these measurements.
The same torque specs apply to the rear control arm as the front upper and lowers.
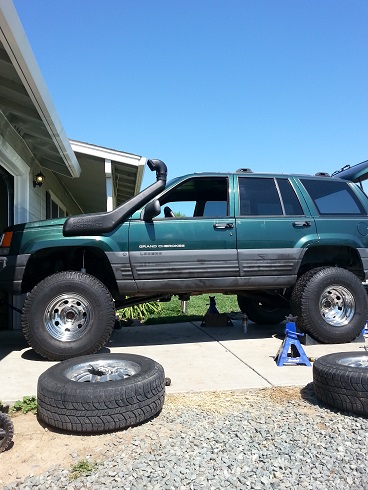
The finished product on 33x12.50's.. I am not messing with steering yet because Thursday I will be installing IRO's OTK steering kit.
Still need to bleed the brakes but other than that it is set!!
The one issue I am trying to resolve is that the exhaust pipe seems to be rubbing against the oil pan now.. Gonna have to do some tinkering..
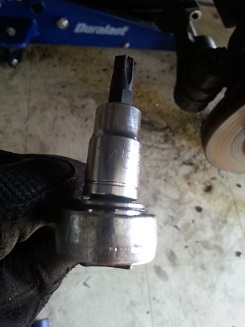
Get good torque bits.. I stripped two of these harbor freight ones until I went and bought a nice set then the control arms popped right off..
The same torque specs apply to the rear control arm as the front upper and lowers.
The finished product on 33x12.50's.. I am not messing with steering yet because Thursday I will be installing IRO's OTK steering kit.
Still need to bleed the brakes but other than that it is set!!
The one issue I am trying to resolve is that the exhaust pipe seems to be rubbing against the oil pan now.. Gonna have to do some tinkering..
Get good torque bits.. I stripped two of these harbor freight ones until I went and bought a nice set then the control arms popped right off..
Thread Starter
Member
Joined: Aug 2013
Posts: 236
Likes: 1
From: Stockton CA
Year: 1990
Model: Cherokee
Engine: I6
Just finished the IRO OTK steering set up and it was a breeze.. Very nice and beefy and the install took less than 2 hours from tear down to alignment. The instructions to do a driveway alignment come with it and I was able to get it within 1/16 which is perfect. Took it down the road at 65 for the first time, very smooth but a little touchy. No vibes either with stock driveshafts on 33's.
Very happy with IRO!!!
Very happy with IRO!!!

Thread Starter
Member
Joined: Aug 2013
Posts: 236
Likes: 1
From: Stockton CA
Year: 1990
Model: Cherokee
Engine: I6