
'94 XJ Country University build!


Thread Starter
Junior Member
Joined: Sep 2012
Posts: 65
Likes: 0
From: Alberta
Year: 1994
Model: Cherokee
Engine: 4.0L
I'm copying all of this from my local forum (4low.ca), bare in mind I'm attending full-time school and am flat broke through the winters...
Also, I have mechanical experience (from my car), but no 'fabrication' experience so everything I do is a first time basis. Everything you see me doing is the result of reading forums and write-ups and giving it a shot!
So now that my Jeep is officially "lifted" (it may only be the rear end, and from a JY, but who cares! haha), I thought I might as well start keeping track of what I've done...
Well I've always been into vehicles and cars... I'll save you the grief of scrolling through a bunch of boring photos lol, but here's the overview.
I started out the day after I turned 16 with an old Exploder... Literally.. I went through 1L of oil every 250km HA!. So I scored some free 31" BFG M/T's wheeled it a few times before selling it.
Sold the exploder and bought my first Jeep! It was short lived though as it was just a straight up piece of crap as a DD.
Thing did amazing with the 32s and rear locker.
However I needed something more practical... And "safer" according to my dad
Then came my car phase... Started out as a stock '97 Acura EL 1.6..
Currently its a 1.8L Turbo running 230hp on 9psi. Not to bad considering how short the gears are lol.

After having it to the 1/4mile, I managed a time of 13.5seconds with a horrible 60ft. Not to shabby!
Once I turbo'd, I realized I probably shouldn't subject the car to anymore Alberta winters... So I started the hunt for a winter vehicle and place to store the car.
Well I wanted a jeep, but thought one was way out of my price range... Looked at some really really beat up Toyota's and full size GMs...
Finally came across this little gem! And it was defiantly in my price range
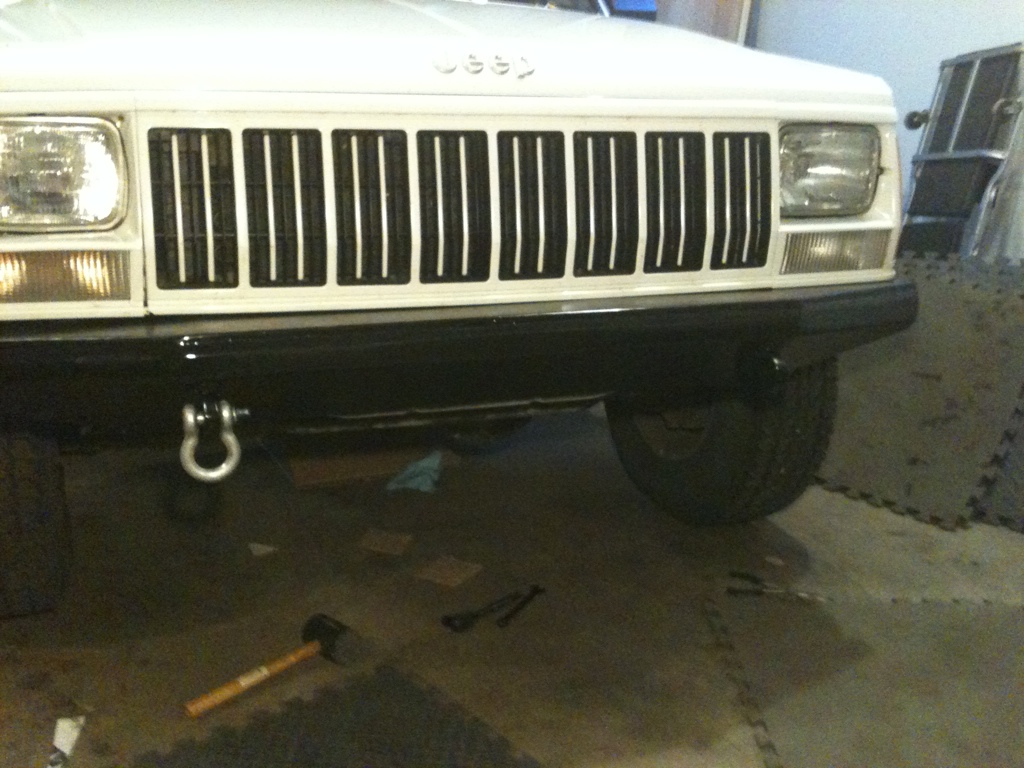
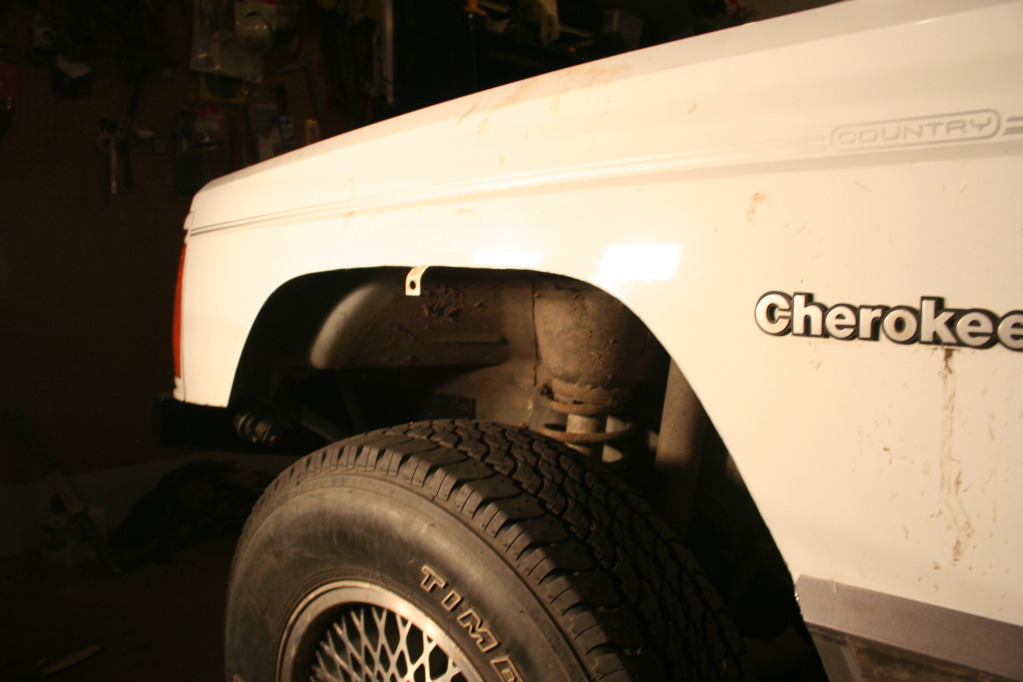
First project was some sort of front protection... The front end looked to have already taken a hit... Bumper / bracket was bent inwards on the passenger side. Fender has a slight bend to it and grill is cracked. I took off the bumper and began building my own. It was the first time ever working with metal aside from using scrap to practice.. I think it came out okay.
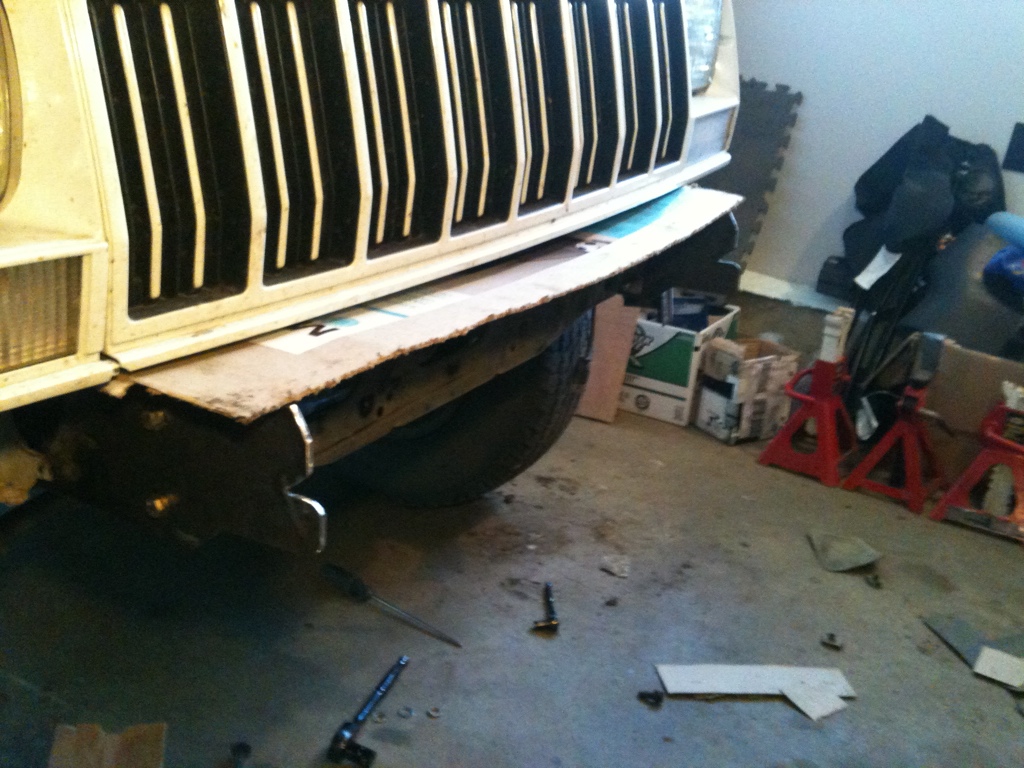
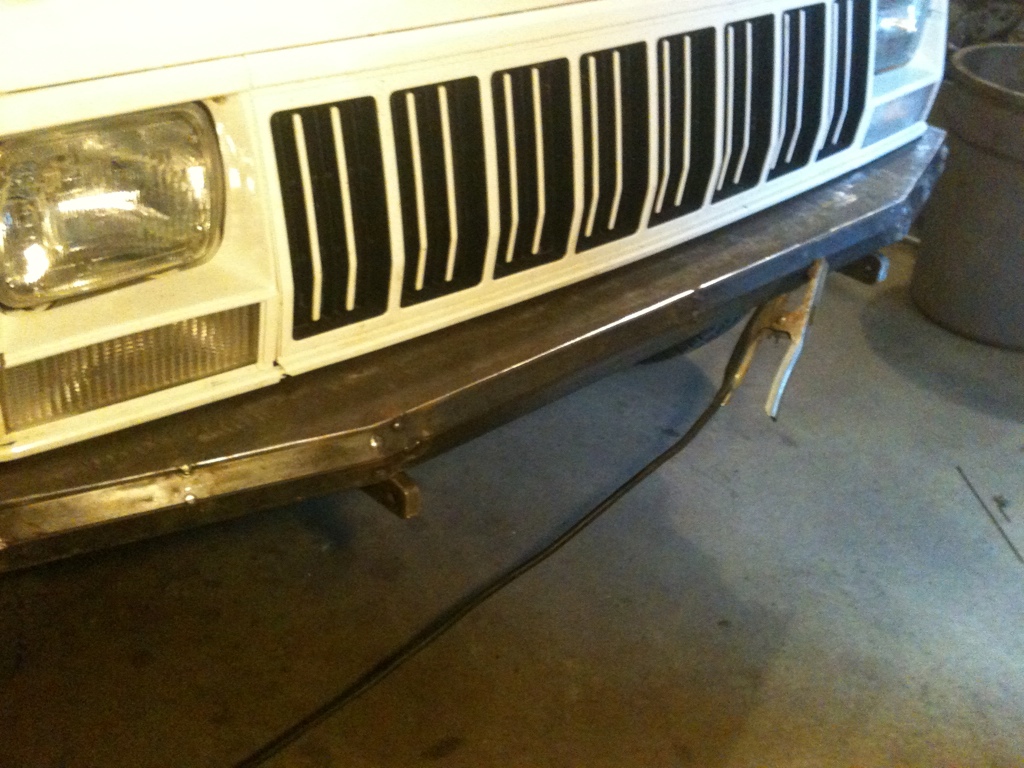
Using an old 220A stick welder + a 5" angle grinder + a jig-saw with a metal blade... Took way to long...
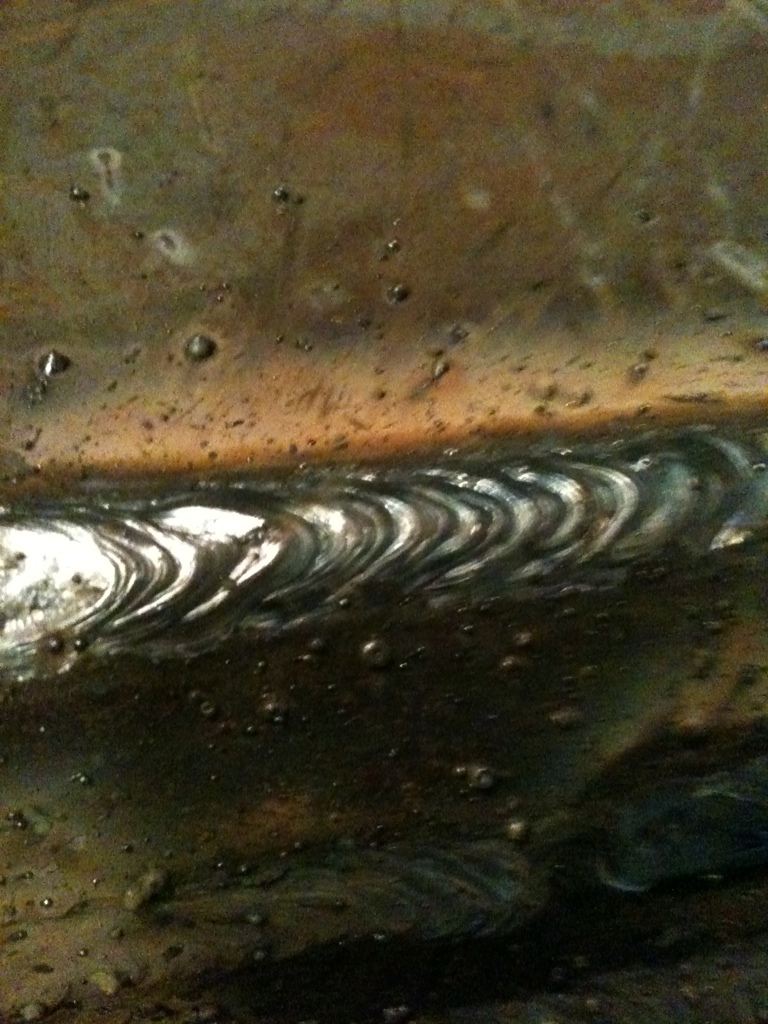
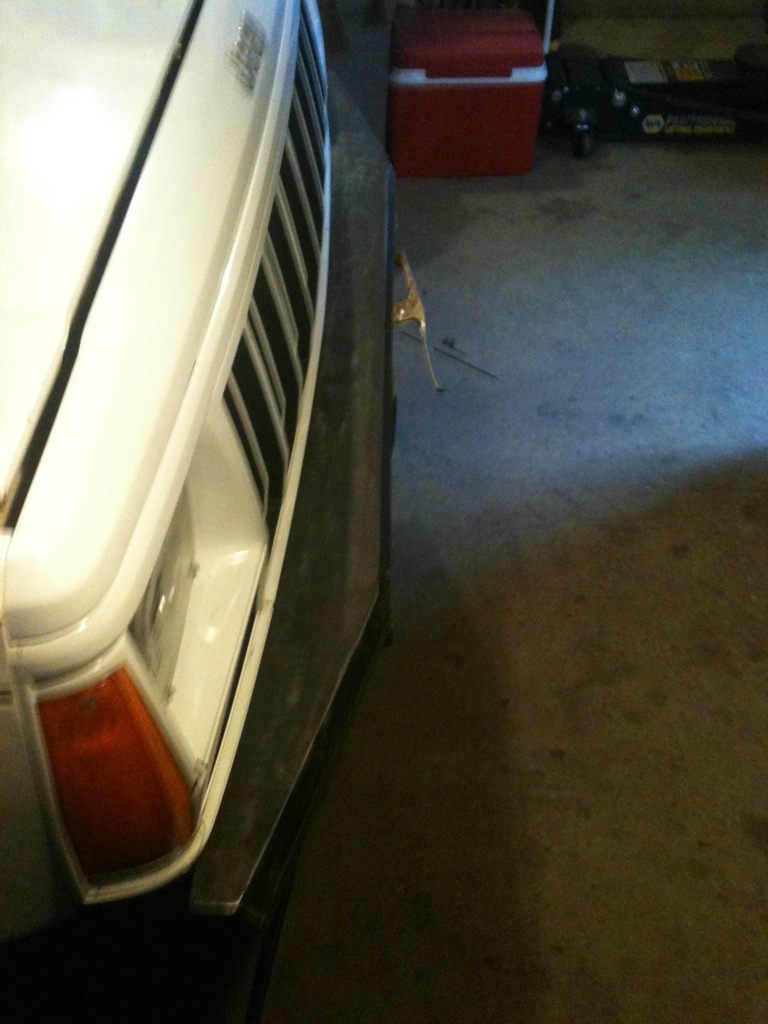
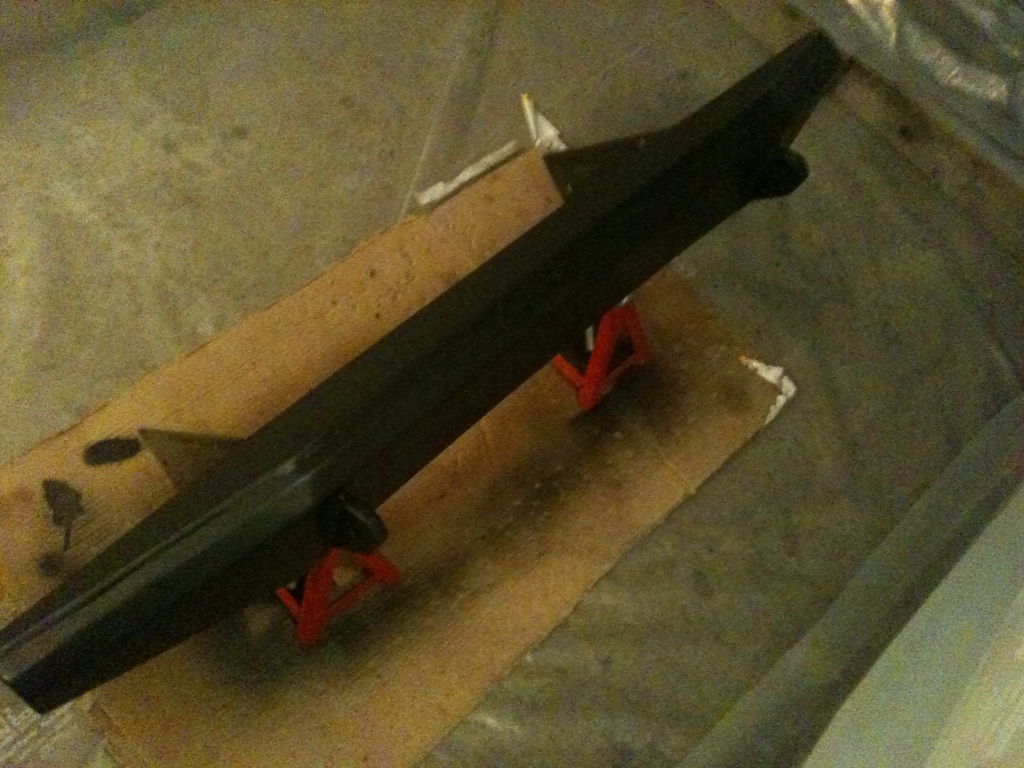
I'm pretty happy with the result!
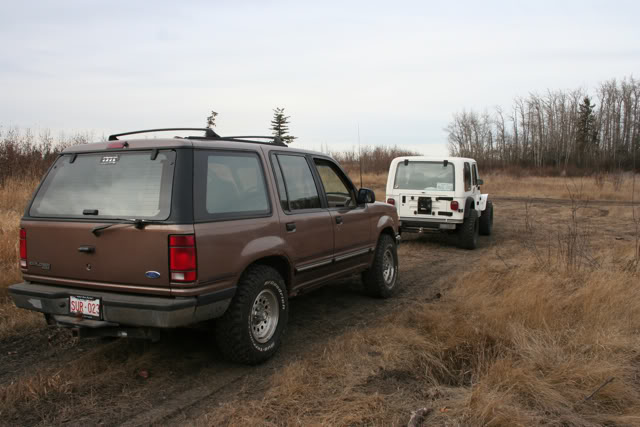
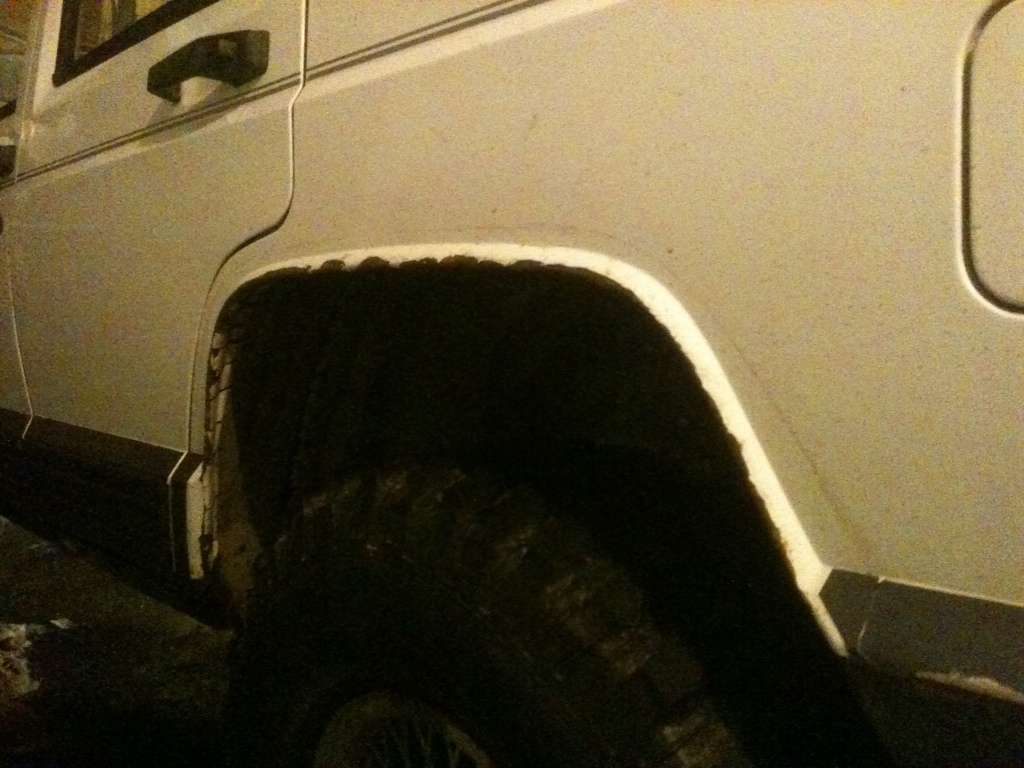
So then came a new problem... Went out and found some tiny side trail just out of town... Had just rained out and was super slick. My stupid tires just clogged up and it was like being on a skating rink trying to not slide into the huge ruts / mud pile. The hunt was on for some real tires..
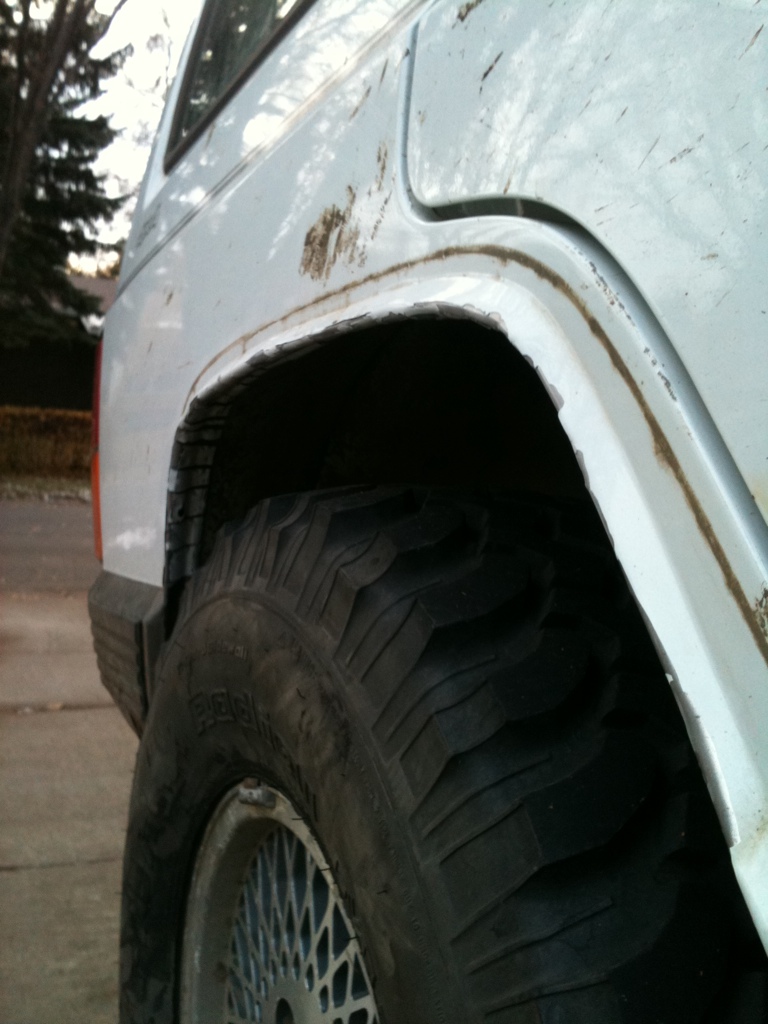
I looked online and everybody said I couldn't run 31's stock.. Even if I trimmed I would rub when I went off road.
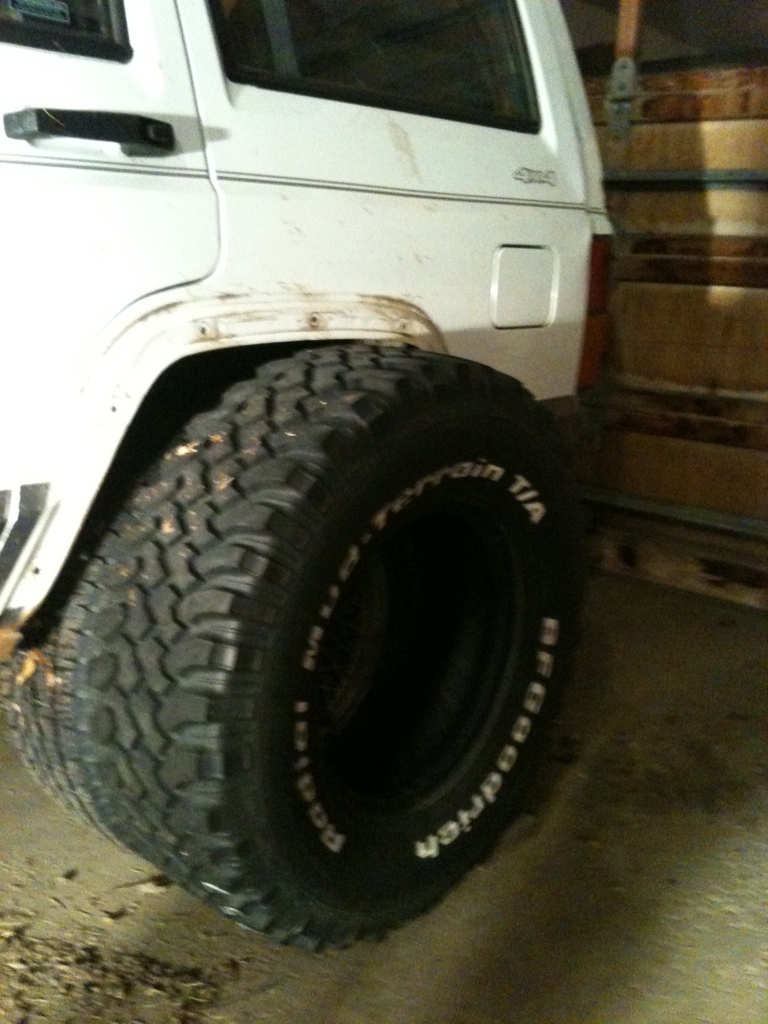
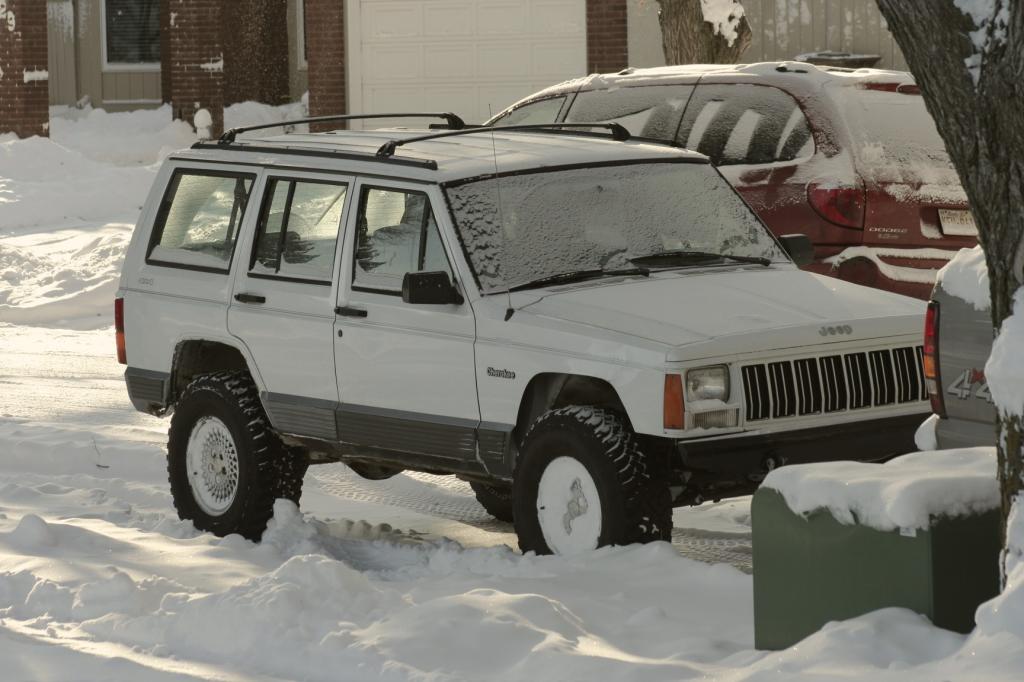
So with that in mind... I bought some 31's!
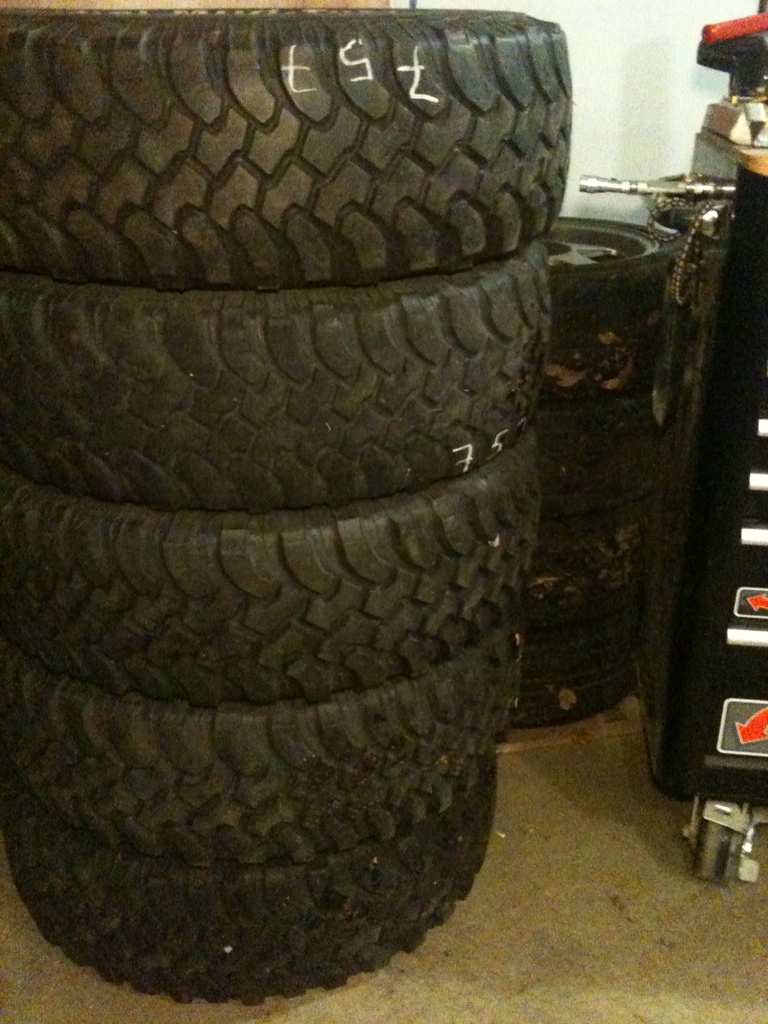
5 tires. Two are 90%, two are 60%, and one is 20%.
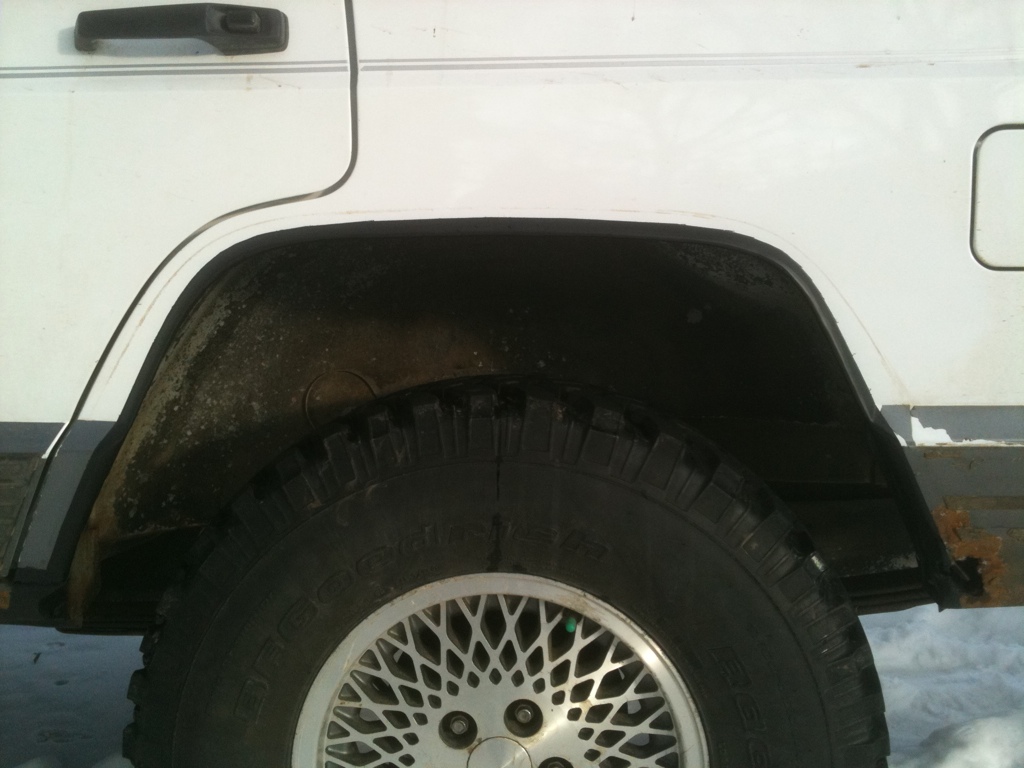
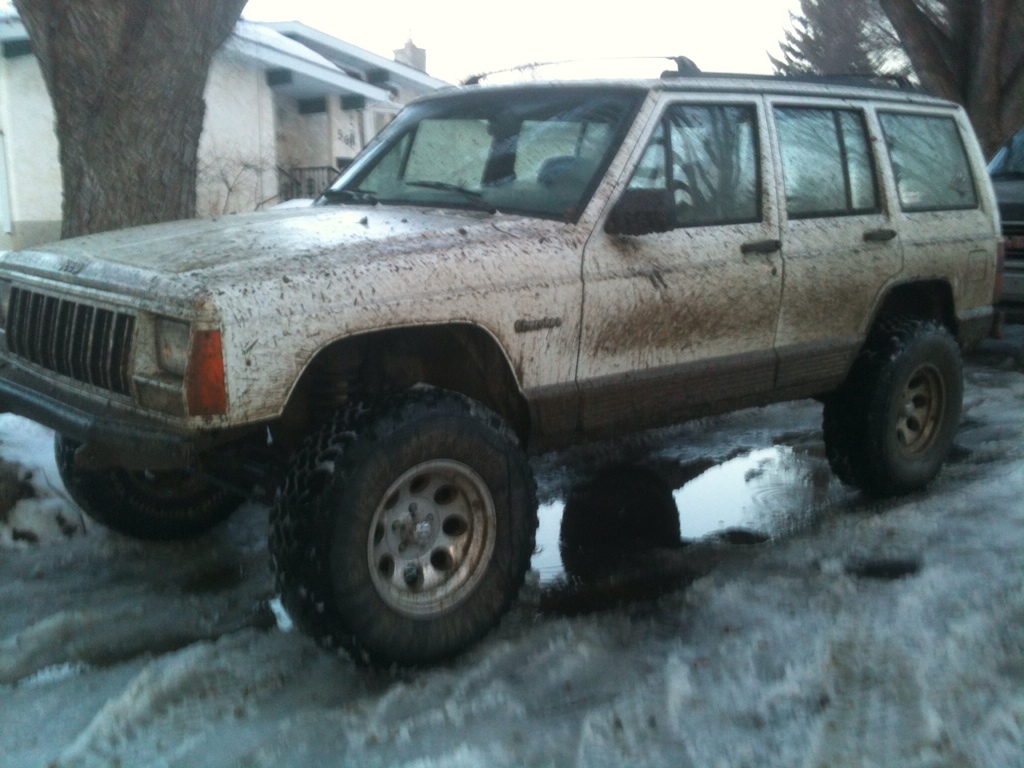
I knew I needed to trim, and that's why I got a jeep of this "nature"... I don't care about the body, aside from rust :evil:
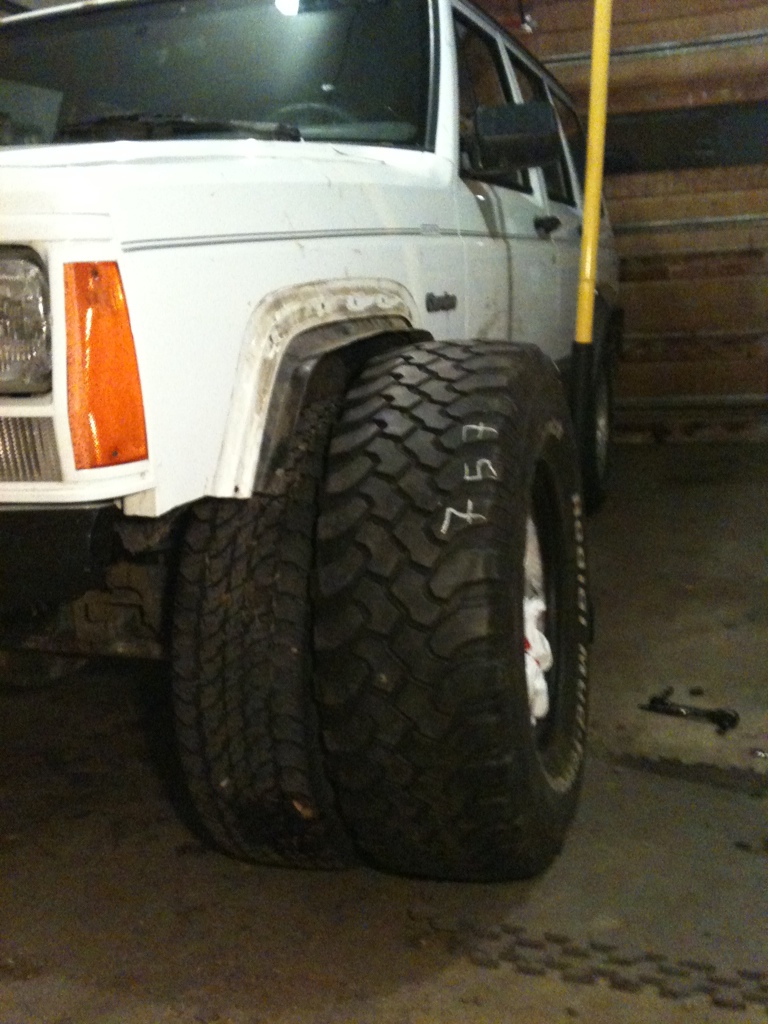
She'll fit!!!!
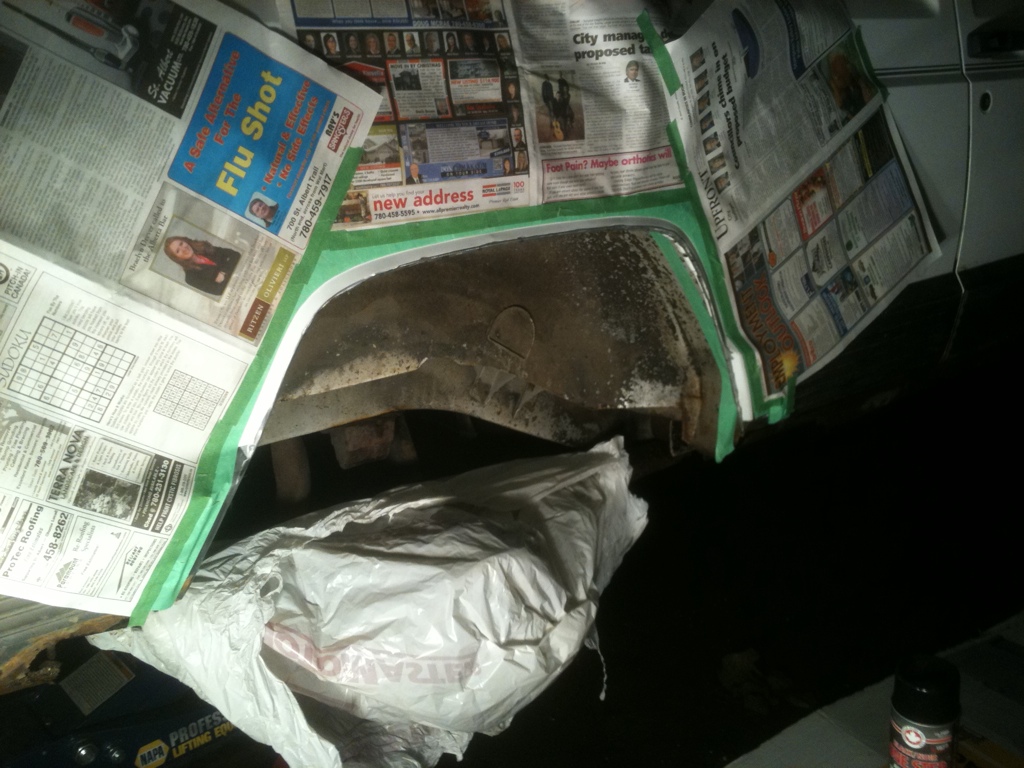
Front end being taped and cut
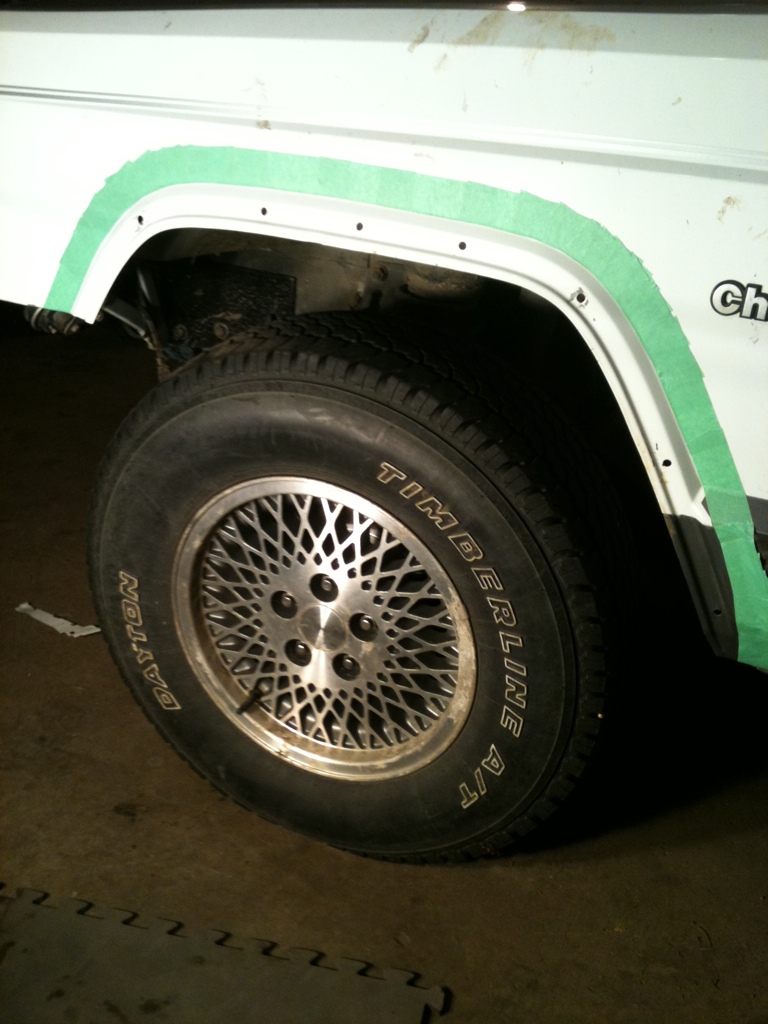
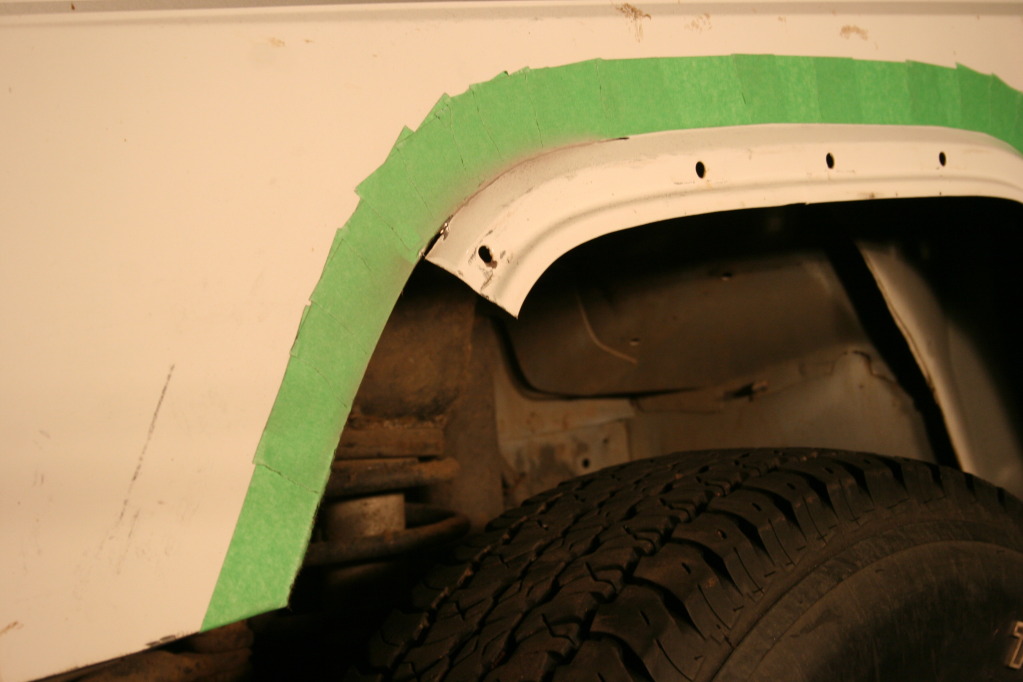
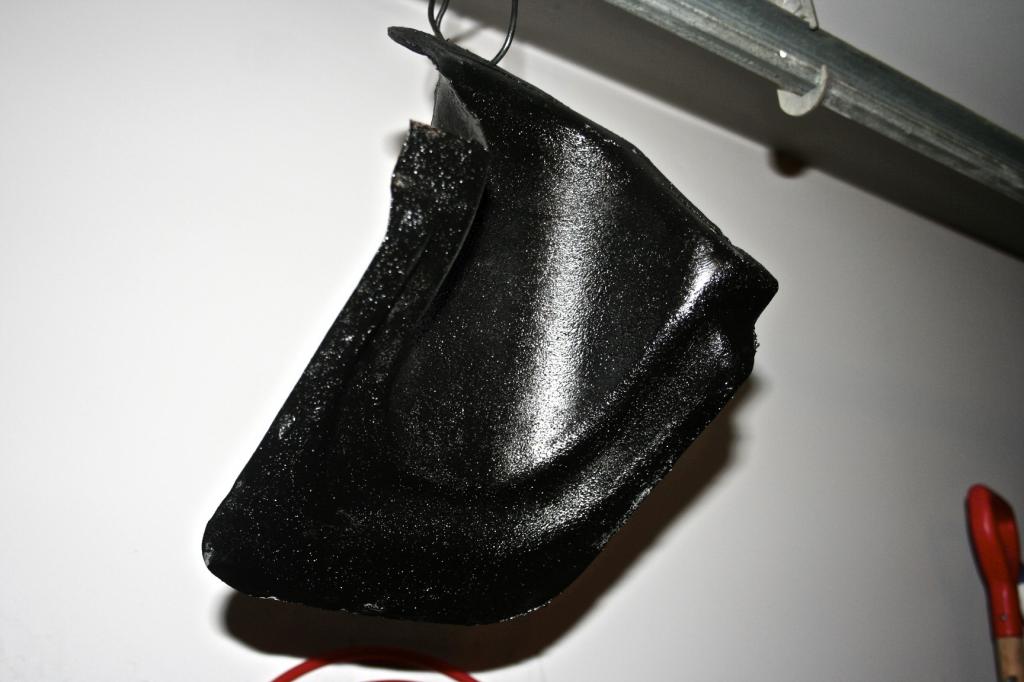
I didn't get pictures of the rear... Me and 95ZJ spent about an hour quickly cutting between the spot welds and folding over... Turned out pretty good I think.. I'm priming them right away, and will bed-line / paint soon after..
We mounted the tires in my garage one night after seeing youtube videos haha
Used the high-lift under my dad's truck hitch to pop the bead off on each side of the tire.. Then used two large pry-bars to slowly work the tire off the rim. One the tire was off, the new 31" went on. Used a generous amount of soap to help it slide on plus help seal the bead. Once the tire was on, stood it upright and used the air compressor while pushing different areas of the tire to seal the bead.
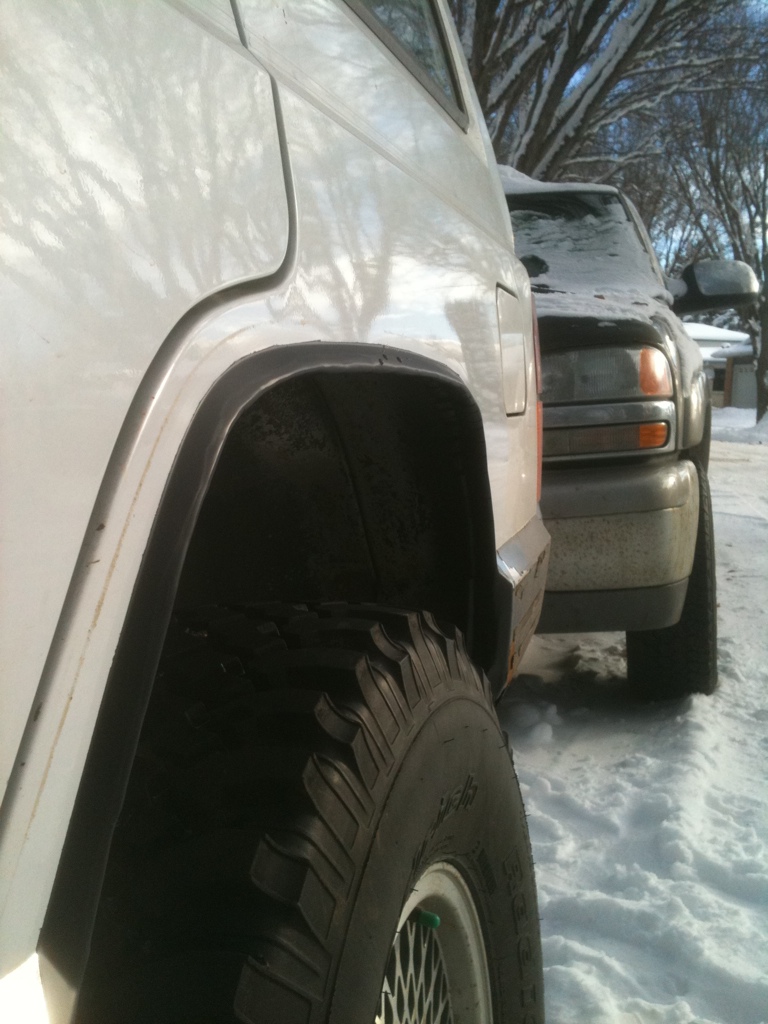
After a couple weeks of driving, I have ZERO leaks, and ZERO vibrations, even at highway speed. I don't know why I didn't have to balance them, but who cares!
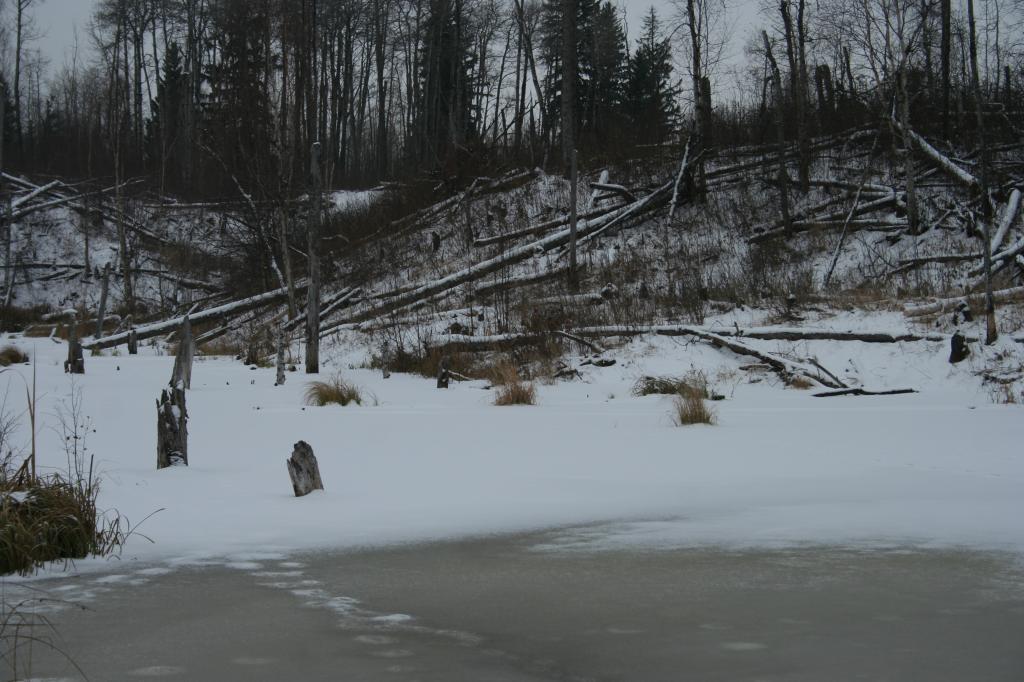
Went out to my cabin near Darwell, AB with my significant other to get out of the city / have some fun in the bush. There's a ton of trails I want to explore this winter. Maybe a 4low trip? There's countless trails I know of, I grew up sledding in this area (first time on a sled I was 6months old haha).
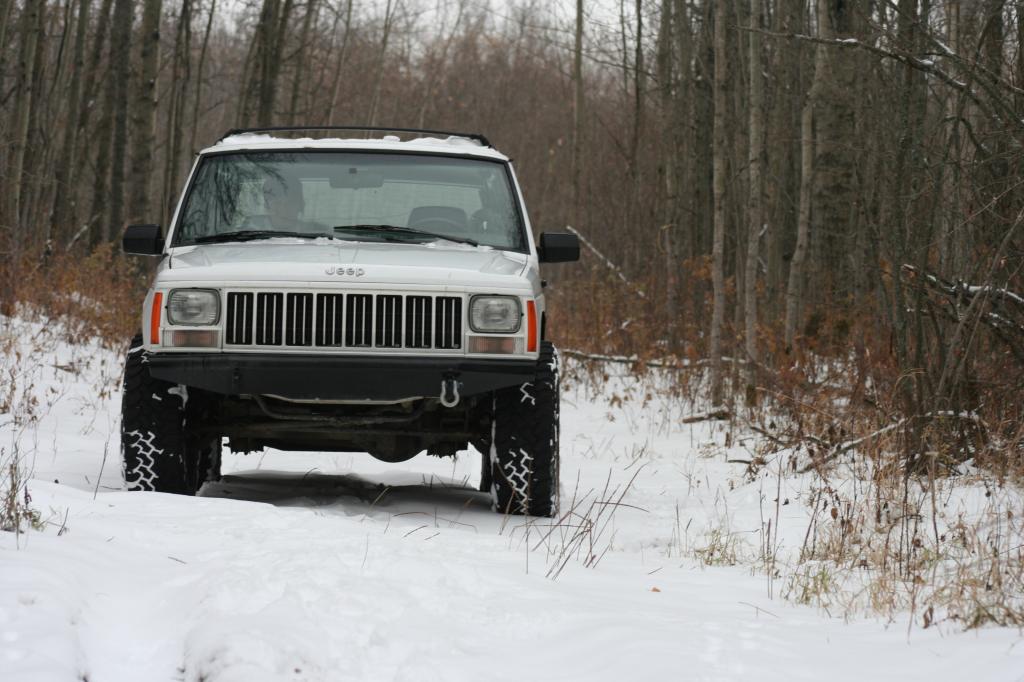

I was trying to avoid ALL mud / scary sections.. I was by myself and the last thing I wanted to do was get stuck. I had a high-lift and lots of straps / a shovel and axe.... But still. Obviously it went as planned.
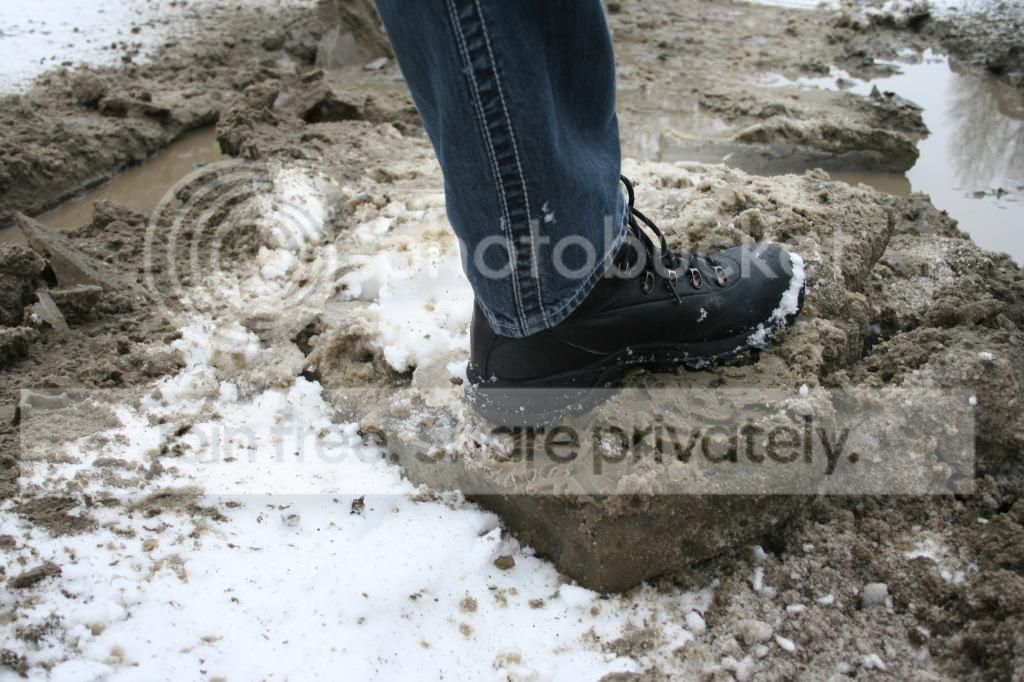
It wasn't that bad, but the ice was pretty thick. Thank god for mud tires.. Just backed up a bit, and chewed my way out in one try. I love my girlfriend though... She loves being out of the city, loves mud, loves trucks, loves classic cars.. So at least I didn't have her yelling at me when we sunk into the hole haha.
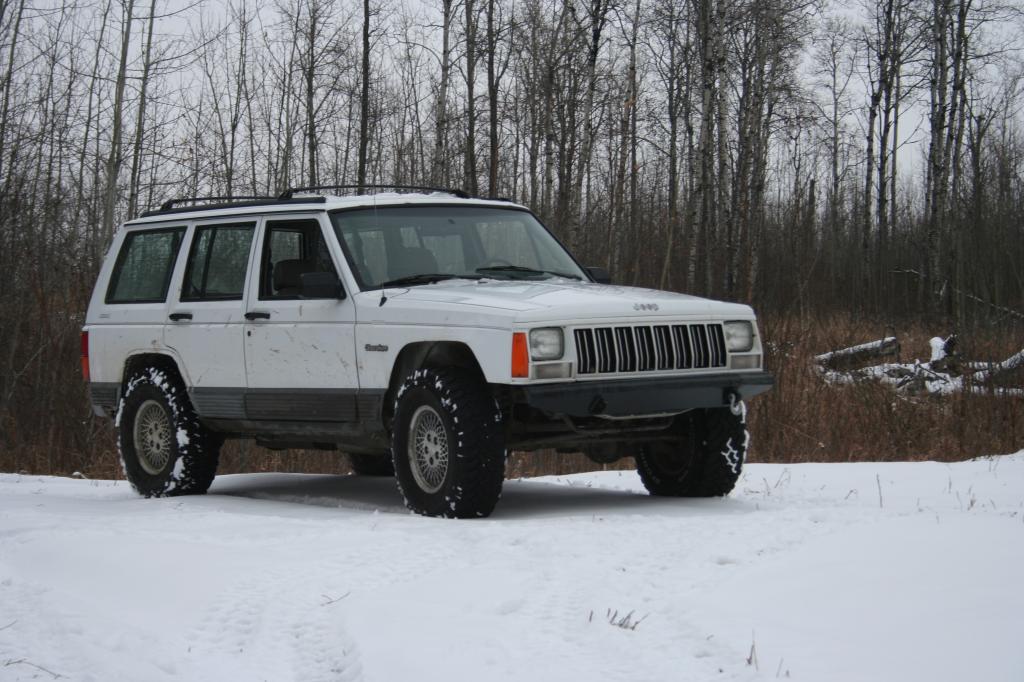
So after coming back, I was getting stressed in Uni and needed some garage time... I decided I might as well try a bastard pack lift. Lots of readings and told me a bastard pack is better than actual lift springs. They can ride smoother, and because they sit flatter, they give you a lot more flex.
Before:

During:
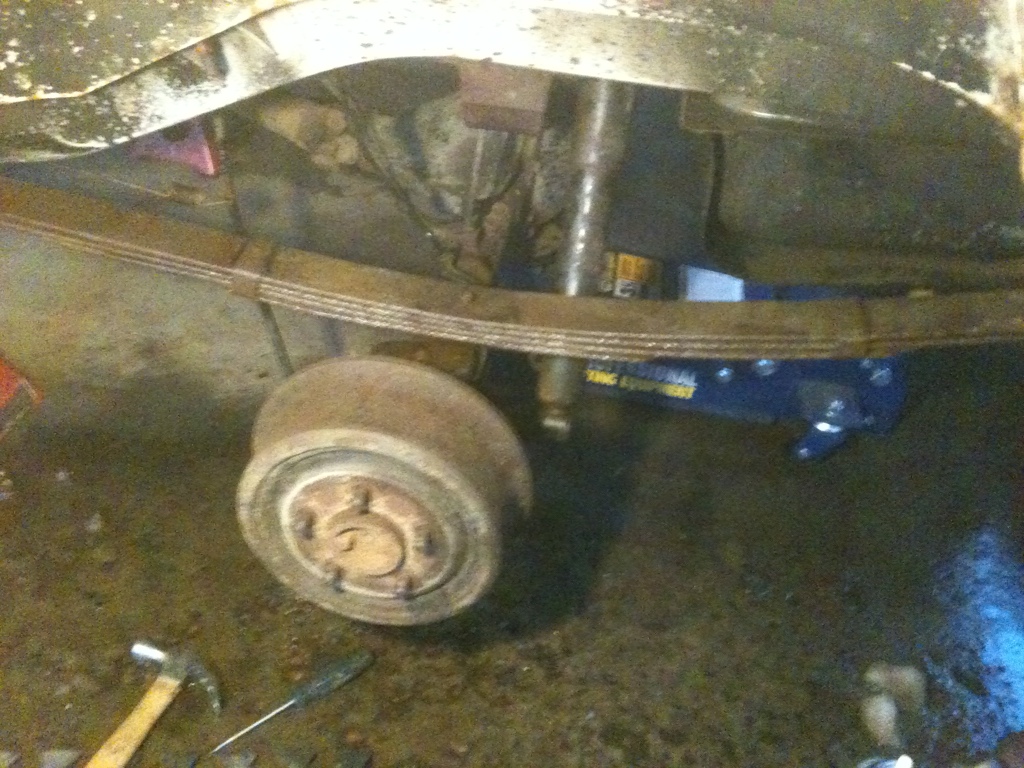
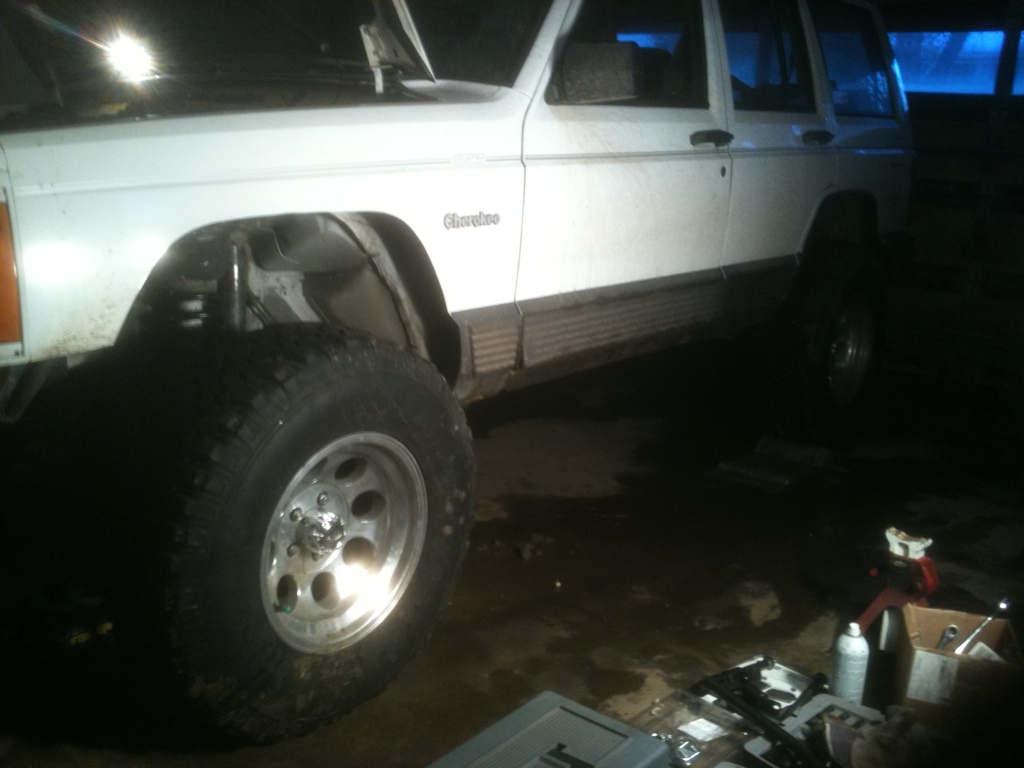
After: I used springs off a '93 Dakota... I chopped the eyes off the dakota main leaf, and used that. So my new pack is = Xj main, Dakota Main, XJ 2nd, XJ 3rd, XJ 4th.
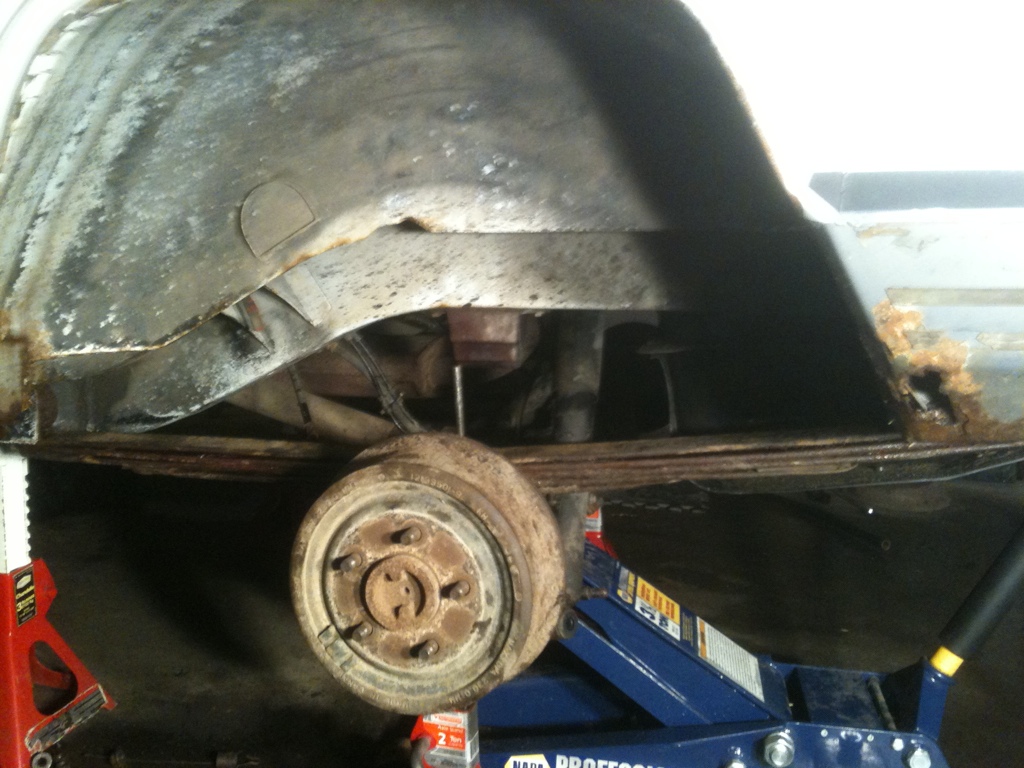
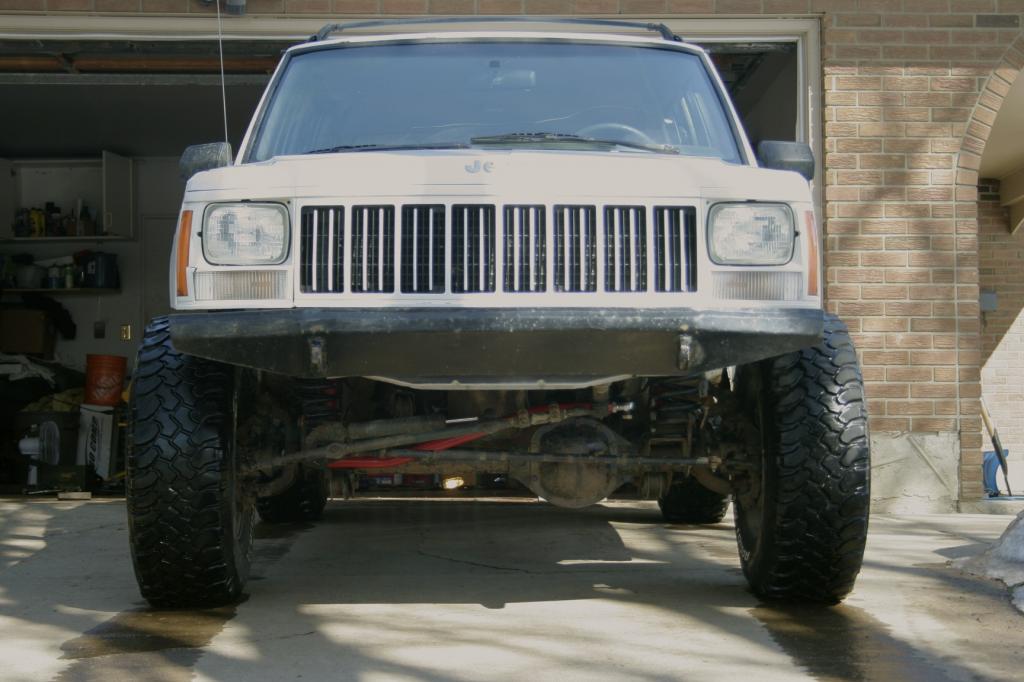
I gained about 3.5" over stock (I have no bumper / no cargo or spare tire in the back yet. That will drop it about 1/2" I think, if not more.)
The ride is a little bit more firm, but honestly I think its VERY close to stock. I'd hate to say this, but i think its a better ride than when 95ZJ first lifted his and he has coils in the rear haha. I'm overall super happy with it.
So that brings me up to date....
I also have the shackles off the dakota springs. They will bolt in and give me another 1/2" of lift. So my plan is to use my awesome employee discount at napa and pick up some Comanche shocks (3" longer) and a YJ rear brake line (4" longer).
After that is levelling out the front a bit with some V8 ZJ coils (1 - 1.5" lift) and possibly a 1/2" spacer.
I also painted my fenders:
Before -
During -
Finished product I used some self-etching black primer for now. I will eventually bed-line the wheel wells and possible the rear quarter panel from the pinstripe down.
Also picked up a spare rim, decided to mount my spare tire on it. I figured I'd take a couple pictures to show how I do it...
Use the hi-lift to un-seat the bead on both sides of the tire.
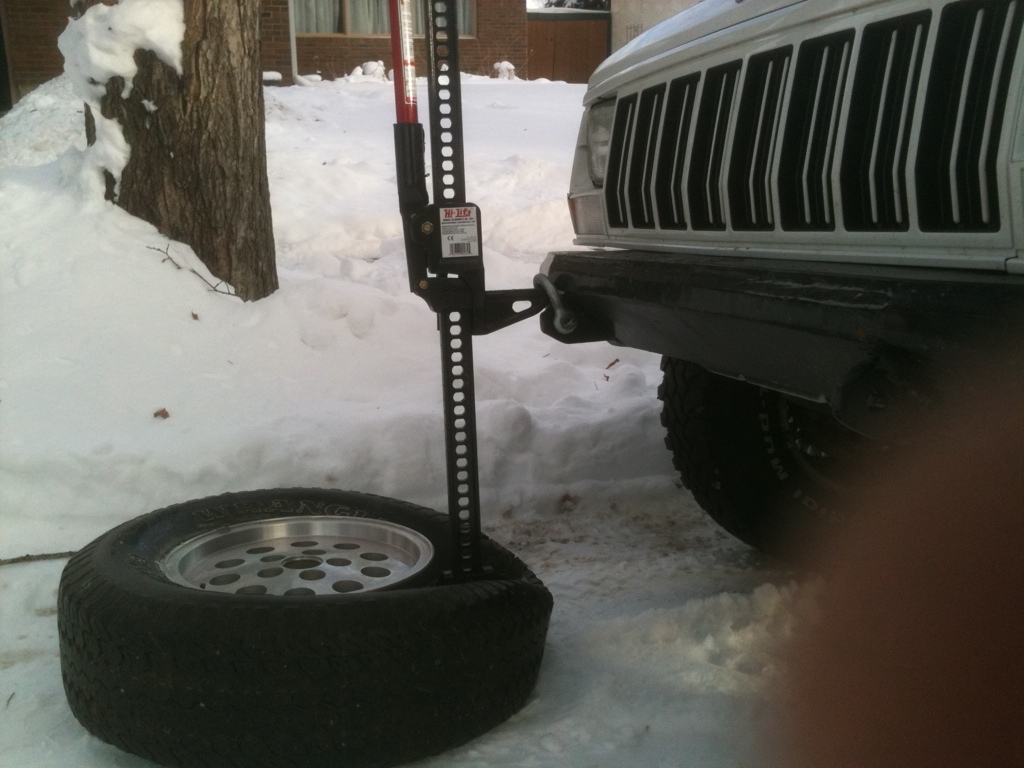
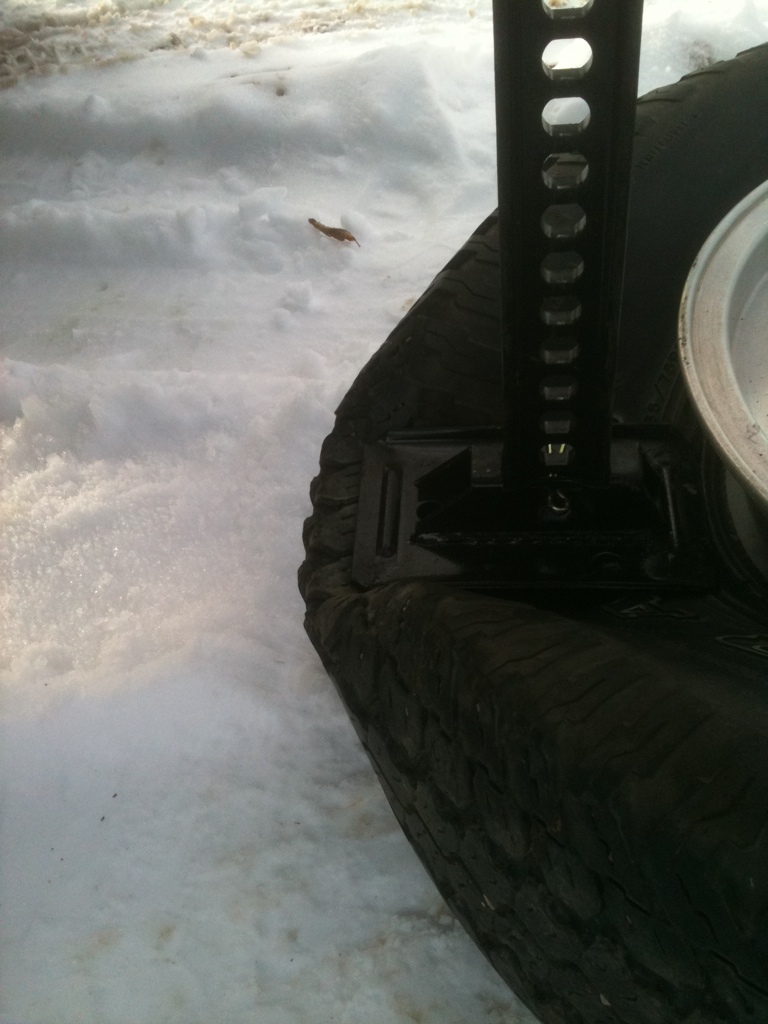
Use 2 pry-bars and get one side of the tire off the rim.

Then pull the rim up through, and take off the other side.
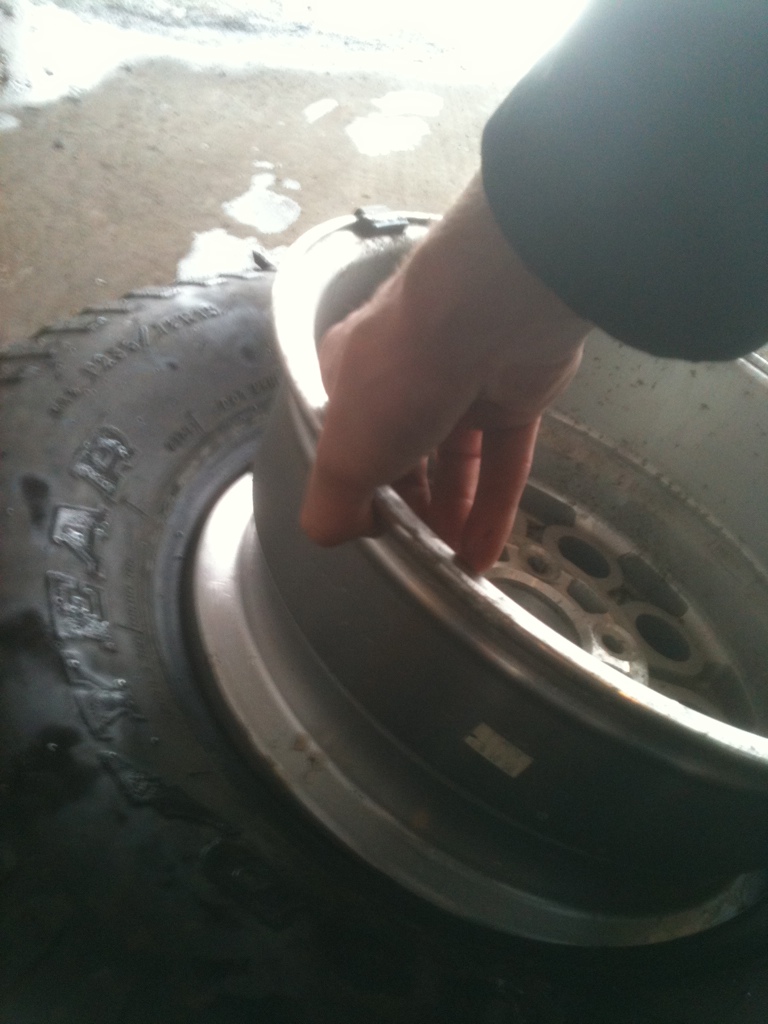
The last side can be tricky... I wasn't able to get the rim out of the tire for a while. Ended up leaning the tire upright against my leg, and using one arm to push the rim out while use the other hand with a pry-bar to work my way around.
No pictures of getting it back on, it's way easier though...
Next step - Levelling out the front / installing hitch and stock rear bumper.
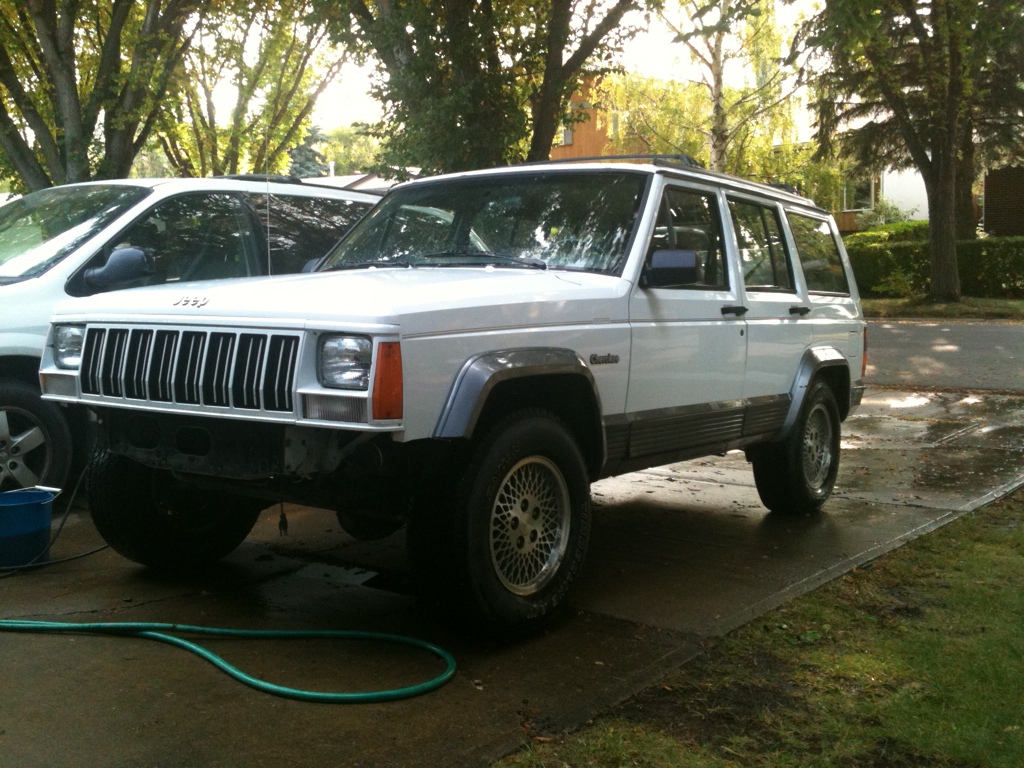
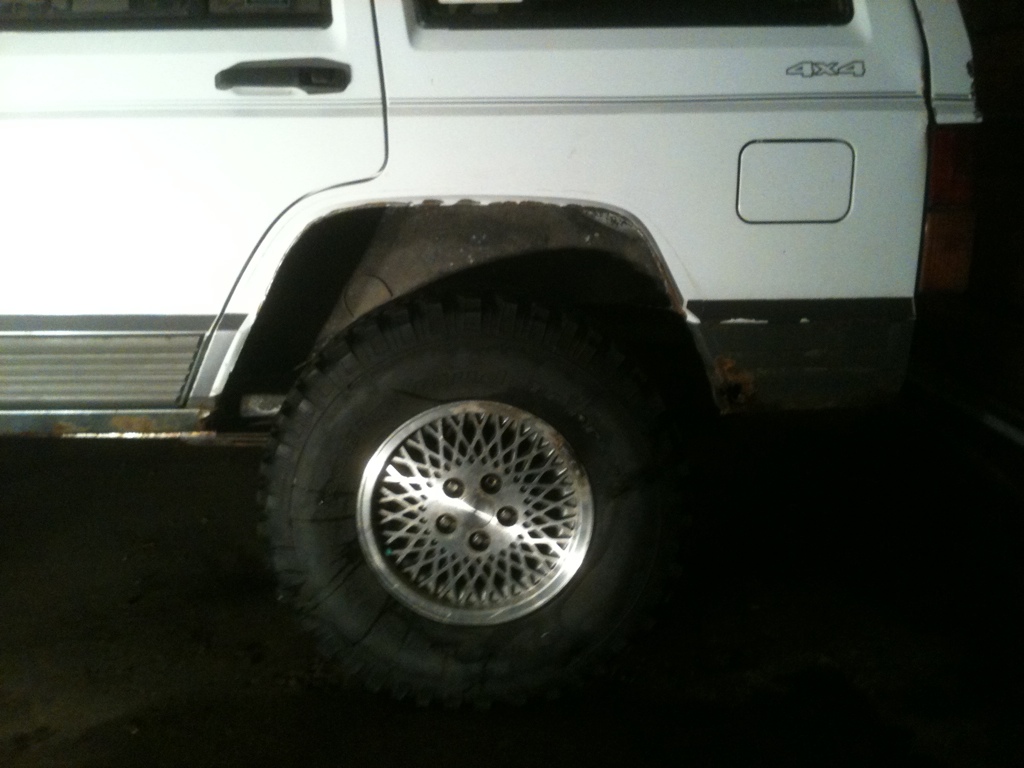
Picked up some rims.
They were pretty dirty
After a bit of cleaning / polishing..
And the final product!
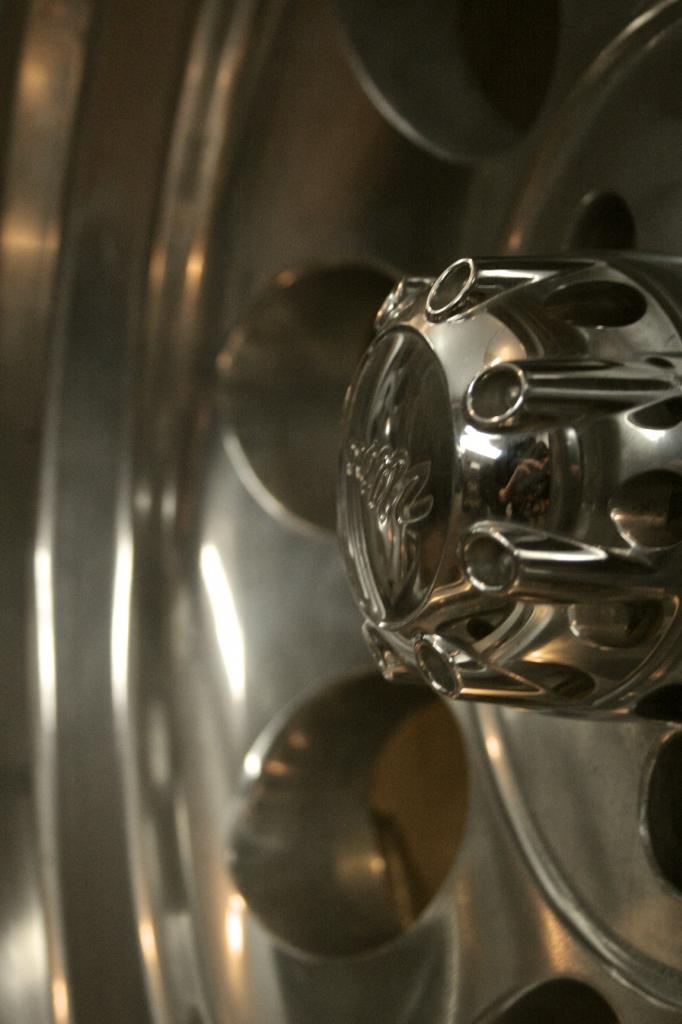
So shiny... Now I need to focus getting through Unviersity Finals so I can swapping the tires onto the new rims.
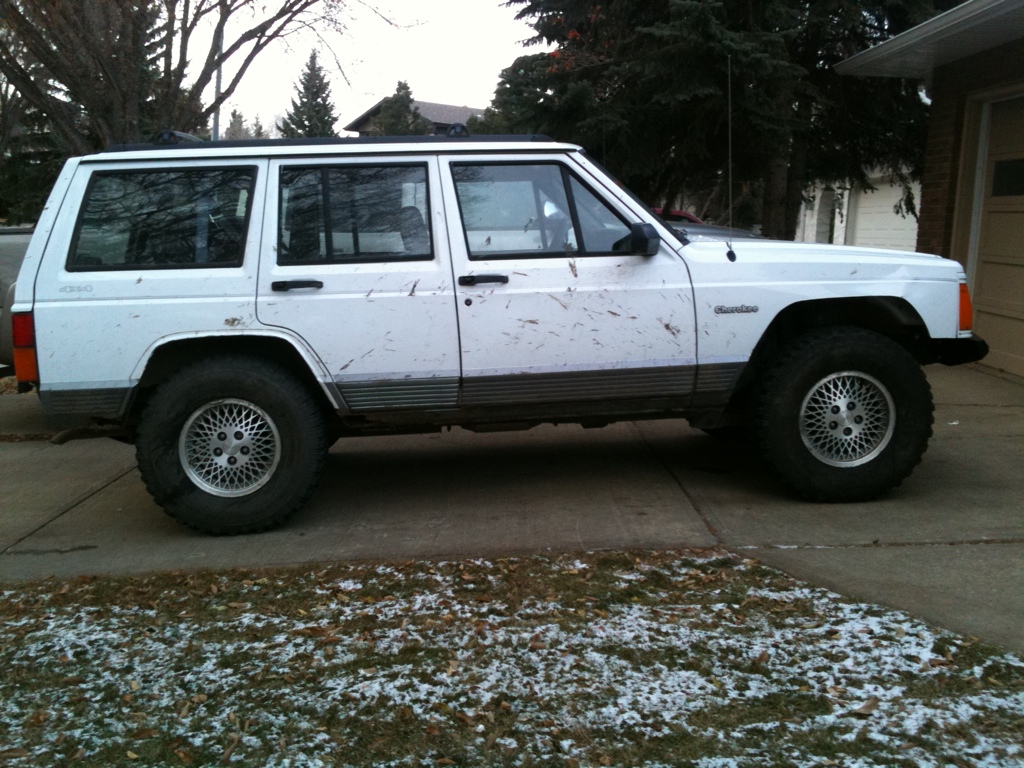
I swapped the tire over from the rim with the bent valve, to a new rim to see how they looked..... They look good, lol really good
Also, I have mechanical experience (from my car), but no 'fabrication' experience so everything I do is a first time basis. Everything you see me doing is the result of reading forums and write-ups and giving it a shot!
So now that my Jeep is officially "lifted" (it may only be the rear end, and from a JY, but who cares! haha), I thought I might as well start keeping track of what I've done...
Well I've always been into vehicles and cars... I'll save you the grief of scrolling through a bunch of boring photos lol, but here's the overview.
I started out the day after I turned 16 with an old Exploder... Literally.. I went through 1L of oil every 250km HA!. So I scored some free 31" BFG M/T's wheeled it a few times before selling it.
Sold the exploder and bought my first Jeep! It was short lived though as it was just a straight up piece of crap as a DD.
Thing did amazing with the 32s and rear locker.
However I needed something more practical... And "safer" according to my dad
Then came my car phase... Started out as a stock '97 Acura EL 1.6..
Currently its a 1.8L Turbo running 230hp on 9psi. Not to bad considering how short the gears are lol.
After having it to the 1/4mile, I managed a time of 13.5seconds with a horrible 60ft. Not to shabby!
Once I turbo'd, I realized I probably shouldn't subject the car to anymore Alberta winters... So I started the hunt for a winter vehicle and place to store the car.
Well I wanted a jeep, but thought one was way out of my price range... Looked at some really really beat up Toyota's and full size GMs...
Finally came across this little gem! And it was defiantly in my price range
First project was some sort of front protection... The front end looked to have already taken a hit... Bumper / bracket was bent inwards on the passenger side. Fender has a slight bend to it and grill is cracked. I took off the bumper and began building my own. It was the first time ever working with metal aside from using scrap to practice.. I think it came out okay.
Using an old 220A stick welder + a 5" angle grinder + a jig-saw with a metal blade... Took way to long...
I'm pretty happy with the result!
So then came a new problem... Went out and found some tiny side trail just out of town... Had just rained out and was super slick. My stupid tires just clogged up and it was like being on a skating rink trying to not slide into the huge ruts / mud pile. The hunt was on for some real tires..
I looked online and everybody said I couldn't run 31's stock.. Even if I trimmed I would rub when I went off road.
So with that in mind... I bought some 31's!
5 tires. Two are 90%, two are 60%, and one is 20%.
I knew I needed to trim, and that's why I got a jeep of this "nature"... I don't care about the body, aside from rust :evil:
She'll fit!!!!
Front end being taped and cut
I didn't get pictures of the rear... Me and 95ZJ spent about an hour quickly cutting between the spot welds and folding over... Turned out pretty good I think.. I'm priming them right away, and will bed-line / paint soon after..
We mounted the tires in my garage one night after seeing youtube videos haha
Used the high-lift under my dad's truck hitch to pop the bead off on each side of the tire.. Then used two large pry-bars to slowly work the tire off the rim. One the tire was off, the new 31" went on. Used a generous amount of soap to help it slide on plus help seal the bead. Once the tire was on, stood it upright and used the air compressor while pushing different areas of the tire to seal the bead.
After a couple weeks of driving, I have ZERO leaks, and ZERO vibrations, even at highway speed. I don't know why I didn't have to balance them, but who cares!
Went out to my cabin near Darwell, AB with my significant other to get out of the city / have some fun in the bush. There's a ton of trails I want to explore this winter. Maybe a 4low trip? There's countless trails I know of, I grew up sledding in this area (first time on a sled I was 6months old haha).
I was trying to avoid ALL mud / scary sections.. I was by myself and the last thing I wanted to do was get stuck. I had a high-lift and lots of straps / a shovel and axe.... But still. Obviously it went as planned.
It wasn't that bad, but the ice was pretty thick. Thank god for mud tires.. Just backed up a bit, and chewed my way out in one try. I love my girlfriend though... She loves being out of the city, loves mud, loves trucks, loves classic cars.. So at least I didn't have her yelling at me when we sunk into the hole haha.
So after coming back, I was getting stressed in Uni and needed some garage time... I decided I might as well try a bastard pack lift. Lots of readings and told me a bastard pack is better than actual lift springs. They can ride smoother, and because they sit flatter, they give you a lot more flex.
Before:
During:
After: I used springs off a '93 Dakota... I chopped the eyes off the dakota main leaf, and used that. So my new pack is = Xj main, Dakota Main, XJ 2nd, XJ 3rd, XJ 4th.
I gained about 3.5" over stock (I have no bumper / no cargo or spare tire in the back yet. That will drop it about 1/2" I think, if not more.)
The ride is a little bit more firm, but honestly I think its VERY close to stock. I'd hate to say this, but i think its a better ride than when 95ZJ first lifted his and he has coils in the rear haha. I'm overall super happy with it.
So that brings me up to date....
I also have the shackles off the dakota springs. They will bolt in and give me another 1/2" of lift. So my plan is to use my awesome employee discount at napa and pick up some Comanche shocks (3" longer) and a YJ rear brake line (4" longer).
After that is levelling out the front a bit with some V8 ZJ coils (1 - 1.5" lift) and possibly a 1/2" spacer.
I also painted my fenders:
Before -
During -
Finished product
I used some self-etching black primer for now. I will eventually bed-line the wheel wells and possible the rear quarter panel from the pinstripe down.Also picked up a spare rim, decided to mount my spare tire on it. I figured I'd take a couple pictures to show how I do it...
Use the hi-lift to un-seat the bead on both sides of the tire.
Use 2 pry-bars and get one side of the tire off the rim.
Then pull the rim up through, and take off the other side.
The last side can be tricky... I wasn't able to get the rim out of the tire for a while. Ended up leaning the tire upright against my leg, and using one arm to push the rim out while use the other hand with a pry-bar to work my way around.
No pictures of getting it back on, it's way easier though...
Next step - Levelling out the front / installing hitch and stock rear bumper.
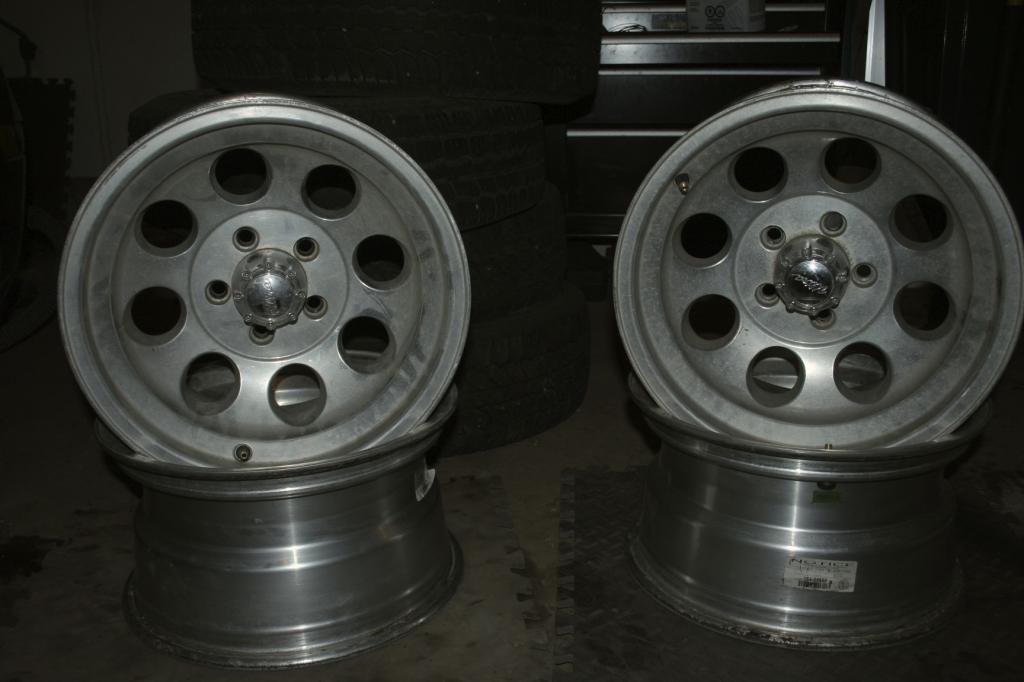
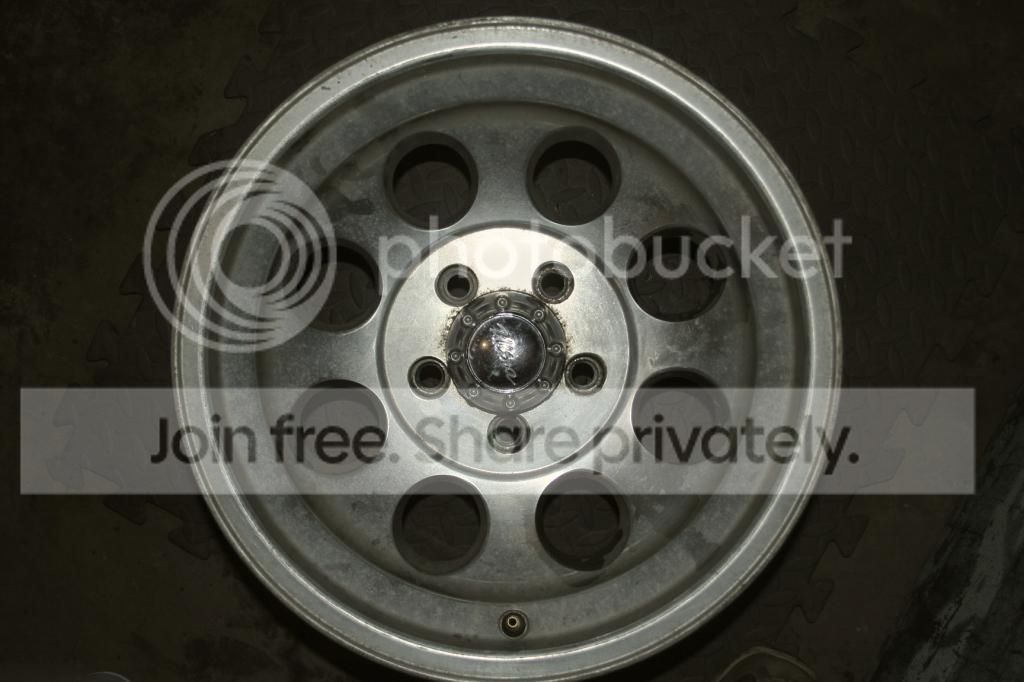
Picked up some rims.
They were pretty dirty
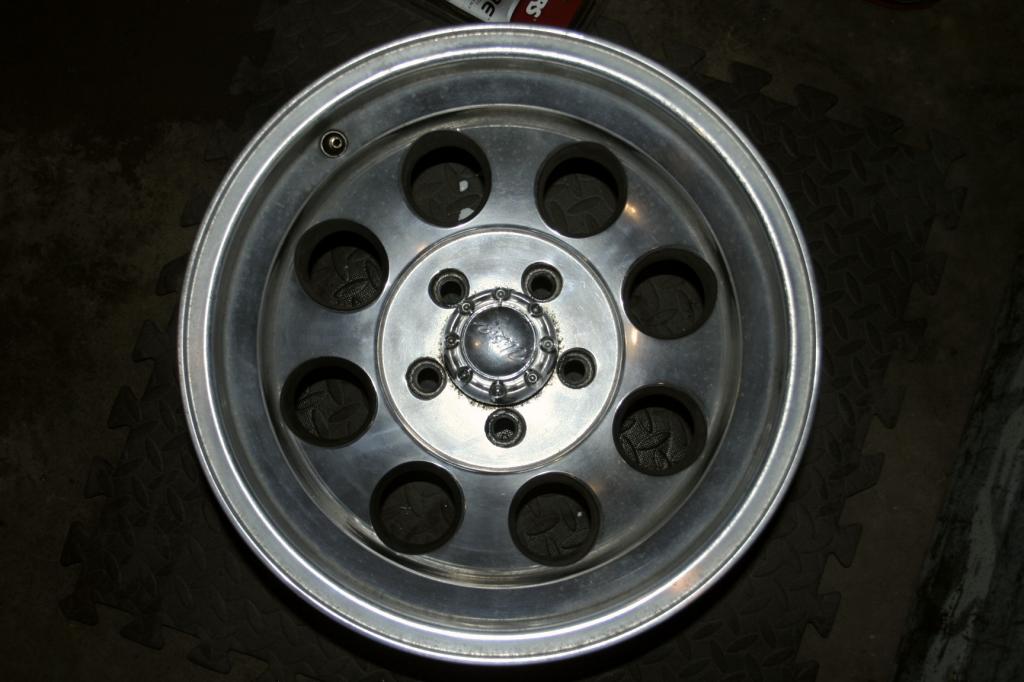
After a bit of cleaning / polishing..
And the final product!
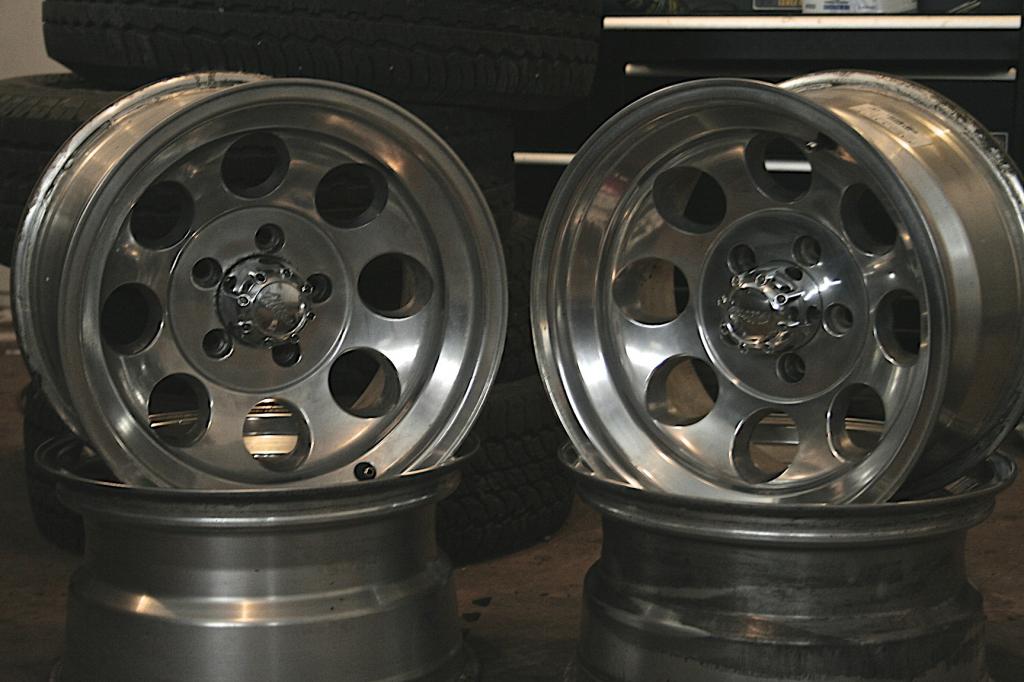
So shiny... Now I need to focus getting through Unviersity Finals so I can swapping the tires onto the new rims.
I swapped the tire over from the rim with the bent valve, to a new rim to see how they looked..... They look good, lol really good
Last edited by Skittle; Sep 30, 2013 at 07:41 PM.
Thread Starter
Junior Member
Joined: Sep 2012
Posts: 65
Likes: 0
From: Alberta
Year: 1994
Model: Cherokee
Engine: 4.0L
So I got those rims mounted... Look stellar in my opinion.
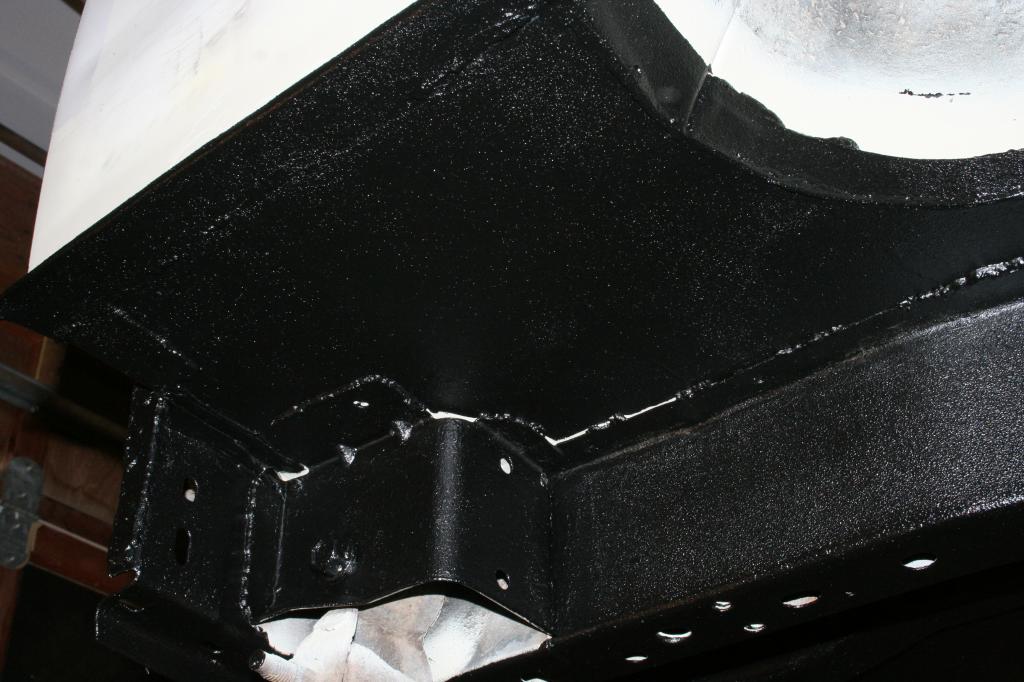
Built me some brackets for my rear bumper... Spend the next day throwing a simple bumper together with a hitch. Eventually will add more to it when I cut / fold my rusty quarters and build in some side protection.


Bumper came out really good. Hitch is a TAD crooked... But what ever. Dosen't bother me.
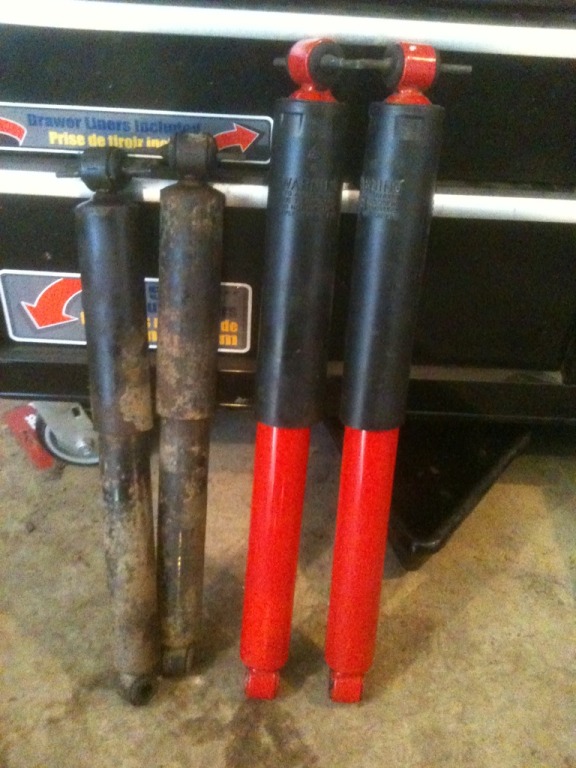
I then picked up some JK Rubicon shocks for $200...
Needed to press out the collars from all four shocks. That sucked without a press..
Then had to press my old bar-pins into new front shocks.

Then on to the rears... Old vs. New
And that brings me up to the last couple days...
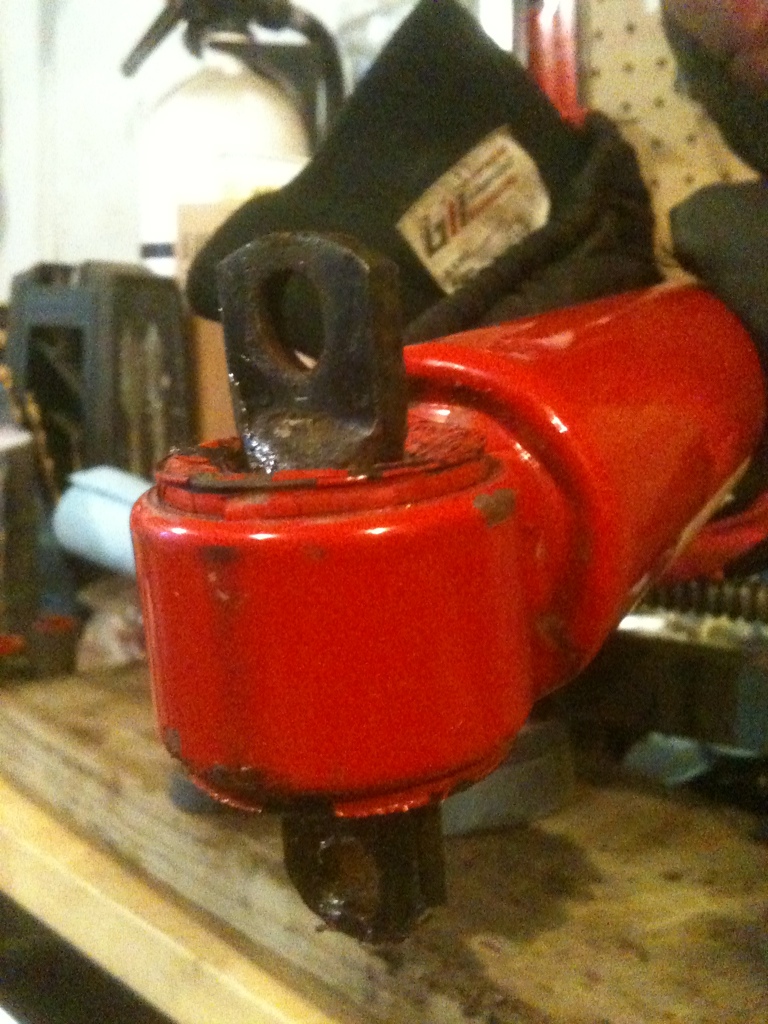
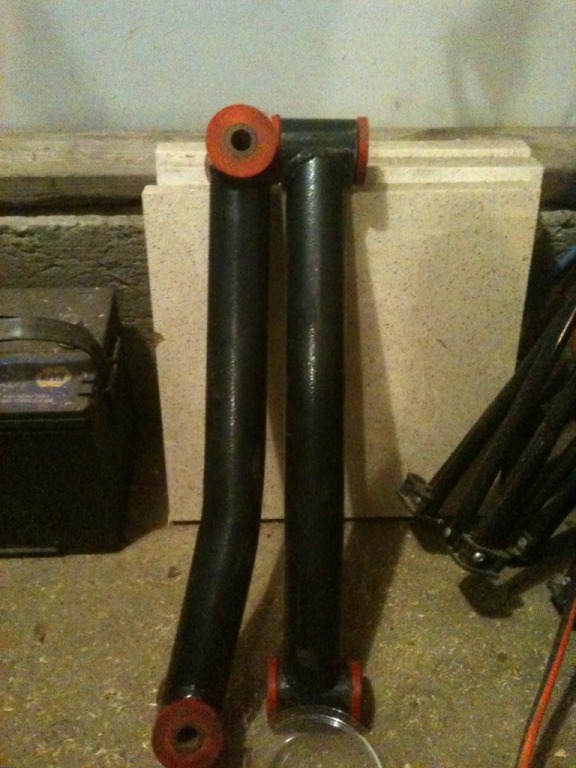
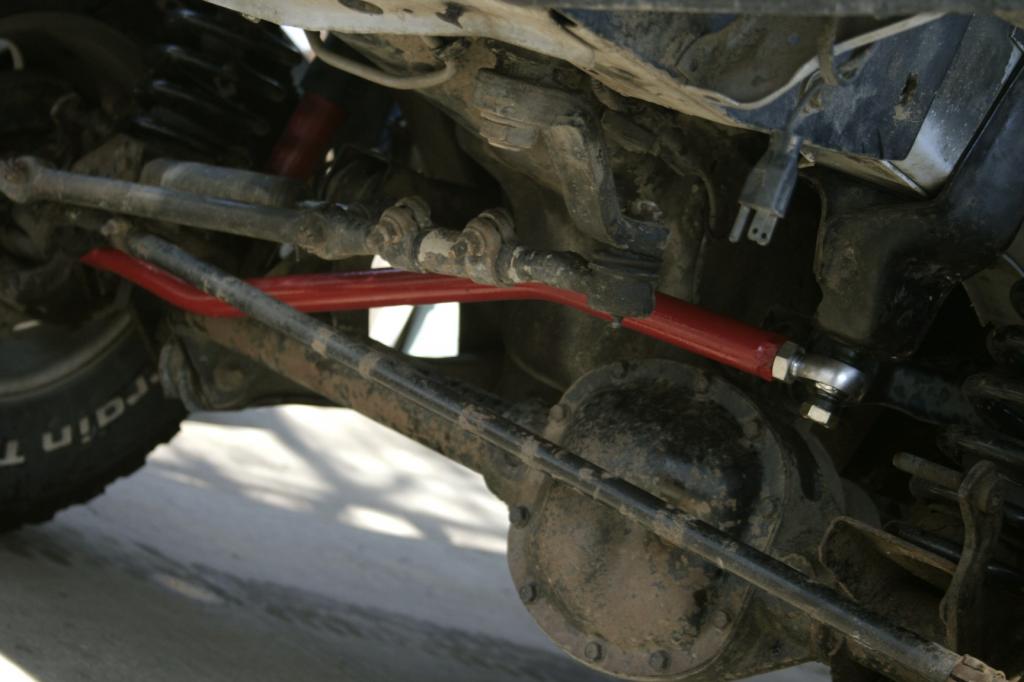
Went out to pick-n-pull and found a ZJ that was missing all the shocks / springs.. It was lifted. And I happened to notice it had procomp lower control arms and a single-shear adjustable track bar!
For $55 I came home with this:
AND this track-bar (didn't get a picture of it black... Decided to paint it)
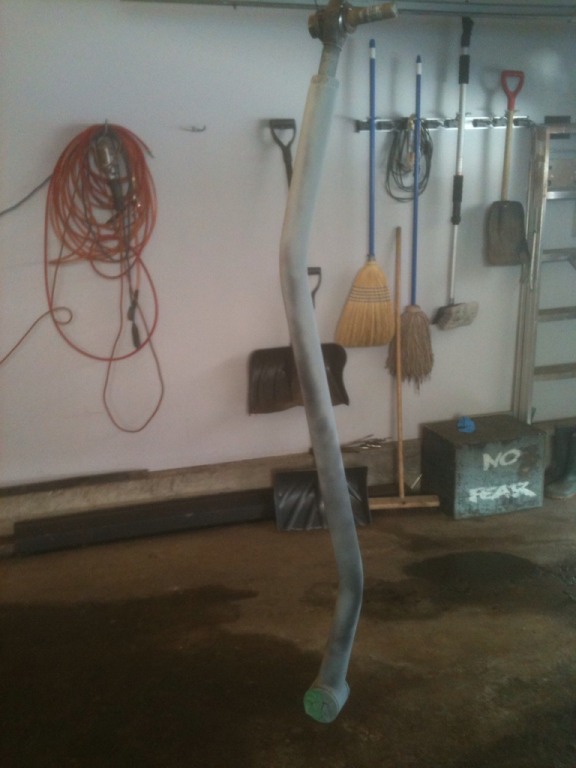
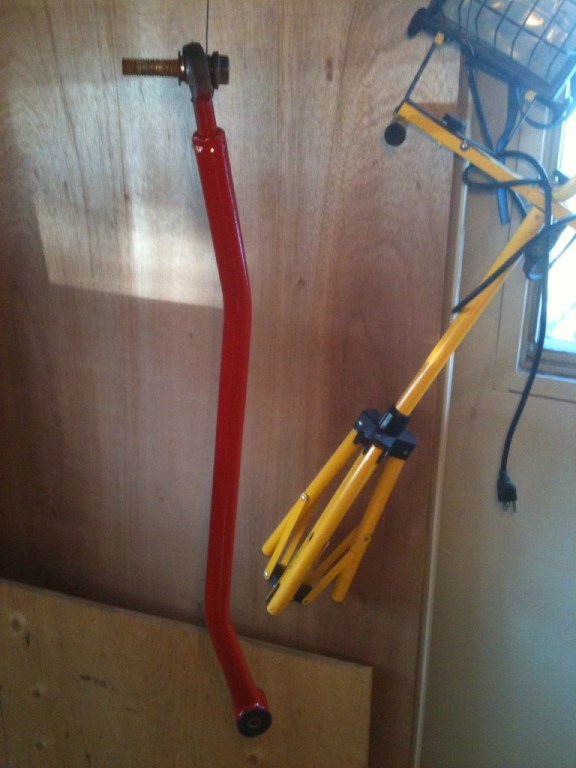
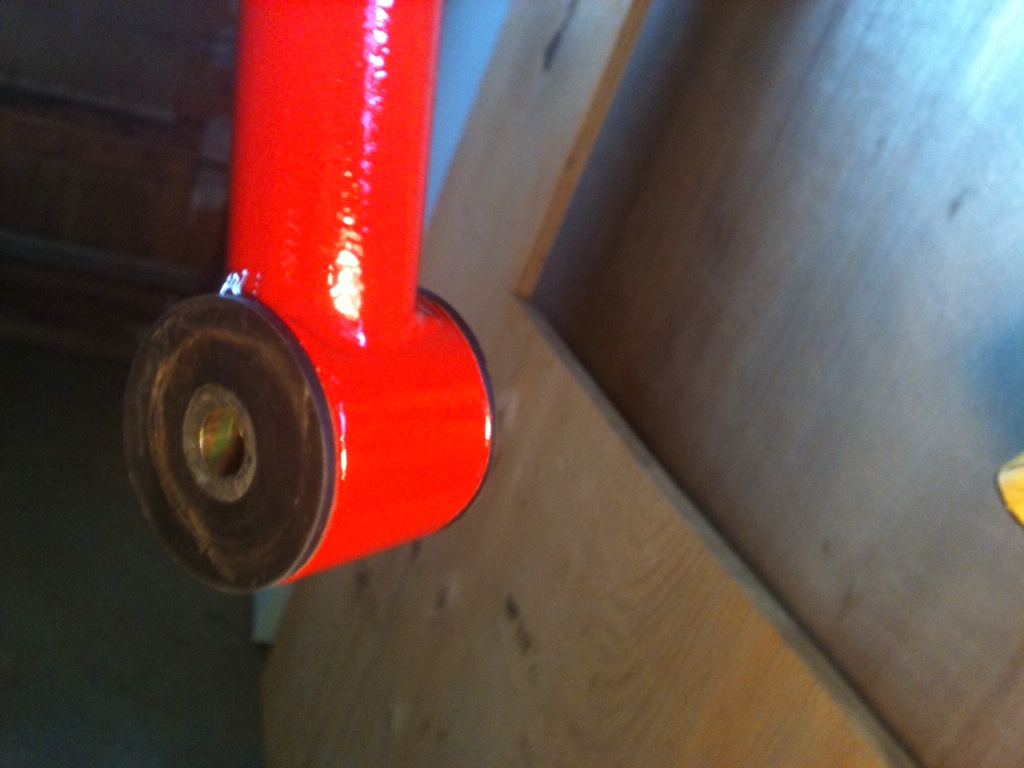
I figure I might as well start a small theme with the jeep... The rubicon shocks look killer under the white jeep so I figured could accent it further with a red trackbar... Hopefully I'll refrain myself from going overboard with the red.... Small steps
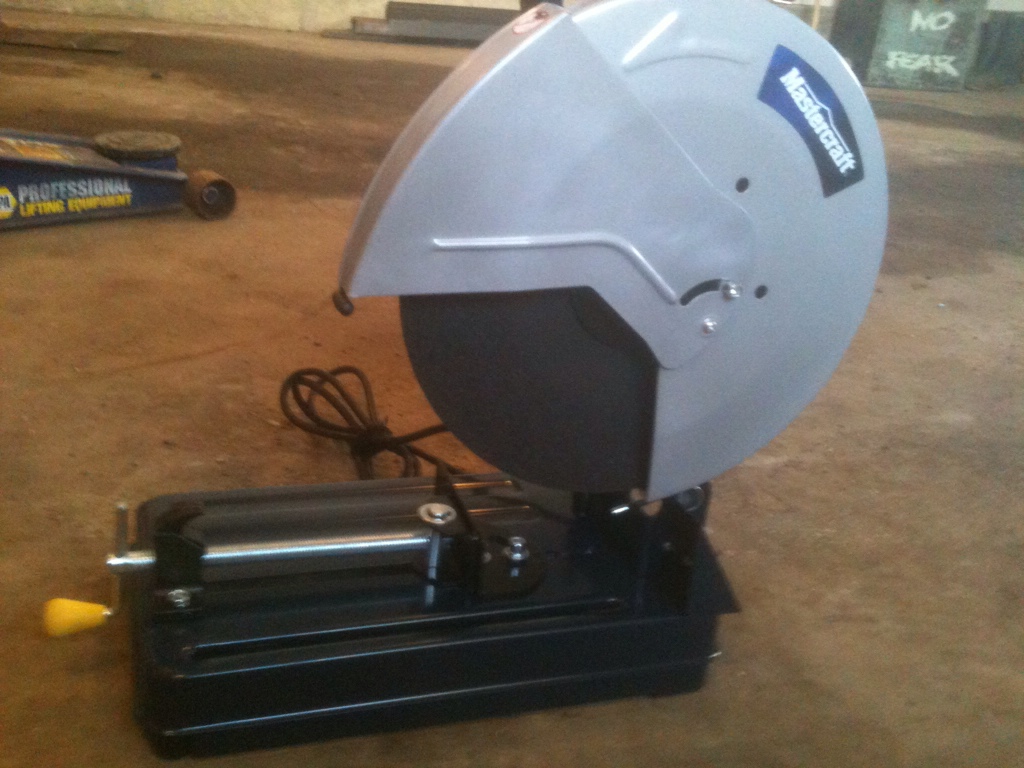
Also picked up this new toy.. Should help for my future projects.
And...
Spring and mud are finally here!!!!
Had to pick up a new heim joint for the track bar... But nowhere carried the misalignment spacers that I needed..
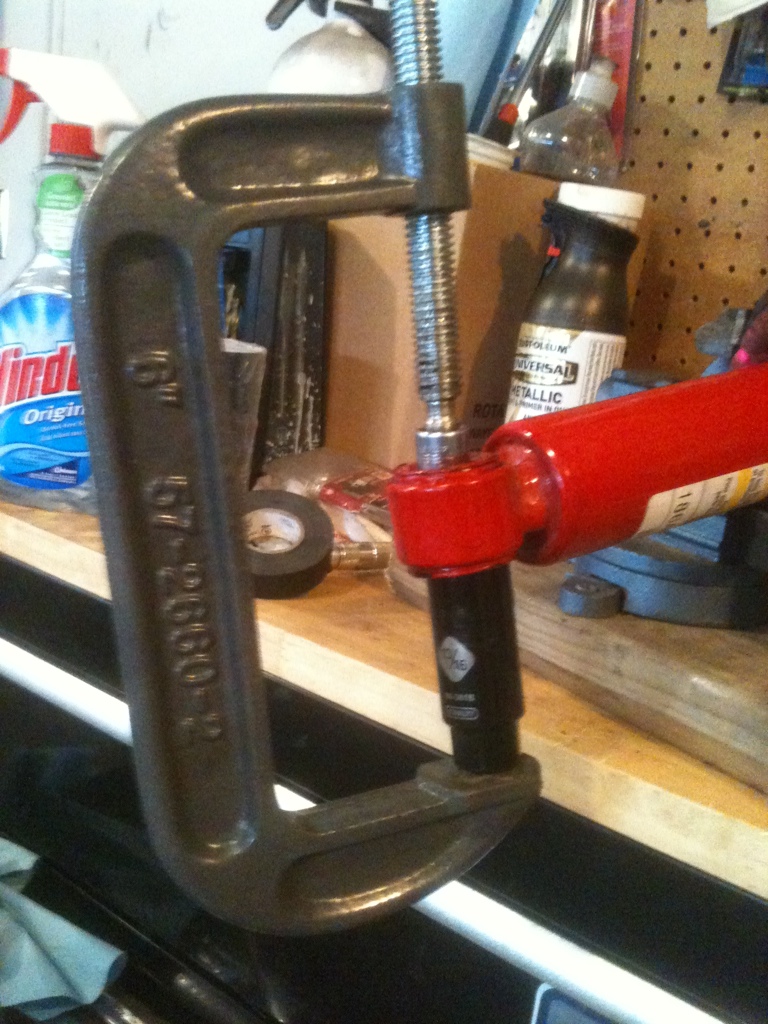
So off to my friends place! Huge thanks to my friends father. We used his lathe and whipped up some spacers out of a simple piece of metal. Man I love machining..

REALLY impressed with how they turned out... Didn't take long either.
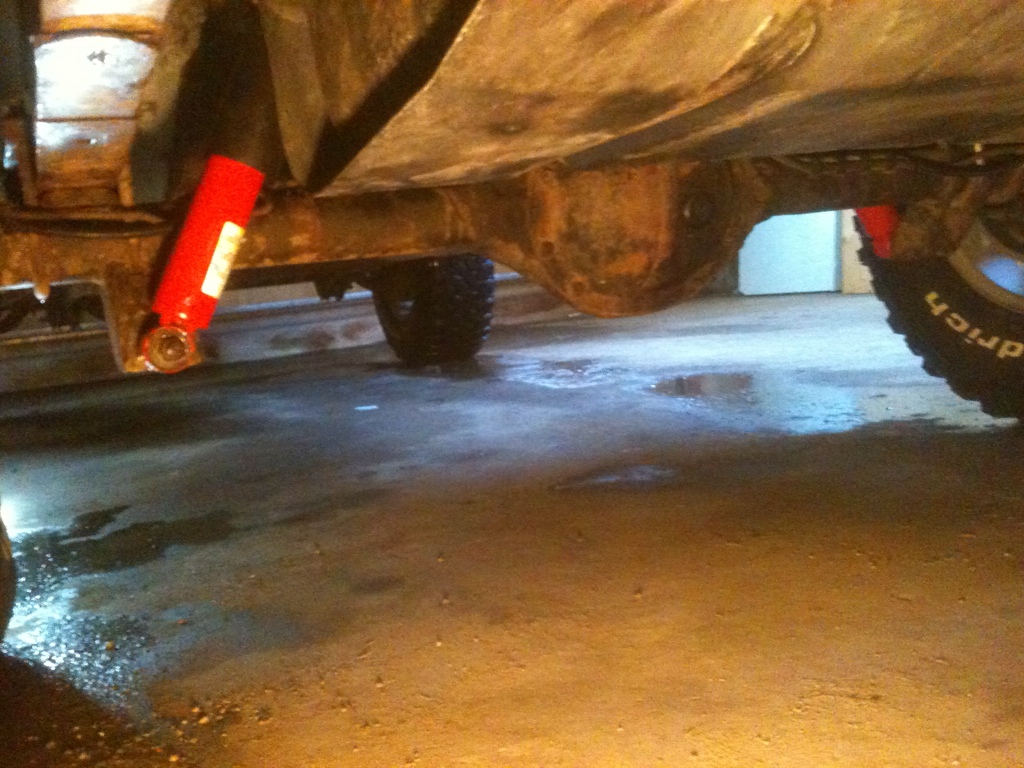
Firstly, I got the trackbar installed. I had it loosen off on me once, so I cranked it tight with some lock-tight and it has been fine since.
Since then, I stripped the rear of the jeep and began the rust repair back there. No pictures yet, but I do have these (of my new toy!!!)
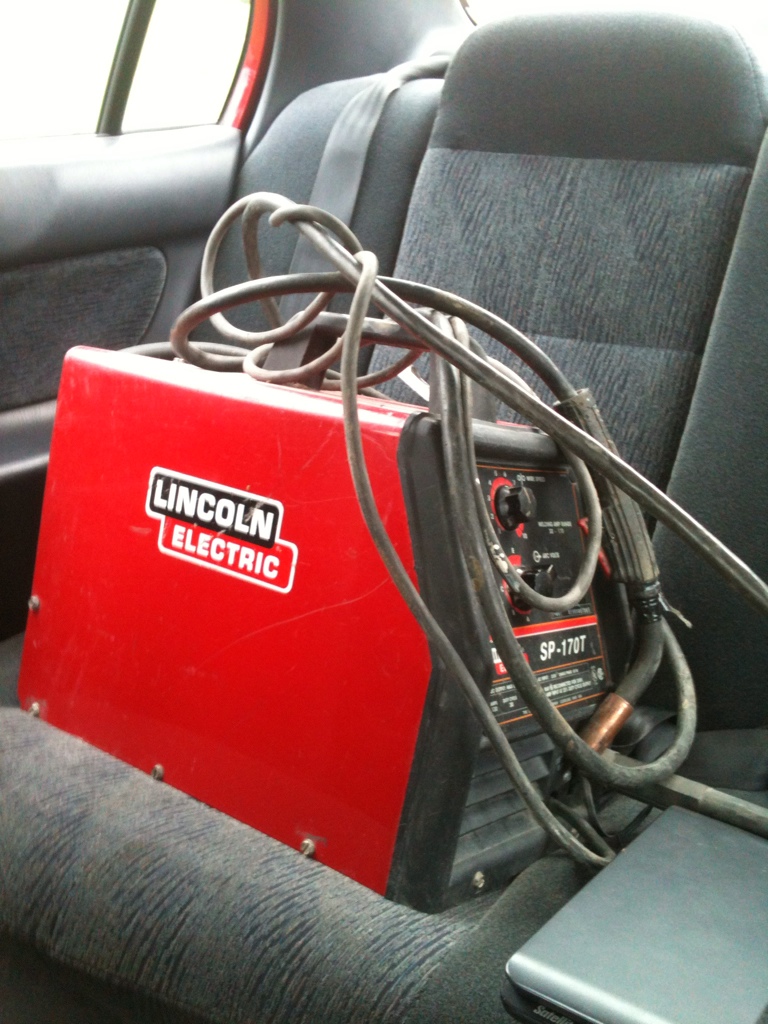
Managed to find a great deal on a 220V mig welder. Only been using it for a day and here are some of the very initial welds (tried some exhaust tubing with flux-core. Works well but have to be careful of burning through..)
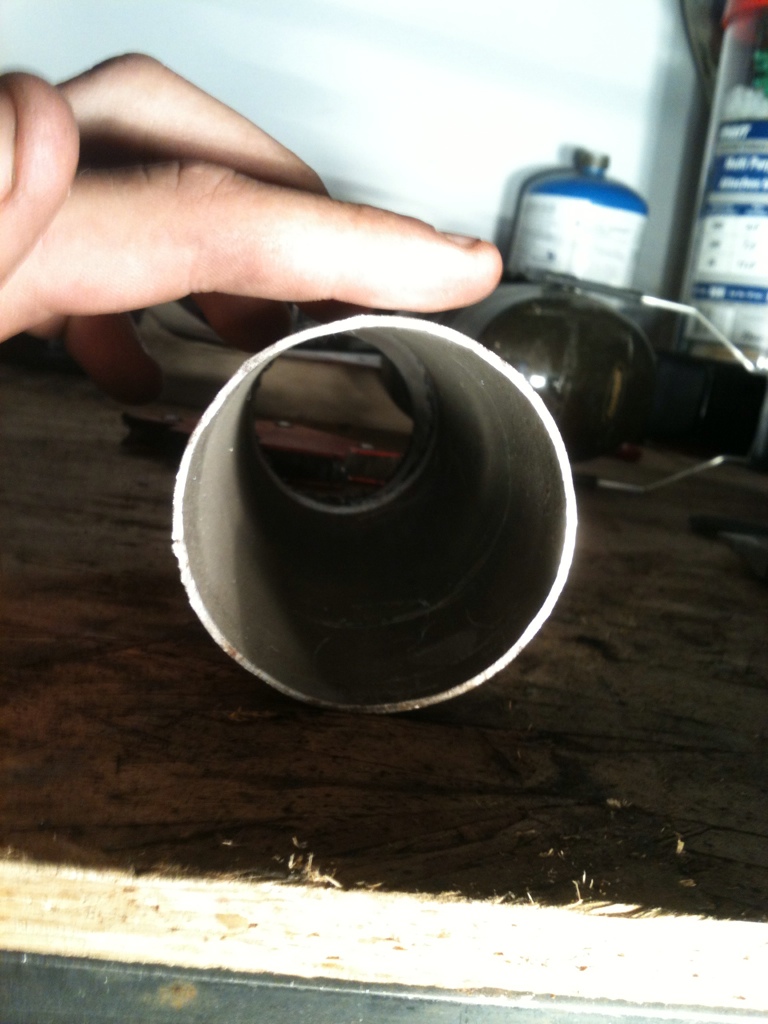
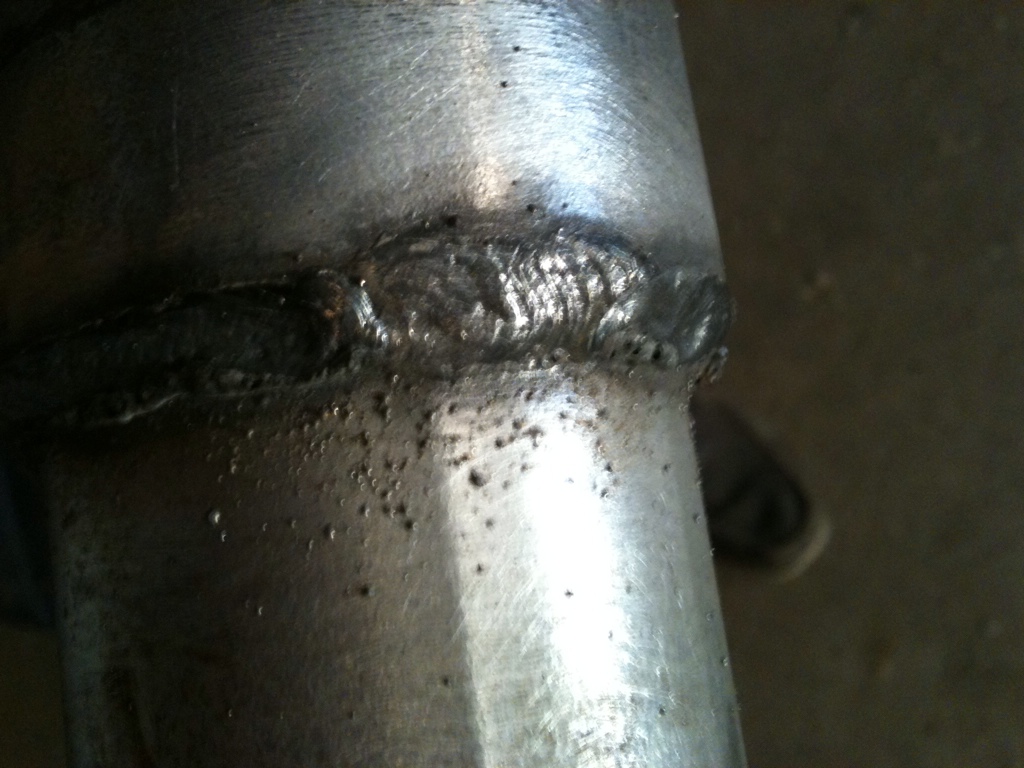
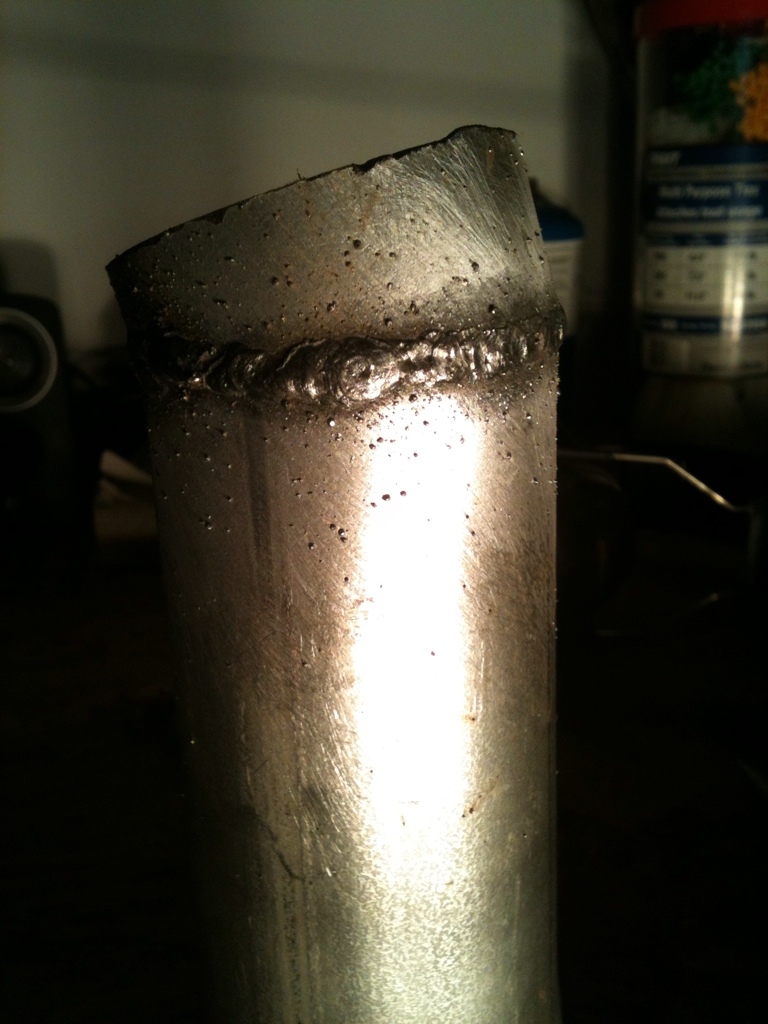
They don't look pretty... but with practice, and some mig action, hopefully that will change. At least I don't have any gapping holes...
Lastly....
I picked up my Ford 8.8! It is out of a '98 Ford Explorer. Has LSD with 3.73 gears and disk brakes.
Plans are....
IRO mounting Kit / Axle Truss
Solid Diff Cover
4.88 gears (for 35s... that should be good huh?)
I'm still debating on what I want to do for a carrier / locker.... I don't know if I want to spend $900 on a detroit, or just grab an open carrier from another junkyard Ford 8.8 and run a lunchbox locker...
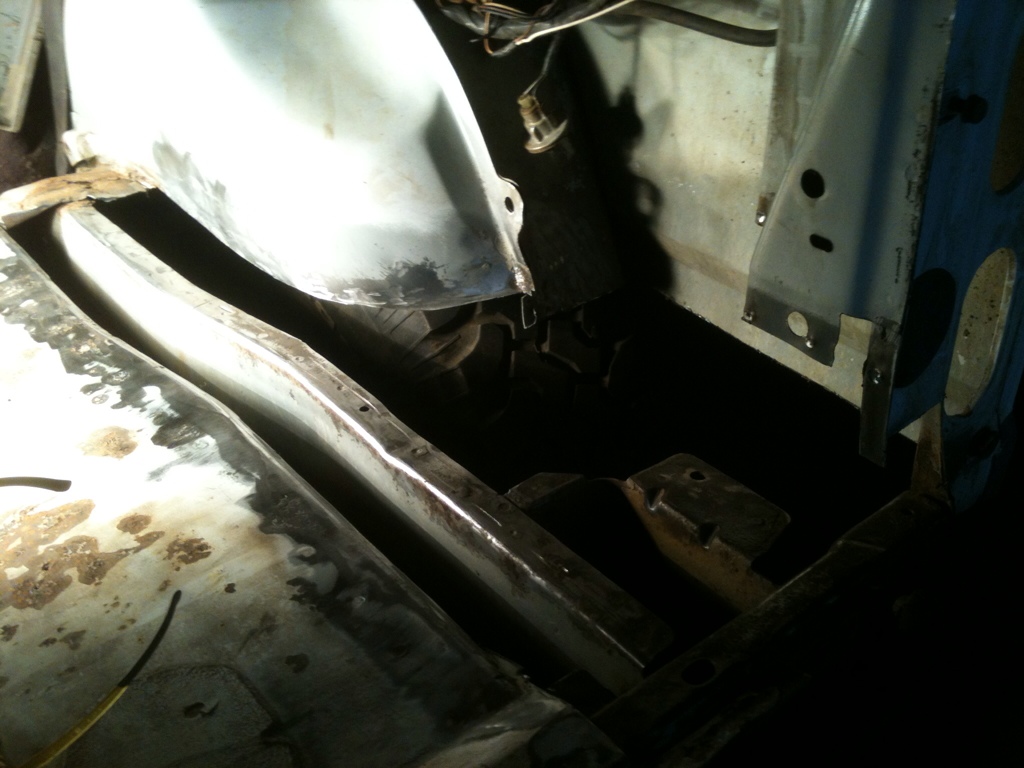
I dove into my rust repair!
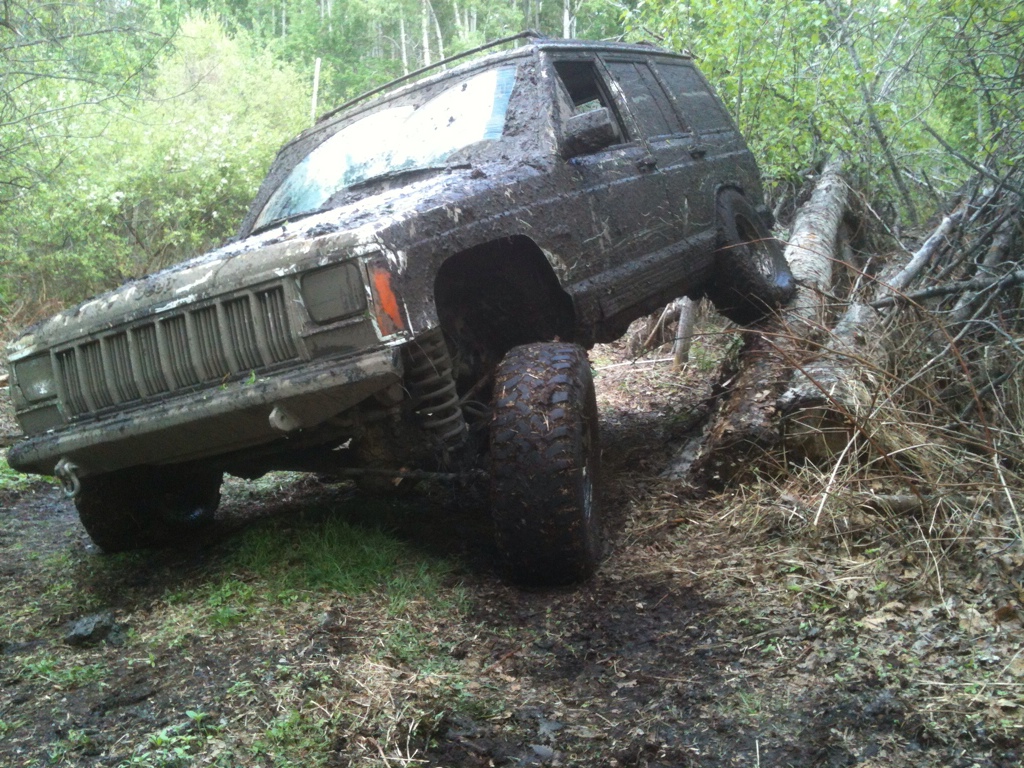
But first. I needed to wash the INSiDE of my jeep because after THIS offroading trip -->
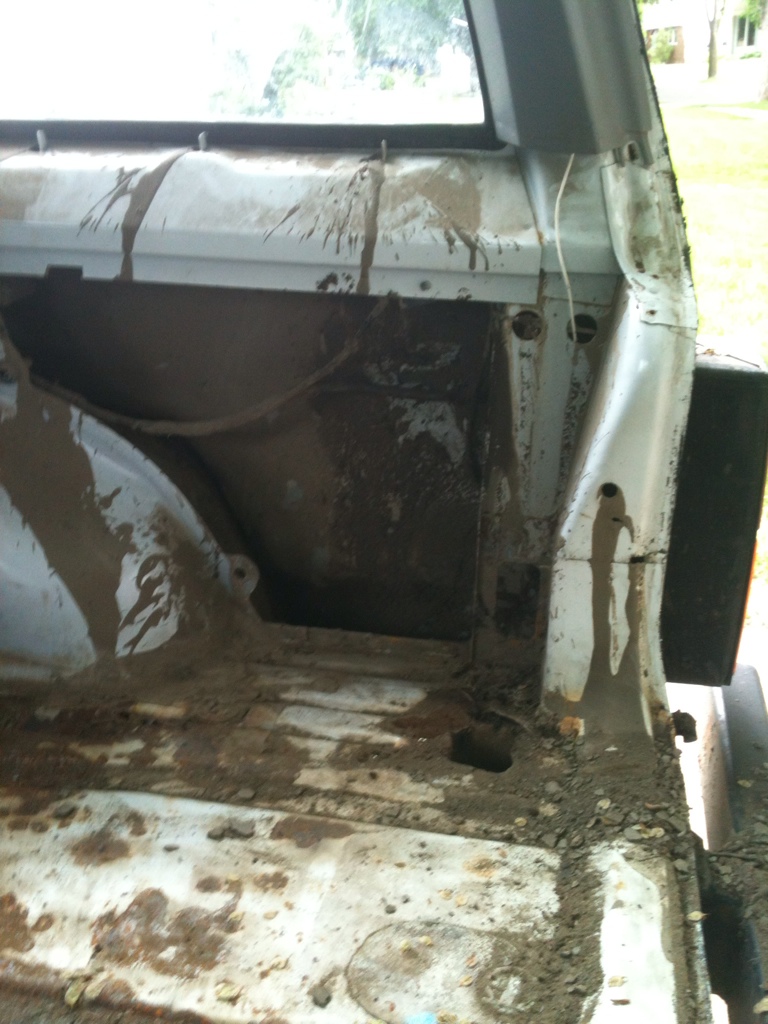
My interior looked like this -->
lol, so out came the hose and it looked like this -->
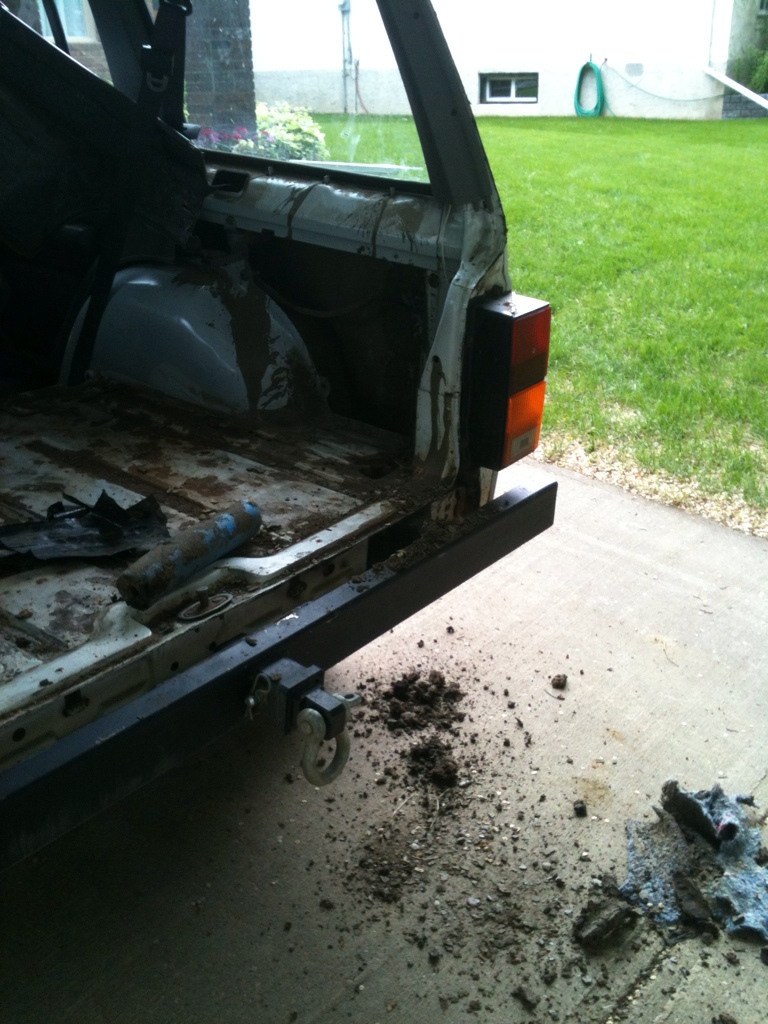
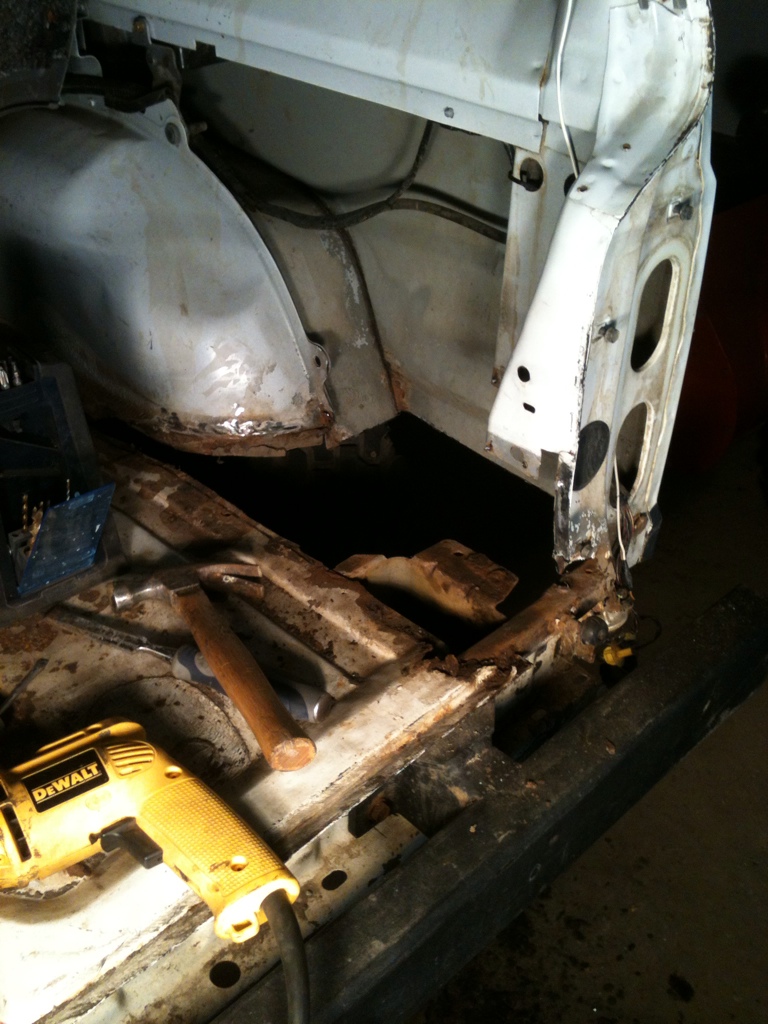
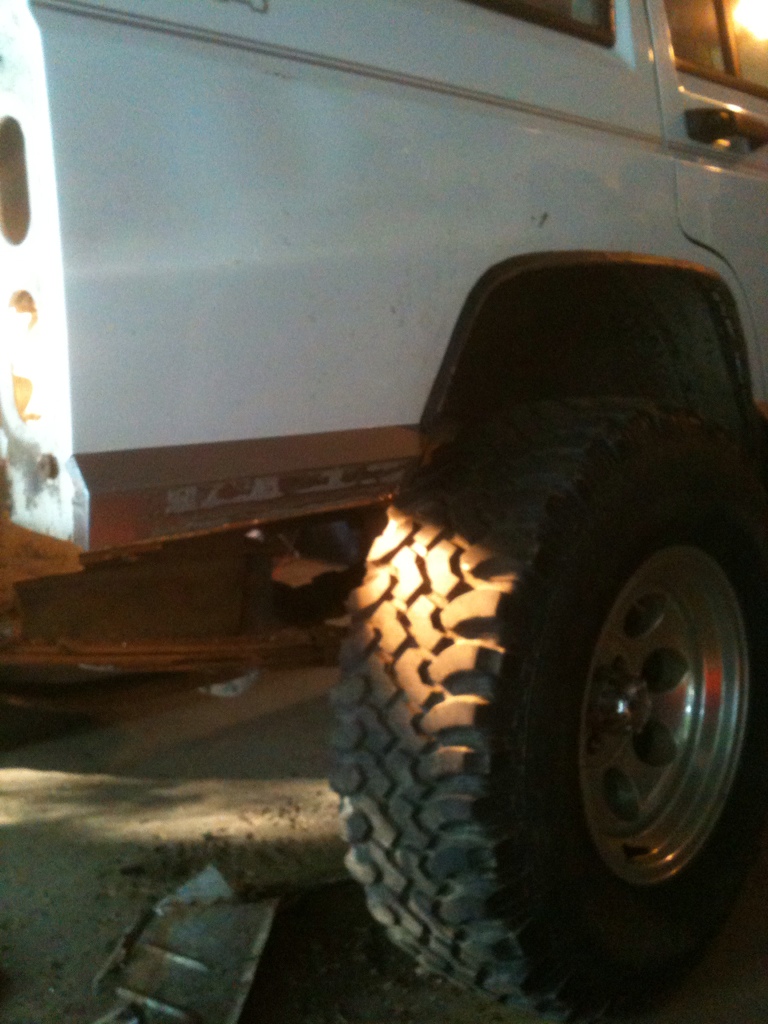
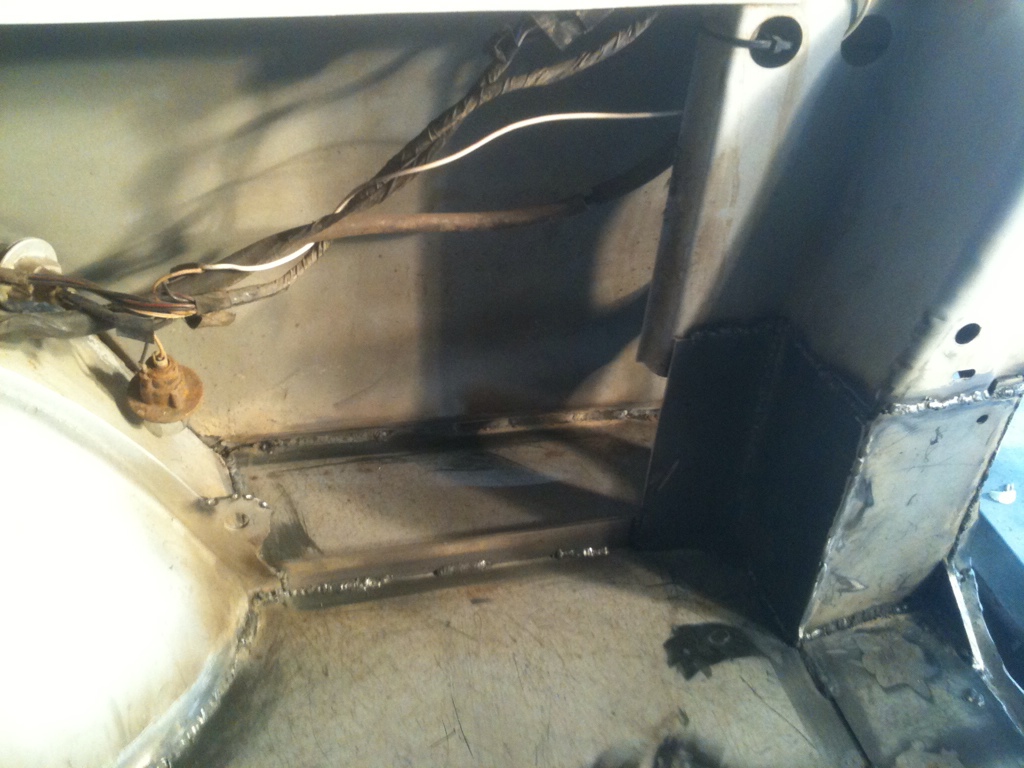
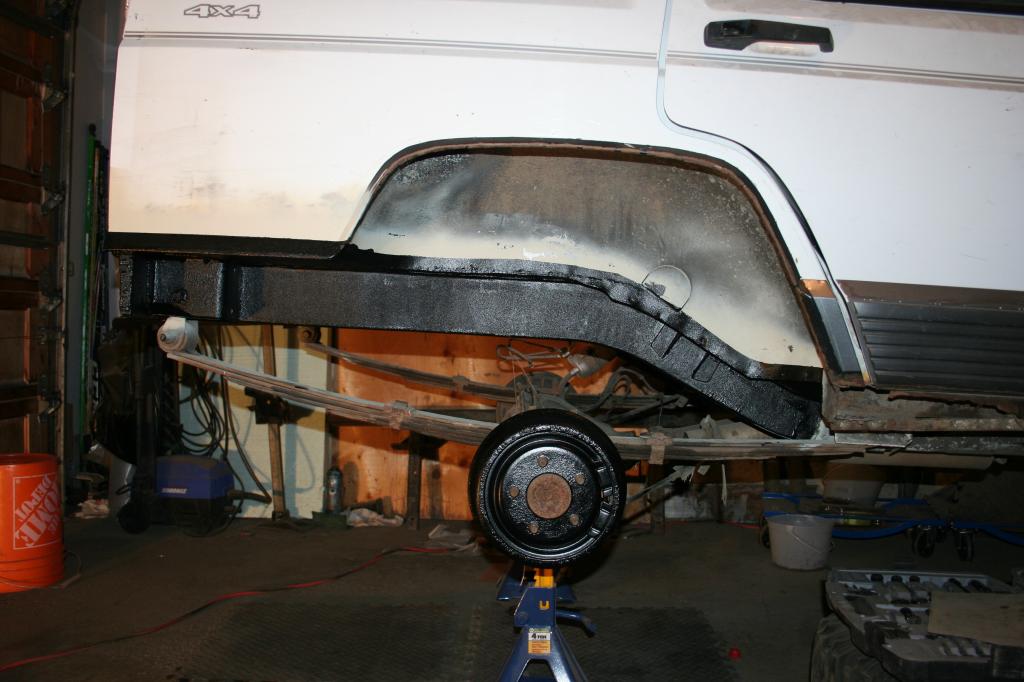
I had my major rust issues in my rear rocker panel (fix with a cut and fold), above the shackle box, and at the bottom of the tail-light housing...
So I started cutting... And cutting... And cutting.... And finally I said **** it.
The plan is to use one large piece of 14g steel and go from beside the wheel well, all the way back to underneath the tail-light housing, then have a slight bend and connect to the outside fender to cap everything off. Then add some ripping / seams for reinforcement and clean up the one curved piece that I saved. (where the tail-gate sits).
Our driveway is being re-done at the end of this week, so I decided to park the jeep in the garage for the next month while the concrete dries. Hopefully I'll be posting quite a few updates soon
Got a couple hours in the garage tonight..
In short, I....
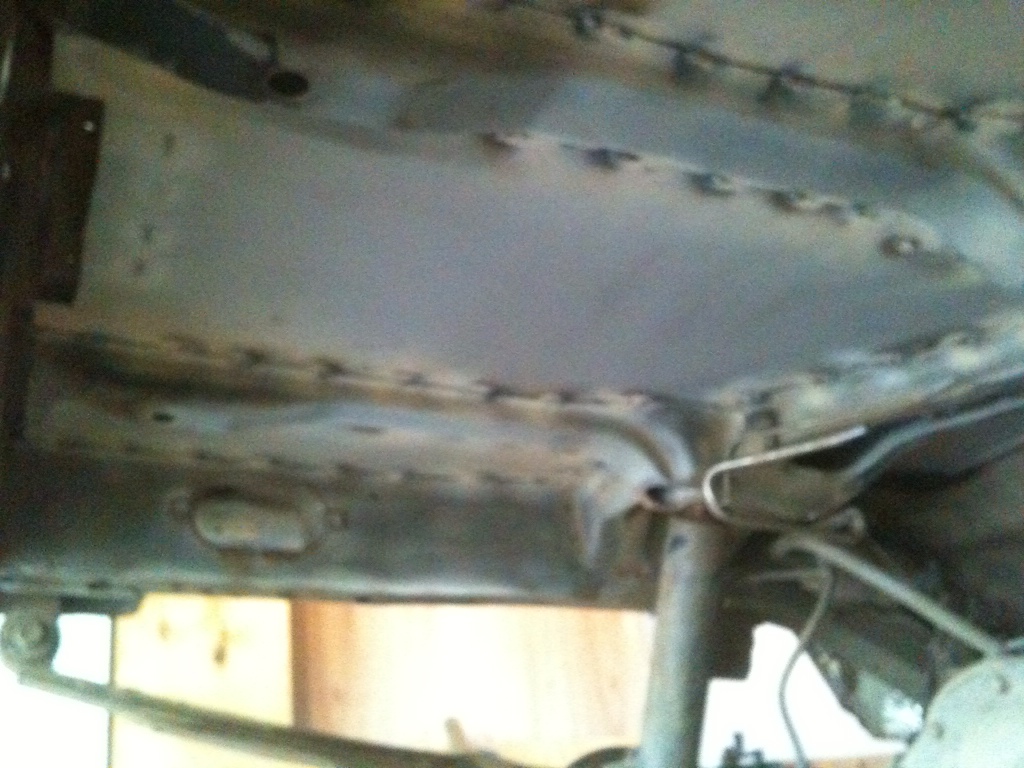
- cut the bottom rusty lip off the inner fender well
- peeled back the rusty sheet metal covering the frame
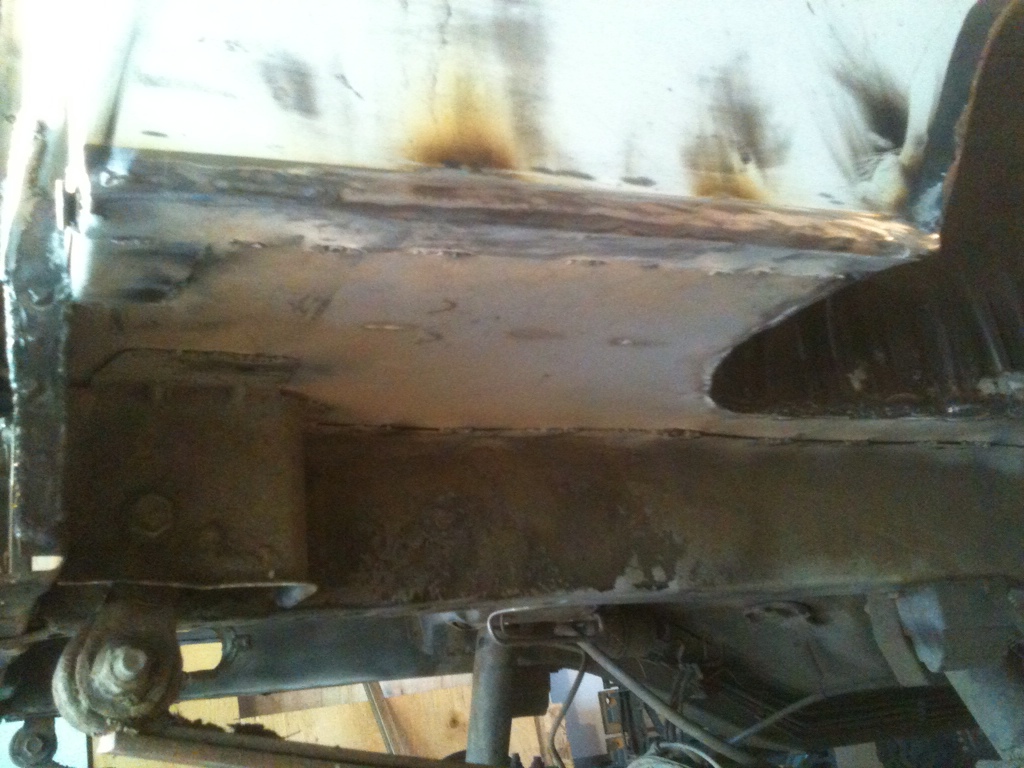
- cleaned inside the frame rails... Going to use weld-thru primer tomorrow
- generally sanded / grinded away some surface rust and got it looking almost ready for paint and metal
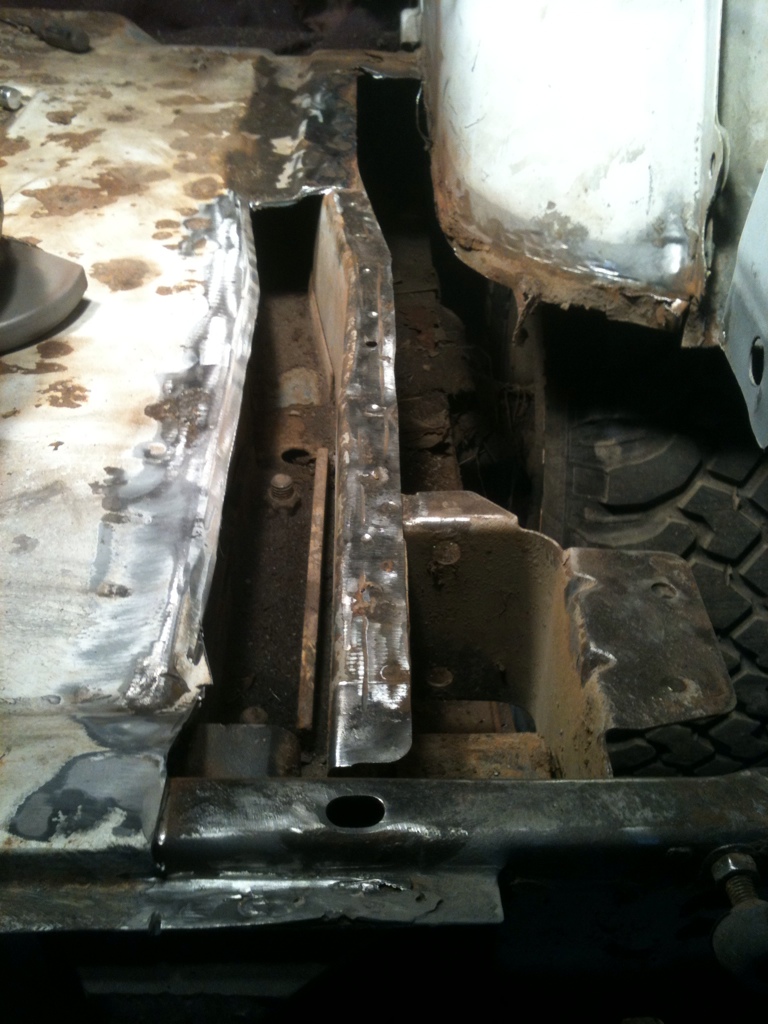
As you can see in the first picture, I left about 1 1/2" of good metal below the rear quater where I will fold it up. I will weld metal on the inside first, then fold that lip up and underneath and weld it all together from the inside and outside. Hopefully that will give me a smoother line when i try to fold the metal up and under.
Tomorrow will hopefully be primer and last bit of cutting and starting to fit some metal in there.
Built me some brackets for my rear bumper... Spend the next day throwing a simple bumper together with a hitch. Eventually will add more to it when I cut / fold my rusty quarters and build in some side protection.
Bumper came out really good. Hitch is a TAD crooked... But what ever. Dosen't bother me.
I then picked up some JK Rubicon shocks for $200...
Needed to press out the collars from all four shocks. That sucked without a press..
Then had to press my old bar-pins into new front shocks.
Then on to the rears... Old vs. New
And that brings me up to the last couple days...
Went out to pick-n-pull and found a ZJ that was missing all the shocks / springs.. It was lifted. And I happened to notice it had procomp lower control arms and a single-shear adjustable track bar!
For $55 I came home with this:
AND this track-bar (didn't get a picture of it black... Decided to paint it)
I figure I might as well start a small theme with the jeep... The rubicon shocks look killer under the white jeep so I figured could accent it further with a red trackbar... Hopefully I'll refrain myself from going overboard with the red.... Small steps
Also picked up this new toy.. Should help for my future projects.
And...
Spring and mud are finally here!!!!
Had to pick up a new heim joint for the track bar... But nowhere carried the misalignment spacers that I needed..
So off to my friends place! Huge thanks to my friends father. We used his lathe and whipped up some spacers out of a simple piece of metal. Man I love machining..
REALLY impressed with how they turned out... Didn't take long either.
Firstly, I got the trackbar installed. I had it loosen off on me once, so I cranked it tight with some lock-tight and it has been fine since.


Since then, I stripped the rear of the jeep and began the rust repair back there. No pictures yet, but I do have these (of my new toy!!!)

Managed to find a great deal on a 220V mig welder. Only been using it for a day and here are some of the very initial welds (tried some exhaust tubing with flux-core. Works well but have to be careful of burning through..)


They don't look pretty... but with practice, and some mig action, hopefully that will change. At least I don't have any gapping holes...
Lastly....
I picked up my Ford 8.8! It is out of a '98 Ford Explorer. Has LSD with 3.73 gears and disk brakes.
Plans are....
IRO mounting Kit / Axle Truss
Solid Diff Cover
4.88 gears (for 35s... that should be good huh?)
I'm still debating on what I want to do for a carrier / locker.... I don't know if I want to spend $900 on a detroit, or just grab an open carrier from another junkyard Ford 8.8 and run a lunchbox locker...
I dove into my rust repair!
But first. I needed to wash the INSiDE of my jeep because after THIS offroading trip -->

My interior looked like this -->

lol, so out came the hose and it looked like this -->

I had my major rust issues in my rear rocker panel (fix with a cut and fold), above the shackle box, and at the bottom of the tail-light housing...
So I started cutting... And cutting... And cutting.... And finally I said **** it.

The plan is to use one large piece of 14g steel and go from beside the wheel well, all the way back to underneath the tail-light housing, then have a slight bend and connect to the outside fender to cap everything off. Then add some ripping / seams for reinforcement and clean up the one curved piece that I saved. (where the tail-gate sits).
Our driveway is being re-done at the end of this week, so I decided to park the jeep in the garage for the next month while the concrete dries. Hopefully I'll be posting quite a few updates soon
Got a couple hours in the garage tonight..
In short, I....
- cut the bottom rusty lip off the inner fender well
- peeled back the rusty sheet metal covering the frame
- cleaned inside the frame rails... Going to use weld-thru primer tomorrow
- generally sanded / grinded away some surface rust and got it looking almost ready for paint and metal


As you can see in the first picture, I left about 1 1/2" of good metal below the rear quater where I will fold it up. I will weld metal on the inside first, then fold that lip up and underneath and weld it all together from the inside and outside. Hopefully that will give me a smoother line when i try to fold the metal up and under.
Tomorrow will hopefully be primer and last bit of cutting and starting to fit some metal in there.
Thread Starter
Junior Member
Joined: Sep 2012
Posts: 65
Likes: 0
From: Alberta
Year: 1994
Model: Cherokee
Engine: 4.0L
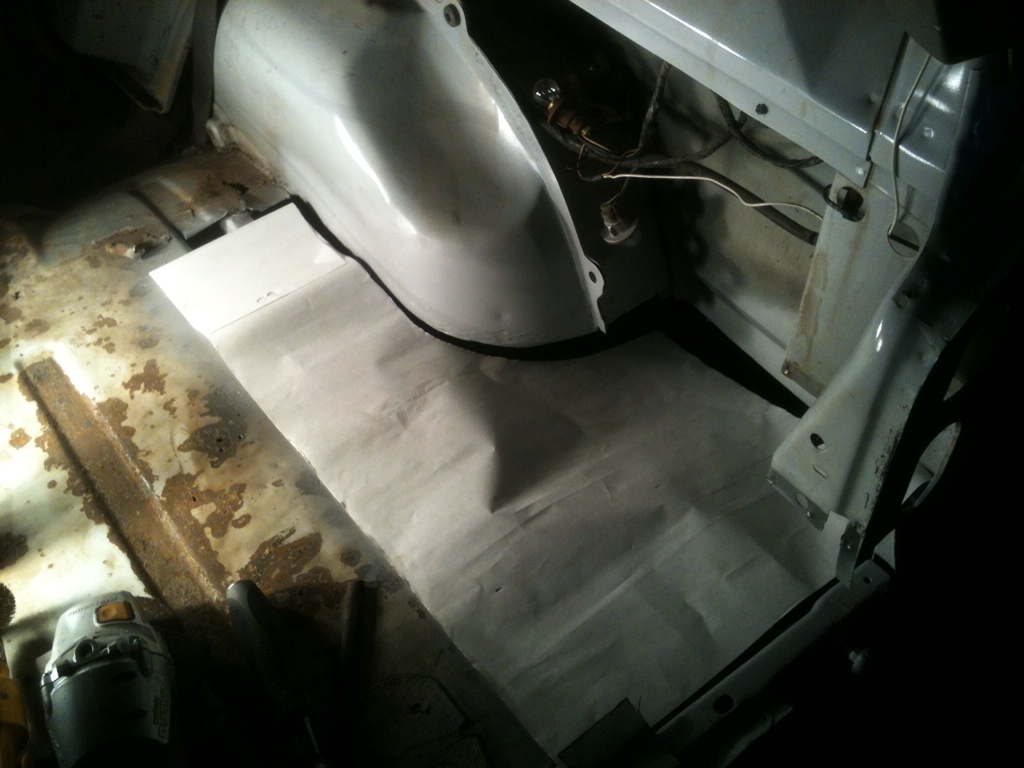
Started with a paper trace of the floor...
Then cut the metal in
Then decided I was sick of dealing with the half-rotten paper-thin stock flooring
All cut out

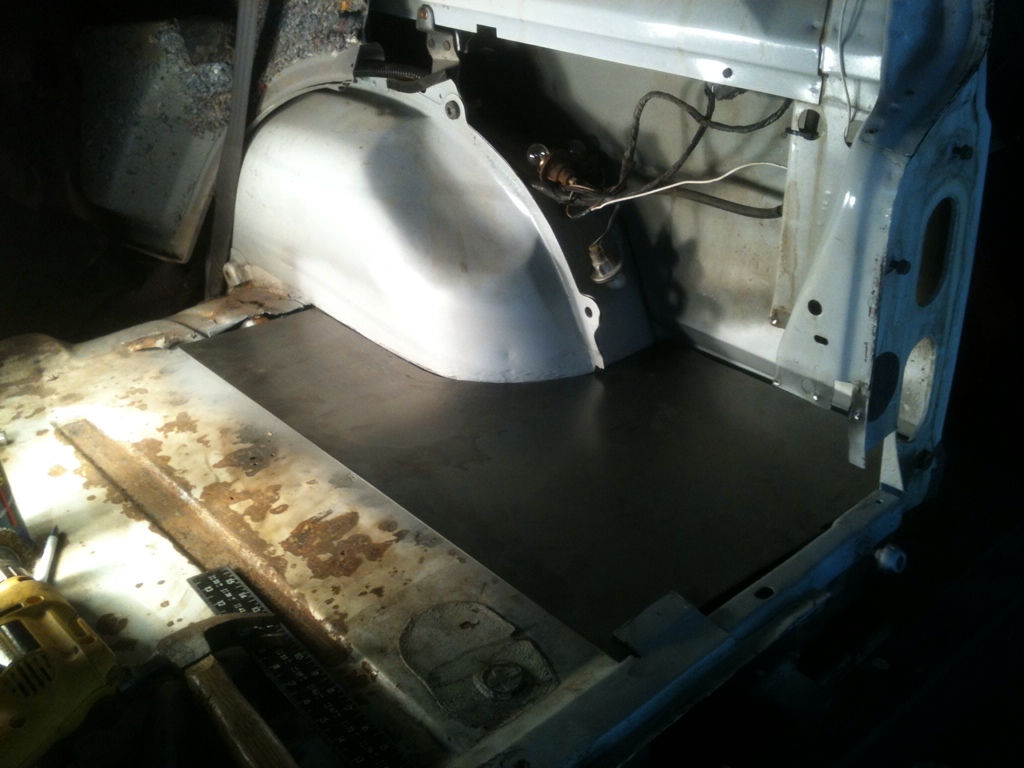
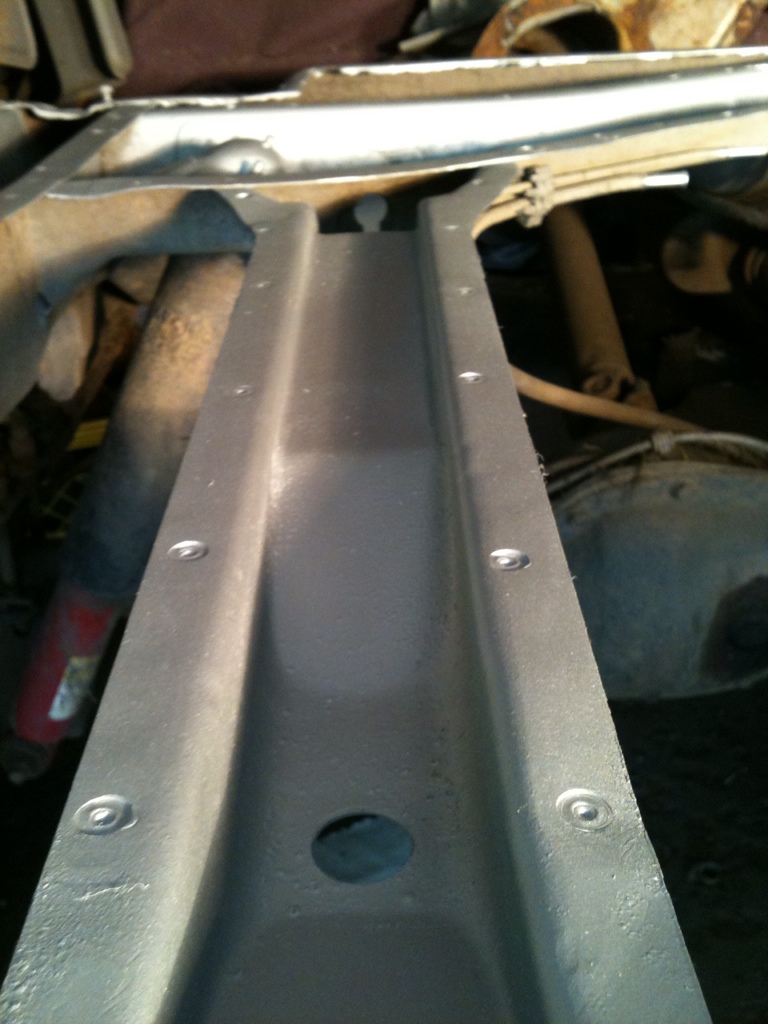
All cleaned and primed with weld-through primer!

Tomorrow I'm heading out fishing finally, so in the morning I'll be buying a big ol' sheet of metal (14g) and cutting that in over the next few days...
Plan is to have it finished by the end of next weekend. I feel like it's taking me forever to get this done, but with ZERO experience with rust repair, what can I expect? lol
_____
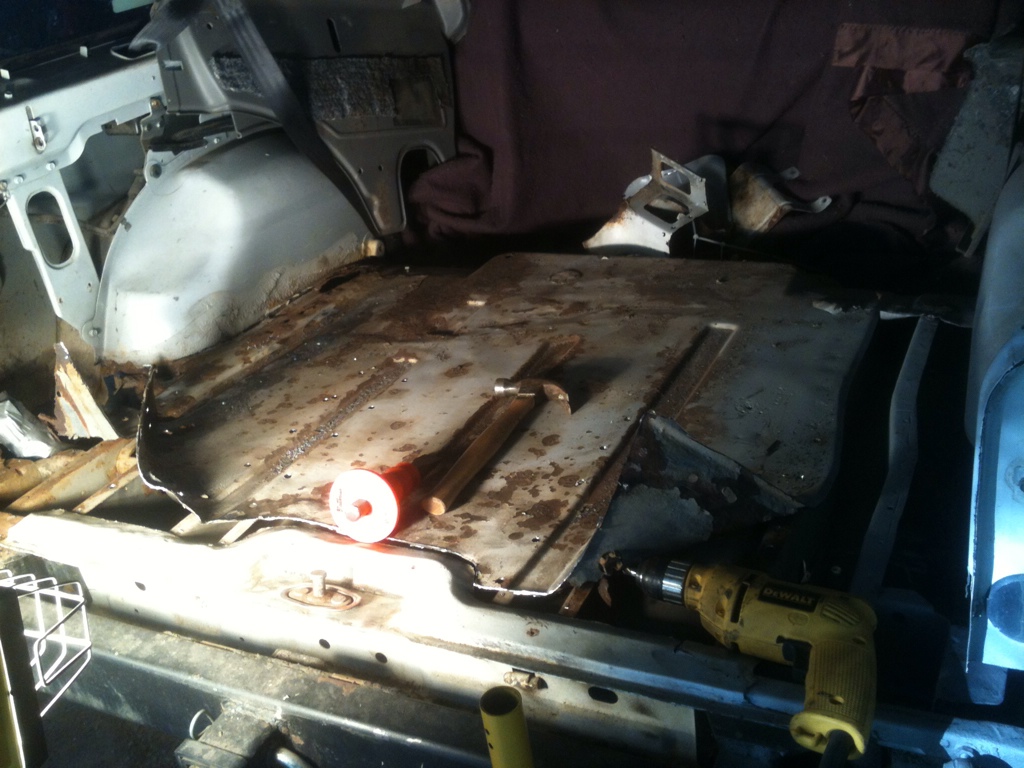
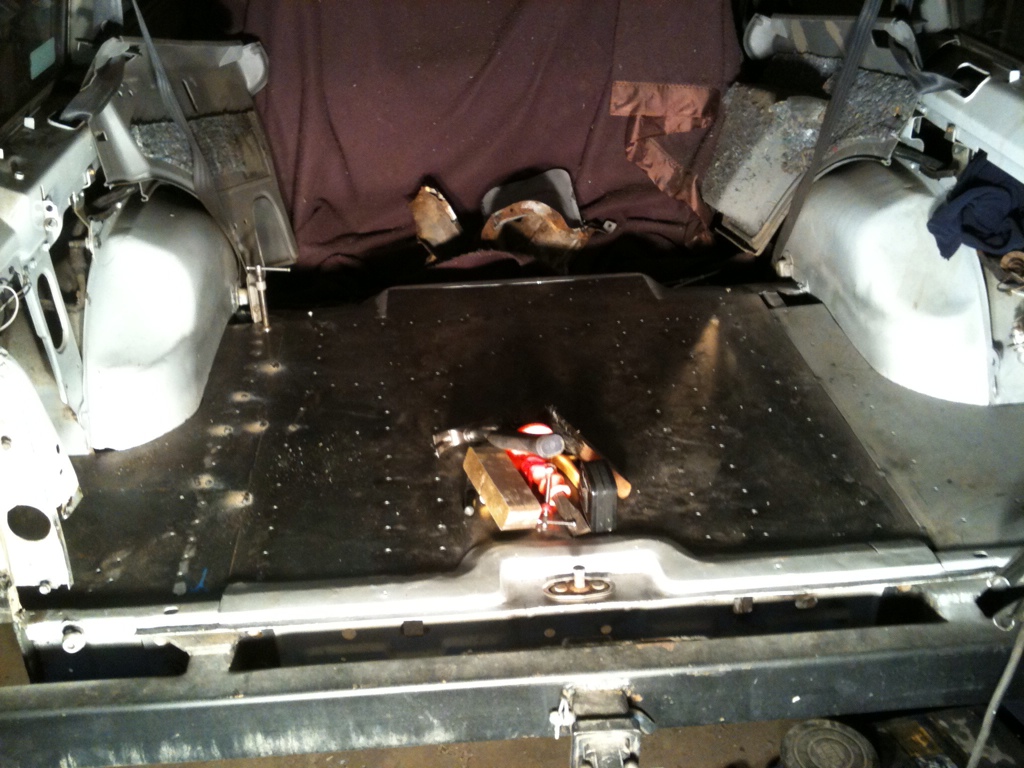
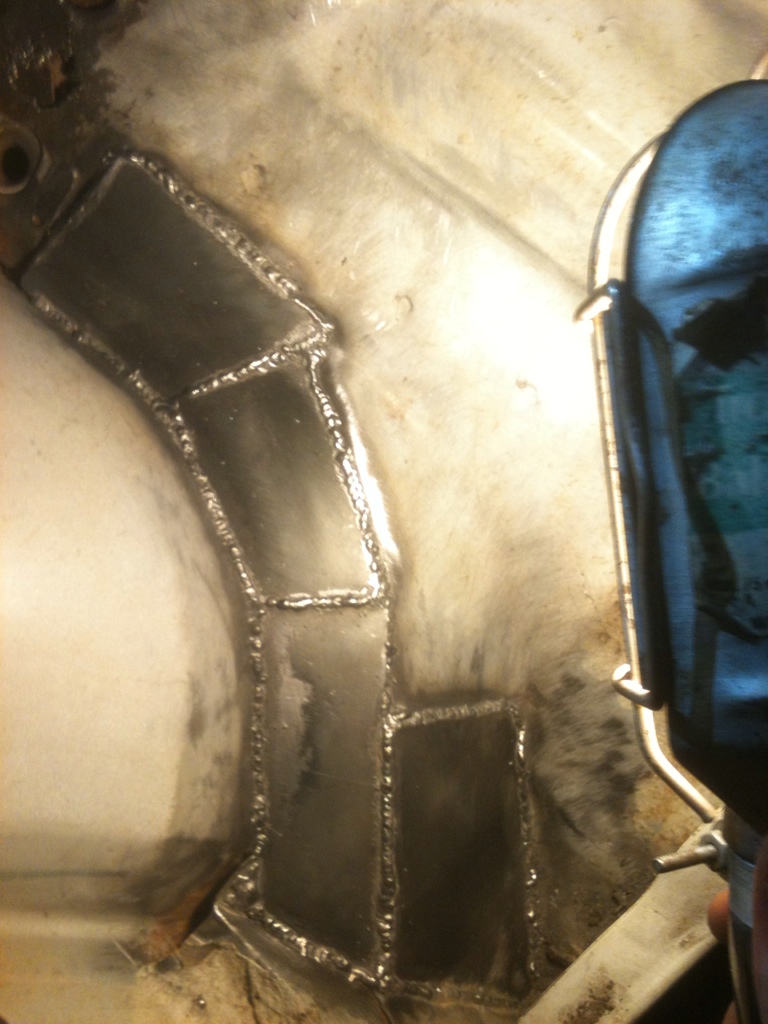
Got the main 3 pieces of metal cut and tacked
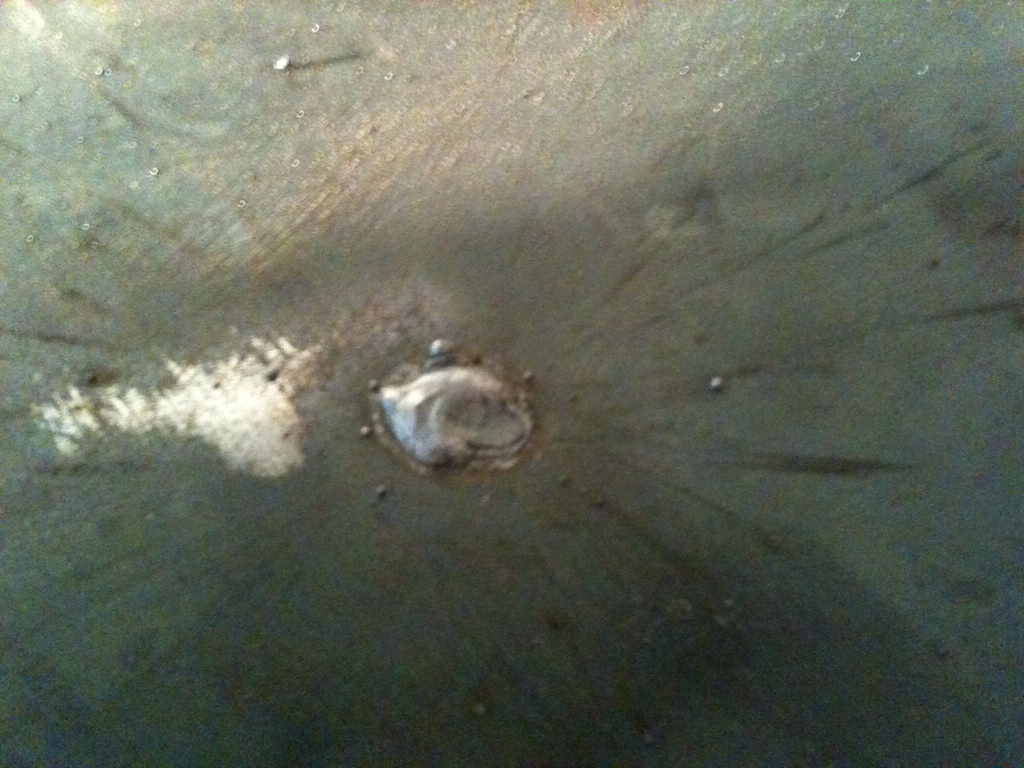
First time doing plug welds... Most turned out pretty good.
I then finished welding and re-made the tail-box / weather stripping areas. That was a PITA
Once all the top was done, I crawled underneath and taught myself to weld overhead. Many burns were had.
Folded up the bottoms of the quarter panels and stitch welded those.
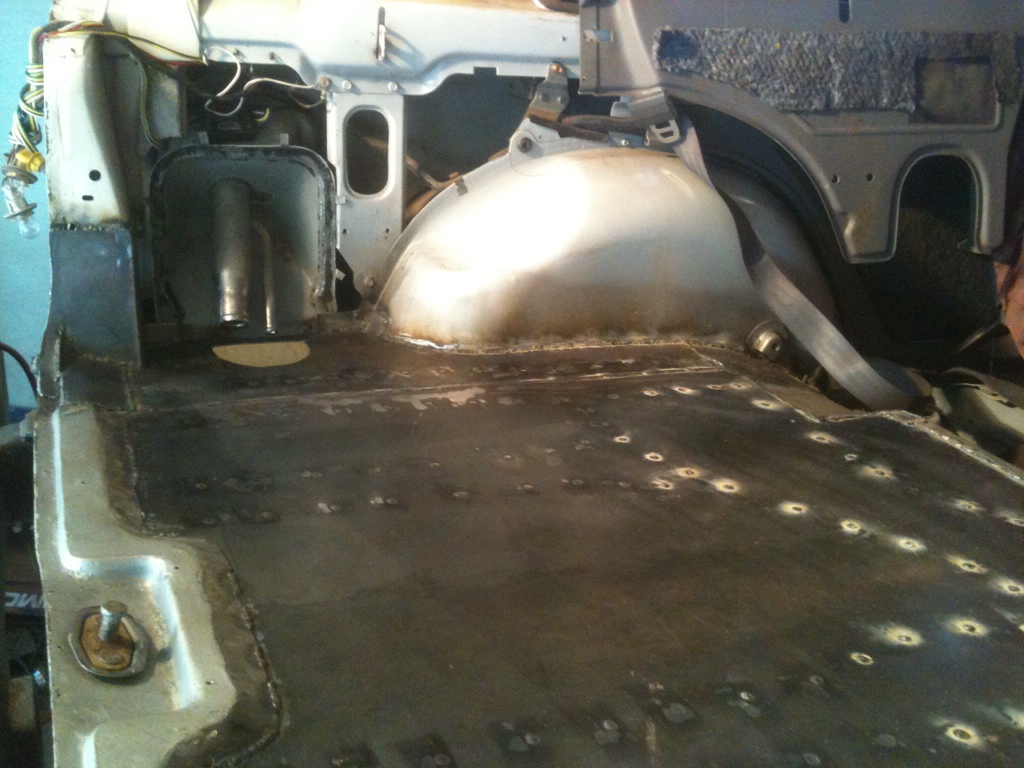
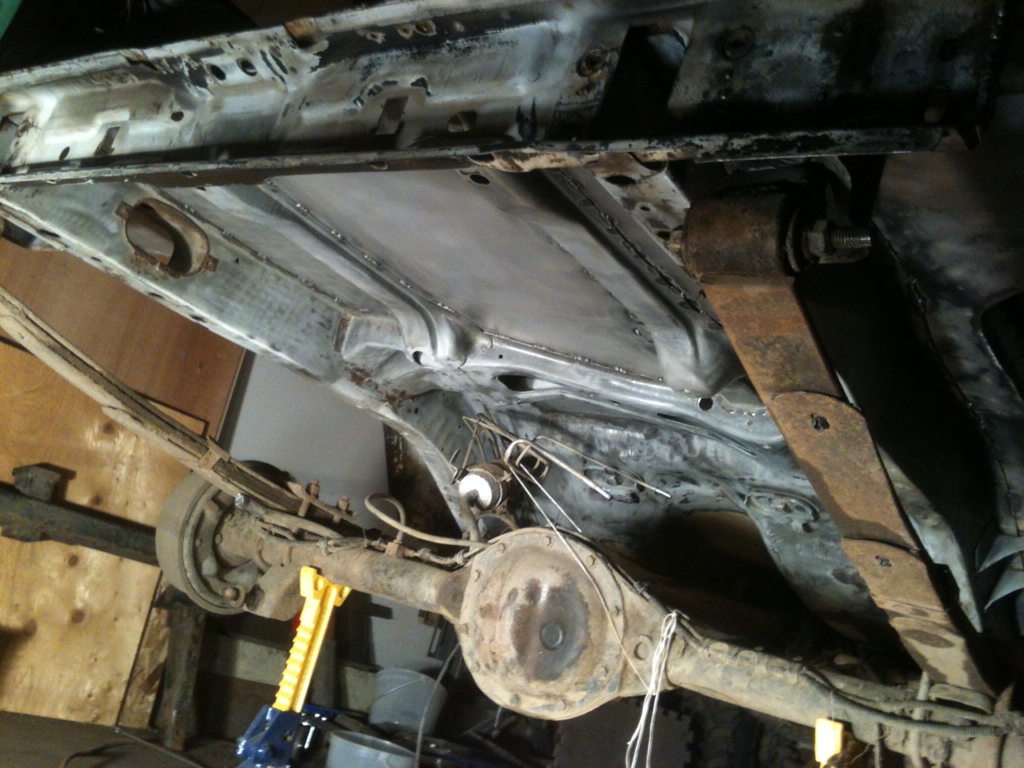
Finally I was done all the welding, top and bottom. Floor was solid once again so I decided to clean up and paint... Until I found more rust. Front of the wheel-wells on both sides.
Did I mention working with 14 and 16g sheet metal is tough? I should have gotten some thiner stuff and just hammered it to shape, but at least its strong... And now I can weld pretty thick metal to ultra thin body panels
So once all that was done, it was clean up time.
First was the power tools -

Then the final scuff
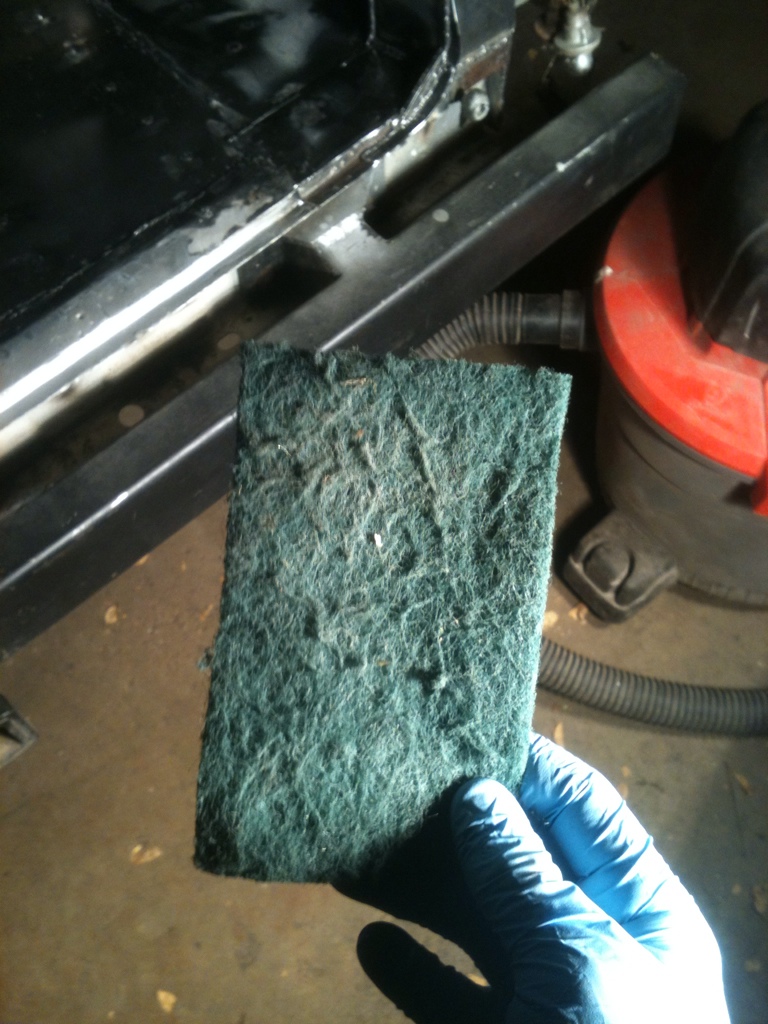
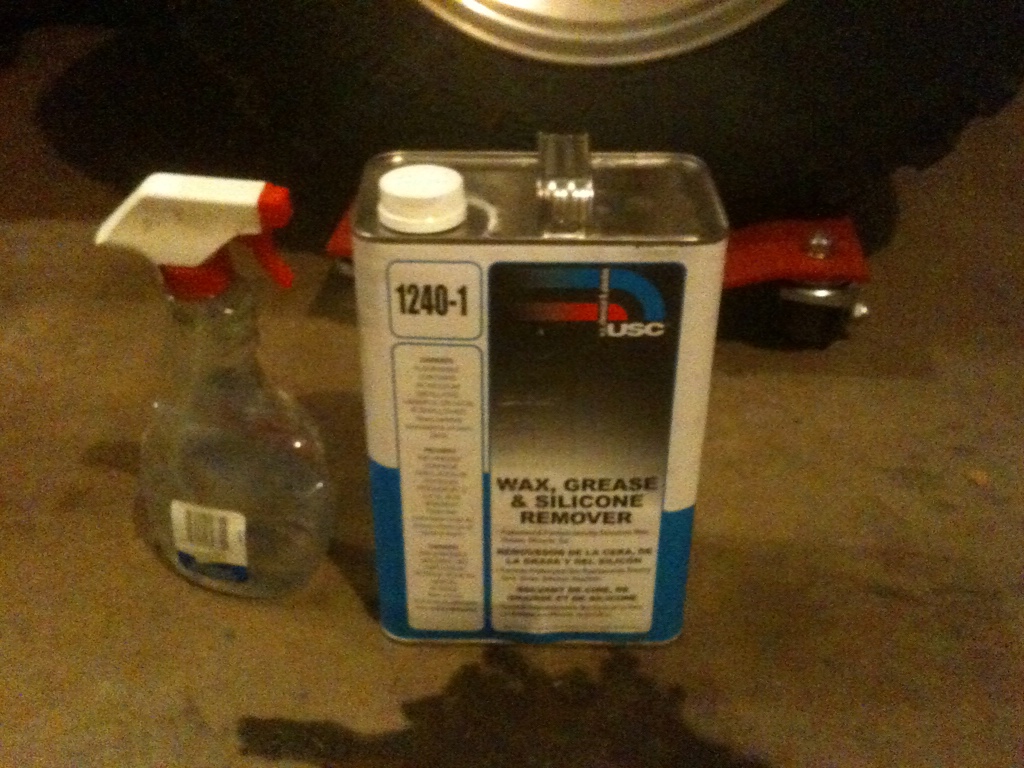
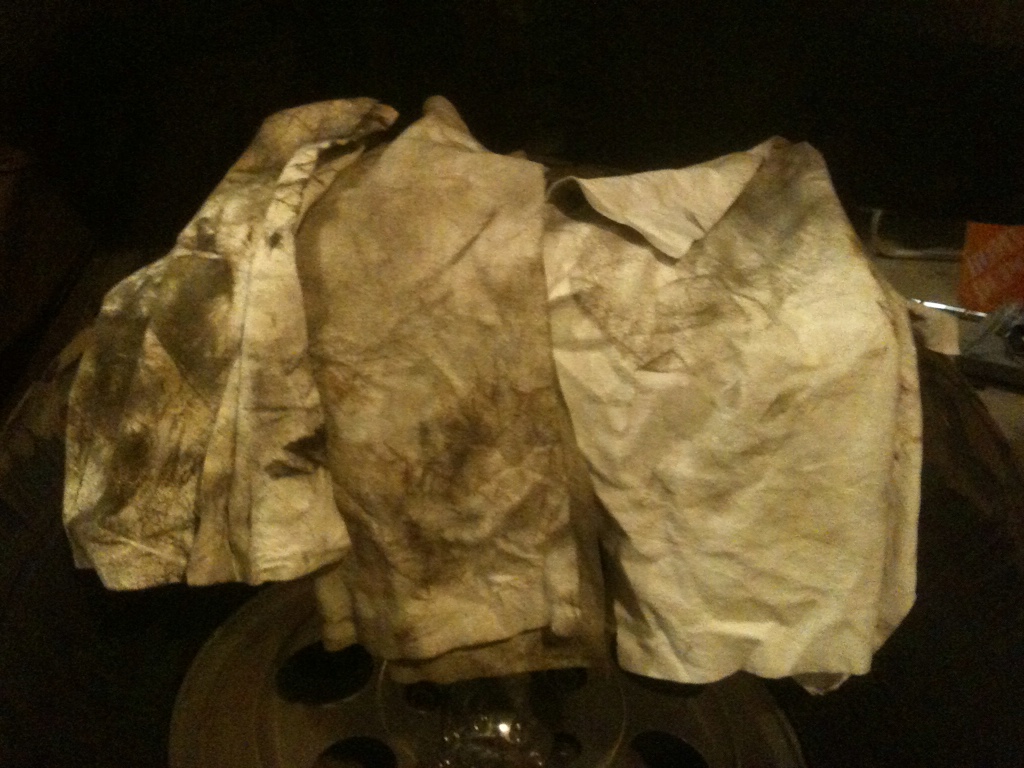
Then degreaser and rags
And finally............
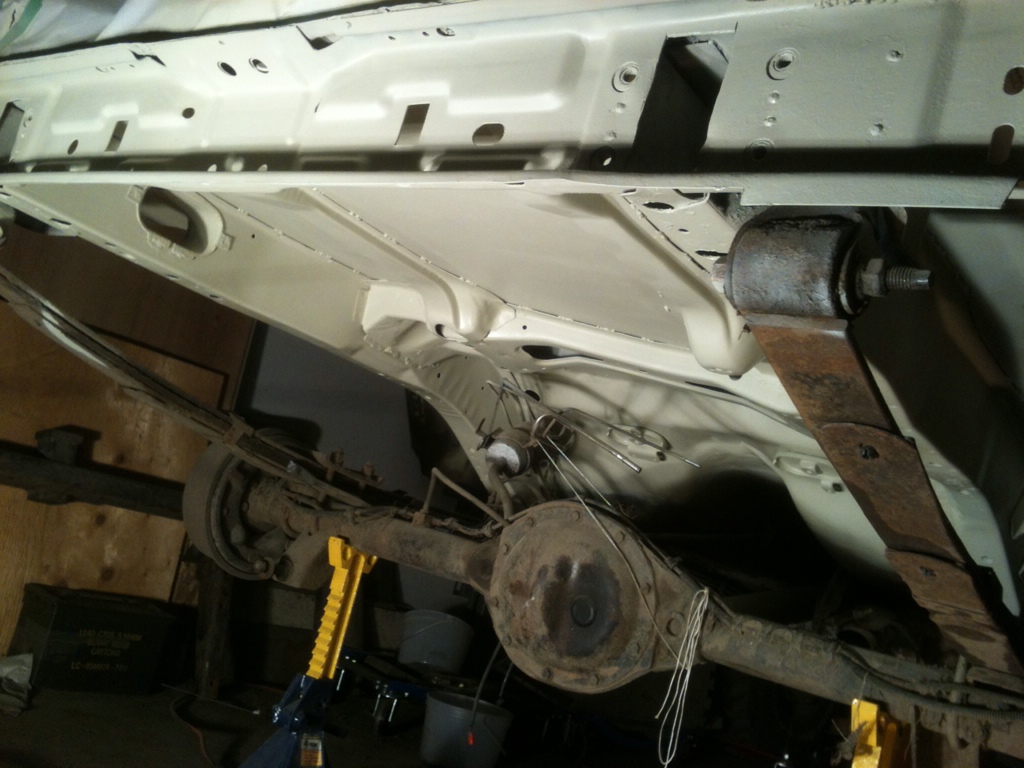
PAINT!
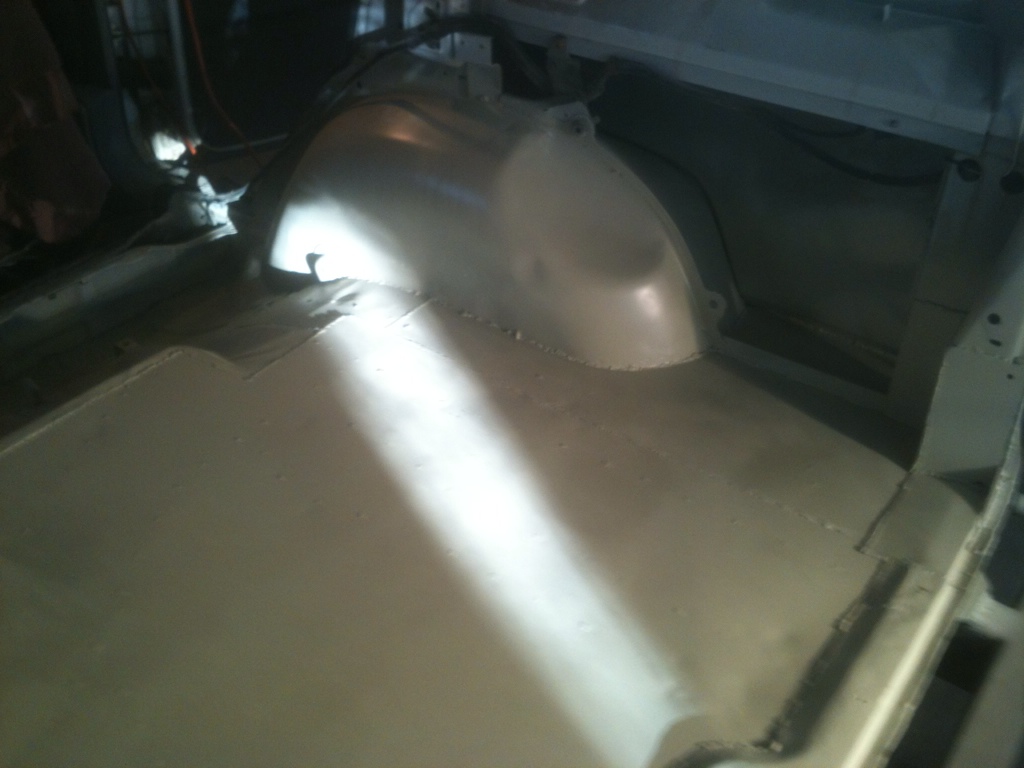
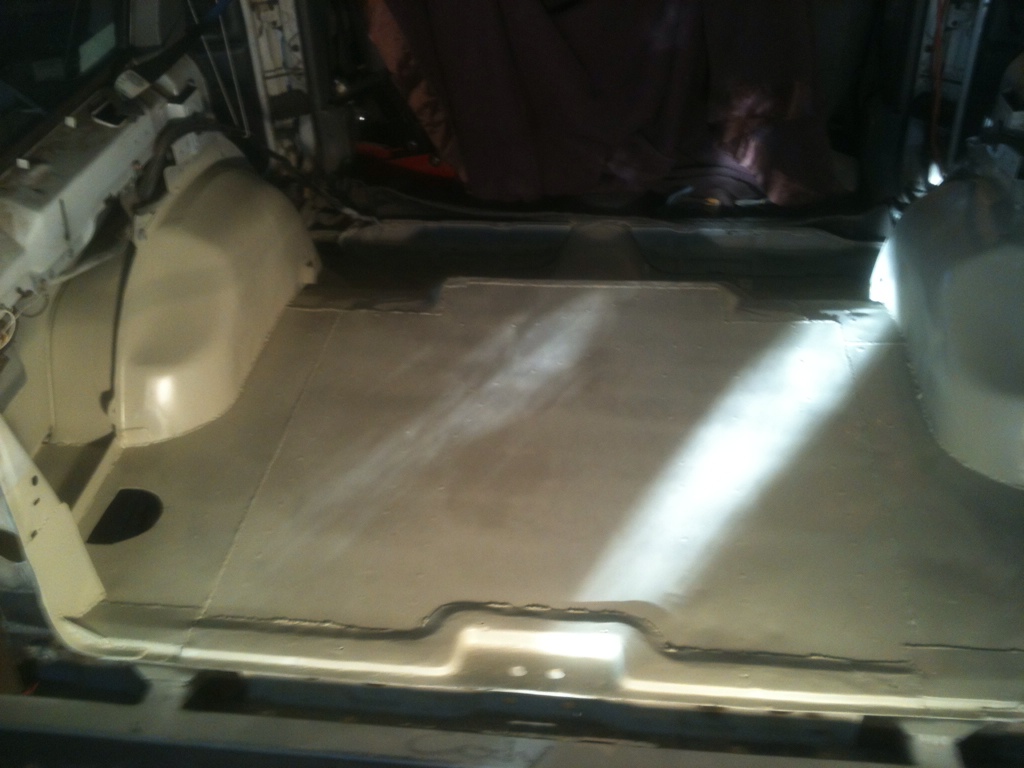
Used 2K epoxy primer. Sticks like glue. Works super well. I used 2 cans to do about 3 coats.
I still have to clean / prep the bottom. But I need to seam-seal the inside so I wanted to get that done asap. I may do another coat overtop of the seam seal... Or just bedline. I'm not sure yet.
Now that I'm almost done, I feel I should have just done something cooler like a recessed fuel tank or something haha. I'm kind of wanting to run a fuel-cell though, I like the look of having all that clearance where the tank normally sits.
Was actually able to keep on schedule for once
Was in the garage for 2 hours... I thought it was more like 4 so when I saw that it was only 6pm I was quite surprised. Guess being sick takes the energy out of you lol.
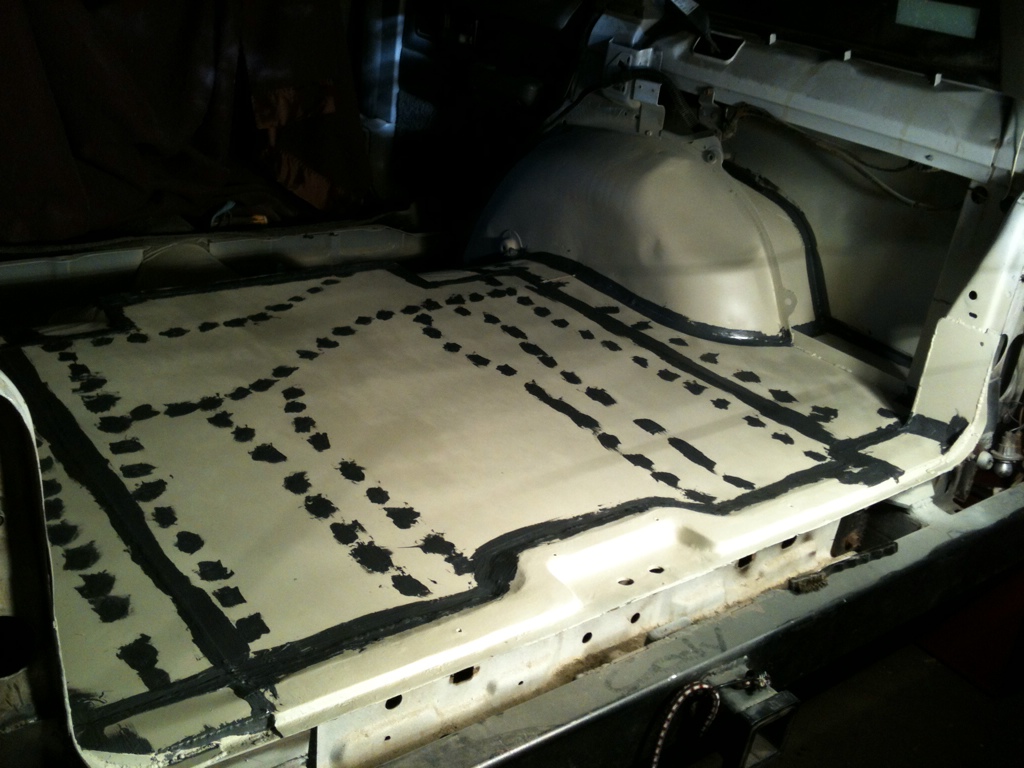
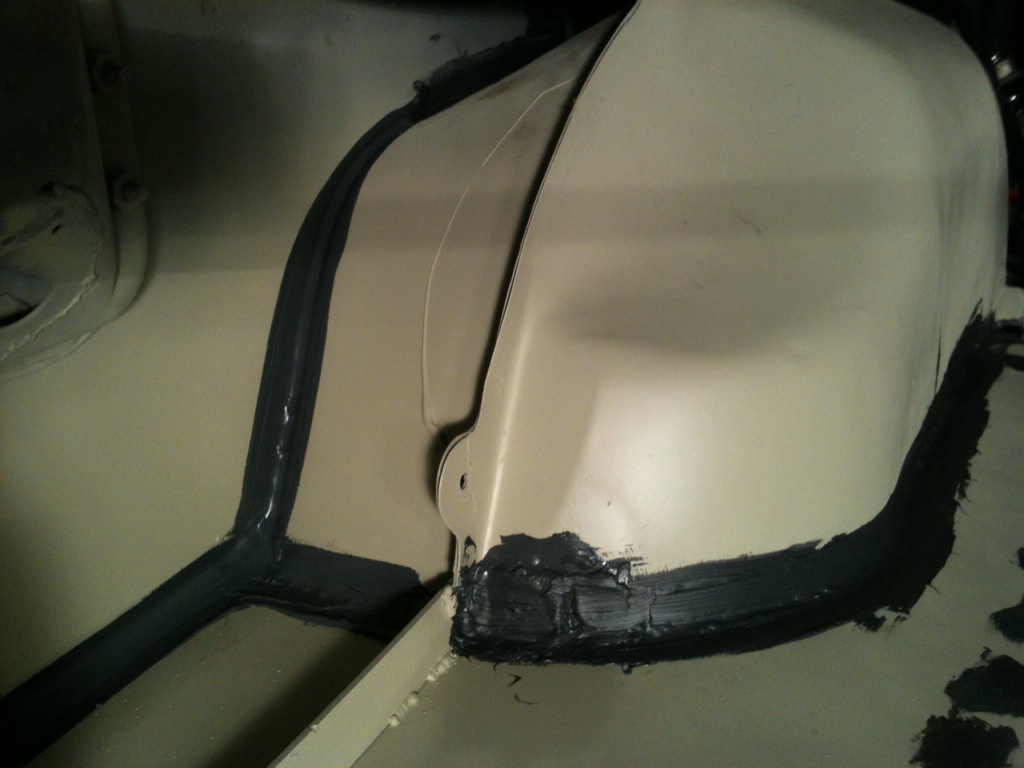
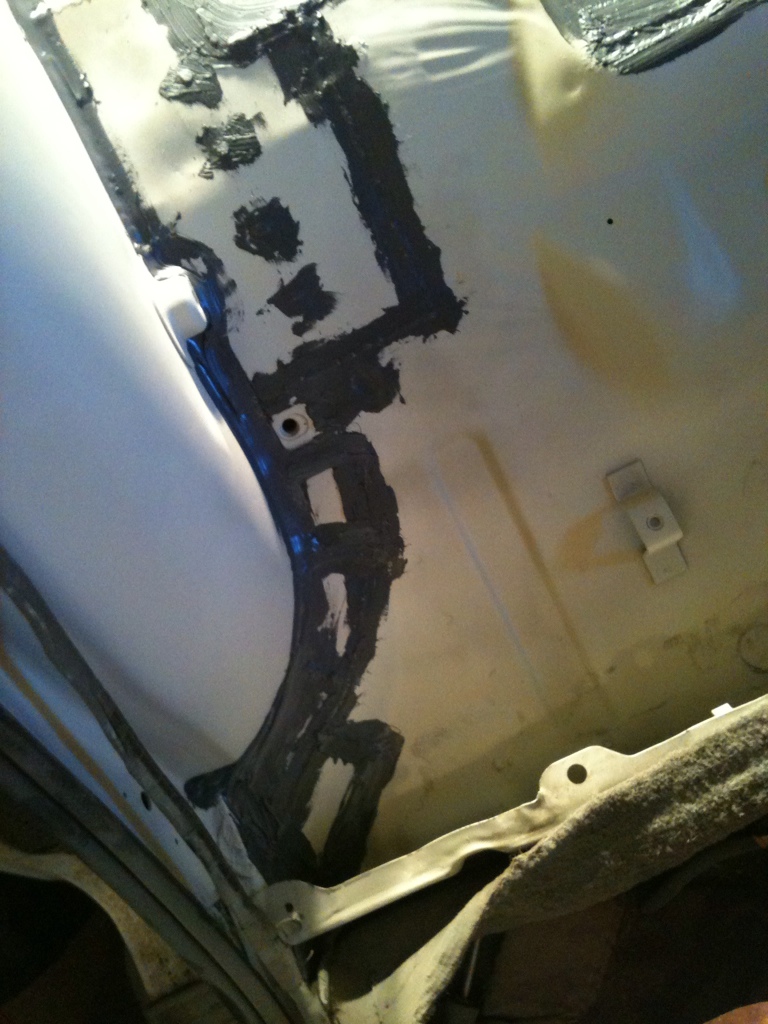
I used Dominion Sure Seal brush on seam sealer and DSS seam sealer in a tube.
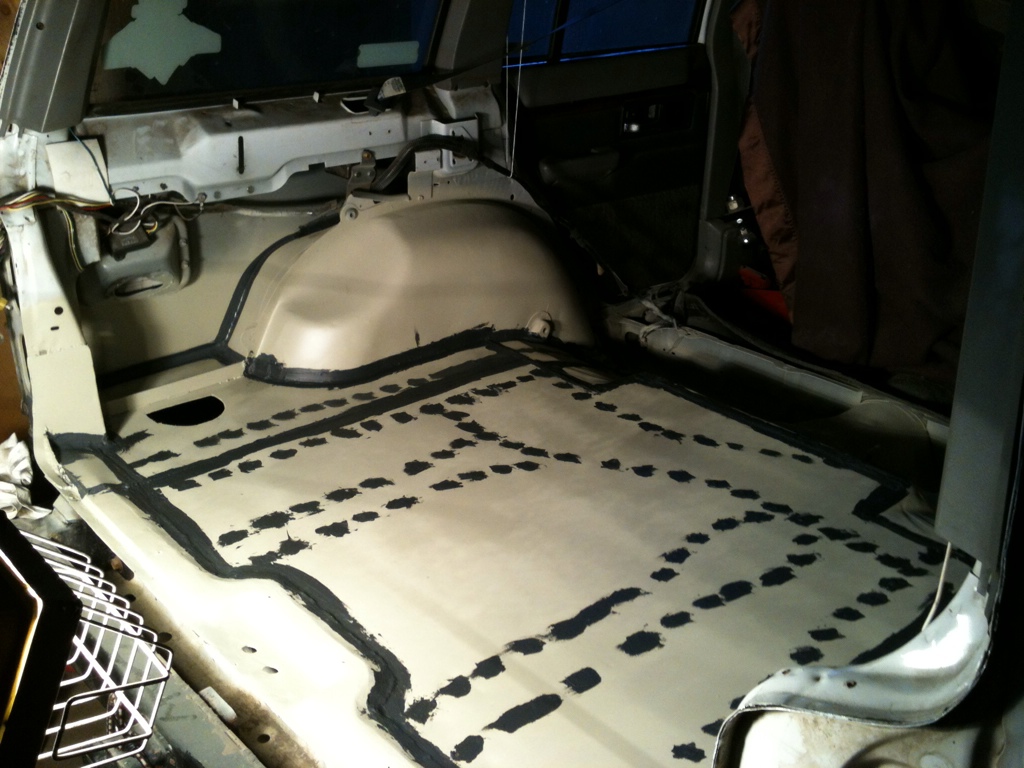
I used the tube seam sealer for the corners / 90� angles, and brush on stuff for spot welds and flat areas. It was more like "goop" it on though lol. Turned out okay for me.
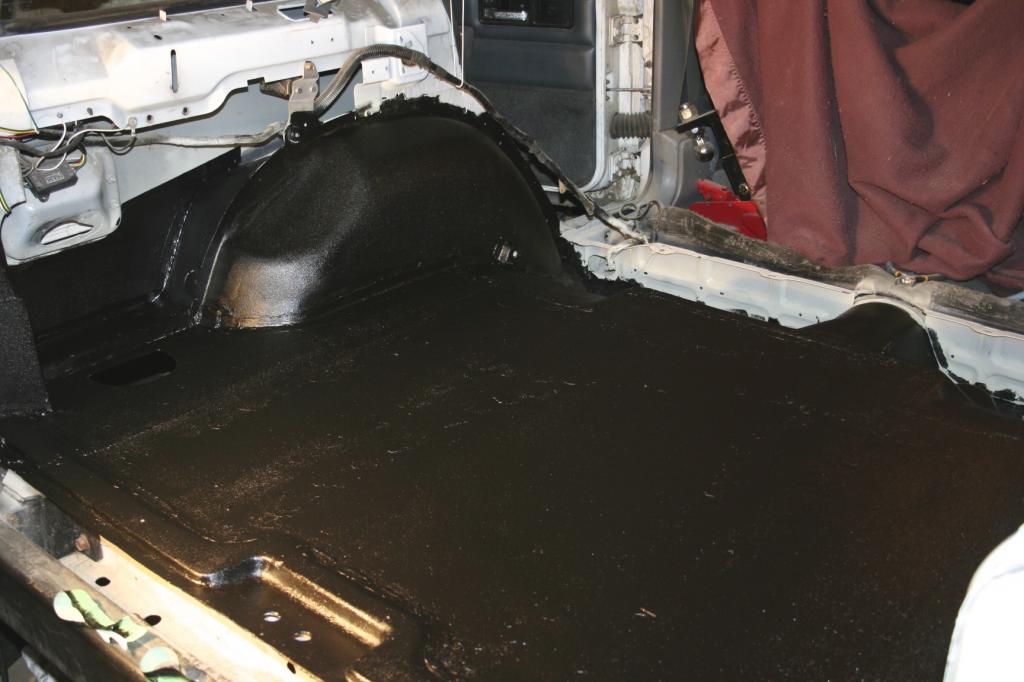
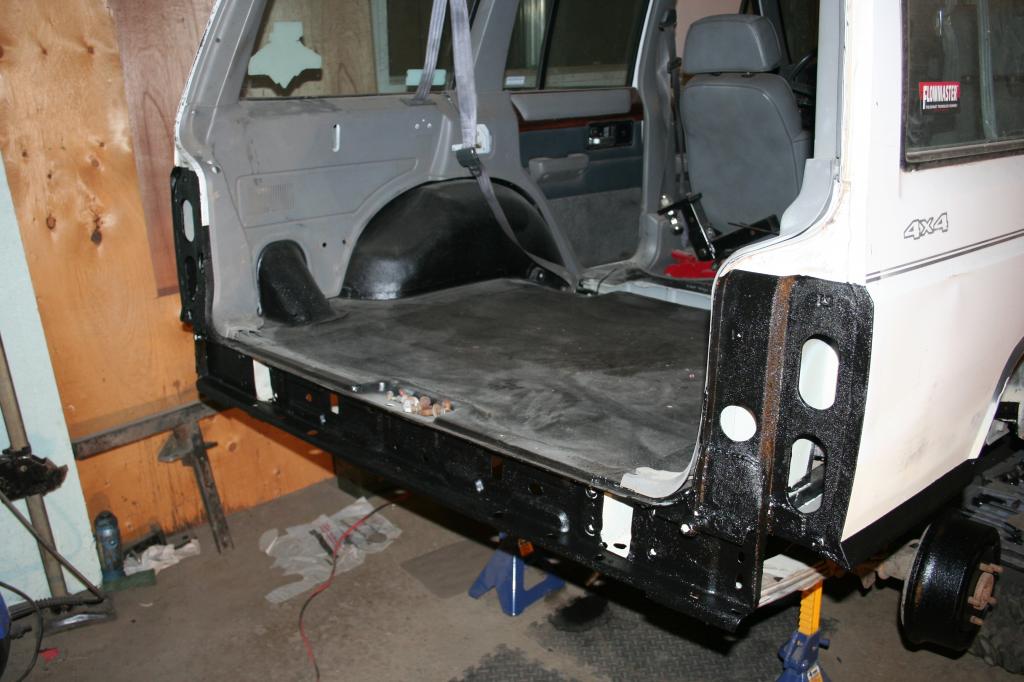
Got the inside finished... Man, Defender Pro bedliner is wicked! I'll have to post a mini-writeup / review when I have some time. But for now, here are some pictures.
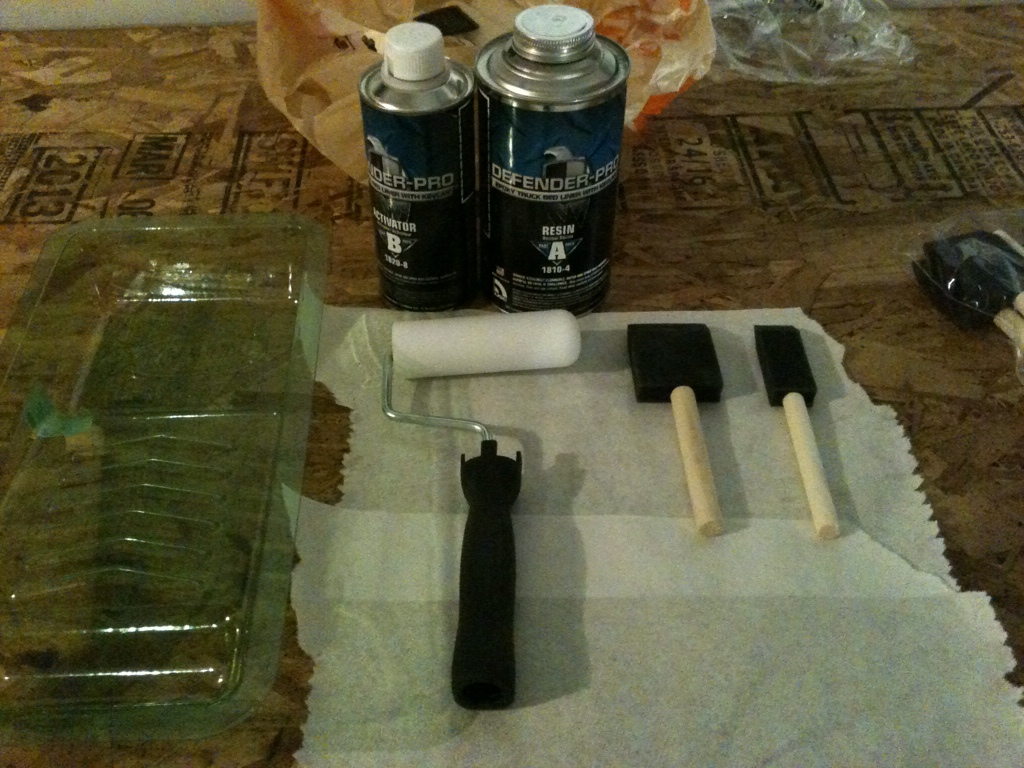


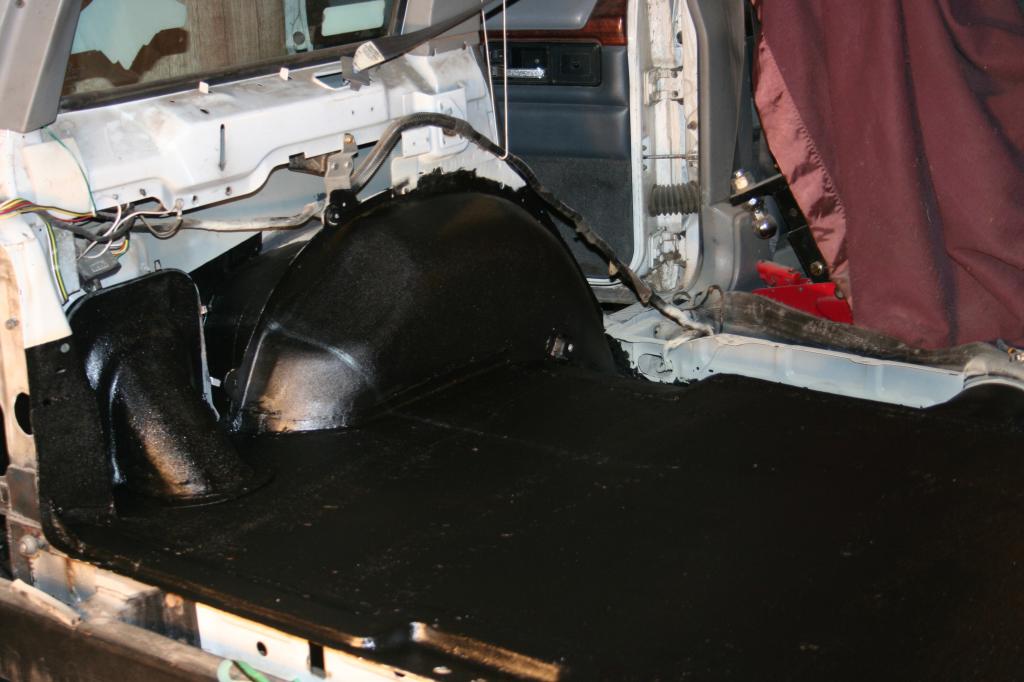
I rolled / brushed it on with a 4" foam roller and a couple 1" foam brushes. The bedliner is very easy to work with, and goes on as thin or thick as you want.
Basically my set-up was:
- Shake both part A(resin) and part B(activator) for 5 minutes
- Either dump them into the same container or pour equal contents into a sealable container
- Shake for another two - four minutes (DON"T STIR!)
- Let sit for 5 - 10 minutes
- Pour into paint tray
- Use the roller as much as I could to get the 'bedliner' texture
- Touch up small areas with the 1" foam brush by dabbing bedliner into areas I needed. To get a bedliner texture with the brush, go over it again with small dabs until it looks good. Strokes just make it look like normal lumpy paint.
I ended up doing one coat last night ( I used 1/4 of the total bedliner). I then did another coat this morning ( I mixed up two thirds of another 1/4, but ended up having a lot of extra..)
So I still have the underside to do, and I have over half the total bedliner left, and its a smaller area.
_______________________________________
And that's where I am as of Today. I basically copied this whole thread to here, so if there are some references to random things or people or my local club, ignore those lol.
This week will be slow as I have midterms, but hopefully by next weekend I can be ready to shoot the underside with primer and possibly bedliner. Then its just a matter of some maintenance before winter and I'll be good to go.

Then cut the metal in

Then decided I was sick of dealing with the half-rotten paper-thin stock flooring

All cut out

All cleaned and primed with weld-through primer!


Tomorrow I'm heading out fishing finally, so in the morning I'll be buying a big ol' sheet of metal (14g) and cutting that in over the next few days...
Plan is to have it finished by the end of next weekend. I feel like it's taking me forever to get this done, but with ZERO experience with rust repair, what can I expect? lol
_____
Got the main 3 pieces of metal cut and tacked

First time doing plug welds... Most turned out pretty good.

I then finished welding and re-made the tail-box / weather stripping areas. That was a PITA


Once all the top was done, I crawled underneath and taught myself to weld overhead. Many burns were had.

Folded up the bottoms of the quarter panels and stitch welded those.

Finally I was done all the welding, top and bottom. Floor was solid once again so I decided to clean up and paint... Until I found more rust. Front of the wheel-wells on both sides.

Did I mention working with 14 and 16g sheet metal is tough? I should have gotten some thiner stuff and just hammered it to shape, but at least its strong... And now I can weld pretty thick metal to ultra thin body panels
So once all that was done, it was clean up time.
First was the power tools -

Then the final scuff

Then degreaser and rags


And finally............
PAINT!


Used 2K epoxy primer. Sticks like glue. Works super well. I used 2 cans to do about 3 coats.
I still have to clean / prep the bottom. But I need to seam-seal the inside so I wanted to get that done asap. I may do another coat overtop of the seam seal... Or just bedline. I'm not sure yet.
Now that I'm almost done, I feel I should have just done something cooler like a recessed fuel tank or something haha. I'm kind of wanting to run a fuel-cell though, I like the look of having all that clearance where the tank normally sits.
Was actually able to keep on schedule for once
Was in the garage for 2 hours... I thought it was more like 4 so when I saw that it was only 6pm I was quite surprised. Guess being sick takes the energy out of you lol.
I used Dominion Sure Seal brush on seam sealer and DSS seam sealer in a tube.

I used the tube seam sealer for the corners / 90� angles, and brush on stuff for spot welds and flat areas. It was more like "goop" it on though lol. Turned out okay for me.


Got the inside finished... Man, Defender Pro bedliner is wicked! I'll have to post a mini-writeup / review when I have some time. But for now, here are some pictures.


I rolled / brushed it on with a 4" foam roller and a couple 1" foam brushes. The bedliner is very easy to work with, and goes on as thin or thick as you want.
Basically my set-up was:
- Shake both part A(resin) and part B(activator) for 5 minutes
- Either dump them into the same container or pour equal contents into a sealable container
- Shake for another two - four minutes (DON"T STIR!)
- Let sit for 5 - 10 minutes
- Pour into paint tray
- Use the roller as much as I could to get the 'bedliner' texture
- Touch up small areas with the 1" foam brush by dabbing bedliner into areas I needed. To get a bedliner texture with the brush, go over it again with small dabs until it looks good. Strokes just make it look like normal lumpy paint.
I ended up doing one coat last night ( I used 1/4 of the total bedliner). I then did another coat this morning ( I mixed up two thirds of another 1/4, but ended up having a lot of extra..)
So I still have the underside to do, and I have over half the total bedliner left, and its a smaller area.
_______________________________________
And that's where I am as of Today. I basically copied this whole thread to here, so if there are some references to random things or people or my local club, ignore those lol.
This week will be slow as I have midterms, but hopefully by next weekend I can be ready to shoot the underside with primer and possibly bedliner. Then its just a matter of some maintenance before winter and I'll be good to go.
Thread Starter
Junior Member
Joined: Sep 2012
Posts: 65
Likes: 0
From: Alberta
Year: 1994
Model: Cherokee
Engine: 4.0L
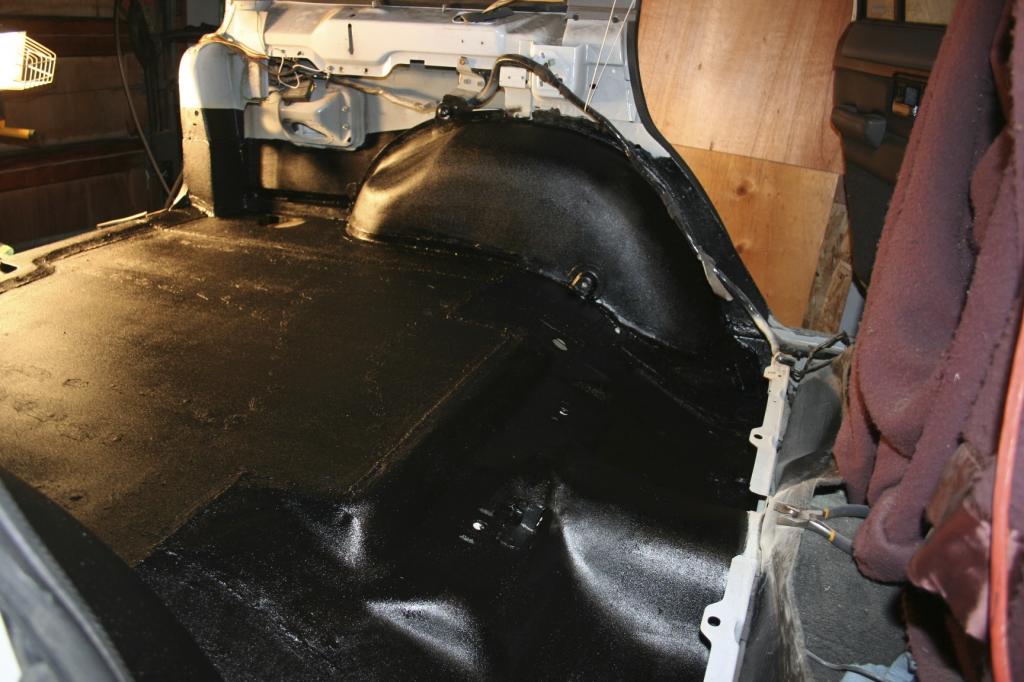
And we're done!
Here's the pics though. Feels good It was a **** done of work, but now I know what to do. So for the rockers / floors I'll be using 18g or thinner with electric shears lol. And some 2x4 tubing and I'll be good to go. That's next summer though...


I'll say it again. SUPER impressed with ease of use / quality of USchem defender pro bedliner. I will be using it again. I bought the kit ($140), used 5 cans of 2K epoxy primer ($18ea), and some seam sealer. The kit came with 4 bottes and I still have 2/3rd of the last bottle left. So that will be used on either my quarter panels and rear fenders, or my bumpers. Or both.
Here's the pics though. Feels good
It was a **** done of work, but now I know what to do. So for the rockers / floors I'll be using 18g or thinner with electric shears lol. And some 2x4 tubing and I'll be good to go. That's next summer though...


I'll say it again. SUPER impressed with ease of use / quality of USchem defender pro bedliner. I will be using it again. I bought the kit ($140), used 5 cans of 2K epoxy primer ($18ea), and some seam sealer. The kit came with 4 bottes and I still have 2/3rd of the last bottle left. So that will be used on either my quarter panels and rear fenders, or my bumpers. Or both.
Thread Starter
Junior Member
Joined: Sep 2012
Posts: 65
Likes: 0
From: Alberta
Year: 1994
Model: Cherokee
Engine: 4.0L
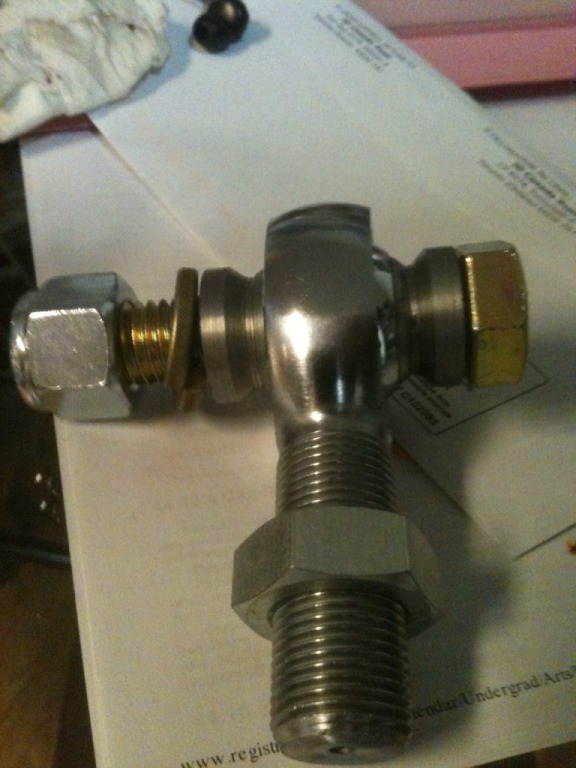
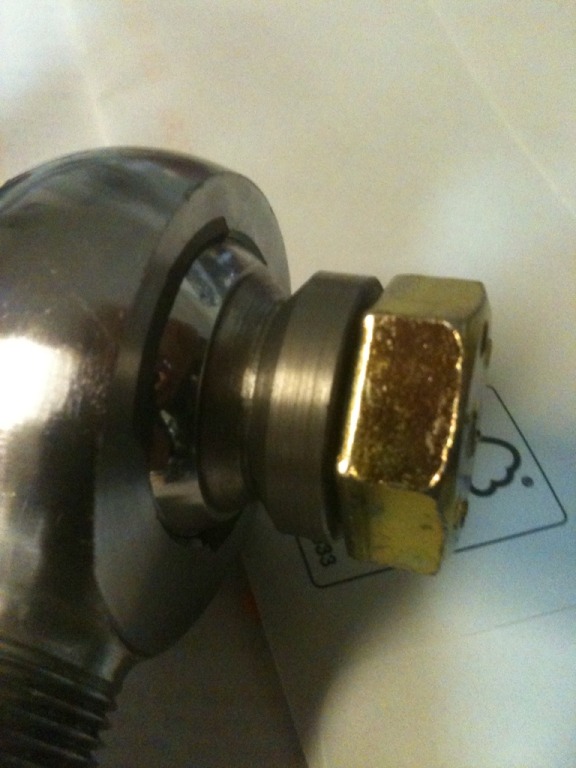
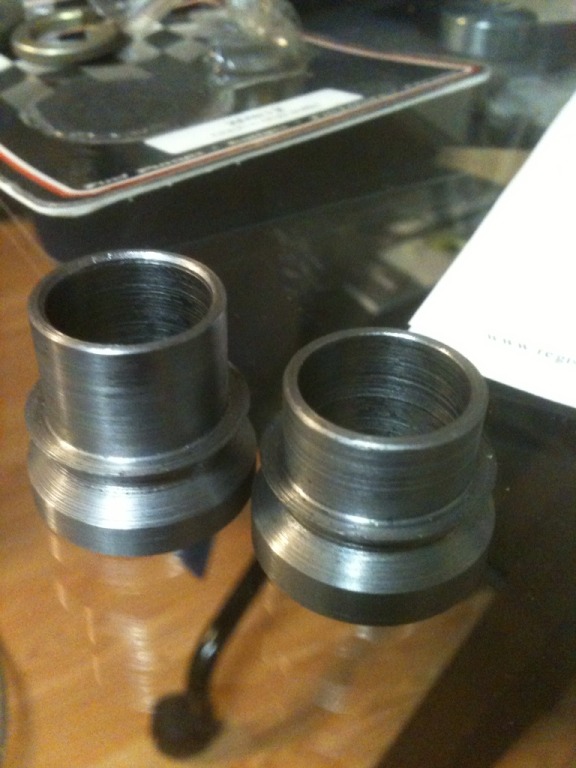
Yay somebody replied! Lol thanks. It's too bad I'm on such a limited budget or this jeep would be seeing a lot more stuff... I keep wanting to get my cross over steering / gears / F8.8 built and installed but that will have to wait. The plan is to try my hand at fabbing up a heavy duty cross-over steering system with a mix of 1ton TREs for protection against mud and a couple heims where I need them.
Trending Topics
Thread Starter
Junior Member
Joined: Sep 2012
Posts: 65
Likes: 0
From: Alberta
Year: 1994
Model: Cherokee
Engine: 4.0L
Thanks guys
Spent a few minutes in the garage tonight. Replaced my blower motor and started to get the jeep back together. Also painted my gas-tank straps so I had to wait for those to dry. Tomorrow hopefully I'll have some more time.
Spent a few minutes in the garage tonight. Replaced my blower motor and started to get the jeep back together. Also painted my gas-tank straps so I had to wait for those to dry. Tomorrow hopefully I'll have some more time.
Thread Starter
Junior Member
Joined: Sep 2012
Posts: 65
Likes: 0
From: Alberta
Year: 1994
Model: Cherokee
Engine: 4.0L
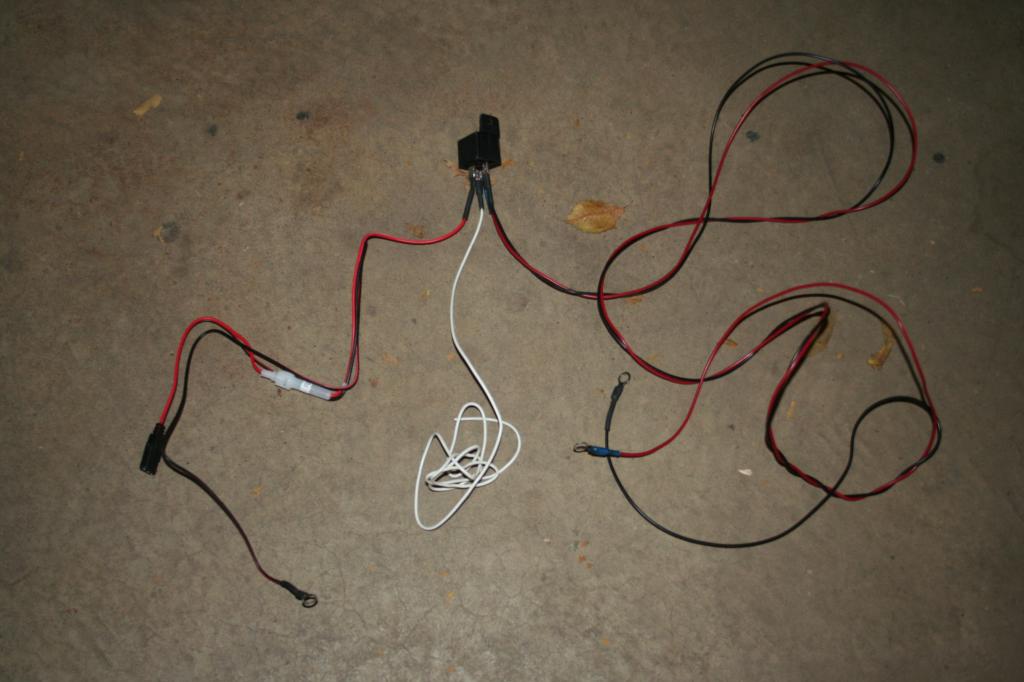
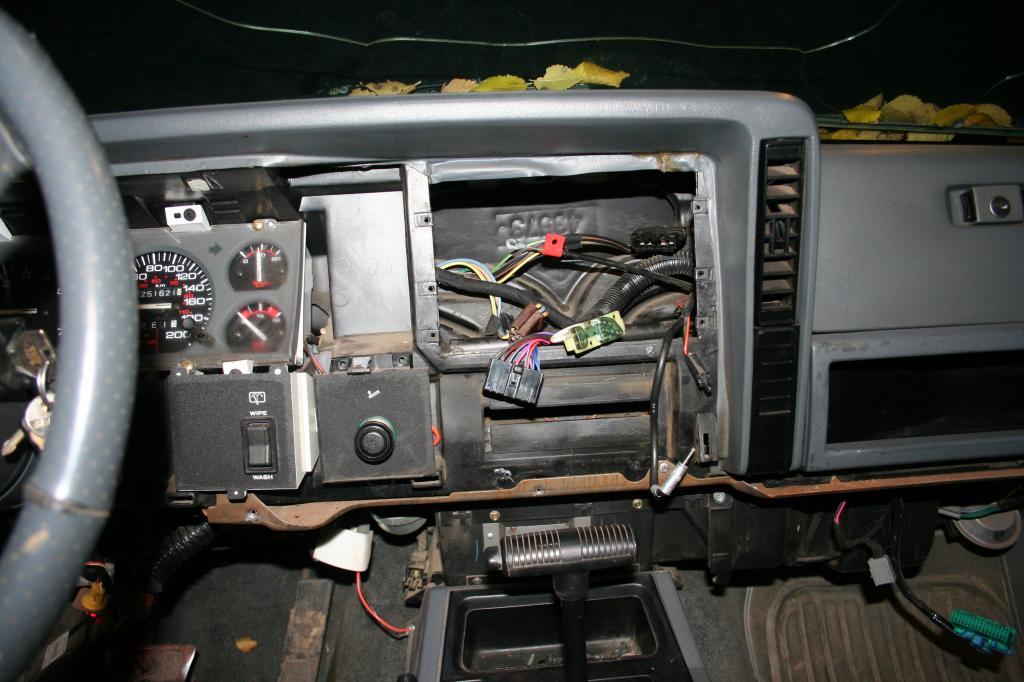
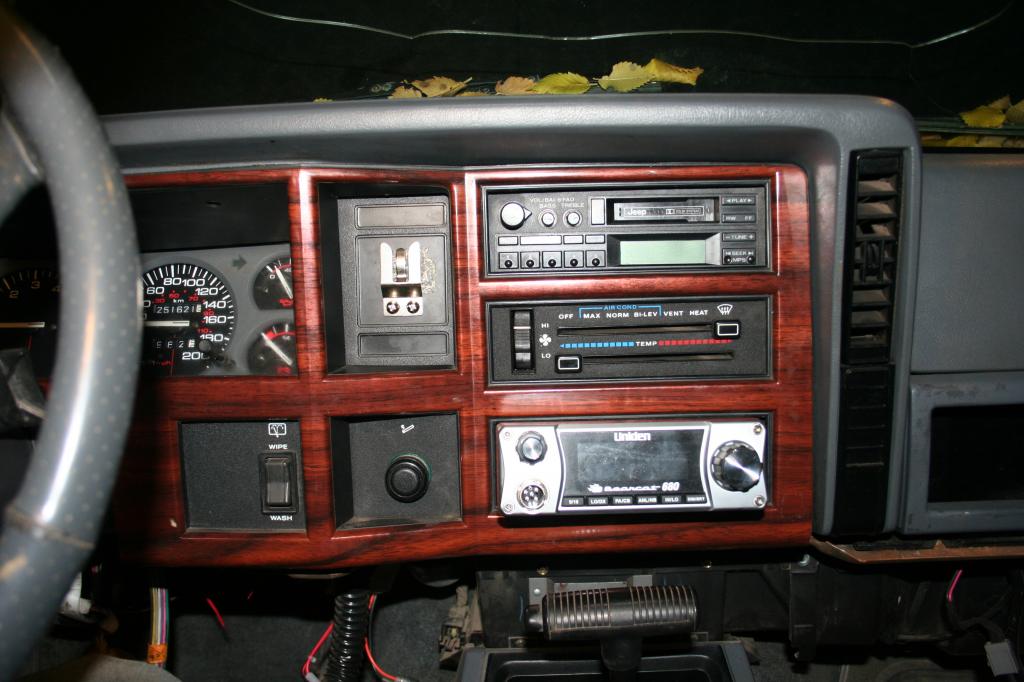
So with the trunk done, I can start focusing on other things I want to do with the Jeep... Like install my CB that's been in my closet all summer!
There were a couple things I really wanted for the install....
1 - CB in the dash instead of bolted somewhere that's in the way.
2 - Wired directly to the battery
3 - A relay to maintain power on ignition to the CB
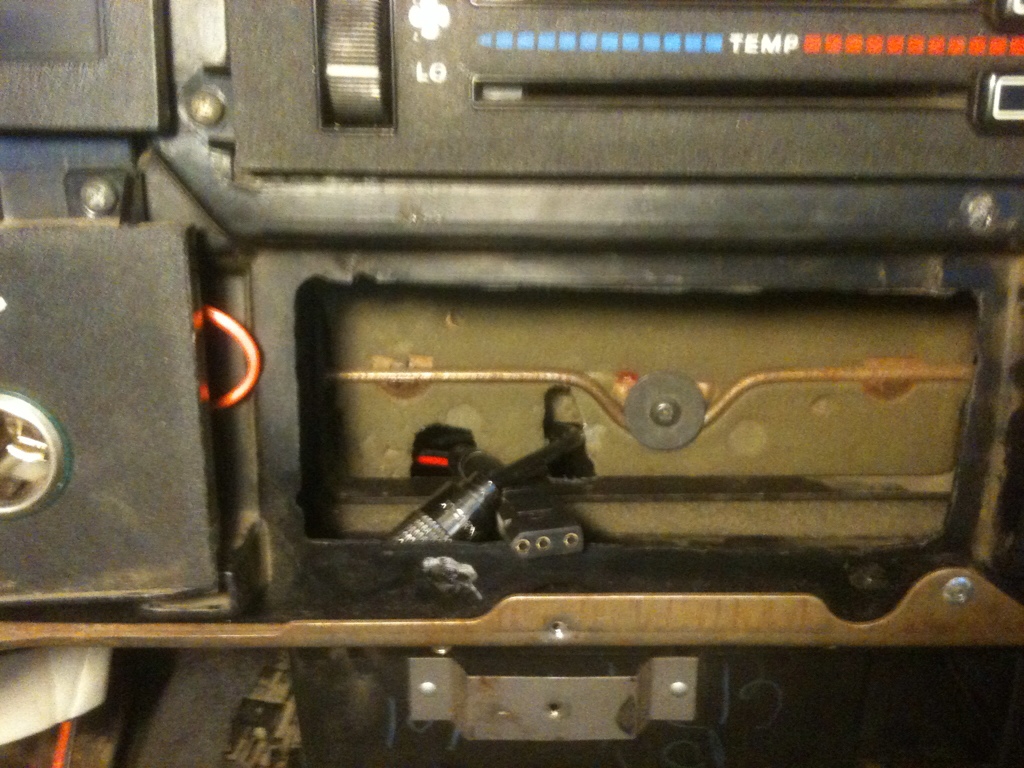
The main problem I was running into was fitting the climate control, radio, and CB radio into the dash. My best bet was using the centre vent, however the new problem was getting something to fit in there without sticking out too far (only has a couple inches behind there...)
So started off by wiring up the Relay:
Then taking apart the dash...
Ran my power / ground to the battery through the main harness grommet

Found a spot for the relay up under the dash... Had a perfect nut / bolt all ready to go
Cut out a section of the dash. No turning back, I was a little worried lol
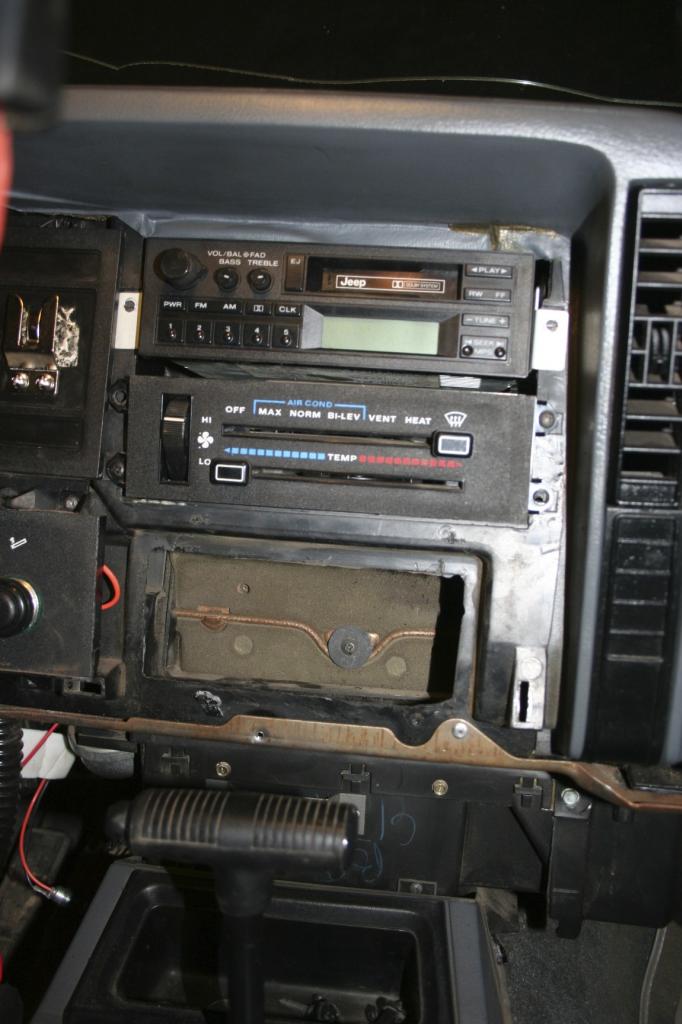
I had to file down the hole a little bit, as well as the wood-grain bezel... However once I did that I said screw it and did a test fit:
It actually worked out amazing... Sits at a tiny angle upwards to give me enough room for the shifter, plus its SUPER tight. No bolts needed.
I bolted up the mount for the mic and I think we're good to go
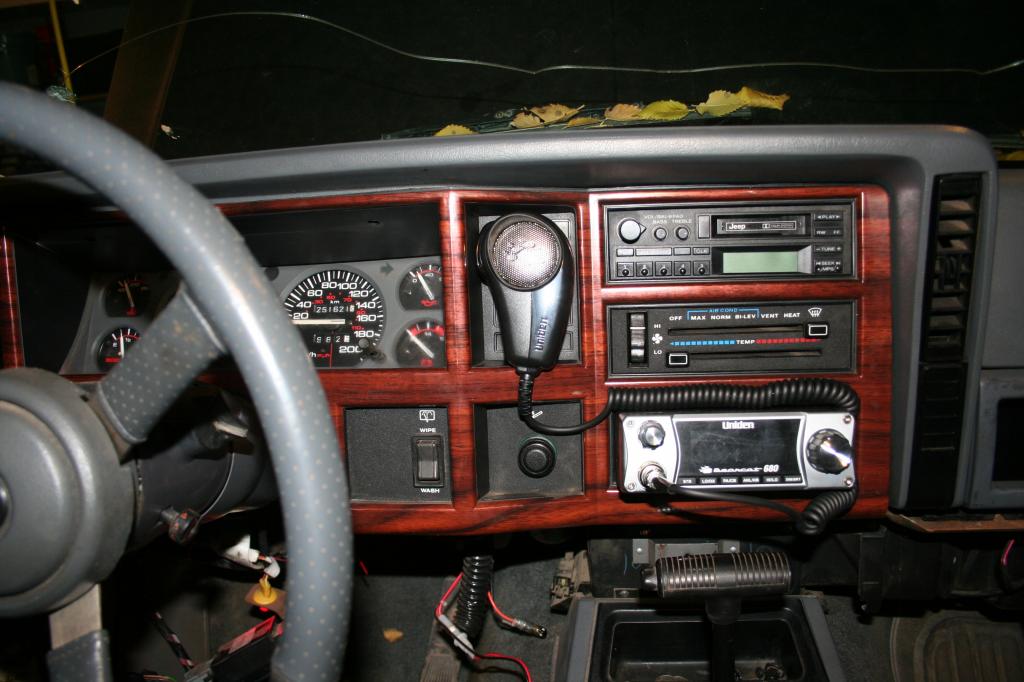
There's a gap between the bezel and the CB on the passenger side... Just so happened to be the perfect size to push the cable into so it is out of the way of the shifter, it is also still long enough to reach my mouth without having to pull the cable out from behind.
All in all, Im incredibly happy with the install. I need to slide out the CB and run my antenna cable once my mount gets here. Hopefully tomorrow or Monday. Then I ned to find someone who can lend me their SWR meter lol
There were a couple things I really wanted for the install....
1 - CB in the dash instead of bolted somewhere that's in the way.
2 - Wired directly to the battery
3 - A relay to maintain power on ignition to the CB
The main problem I was running into was fitting the climate control, radio, and CB radio into the dash. My best bet was using the centre vent, however the new problem was getting something to fit in there without sticking out too far (only has a couple inches behind there...)
So started off by wiring up the Relay:

Then taking apart the dash...

Ran my power / ground to the battery through the main harness grommet

Found a spot for the relay up under the dash... Had a perfect nut / bolt all ready to go

Cut out a section of the dash. No turning back, I was a little worried lol

I had to file down the hole a little bit, as well as the wood-grain bezel... However once I did that I said screw it and did a test fit:

It actually worked out amazing... Sits at a tiny angle upwards to give me enough room for the shifter, plus its SUPER tight. No bolts needed.
I bolted up the mount for the mic and I think we're good to go

There's a gap between the bezel and the CB on the passenger side... Just so happened to be the perfect size to push the cable into so it is out of the way of the shifter, it is also still long enough to reach my mouth without having to pull the cable out from behind.
All in all, Im incredibly happy with the install. I need to slide out the CB and run my antenna cable once my mount gets here. Hopefully tomorrow or Monday. Then I ned to find someone who can lend me their SWR meter lol
Thread Starter
Junior Member
Joined: Sep 2012
Posts: 65
Likes: 0
From: Alberta
Year: 1994
Model: Cherokee
Engine: 4.0L
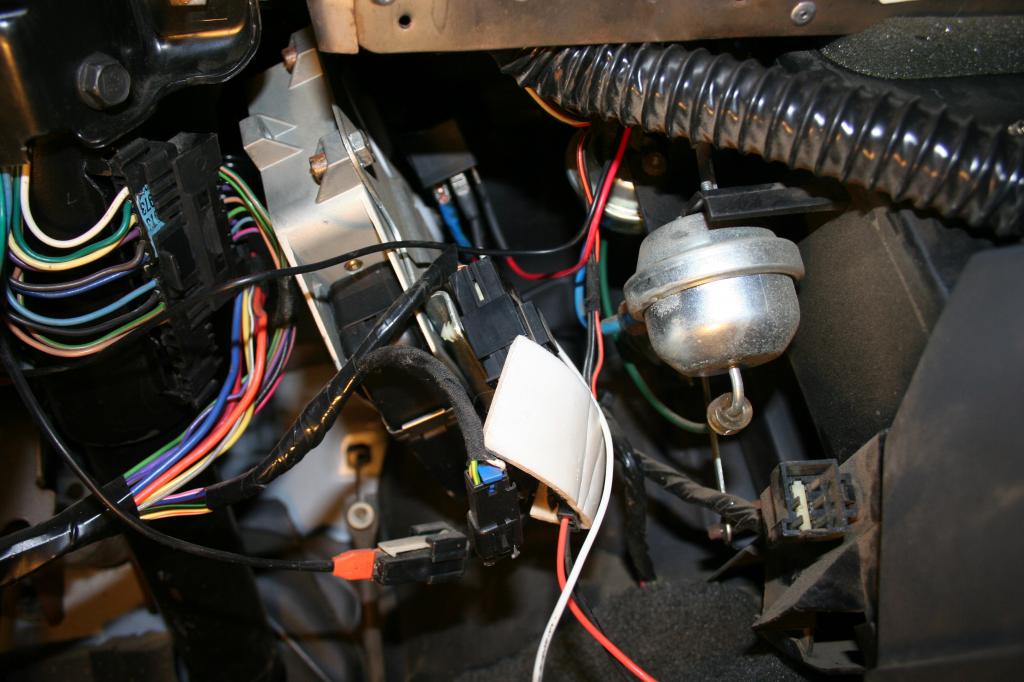
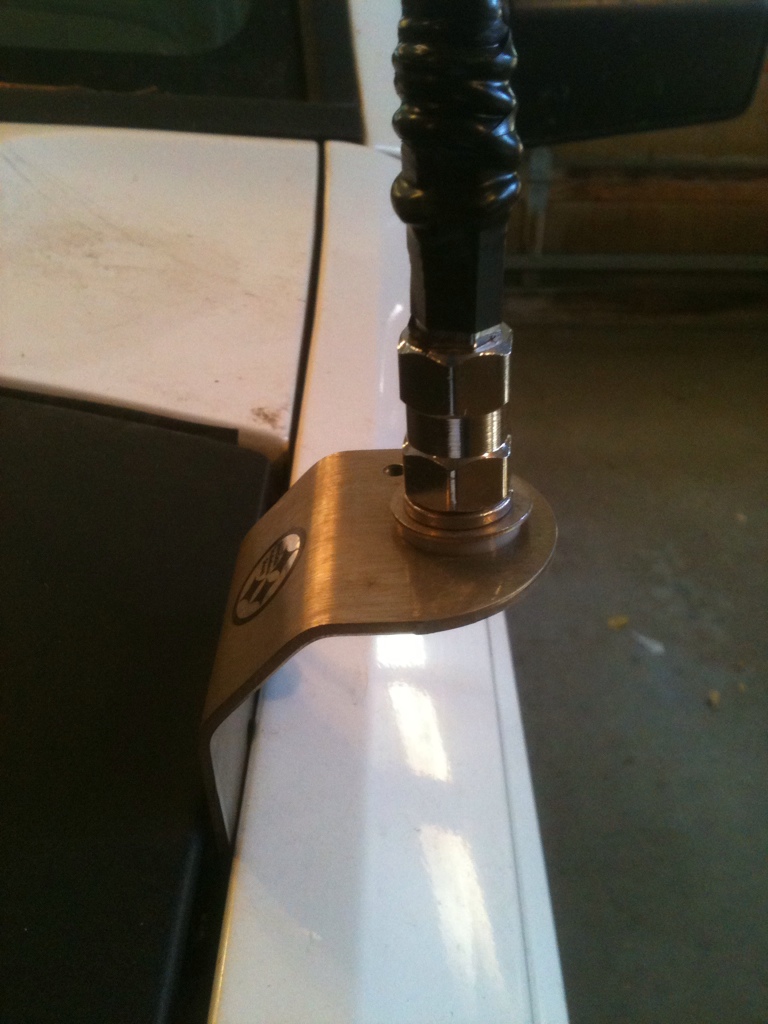
Spent some more time in the garage this weekend... Focusing on the AW4 cooling and a new rad this time round.
First a picture of my finished Antenna mount and CB wiring setup ----- I prefer to mount the antenna on my hood simply because its safely out of the way. I feel like having it off the corner of the bumper would allow it to get hit a lot more by deep ruts or trees.
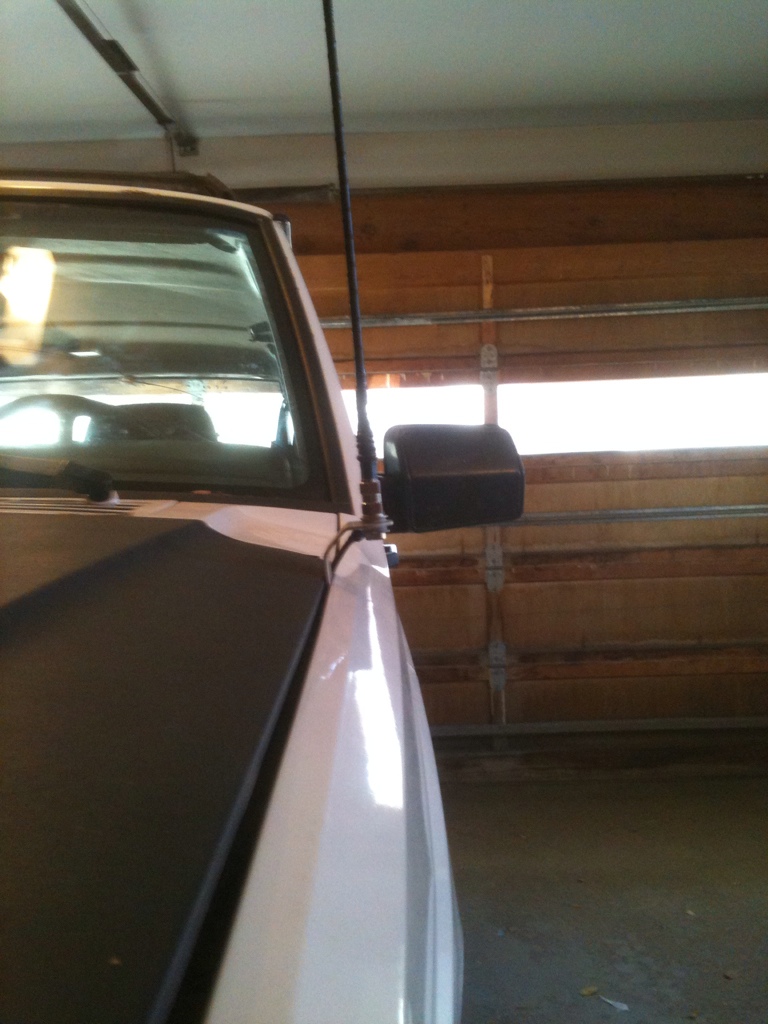
You can see I had to cut out a section of the defrost / vent flap..thingy... in order for the wires to come through without getting caught as the flap moved up and down.
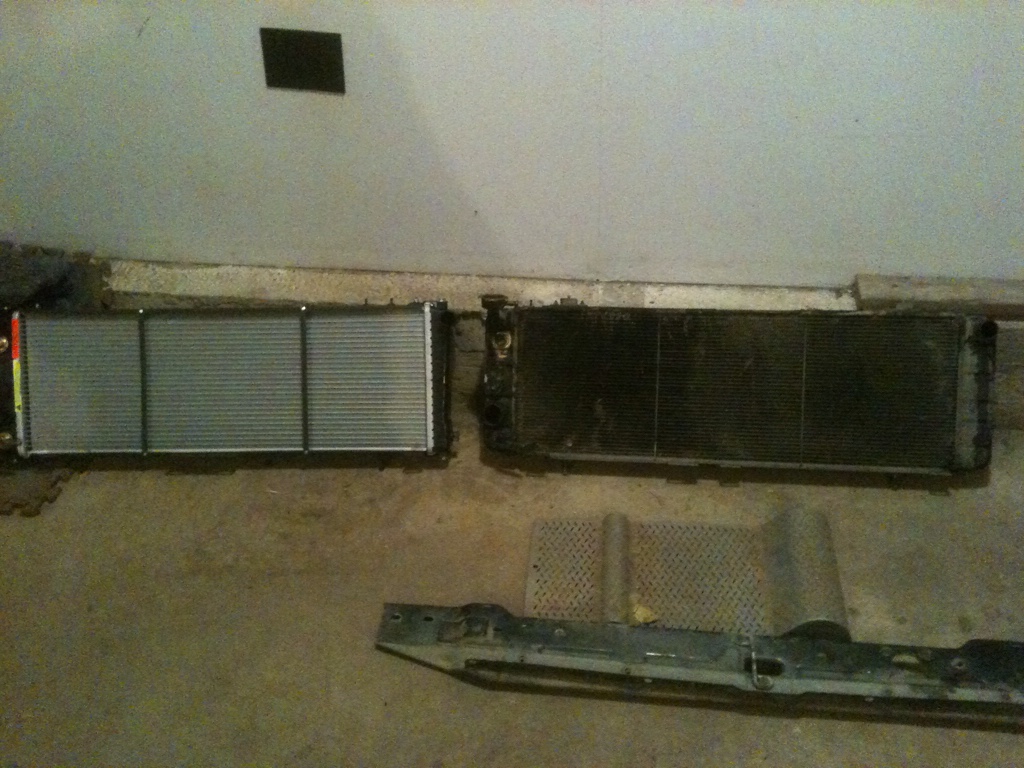
Then I found a crack in my rad :evil: so...... out with the old, in with the new!
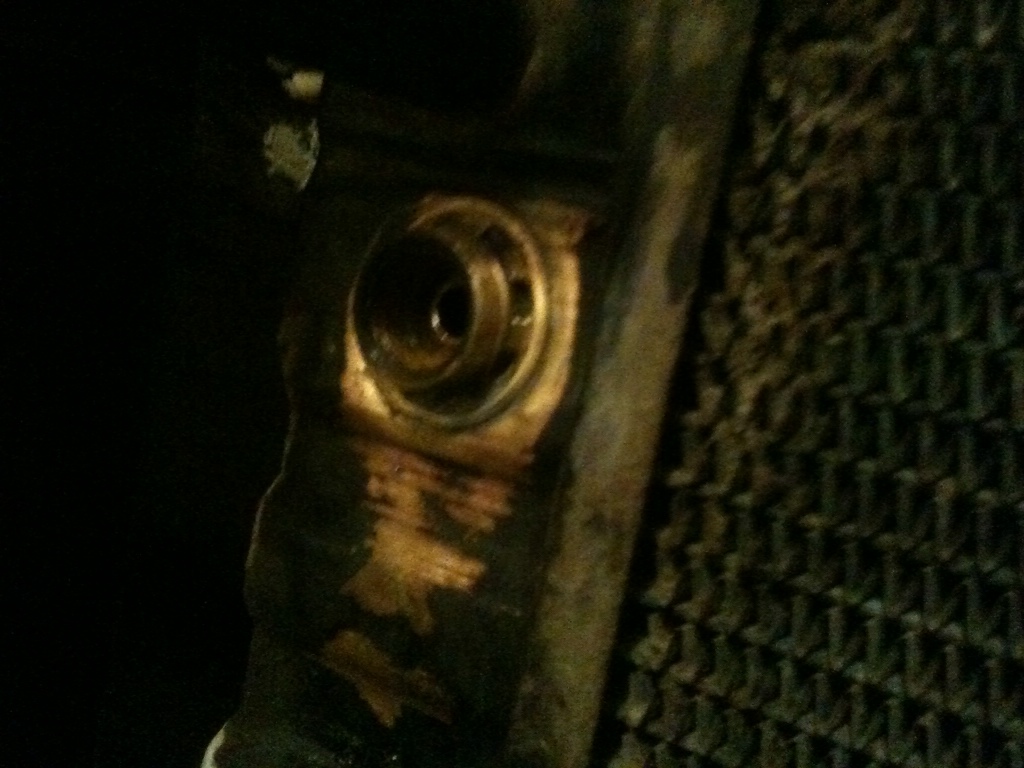
That's the fitting where the coolant was spewing out...
I kind of skimped on photos for the rad install, but I'm sure we've all done one... I also forgot to get pictures of my actual tranny cooler. Its black.. And square. Sits infront of my rad just behind the grill with a couple metal strips for mounting
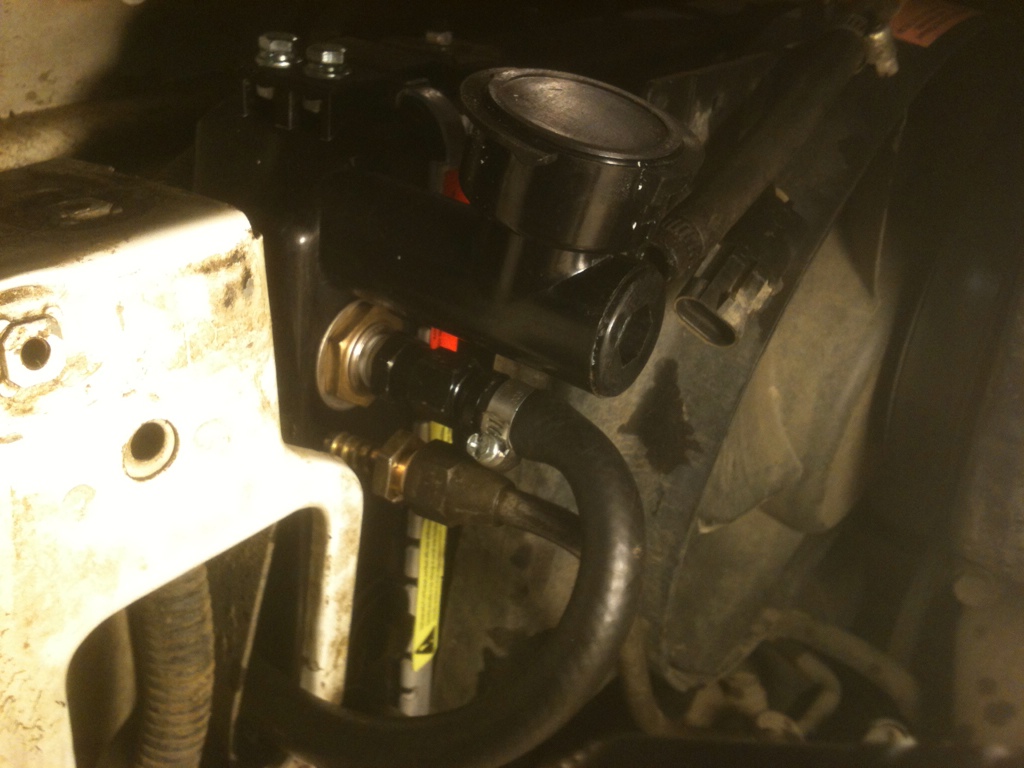
But heres a photo of the line routing (That's the return line from the new rad, simply attach supplied fittings, and cut hoses to fit) Only had the one line done in this pic. Second line is ran the exact same.
Next I cut the line coming out of the tranny and fitted the compression tee for the temp gauge. Ran the wire up through the firewall (same place as my CB wiring ^^^)
Here is how I mounted it all up:
First, I removed the rear wiper / washer button and mount
Then I fit the gauge / pod into the hole in the cluster bezel (fit perfect btw)
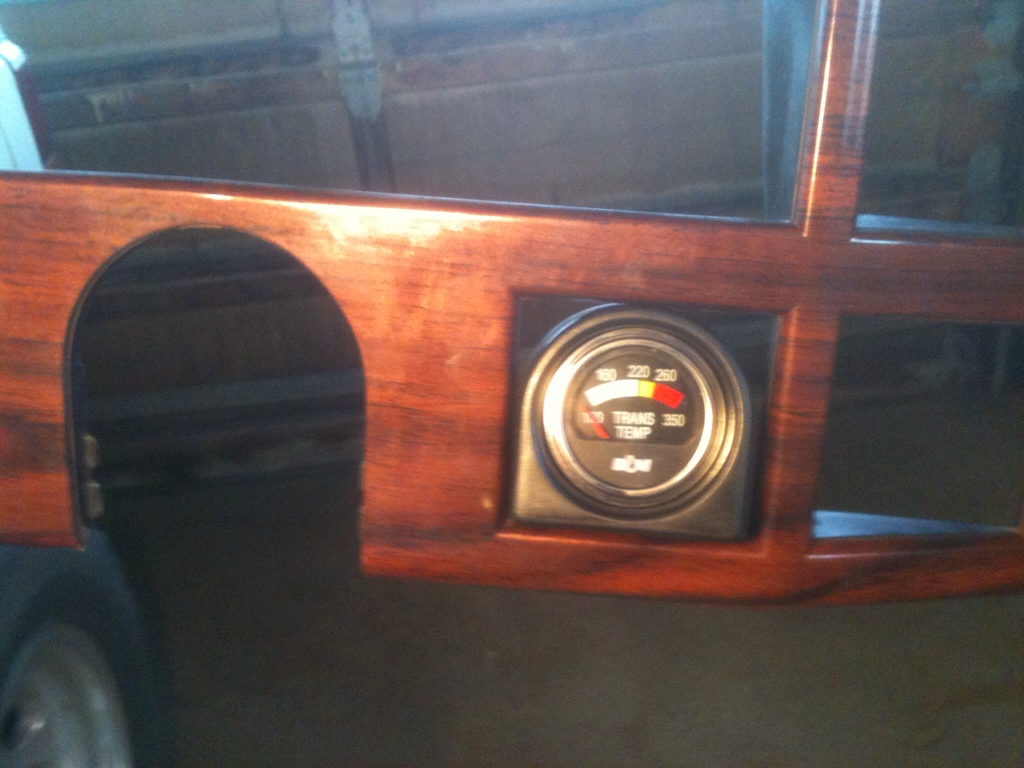
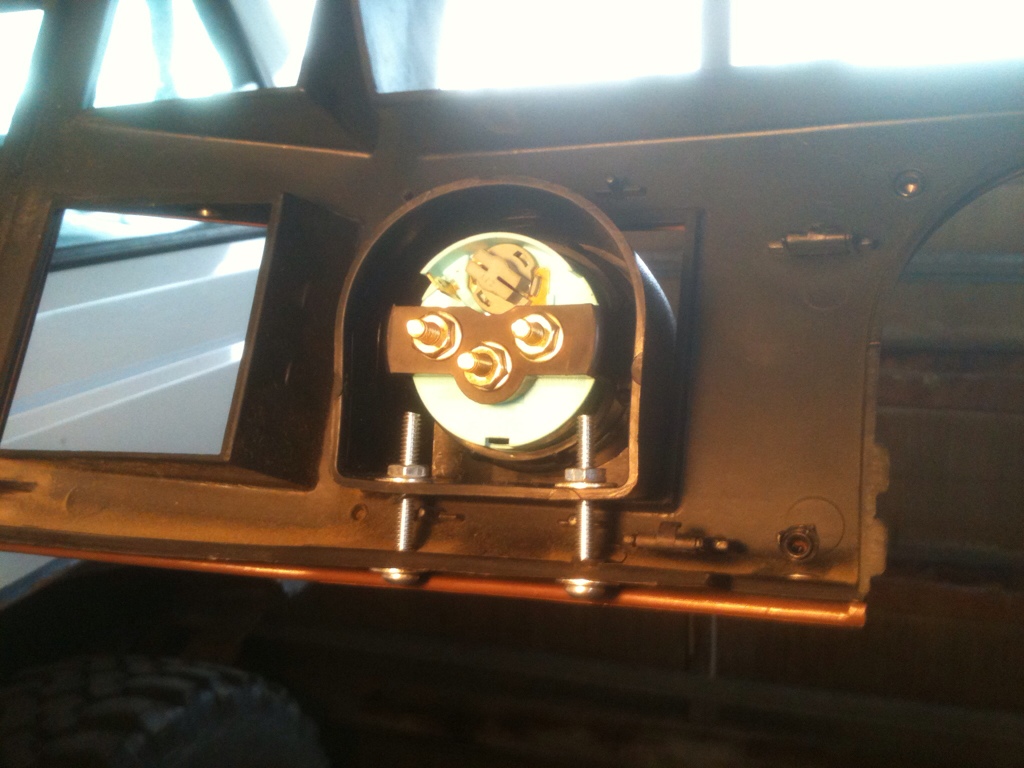
I left the wires (ground, switched-power, temp sender, and light wires) super long so I could pull the whole bezel out and then undo the wires for the future.
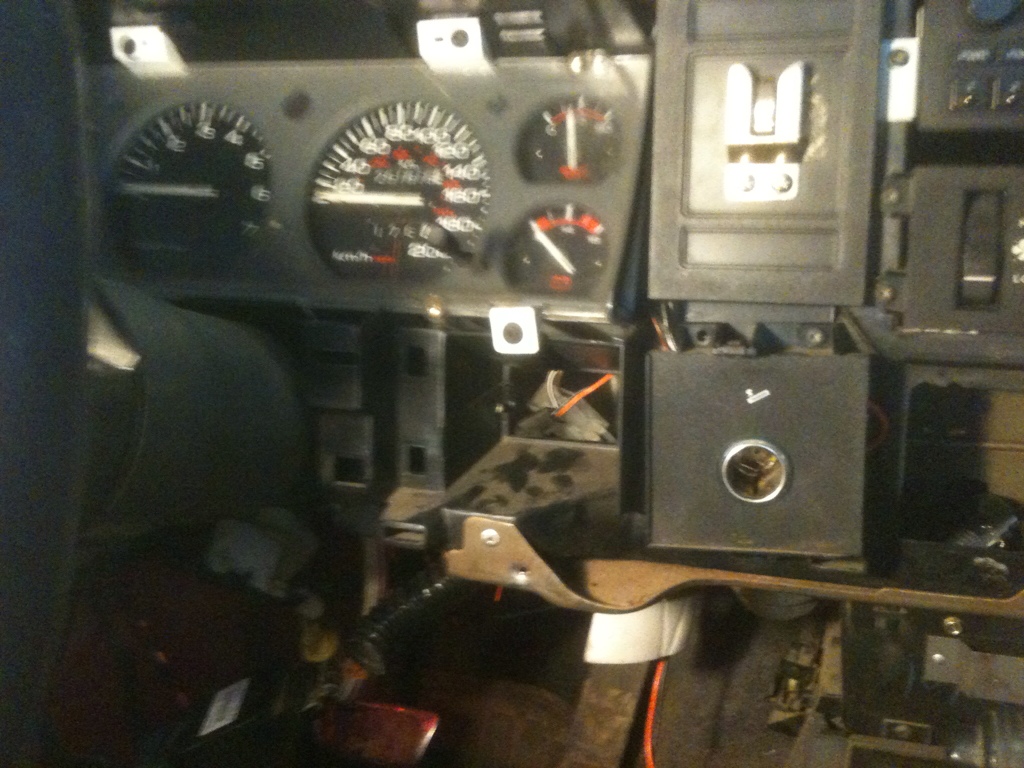
Here's a crappy / dark picture of it installed, I forgot to get one while in the garage.
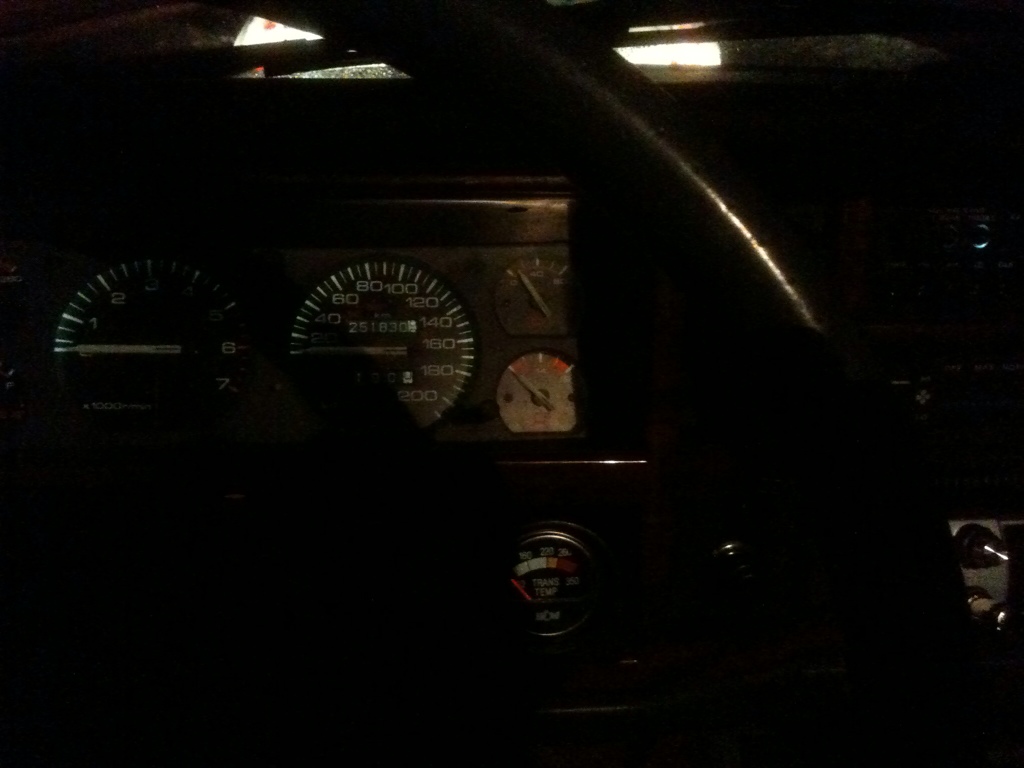
Sits in there perfect with no dash / bezel interference. I've just done a trip across St. Albert and it read just over 100�F. Pretty cool, but was simply driving down the street so not much stress on the tranny yet.
Almost forgot... A few pics of the shop that my and a buddy are renting out. Fully furnished. Kind of cluttered but they are in the process of cleaning it all up...
It has three sections, (1st is entrance, middle of shop / work space, third is storage)
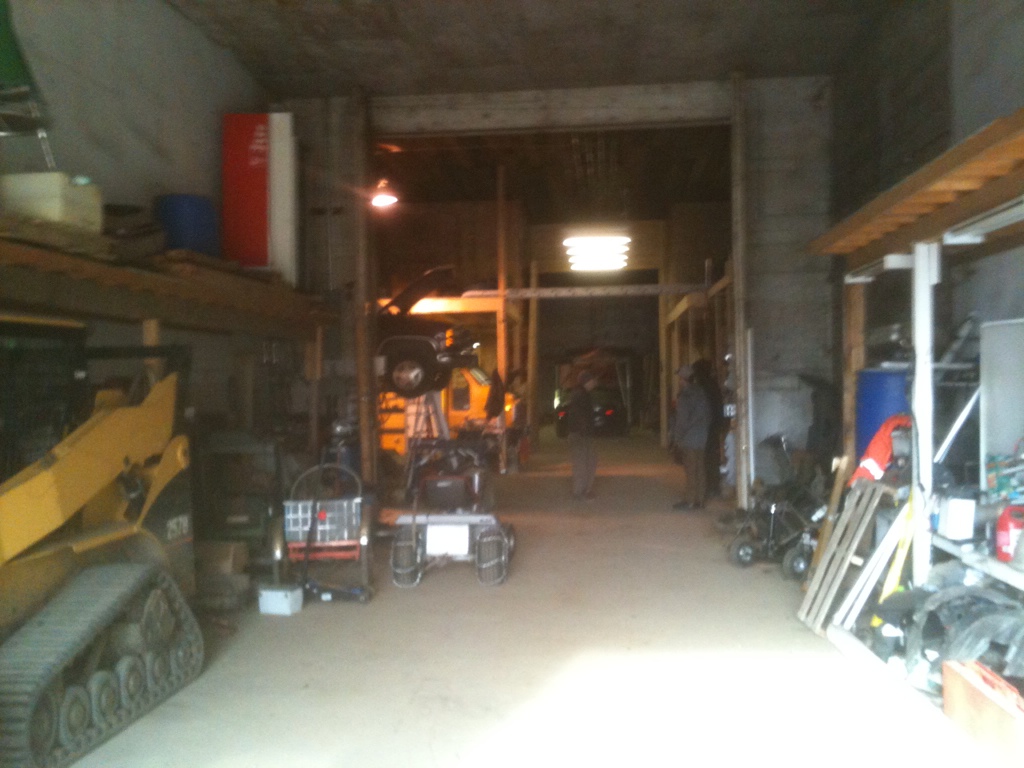
Here is our bay, that frame is getting scrapped Or being sold for something like 100bucks. It was made to fit inside a firefly. Plan was for a custom 454 bigblock build with a tube frame and a firefly body fitted on top.
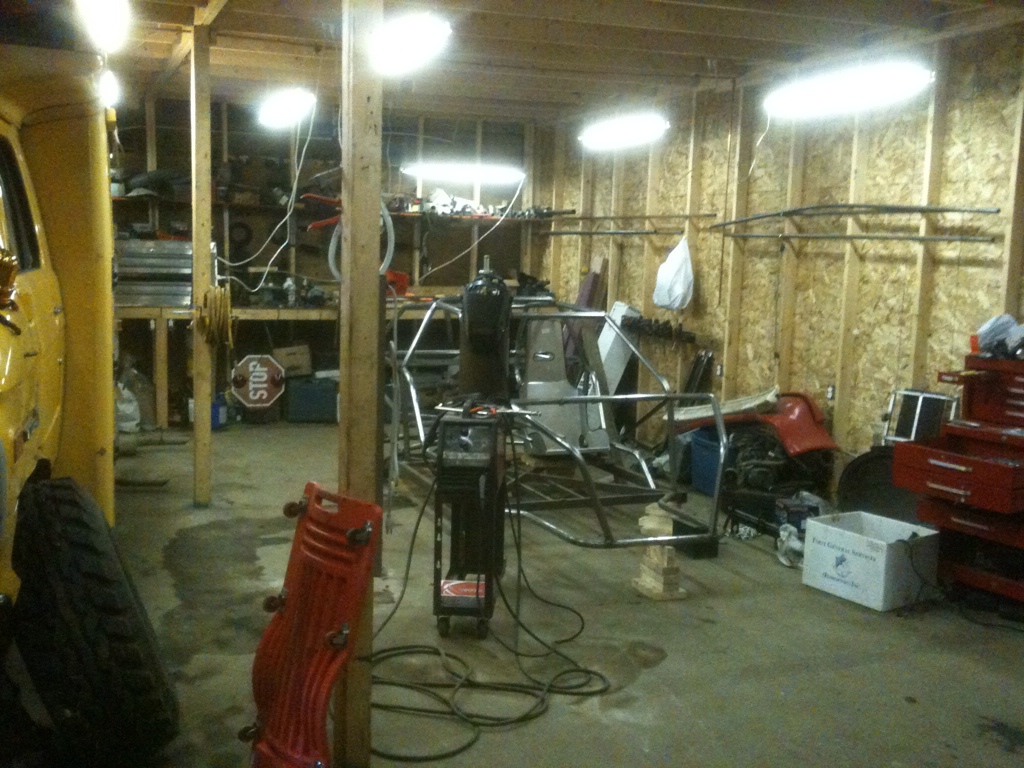
The shop is fully furnished with milling machine, lathe, bender, plasma cutter, welders, chop saws / grinders / air tools. A hoist, engine crane and lift. As well as a... Dyno! Will be making use of that next summer with my car for sure.
First a picture of my finished Antenna mount and CB wiring setup ----- I prefer to mount the antenna on my hood simply because its safely out of the way. I feel like having it off the corner of the bumper would allow it to get hit a lot more by deep ruts or trees.


You can see I had to cut out a section of the defrost / vent flap..thingy... in order for the wires to come through without getting caught as the flap moved up and down.

Then I found a crack in my rad :evil: so...... out with the old, in with the new!

That's the fitting where the coolant was spewing out...

I kind of skimped on photos for the rad install, but I'm sure we've all done one... I also forgot to get pictures of my actual tranny cooler. Its black.. And square.
Sits infront of my rad just behind the grill with a couple metal strips for mountingBut heres a photo of the line routing (That's the return line from the new rad, simply attach supplied fittings, and cut hoses to fit) Only had the one line done in this pic. Second line is ran the exact same.

Next I cut the line coming out of the tranny and fitted the compression tee for the temp gauge. Ran the wire up through the firewall (same place as my CB wiring ^^^)
Here is how I mounted it all up:
First, I removed the rear wiper / washer button and mount

Then I fit the gauge / pod into the hole in the cluster bezel (fit perfect btw)


I left the wires (ground, switched-power, temp sender, and light wires) super long so I could pull the whole bezel out and then undo the wires for the future.
Here's a crappy / dark picture of it installed, I forgot to get one while in the garage.

Sits in there perfect with no dash / bezel interference. I've just done a trip across St. Albert and it read just over 100�F. Pretty cool, but was simply driving down the street so not much stress on the tranny yet.
Almost forgot... A few pics of the shop that my and a buddy are renting out. Fully furnished. Kind of cluttered but they are in the process of cleaning it all up...
It has three sections, (1st is entrance, middle of shop / work space, third is storage)

Here is our bay, that frame is getting scrapped
Or being sold for something like 100bucks. It was made to fit inside a firefly. Plan was for a custom 454 bigblock build with a tube frame and a firefly body fitted on top. 
The shop is fully furnished with milling machine, lathe, bender, plasma cutter, welders, chop saws / grinders / air tools. A hoist, engine crane and lift. As well as a... Dyno! Will be making use of that next summer with my car for sure.

Thread Starter
Junior Member
Joined: Sep 2012
Posts: 65
Likes: 0
From: Alberta
Year: 1994
Model: Cherokee
Engine: 4.0L
Thanks guys!
The rails are solid... The floors are gone, the rockers are gone. I got rust bubbles a few spots on the roof, and pretty bad rust bubbles under some 3M tape along the top of the windshield.
So its all fixable. Not necessarily worth it, but I'd like to learn instead of just buying a new jeep. Considering I picked this up for a grand, and a rust free one around here is going for 4 to 6.
As for the shop, ya its fricken awesome. Its got a full sound system wired throughout, a second floor lounge area with couches and TV. And an enclosed kitchen with an enclosed bathroom with shower and everything.
Plan is to have some all weekend build parties out there. Over summer when I rip into my rust again probably.