1BEASTXJ Under construction
 04-19-2017, 05:40 PM
#1
Junior Member
Thread Starter
Join Date: Mar 2017
Location: Ft Hood
Posts: 46
Likes: 0
Received 0 Likes
on
0 Posts
Year: 2000 Sport
Model: Cherokee
Engine: 4.0
First things first a little history of how it all began. I bought this 2000 XJ from a friend with the intention to wheel the **** out of it while also using it as a daily driver. So thats what I did until one day while wheeling over sand dunes at South Padre Island one friend accidentally rearended the XJ with his Comanche.
This is what happened. I went over a tall sand dune and got stuck on the other side. My friend could not see I was stuck because I didn't have a wheeling flag. He followed the same path and slammed into the hatch. Im sure you can imagine how it happened. It didnt seem like a big deal but it was actually scary because he almost ran over me while I tried to signal him to stop, thank God that wasnt the case.
The hatch on the cherokee got damaged pretty bad and the rear quarter panel received some damage but luckily the glass survived. While the damage gave the Cherokee its unique character water and sand were finding their way into the cabin. I began looking and found a replacement hatch with no glass for $100. Boy if I only knew the extensive amount of work I was gonna put into this XJ. What was gonna be a simple repair turned out to a complete paintjob and restomod project.
About her name. I named her 1BeastXJ for many reasons. One is because its unique thats what the ''1'' stands for. ''Beast'' describes her attitude, and mostly because she has gone through hell and back. ''XJ'' stands for ''Xtreme Jeep'' in my opinion of course and XJs are the best looking Jeeps out there right? Right! I knew you would agree.
Her abuse. She survived very aggressive abuse miraculous I suppose. I remember having the pedal to the metal and doing donuts and eight figures on some slippery muddy-sand literally for more than 5 minutes straight until I saw steem coming out of the hood. The temp needle was maxed. I opened the hood but never shut her off because I feared she would thow up all the water. Eventually she cooled her *** down on her own. She has sucked water into the intake numerous times now because I keep thinking she can swim lol. You know what I mean I exceeded her capabilities several times, luckily I didnt bent any rods atleast not yet, she's gonna need a snorkle. If you look at the pics my tires are not for mudding but that didnt stop me from having fun. At the end thats what it's all about getting stuck multiplies the fun breaking stuff is part of the equation.
In this thread I will document and share with you the construction of my Beast XJ. I hope to make many friends and learn new things. Also I hope to some day meet with people from the forum and go offroading. Thank You for your time and I hope you Enjoy!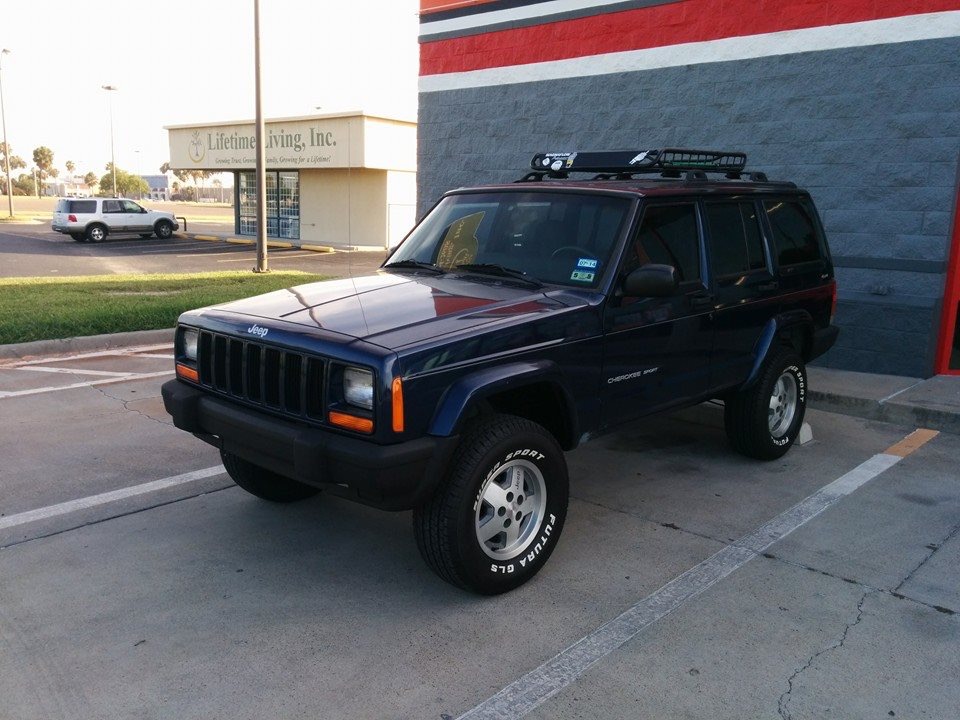 This is how she sat when I bought her. She was super clean!
 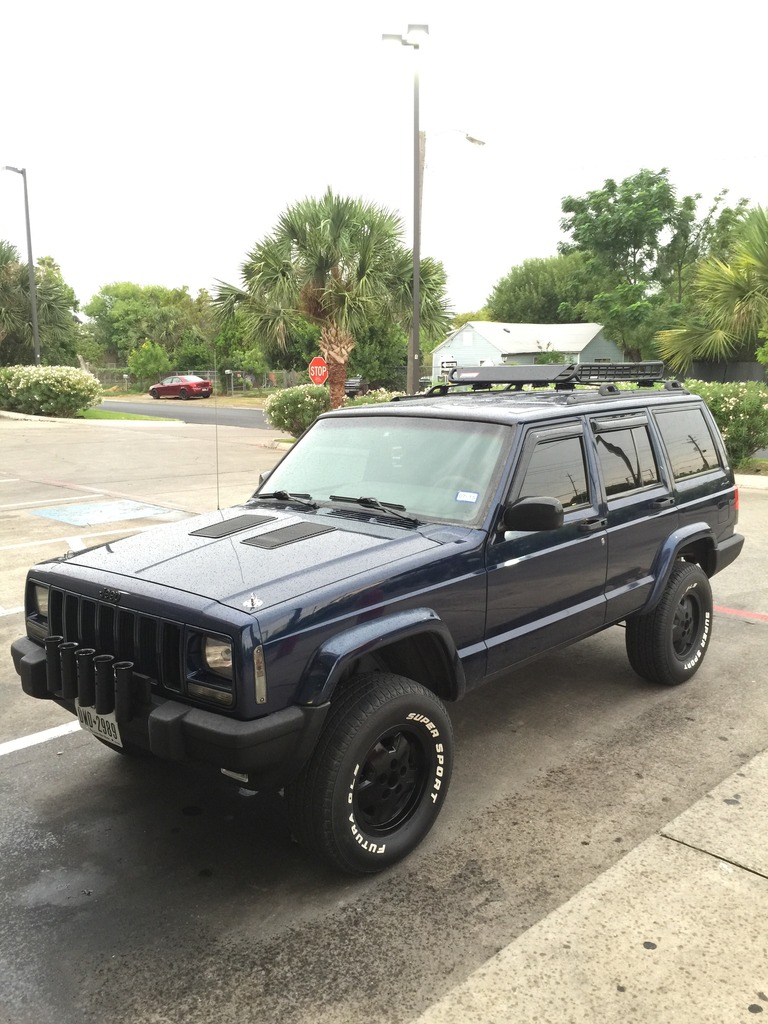 Within a couple of months and after a few bolt on accessories of my taste this is how she looked.
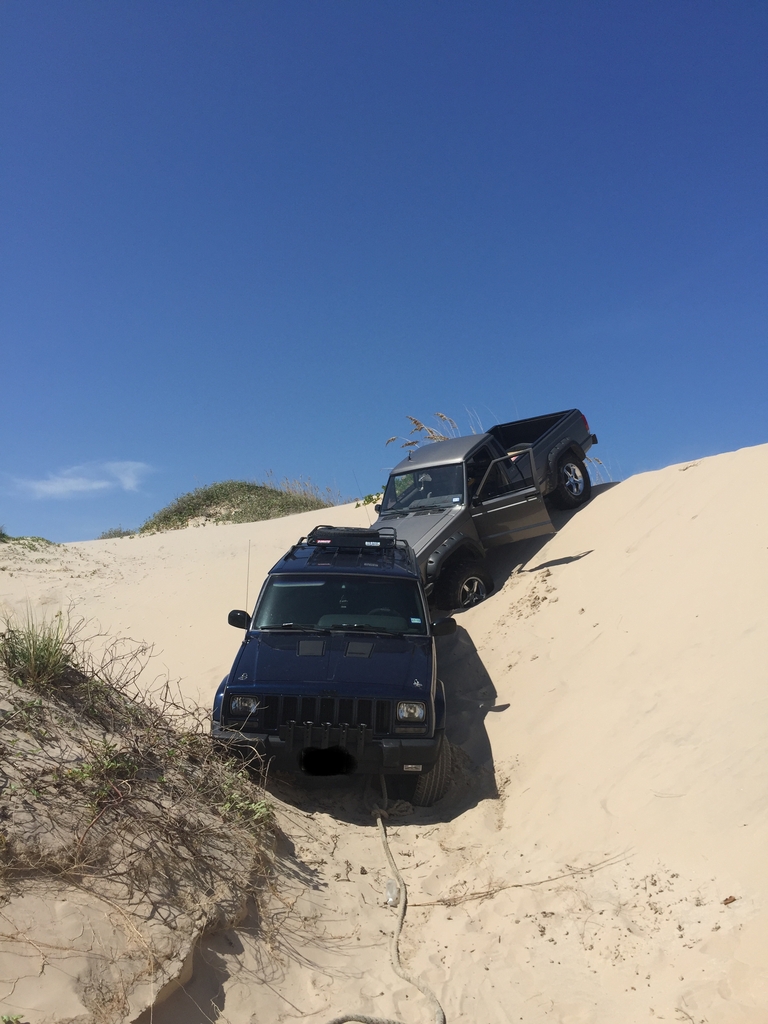 This is were the accident happen. Notice we didnt have wheeling flags; lesson learned.
  Her first battle scar. Notice how close the glass was from the impact.
This is what happened. I went over a tall sand dune and got stuck on the other side. My friend could not see I was stuck because I didn't have a wheeling flag. He followed the same path and slammed into the hatch. Im sure you can imagine how it happened. It didnt seem like a big deal but it was actually scary because he almost ran over me while I tried to signal him to stop, thank God that wasnt the case.
The hatch on the cherokee got damaged pretty bad and the rear quarter panel received some damage but luckily the glass survived. While the damage gave the Cherokee its unique character water and sand were finding their way into the cabin. I began looking and found a replacement hatch with no glass for $100. Boy if I only knew the extensive amount of work I was gonna put into this XJ. What was gonna be a simple repair turned out to a complete paintjob and restomod project.
About her name. I named her 1BeastXJ for many reasons. One is because its unique thats what the ''1'' stands for. ''Beast'' describes her attitude, and mostly because she has gone through hell and back. ''XJ'' stands for ''Xtreme Jeep'' in my opinion of course and XJs are the best looking Jeeps out there right? Right! I knew you would agree.
Her abuse. She survived very aggressive abuse miraculous I suppose. I remember having the pedal to the metal and doing donuts and eight figures on some slippery muddy-sand literally for more than 5 minutes straight until I saw steem coming out of the hood. The temp needle was maxed. I opened the hood but never shut her off because I feared she would thow up all the water. Eventually she cooled her *** down on her own. She has sucked water into the intake numerous times now because I keep thinking she can swim lol. You know what I mean I exceeded her capabilities several times, luckily I didnt bent any rods atleast not yet, she's gonna need a snorkle. If you look at the pics my tires are not for mudding but that didnt stop me from having fun. At the end thats what it's all about getting stuck multiplies the fun breaking stuff is part of the equation.
In this thread I will document and share with you the construction of my Beast XJ. I hope to make many friends and learn new things. Also I hope to some day meet with people from the forum and go offroading. Thank You for your time and I hope you Enjoy!
 This is how she sat when I bought her. She was super clean!
  Within a couple of months and after a few bolt on accessories of my taste this is how she looked.
  This is were the accident happen. Notice we didnt have wheeling flags; lesson learned.
  Her first battle scar. Notice how close the glass was from the impact.
 04-19-2017, 06:30 PM
#2
Junior Member
Thread Starter
Join Date: Mar 2017
Location: Ft Hood
Posts: 46
Likes: 0
Received 0 Likes
on
0 Posts
Year: 2000 Sport
Model: Cherokee
Engine: 4.0

To cope with the extreme south Texas heat i decided to cut the hood and install some 80s chrysler lebaron oem vents.

I originally got the idea from martinbuilt youtube so shout out to him.

This is the last time I went mudding before I took it out of service for repairs. Everytime I would wash it muddy water would pour into the cabin; I had to do something about it. I never realized it would take forever. Money, time, and being in the mood have to be on point to make progress in any project to do it right. It's been 17 months to this day since I began just the paintjob stage and I'm far from done. Worst feeling ever is not beeing able to go wheeling.
Last edited by Esechuy; 04-19-2017 at 09:22 PM.
04-19-2017, 08:52 PM
#3
Junior Member
Thread Starter
Join Date: Mar 2017
Location: Ft Hood
Posts: 46
Likes: 0
Received 0 Likes
on
0 Posts
Year: 2000 Sport
Model: Cherokee
Engine: 4.0

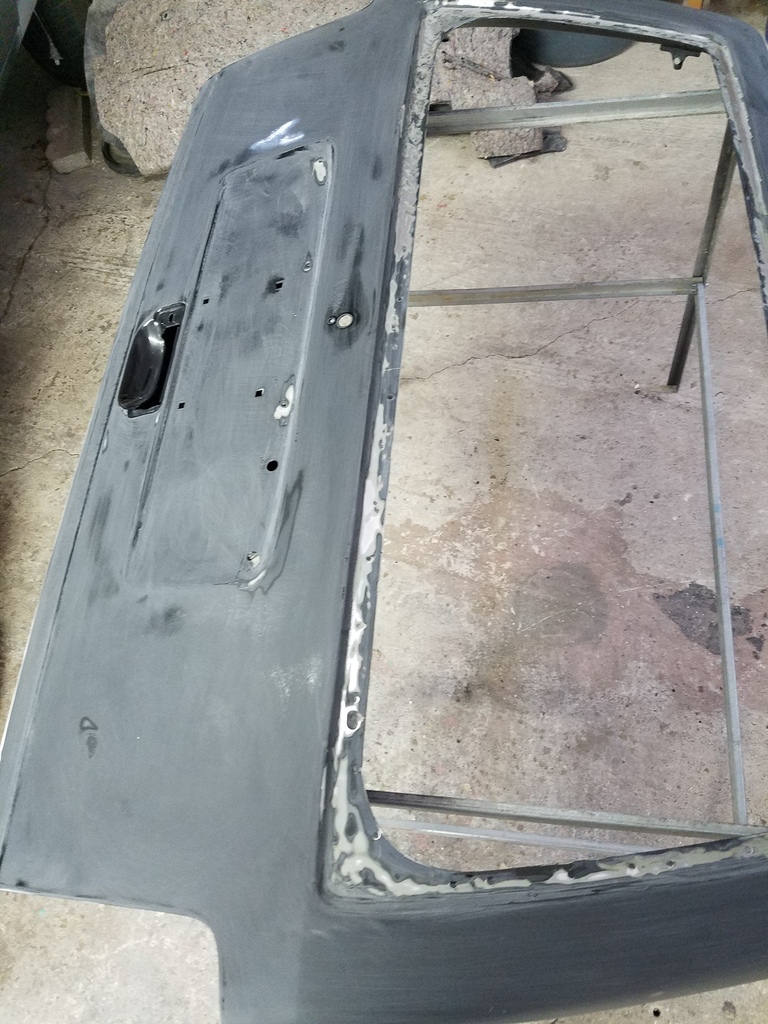
I really didn't want to take this route but there was no way around.

To fill up all the holes and rivets I used Fiberglass resin jelly Bondo 432. Although I hate to use body fillers on cars because I have seen many adhesion failures, anyways I went with this product because I have used it before and it's actually prettygood.

To seal everything off from potential contaminants I used SPI epoxy primer. The next day I sprayed SPI 2k primer over that to do some wet sanding. Not bad for a beginner.

I decided to go with SPI after some extensive research and to be honest theire products are awesome.
Is that cancer?
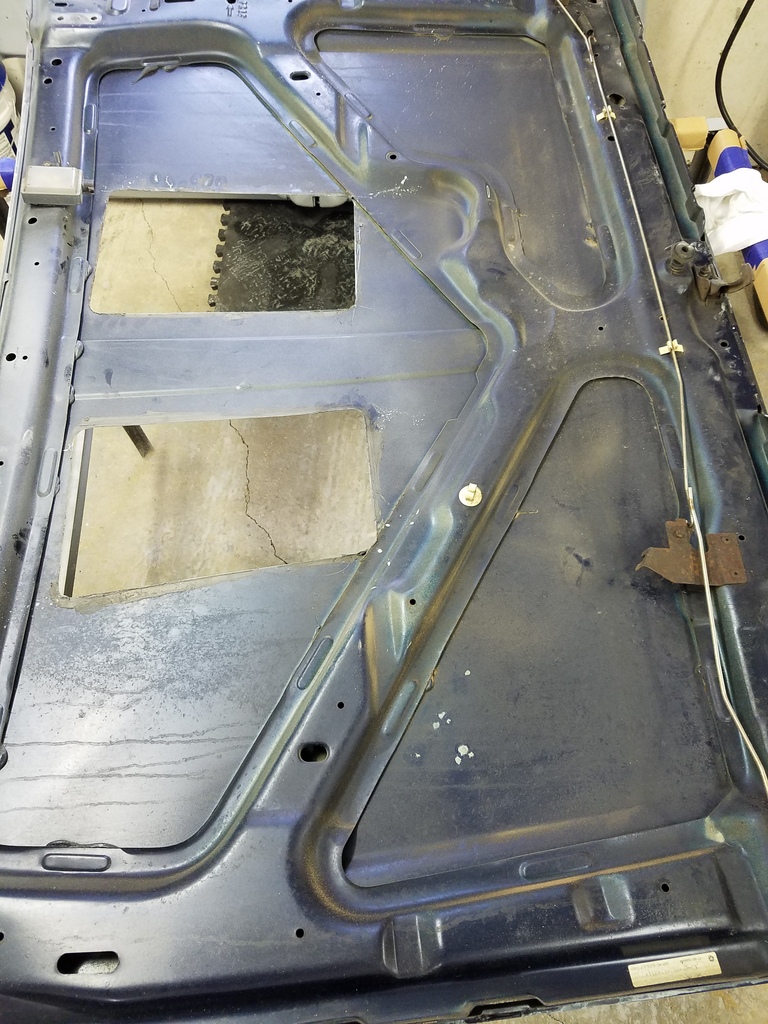
While doing a visual inspection on the rest of the paint I came across these spider web looking cracks on the hood and roof top. I assumed it was caused from exposure to the sun and also because those areas are rarely washed and dryed good.

These are the cracks, I though they were only on the clear coat but after more investigation look what I found.

what the hell! I used Rustoleum aircraft paint remover to get to bare metal and I was shocked on what was underneath the paint. I wont be leaving my salty sand covered tow ropes on the top basket anymore.

Luckily all the that rustiness was superficial. Is that better?

Epoxy primer it up! looking good!

Same steps with the hood.

Hood is done with the epoxy primer aswell. The next day I sprayed some 2k primer for the wet sanding.
At this point I knew it was not just a minor repair but a complete paintjob. I had already removed the windshield because it was cracked and also because there was also superficial rust in the seal area. So that had to be fixed.

Factory style or better!

If im already at it, why not remove the wiper motor assembly and see how it looks under there. Thats not too bad!

What about the fenders? Take those sucker off too, its only a couple of bolts. Piece of cake

If all that was off and it was a piece of cake, why not take the doors off? ****it. So thats what I did. With a dremel and small cuting wheels. I easily removed all four doors within a couple of hours or so. My idea was to paint all the hinges and jambs real good and the only way to do that properly was taking this route.

I washed everything with dawn soap using small wire brushes to get into the tight corners. Then I sanded every visible square inch possible with 220 grit. After that I rewashed everything, dryied it up real good with lint free rags and then with air pressure. Then I brushed on the wax and grease remover getting into all the small crevices and dryied it again. At this point it was beyond clean.

Underjamb area nice and clean too

What about the booty? Dont worry, after removing the trailer hitch I gave it all the same attention as the above areas.

Notice anything missing in the lower quarter area? Yup I removed the metal tabs where the plastic bumper corner attaches to. Those metal things are notorious for collecting sand and mud you know what I mean. A perfect place for rust cancer.

After all the dismantling, cleaning, sanding, cleaning, primering, sanding, filling, more sanding, and more cleaning, yup a lot of steps this is how she sat.
04-19-2017, 09:02 PM
#4
Junior Member
Thread Starter
Join Date: Mar 2017
Location: Ft Hood
Posts: 46
Likes: 0
Received 0 Likes
on
0 Posts
Year: 2000 Sport
Model: Cherokee
Engine: 4.0
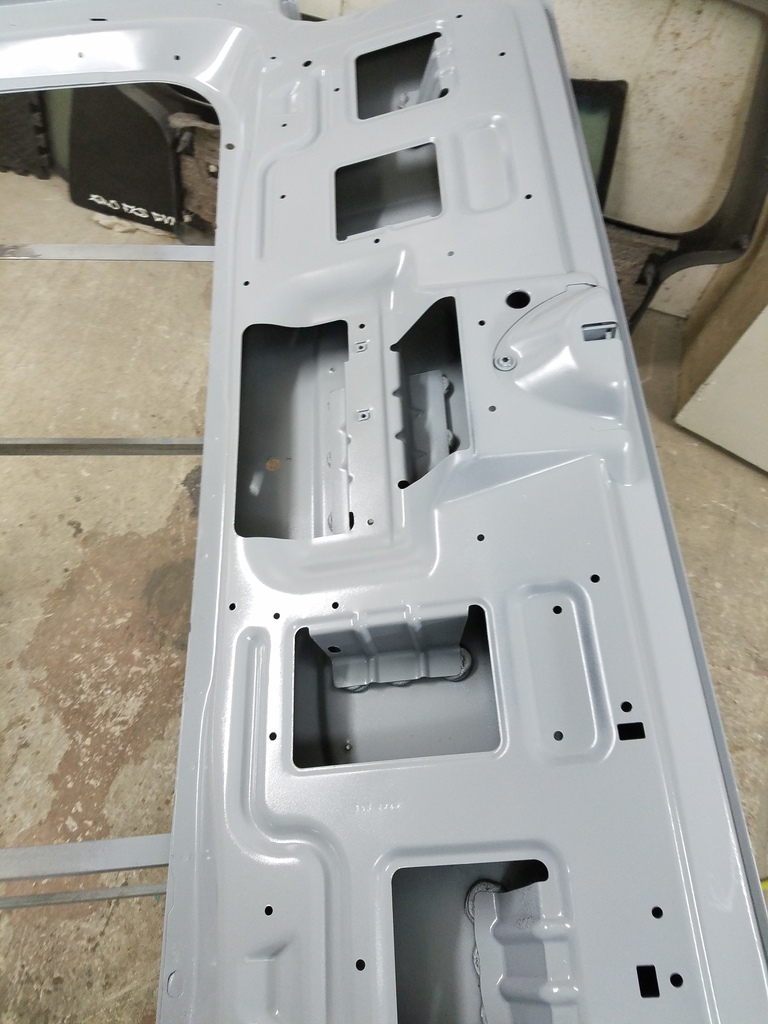
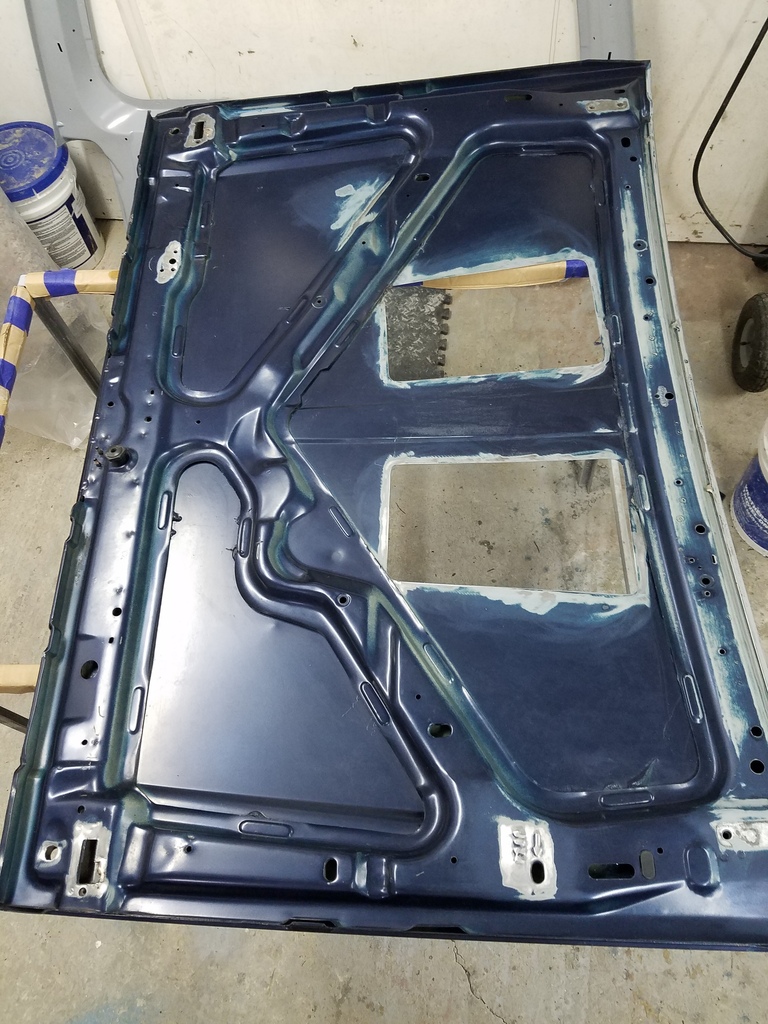
Next thing I started working on the replacement hatch and the inside of the hood.
This hatch was in pretty good condition so it didn't require much work.
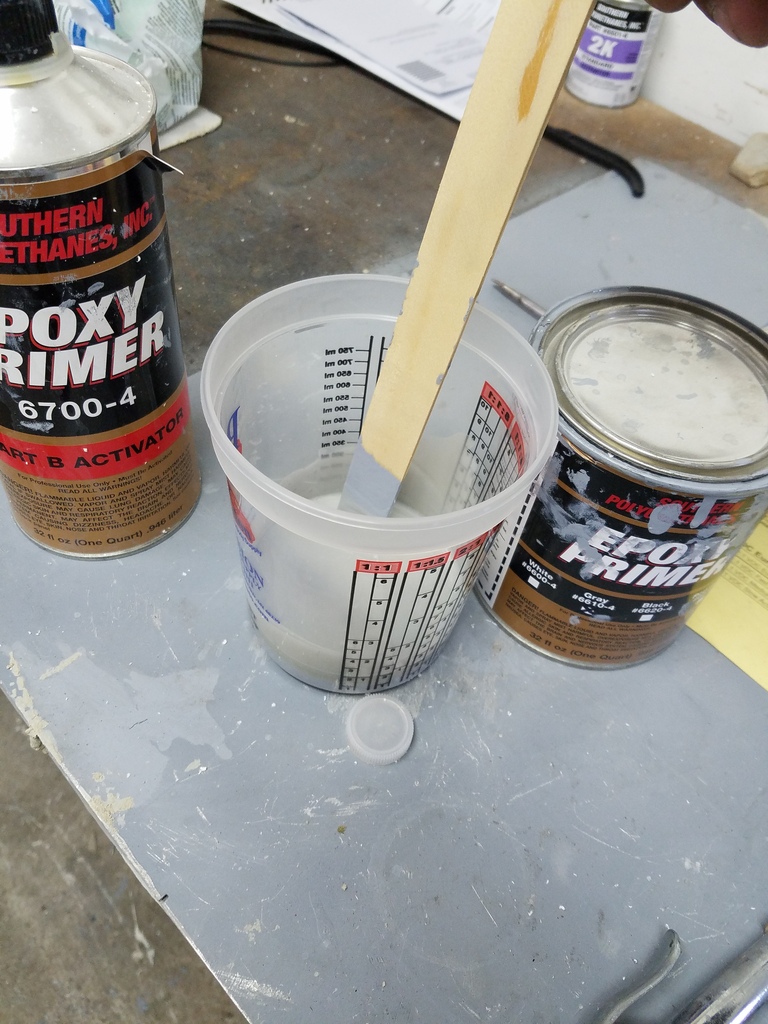
Once again I use this primer for better protection. Also this primer when reduced can be used as a sealer prior to applying the base.
It wasnt necessary to paint the inside, but I wanted to sharpen my painting skills before I got to the base and clear.
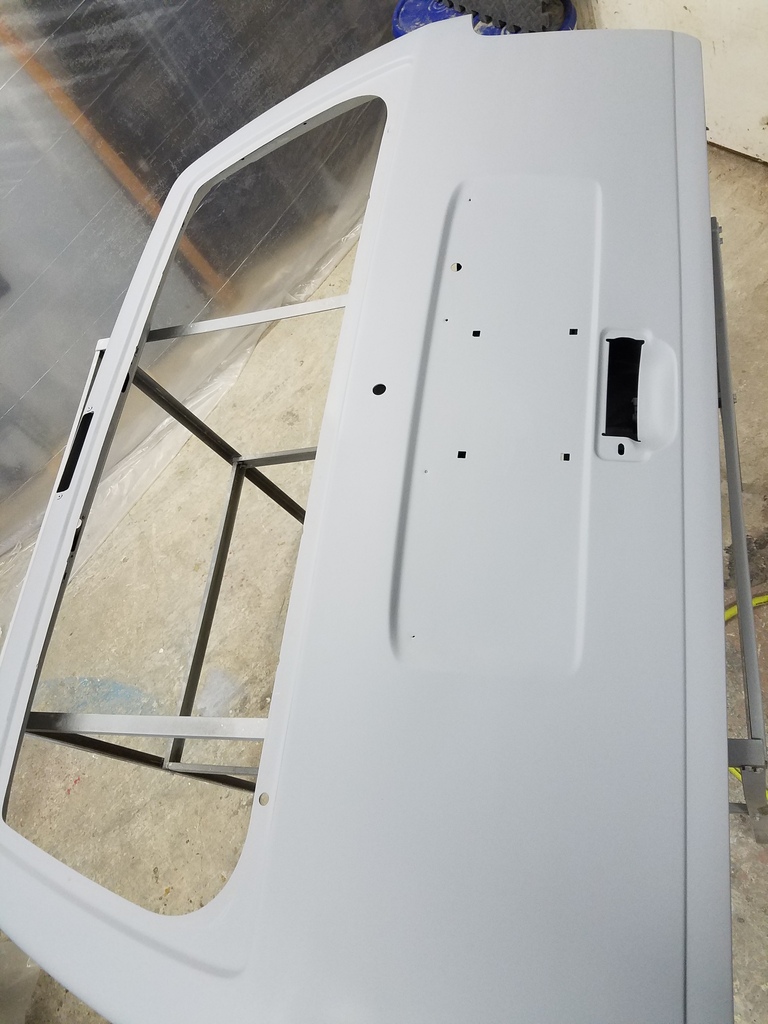
Looks straight to me.
Since the hood was off why not prep the underside. To be honest I had to wash it like four times before I sanded it and not because it had mud or dirt but because that is an area were oil evaporates I dint want to risk it.
That looks much better.

This hatch was in pretty good condition so it didn't require much work.

Once again I use this primer for better protection. Also this primer when reduced can be used as a sealer prior to applying the base.

It wasnt necessary to paint the inside, but I wanted to sharpen my painting skills before I got to the base and clear.

Looks straight to me.

Since the hood was off why not prep the underside. To be honest I had to wash it like four times before I sanded it and not because it had mud or dirt but because that is an area were oil evaporates I dint want to risk it.

That looks much better.
04-19-2017, 09:09 PM
#5
Junior Member
Thread Starter
Join Date: Mar 2017
Location: Ft Hood
Posts: 46
Likes: 0
Received 0 Likes
on
0 Posts
Year: 2000 Sport
Model: Cherokee
Engine: 4.0

Painting this wasn't necessary but oh well atleast im getting the feel of the spray guns.

I dont want to brag but to be honest it looks better than what the robots did at the assembly line

I forgot to mention at this point I had sprayed the jams and quarters with reduced epoxy primer, like I said before to serve as a sealer because the next day I was gonna do some top coating. I had the option to top coat the same day but im doing all this in a small shack with poor ventilation and the smell is terrible plus im renting this house and im afraid the neighbors will complain one day.
04-19-2017, 09:21 PM
#6
Junior Member
Thread Starter
Join Date: Mar 2017
Location: Ft Hood
Posts: 46
Likes: 0
Received 0 Likes
on
0 Posts
Year: 2000 Sport
Model: Cherokee
Engine: 4.0
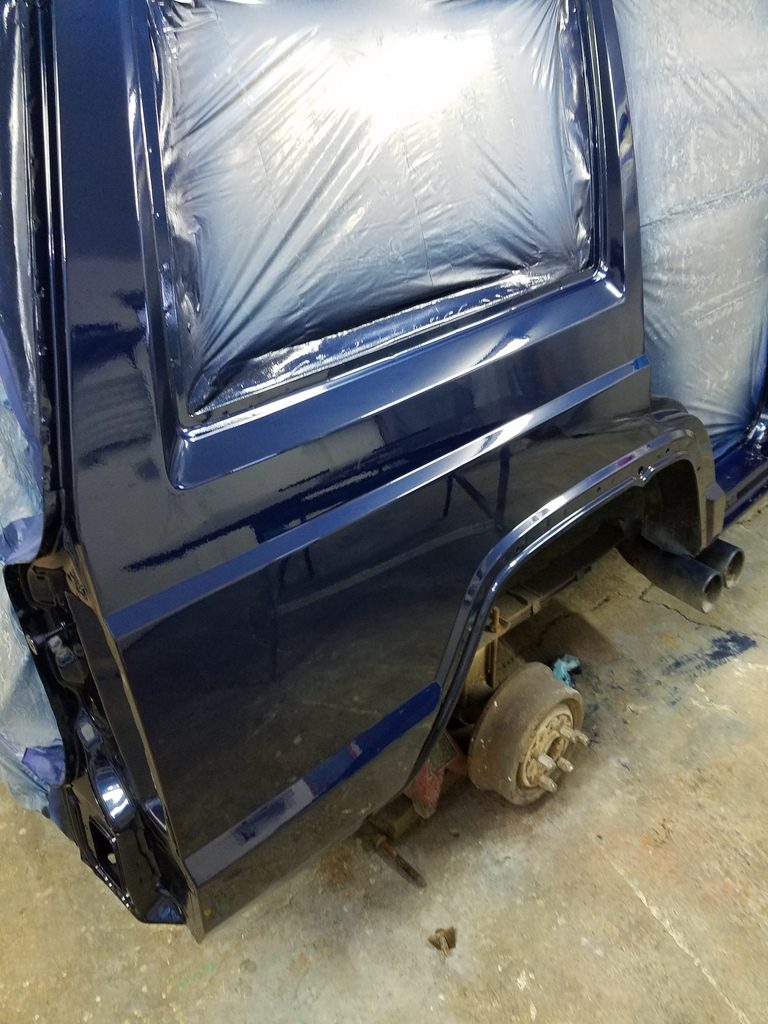
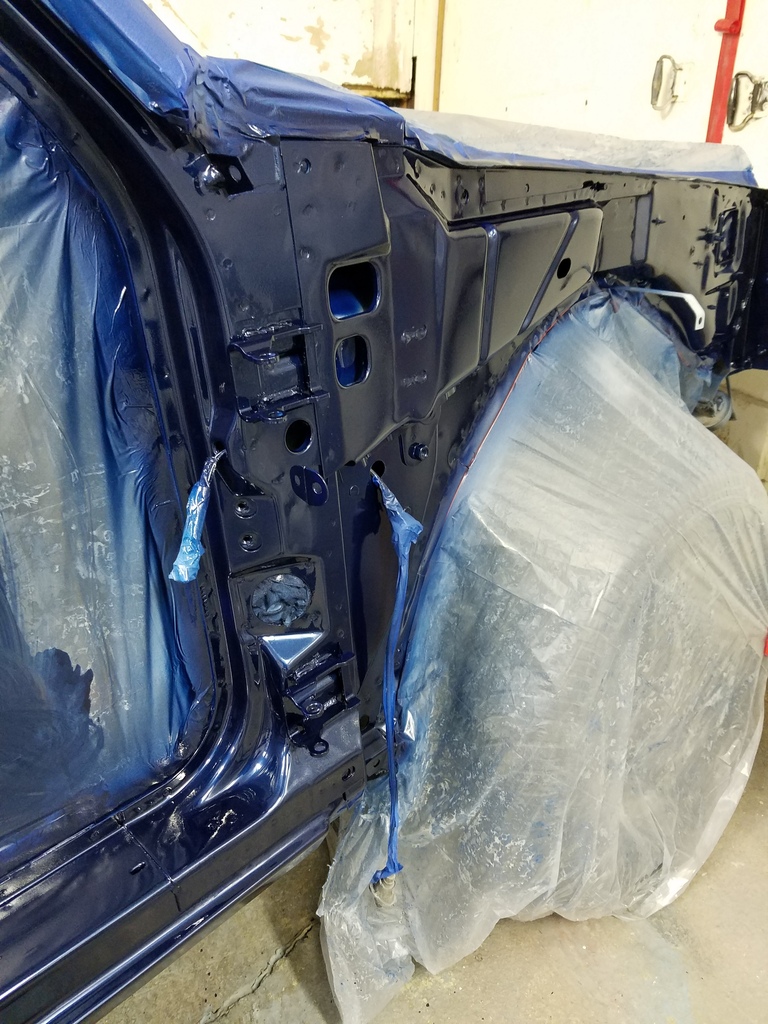
It was about time I started painting something. I decided to go with the original color Patriot Blue just to keep her a little original. Like I said earlier I have to paint things in portions because this little shop is always working against me. There is not much ventilation the interior has sheet rock and it's paint is flaking off then there are holes were wind blows in to the shop. Plus I already broke a window by accident. Just sucks. I first painted the roof with the windshield pillars and the wiper motor box all at once. Then I painted all the passenger side jambs and quarters.
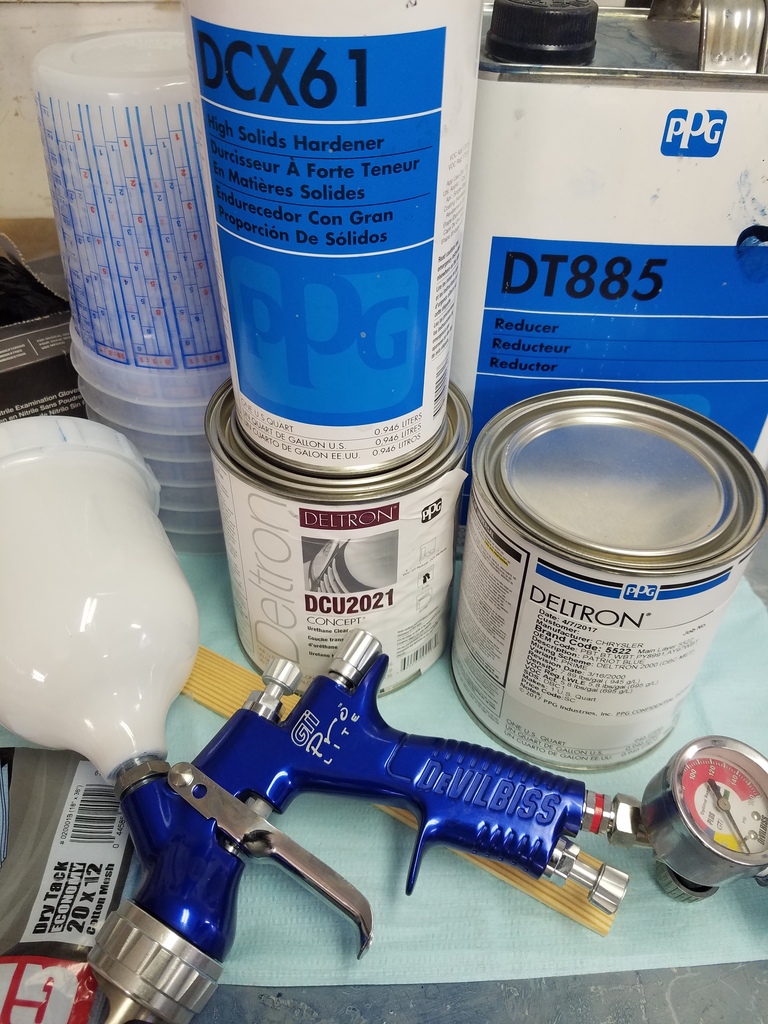
I've been using cheap ebay guns for the primers but for base and clear I will be using this baby right here Devilbiss Gti Pro lite T110 cap 1.2 mm nozzle. Im using ppg deltron 2000 some of the best stuff out there along with the deltron clear dcu2021.
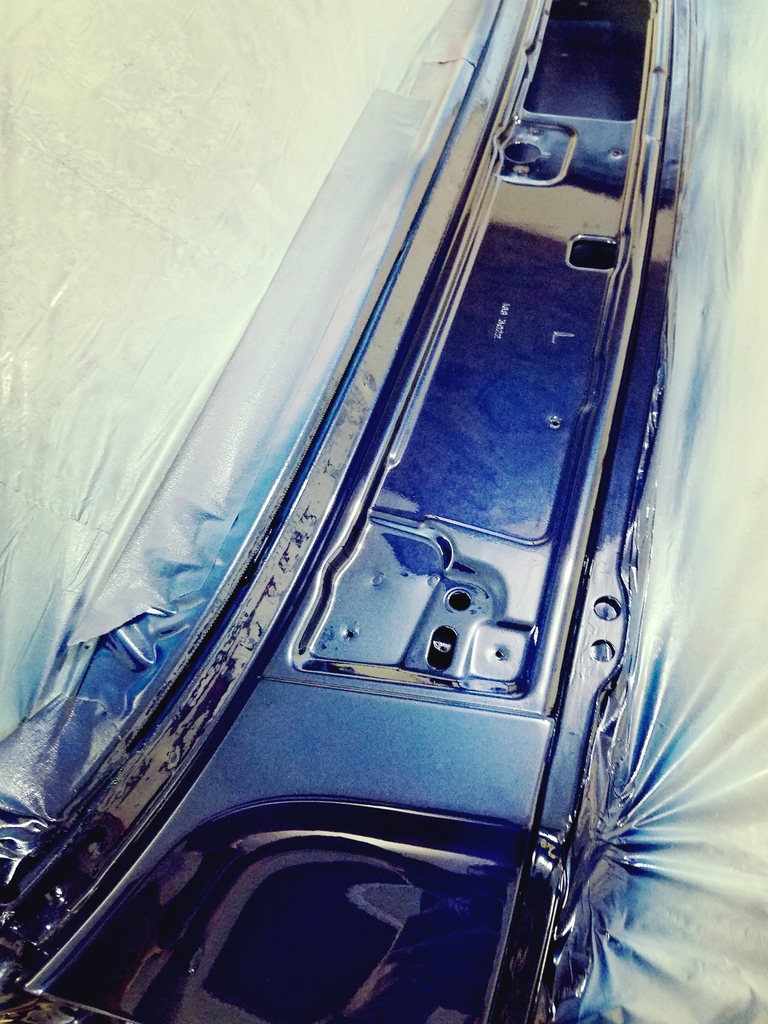
Wiper motor box came out good.
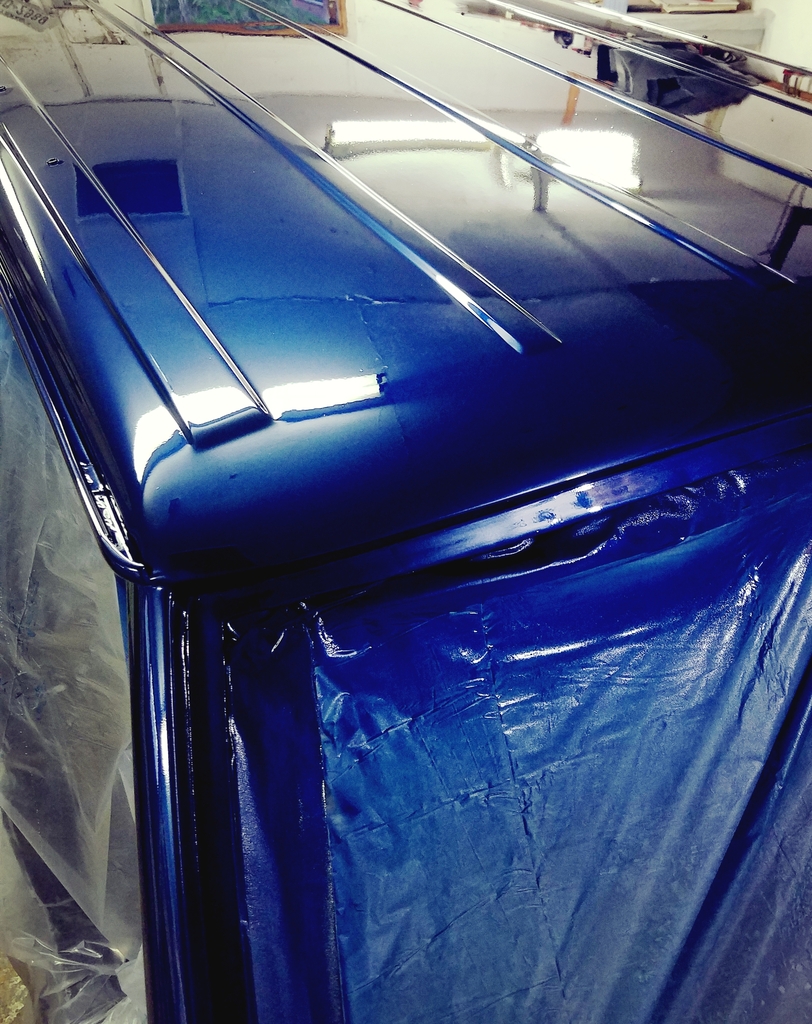
look at that gloss. If it wasnt for the stupid dirt nibs and two small insects. I would not even consider buffing it. I really loved how the clear flowed out leaving a factory style orange peel. Im spraying one light coat of base followed by three wet coats. Then 1 light coat of clear followed by two wet coats all with appropriate flash times in between.
When I did the passenger side I painted the hood with the same batch because I had mixed to much paint. I wont be doing that again. It was over whelming the shop couldnt handle all the paint cloud and my respiratory mask wasnt helping at all I was feeling terrible with a big headache I wanted to throw up. I seriously need to do something about this.
Its unbelievable how this turned out I can drive it fenderless.
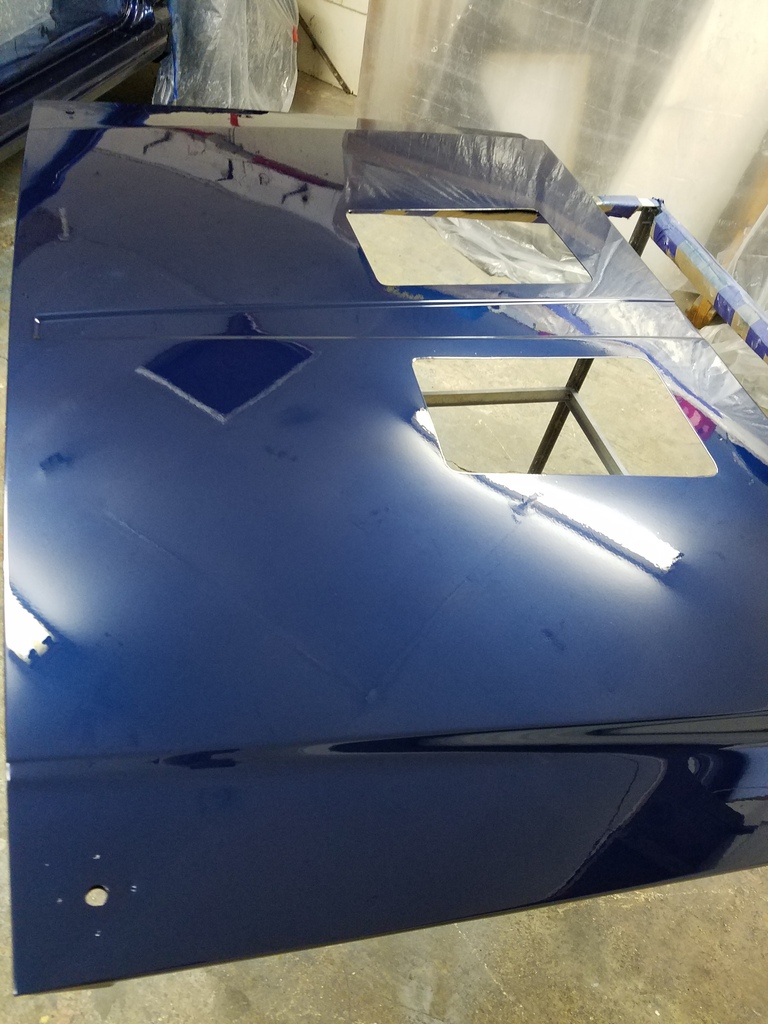
Eventually things wont always come out good. As you can see in this picture the hood looks good but with my critical eyes I can see fan marks on the hood plus on the 3rd coat of base some dirt nibs landed on the surface and I was dumb enough and attempted to sand them off with 2000 gritt I did get the dirt off but I messed up the arrangememt of the metallic flakes. That doesn't bother me much but the fan marks do. The hood deserves a session by its own. Painting too much makes me feel in a hurry and things will never come out good like that. Im 90% sure I will redo it.
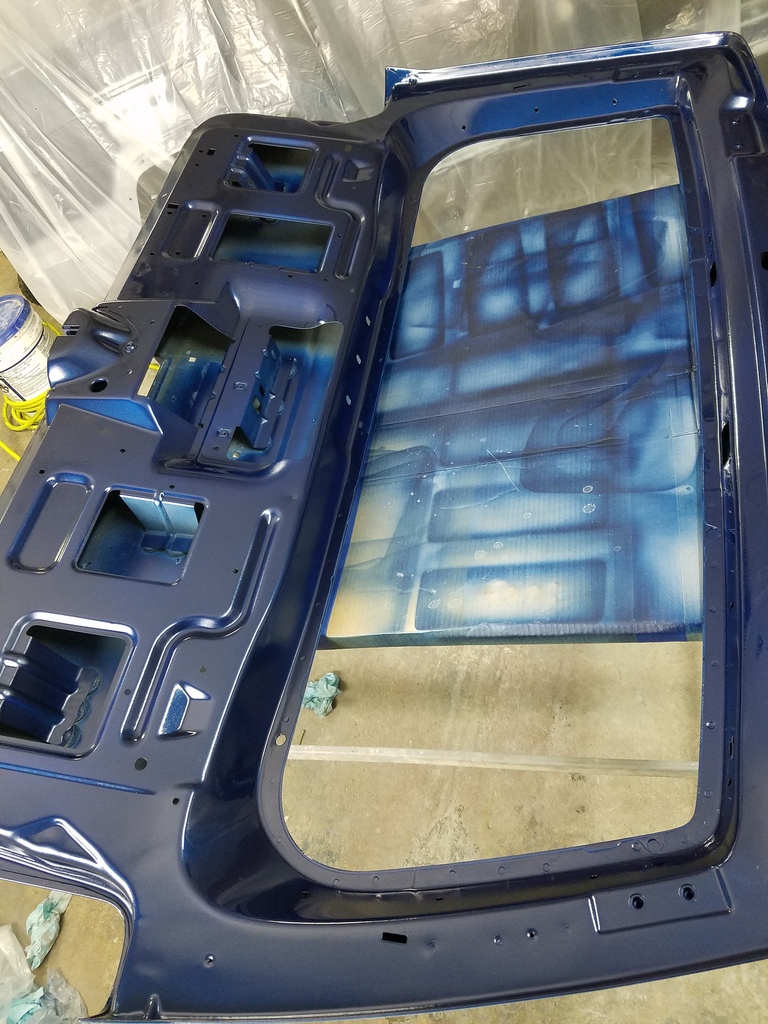
I painted the inside of the hatch and installed it. I will paint the outside while its on the Cherokee, should be an easy session; I hope.

I've been using cheap ebay guns for the primers but for base and clear I will be using this baby right here Devilbiss Gti Pro lite T110 cap 1.2 mm nozzle. Im using ppg deltron 2000 some of the best stuff out there along with the deltron clear dcu2021.

Wiper motor box came out good.

look at that gloss. If it wasnt for the stupid dirt nibs and two small insects. I would not even consider buffing it. I really loved how the clear flowed out leaving a factory style orange peel. Im spraying one light coat of base followed by three wet coats. Then 1 light coat of clear followed by two wet coats all with appropriate flash times in between.

When I did the passenger side I painted the hood with the same batch because I had mixed to much paint. I wont be doing that again. It was over whelming the shop couldnt handle all the paint cloud and my respiratory mask wasnt helping at all I was feeling terrible with a big headache I wanted to throw up. I seriously need to do something about this.

Its unbelievable how this turned out I can drive it fenderless.

Eventually things wont always come out good. As you can see in this picture the hood looks good but with my critical eyes I can see fan marks on the hood plus on the 3rd coat of base some dirt nibs landed on the surface and I was dumb enough and attempted to sand them off with 2000 gritt I did get the dirt off but I messed up the arrangememt of the metallic flakes. That doesn't bother me much but the fan marks do. The hood deserves a session by its own. Painting too much makes me feel in a hurry and things will never come out good like that. Im 90% sure I will redo it.

I painted the inside of the hatch and installed it. I will paint the outside while its on the Cherokee, should be an easy session; I hope.
Trending Topics
04-19-2017, 10:00 PM
#8
Member

Join Date: Jan 2017
Location: Anthem, AZ
Posts: 125
Likes: 0
Received 2 Likes
on
2 Posts
Year: 2001
Model: Cherokee
Wow! That's looking awesome!! Do you have some sort of ventilation rigged up for the shop? I've seen some use fans with furnace/ac filters for a make shift filtration system in a garage. Just a thought, it's better than nothing if you have that option.
04-19-2017, 11:25 PM
#9
Junior Member
Join Date: May 2015
Location: STL
Posts: 91
Likes: 0
Received 0 Likes
on
0 Posts
Year: 2001
Model: Cherokee
Engine: 4.0
Jeep is looking excellent! I want to try to paint mine someday,but i dont have any patience and im sure it wouldn't come out well. Cant wait til its all back together. Nice work!
04-19-2017, 11:31 PM
#10
Junior Member
Thread Starter
Join Date: Mar 2017
Location: Ft Hood
Posts: 46
Likes: 0
Received 0 Likes
on
0 Posts
Year: 2000 Sport
Model: Cherokee
Engine: 4.0
04-19-2017, 11:37 PM
#11
Junior Member
Thread Starter
Join Date: Mar 2017
Location: Ft Hood
Posts: 46
Likes: 0
Received 0 Likes
on
0 Posts
Year: 2000 Sport
Model: Cherokee
Engine: 4.0
Thanks! I did try using a/c filters on the windows but everytime I would paint I'd had to set them up and then take them off to close the shop. So it was a pain in the ***. However I did something I should've done since I started. Pvc booth!
04-19-2017, 11:48 PM
#12
Junior Member
Thread Starter
Join Date: Mar 2017
Location: Ft Hood
Posts: 46
Likes: 0
Received 0 Likes
on
0 Posts
Year: 2000 Sport
Model: Cherokee
Engine: 4.0
Thanks! I sometimes wish I didnt have any patience because of that I have been more than a year without my XJ. I was gonna pay 2,000 to get it painted supposedly professionally. Instead I decided to invest in the equipment and do it myself at my own pace. I once had a car painted and it was a total failure I got ripped off, the paint had fish eye all over; I was pissed. so I rather mess it up on my own and learn from my mistakes. At the end it will get bush whacked anyways so its all good.
04-20-2017, 12:03 AM
#13
Junior Member
Thread Starter
Join Date: Mar 2017
Location: Ft Hood
Posts: 46
Likes: 0
Received 0 Likes
on
0 Posts
Year: 2000 Sport
Model: Cherokee
Engine: 4.0
Yesterday I began rigging up a pvc booth. I built it inside the shop on a corner near a window. I used the window as the extraction point and on the opposite side i have four a/c filters. I really like how its turning out, I just have to finish a few more minor details and I'll give it a test.
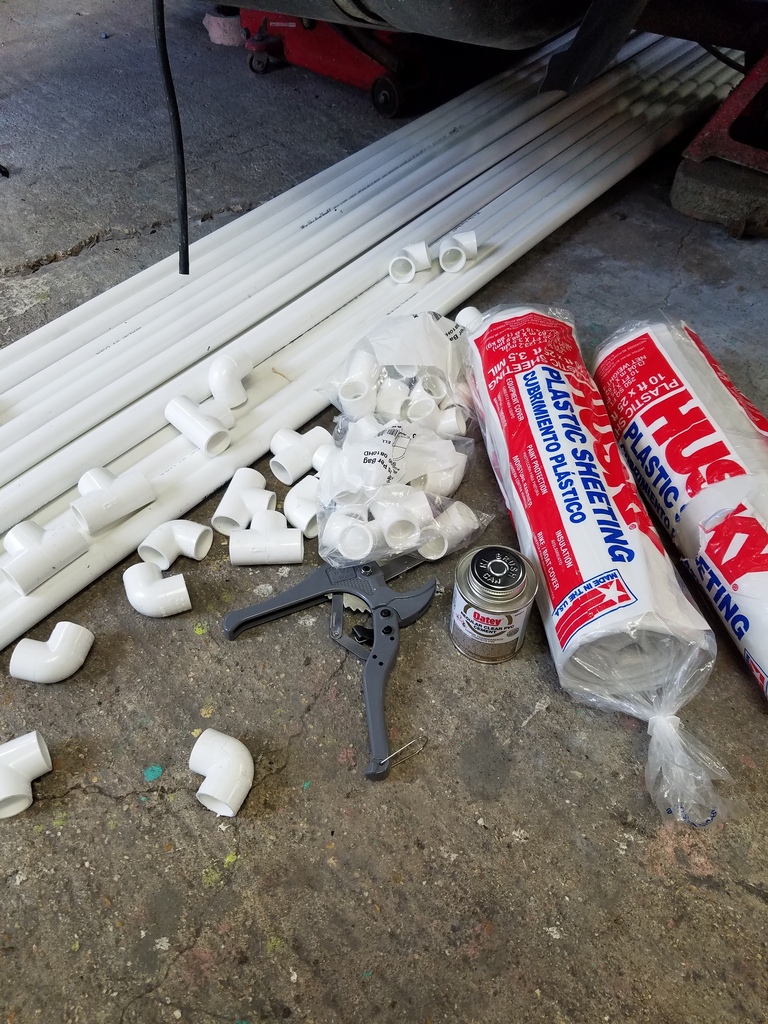
This was the first trip to the hardware supply out of three.
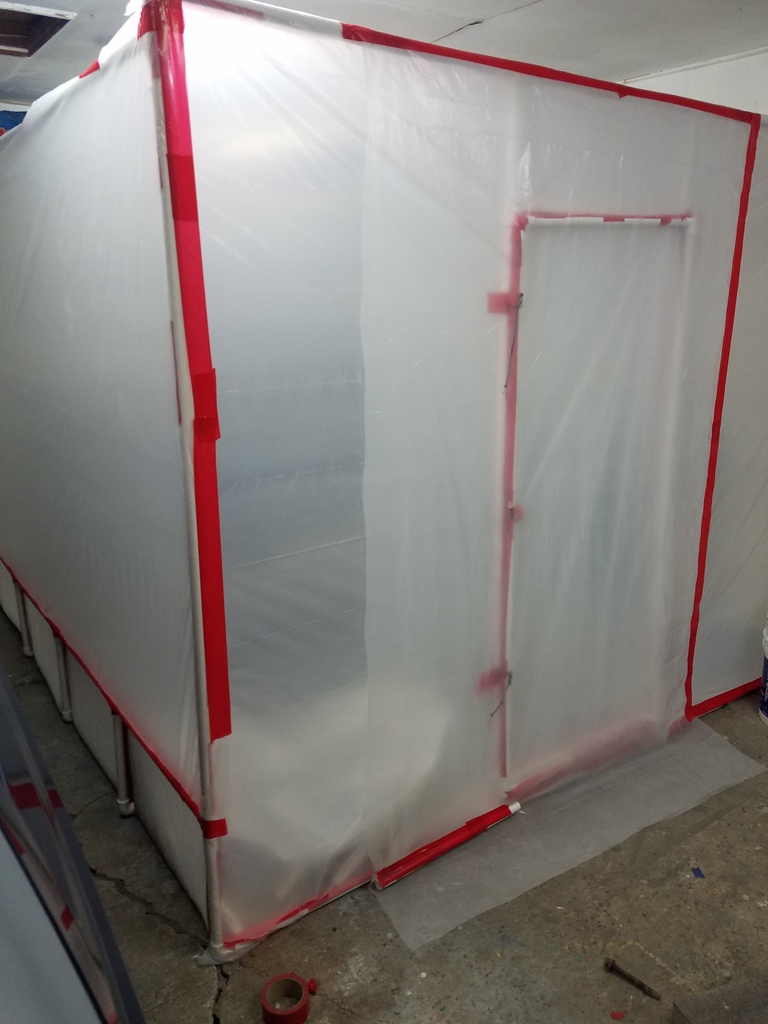
Notice the the left on the bottom is where I have the air intake. On that same side I plan to like attach the Cherokee to the booth and paint it. I hope that works. I made the door out of pvc and layed and extra plastic curtain over it for more protection.
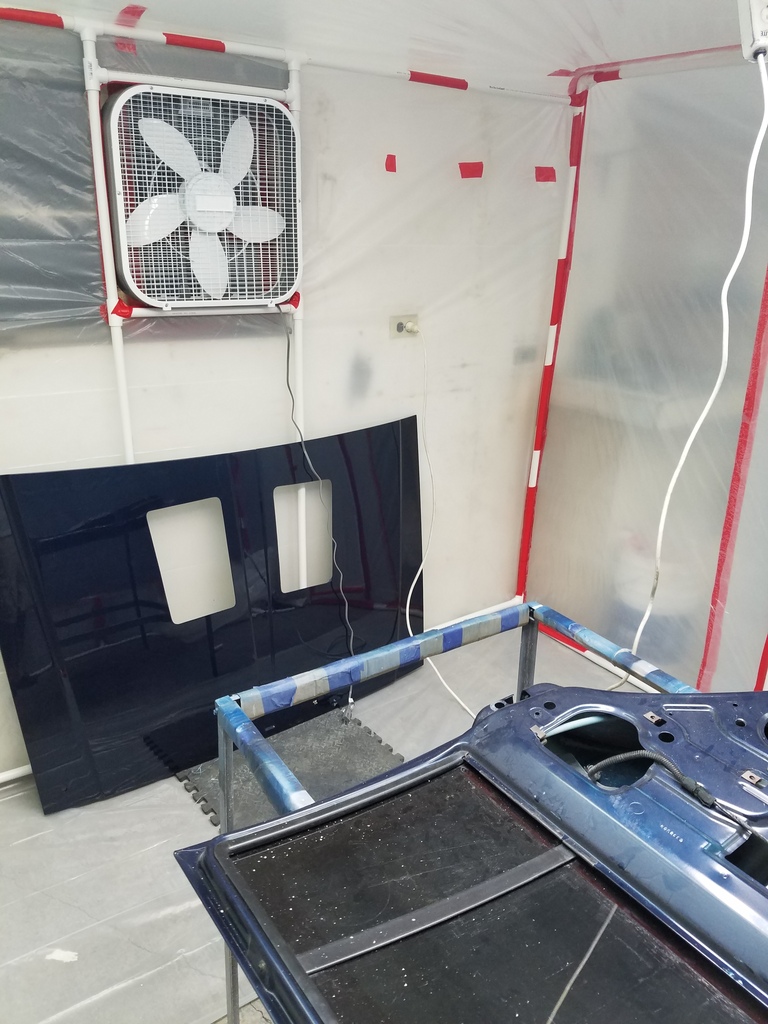
Notice how bright it is in there. Im gonna add an extra light fixture, one that I can move around inside the booth. I should be painting the inside of the right doors in the following days.