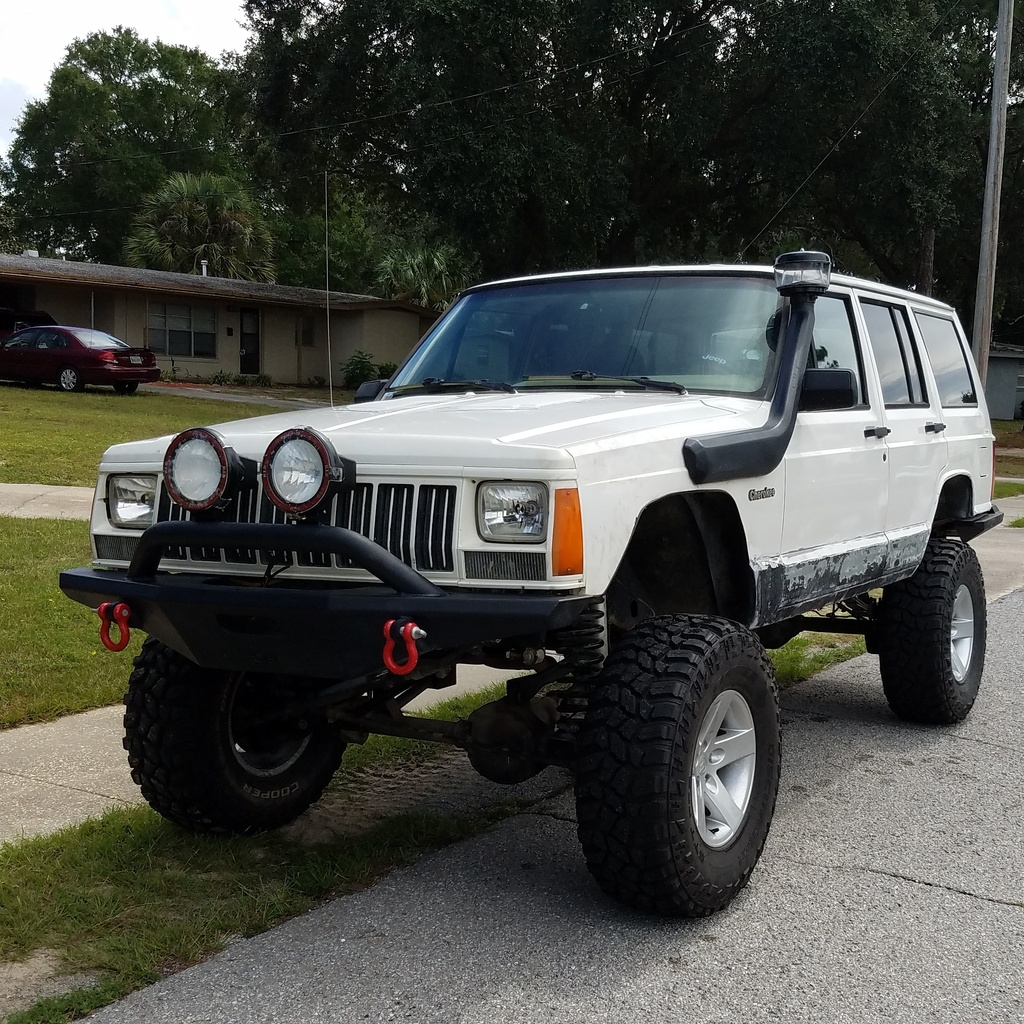
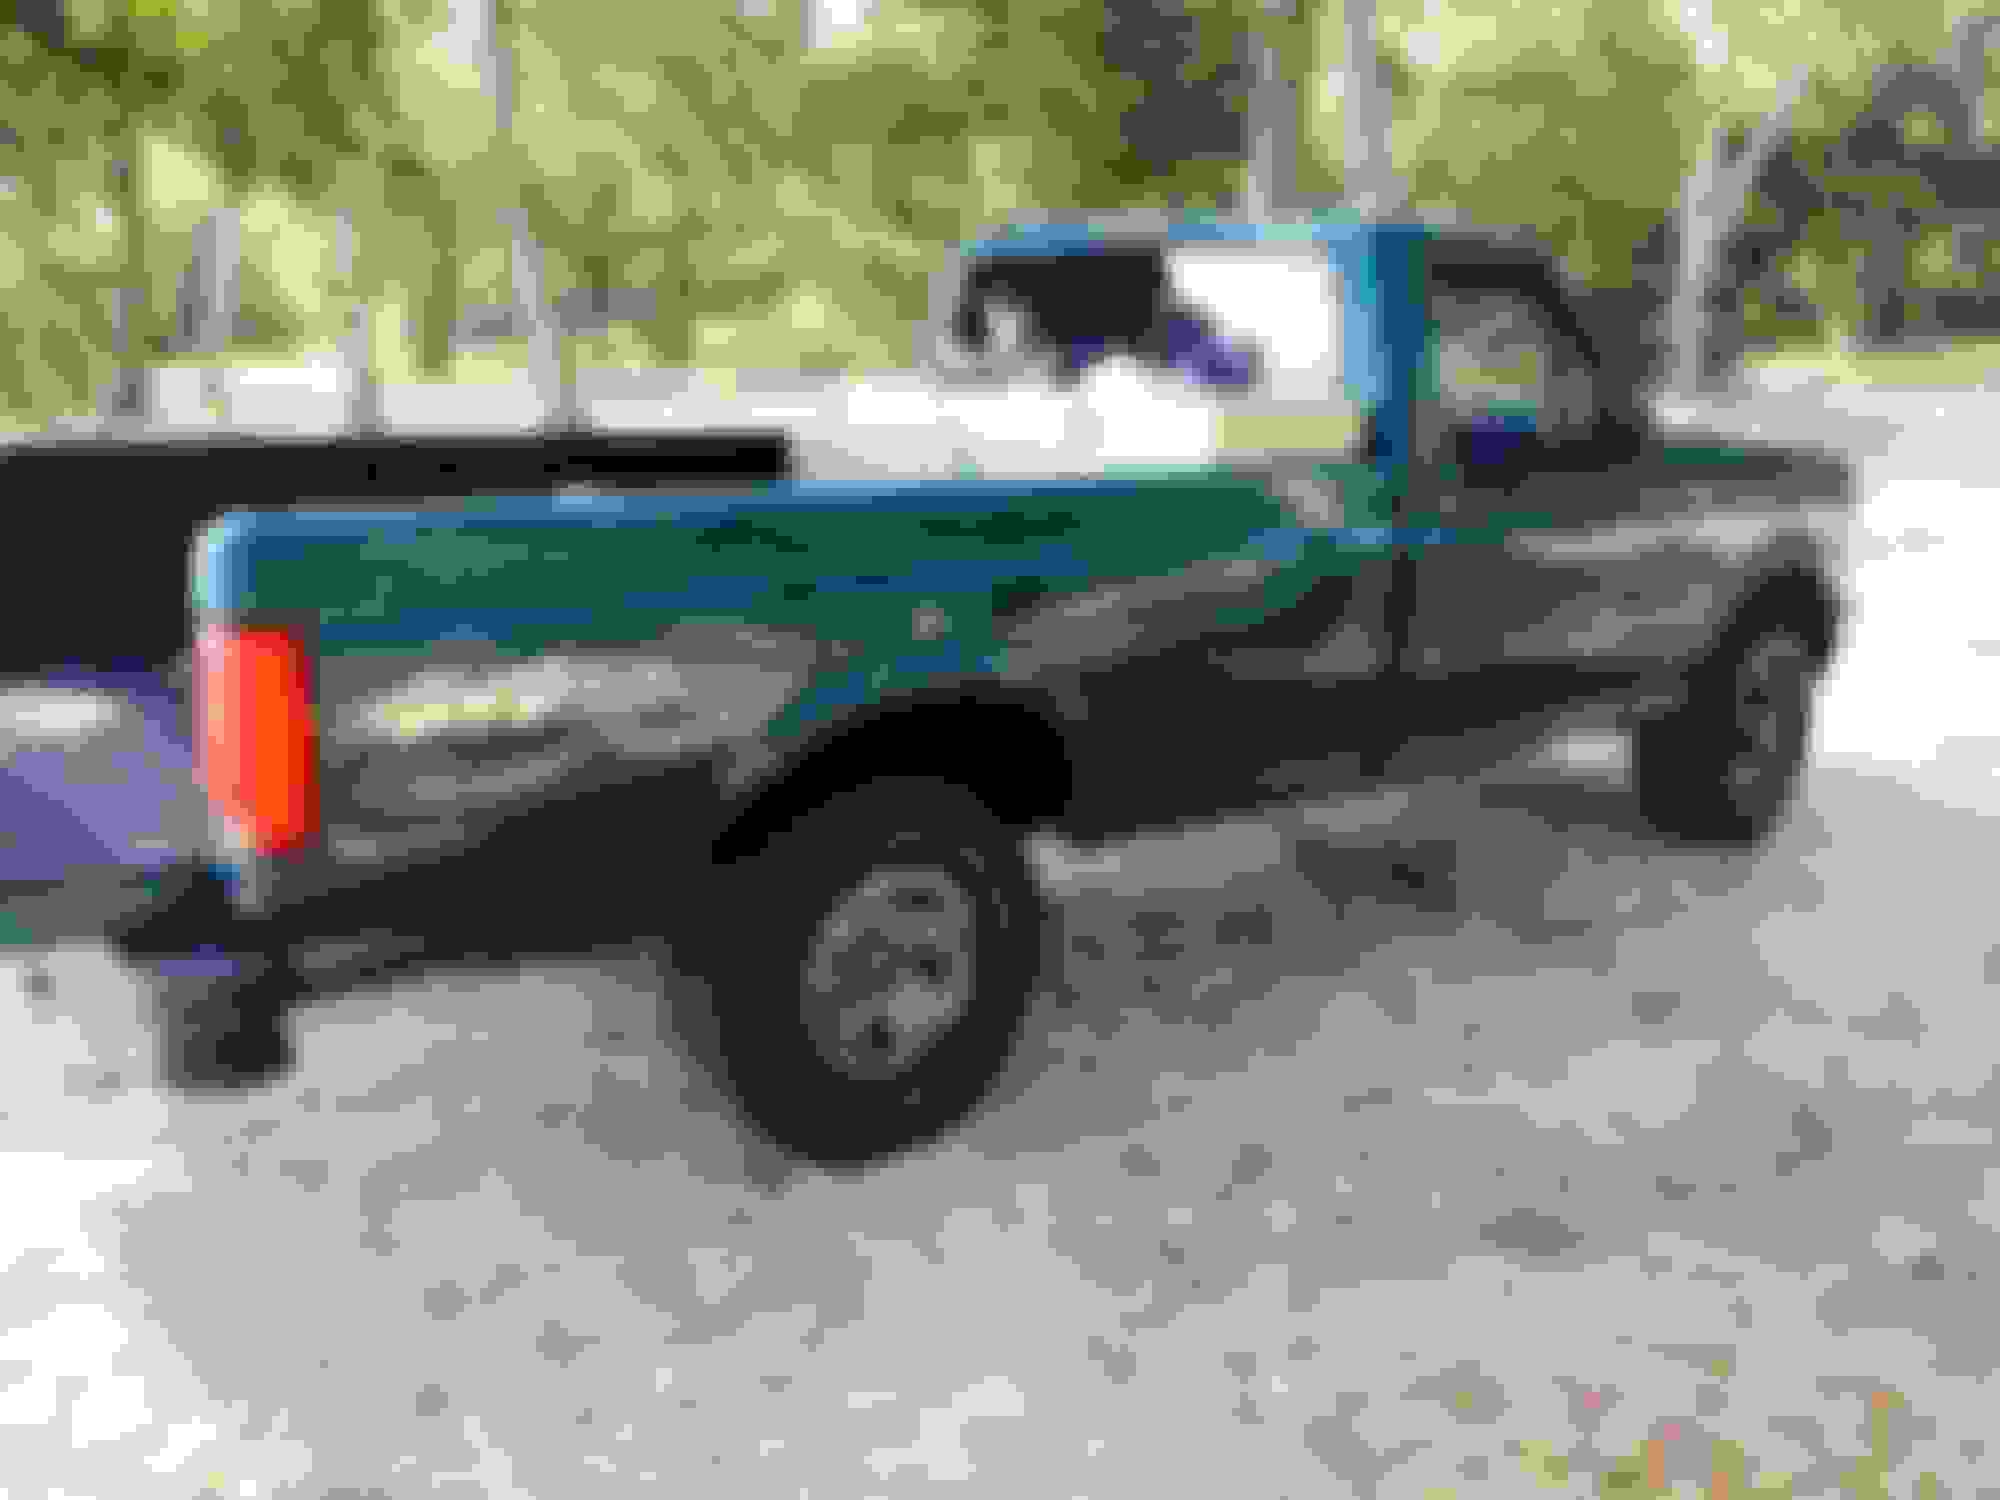
Well out of misfortune i ended up with my first jeep cherokee. I originally had a 1996 Ford F150 4.9 xl that i was building up slowly for camping,fishing and exploring. it was a base model manual trans,transfer case,hubs. very reliable and could pull a house. I was lucky enough to have dual tanks that worked with over 30 gal of fuel and a long bed. I did a full tuneup tires,stereo,herculiner,headlights, and brakes before having to sell it in less then a year. the reason i had to sell it is i was in a motorcycle accident that broke my right wrist. With my bike and my truck my only means of driving to work. the truck had to go. i luckily stumbled across a 1996 jeep cherokee country fully loaded with 194k miles and somehow everything worked for $2500. it only needed some tires. drove it a while then got a deal on some 235/76/r15s dealer revos. after that came the led gauge cluster which is still in work since the bulbs i found that work the best are 9 a piece.already installed the factory cupholder even though it had the passenger side holder. Also installed new water pump,thermostat,bluetooth head unit and it came with the roof soundbar.Randomly had the wife tell me the jeep was to quiet for me to drive so got a flow master super 40 installed. the goal is as follows
** Current Status waiting on fender flares and paint**
Project XJ Country
-3.5/4.5 lift with sye and driveshaft
-31/10.5r15
-power inverter
-winch bumper
-rear bumper with swing out tire carrier
-roofrack
-amber grill lights
-windshield pillar lights
-plenty of roof lights
-rock lights
-rtt?
-fishing rod holder
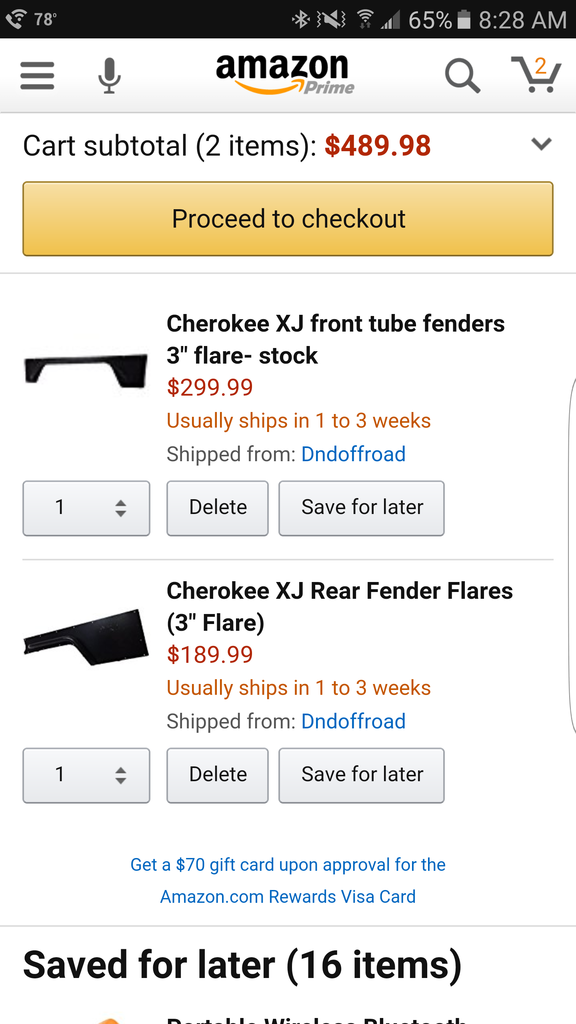
-bushwacker fender flares
-herculine undercarriage
-HO alt(mines currently randomly dropping to 12 volts and kicking gen light on)
-any other recommended mods
-snorkel or cowl intake
-hood vents
truck as I bought it
new 31/10.50
tires
fishing rack
2001 yamaha r1 day before the accident
broken scaphoid and torn ligaments
the jeep cherokee
interior isn't bad at all.front seats need covered
Small update. Finished led interior conversion except the cargo bulb. Also didn't swap the trans case or auto gear indicator since they were way to bright and blinding or blue with a hotspot
Well just ordered rampage h4 headlight kit,Cree 32" led lightbar,r uncool large hi flow louvered,Monroe self leveling shocks to get me by until iron rock 4" long arm kit next year and a full tuneup kit. Trimmed fenders and herculiner kit waiting for the rockers and bumpers in the garage
Got the shocks and headlights today. Installed the headlights. What a difference. Night and day. Still waiting on the putco harness to get here along with the led lightbar. Also soaking the the shock mount bolts longer. A bit paranoid about breaking a bolt
Front shocks are installed. Snapped all 4 upper rear bolts as expected. Drilled them out and put a bolt up through to a nut through the access window. Pain in the butt. Eventually going to drill through the floor and ream out the floor hole to fit the bolt from the top down to a bar pin eliminater. More then likely when I do the lift kit next year. Thinking about removing the messed up clear coat on my wheels and. Either polishing or re coating them. Also ordered the new Rough country steering stabilizer. Will bolt up they last rear shock today and post pictures and review the ride. Should be much improved as the old shocks I can easily compress by and and take about 20 minutes for the front to uncompress. And the rear stayed fully compressed. I'd say they are shot
I purchased from quadratec but they do not keep them in stock. As soon as you pay them it will say back order. Mine are still on back order but they emailed me and said it usually takes 5-7 days to get them and ship them. So should be shipping sometime this week.
Sits much better with the new shocks. Especially the load leveling coil overs in the rear
Just go the light bar just need to mount<br/> and wire it up
I do not have any before and after for the headlights but I will say it was an astounding difference. Well worth it in my opinion. Still need to install the harness. The lightbar is. 32 inch. Fyi with the light bar I had to drill through the bumper pads at an angle to go through the steel of the bumper it was an awkward fit and the cooling fins do press up against the grill. So if your worried about you would have to trim the fund or grill about 1/4 inch
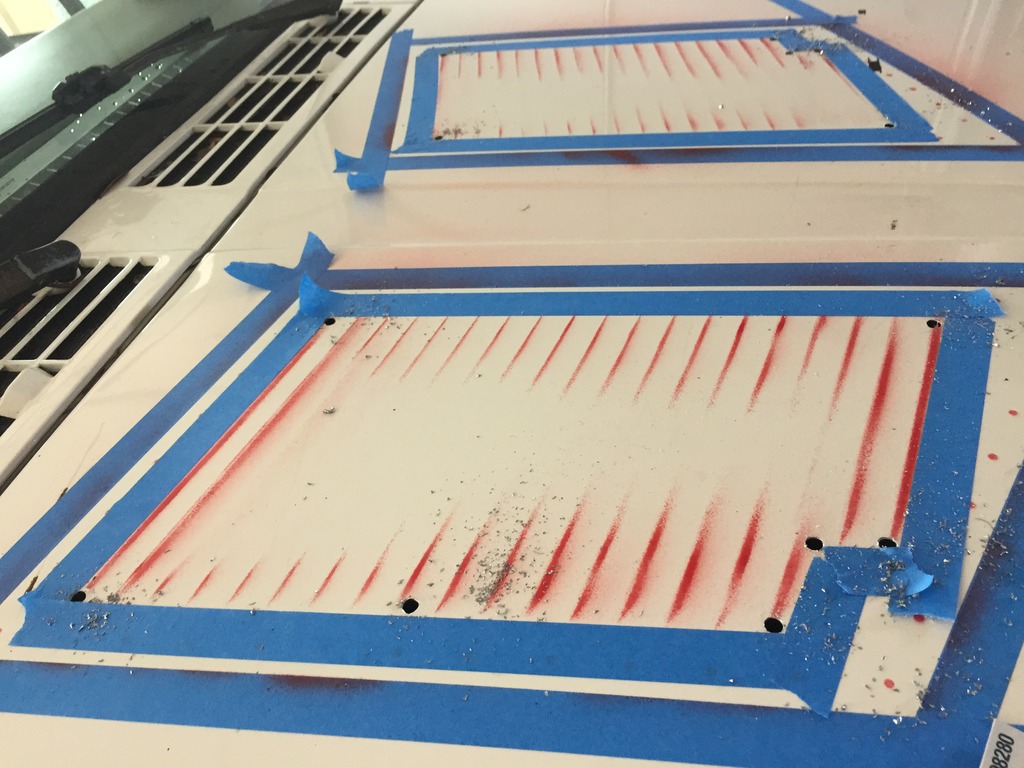
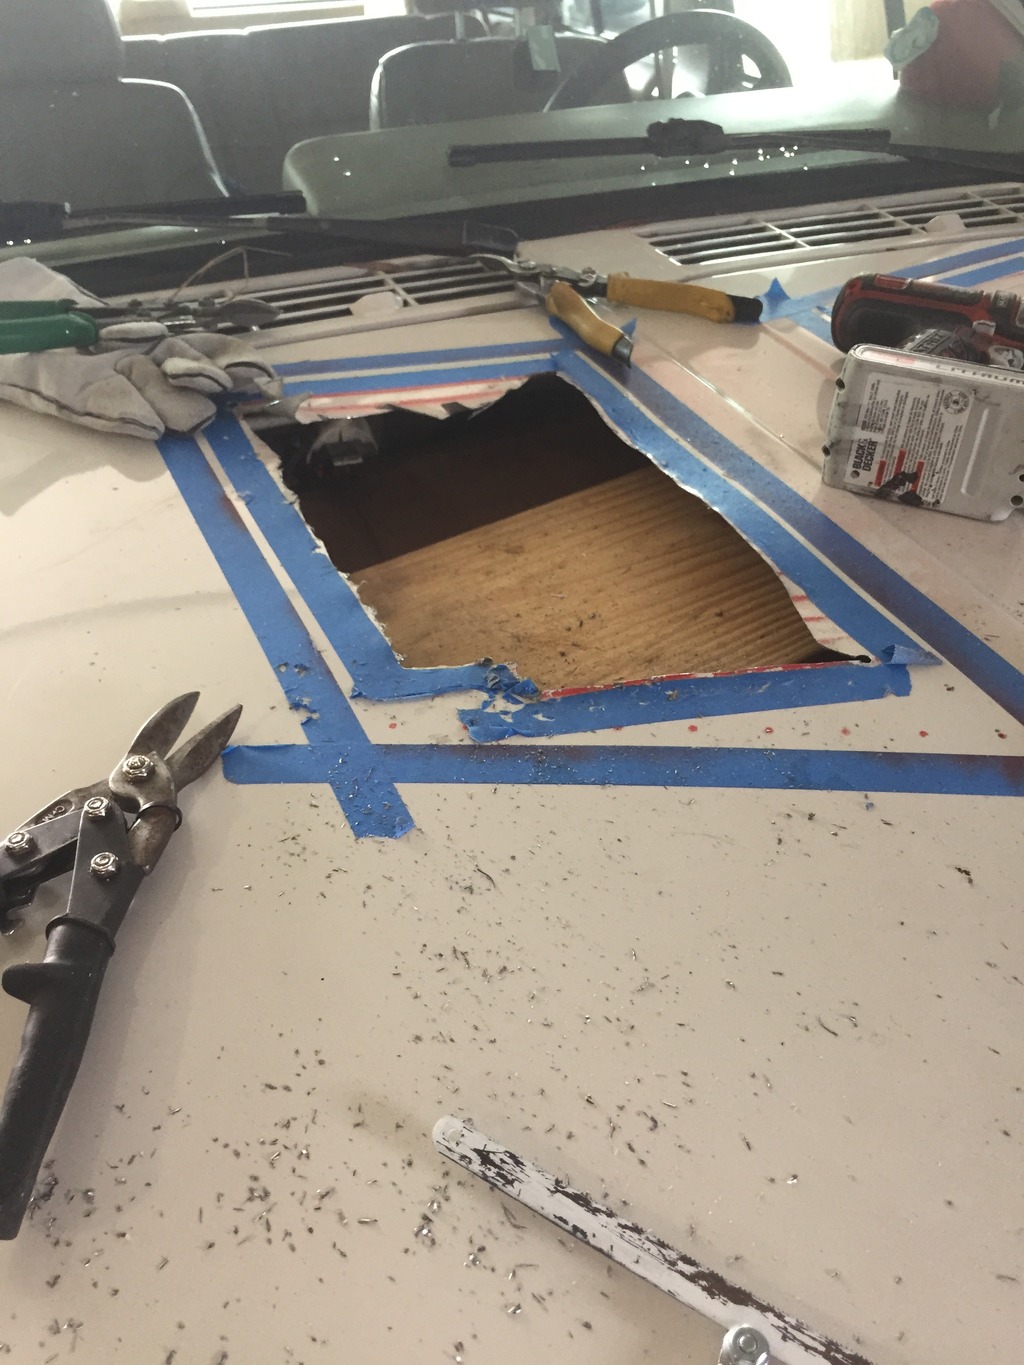
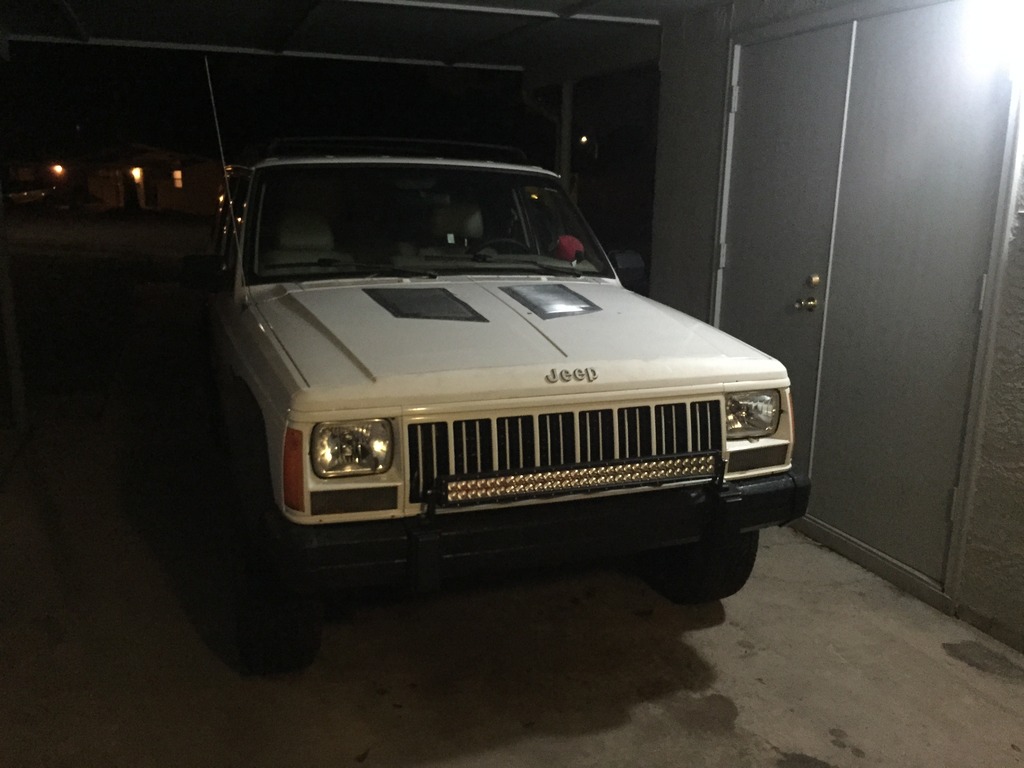
finished the hood louvers. the underside looks rough since i didn't have a jigsaw but it still gets the job done.i sprayed red plastidip on the louvers to mark the drilling and cutout spots since the louvers were plastic coated. then combo of chain drilling and sheetmvetal snips to remove the metal then filed the edges somewhat smooth and spray painted the edge before riveting it all down