'01 Jeep Cherokee Limited Build
 09-25-2012, 06:36 PM
#151
Senior Member
Thread Starter
Join Date: May 2011
Location: Paramus NJ
Posts: 747
Likes: 0
Received 1 Like
on
1 Post
Year: 2002
Model: Grand Cherokee
Engine: 4.7L HO V8
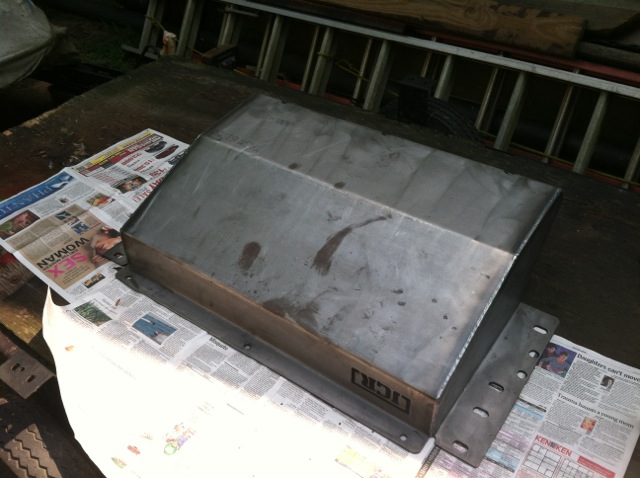
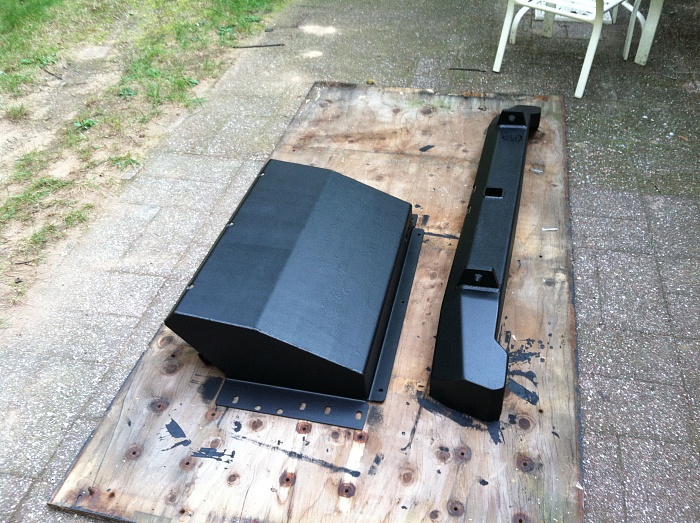
I bought a JCR Gas Tanks Skid and a rear bumper to match the front. They are both very beefy, and I will update the thread when I get them on. I painted them both with Rustoleum Roll On Bedliner.
Heres a pic of the Skid before I painted it:
And after bed-lining the skid and the bumper:
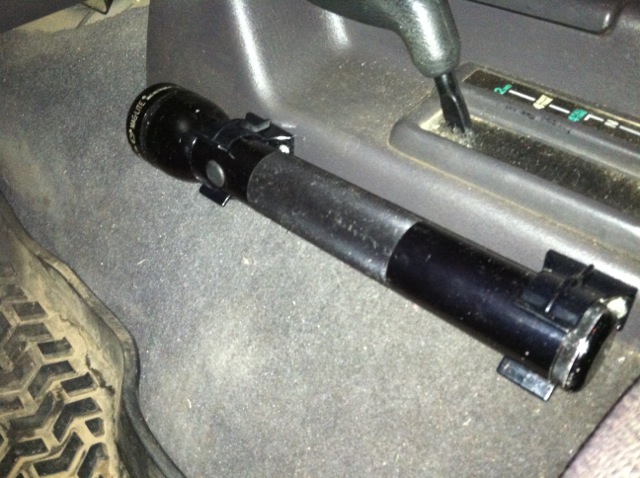
I also added a flashlight mount on the drivers side center console.
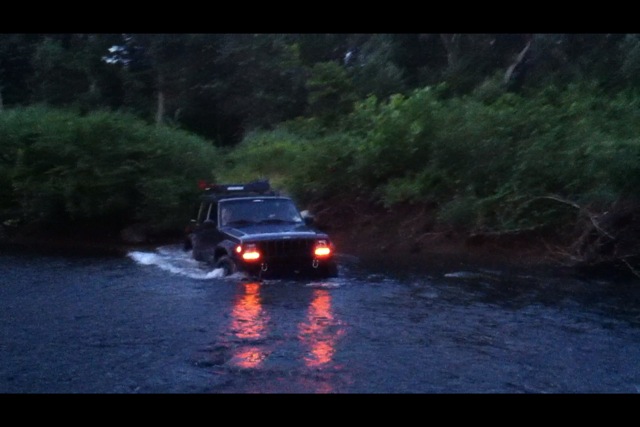
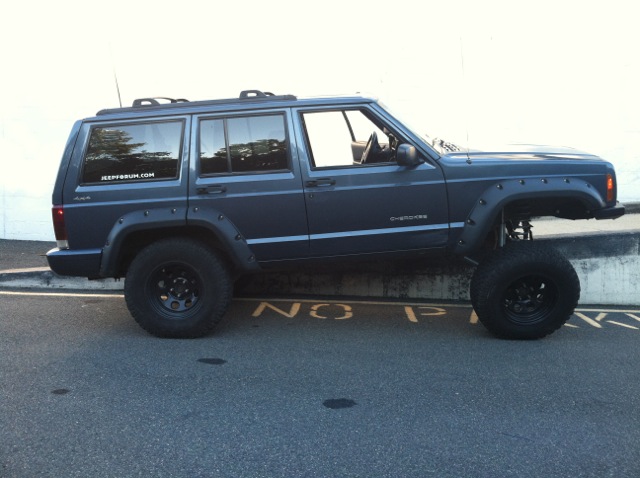
Heres just two cool shots I took. I removed the roof rack because I thought it would look better without it. I will add new pictures of my new lift kit and shocks tomorrow afternoon, when I am finished.
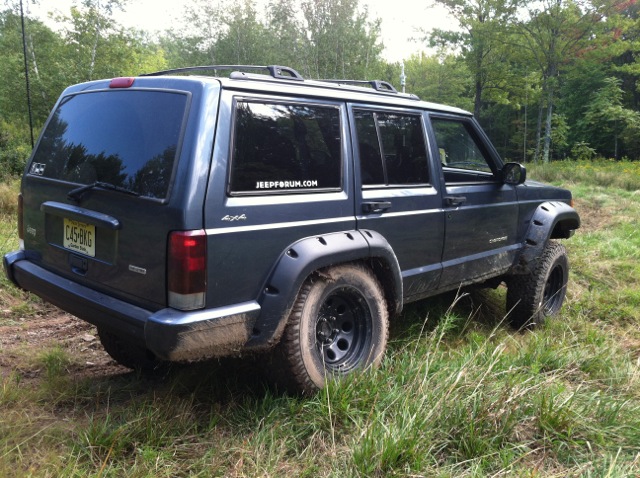
Driving through Ramapo River:
Heres a pic of the Skid before I painted it:
And after bed-lining the skid and the bumper:

I also added a flashlight mount on the drivers side center console.

Heres just two cool shots I took. I removed the roof rack because I thought it would look better without it. I will add new pictures of my new lift kit and shocks tomorrow afternoon, when I am finished.

Driving through Ramapo River:
 10-22-2012, 12:51 PM
#152
Senior Member
Thread Starter
Join Date: May 2011
Location: Paramus NJ
Posts: 747
Likes: 0
Received 1 Like
on
1 Post
Year: 2002
Model: Grand Cherokee
Engine: 4.7L HO V8
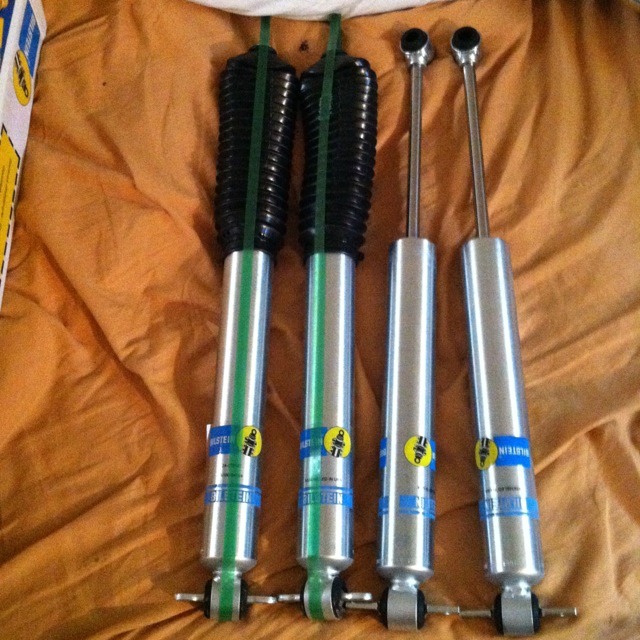
Hey guys, I havn't updated this thread in a while, so here it goes. I ordered a new lift. 3.5" Rubicon Express Superflex Kit, 4 Bilstein 5100 Shocks, and IRO Adjustable Trackbar. I decided to order this new lift, because the Rough Country one totally fell apart.
So i first started by taking all the old lift components out of the Jeep. Once that was done, I unboxed everything and Started putting the new stuff in.
Look how nice these Bilsteins look:
I then moved on to disconnect the track bar, and the drag link, so that i could fully drop the axle to put the new coil springs in. Heres a pic after we finished with the front coils and new shocks.
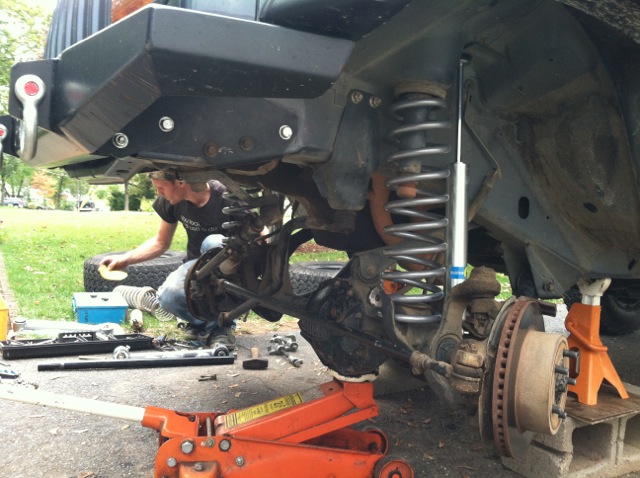
New control arms with the superflex end. I put these in next, very simple, just unbolting.

And the front end pretty much completed, besides the trackbar, which i did last.

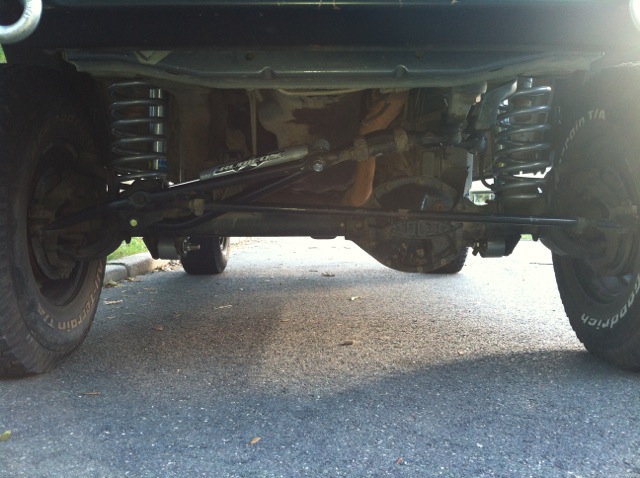
And another, after doing the trackbar, and steering stabilizer.
So i first started by taking all the old lift components out of the Jeep. Once that was done, I unboxed everything and Started putting the new stuff in.
Look how nice these Bilsteins look:

I then moved on to disconnect the track bar, and the drag link, so that i could fully drop the axle to put the new coil springs in. Heres a pic after we finished with the front coils and new shocks.

New control arms with the superflex end. I put these in next, very simple, just unbolting.

And the front end pretty much completed, besides the trackbar, which i did last.

And another, after doing the trackbar, and steering stabilizer.

Last edited by MudMann94; 10-22-2012 at 12:58 PM.

 10-22-2012, 01:09 PM
#154
Senior Member
Thread Starter
Join Date: May 2011
Location: Paramus NJ
Posts: 747
Likes: 0
Received 1 Like
on
1 Post
Year: 2002
Model: Grand Cherokee
Engine: 4.7L HO V8
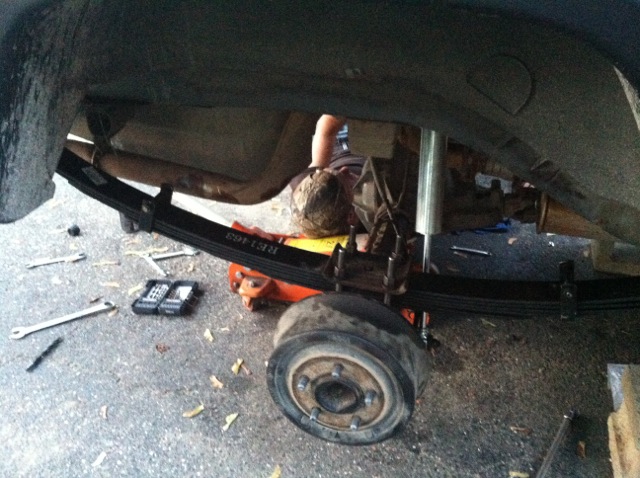
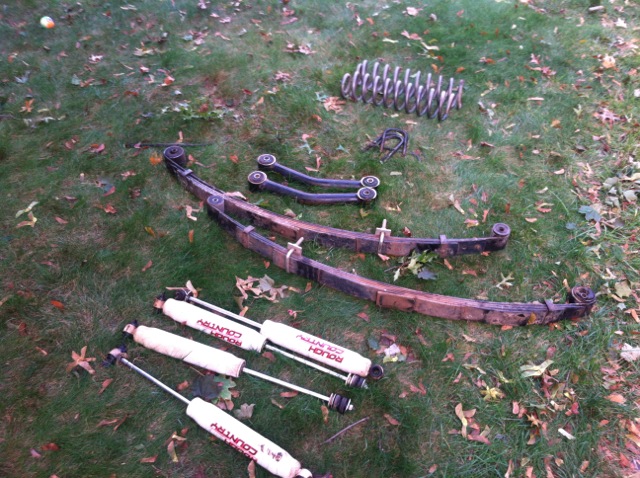
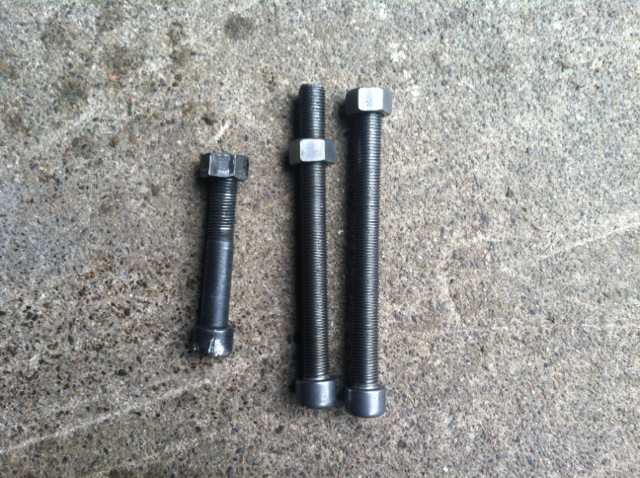
Next it was time to get started on the rear. I dropped the axle down unbolted the old shocks, and of course, the upper shock bolts snapped. I unbolted the leaf springs, and then gathered the new parts:
New Leaf-spring in:
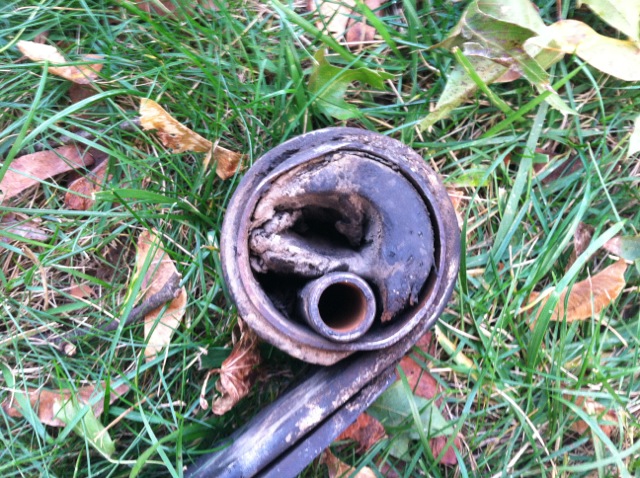
I then went to do the other side, and this is what i found, no wonder Rough Country is notorious for bad bushings, this lift hasn't even been in for a year yet...
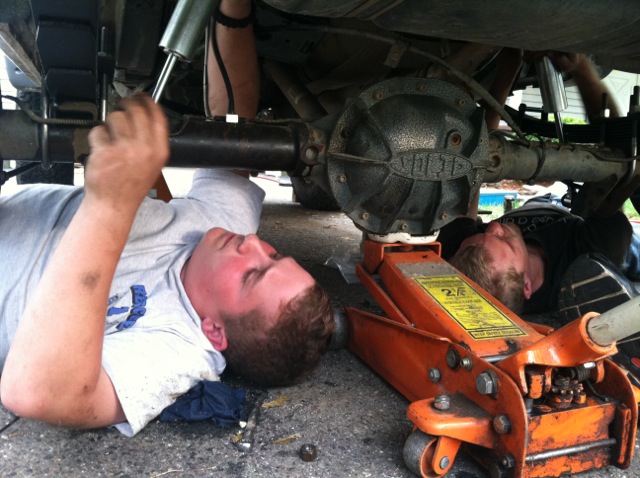
I then, with a help from a few friends, fished the shock bolts through the new holes, using new grade 8 bolts with a nut on the end. I had to do this for all 4 of them.
The last thing to do was put in the extended rear line, and then bleed the brakes:
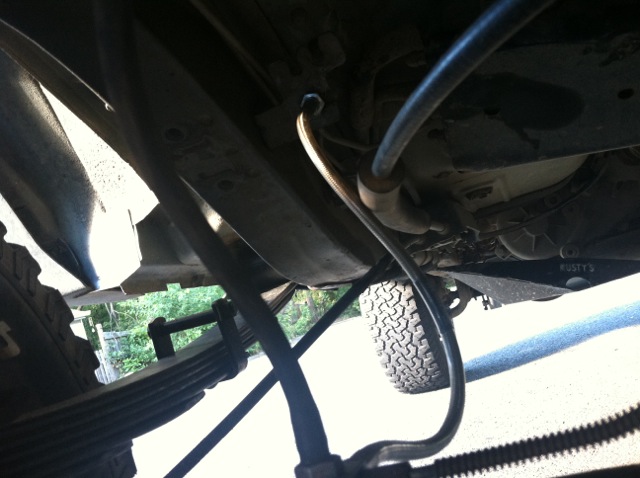
And a pic of the rear all done:
New Leaf-spring in:

I then went to do the other side, and this is what i found, no wonder Rough Country is notorious for bad bushings, this lift hasn't even been in for a year yet...

I then, with a help from a few friends, fished the shock bolts through the new holes, using new grade 8 bolts with a nut on the end. I had to do this for all 4 of them.

The last thing to do was put in the extended rear line, and then bleed the brakes:
And a pic of the rear all done:
 10-22-2012, 01:16 PM
#155
Senior Member
Thread Starter
Join Date: May 2011
Location: Paramus NJ
Posts: 747
Likes: 0
Received 1 Like
on
1 Post
Year: 2002
Model: Grand Cherokee
Engine: 4.7L HO V8
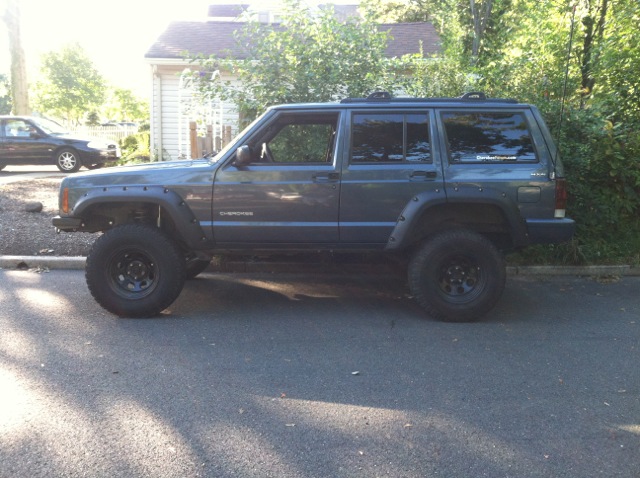
Of course I had to take a pic of it when it was done, so here it is the next morning:
I pile of the old Rough Country parts, such junk after not even a year
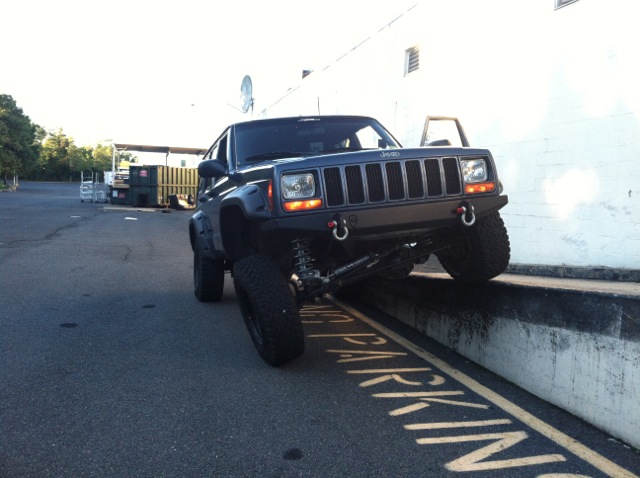
And some flex pics for the hell of it:
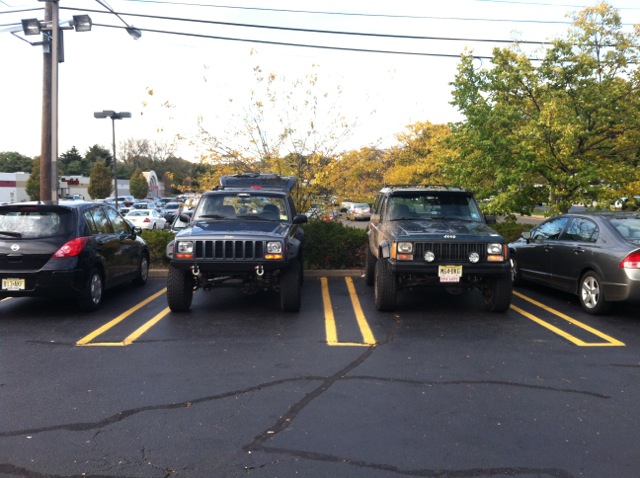
Heres a pic of me and my buddies Jeep with the same kit that I have.
Overall, I am very happy with the ride quality of this kit. It was definitely worth the extra cash for the Bilstein 5100s if you can afford it. I have really bad vibes so I decided to order the Iron Rock Offroad SYE Kit, and use a front CV Shaft. Stay tuned for an update on that.

I pile of the old Rough Country parts, such junk after not even a year

And some flex pics for the hell of it:
Heres a pic of me and my buddies Jeep with the same kit that I have.

Overall, I am very happy with the ride quality of this kit. It was definitely worth the extra cash for the Bilstein 5100s if you can afford it. I have really bad vibes so I decided to order the Iron Rock Offroad SYE Kit, and use a front CV Shaft. Stay tuned for an update on that.
10-22-2012, 01:38 PM
#156
Senior Member
Thread Starter
Join Date: May 2011
Location: Paramus NJ
Posts: 747
Likes: 0
Received 1 Like
on
1 Post
Year: 2002
Model: Grand Cherokee
Engine: 4.7L HO V8
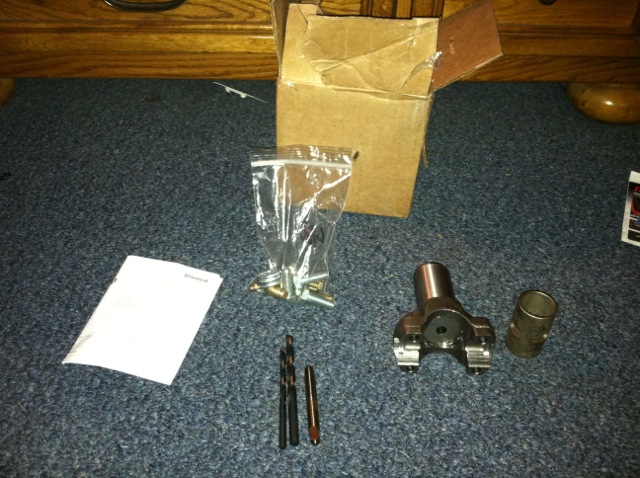
Vibes got real bad and I had some free time so i did my SYE/CV Shaft yesterday with help with a buddy. Here is what the kit comes with, a yoke, an IRO sticker which i already put on the Jeep, and the bolts and washers required for installation. I went the extra mile and I ordered the tap, the bits, and even the drill jig required for installation. It made the whole process easier.
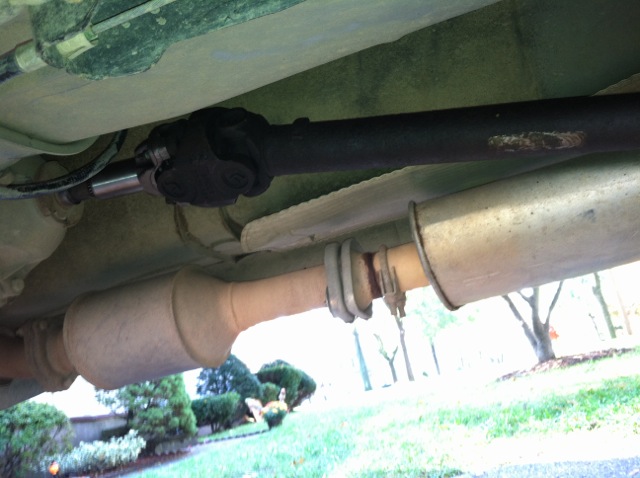
The first thing I had to do was take off my T Case Skid. After that was done, I unbolt the rear driveshaft from the rear yoke, and took the boot off my the transfer case and slid the driveshaft right off the slip yoke.
After that, It was time to mock up the whole assembly, and measure where to cut.
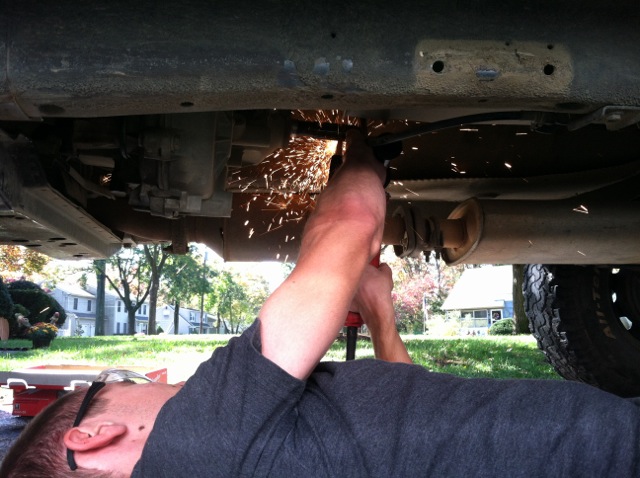
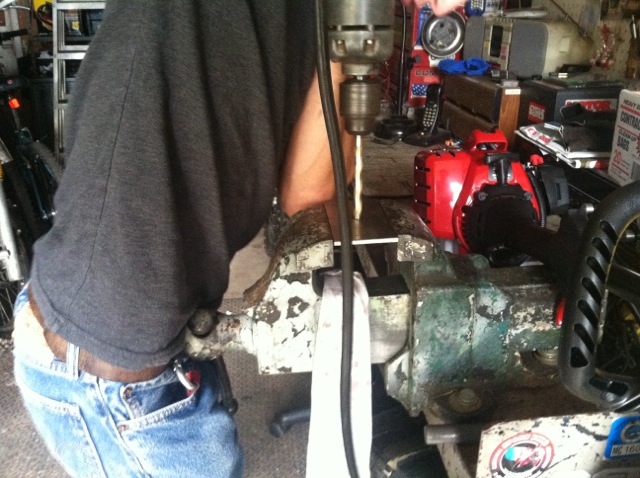
After measuring where to cut, we started cutting, we put the jeep in reverse so that it would be a nice clean cut. After that, we slid the jig on the shaft and drilled the 1/4 hole, followed by the 5/16 hole. Then proceeded to tap it.
The yoke was a bit too long so it had to be cut down 2 centimeters, I then slid it on and put the bolt in and proceeded to torque it down to 30 ft/lbs.

The first thing I had to do was take off my T Case Skid. After that was done, I unbolt the rear driveshaft from the rear yoke, and took the boot off my the transfer case and slid the driveshaft right off the slip yoke.

After that, It was time to mock up the whole assembly, and measure where to cut.
After measuring where to cut, we started cutting, we put the jeep in reverse so that it would be a nice clean cut. After that, we slid the jig on the shaft and drilled the 1/4 hole, followed by the 5/16 hole. Then proceeded to tap it.

The yoke was a bit too long so it had to be cut down 2 centimeters, I then slid it on and put the bolt in and proceeded to torque it down to 30 ft/lbs.
Last edited by MudMann94; 10-22-2012 at 01:47 PM.
10-22-2012, 01:46 PM
#157
Senior Member
Thread Starter
Join Date: May 2011
Location: Paramus NJ
Posts: 747
Likes: 0
Received 1 Like
on
1 Post
Year: 2002
Model: Grand Cherokee
Engine: 4.7L HO V8
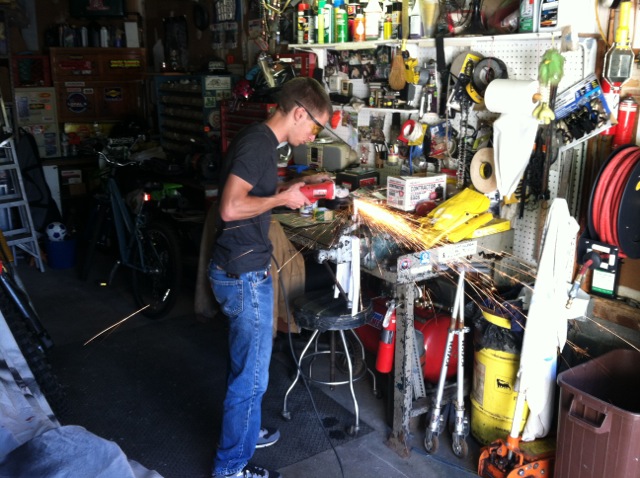
Heres my buddy cutting the yoke down with the angle grinder.
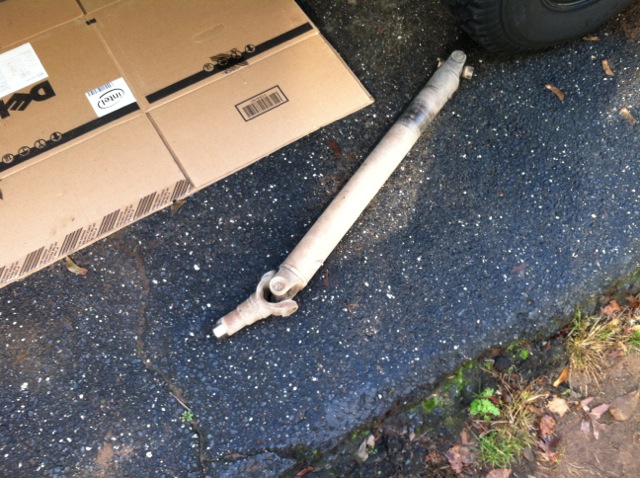
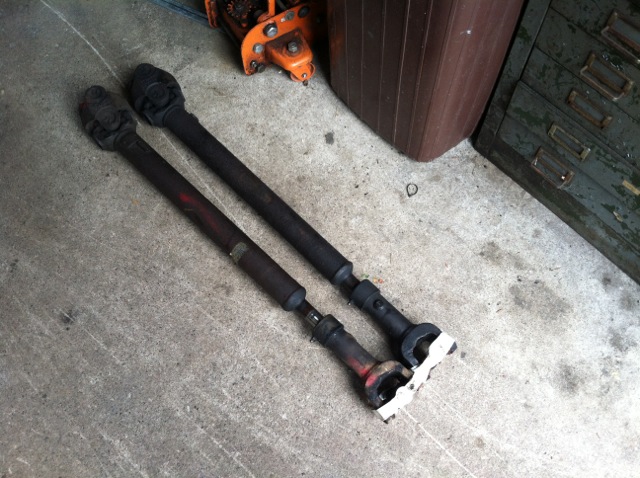
I had pulled two front driveshafts from XJs at the junkyard. I greased them up and replaced the U-Joints. I will use one for the SYE and one as a spare trail shaft.
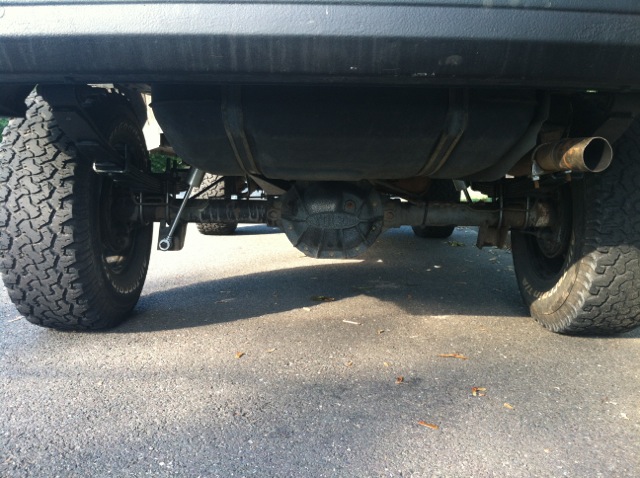
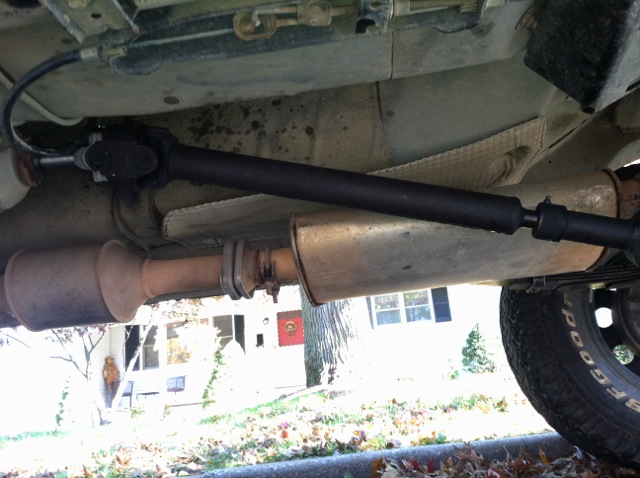
I then proceeded to bolt the driveshaft to the newly installed yoke, and onto the rear yoke on the axle. I made sure the driveshaft had enough splines showing at ride height. Here is a pic of it all done.
I took it for a test drive and most of the vibes are gone. I got out an angle finder and realized that im going to need a 4 degree shim to correct the pinion angle. I will install those as soon as they come in from Quadratec, along with new shackles for the rear.

I had pulled two front driveshafts from XJs at the junkyard. I greased them up and replaced the U-Joints. I will use one for the SYE and one as a spare trail shaft.

I then proceeded to bolt the driveshaft to the newly installed yoke, and onto the rear yoke on the axle. I made sure the driveshaft had enough splines showing at ride height. Here is a pic of it all done.
I took it for a test drive and most of the vibes are gone. I got out an angle finder and realized that im going to need a 4 degree shim to correct the pinion angle. I will install those as soon as they come in from Quadratec, along with new shackles for the rear.
 10-22-2012, 08:58 PM
#161
Senior Member
Thread Starter
Join Date: May 2011
Location: Paramus NJ
Posts: 747
Likes: 0
Received 1 Like
on
1 Post
Year: 2002
Model: Grand Cherokee
Engine: 4.7L HO V8
Thanks guys, I really appreciate it, I will keep you updated on everything, gunna do shims and shackles this week, put the rear bumper and gas tank skid on next week, and then new tires in a few weeks, stay tuned! 
10-23-2012, 01:40 PM
#162
Senior Member
Thread Starter
Join Date: May 2011
Location: Paramus NJ
Posts: 747
Likes: 0
Received 1 Like
on
1 Post
Year: 2002
Model: Grand Cherokee
Engine: 4.7L HO V8
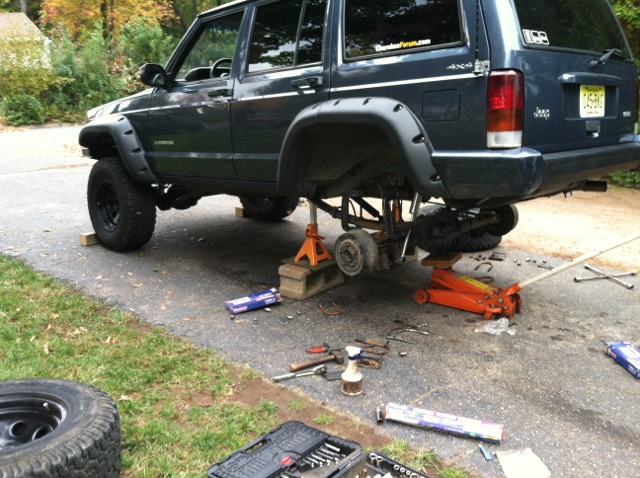
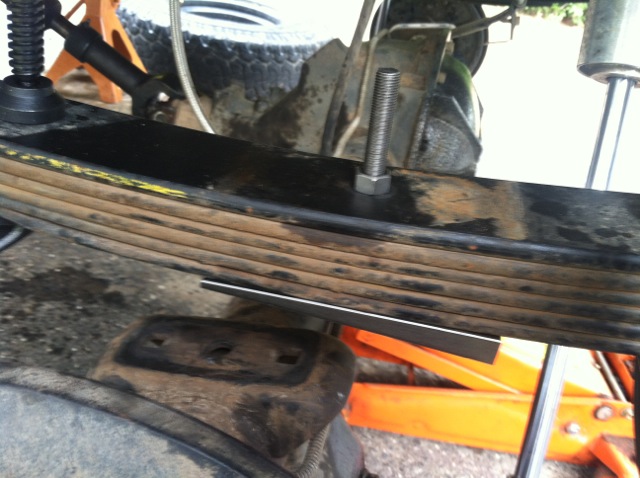
Ended up doing more work today on the Jeep. The rear shims came in today from Quadratec, so of course I had to put them in.  So I jacked the whole Jeep up first, then put it on jackstands. I lowered the axle down after the tires were taken off and disconnected the unbolts, letting the axle rest on the jack. I then proceeded to unbolt the center pin from the leaf springs. It came out nice and easy since the leaf pack is like 3 weeks old.
After that was out, I realized I forgot to order longer centering pins, so I went over to my local spring shop, and got me two of them for $4.25. The place is great, and its the same place I got my U-Bolts made. Very fast and helpful.
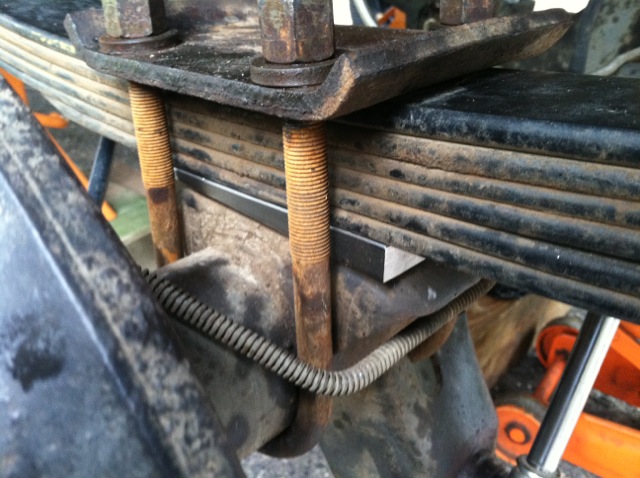
I had to drill out the hole on the shims to 3/8s because it was too small.
Heres the shim bolted up to the leaf pack, which i torqued down to 40 ft/lbs and then next shot is the whole thing completed. I did the exact same thing for the other side.
So I jacked the whole Jeep up first, then put it on jackstands. I lowered the axle down after the tires were taken off and disconnected the unbolts, letting the axle rest on the jack. I then proceeded to unbolt the center pin from the leaf springs. It came out nice and easy since the leaf pack is like 3 weeks old. 
After that was out, I realized I forgot to order longer centering pins, so I went over to my local spring shop, and got me two of them for $4.25. The place is great, and its the same place I got my U-Bolts made. Very fast and helpful.

I had to drill out the hole on the shims to 3/8s because it was too small.

Heres the shim bolted up to the leaf pack, which i torqued down to 40 ft/lbs and then next shot is the whole thing completed. I did the exact same thing for the other side.
 10-23-2012, 01:50 PM
#163
CF Veteran
Join Date: Jul 2009
Location: New Jersey (Milltown, Lavallette, and Wayne)
Posts: 2,245
Likes: 0
Received 1 Like
on
1 Post
Year: 1999
Model: Cherokee
Engine: 4.0L I6
How are your vibes doing after the shim?
I have a 4" setup dropped tcase and a 4* shim and it seemed to eliminate most of it but not at highway speeds of 70+
I have a 4" setup dropped tcase and a 4* shim and it seemed to eliminate most of it but not at highway speeds of 70+
10-23-2012, 01:55 PM
#164
Senior Member
Thread Starter
Join Date: May 2011
Location: Paramus NJ
Posts: 747
Likes: 0
Received 1 Like
on
1 Post
Year: 2002
Model: Grand Cherokee
Engine: 4.7L HO V8
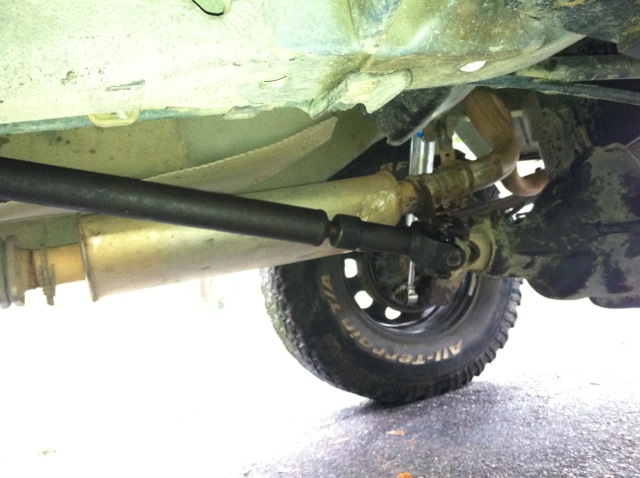
I took the Jeep for a drive down to the town, and all my driveline vibrations are gone. The pinion angle is near perfect, id say like 2 degrees lower. I havn't felt it drive like that since I first bought the Jeep. I am very amazed on how good the SYE/CV Driveshaft Combo works. Im going to get .75 Coil Spacers for the front, since the shims gave the back of the Jeep a 1/2 raise. Heres a pic of my new pinion angle.
10-23-2012, 01:56 PM
#165
Senior Member
Thread Starter
Join Date: May 2011
Location: Paramus NJ
Posts: 747
Likes: 0
Received 1 Like
on
1 Post
Year: 2002
Model: Grand Cherokee
Engine: 4.7L HO V8
I havent gotten a chance to take it on the highway yet, I will let you know later tonight when I check it out on the highway