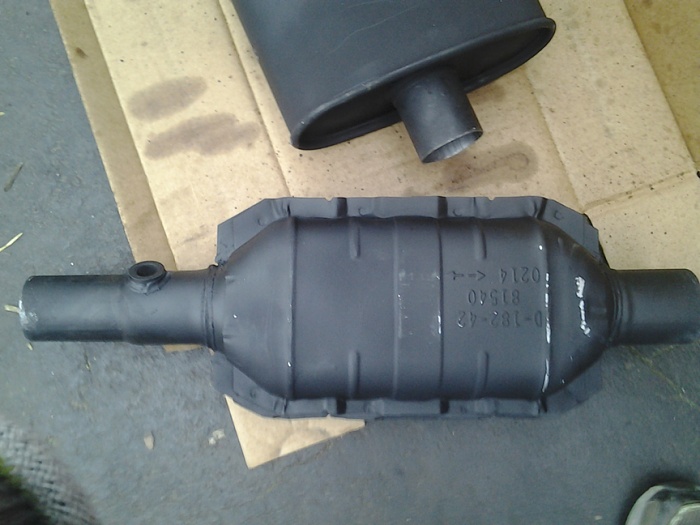
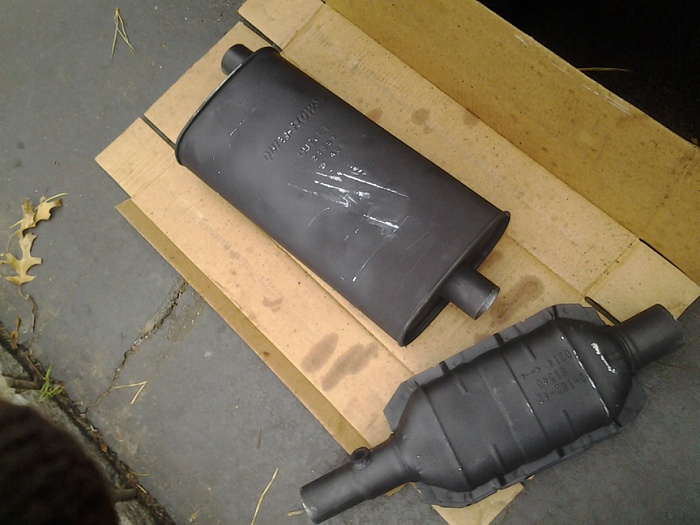
I went with the Walker Cat for NY, Quietflo muffler and exhaust pipe. Painted them with VHT flame proof primer and paint. PITA to apply and chips real easy. Hopefully it ads some life to the parts.
Everything went fine, cut out the old cat and muffler, tail pipe fell off.
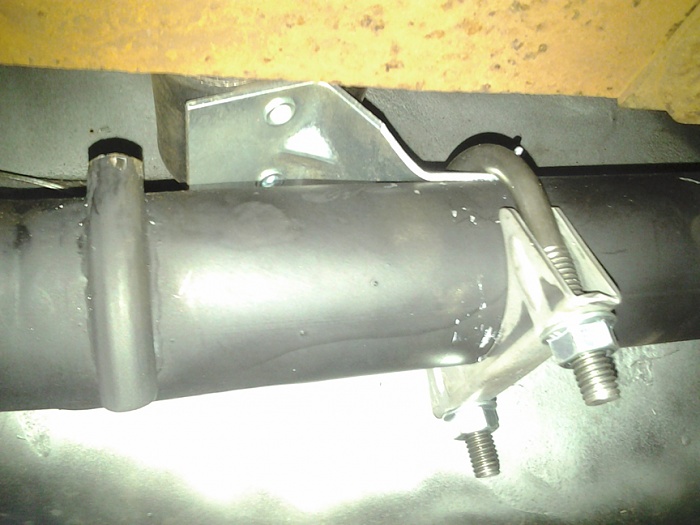
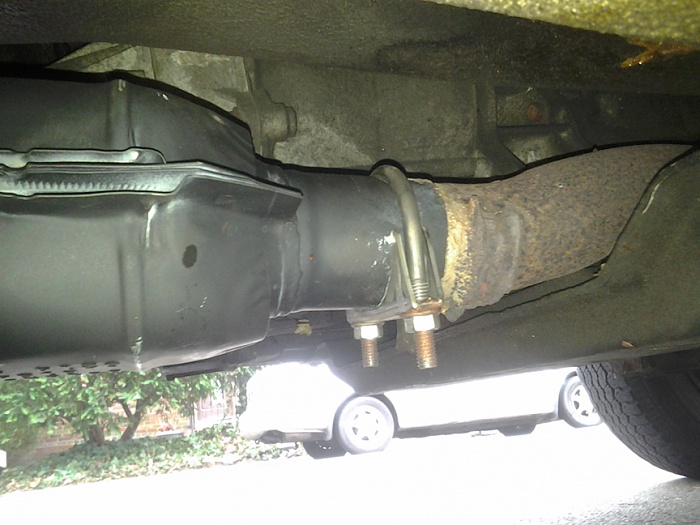
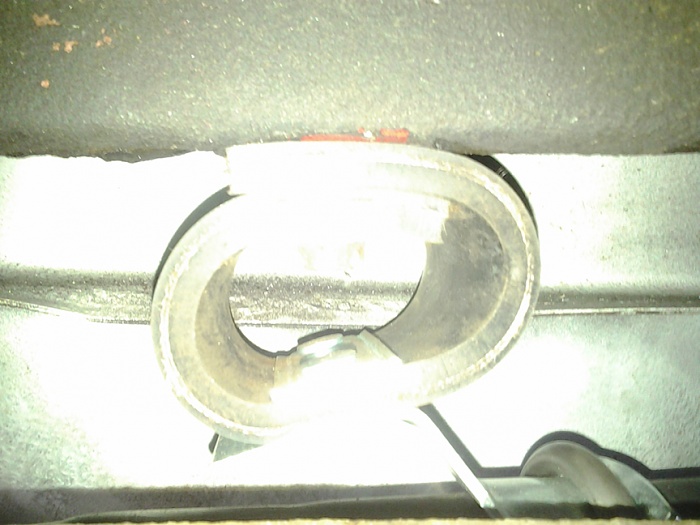
New ones went on fine. I put Anti seize copper between the parts and new clamps.
Sounds real good now and has more power and pickup as the old cat was clogged badly.
But I get a low rattle at times when idling in Drive or Reverse and not moving. Does not do it in Neutral or Park. I checked the run from front pipe to tail pipe and nothing is rubbing.
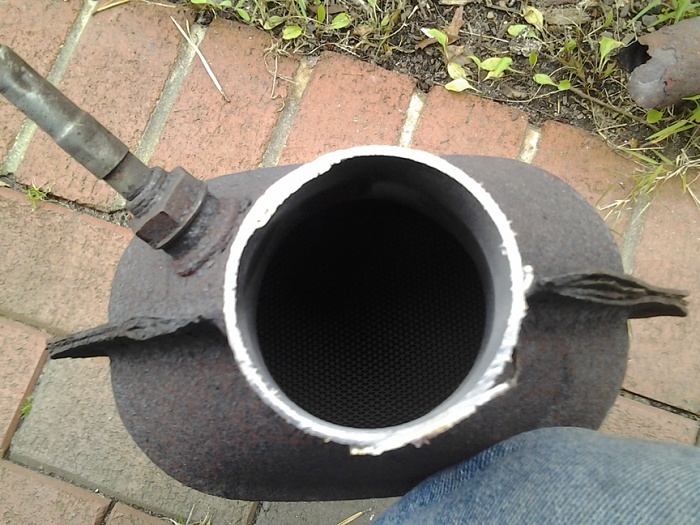
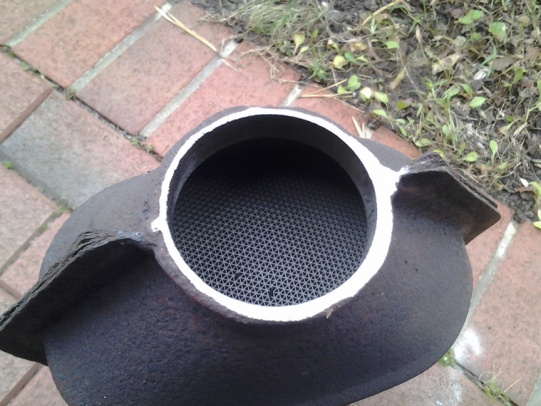
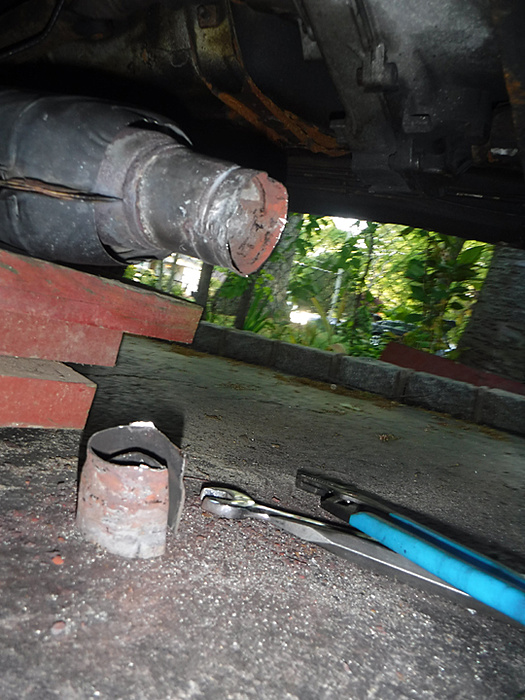
Here's the old cat. Honeycomb was dropping gray dust and rattling. Tried looking through it and nothing. Oxygen sensor is on real tight. Tried moving it with a big wrench just to see how tough it was, and could not even nudge it. Gave up that experiment real quick.
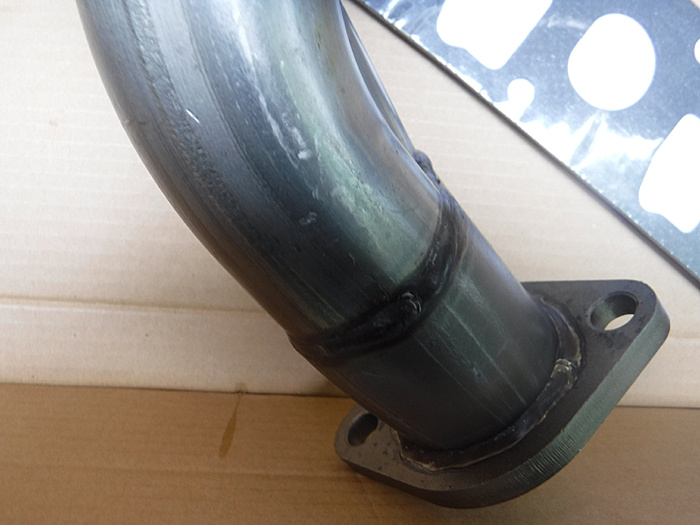
Thought I would update this thread with the change of the old, cracked exhaust manifold and downpipe.
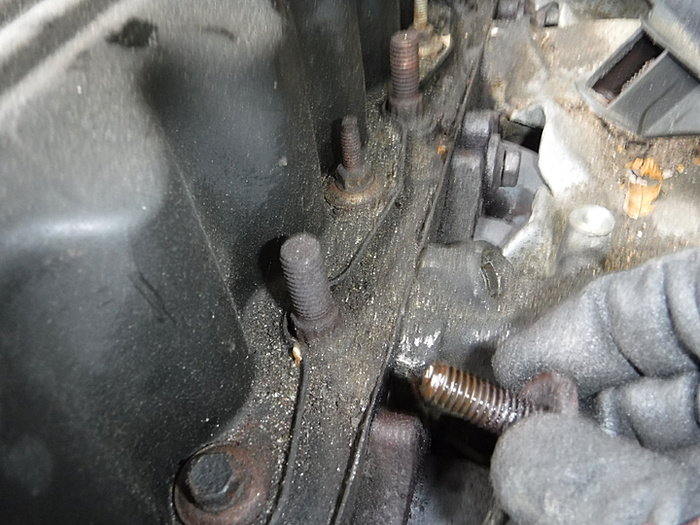
I started 2 weeks prior by spraying PB blaster on all the bolts every day. Using the plastic sheathing from 12 gauge electrical wire really helps to make an extension to reach the hard to reach bolts. You can see the oil really penetrated. They all came out with no issues, including the studs.
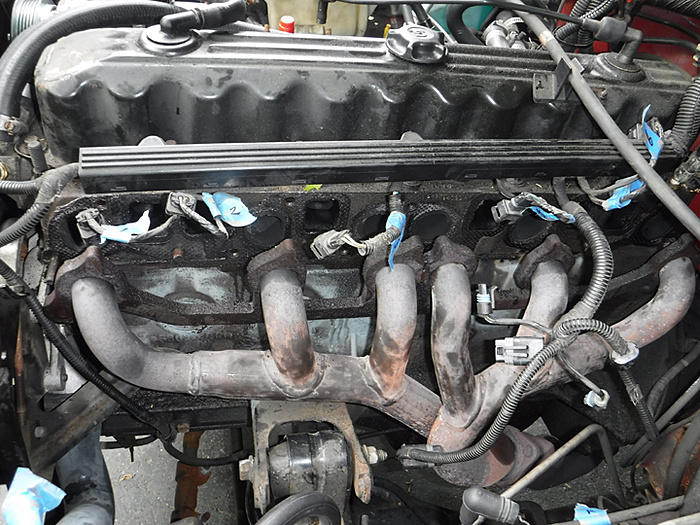
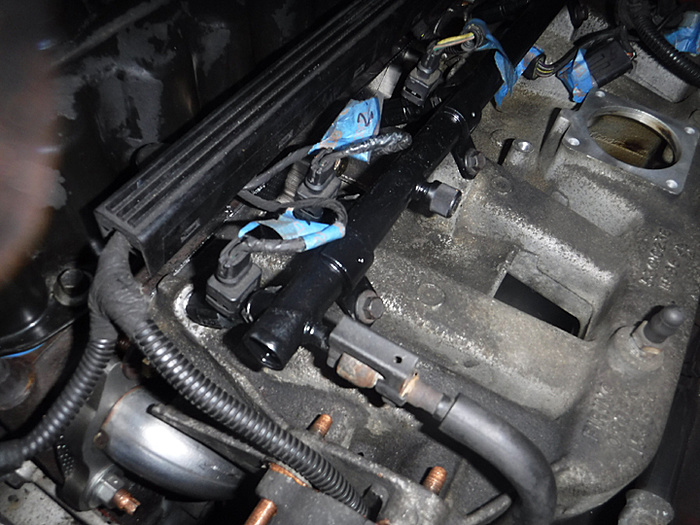
The injectors and the injector holes on the manifold side were really dirty.
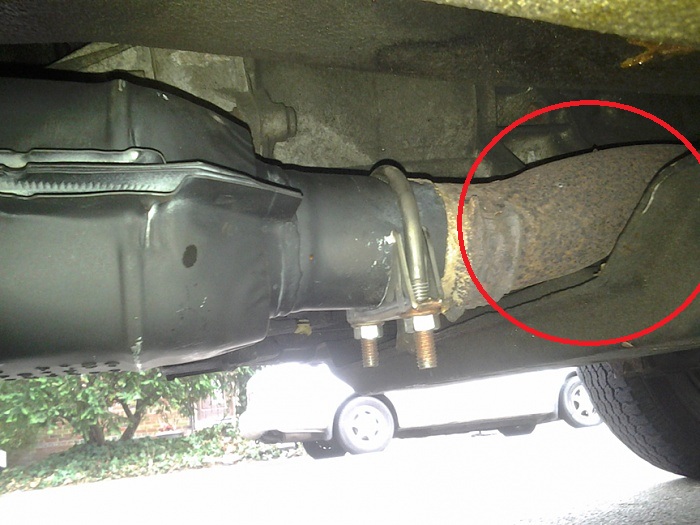
I had to cut the downpipe to get it off. It was pretty rusted out.
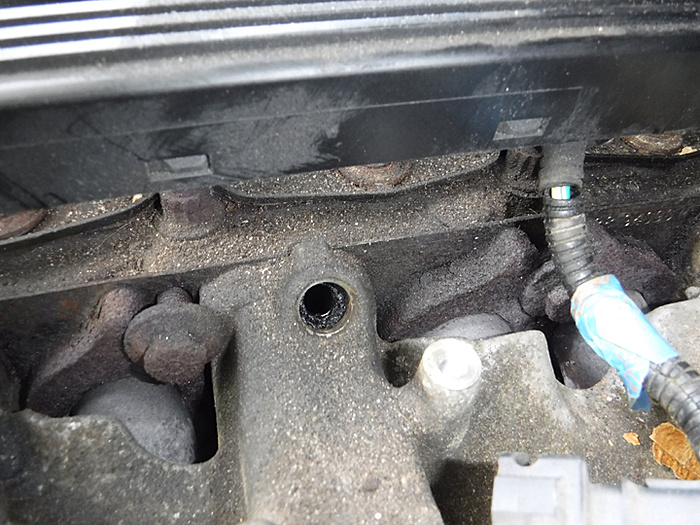
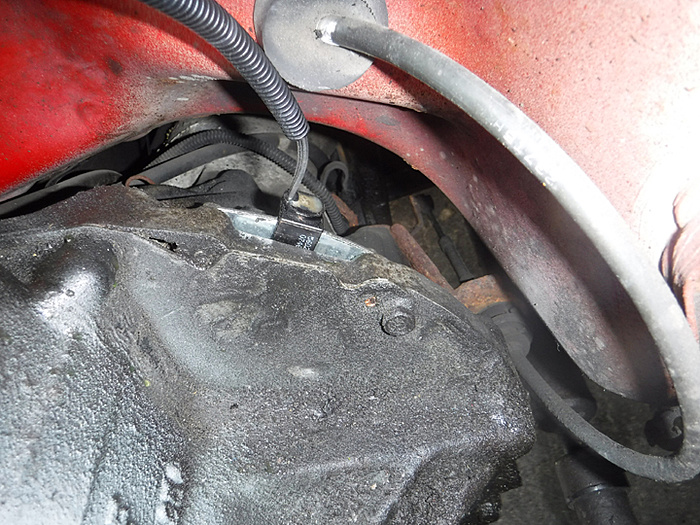
Once everything was off, I thought now would be a great time to change the CPS sensor.
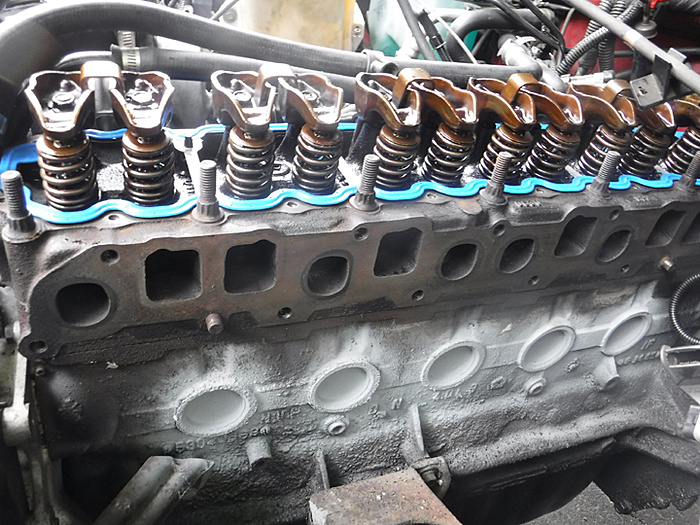
And finally change the valve cover gasket and paint the freeze plugs again. I was happy to feel the rockers are tight, no wiggle whatsoever, looking very clean (I guess the Rotella T6 and MM oil are working).
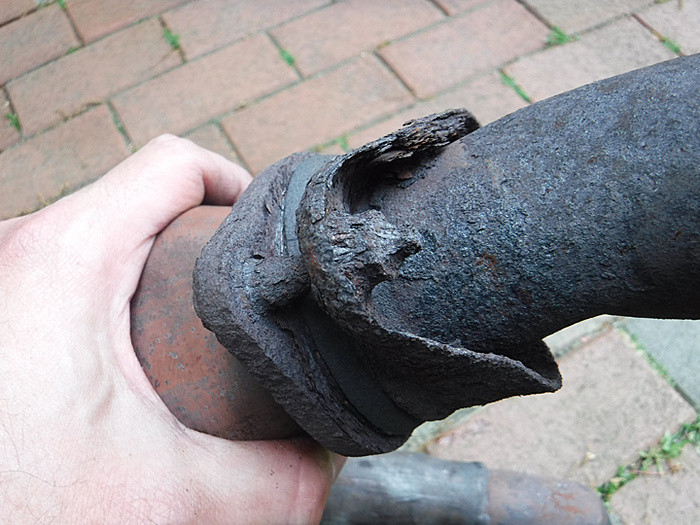
The hardest part of the dismantling process, was taking out the old piece of downpipe in the catalytic converter. Took me a couple of hours of carefully cutting and crimping the pipe. Then heating up the catalyst pipe back into shape using an expander.
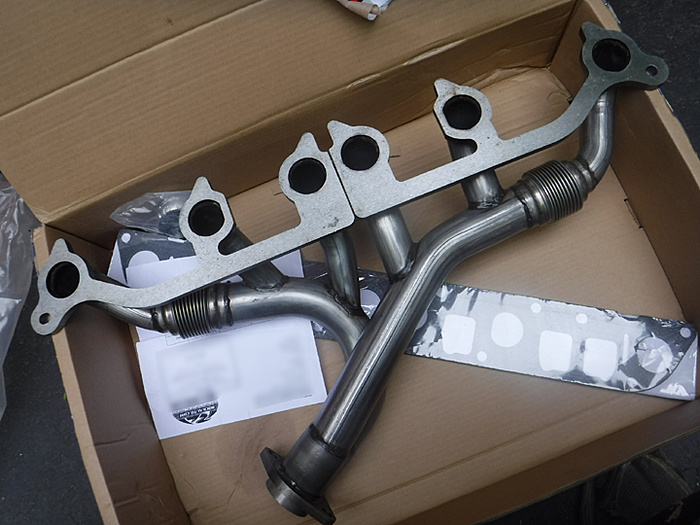
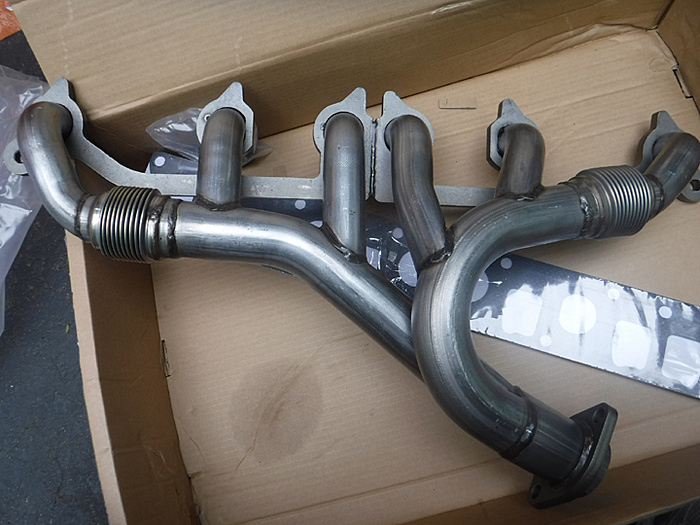
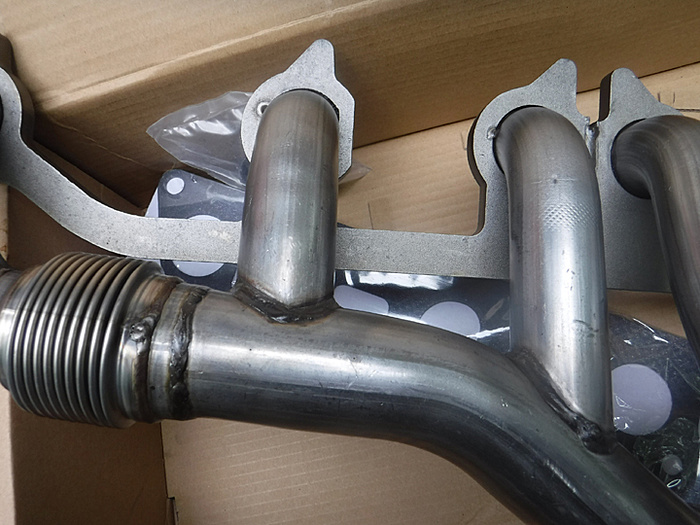
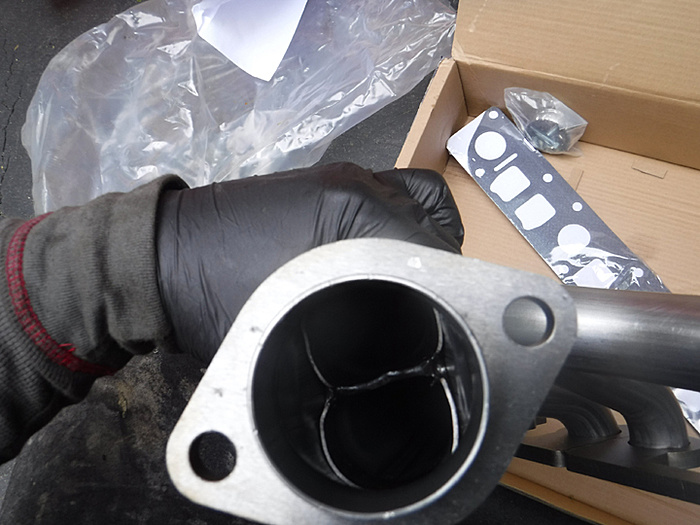
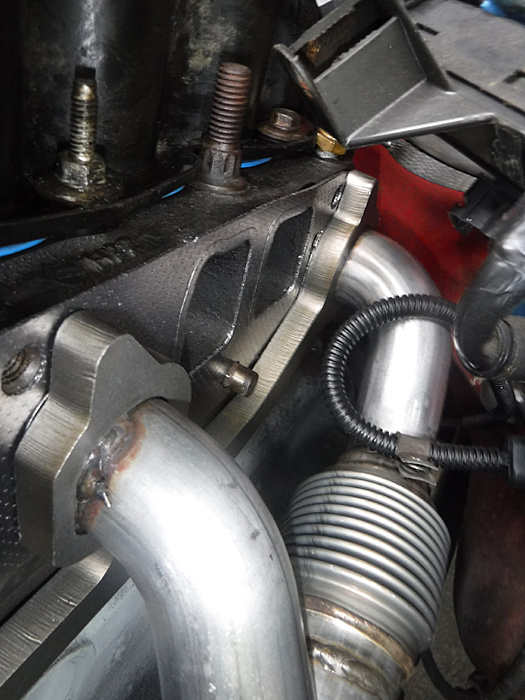
I bought the ATP header for $131 from RA. It looks really nice, fits fine, and the welds look good. For the price, well worth it so far.
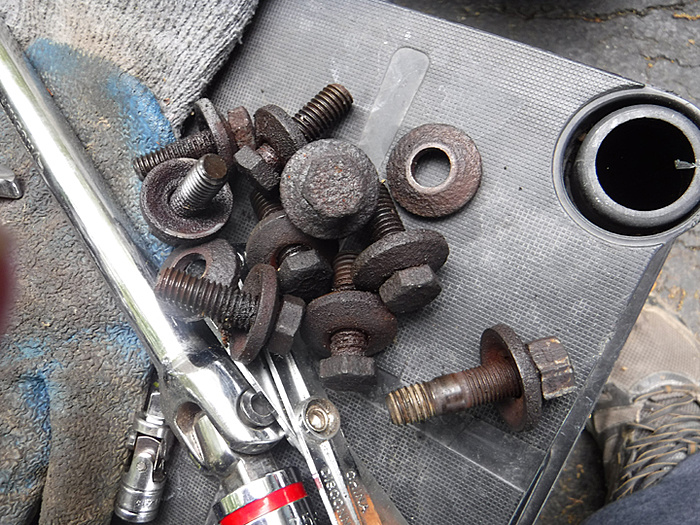
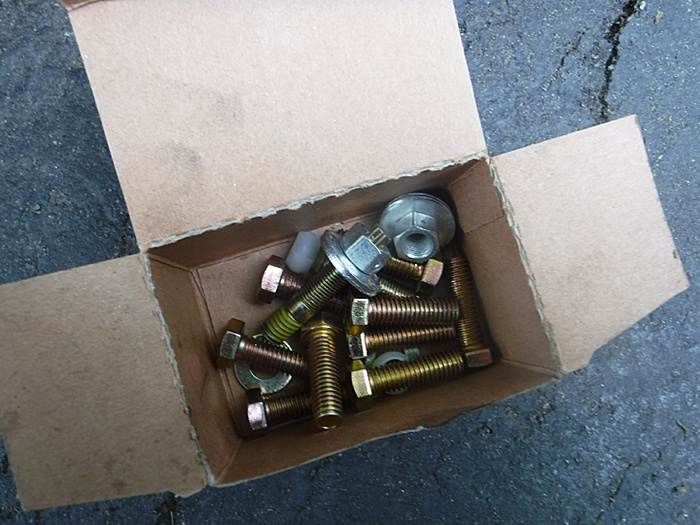
I used the Dorman bolt kit.
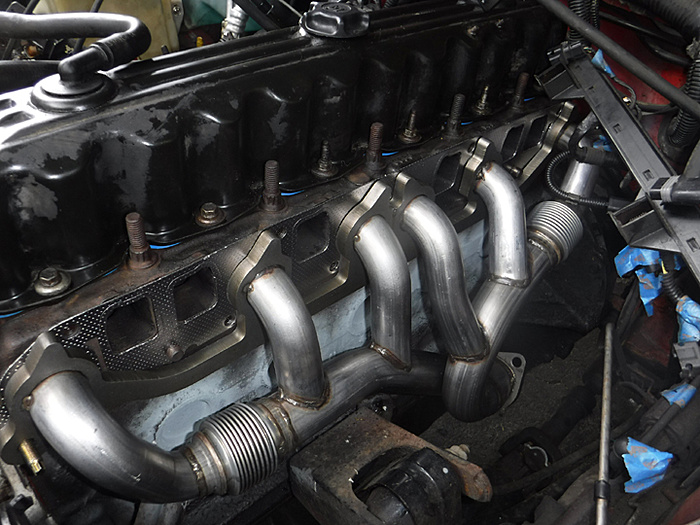
The manifold went on with no issues. I used a Mopar gasket from the dealer ($22).
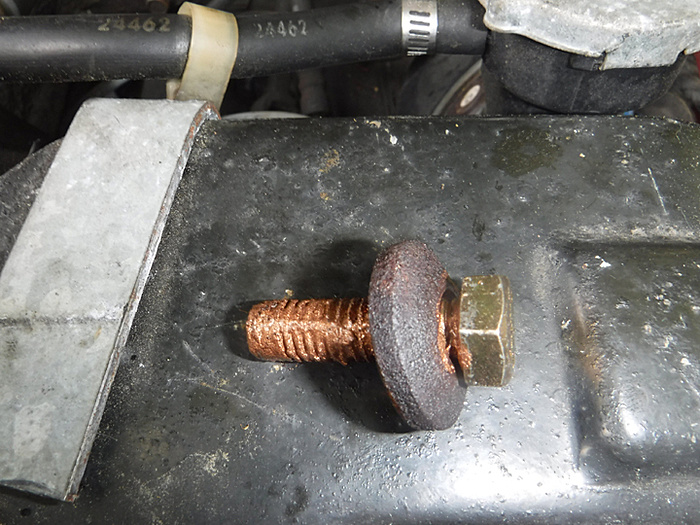
Made sure to use high heat anti-seize on the new bolts.
Also took the opportunity to finally install the 4 hole injectors and paint the fuel rail. Oh, and a new upstream oxygen sensor in the downpipe (since I could never take off the old one).
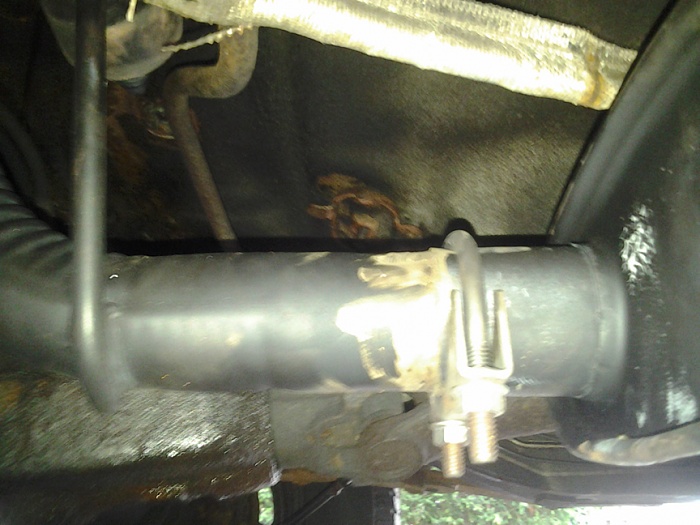
This took me 2 long days to do and I finished late at night on day 2. On first start up it smoked and ran like crap. The copper anti-seize really smokes at first and I had a huge exhaust leak from the catalyst and downpipe union - I tried using a band clamp so I could undo the pipes in the future, but it didn't work. I had to go back to the u-clamp and crimp the pipes together a bit to make the leak stop. Also had to tighten the exhaust manifold and downpipe joint a bit too.
I was pretty happy at first when my idle speed went down to around 900. It had been running high at about 1200 for the past few months and I was thinking it was the upstream Oxygen sensor I couldn't get off. But after a few days of idling at 900 it is back up to 1200. Oh well, it's a Jeep life.
On the plus side, the Jeep is running really fast on the road now, with plenty of quick acceleration and power.
Sounds real good now and has more power and pickup as the old cat was clogged badly.
But I get a low rattle at times when idling in Drive or Reverse and not moving. Does not do it in Neutral or Park. I checked the run from front pipe to tail pipe and nothing is rubbing.
Any ideas?
Thanks.
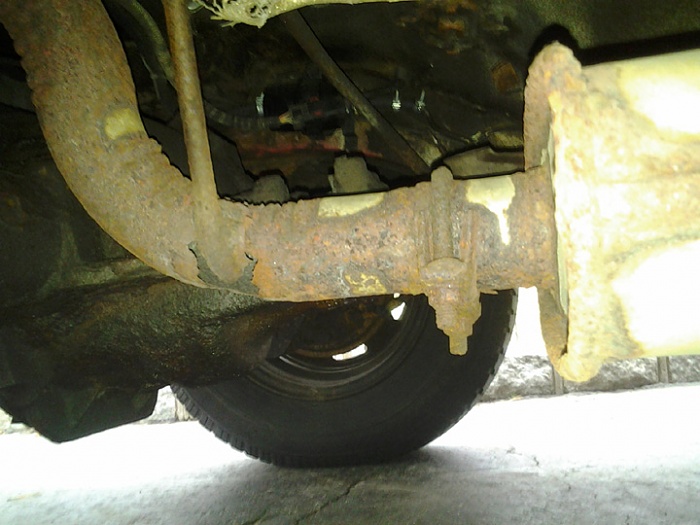
Rattles most likely here raise more and retighten.
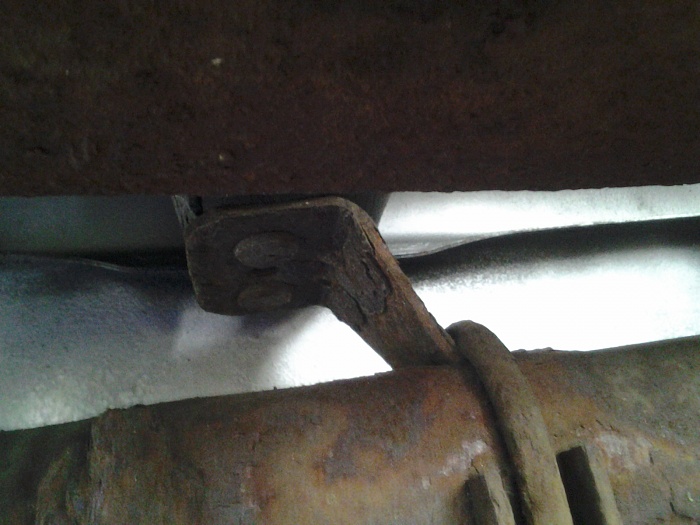
I thought that would have been it, but once I changed the downpipe and properly set the height, I still hear it some times, very low, towards the back. I figure it is the exhaust pipe tapping the leaf spring. But it happens so randomly and doesn't sound loud, that I don't care anymore.
I thought that would have been it, but once I changed the downpipe and properly set the height, I still hear it some times, very low, towards the back. I figure it is the exhaust pipe tapping the leaf spring. But it happens so randomly and doesn't sound loud, that I don't care anymore.
That was next suspect area loosen clamp on rear haanger and push pipe towards tank and retighten should cure it I got 3 inch thru there.
Well I had 3 issues crop up simultaneously. The exhaust pipe broke at the muffler (didn't even last 4 years), the parking brake tension bracket came loose (after the new cables stretched out from normal use) enough to droop down and hit the drive shaft, which sent it smacking against the oxygen sensor at in the cat. And finally, the one rear link that was holding the rear stabilizer bar in place broke and let the bar jam itself against the rear passenger tire
Time to roll up the sleeves.
For about 3 months I could not find the source of the noise every time I hit a bump. I pulled and pushed on the exhaust and nothing. Then the exhaust pipe broke. I figure it must have been flexing and breaking slowly of time until it broke altogether.
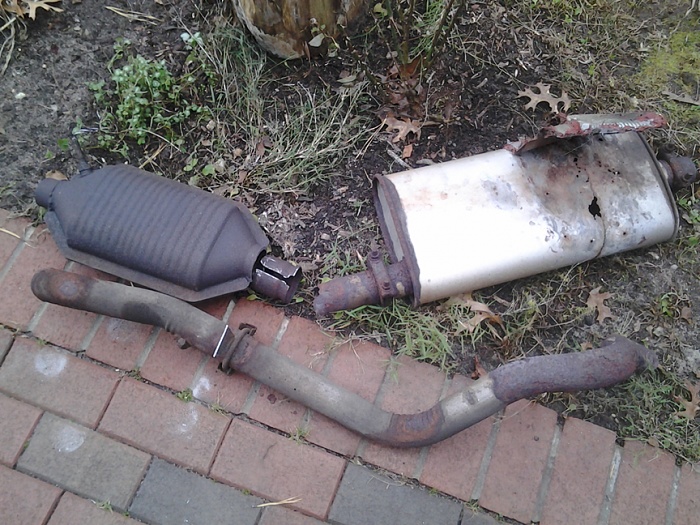
I cut everything out, including the cat.
The cat is still good but the muffler and exhaust pipe were breaking apart. Side note, painting the muffler was a waste because it rotted out from within.
With the cat out, I went to work removing the oxygen sensor that was throwing the check engine light and I suspect, idling fast. I had to use the 22mm wrench and the big pipe. Yes, the copper wires (old romex wires I was going to recycle) are holding the heat shield in place. It works quite well.
The **** was a pita to take out but the big pipe did it.
In the meantime, I changed the rear stabilizer links. I have read people say you don't need the rear bar, but I do feel a difference on the road.
Then I put it all back together. I have to admit I did dunk the cat in a hot bucket of water and Dawn dish soap for about an hour. Then I rinsed it out - It takes forever to get the bubbles to stop bubbling - i mean I put the garden hose in there and let it run for a good 30 minutes. When I ran it first, I thought I killed the cat because it took a good 30 minutes for it to get above 300 degrees on the ir gun. But then it was fine. It seems to have worked some as it feels like it responds faster on acceleration.
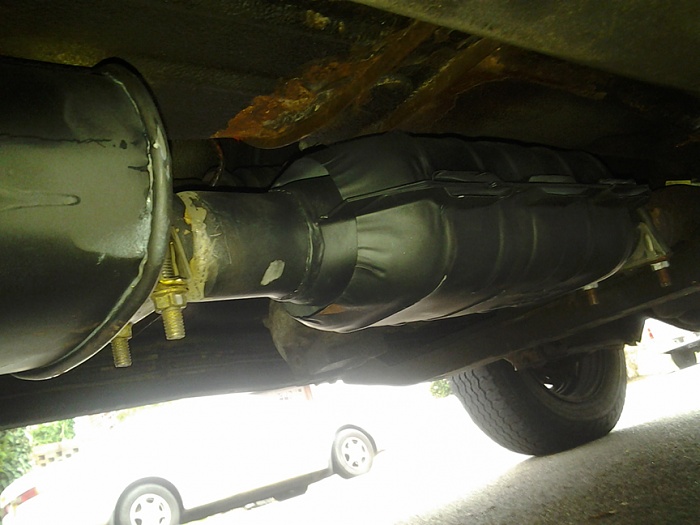
This was the toughest part of the process, getting the flex pipe on. The issue was it was too big for the down pipe and the next size down was too small. So I had to really clamp it down to make the pipes crush together. Then I used some exhaust cement on the end in case of any leaks. I am not going to lie, it looks ugly but so far so good.
The bracket that holds the cat oxygen sensor (56041000) had lost the inner part that secures it to the stud on the floor, so I created a new plastic tab out of an old clorox plastic bottle (thicker plastic), and attached it to the bracket body with zip ties and silicone. Make the hole smaller than the stud and push it in. Works well.
New NTK sensor working well. Idle is back to normal and no check engine light.
I painted all my exhaust with POR 15 heat paint which was a waste of time IMO. Of course it could be user error. Might not have prepped them well enough. One thing I did do though was to paint the inside of the tailpipe with it too. To hopefully avoid what happened to you. I used the Fluid Film nozzle that you can buy for the spray cans.
I painted all my exhaust with POR 15 heat paint which was a waste of time IMO. Of course it could be user error. Might not have prepped them well enough. One thing I did do though was to paint the inside of the tailpipe with it too. To hopefully avoid what happened to you. I used the Fluid Film nozzle that you can buy for the spray cans.
Thanks for the link, Ralph. I didn't even know there was something like that.
They won't work on all spray cans but I know they work on the POR 15 heat paint. For instance they will not work on CRC brake cleaner spray cans. Cause you can't see what you are doing a lot gets in there. Then I just held my hand at one end and tipped the pipe that way. Held my hand on the other end and did the same. Back and forth. Then just let the excess drain out. LOL. Only place I would risk painting inside though it case it flaked. Figure in the tailpipe it just blows out the back so who cares.
I Fluid Filmed my Jeep today so I was able to see what cans the wand will and won't fit on. Only will fit on rattle cans with a traditional sprayer. The kind that the tube that goes into the can is attached to the sprayer head. Some rattle cans when you pull off the sprayer head the tube that goes into the can is part of the can. These are the ones they won't work on. But if you are using that type of can then there are these: