When you click on links to various merchants on this site and make a purchase, this can result in this site earning a commission. Affiliate programs and affiliations include, but are not limited to, the eBay Partner Network.
Stock XJ Cherokee Tech. All XJ Non-modified/stock questions go hereXJ (84-01)
All OEM related XJ specific tech. Examples, no start, general maintenance or anything that's stock.
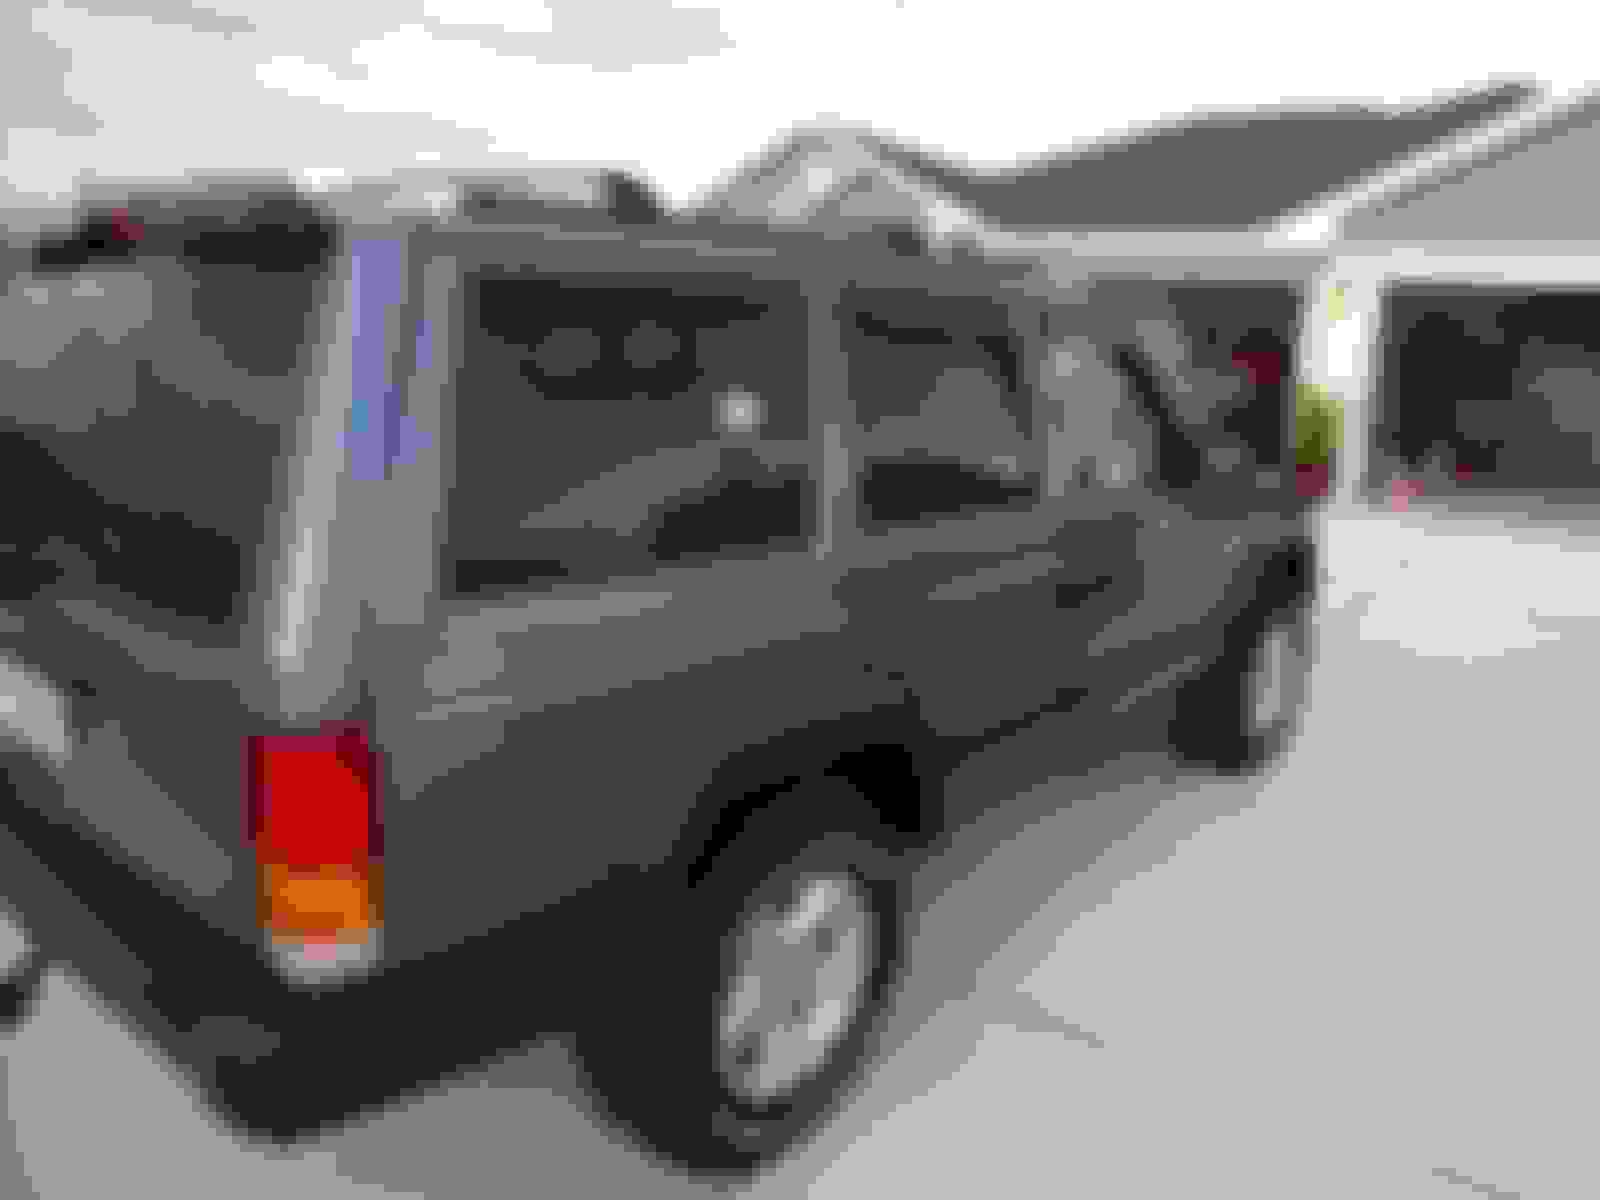
I'm excited to be back in the Jeep community after a lengthy search for a stock Jeep Cherokee XJ with a manual transmission and relatively low miles. Earlier this year I picked up a 1998 XJ with 120k miles that was well taken care of, and I've already received a lot of great information from searching this forum. I have numerous projects in mind and want to give back by sharing what I can to help others.
To that point, my first project was debadging the XY by removing the side body moldings and "Sport" stickers. The molding were already starting to come off, and I prefer the cleaner look of the SE models.
The project consisted of 4 main parts:
1) removing the body moldings
2) removing the adhesive foam
3) removing the adhesive residue
4) removing the "Sport" and dealer decals
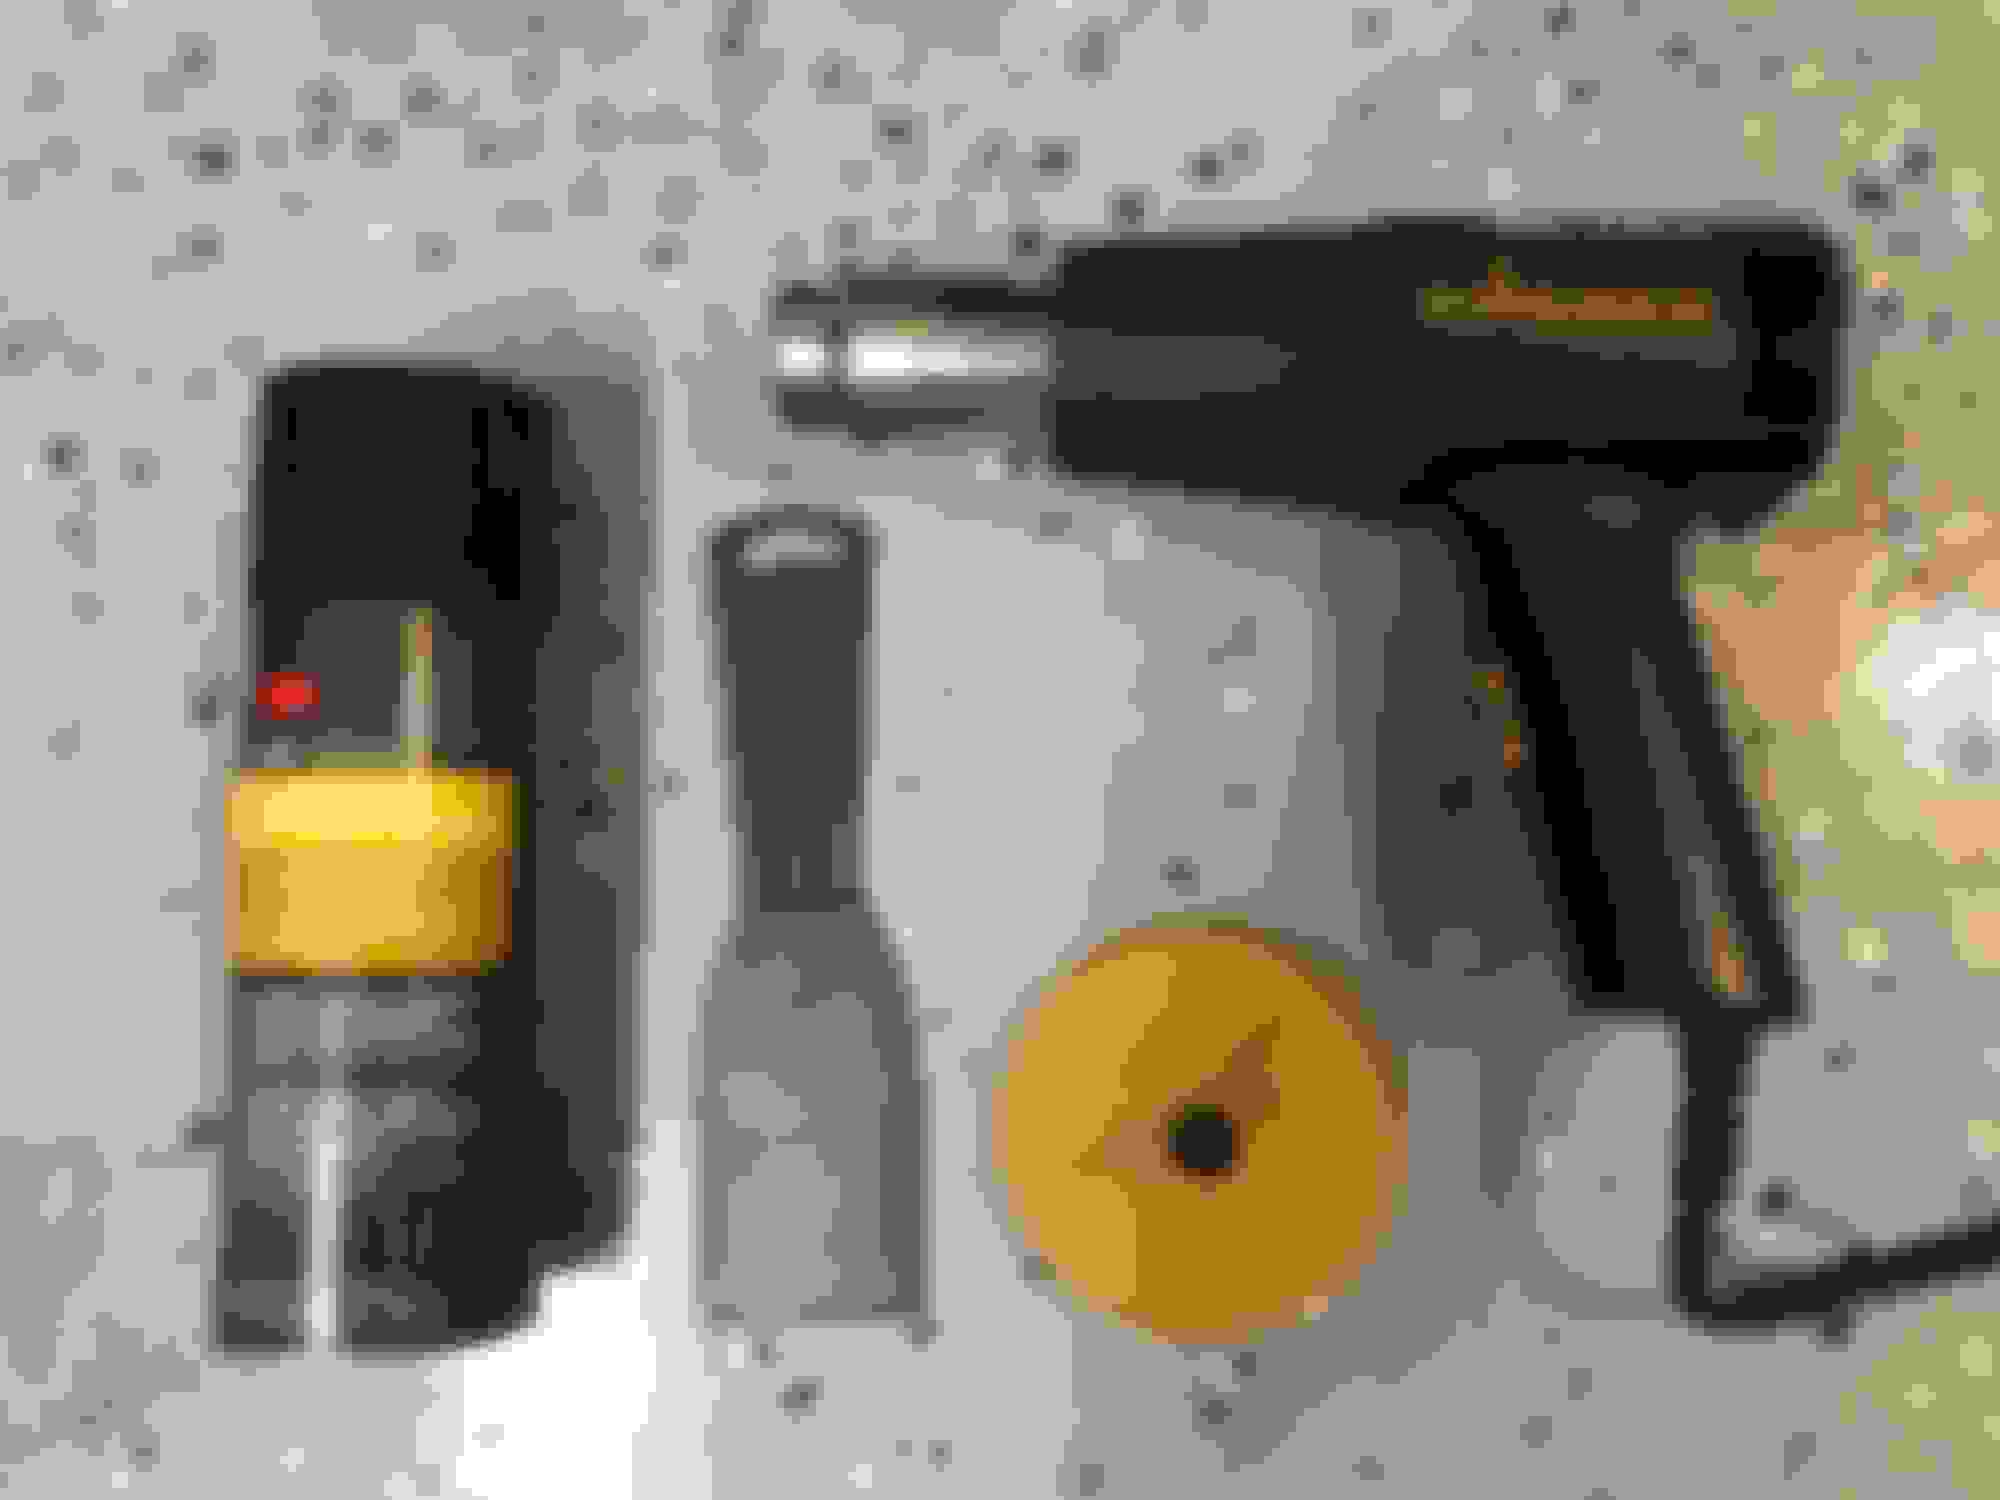
The following tools came in handy (pic below):
1) heat gun
2) putty scraper
3)
Project Details: 1) Removing body moldings: This was one of the easier parts of the process, as it really only consisted of heating the moldings as I applied pressure away from the body. I started at the loose ends and applied heat between the molding and body as I pulled the trim out. It took ~10 seconds for the adhesive underneath to get warm enough for the moldings to detach from the body a few inches at a time. Again, the process was pretty straight forward, and I was able to remove all the trim pieces in under an hour. After this was complete, a mix of white foam, clear adhesive, and dirt remained (see pic below).
2) Removing the adhesive foam: This step took more time but wasn't bad, once I figured out that using the putty knife was substantially quicker and easier on my thumbs. Initially, I tried removing the foam by heating it until it started to bubble and trying to rub it off with my thumbs. In just under an hour, I still hadn't removed all the foam from one section, and I had blisters on both thumbs. I purchased a generic plastic putty knife the next weekend and tried using it along with the heat gun. I was concerned that it would potentially damage the paint, but, after testing, I found that it worked extremely well. I simply applied heat and scraped the foam off, being sure to keep the blade relatively flat against the paint surface and applying gentle pressure. After this was complete, a thinner film of adhesive was left over.
3) Removing the adhesive residue: This portion took the longest amount of time, as it required a lot of rubbing with the shop paper towels. I found it useful to spray the adhesive with the adhesive remover, let it set for several seconds, and then use the towels to rub the adhesive off. Letting the remover set for a few seconds went a long way to chemically breaking down the glue. Some sections came off in seconds, while others were more stubborn and took much more time. For these sections, I used the heat gun to warm the adhesive, which worked well in expediting the process. I used the same process to remove the adhesive left over when I removed the sun visors from the four windows.
4) Removing the "Sport" and dealer decals: This was a breeze, due to the eraser wheel I used. I ended up purchasing the wheel linked above, instead of 3M's wheel, because it was ~1/3 the price and had great reviews. I'm glad I went with the cheaper version, as it worked great. I found it worked best if I applied heat to the decals and got the surface warm to the touch before using the wheel. It ripped right through the decals in seconds. It did leave a fairly big mess with the wheel residue, but it was easy to clean up. I was a little concerned to use such a spinning wheel against the paint, but I took my time and had zero issues.
Overall, it was a simple project and just required about a day of work (with several breaks) to complete, and I'm very happy with the results. I hope this was helpful, and let me know if you have any questions.
 02-02-2019, 03:19 PM