
floor pan progress


Senior Member
Joined: Mar 2014
Posts: 952
Likes: 55
From: Eastern Long Island, NY
Year: 1996
Model: Cherokee
Engine: I6 Cyl / 4L
nice work. i have to do this too. thanks for sharing.
what gauge metal sheet did you use?
what type of welder?
how did you cut it?
thanks again.
what gauge metal sheet did you use?
what type of welder?
how did you cut it?
thanks again.

Thread Starter
Newbie
Joined: Nov 2010
Posts: 19
Likes: 0
Model: Cherokee
I bought a 4x8 18 gauge piece of sheet metal from a metal store, with tax it cost me $54. I am only doing the passenger side as the driver side is fine so a 4x8 is wayyy too much.
I am not a welder, this is my fist time that i welded, its a 88 amp flux welder with no gas. got it on sale at home depot. dont be discouraged, like i said its my first time welding, granted not the best and looking welds but its a fun learning experience.
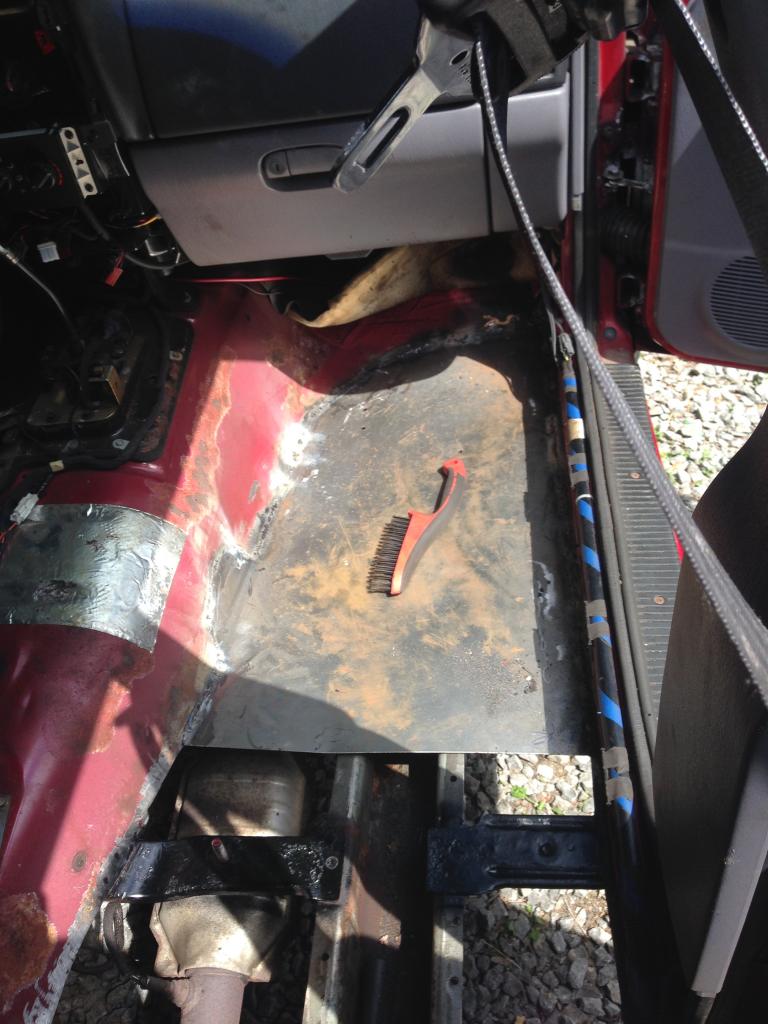
Once the old rusted metal was out, i used cardboard as a template, so i placed it on top and traced it from underneath. Then transferred the cardboard template on the sheet metal and cut it out with a angle grinder.
Good luck on your project.
I am not a welder, this is my fist time that i welded, its a 88 amp flux welder with no gas. got it on sale at home depot. dont be discouraged, like i said its my first time welding, granted not the best and looking welds but its a fun learning experience.
Once the old rusted metal was out, i used cardboard as a template, so i placed it on top and traced it from underneath. Then transferred the cardboard template on the sheet metal and cut it out with a angle grinder.
Good luck on your project.

Thread Starter
Newbie
Joined: Nov 2010
Posts: 19
Likes: 0
Model: Cherokee
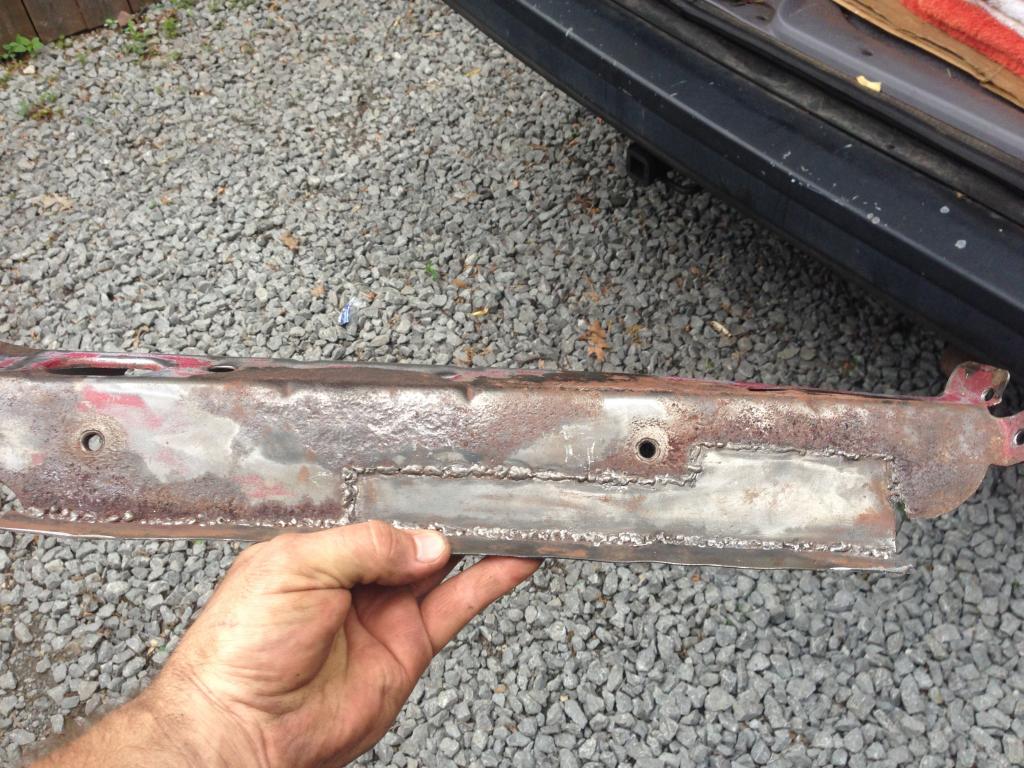
I am reusing the old seat bracket.
I had to do a patch on it as it was also rusted. I will post a picture of it when i get home.
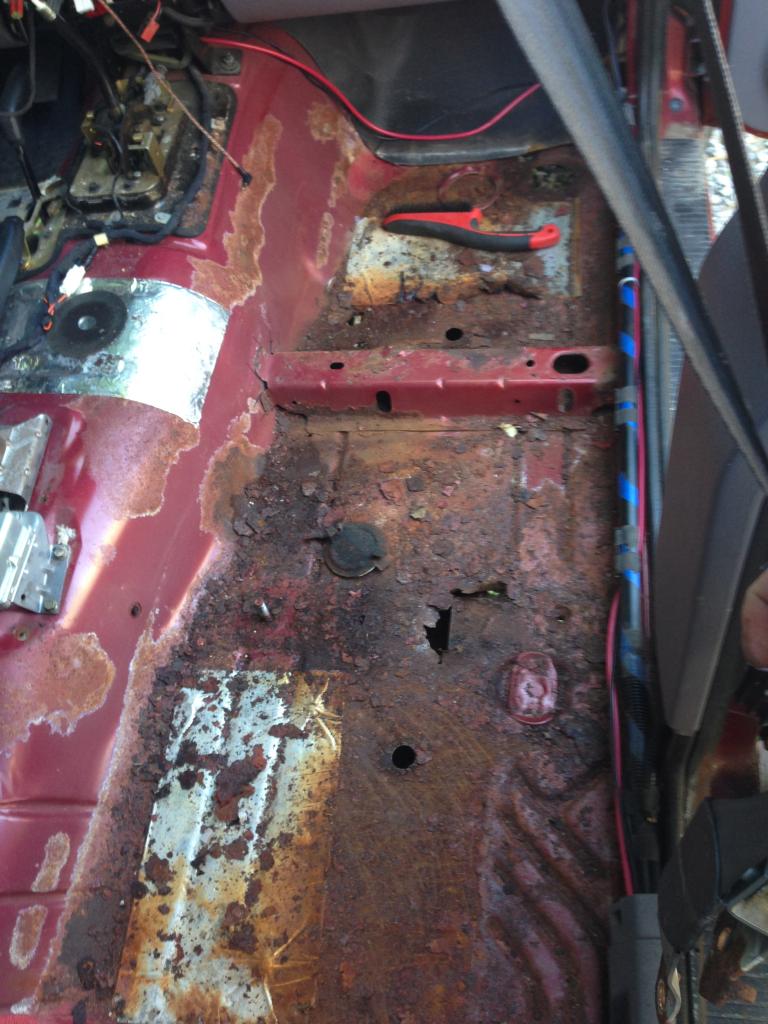
When I first started this job i didn't even want to pull the seat bracket but the metal underneath it was too far gone...
Simon
I had to do a patch on it as it was also rusted. I will post a picture of it when i get home.
When I first started this job i didn't even want to pull the seat bracket but the metal underneath it was too far gone...
Simon


Trending Topics
Thread Starter
Newbie
Joined: Nov 2010
Posts: 19
Likes: 0
Model: Cherokee
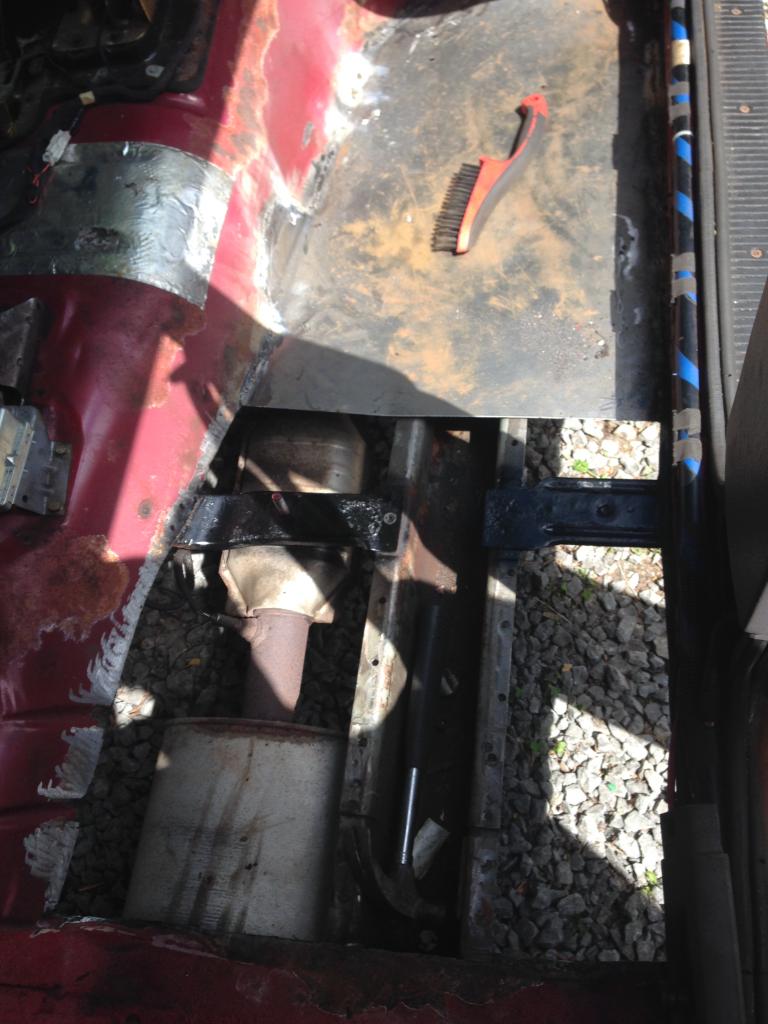
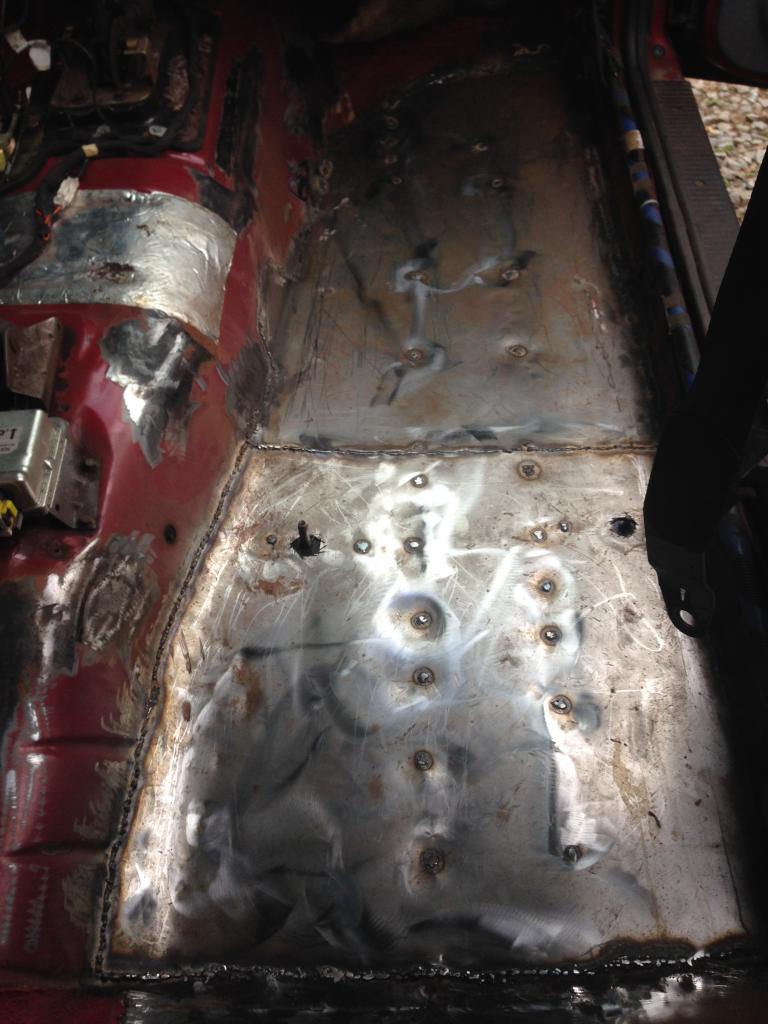
I tack welded the replacement floor pan in certain sport to the rails, see pics below.
Should I run a bead across from front to back? is that necessary?
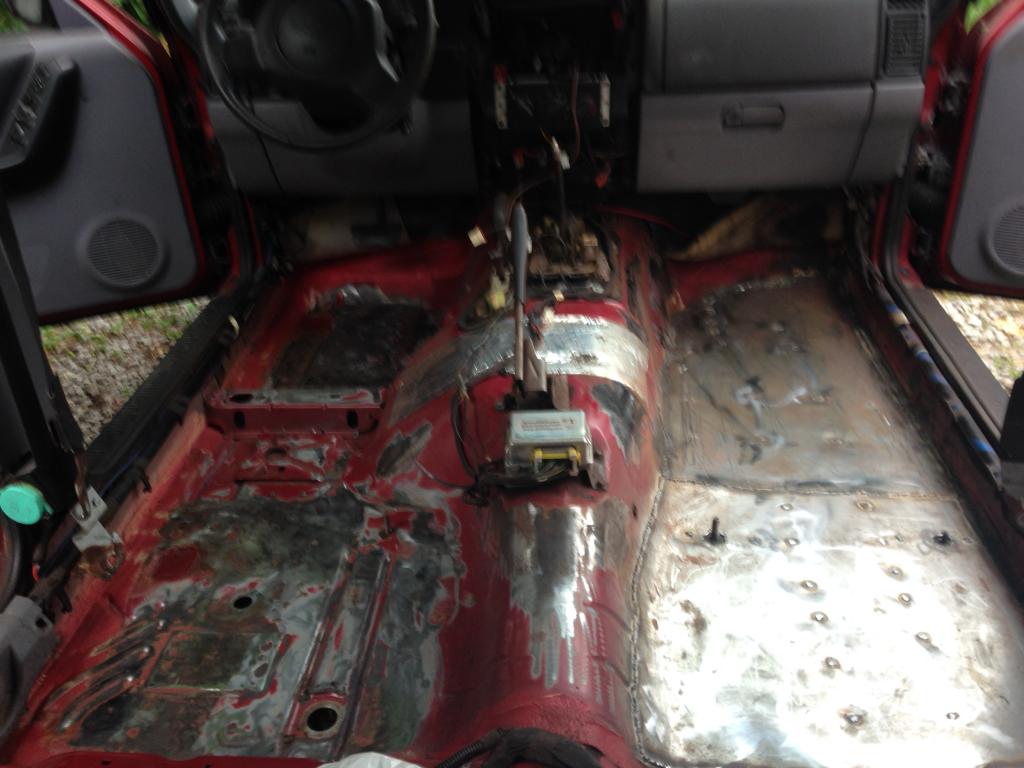
updated pics below,
id say im about 80% done, next step is to rust bullet the entire floor. Protect from future rust, i really dont want to do this again.
also found some very minor rust on the drivers side, will use a small patch to address it.
pic of the reused seat bracket
Should I run a bead across from front to back? is that necessary?
updated pics below,
id say im about 80% done, next step is to rust bullet the entire floor. Protect from future rust, i really dont want to do this again.
also found some very minor rust on the drivers side, will use a small patch to address it.
pic of the reused seat bracket
Thread Starter
Newbie
Joined: Nov 2010
Posts: 19
Likes: 0
Model: Cherokee
The Project has been completed, the pic you see above is the last I took, basically after the entire floor has been prepped via sanding disc I painted the entire floor with Rust Bullet, then I seam sealed my welds and than I applied a second coat of Rust Bullet,
I did the exact same process from underneath.
I reassembled the interior and she runs like a dream, hard to explain but the jeep feels more solid now, also its quieter inside.
Let me know if you have any questions.
Simon
I did the exact same process from underneath.
I reassembled the interior and she runs like a dream, hard to explain but the jeep feels more solid now, also its quieter inside.
Let me know if you have any questions.
Simon

Member
Joined: Jan 2012
Posts: 232
Likes: 0
From: Topeka, KS
Year: 1996
Model: Cherokee
Engine: 4.0
Did you have many issues using the flux core welding blowing through? Have been reading that it's too hot of a process for sheet metal. Did you grind down your welds at all? You may be getting done PMs from me as I think I'm getting ready to start this project and I am kind of in the same boat although I did buy floor pan panels.
Thread Starter
Newbie
Joined: Nov 2010
Posts: 19
Likes: 0
Model: Cherokee
I did find that the flux blew though some of the stock sheet metal yes,
But I just turned down my welder as much as I could and increased the wire speed which seemed to help, also I did not run a continuous bead for that exact reason. I would weld for about 1-2 sec then move on, not the best practice but its what worked.
after the welding process was complete I did not bother cleaning up the welds, I just used a wire brush to get rid of the slag to prep for paint. I put my carpet back in the jeep so no one will see my ****ty welds.
I considered buying pre-fabbed floor pans but they were pricey and possibly more difficult to weld than my 18ga sheet metal i bought.
CF Veteran
Joined: Apr 2011
Posts: 4,825
Likes: 2
From: Indianapolis
Year: '99 and '91
Model: Cherokee
The Project has been completed, the pic you see above is the last I took, basically after the entire floor has been prepped via sanding disc I painted the entire floor with Rust Bullet, then I seam sealed my welds and than I applied a second coat of Rust Bullet,
I did the exact same process from underneath.
I reassembled the interior and she runs like a dream, hard to explain but the jeep feels more solid now, also its quieter inside.
Let me know if you have any questions.
Simon
I did the exact same process from underneath.
I reassembled the interior and she runs like a dream, hard to explain but the jeep feels more solid now, also its quieter inside.
Let me know if you have any questions.
Simon
That seat bracket, that's welded in place right? Just wondering I don't know what my situation is going to look like in that area.
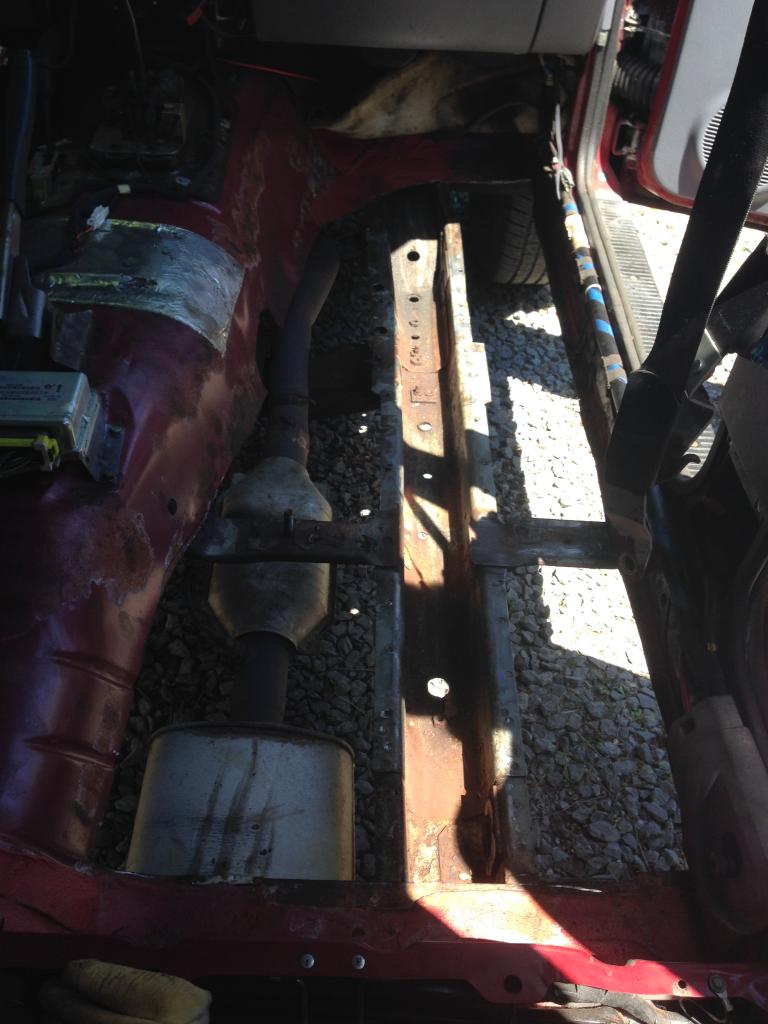
My passenger side is bad off because of the heat from exhaust, I would recommend a heat shields for the catalytic converter, and possibly some undercoating to help prevent it from chipping.
Thread Starter
Newbie
Joined: Nov 2010
Posts: 19
Likes: 0
Model: Cherokee
Ya the seat bracket welds back in place, just make your your mark it before you cut it out so you know exactly where to put it back in, if you are half inch out the front seat may not fit in properly.
As far as the heat from exhaust I'm going to go to the junk yard and find (from any car) the flexy aluminium heat shield and install it with JBweld or use velcro to put it in place, I dont want to drill in my floor.
The aluminium stuff is very bendy and popular on newer cars so easy to work with.
I did 2 coats of rust bullet from the bottom and some seam sealer, I also get the jeep rust proofed once every fall,
i think the the passenger side will outlast the rest of the jeep.
Last edited by bootleg23; Jul 14, 2014 at 09:39 AM.
CF Veteran
Joined: Apr 2011
Posts: 4,825
Likes: 2
From: Indianapolis
Year: '99 and '91
Model: Cherokee
99-04 Grand Cherokees (WJs) have a nice lengthy piece of the aluminum stuff you're talking about. I've been eyeing that as a solution just never yanked one off yet. You might be able to use some existing holes in the floor to mount it.