

 Sep 18, 2015, 07:21 PM
Last edit by: IB Advertising
See related guides and technical advice from our community experts:
Browse all: Jeep Cherokee XJ Engine Guides
- Jeep Cherokee: How to Paint Your Valve cover
Step by step instructions for do-it-yourself repairs.
Browse all: Jeep Cherokee XJ Engine Guides

changing valve gasket/painting the cover
Thread Starter
CF Veteran
Joined: Oct 2010
Posts: 1,756
Likes: 1
From: Salem Nh
Year: 1998
Model: Cherokee
Engine: 4.0
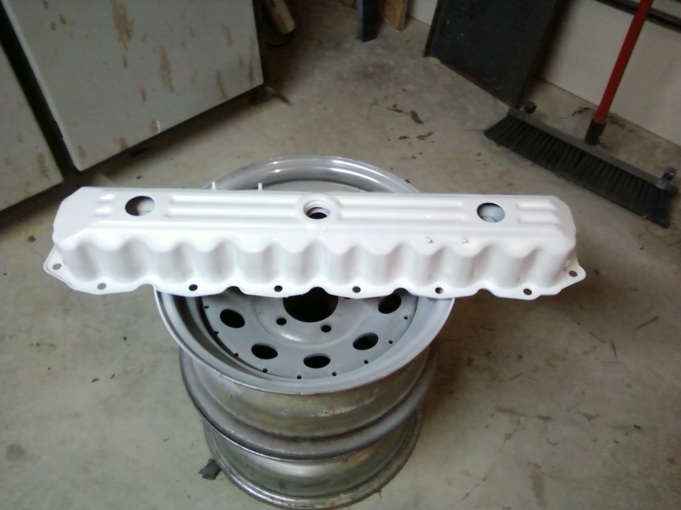
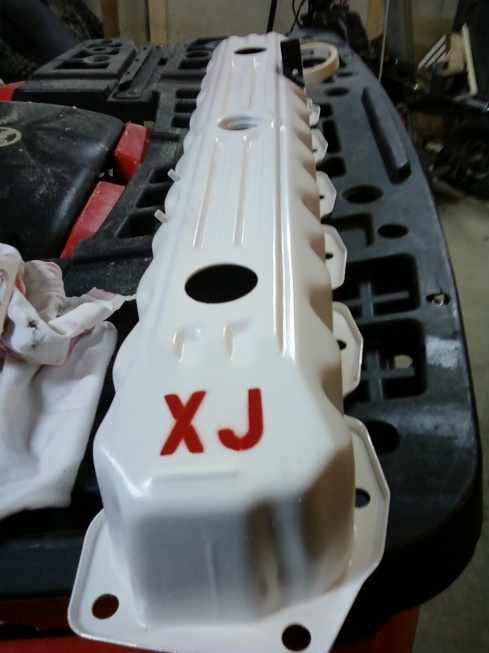
i need to replace my valve cover gasket, i was just wonder how hard it is and if i could screw anything up rlly by doing it myself. i kno theres a write up on it. but was just wondering if it is easy to do and anything else i need to know. also what would be a good paint to use to paint the valve cover

Seasoned Member
Joined: Nov 2010
Posts: 475
Likes: 2
From: Michigan
Year: 1998
Model: Cherokee
Engine: 4.0
The cylinder head cover is isolated from the cylinder head via grommets and a reusable molded rubber gasket. The grommet and limiter are retained in the cylinder head cover.
Fig.32 Cylinder Head Cover Gasket Locator Pins At #8 & #9
There are two cylinder head bolts that have a pin to locate the cylinder head cover gasket, they are located at position 8 and 9.
REMOVAL

Fig.32 Cylinder Head Cover Gasket Locator Pins At #8 & #9
There are two cylinder head bolts that have a pin to locate the cylinder head cover gasket, they are located at position 8 and 9.
REMOVAL
- Disconnect negative cable from battery.
- Disconnect the Crankcase Ventilation (CCV) vacuum hose from engine cylinder head cover.
- Disconnect the fresh air inlet hose from the engine cylinder head cover.
- Disconnect the accelerator, transmission, and speed (if equipped) control cables from the throttle body.
- Remove the three bolts that fasten the control cable bracket to the intake manifold.
- Remove control cables from cylinder head cover clip.
- Position control cables and bracket away from cylinder head cover secure with tie straps.
- Remove the engine cylinder head cover mounting bolts.
- Remove the engine cylinder head cover and gasket.
- If a replacement cover is installed, transfer the CCV valve grommet and oil filler cap from the original cover to the replacement cover.
- Install cylinder head cover and gasket. Tighten the mounting bolts to 10 Nm (85 inch lbs.) torque.
- Connect the CCV hoses.
- Install control cables and bracket on intake manifold and tighten bolts to 8.7 Nm (77 inch lbs.) torque.
- Connect control cables to throttle body linkage.
- Snap control cables into cylinder head cover clip.
- Connect negative cable to battery.
Member
Joined: Sep 2010
Posts: 171
Likes: 0
From: Spotsylvania VA
Year: 1992
Model: Cherokee
Engine: 4.0
I seem to remember reading about a factroy modification, something about trimming the baffles in the cover to reduce the oil sucked up into the vent hose. Has anyone else heard about this?

Trending Topics


Senior Member
Joined: Mar 2010
Posts: 693
Likes: 0
From: Carrollton, Georgia
Year: 1995
Model: Cherokee
Engine: 4.0 Liter High Output
The cylinder head cover is isolated from the cylinder head via grommets and a reusable molded rubber gasket. The grommet and limiter are retained in the cylinder head cover.
Fig.32 Cylinder Head Cover Gasket Locator Pins At #8 & #9
There are two cylinder head bolts that have a pin to locate the cylinder head cover gasket, they are located at position 8 and 9.
REMOVAL
Fig.32 Cylinder Head Cover Gasket Locator Pins At #8 & #9
There are two cylinder head bolts that have a pin to locate the cylinder head cover gasket, they are located at position 8 and 9.
REMOVAL
- Disconnect negative cable from battery.
- Disconnect the Crankcase Ventilation (CCV) vacuum hose from engine cylinder head cover.
- Disconnect the fresh air inlet hose from the engine cylinder head cover.
- Disconnect the accelerator, transmission, and speed (if equipped) control cables from the throttle body.
- Remove the three bolts that fasten the control cable bracket to the intake manifold.
- Remove control cables from cylinder head cover clip.
- Position control cables and bracket away from cylinder head cover secure with tie straps.
- Remove the engine cylinder head cover mounting bolts.
- Remove the engine cylinder head cover and gasket.
- If a replacement cover is installed, transfer the CCV valve grommet and oil filler cap from the original cover to the replacement cover.
- Install cylinder head cover and gasket. Tighten the mounting bolts to 10 Nm (85 inch lbs.) torque.
- Connect the CCV hoses.
- Install control cables and bracket on intake manifold and tighten bolts to 8.7 Nm (77 inch lbs.) torque.
- Connect control cables to throttle body linkage.
- Snap control cables into cylinder head cover clip.
- Connect negative cable to battery.

Thread
Thread Starter
Forum
Replies
Last Post
jurazov
Stock XJ Cherokee Tech. All XJ Non-modified/stock questions go here
12
Jul 20, 2023 04:13 AM
MidwestNick
Stock XJ Cherokee Tech. All XJ Non-modified/stock questions go here
10
Feb 28, 2016 02:05 AM
CAT_Tech2
Stock XJ Cherokee Tech. All XJ Non-modified/stock questions go here
67
Sep 18, 2015 08:26 AM
Currently Active Users Viewing This Thread: 1 (0 members and 1 guests)