When you click on links to various merchants on this site and make a purchase, this can result in this site earning a commission. Affiliate programs and affiliations include, but are not limited to, the eBay Partner Network.
4.0 head rebuild in progress. Lots of question and pictures
Stock XJ Cherokee Tech. All XJ Non-modified/stock questions go hereXJ (84-01)
All OEM related XJ specific tech. Examples, no start, general maintenance or anything that's stock.
Background: It all started last summer (first summer after buying it, so I don't know if there was a problem before or not) when the radiator exploded when I pulled off the highway to get gas. I did notice the needle was getting a little above normal before the rad burst open. I was towed home and I put in a new radiator, but I found that it was now overheating on the highway after 20 minutes or so.
I replaced the rest of the cooling system and started aggressively flushing the rust buildup out of the coolant passages and it got better, now it only overheated after several hours of highway use. I figured the new radiator was clogged with rust scale and stuff, so last week I swapped it out. I cut open the old one a yeah there was some black crud in it. But a few days ago I went on a 30 minute highway drive and it started getting warm again, like 230*F. I used the heater core to lower it back down to normal temps and drove slow on the way back home.
After reading this article, I decided to do the same thing so I sent in my oil sample to Blackstone lab. Here it is:
I was in HGD (head gasket denial) for a few days until I accepted the truth and got under the hood, and I had the head off after a few hours. Here's what I saw:
While it's not supper obvious, there's signs that the combustion was leaking past the HG and probably getting into other cylinders and into the coolant. Right now it's just a theory, but my theory is that these engines are so badass they run great even with a warped head or blown head gasket. You'd never know until it starts to run a little too hot. And when it does, you can, or at least I could, keep the temps under control by slowing down and turning on the heater. I did that well over a year, including a long trip to Colorado about a year ago. It did boil over a few times but it didn't seem to damage the engine at all. So most people might not ever detect it. There's many folks out there, myself included for a while, who say that these engines just like to run hot and the cooling system just isn't good enough. But maybe they have a tiny head gasket leak just like I did, and they'll never know it!
---------------------------------------
For the lifters, I'm weighing the risk of replacing them, which could potentially cause problems with the cam and waste of $100, vs. the risk of not replacing them, which could be a lost opportunity to easily swap them out for new ones to quiet down the engine or if one collapses in a few years from now or something. I'm probably going to just buy them and be done with it. NAPA has them for me. What do you think?
A guy on Reddit is telling me that it would be a very bad idea to put new lifters on an old cam, but I don't know if he's speaking about the Jeep/AMC 4.0 engine specifically or automotive engines in general. What do you think?
He also said that the rockers and rocker fulcrums/bridges probably are badly warn and need to be replaced. But I took a look at them and they look fine. What do you think?
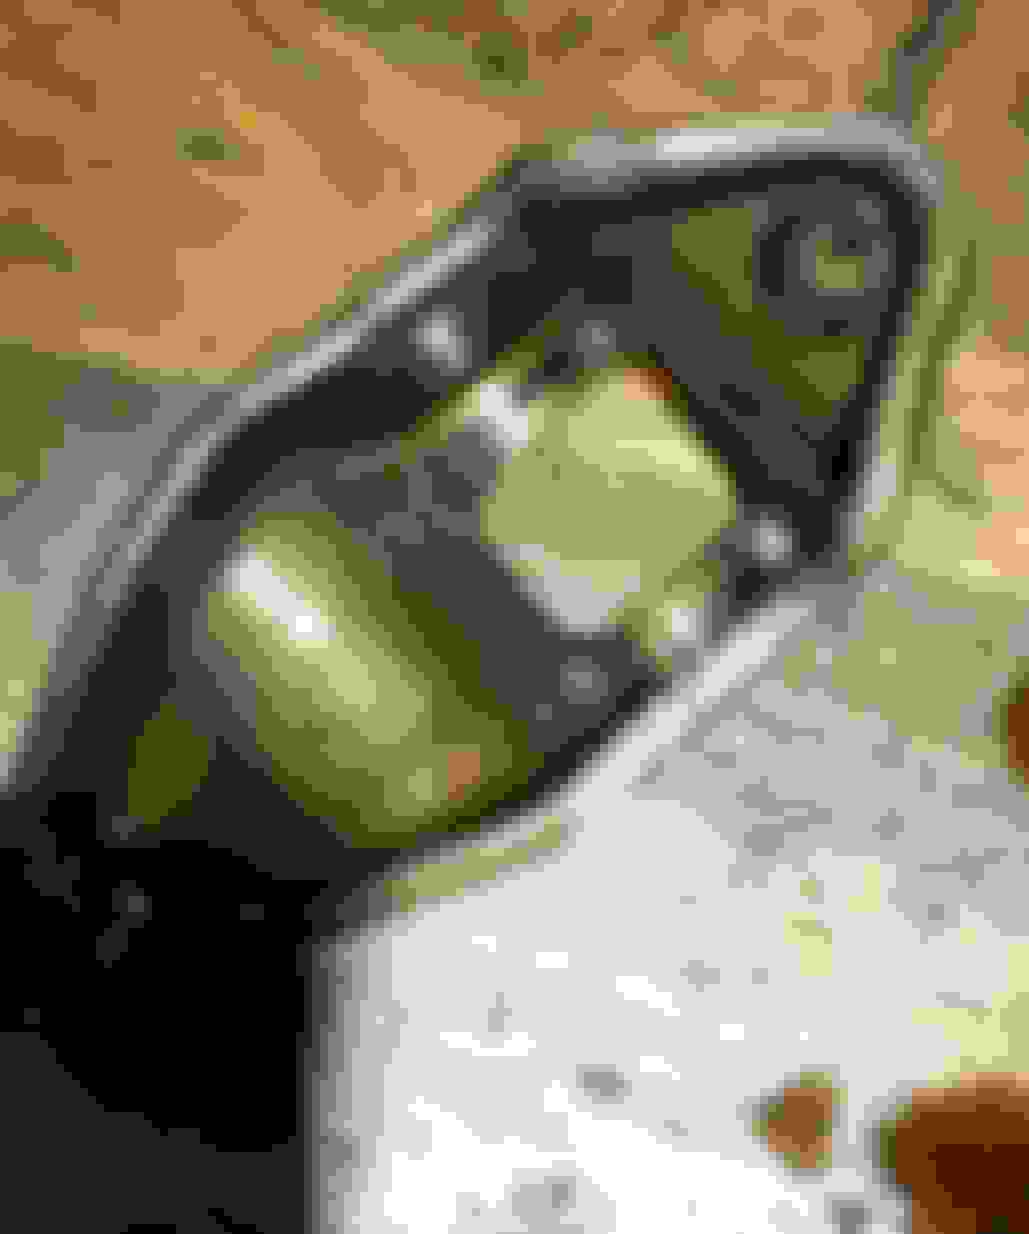
I also found a freeze plug that is leaking. It's mixed with the oil that was probably leaking out of the valve cover gasket, so to make sure there was coolant in it I scooped up some and put it on some foil and held a lighter under it. The idea is that if it boils then there's water in it, if it only smokes then its just oil. It boiled so I know the freeze plug is leaking.
Someone fixed it many years ago and it looks like, instead of replacing the soft plug, he bolted another piece of metal to it. No surprise that is failed. I tightened down the nut but I'm thinking it should just be replaced. I've never dealt with freeze plugs before...
Edit: apparently it's a expandable rubber plug. Just needed to be tightened?
This one crazy guy on naxja says that if the top end is rebuilt then the bottom end must be rebuilt too. Supposedly the old piston rings can not withstand the pressure that the valves are now holding.
What do you think about that? I'm hoping thats BS or at least not applicable in my case, because there is no way I'm replacing my piston rings. God dammit if I had known this I would have told the machinist not to do the valve job. Keep in mind that I'm not burning any oil, oil pressure is great, and when I tested the compression several weeks ago it was great. All cylinders where between 140 and 150 psi.
Plenty have replaced just the head (new valves, etc.), and thier engines are doing just fine.
Don't overthink it. I did an in place rebuild because of a cracked piston skirt. This was a '99. Pulled the head, pulled the oil pan and replaced all the pistons, rings and connecting rod bearings. I didn't really want to use plastiguage on the crank bearings because I didn't really want to know if I needed to pull the engine for a full rebuild. It had ~215k at the time. I was in a time crunch so I didn't do anything with the head either. Just put a new head gasket on and put it back on.
The only thing I regret was not replacing the lifters while I could. I pulled them and they all looked ok. After I got it all back together, it had a tick that I cannot identify. Oil pressure is great, compression is great on all cylinders, but that tick bothers me.
Once you pull the head once, it is so much easier the next time, but I have not dug in to pull it to replace the lifters.
I'd check the head for warping, clean the block, replace the lifters, put a new head gasket on, put the head back and call it done. If the bottom end isn't broken, then don't fix it.
That does look like a good amount of wear on the rockers and bridge, but those cna be replaced pretty easily later if you need to.
In the end, I think it comes down to if you have more time or money and if you are ok doing it piecemeal vs. all at once. One thing to be aware of is if coolant has been flowing through the engine for any good amount of time, it will have taken a tool on all the metal to metal contact including all the bottom end bearings.
It's really not that bad to take the oil pan off and push a piston out to check the bearing conditions. If you drop the oil pan, you can pull a connecting rod end off and see the bearing without removing the piston. And you can check the main bearings as well by removing one of the main bearing caps. Just something else to think about if you want to rest easier about what work you are doing.
Cool! That makes me feel a little better, and I did buy the lifters. Sealed Power HT-2011 is the make and part number.
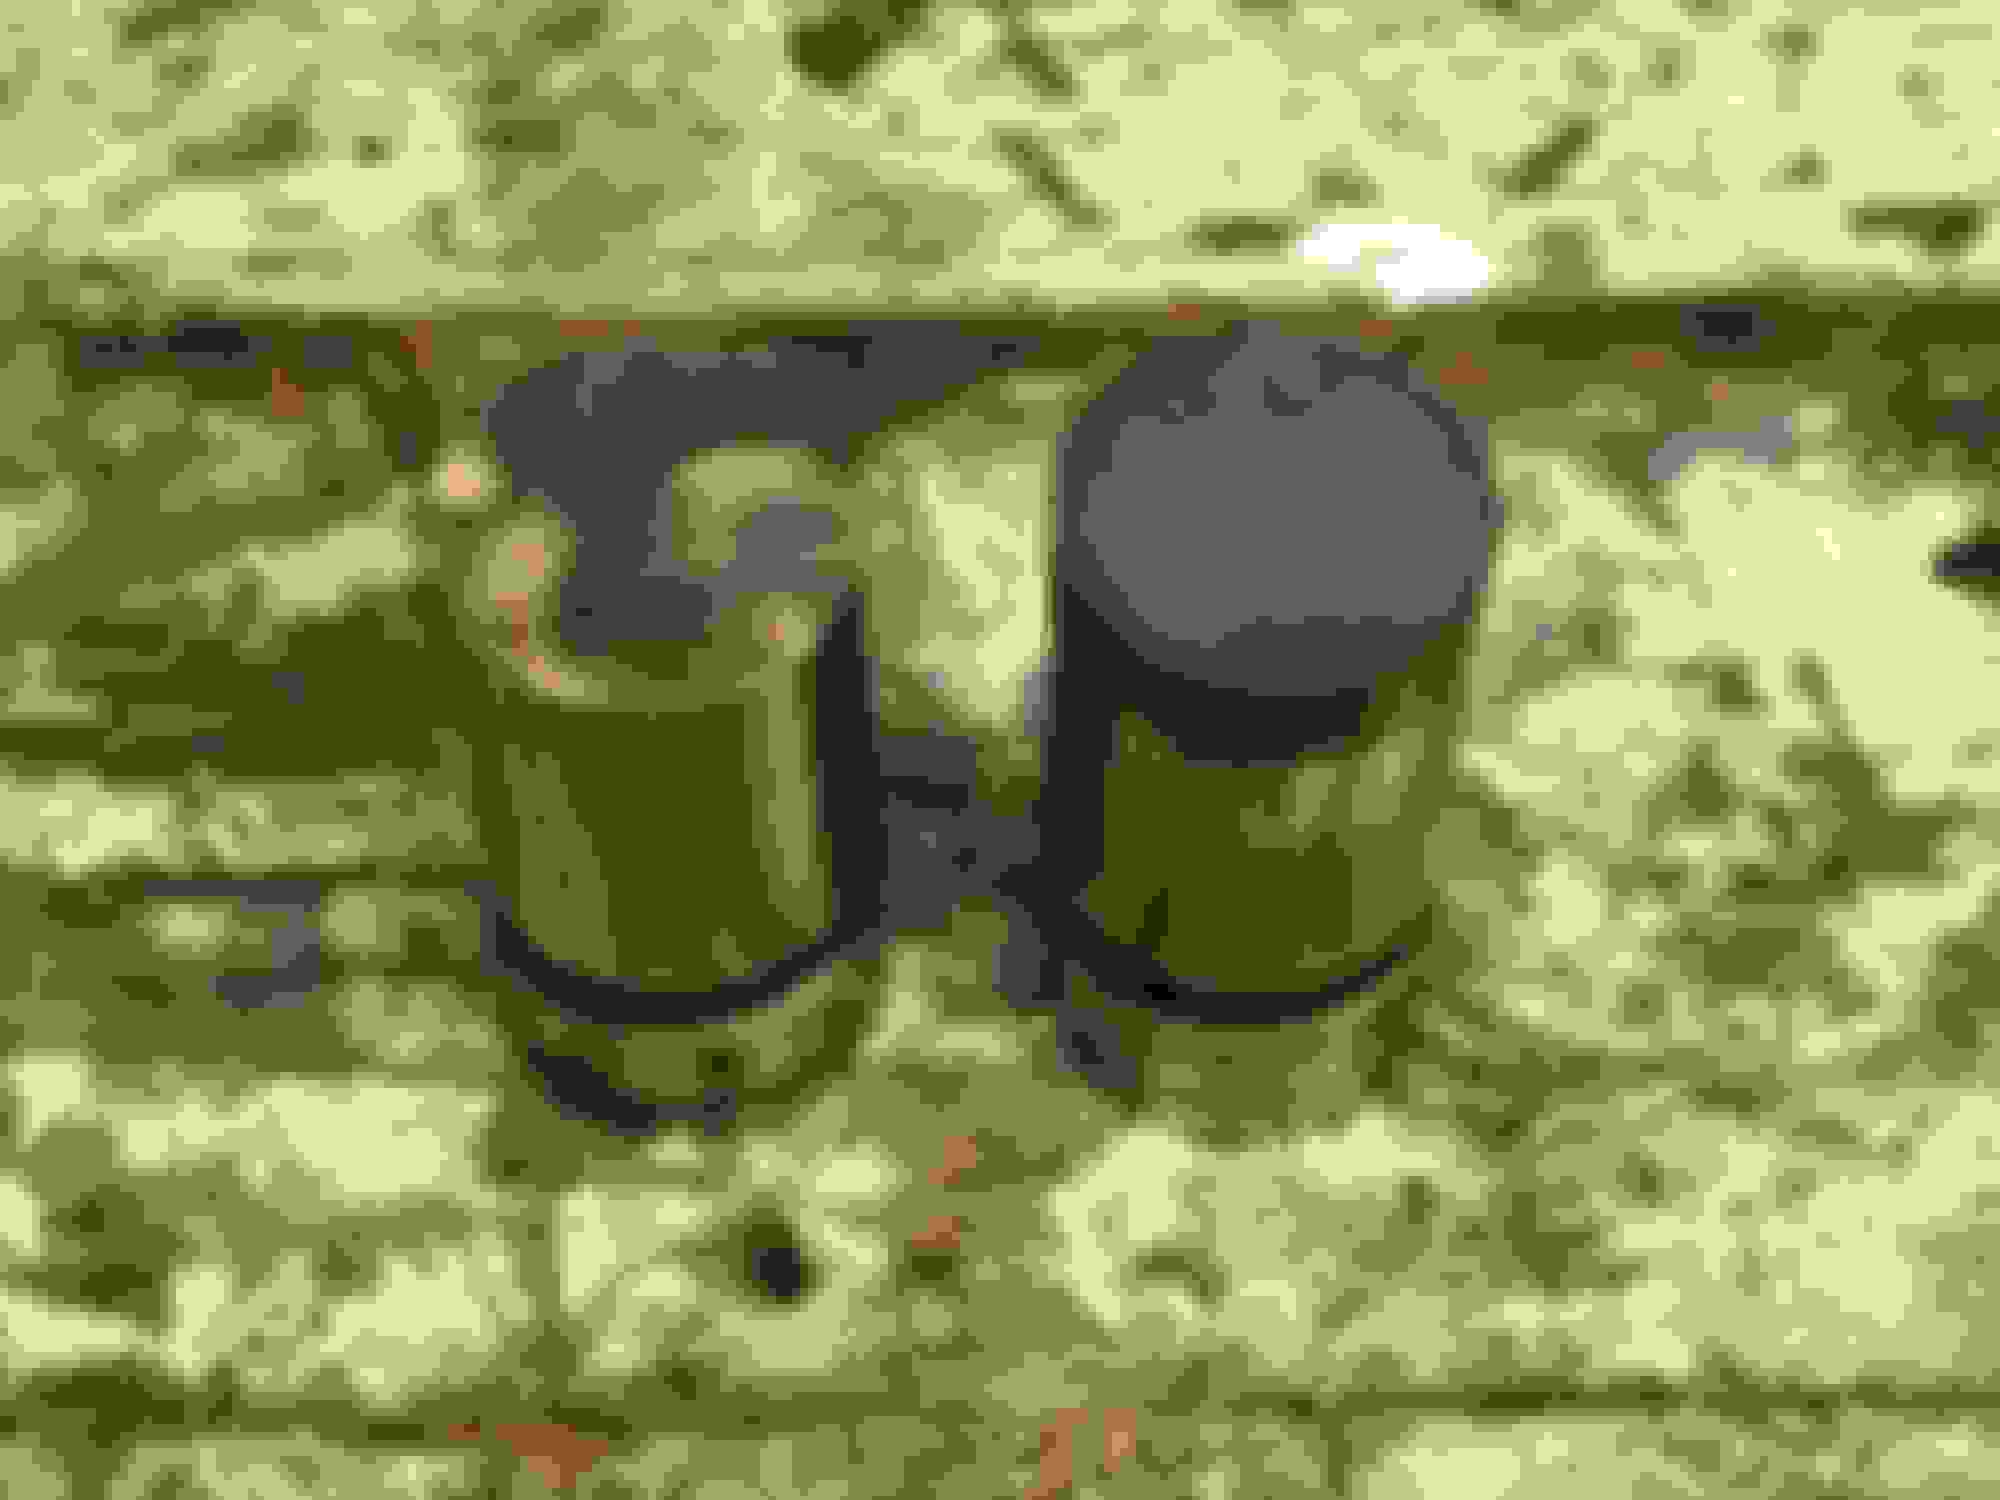
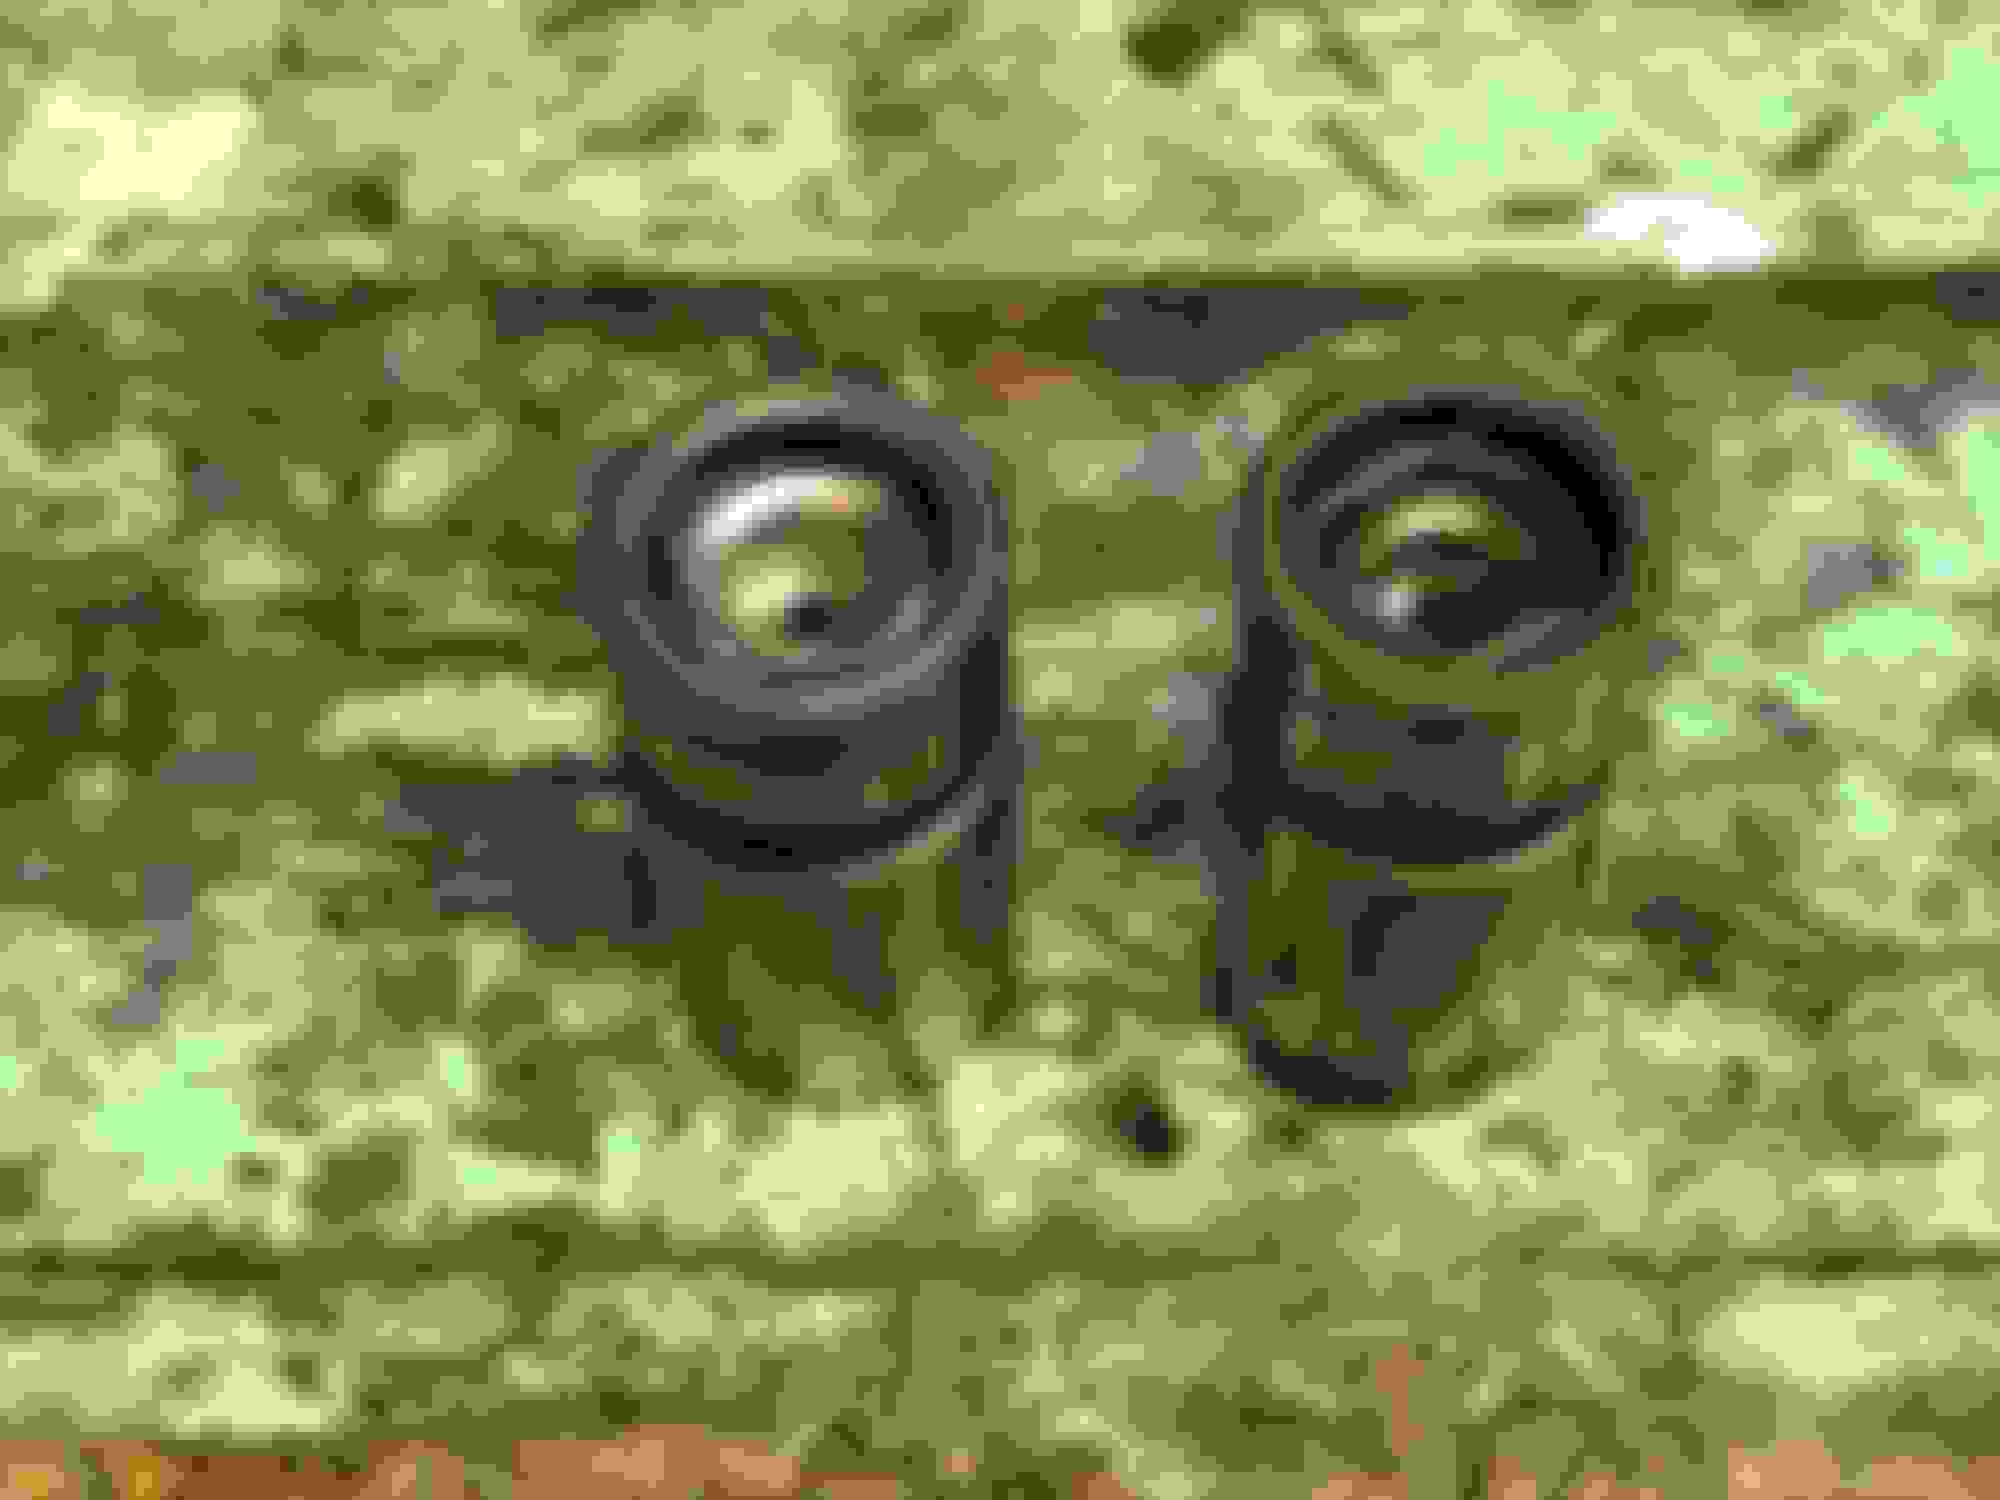
Here are the old lifters compared to the old ones. New on the left, old on the right. Half of the new ones where opened up and someone must have touched them and there was a tiny bit of flash rust. Also, I looked close and the old ones were a bit concave on the bottom and the new ones where a bit convex. That's normal, right?
You can see the new ones look slightly shorter but I'm not sure that it matters...? They dropped into the engine just fine and I put assembly lube on them but I didn't fill them with oil first, I'll do that when starting the engine. Will crank the starter for a few seconds to get oil pressure to them, then connect the fuel injectors and ignition coil and fire it up.
[update: i put a push rod in one old lifter and one new lifter and the overall height was exactly the same, so the new lifters provide the correct dimension even though they look taller]
I picked up the head from the machine shop yesterday. No cracks!
And of course I had to paint that bare iron before it rusted. Hopefully it sticks, I didn't use any primer and its cast iron and had been soaked in engine oil for decades so I don't know exactly how it will hold up. When it came back from the shop, I think they put it in a hot tank rather than media blasting it, and it was slightly sticky so I sprayed it with brake cleaner first and when I did it turned black! I think that was the oil deep in the pours being pulled to the surface! I wiped it down with acetone but that didn't change the color.
Of course, also got to paint the valve cover too! Would it even be a top end rebuild if the valve cover isn't painted?
Last edited by mannydantyla; Jun 22, 2018 at 09:22 AM.
I think I've decided to not lap the valves. The machine shop cut/grinded the valves and valve seats but I don't know if they also lapped them or if it was even needed? There's plenty of smart sounding people on google who say that valve lapping is detrimental and they give smart sounding reasons for why. Gotta love gear heads! And then there's the argument that if the valves seal *too* tight then that could cause the old piston rings to blow out. I don't totally buy that argument but it's worth considering or maybe a good excuse to skip the valve lapping.
Questions:
1. Wondering if I need to hone or deglaze the cylinder walls.. Is that only necessary when installing new rings? I'm not removing the pistons but I can drop them to the bottom of their stroke and get a cylinder ball-honing tool in there. There is a ridge at the top of the cylinders but its not a sharp change in bore or anything and it doesn't catch my finger nail but I can feel with my finger pads.
2. does anyone know if the felpro head gaskets need any sort of dressing or sealant? I don't think so but I wan't to be sure. What about the exhaust/intake manifolds gasket? [edit] Felpro says leave them clean and dry.
3. For the head bolt that goes through the water jacket, what is the recommended sealant? I've read a dazling array of options, including teflon tape, commercial-grade Teflon sealant, non-teflon sealant, permatex "right stuff", loctite thread lock, Loctite 592 sealant, any "flexible sealer", any "PTFE pipe dope", etc. And do I spread it all over the bolt or just on one end?
Last edited by mannydantyla; Jun 21, 2018 at 01:52 PM.
Nice work. If you aren't doing anything to the bottom end, I wouldn't touch the cylinder walls. I think I used locktite 592 on the head bolt in the water jacket. It does need to cure for 72 hours I think. I put it on the bottom half of the bolt. It's really jsut the bottom part that touches the water jacket. Can't help you with the valve lapping.
Only other advice I have is when putting the manifolds back on. I struggled with the lower bolts until I figured out I could put them in a little bit and then set the exhaust manifold on top of them. Make sure you are careful putting the intake manifold onto the little dowels. It kept getting super high revs on startup. I swore the manifold was on the dowels, but it was sitting on top of them. Manifold bolts still went in ok but it was off for sure. I finally took everything off and checked where the top of the manifold once when it was actually on the dowels. Not sure why I had so much trouble with it, but I did.
And for the freeze plugs. The only one I ever had a problem with is the one on the back of the block. If you want to replace them, they are really easy. Put a screwdriver near the lip and whack it few times. It will then spin out like a man hole cover. I used some hitack gasket stuff wiped around the new ones and used a socket to drive it in. When I replaced the motor in my '98 I replaced them jsut for peace of mind after having that one leak on my '99.
I think I've decided to not lap the valves. The machine shop cut/grinded the valves and valve seats but I don't know if they also lapped them or if it was even needed? There's plenty of smart sounding people on google who say that valve lapping is detrimental and they give smart sounding reasons for why. Gotta love gear heads! And then there's the argument that if the valves seal *too* tight then that could cause the old piston rings to blow out. I don't totally buy that argument but it's worth considering or maybe a good excuse to skip the valve lapping.
Questions:
1. Wondering if I need to hone or deglaze the cylinder walls.. Is that only necessary when installing new rings? I'm not removing the pistons but I can drop them to the bottom of their stroke and get a cylinder ball-honing tool in there. There is a ridge at the top of the cylinders but its not a sharp change in bore or anything and it doesn't catch my finger nail but I can feel with my finger pads.
2. does anyone know if the felpro head gaskets need any sort of dressing or sealant? I don't think so but I wan't to be sure. What about the exhaust/intake manifolds gasket? [edit] Felpro says leave them clean and dry.
3. For the head bolt that goes through the water jacket, what is the recommended sealant? I've read a dazling array of options, including teflon tape, commercial-grade Teflon sealant, non-teflon sealant, permatex "right stuff", loctite thread lock, Loctite 592 sealant, any "flexible sealer", any "PTFE pipe dope", etc. And do I spread it all over the bolt or just on one end?
These "Gear heads" you refer to are more like keyboard warriors!!! lots of talk and they dont know anything. I am in the middle of replacing the head on my XJ as well because of a 1/2" gap in the gasket between #2 and #3 cylinders.
If you had a shop rebuild your head dont worry about lapping the valves. If you were to have refreshed the head yourself then I would have recommended lapping the valves,,,that is the main application for lapping valves. As for a rebuilt head causing the lower end to fail,,,how can I put this???,,,is like saying you went blind because the sun went down. If the bottom end goes bad after you rebuild the head then the lower end was bad to start with. "Rebuilt head blows out piston rings",,,love this!!! If you have 100 - 150 psi in the cylinders before the head is rebuilt, and new specs call for 140 - 150 psi How in the world is putting a rebuilt head on a block going to blow out piston rings??? I sure hope you, or anyone else, are not listening to the jokers!!!
DO NOT put a hone in those cylinders unless you remove the pistons. I would also suggest not honing a cylinder unless you have a way to measure the bore, pistons, and rings. Your rings are already seated and you would do more harm than good honing just part of the cylinder.
Head gaskets require no additional sealant. I have read that some use a copper spray glue/sealer on other various gaskets, but I never have on intake or exhaust gaskets using FelPro gaskets.
Info for the head bolt, #11 I think, I am not sure of. I am looking for that info myself.
Last edited by 97XJ Journey; Jun 22, 2018 at 09:21 AM.
Reason: Spelling error
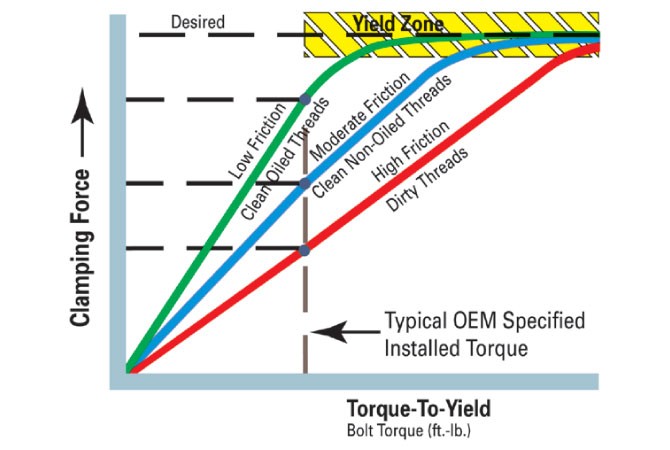
^^^ I really like this guy's approach. He's a dorky gear head like myself but not of the "Haynes manual armchair quarterback" variety. He's super **** about getting the torque on the head bolts all exactly the same, and I think they're valid points if you're building an F1 engine but I'm sure not going to go to the extend that he does. I think the important thing is they're all the same torque, and I'll at least clean out the threads and put a little oil on them. Thankfully we don't need to worry about using a Torque Angle Gauge as the FSM only asks that we torque to 110 foot pounds. I think that some engines say you gotta torque it down to a certain point, and then torque it 90 degrees past that or something. I had to do that once on some chevy k10 wheel hubs.
Last edited by mannydantyla; Jun 22, 2018 at 10:39 AM.
I have the head ready to be dropped onto the block, just need to get the block ready first.
Here's the block deck. I scrapped off the bits of stuck-on gasket, polished it with #3 steel wool and wd40, then cleaned it with acetone. But if you look closely there's still some bits of hardened gasket that are not coming off, and after some reading I think I may want to carefully sand it with 100 grit sand paper. I might glue it to a perfectly flat piece of wood or something and block sand it. For the type of gasket I'm using (felpro permatorque sd, which is not MLS) you don't want it to be too smooth, so I'm told.
I don't think I'm going to bother messing with the little amound of carbon on the piston domes unless you think it looks worse than I do
This doesn't look like a crack to you, does it? I have the bolts soaking in pb blaster in case I need to remove it and put a weld bead on it.
Is that a freeze plug in the water outlet hole???
You could also use a wire brush on a drill motor or grinder to clean the block.
Yes,,,that is a crack. Mine was cracked there and two other places. I took it to work and got it welded, not sure how long the repair will last but I am out of $$$ for more parts right now.
I took the exhaust manifold off and, yup, it was cracked in two places.
I fixed the cracks by drilling tiny holes at either ends of the cracks, then laying a bead over the cracks and holes. I used a DC stick welding machine set to Electrode Positive, 110 amps, and used 7014 welding rod. I also welded on new studs as I just cut the old ones
Saturday was the day to put the rebuilt head back on the engine. I sanded the block's deck with 120 grit sand paper on a flat sanding block, then cleaned it with acetone. With some nitrile gloves on, I put the new head gasket on the block with the word TOP facing up. Then, with my left foot standing on the firewall and my right foot standing on the radiator support, grabbed the head and dropped it onto the new gasket. Wasn't very hard to do myself but a helper would have made it easier and safer.
Bolting it on went fairly smooth. I used teflon tape on the #11 bolt as that's what I had laying around and I didn't want to wait 72 hours for a sealant to cure. Then went in the push rods in the same order they came out (cleaned up and with assembly lube on the tips) and the rockers and rocker fulcrums which both had assembly lube put on them. Then I dowsed the valve stems and springs with engine oil just because why not. I accidentally broke a valve cover bolt because the Haynes manual said to torque them to 45 inch pounds and I accidentally torqued it to 45 food pounds (!) but thankfully it was easy to extract and replace.