Jeep Grand Cherokee 1993-2004: The Ultimate Exhaust Guide
If your exhaust manifold needs replacement, you're in for a hard procedure. The process requires the removal of tons of components, but you will end up saving some serious money. Read on to learn how to do it yourself in the Jeep Grand Cherokee.
This article applies to the Jeep Grand Cherokee (1993-2004).
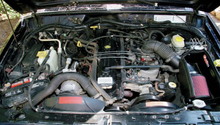
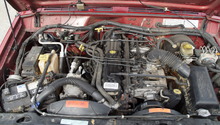
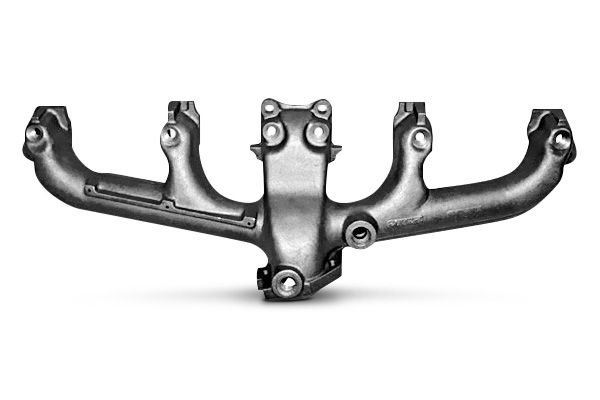
The exhaust manifold is responsible for evacuating spent exhaust gasses from the combustion process through the exhaust and out the tail pipe. Being that the manifold is bolted to the engine, and working with hot exhaust gasses, it experiences very severe heat cycling and can be prone to cracking with age. Some symptoms of a bad exhaust manifold are fumes going into your cabin. A cracked manifold will also result in a very rough idle, and at some point, you won't even want to drive your Jeep Grand Cherokee. The process isn't simple; in fact, it is one of the harder DIYs, due to the fact that you have to remove a lot of engine components to get to it, only to work in an extremely tight space. However, if you still decide to do it yourself, you can save yourself a ton of money because labor will be intensive with a fix like this. Read on to learn how you can replace the exhaust manifold yourself.
Table of Contents
How to Replace Exhaust Manifold

Materials Needed
- Set of wrench and sockets
- Torque wrench
- Gear wrench
- Flat head screwdriver
- Jack and jack stands
- New exhaust manifold
- Nylon string
Step 1 – Raise your Jeep
Park on a flat ground, then raise your Jeep using your jack and secure it with jack stands. Start from the front, raise each side, secure it, and then go to the other side, moving your way to the back until all four wheels are off the ground.
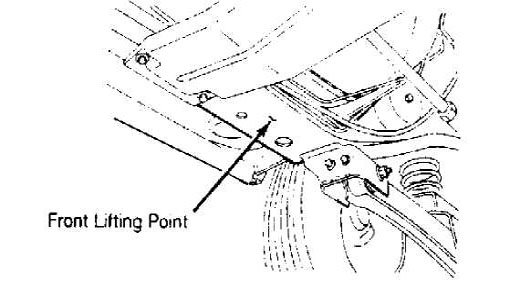
Figure 1. Raise the front and secure it. 
Figure 2. Raise the rear and secure it.
Step 2 – Take photos before removing anything
This is your time to try to make it easier on yourself when you're putting everything back together. Take photos and label every component you will remove. You will be removing everything that is on top of the exhaust manifold, so label away.

Step 3 – Remove the air box
Remove the air box.
- Remove the CCV hose going in the side of the air box assembly.
- Disconnect the rear hose going into the air box.
- Remove the hose going from the air box to the throttle boxy. It should have a clamp on it.
- Remove the air box lid by un-clamping the clamps around it and pulling it out.
- Remove the filter, then remove all the bolts and nuts in the bottom of the box.

Figure 4. Air box assembly diagram. 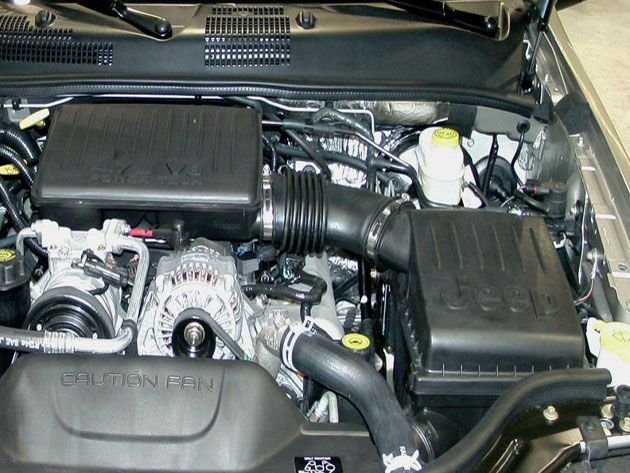
Figure 5. Air box assembly. 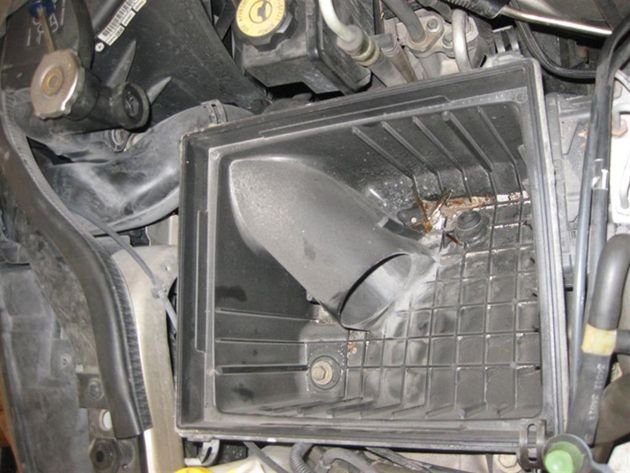
Figure 6. Remove the nuts in the assembly. 
Figure 7. Air box removed.
Step 4 – Remove cables
Remove the throttle cable, the cruise control cable, and the transmission valve control cable from the throttle body.
The throttle cable requires you to remove the socket joint at the end of it. The rest of the cables can just be pushed forward until they pop out.
Step 5 – Remove all connections
Now is your chance to label everything. Take photos and try to make the process as easy as possible for yourself. Remove all hoses and electrical connectors that are connected to the exhaust manifold.
Some require just slight pulls to come off, such as electrical connectors, while other require gentle prying with a flat head screwdriver.
Be sure to put a rag under the fuel lines when you remove them to avoid too much mess.

Pro Tip
This is a good time to check all your hoses and lines. If you see anything that is cracked or worn, it's cheap and easy to replace now.
Step 6 – Remove the power steering pump
- Loosen the two bolts on top and on the bottom of the pump.
- Loosen the two bolts on the back of the pump.
- Loosen the two adjuster nuts holding the pump to the bracket.
- Start removing the long bolt under the pump until the belt is loose.
- Remove the belt.
- Remove the bolts holding the bracket to the intake, and remove the pump as a whole.
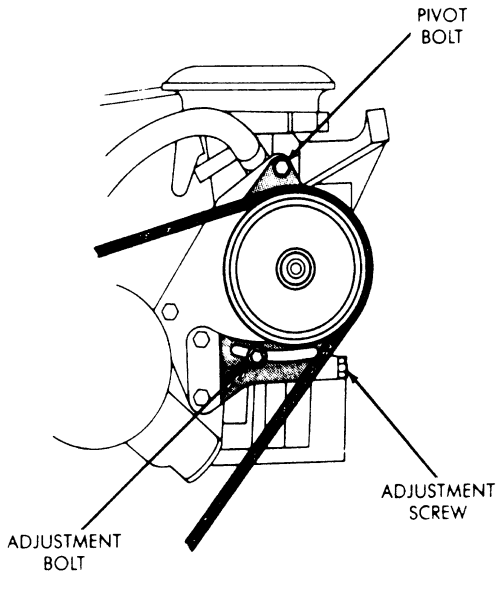
Figure 10. Power steering pump diagram. 
Figure 11. Power steering pump. 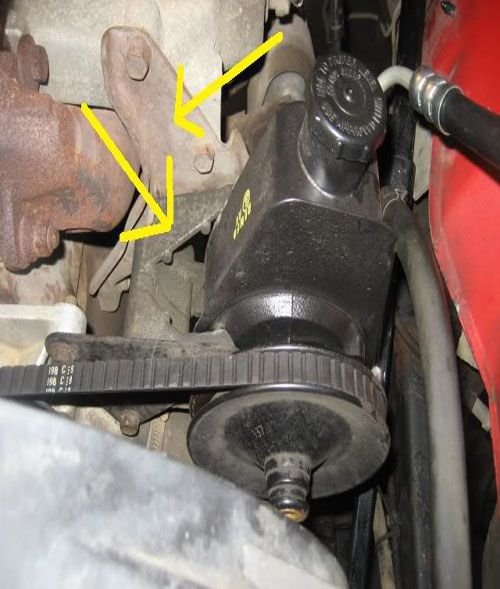
Figure 12. Bracket to manifold.
Pro Tip
Don't tilt the power steering pump to avoid spilling. Just pull it straight out.
Step 7 – Remove fuel line and bracket
Locate the two fuel lines going into the exhaust manifold from the rear. Then remove the two bolts holding their bracket. These are two hard lines, so avoid bending them too much so they don't weaken and break.
Forum expert "1991Jeep_Man" offers a great tip, and that is to tie these two lines with a nylon string to keep it out of the way.

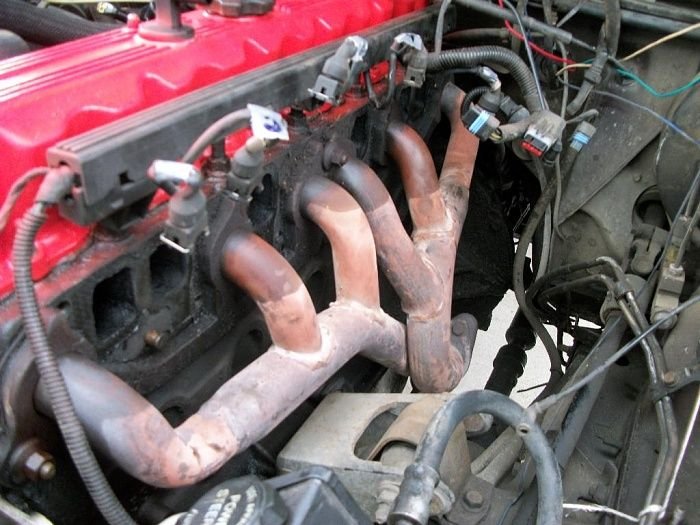
Step 8 – Remove the intake manifold
- Remove the upper bolts from the intake manifolds.
- Remove the lower bolts from the manifold.
- Be prepared for it to come off, then gently pull it outwards and then up.
Step 9 – Install the new manifold
Installation is the reverse of removal. Here's a summarized list:
- Align the new manifold in place, then tighten the lower bolts and then the upper.
- Install the hard fuel lines in the back of the manifold.
- Install the power steering pump. Bracket first, then loop the belt around, and then tighten the adjuster bolt along with the rest.
- Install all hoses and electrical connections. (Refer to the photos and labels you took.)
- Install the throttle cable, the cruise control cable, and the transmission valve control cable.
- Install the air box assembly, filter, and hoses.
- Lower the car safely.
Exhaust Manifold Review
An exhaust manifold is a very important part of your Jeep Grand Cherokee. It is where the gases and fuel meet. Not only is it important for the environment, it is critical to your vehicle's performance. Whether yours is cracked or you want to upgrade, the picks are many. Here are some of the most popular brands out there, so you can choose the best one for you and your budget.
Gibson |
Crown |
Omix-Ada | |
|---|---|---|---|
Price |
$340+ | $67+ | $140+ |
Legality |
50 States |
50 States |
50 States |
Installation |
Bolt-on | Bolt-on | Bolt-on |
Material |
Stainless Steel |
Cast Iron | Cast Iron |
Warranty |
Limited Lifetime |
1 Year | 5 Year Limited |
Best Value: Crown
Gibson
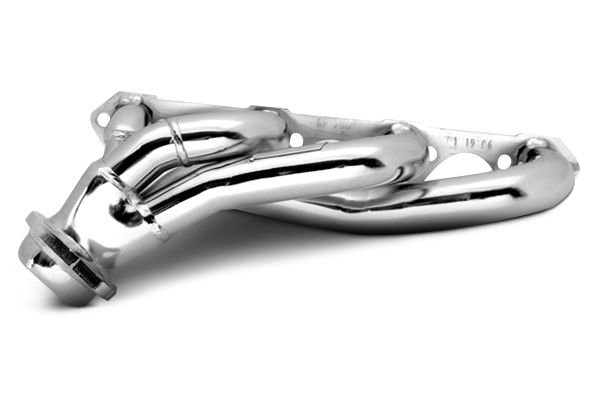
Price – $340+
Legality – 50 States
Installation – Bolt-on
Material – Stainless Steel
Warranty – Limited Lifetime
This American made product screams performance. The stainless steel tubing allows it to resist any heat you throw its way. Even though it is pricier than most competitors, forum users swear that it is well worth it. This product comes with a lifetime warranty and is designed to last a lifetime itself. It allows the engine to breathe better, thus giving much more power. The installation process is rather easy, after you've removed everything else of course. Recommended if you're looking for top quality product.
Crown

Price – $67+
Legality – 50 States
Installation – Bolt-on
Material – Cast Iron
Warranty – 1 Year
If you're looking for an OEM replacement and you don't want to spend a lot of money, this is a good product for you. It is simple, easy to bolt on, and offers basic warranty. The cast iron make it a durable product, and even though it gets extremely hot, it could last a very long time. If you like the brand, you can upgrade and pay a little more to get more out of your manifold. All in all, this is a decent product. Recommended if you're looking for an OEM replacement.
Omix-Ada
Price – $140+
Legality – 50 States
Installation – Bolt-on
Material – Cast Iron
Warranty – 5 Year
This is a mid-range product that will go a long way. A popular choice among customers, this will not disappoint. This product offers a great warranty at five years. Some customers complained about the bolts not fitting the holes, and others complained about the holes not aligning with the car itself. If you don't face this problem, this could be a decent replacement for the OEM one, just don't expect much performance increase. Recommended if you're looking for a good OEM replacement with great warranty.
Related Discussions
- Exhaust Manifold Replacement - CherokeeForum.com
- Easiest Way for Replacement - CherokeeForum.com
- Exhaust Manifold Removal - CherokeeForum.com