Jeep Grand Cherokee 1993-1998: How to Install Projector Headlights
Projector headlights do a more than just add to your Jeep in the looks department. Read more to find out.
This article applies to the Jeep Grand Cherokee ZJ (1993-1998).
You get into your beloved Jeep, crank the ignition and turn on your headlights, and what do you get? A hazy beam lighting up the road ahead of you that isn't only unsafe, but also unflattering. It's time to upgrade to new projector style headlights, which are designed with a completely different look and light performance. Projector style headlights are intended to burn brighter and also project the beam produced by the light bulb much further and also in a more defined pattern, therefore illuminating the road ahead further, brighter and wider. We've created a step by step guide to show you how to replace your old pair with some new projector headlights, but keep in mind if you are not familiar with how lights work, you may want to visit your dealer or professional repair shop.

Materials Needed
- New projector headlights
- Phillips screwdriver (Torx T25 in some model years)
Step 1 – Remove headlights
You must first remove the old headlights properly in order to install your new set. This is a simple step as it only requires one tool, use the Phillips screwdriver or Torx T25 (in some model years) to undo the top and bottom screws. The top screw is located right next to the top of the headlight housing, and the bottom screw is located in between the turn signal and bottom of the headlight housing. Then simply pull the headlight and turn signal housing out gently, until you can disconnect the wiring connectors on the back of it. Lastly, remove the bottom (third) light housing by undoing the two Phillips screws.
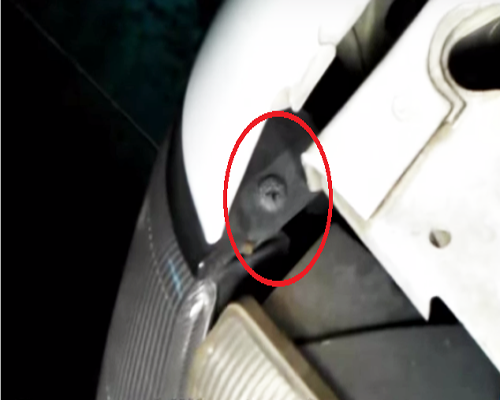
Figure 1. Remove the top screw. 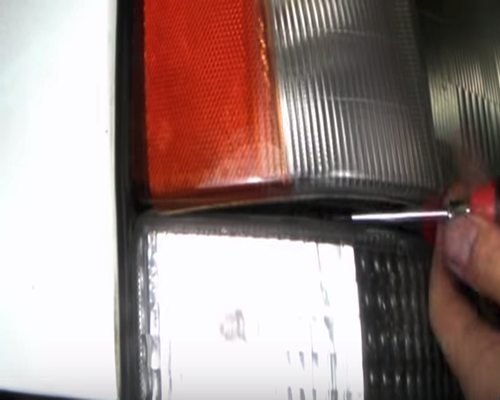
Figure 2. Remove bottom screw. 
Figure 3. Disconnect the harness.
Step 2 – Install new headlights
With the headlight compartment empty and clear, set the old headlight housing on a flat surface and remove the light bulb. Carefully grab the new headlight housing and insert the same light bulb into it. Then proceed to mount the new headlight and turn signal housings in the exact reverse manner in which the stock units were removed. Follow these steps:
- Plug in the new headlight.
- Plug in the new turn signals.
- Mount the bottom housing and screw it back in.
- Screw the turn signal and the headlight housing back in.
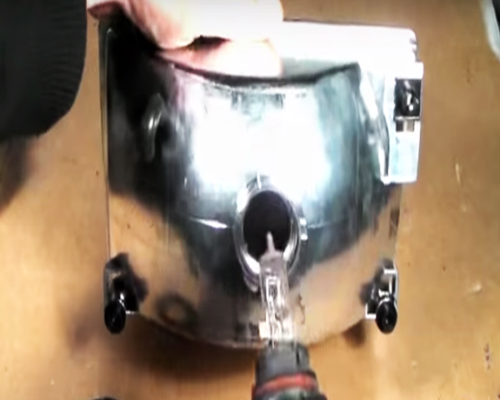
Figure 4. Install light bulb in new housing. 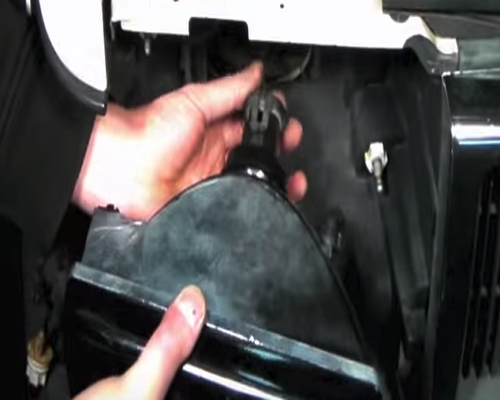
Figure 5. Slide new housing into place and plug in harness. 
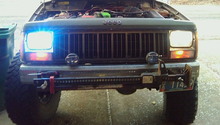
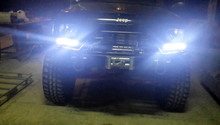
Figure 6. Enjoy your new projector headlights.
Featured Video: Aftermarket Headlight Install for Jeep
Related Discussion
- Projector Headlights for ZJ Jeep Cherokee - CherokeeForum.com