Jeep Cherokee 1984-2001: Engine Performance Diagnostic Guide
Engine performance comes down to having what the engine needs at the appropriate times. These needs are air, fuel, spark, and compression. The systems must work together in coordination to create a properly performing engine.
This article applies to the Jeep Cherokee XJ (1984-2001).
For an engine to work as designed, all electrical and mechanical systems must be working properly. The precise amount of fuel needs to be injected into the cylinder to match the density of air in the intake. This mixture must be ignited by the spark plug at the proper time during the combustion cycle. When the combination works as designed, the result is a smooth, responsive engine with good power output.
To test an engine's performance for issues, you must first know the proper specifications for the system you are testing. These will give you pass/fail results, allowing you to narrow down the cause to a particular part or area of the engine.

Materials Needed
- OBD trouble code scan tool
- Propane
- Soap and water mixture (optional)
- Flashlight
- Vacuum gauge
- Multimeter
- Compression tester
- 3/8" ratchet
- 6" extension
- Spark plug socket
- T-pin for backprobing
- Engine oil
Start your diagnosis by checking for trouble codes. Plug a code reader into the OBD port below your steering column. You can also use the method described in the article How to Read OBD Trouble Codes. Also, refer to the article Why is My Car Losing Power? for more diagnostic testing. You may also want to view the testing in the article Why Does My Car Idle Rough?, especially if the problem is present at idle.
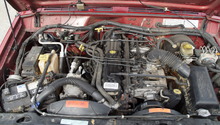
Step 1 – Perform a visual inspection
Start by noting any obviously odd smells and sounds coming from the Jeep while it's running. These include smoke from the engine bay or exhaust pipe, rattles, squeals etc. Look throughout the engine bay for disconnected vacuum lines and electrical connectors. Choose a couple places on the main harness and give it a light wiggle. If there is a change in the engine's operation, you know a wiring problem is present.
Note any fluid leaks. Fluids can create electrical problems once they contact electrical connectors and sensors.
Look under the vehicle at the catalytic converter(s). If any appear red, a clogged converter is present. This can also result from raw fuel entering the exhaust.

Step 2 – Begin vacuum testing
First test for vacuum leaks by spraying propane throughout areas in the engine bay where engine vacuum is present. If the engine idles higher, you know a vacuum leak is present. Soap and water can also be used for detection. The soap will bubble in the area of the vacuum leak.
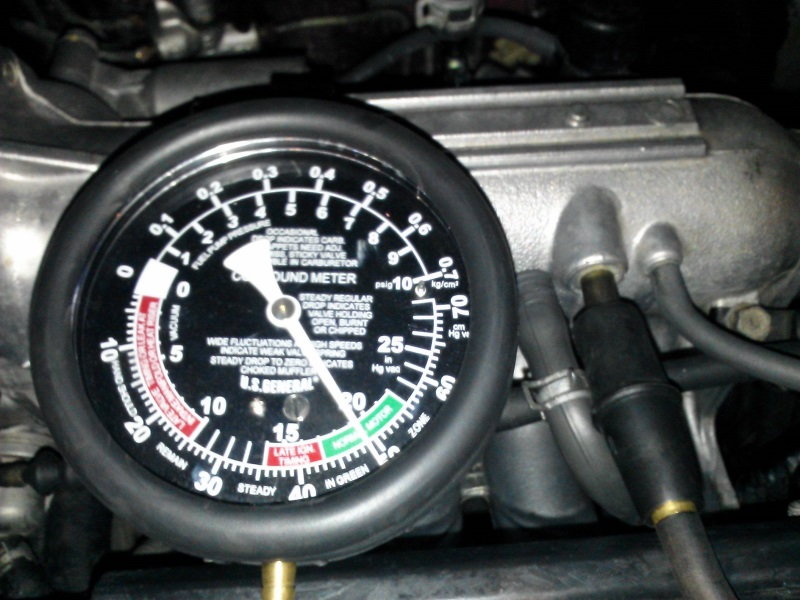
If no leak is located, connect a vacuum gauge to an engine vacuum source, such as the intake piping or intake manifold. You can tee into a line for easy reading.
At idle, your readings should be about 17" to 21" of vacuum. If not, see if the readings resemble any of these problems:
- A low vacuum gauge reading. This reading could be as low as 5". It's another indicator of a vacuum leak.
- A rapid needle vibration between 14" and 19". This reading indicates worn valve guides.
- A low reading that holds steady between 8" and 14" may indicate late ignition timing or leaking piston rings.
- A reading that periodically drops 2" to 6" below normal may indicate low compression.
- A reading that stays above 21" can indicate an intake restriction.
- A reading that slowly lowers below normal and continues to drop is indicative of an excessive exhaust back-pressure.
Now test with the engine RPM's at 2,000.
- If the needle waivers between 10" to 20" at idle and becomes worse at higher RPM's, there may be a weak or broken valve spring.
- If the needle waivers at idle and fluctuates rapidly in a smaller range at higher RPM's, you may have a vacuum leak.
- If the needle drifts at idle then stabilizes at higher RPM's, a burned valve may be present.
- If the needle does not rise much from the idle reading when the throttle is released, the engine may have worn piston rings.
Vacuum testing is a quick and easy way to get a good sense of where the problem is as well as what to test next.
Step 3 – Perform a compression test
Remove one spark plug from the engine and install the compression tester into that cylinder. You will want four full piston cycles without the engine running, so disconnect the ignition coils or fuel injectors. Hold the throttle plate open and crank the engine. Record the highest reading for each cylinder.
The readings should be near or above 150 psi and within 10% of each other.
If you find a cylinder with a low reading, place about 1/2 a teaspoon of oil into the cylinder through the spark plug hole. The oil will help seal the piston rings. If the problem improves, you know the piston rings are worn.

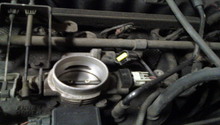
Step 4 – Check the throttle position sensor
This is a common fault part on the Jeep Cherokee. A fault with the throttle position sensor (TPS) can be intermittent and may not create a trouble code. TPS sensor issues can cause erratic shifting and severe hesitation. The engine computer cannot determine the difference in signals between the sensor and the driver's actions.
Locate the output wire (most likely the center terminal) and turn the key to the "on" position. Back-probe the TPS connector and record the readings at idle as well as wide open throttle. The reading changes from 0-5 volts as the throttle plate moves. At idle, the TPS reading should be less than 0.2 volts. At wide open throttle it should be near 4.8 volts.

Step 5 – Check the torque converter
The torque converter uses the movement of fluid to create a coupling between the engine and transmission. Fins on the impeller, turbine, and stator direct fluid flow to create varying levels of torque multiplication. A torque converter clutch is also used. This clutch locks the torque converter together to act like a fluid coupler during highway speeds improving gas mileage.
A quick test to check the operation of the torque converter lock up clutch is to drive down the road at 50 MPH. Keeping your foot on the gas, tap the brake pedal. RPM's should rise from 300 to 500. This rise is the converter clutch unlocking. A solenoid mounted to the transmission case locks and unlocks the solenoid.
Related Discussions
- Hesitation, Bucking During Acceleration - CherokeeForum.com
- TPS Voltage Readings - CherokeeForum.com
- Torque Converter Check Engine Light - CherokeeForum.com