
$100 or less Homemade Fender Flares

Thread Starter
Member
Joined: Nov 2011
Posts: 133
Likes: 2
From: Chicago
Year: 2001
Model: Cherokee
Engine: 4.0
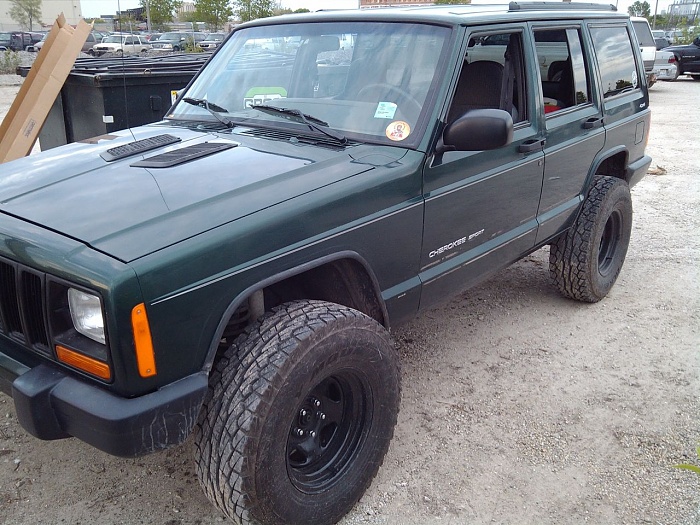
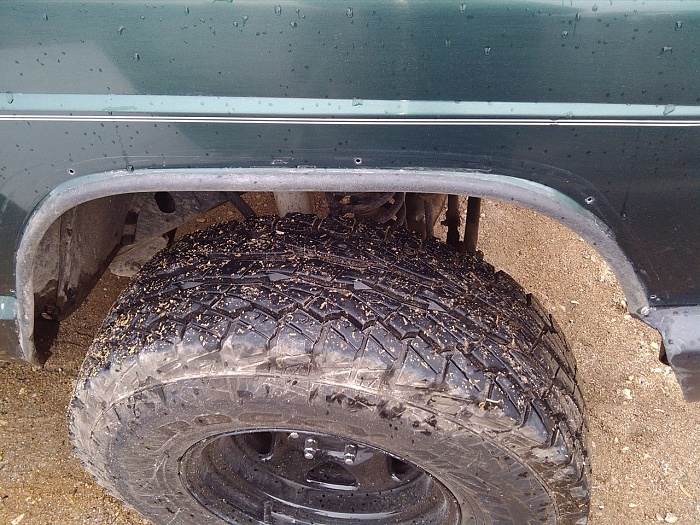
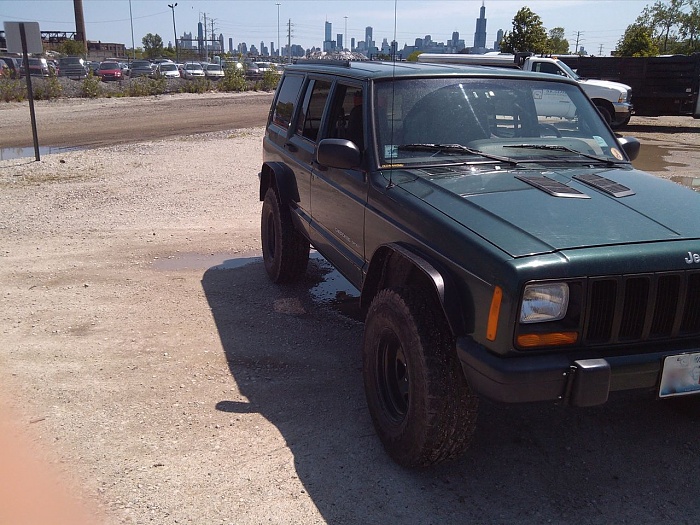
So, I was really sick of always having a dirty truck because or trimmed fenders. You could spend over 400 on a good set of new flares or there are also cheaper alternatives. I couldnt bring myself to buy the cheaper ones because of fear of regret.
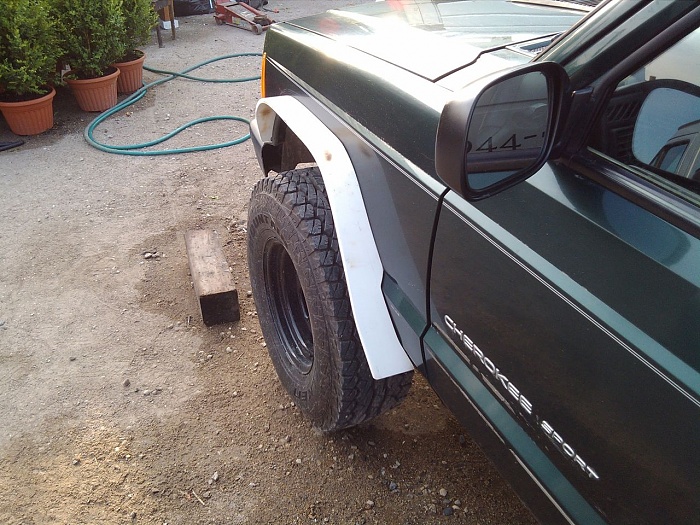
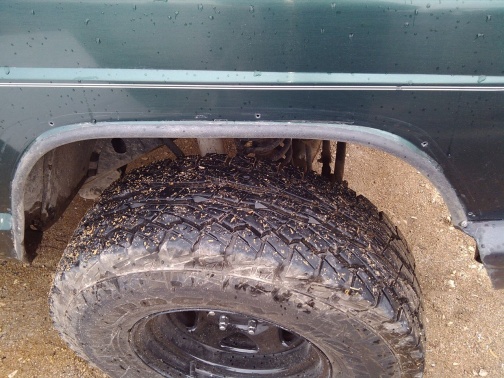
my rig shown clean here with trimmed fenders pre project
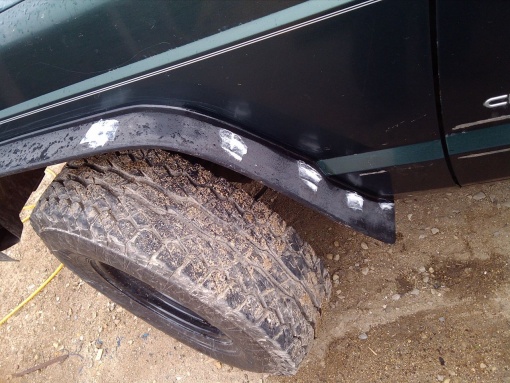
After (More Pics at end)

Homebrew options that i have seen with garden edging or other, have ranged from really good looking to floppy and poor. I wanted to make something that would be strong enough to withstand debris as well as highway speeds with wind.
After waiting about six months for a good idea to strike me, this is what i came up with.
Azek, a pvc material manufactured for outdoor (or indoor) use as trim etc. It is also flexible to some degree. I use it almost everyday and is a great product, but i digress.
Now, I did my fender flares for free using scrap material but YOU could do it for about 100 or less. I used pieces from a 1/2"x4'x8' sheet. I know they sell 3/8" sheets at Home Depot now for about $90 i think. All you will need is one sheet and you should have plenty, even if you mess up a lot.
How this process works (the short version):
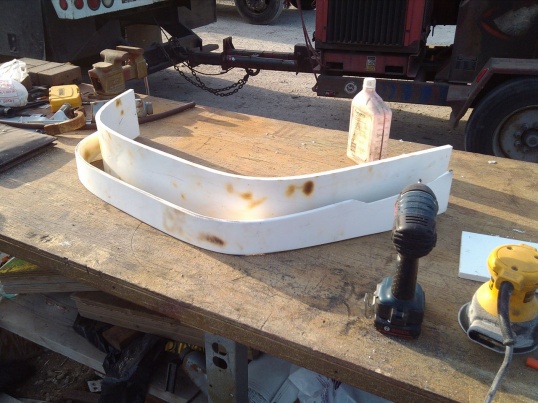
The azek strips are heated and bent around a form, where they briefly cool and retain the shape of the form.
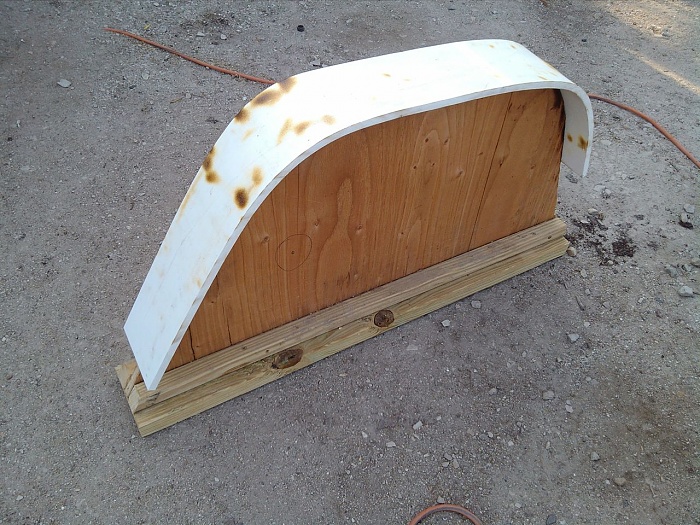
Step 1 Building a form
Step 2 Azek rough cuts
Step 3 Heating/Bending Azek
Step 4 Transferring fender shape to new flare
Step 5 Attaching Flares
Step 6 Silicon, Patch, and Paint
Step 1 Building a form
What you will need:
-a large piece of cardboard
-a piece of plywood large enough to cut down to the size of the wheel well opening
-Pencil/Pen
- Jigsaw or other
- knife
- drill and screws
- some other scrap wood helps, like a 2x6 and some 2x2's
Put a piece of cardboard larger than the size of the wheel well up against your trimmed fender or fender with out flare.
It is easiest to trace the shape of the fender opening from the inside. If you have someone to hold the cardboard up from the outside while you crawl underneath / behind and trace it. Do not worry if it is not totally accurate. I traced only one front fender and used the form from that for all four flares.
cut that tracing out of the cardboard and retrace it onto the plywood. Now cut (jigsaw) the plywood. You should now have the main part of the form in the shape of your wheel well.
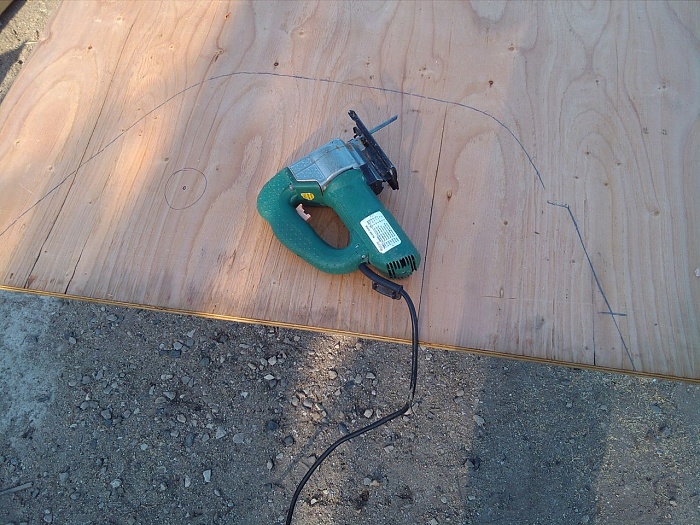
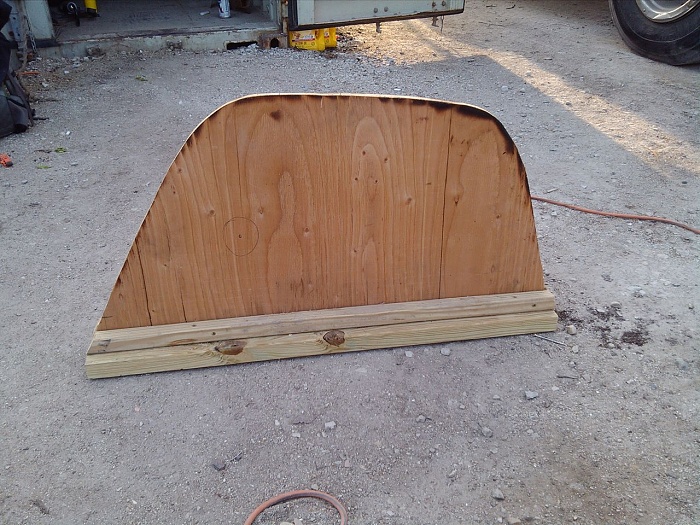
It makes it easier to attach the ply to something. I sandwiched the bottom of the ply with some 2x2, then screwed the 2x2s to a 2x6. this made it plenty strong to stand on its own.
Step 2 Azek rough cuts
What you will need
- Pencil
- Tape measure
-table saw or circular saw
-chop saw or circular saw
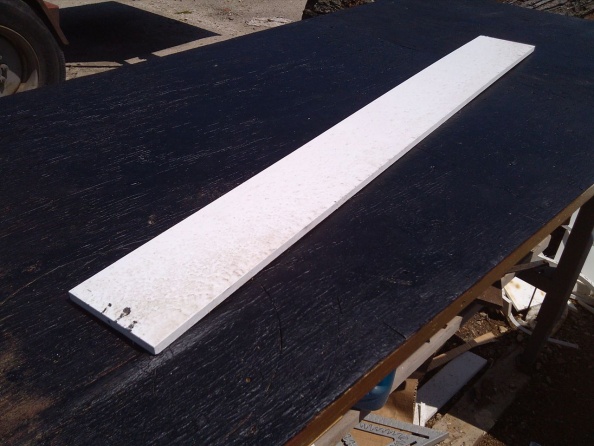
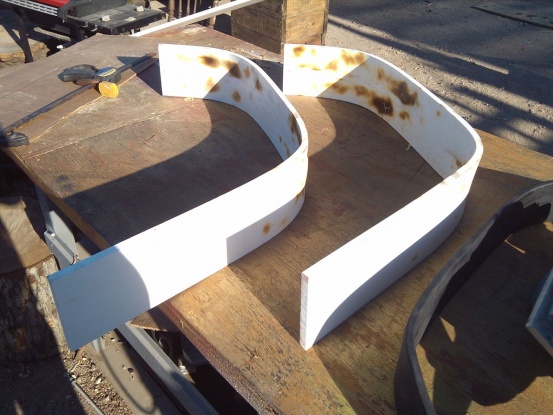
For the front flares i ripped a 5 1/2" x 8' piece out of the sheet of azek, and cut in half to have two 1/2 " x 5 1/2" x 4' pieces. the rear flares I made longer so you'll have to cut two 8' pieces and then cut them down.

feel free to cut extra. When I made my first front flare I tried a couple of tactics and styles. It probably took 3 tries till I got what I wanted.
my rig shown clean here with trimmed fenders pre project

After (More Pics at end)

Homebrew options that i have seen with garden edging or other, have ranged from really good looking to floppy and poor. I wanted to make something that would be strong enough to withstand debris as well as highway speeds with wind.
After waiting about six months for a good idea to strike me, this is what i came up with.
Azek, a pvc material manufactured for outdoor (or indoor) use as trim etc. It is also flexible to some degree. I use it almost everyday and is a great product, but i digress.
Now, I did my fender flares for free using scrap material but YOU could do it for about 100 or less. I used pieces from a 1/2"x4'x8' sheet. I know they sell 3/8" sheets at Home Depot now for about $90 i think. All you will need is one sheet and you should have plenty, even if you mess up a lot.
How this process works (the short version):
The azek strips are heated and bent around a form, where they briefly cool and retain the shape of the form.
Step 1 Building a form
Step 2 Azek rough cuts
Step 3 Heating/Bending Azek
Step 4 Transferring fender shape to new flare
Step 5 Attaching Flares
Step 6 Silicon, Patch, and Paint
Step 1 Building a form
What you will need:
-a large piece of cardboard
-a piece of plywood large enough to cut down to the size of the wheel well opening
-Pencil/Pen
- Jigsaw or other
- knife
- drill and screws
- some other scrap wood helps, like a 2x6 and some 2x2's
Put a piece of cardboard larger than the size of the wheel well up against your trimmed fender or fender with out flare.
It is easiest to trace the shape of the fender opening from the inside. If you have someone to hold the cardboard up from the outside while you crawl underneath / behind and trace it. Do not worry if it is not totally accurate. I traced only one front fender and used the form from that for all four flares.
cut that tracing out of the cardboard and retrace it onto the plywood. Now cut (jigsaw) the plywood. You should now have the main part of the form in the shape of your wheel well.


It makes it easier to attach the ply to something. I sandwiched the bottom of the ply with some 2x2, then screwed the 2x2s to a 2x6. this made it plenty strong to stand on its own.
Step 2 Azek rough cuts
What you will need
- Pencil
- Tape measure
-table saw or circular saw
-chop saw or circular saw
For the front flares i ripped a 5 1/2" x 8' piece out of the sheet of azek, and cut in half to have two 1/2 " x 5 1/2" x 4' pieces. the rear flares I made longer so you'll have to cut two 8' pieces and then cut them down.
feel free to cut extra. When I made my first front flare I tried a couple of tactics and styles. It probably took 3 tries till I got what I wanted.
Thread Starter
Member
Joined: Nov 2011
Posts: 133
Likes: 2
From: Chicago
Year: 2001
Model: Cherokee
Engine: 4.0
Step 3 Heating/Bending Azek
What you will need
WARNING
Heating or burning of pvc can produce toxic gas
- Well ventilated area
- maybe some kind of respirator if you are really paranoid
- Drill or nail gun or hammer
- screws or nails
- torch or a heat gun
Start by screwing or nailing one end of the azek to the ply. You will not be able to really bend it to fit the curve until it is heated up. I used a little torch to gradually bring up the temperature of the azek because my heat gun was out of commission. There are other possible methods of heating up the azek but because of the length of these pieces i think the heat gun will work best.
So, start heating at one end and work your way to the other, bending it down to the form as you go. You can attach some screws or nails along the way to help hold it down but it is not entirely necessary and keep in mind that the more holes you put in it the more you will have to patch and sand.
If your using a little torch, it is ok if you burn the azek a little bit, just be careful not to inhale any of the smoke. In fact, even the heat gun will produce fumes so be careful and make sure there is ventilation.
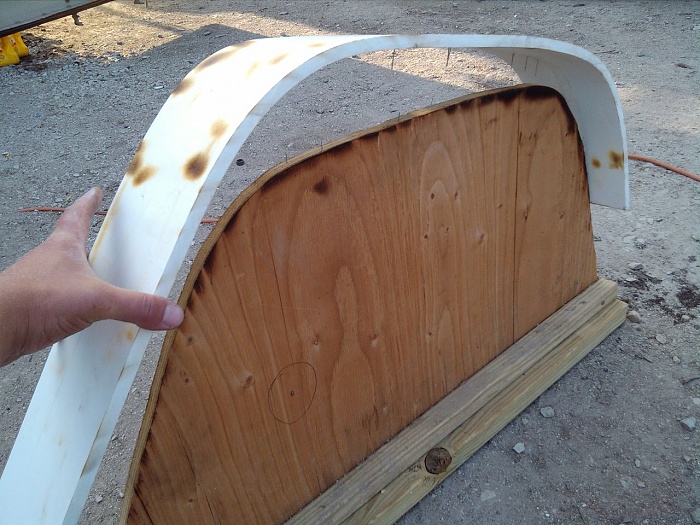
The Azek will cool pretty quickly or enough to retain the shape of the form. Do this for each flare or more.

What you will need
WARNING
Heating or burning of pvc can produce toxic gas
- Well ventilated area
- maybe some kind of respirator if you are really paranoid
- Drill or nail gun or hammer
- screws or nails
- torch or a heat gun
Start by screwing or nailing one end of the azek to the ply. You will not be able to really bend it to fit the curve until it is heated up. I used a little torch to gradually bring up the temperature of the azek because my heat gun was out of commission. There are other possible methods of heating up the azek but because of the length of these pieces i think the heat gun will work best.
So, start heating at one end and work your way to the other, bending it down to the form as you go. You can attach some screws or nails along the way to help hold it down but it is not entirely necessary and keep in mind that the more holes you put in it the more you will have to patch and sand.

If your using a little torch, it is ok if you burn the azek a little bit, just be careful not to inhale any of the smoke. In fact, even the heat gun will produce fumes so be careful and make sure there is ventilation.

The Azek will cool pretty quickly or enough to retain the shape of the form. Do this for each flare or more.
Thread Starter
Member
Joined: Nov 2011
Posts: 133
Likes: 2
From: Chicago
Year: 2001
Model: Cherokee
Engine: 4.0
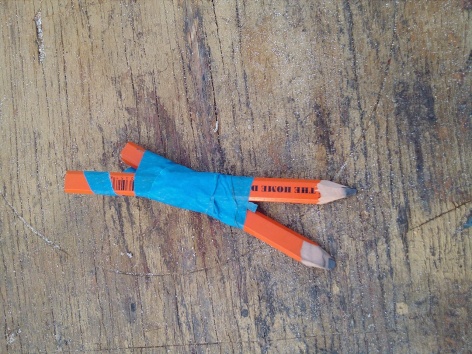
Step 4 Transferring fender shape to new flare
What you will need:
- A compass or make one like I did with two pencils
- Jig saw or a coping saw or something will work but it will be really slow
Take the blank flare and hold it right up to where you want it to be. Mine are set larger than the trimmed fenders, as it is easier than trying to match everything exactly. Depending on where you want it, it might be able to slightly sit there by itself. I was able to do this part myself but it would be easier with a second hand.
Place one end of your compass against the car while your drawing end is on the new flare. When you trace along where the new flare meets your fender the other pencil will duplicate the shape onto the new flare.


This process can be a little imprecise so only have the compass open to about an inch - inch and a half. This will leave you extra width to retrace an recut from.
Now take your jig saw or other and cut your line. Hold it up to your fender and see how it matches up. At this point you might want to mark where there is extra length on the fender. My flare starts at the bumper wrap around, so that is where i marked and cut mine.
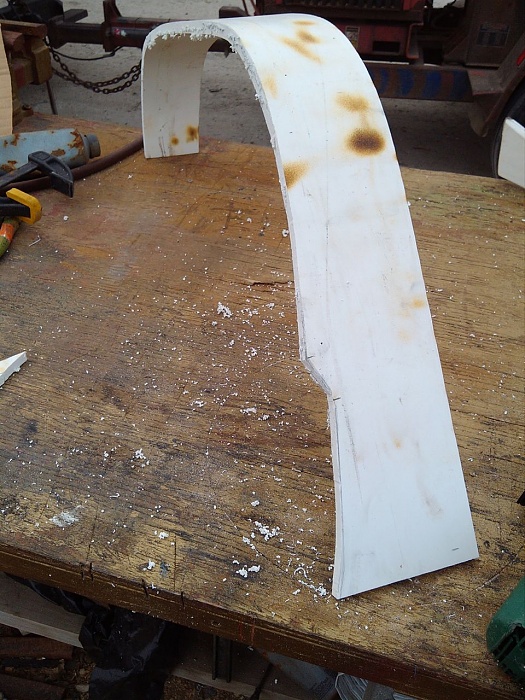

Even if your first cut matches the fender pretty well, you might want to do it again so that they aren't so wide. If there are little gaps, dont worry. You can fill these with silicon later.
Repeat this for all four fender flares
What you will need:
- A compass or make one like I did with two pencils
- Jig saw or a coping saw or something will work but it will be really slow
Take the blank flare and hold it right up to where you want it to be. Mine are set larger than the trimmed fenders, as it is easier than trying to match everything exactly. Depending on where you want it, it might be able to slightly sit there by itself. I was able to do this part myself but it would be easier with a second hand.
Place one end of your compass against the car while your drawing end is on the new flare. When you trace along where the new flare meets your fender the other pencil will duplicate the shape onto the new flare.
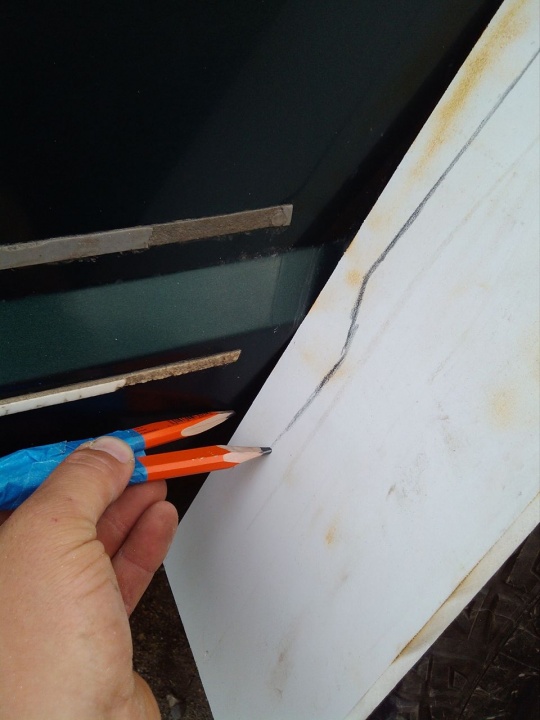
This process can be a little imprecise so only have the compass open to about an inch - inch and a half. This will leave you extra width to retrace an recut from.
Now take your jig saw or other and cut your line. Hold it up to your fender and see how it matches up. At this point you might want to mark where there is extra length on the fender. My flare starts at the bumper wrap around, so that is where i marked and cut mine.

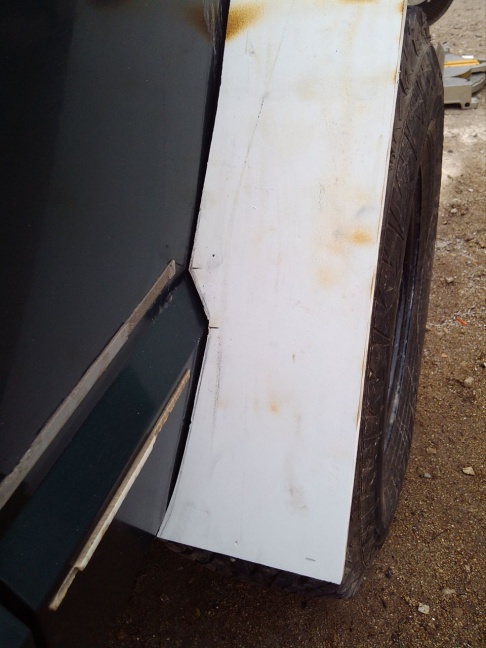
Even if your first cut matches the fender pretty well, you might want to do it again so that they aren't so wide. If there are little gaps, dont worry. You can fill these with silicon later.

Repeat this for all four fender flares
Thread Starter
Member
Joined: Nov 2011
Posts: 133
Likes: 2
From: Chicago
Year: 2001
Model: Cherokee
Engine: 4.0
Step 5 Attaching Flares
What you will need
- Drill
- Drill bits and drivers for whatever screw you choose
- Screws
- Silicon
Start by tracing the new flare onto the fender with a pencil or something that will not permanently mark your truck.
Now, you may choose to do this differently, because this is a little hard to explain but here it goes.
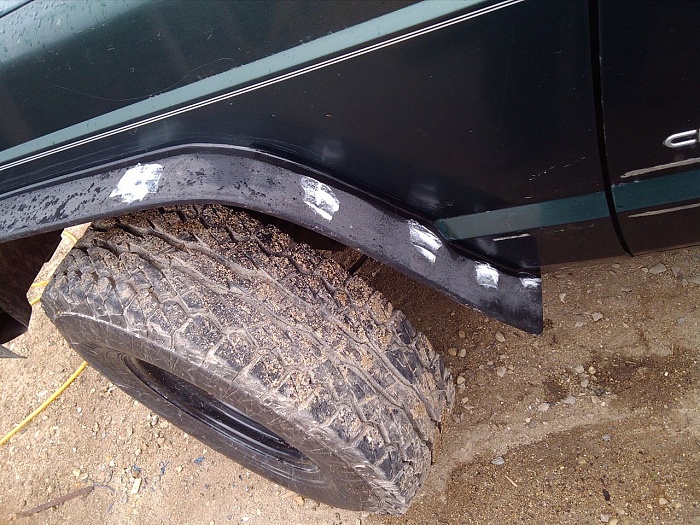
I drilled about 5 holes in the fender so that the screw would enter the flare at an angle. So the holes were about a half inch or less below the underside of the fender flare. This was done mostly due to the fact that it was too hard to get a drill on the inside of the wheel well AND drive a screw straight into the flare. This also causes the screws to come through the top of the fender, but you can fix this later and I'll get to that in the next step.
It is a good idea to put a dab of silicon in each hole before you screw to prevent rust.
The longer the screw and the more of the threads of the screw you can have in the flare, the better.
Step 6 Silicon, Patch, and Paint
What you will need
- Exterior paintable silicon
- vinyl patch (its used for patching screws on drywall)
- Exterior grade paint (oil based probably better)
So to get to your protruding screws. Cut them with a grinder or a hack saw or something like that. If you cut into the flare do not worry. You take the patch and with a putty knife fill in any holes or cut marks. This is also a good time to find any other holes from when you molded it to the form and fill them.
Let the patch dry (does not take too long) and then sand your whole fender flare. You might need an additional pass with the vinyl patch and another sanding.
Now take your silicon and squeeze a small bead where the flare meets the fender. Then wipe it smooth with your finger, while at the same time try to push it into the gaps.
The silicon will take longer to dry than the patch but could be painted before it is fully dry.
Next take painters tape and tape off your truck. Then, paint your flares whatever color you want. More than one coat would probably be a good idea
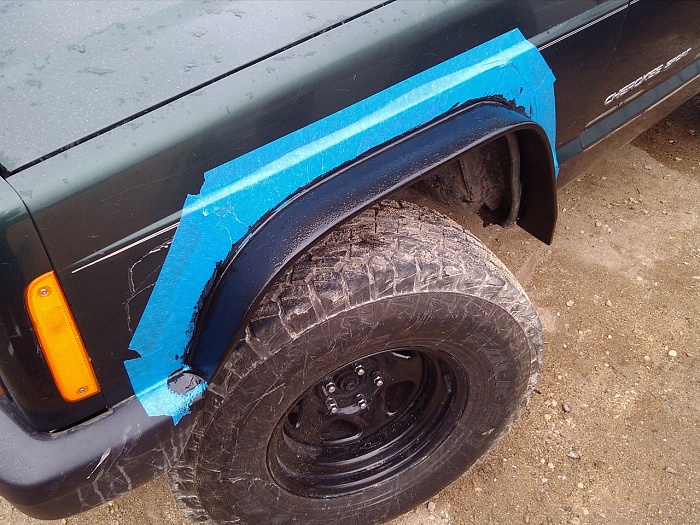
Wait till your last coat of paint dries till you pull off the tape. Then admire your work
Additional Notes
The patch paint and sand process can be redone in the future if you have any more damage from debris.
What you will need
- Drill
- Drill bits and drivers for whatever screw you choose
- Screws
- Silicon
Start by tracing the new flare onto the fender with a pencil or something that will not permanently mark your truck.
Now, you may choose to do this differently, because this is a little hard to explain but here it goes.
I drilled about 5 holes in the fender so that the screw would enter the flare at an angle. So the holes were about a half inch or less below the underside of the fender flare. This was done mostly due to the fact that it was too hard to get a drill on the inside of the wheel well AND drive a screw straight into the flare. This also causes the screws to come through the top of the fender, but you can fix this later and I'll get to that in the next step.
It is a good idea to put a dab of silicon in each hole before you screw to prevent rust.
The longer the screw and the more of the threads of the screw you can have in the flare, the better.
Step 6 Silicon, Patch, and Paint
What you will need
- Exterior paintable silicon
- vinyl patch (its used for patching screws on drywall)
- Exterior grade paint (oil based probably better)
So to get to your protruding screws. Cut them with a grinder or a hack saw or something like that. If you cut into the flare do not worry. You take the patch and with a putty knife fill in any holes or cut marks. This is also a good time to find any other holes from when you molded it to the form and fill them.
Let the patch dry (does not take too long) and then sand your whole fender flare. You might need an additional pass with the vinyl patch and another sanding.
Now take your silicon and squeeze a small bead where the flare meets the fender. Then wipe it smooth with your finger, while at the same time try to push it into the gaps.
The silicon will take longer to dry than the patch but could be painted before it is fully dry.
Next take painters tape and tape off your truck. Then, paint your flares whatever color you want. More than one coat would probably be a good idea
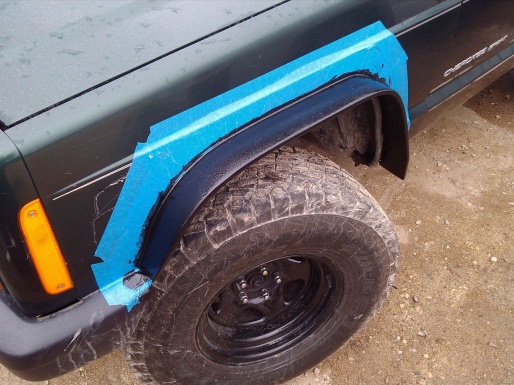
Wait till your last coat of paint dries till you pull off the tape. Then admire your work

Additional Notes
The patch paint and sand process can be redone in the future if you have any more damage from debris.

Thread
Thread Starter
Forum
Replies
Last Post
Currently Active Users Viewing This Thread: 1 (0 members and 1 guests)