Project "Hippo"...black 99 XJ
 03-31-2012, 10:09 AM
#46
CF Veteran
Thread Starter
Join Date: Jan 2011
Location: Las Vegas
Posts: 1,894
Likes: 0
Received 4 Likes
on
4 Posts
Year: 1999
Model: Cherokee
Engine: 4.0
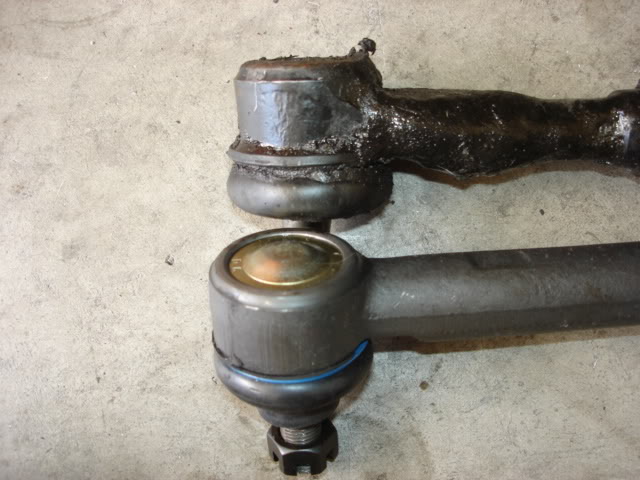
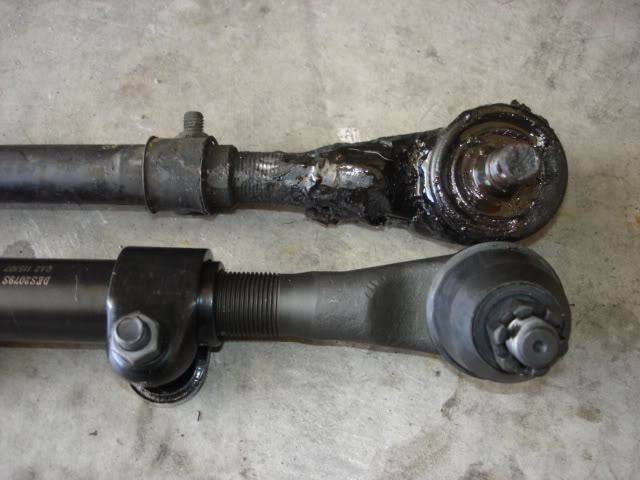
While i'm working on the front, i decided to upgrade to ZJ tie rod and replace my draglink bushing at the same time.
Parts
>#DS1312 Tierod
>#ES3096 Tierod End
>#ES2079S Adjuster Sleeve
>#9.13103G Energy Draglink Bushings
XJ vs ZJ
If my understand is right, lifting the Jeep does not required to adjust the tierod.....someone correct me if i'm wrong.
Using the old tierod as a guide, i adjust the new one to the same length and install.
A bfh will get the job done.
I did not tighten the tierod/draglink bolt as i'll be removing the draglink to replace the bushing
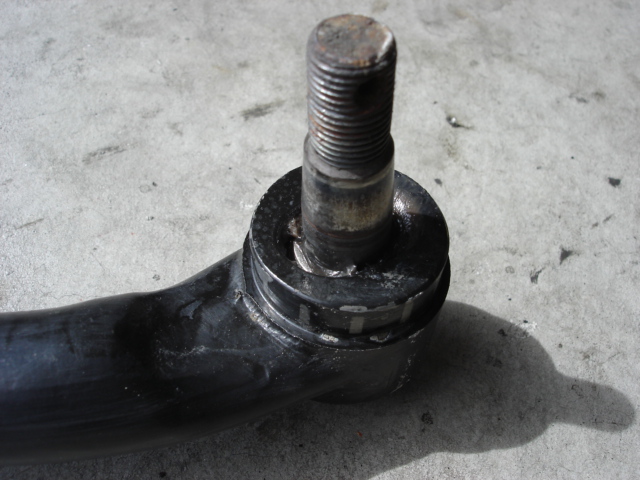
Now to the draglink bushings
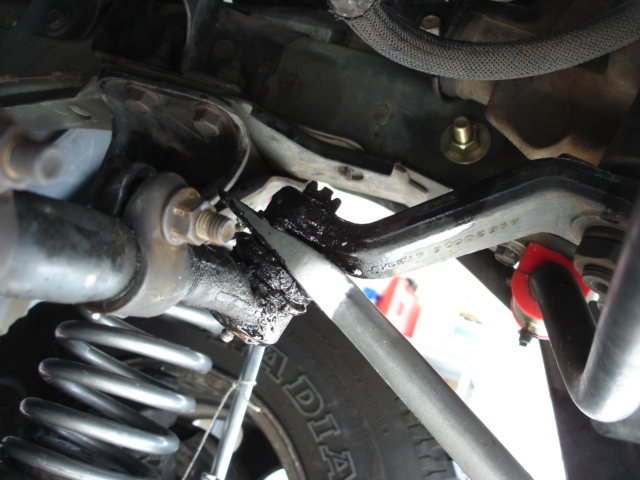
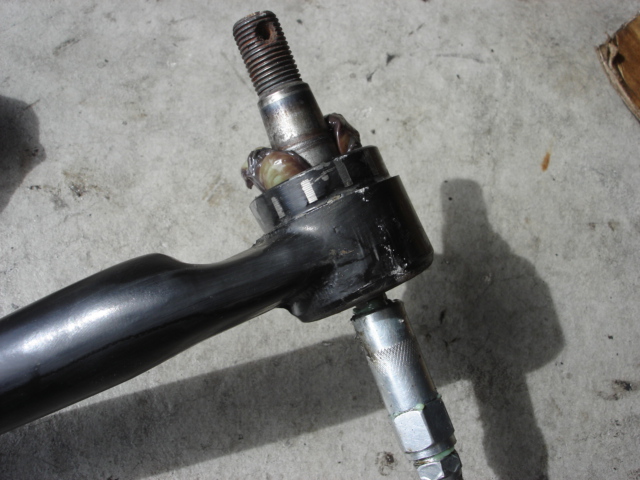
Removing draglink from the pitman arm
A pickle fork and a bfh got the job done
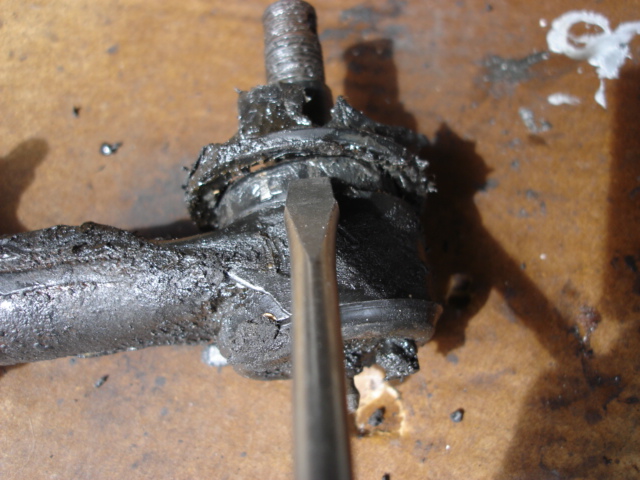
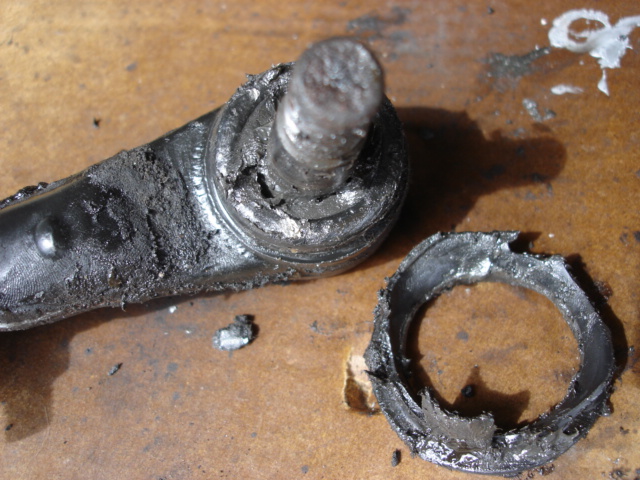
Refurbished Draglink
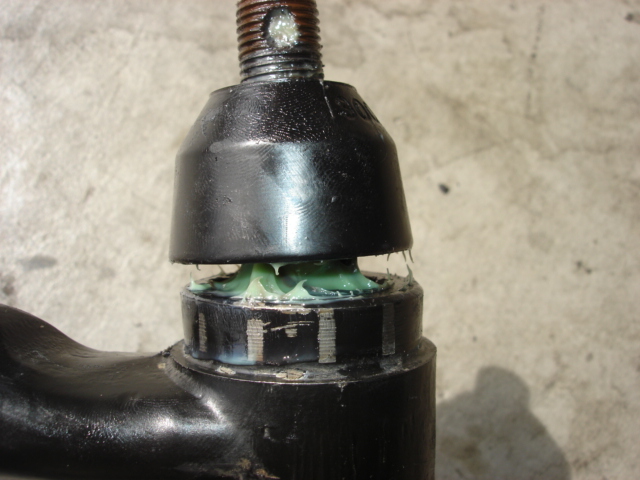

Installed!

Parts
>#DS1312 Tierod
>#ES3096 Tierod End
>#ES2079S Adjuster Sleeve
>#9.13103G Energy Draglink Bushings
XJ vs ZJ
If my understand is right, lifting the Jeep does not required to adjust the tierod.....someone correct me if i'm wrong.
Using the old tierod as a guide, i adjust the new one to the same length and install.
A bfh will get the job done.
I did not tighten the tierod/draglink bolt as i'll be removing the draglink to replace the bushing
Now to the draglink bushings
Removing draglink from the pitman arm
A pickle fork and a bfh got the job done
Refurbished Draglink
Installed!
Last edited by BotakBeng; 04-19-2012 at 11:20 PM.
 03-31-2012, 10:40 AM
#47
CF Veteran
Thread Starter
Join Date: Jan 2011
Location: Las Vegas
Posts: 1,894
Likes: 0
Received 4 Likes
on
4 Posts
Year: 1999
Model: Cherokee
Engine: 4.0
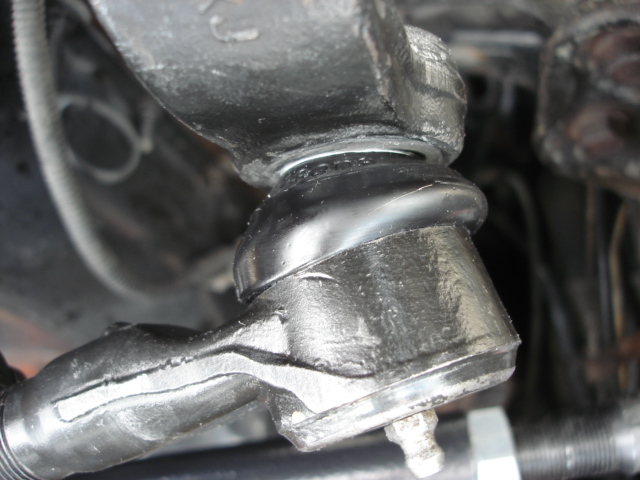
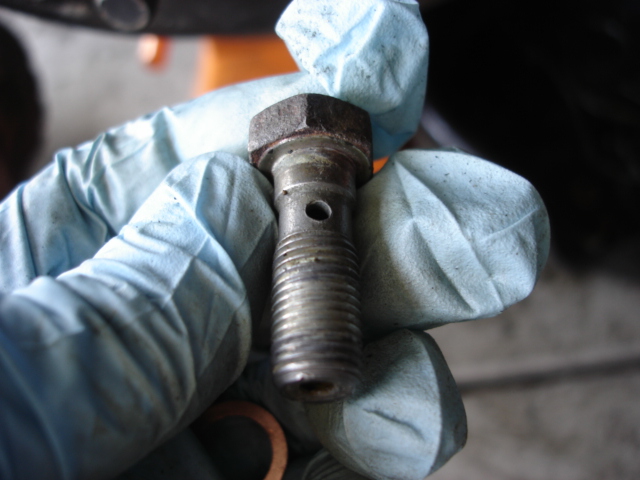
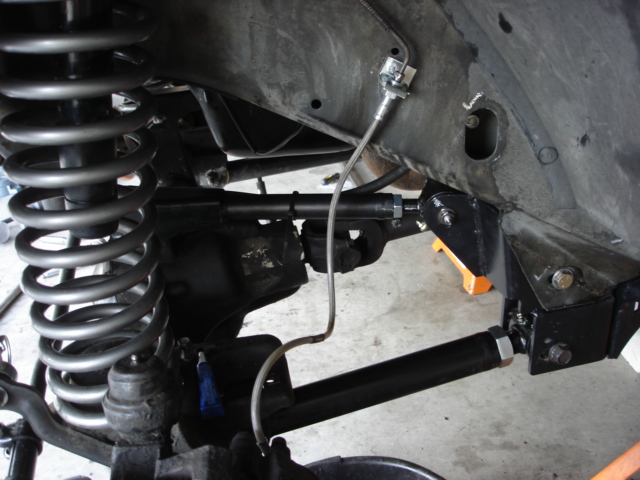
17)Install SS Extended Brake Line
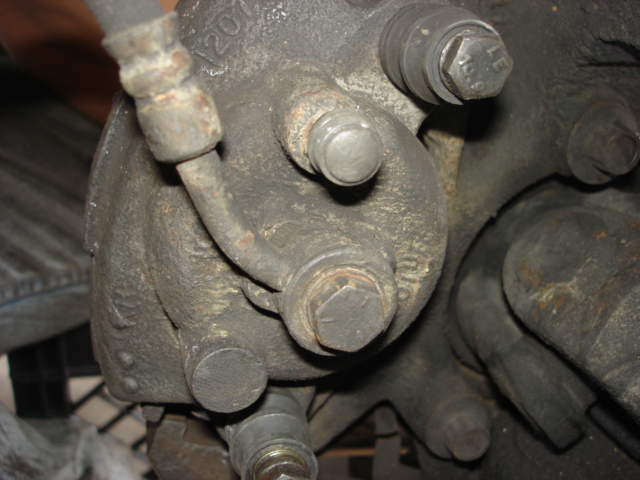
a)Remove factory line from caliper, making sure to remove old crush washer
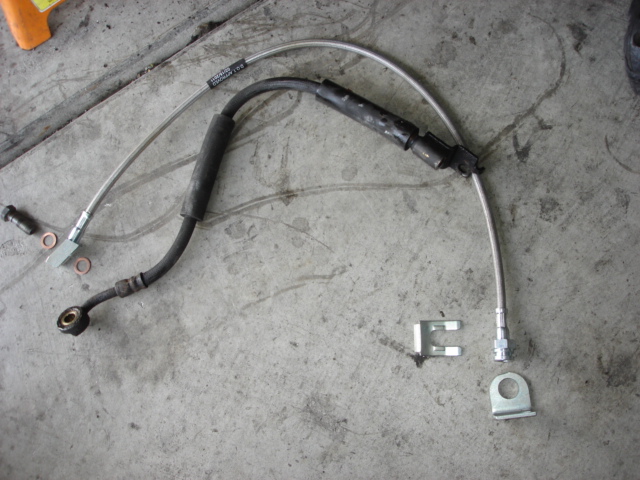
Factory vs RC
b)Flush the brake bolt (or whatever its called ) with some brake cleaner
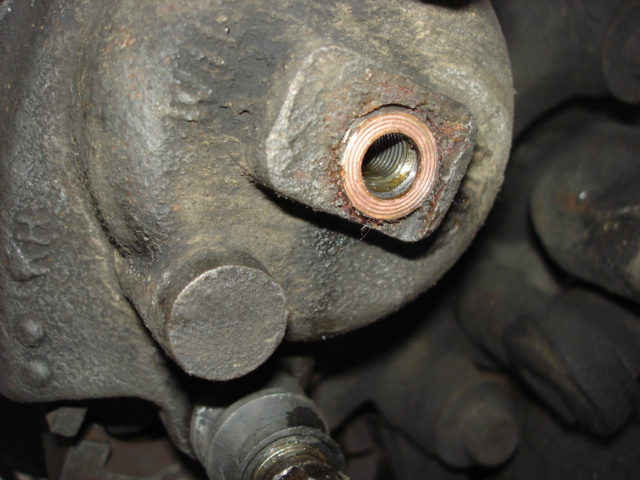
c)Clean up caliper mating surface
d)Install new brake line to caliper using new crush washers
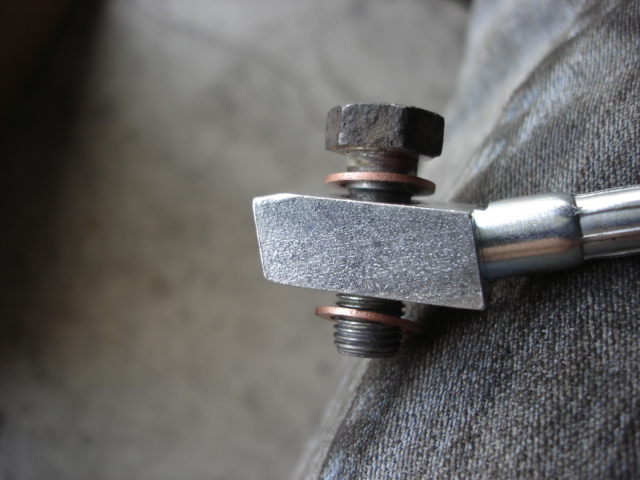
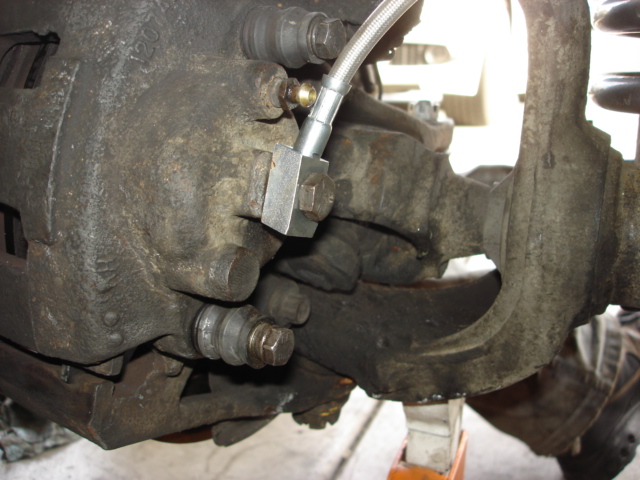
e)Install bracket and attach new brake line to factory line
I replaced my bracket's torx bolt as well

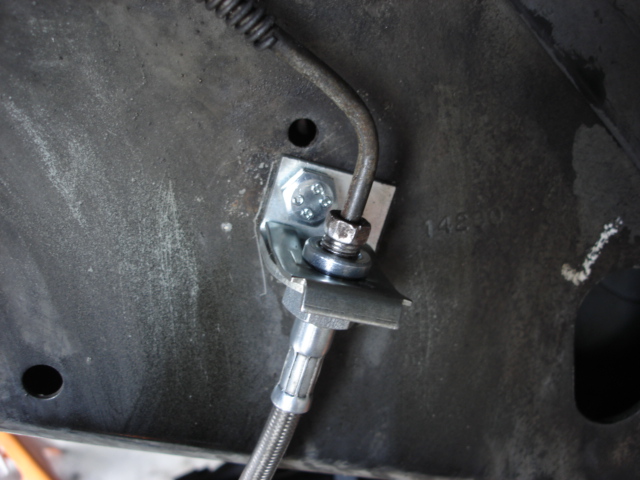
f)Repeat passenger's side
g)Bleed brake system (i only did the front )
)
Done!
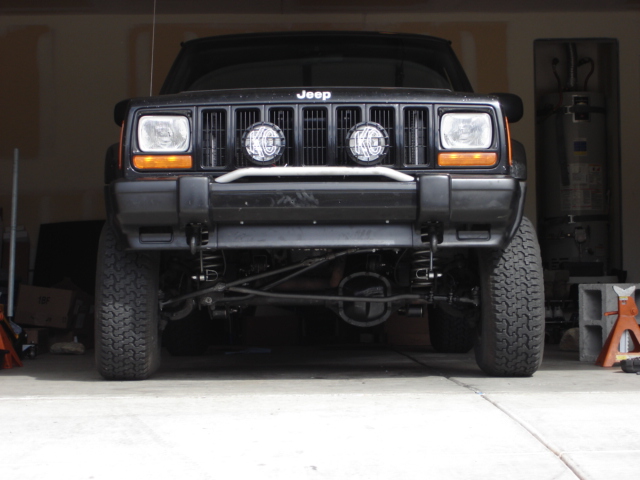
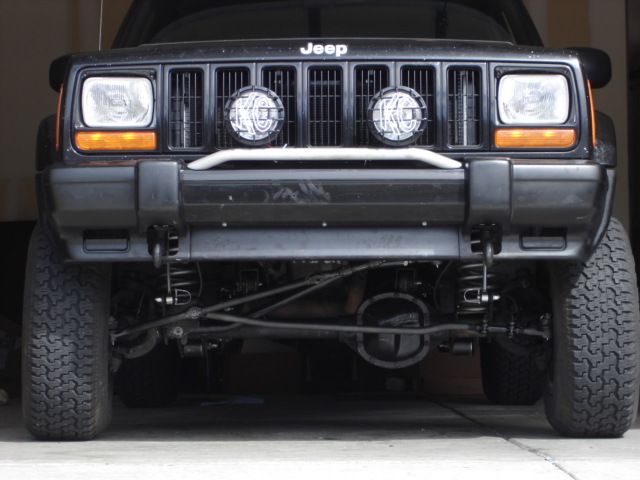
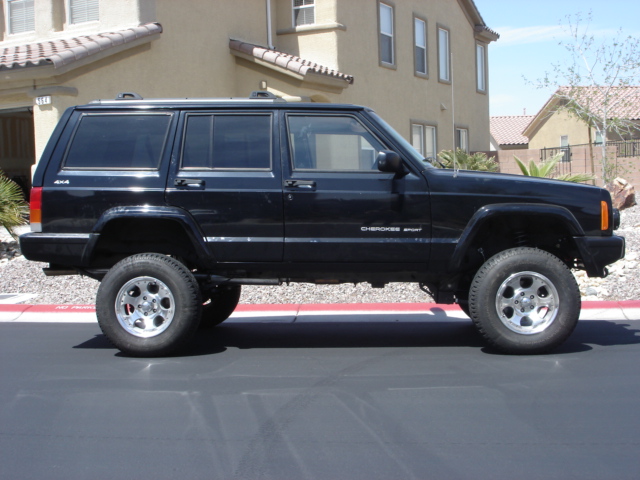
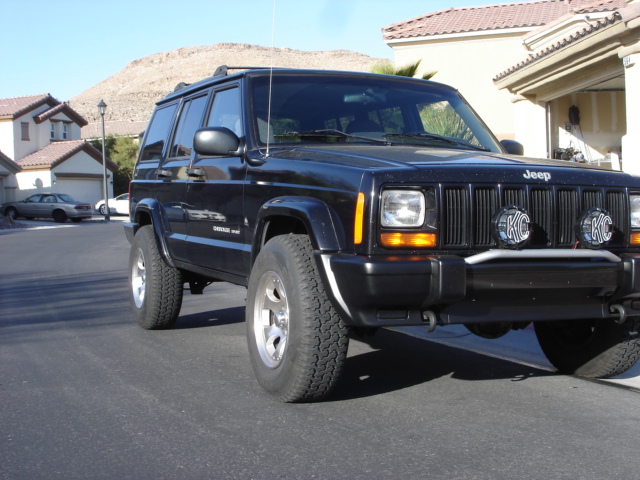
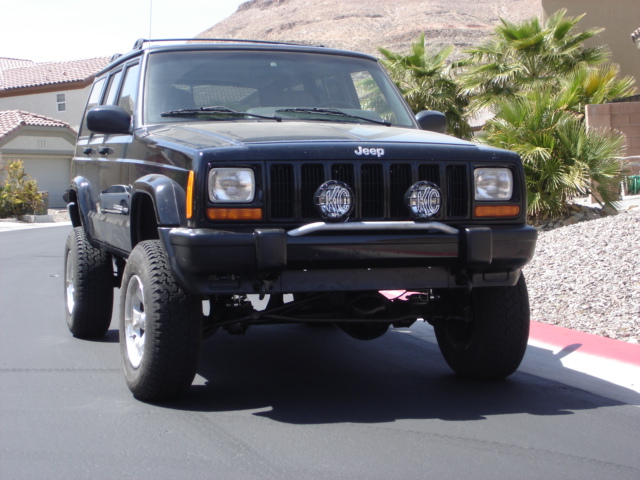
Couple of pics of my lifted jeep (oh, just the front for now)
Before

After

Took it for around the block for a test drive (without shocks ).....
Drives straight except it won't center back when turning and the swaybar link is hitting the draglink .
.
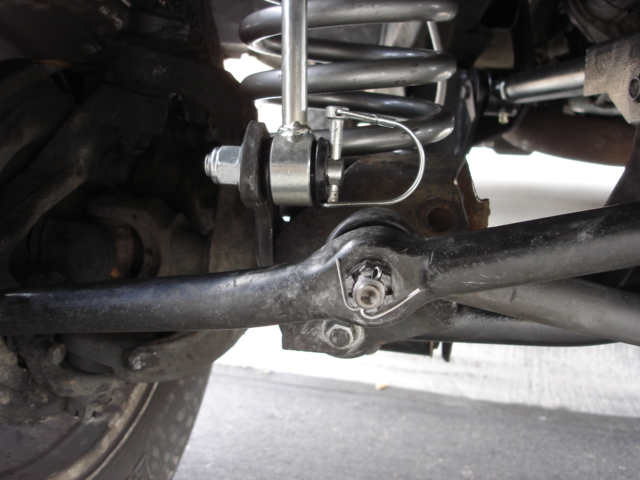
After a little adjustment to the draglink, it doesn't bind as much but is still pretty close.
I'm hoping a good alignment would get these fixed.
a)Remove factory line from caliper, making sure to remove old crush washer
Factory vs RC
b)Flush the brake bolt (or whatever its called
) with some brake cleanerc)Clean up caliper mating surface
d)Install new brake line to caliper using new crush washers
e)Install bracket and attach new brake line to factory line
I replaced my bracket's torx bolt as well
f)Repeat passenger's side
g)Bleed brake system (i only did the front
Done!
Couple of pics of my lifted jeep (oh, just the front for now
)Before
After
Took it for around the block for a test drive (without shocks
).....Drives straight except it won't center back when turning and the swaybar link is hitting the draglink
.After a little adjustment to the draglink, it doesn't bind as much but is still pretty close.
I'm hoping a good alignment would get these fixed.
Last edited by BotakBeng; 04-02-2012 at 03:30 PM.
04-01-2012, 10:46 AM
#48
CF Veteran
Thread Starter
Join Date: Jan 2011
Location: Las Vegas
Posts: 1,894
Likes: 0
Received 4 Likes
on
4 Posts
Year: 1999
Model: Cherokee
Engine: 4.0
18)Removal of rear shocks
I'll have read so many stories about snapped rear shocks bolts so i am prepared for them.
Parts
>Bolts 5/16x1.5"
>Washers
>Lock Washers
>Nuts
>Mechanic Wire
LUCKY me! no such problem (at least not for me)
For those who are not as lucky as me, here is a write-up on rear shock bolts removal.
Seems like PO took care of it when he replaced them with some air shocks.
Here is a good write up for those who are interested.
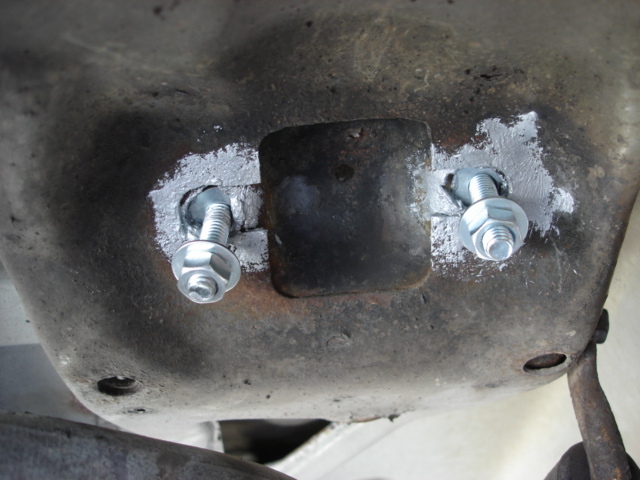
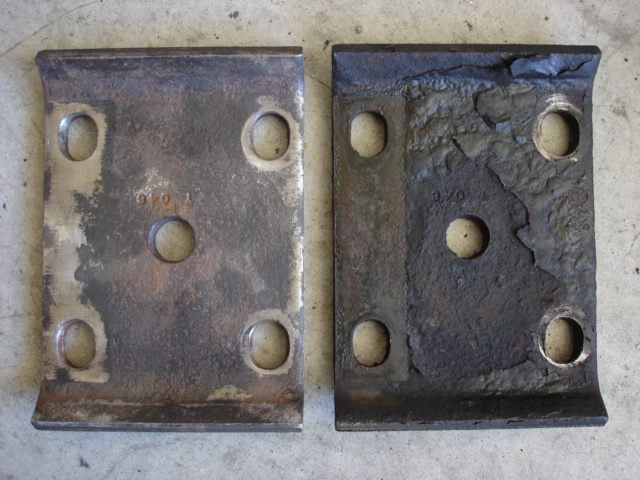
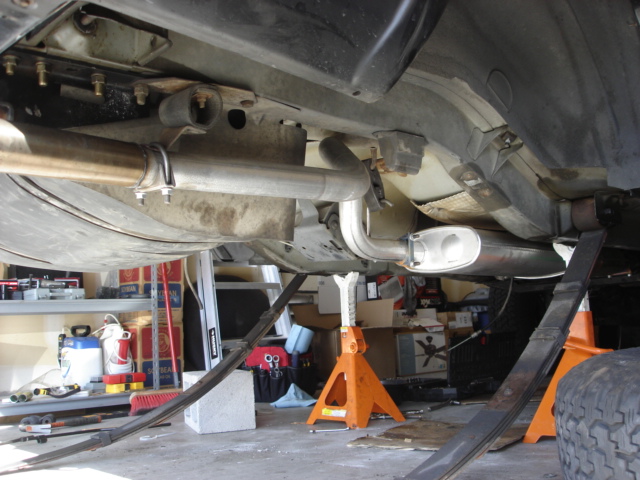
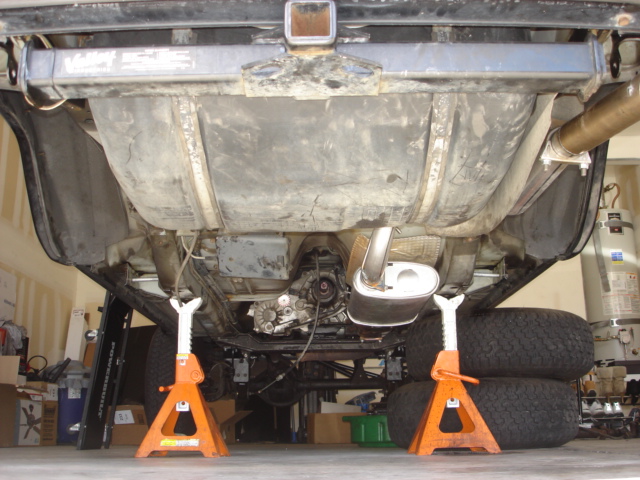
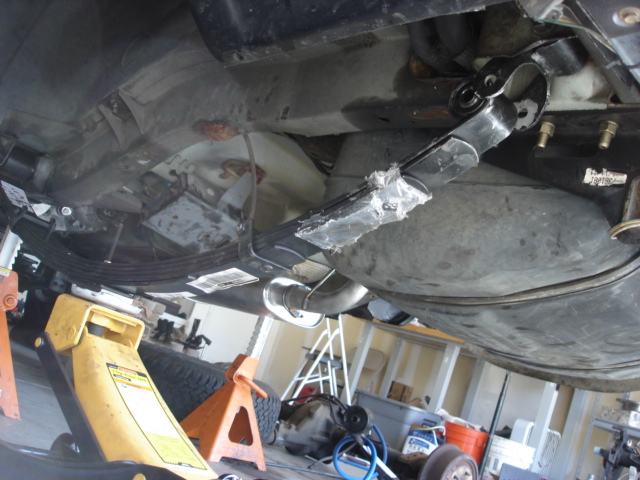
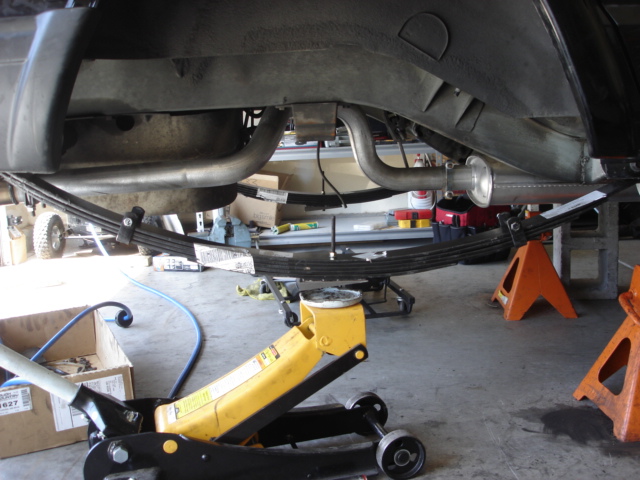
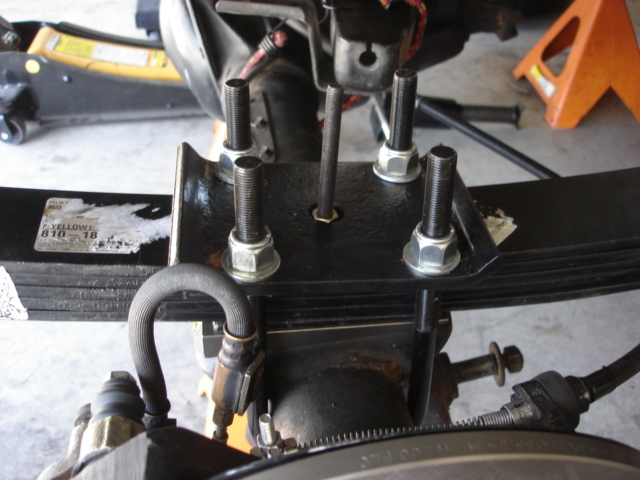
19)Remove U-bolts and lower axle
I removed and discard the rear swaybar as well.
My "new" u-bolt plates
I removed the whole axle and DS, since i would be replacing it with a spare C8.25 axle which i've done a disc brake conversion earlier and my SYE and Adam's Custom DS.
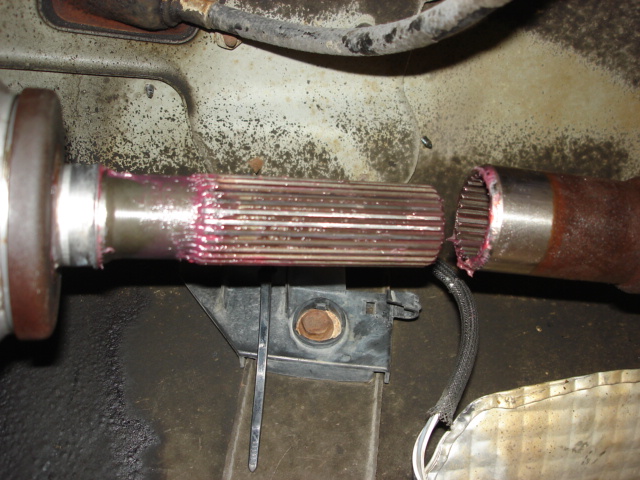
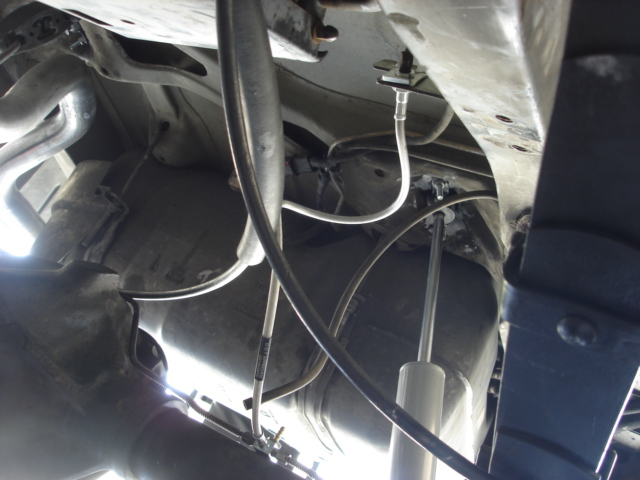
Axle and DS removal
a)Remove ujoint strap (axle)
b)Disconnect driveshaft from axle (a rubber mallet should do the job)
c)Remove dust cover (yoke side)
d)Slide driveshaft outward
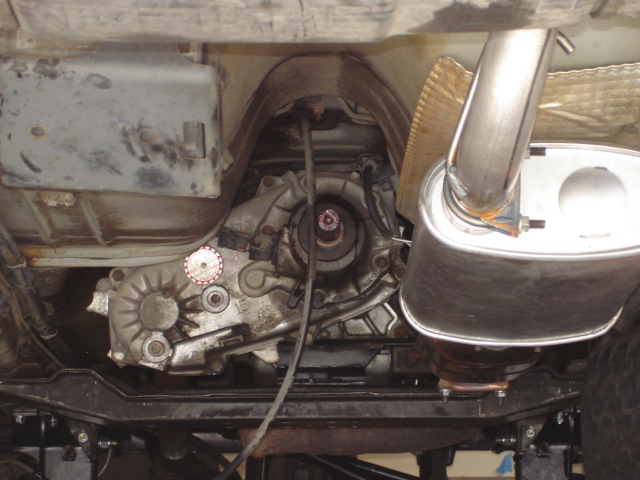
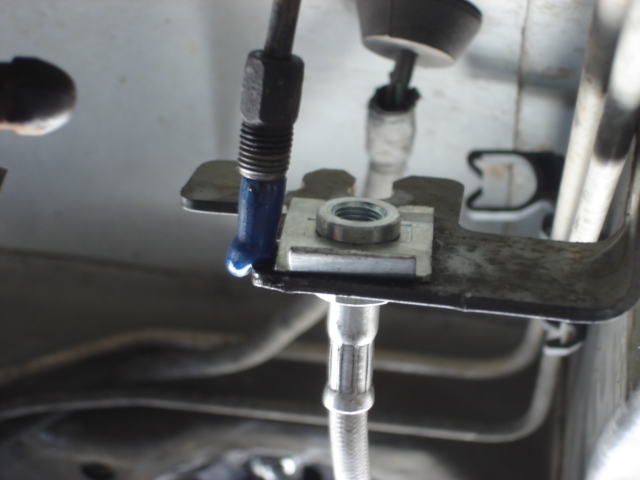
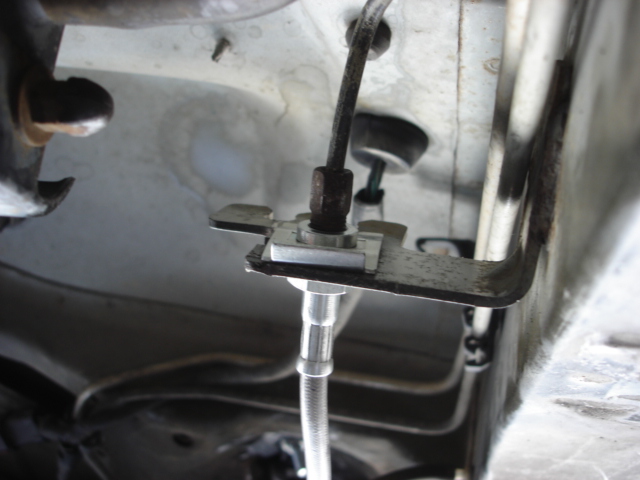
With the driveshaft removed, is time to disconnect the brake line and breather tube from the frame (i'll be using brake line and breather tube from my spare)
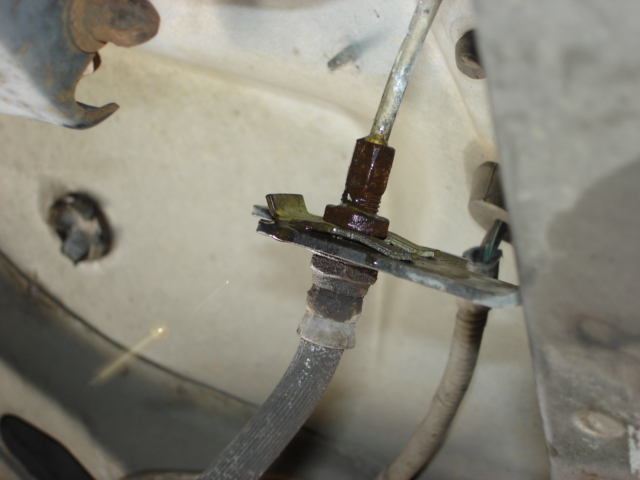
e)Remove parking brake equalizer bracket from frame

f)Loosen parking brake cable
g)Disconnect parking brake cables from bracket
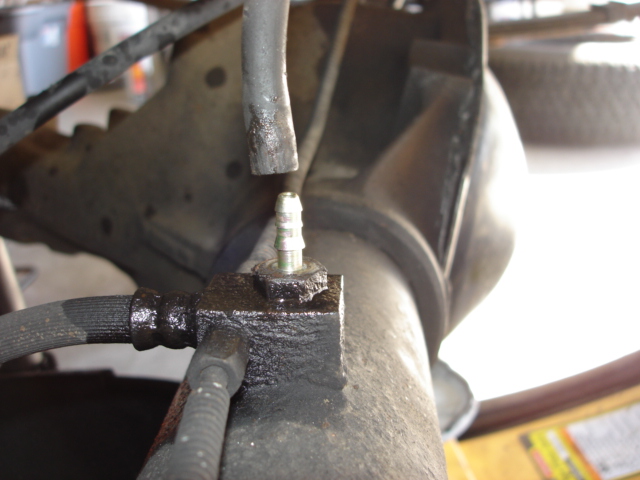
h)Disconnect brake line
i)Disconnect axle breather tube
Axle removed!
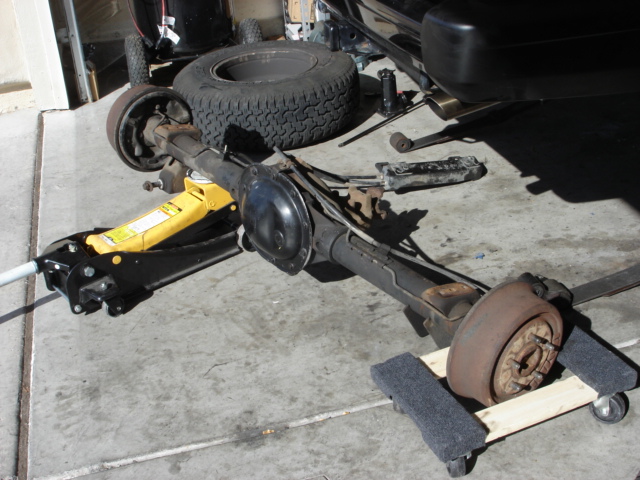
So far so good.
Time to tackle the infamous rear spring leaf bolts
I'll have read so many stories about snapped rear shocks bolts so i am prepared for them.
Parts
>Bolts 5/16x1.5"
>Washers
>Lock Washers
>Nuts
>Mechanic Wire
LUCKY me! no such problem (at least not for me)
For those who are not as lucky as me, here is a write-up on rear shock bolts removal.
Seems like PO took care of it when he replaced them with some air shocks.
Here is a good write up for those who are interested.
19)Remove U-bolts and lower axle
I removed and discard the rear swaybar as well.
My "new" u-bolt plates
I removed the whole axle and DS, since i would be replacing it with a spare C8.25 axle which i've done a disc brake conversion earlier and my SYE and Adam's Custom DS.
Axle and DS removal
a)Remove ujoint strap (axle)
b)Disconnect driveshaft from axle (a rubber mallet should do the job)
c)Remove dust cover (yoke side)
d)Slide driveshaft outward
With the driveshaft removed, is time to disconnect the brake line and breather tube from the frame (i'll be using brake line and breather tube from my spare)
e)Remove parking brake equalizer bracket from frame
f)Loosen parking brake cable
g)Disconnect parking brake cables from bracket
h)Disconnect brake line
i)Disconnect axle breather tube
Axle removed!
So far so good.
Time to tackle the infamous rear spring leaf bolts
Last edited by BotakBeng; 04-23-2012 at 08:22 AM.
04-01-2012, 11:27 AM
#49
CF Veteran
Thread Starter
Join Date: Jan 2011
Location: Las Vegas
Posts: 1,894
Likes: 0
Received 4 Likes
on
4 Posts
Year: 1999
Model: Cherokee
Engine: 4.0
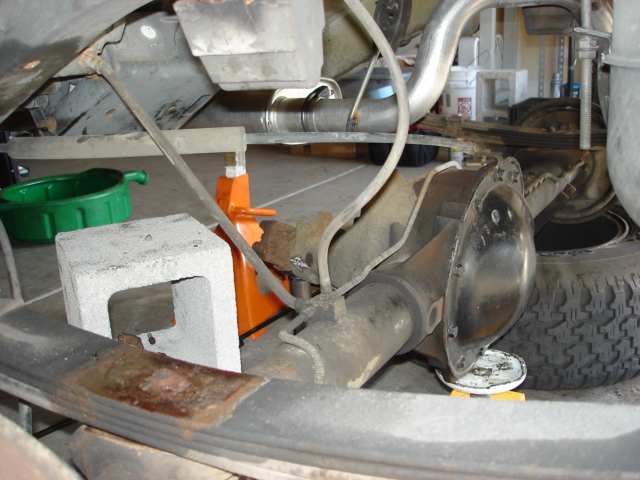
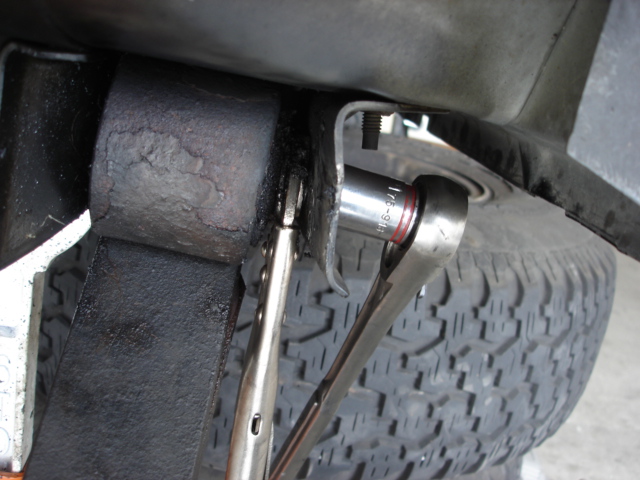
20)Remove rear leaf spring bolts
As advised, i did pb blast them everyday for more than a week.
>Impact gun (IR231G @350ft-lbs max) = FAILED
>Breaker bar w/extention = FAILED


C'mon, are you kidding me!
.....
As advised, i did pb blast them everyday for more than a week.
>Impact gun (IR231G @350ft-lbs max) = FAILED
>Breaker bar w/extention = FAILED
C'mon, are you
kidding me!.....
04-02-2012, 12:15 PM
#52
CF Veteran
Thread Starter
Join Date: Jan 2011
Location: Las Vegas
Posts: 1,894
Likes: 0
Received 4 Likes
on
4 Posts
Year: 1999
Model: Cherokee
Engine: 4.0
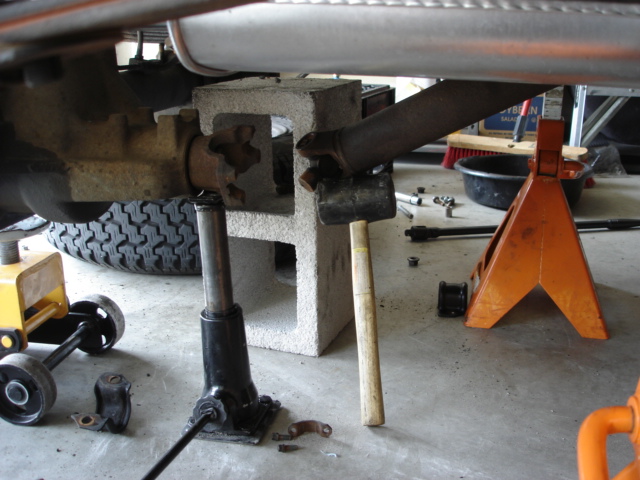
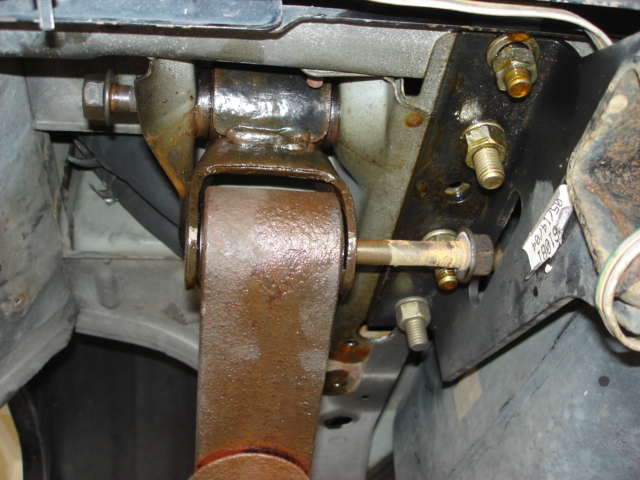
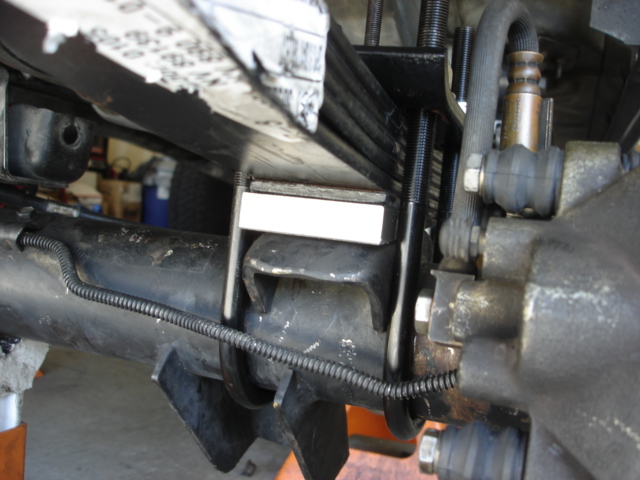
Back to working on the rear leaf springs bolts....
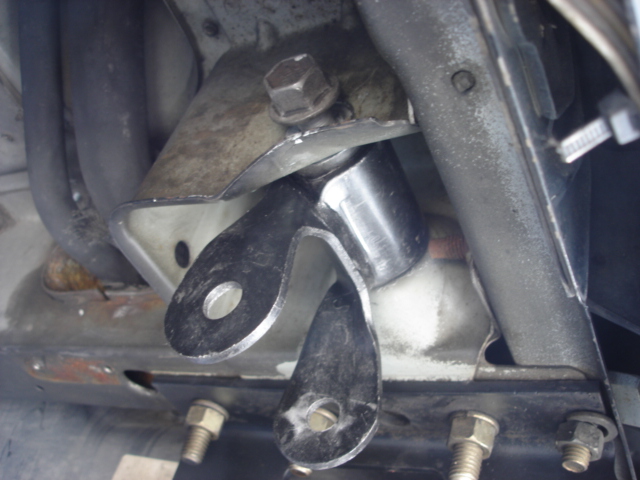
Shackle ends came out after a good amount of heating and alot of patient
Here is a good tip from NW99XJ
Or you can try this.
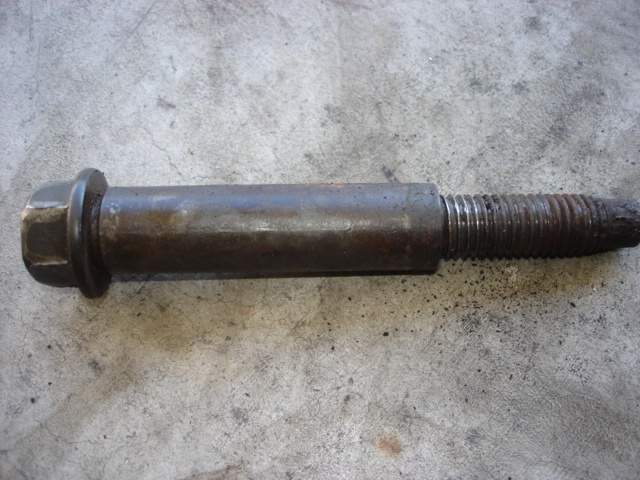
Bolt size are M14x20x120 and they can purchased at the stealership for $10 each or your local store (half the price) should have them in a non flange head version.
This is how i did mine
a)Heat weld nut
b)With a breaker bar, i was able to break free the rust freeze
c)PB blast weld nut/bolt
d)Tighten bolt
e)Loosen bolt
f)repeat c - e
Only passenger's side seized, but somehow, it went thru the frame hole
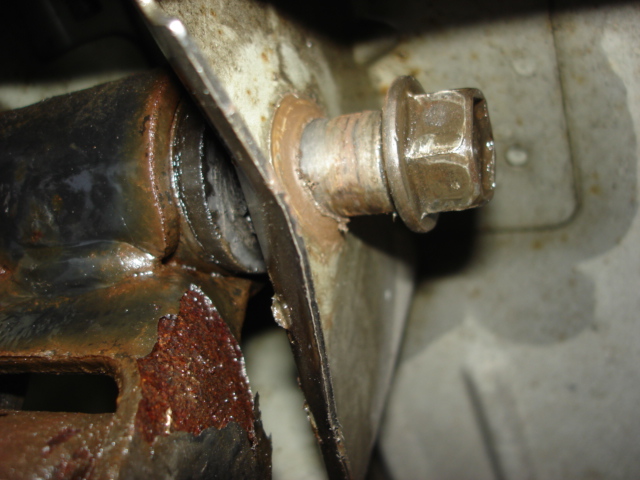
Rear shackle ends removed...ONLY 2 bolts to go!(that turned out to be hell for me)
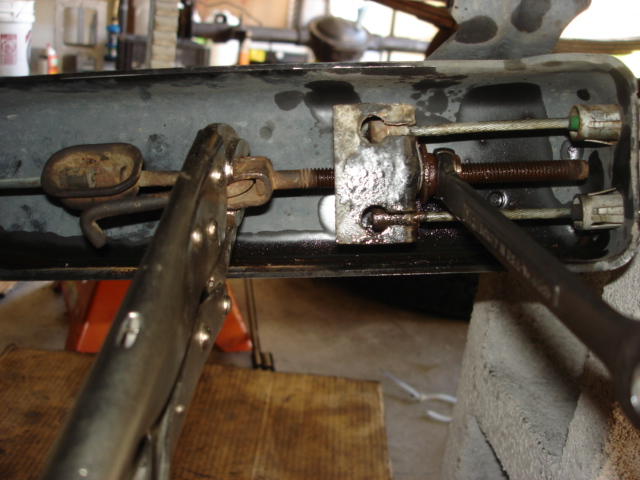
This is how i did mine
a)Heat weld nut
b)With a breaker bar, i was able to break free the rust freeze
c)PB blast weld nut/bolt
d)Tighten bolt
e)Loosen bolt
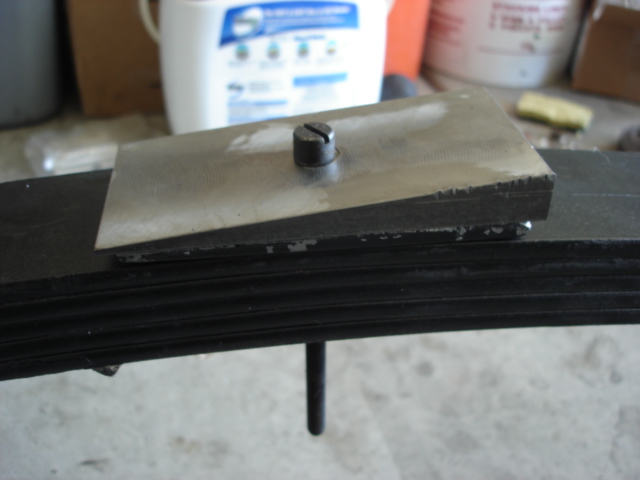
f)repeat c - e until a good enough area between spring and frame is exposed
g)torch spring bushing and let it burn
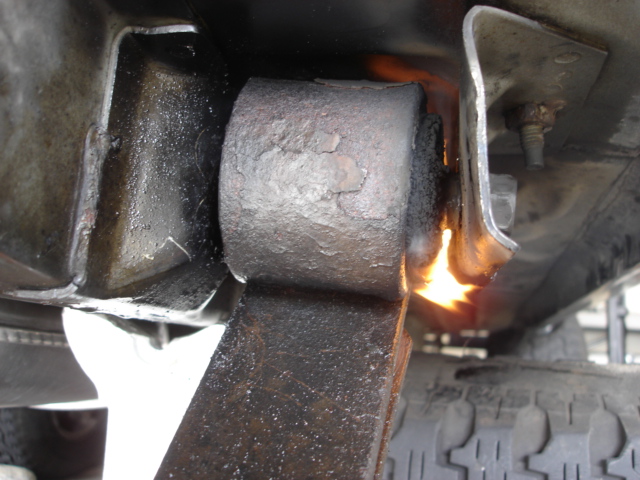
h)Scraped off burned bushing
i)Grip sleeve with a good vise grip (my cheapo HF was good enough after some bruised palm)
j)Repeat c - e
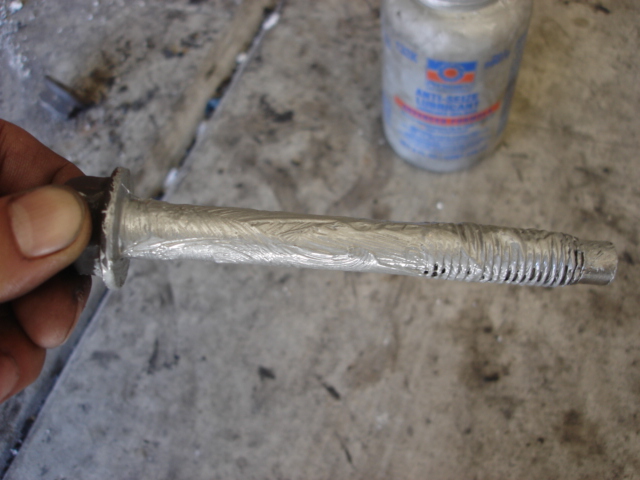
Mission Accomplished!
Shackle ends came out after a good amount of heating and alot of patient
Here is a good tip from NW99XJ
A tip for anyone swapping out their shackles: THE BOLTS WILL SPIN, BUT SO WILL THE "SLEEVE" INSIDE THE BUSHING!!! Do yourself a favor, and get a set of needle nose vice grips, heat up the old bolt until the rubber starts to melt... clear it out a bit with an old flat head screw driver, and get those vice grips up onto that sleeve. Make sure you got a good bite on it too. Other wise, you'll be turning that bolt, thinking that you backing it out, when in fact all your doing is stripping the threads of the weld nut in the frame. GOOD LUCK!
Bolt size are M14x20x120 and they can purchased at the stealership for $10 each or your local store (half the price) should have them in a non flange head version.
This is how i did mine
a)Heat weld nut
b)With a breaker bar, i was able to break free the rust freeze
c)PB blast weld nut/bolt
d)Tighten bolt
e)Loosen bolt
f)repeat c - e
Only passenger's side seized, but somehow, it went thru the frame hole
Rear shackle ends removed...ONLY 2 bolts to go!(that turned out to be hell for me)
This is how i did mine
a)Heat weld nut
b)With a breaker bar, i was able to break free the rust freeze
c)PB blast weld nut/bolt
d)Tighten bolt
e)Loosen bolt
f)repeat c - e until a good enough area between spring and frame is exposed
g)torch spring bushing and let it burn
h)Scraped off burned bushing
i)Grip sleeve with a good vise grip (my cheapo HF was good enough after some bruised palm)
j)Repeat c - e
Mission Accomplished!
Last edited by BotakBeng; 04-11-2012 at 11:27 AM.
04-03-2012, 11:04 AM
#53
Former Sponsor

Join Date: Nov 2009
Location: Queen Creek AZ
Posts: 75
Likes: 0
Received 0 Likes
on
0 Posts
Model: Cherokee
04-03-2012, 12:29 PM
#54
Member
Join Date: Jan 2012
Location: WA
Posts: 204
Likes: 0
Received 0 Likes
on
0 Posts
Year: 1999
Model: Cherokee
Engine: 4.0L
With an inverted-Y steering setup, as you change the vertical distance between the pitman arm and the pivot point connection at the drag link and tie-rod, your toe-in will increase. As such, you in fact may need to adjust the tie-rod length to maintain proper alignment. As you adjust the drag link to re-center the steering wheel, you may get the majority of it, but the possibility does exist...
04-03-2012, 03:45 PM
#55
CF Veteran
Thread Starter
Join Date: Jan 2011
Location: Las Vegas
Posts: 1,894
Likes: 0
Received 4 Likes
on
4 Posts
Year: 1999
Model: Cherokee
Engine: 4.0
You are welcome.
I was just speaking my heart out.
Thx.
That makes sense.
I'll look into it.
I was just speaking my heart out.
With an inverted-Y steering setup, as you change the vertical distance between the pitman arm and the pivot point connection at the drag link and tie-rod, your toe-in will increase. As such, you in fact may need to adjust the tie-rod length to maintain proper alignment. As you adjust the drag link to re-center the steering wheel, you may get the majority of it, but the possibility does exist...
That makes sense.
I'll look into it.
04-08-2012, 09:50 AM
#56
CF Veteran
Thread Starter
Join Date: Jan 2011
Location: Las Vegas
Posts: 1,894
Likes: 0
Received 4 Likes
on
4 Posts
Year: 1999
Model: Cherokee
Engine: 4.0
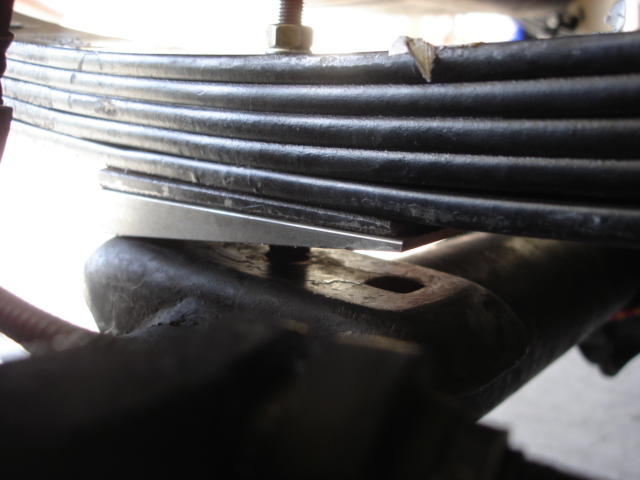
Based on some of my readings, even with a SYE, there's still a chance that i'll get vibration due to pinion angle being off and the solution was to add shims to adjust the angle.
Here is a good write-up on rear pinion angle measurement and shims calculation.
I decided to go with 6* steel shims from Rubicon Express (RE1468).
Here are some pics
Btw, site says the shims comes with center pins but as usual, people at 4wheelparts ripped me off again (Mr Neal Shelton claimed that in his 14 yrs experience, they never came with center pins). Paid the man $4 for some center pins and i was on my way.
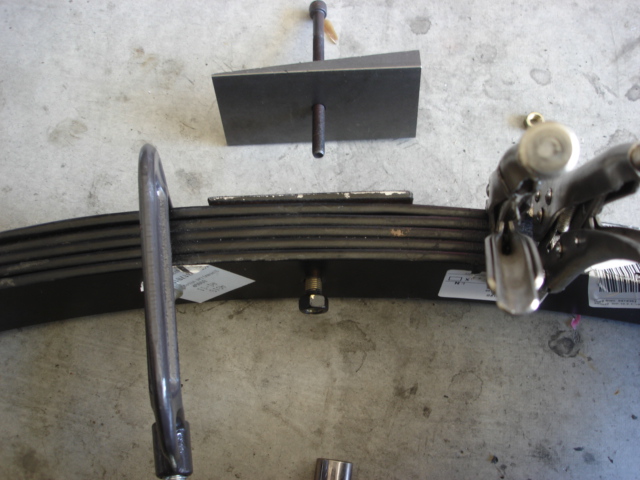
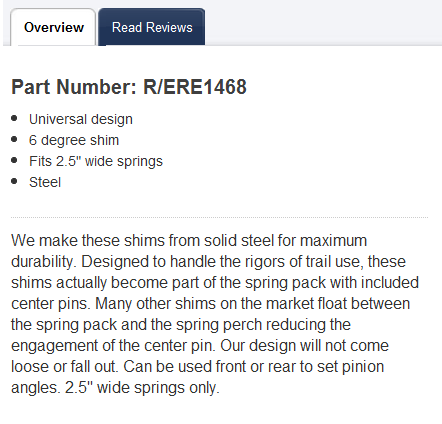

Note: To tilt the pinion upward, thicker end of shims to be installed toward the rear of the spring.
21)Install rear leaf springs
Note" Hand tighten all springs bolts for now, torque to spec with Jeep on the ground)
Install spring to frame
A little overkill
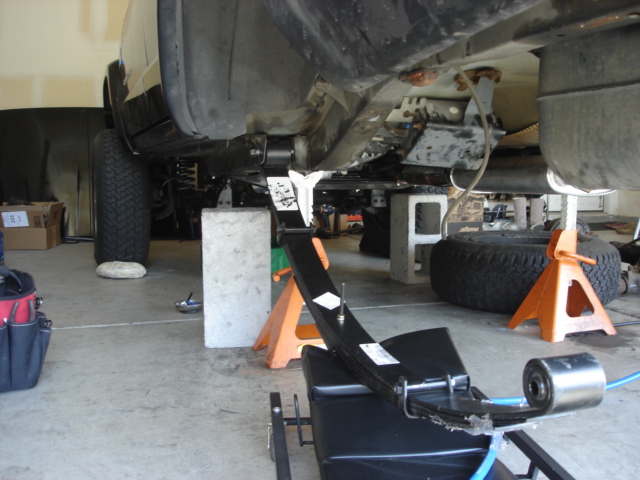
Install shackle (i replaced mine with a new set from Crown)
Install spring to shackle
Note: Common problem with RC springs.....too short!
A little persuasion with a jack

Installed
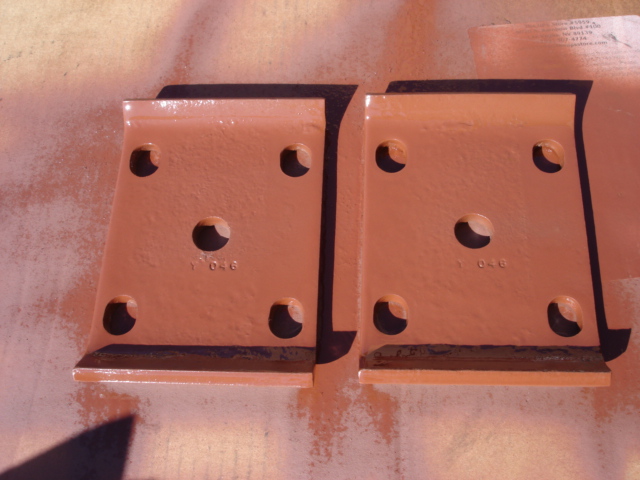
22)Install provided U-bolts and torque to spec
Aligning center pin to axle
My "new" u-bolt plate
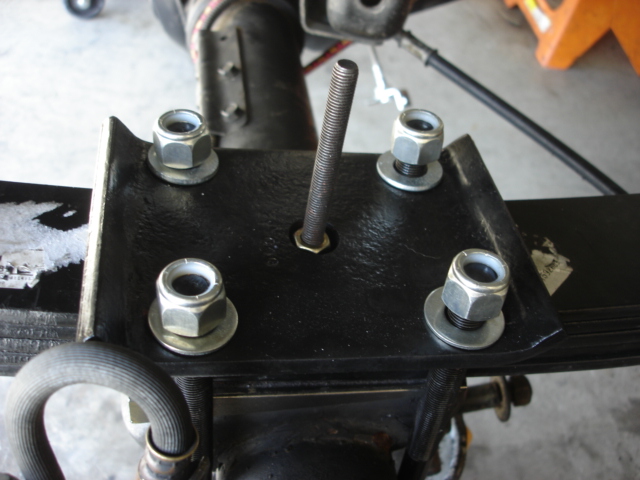
Installed and torqued
Disc brake baby!
Passenger side looking from the rear
23)Install shocks
Install axle end
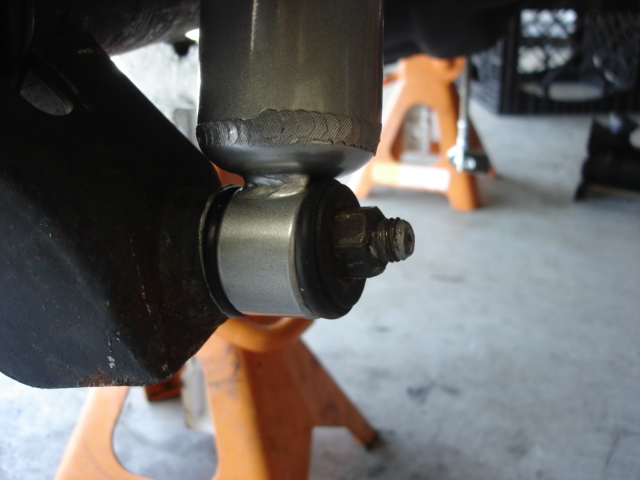
Frame end
Installed
24)Install RC Extended brake line
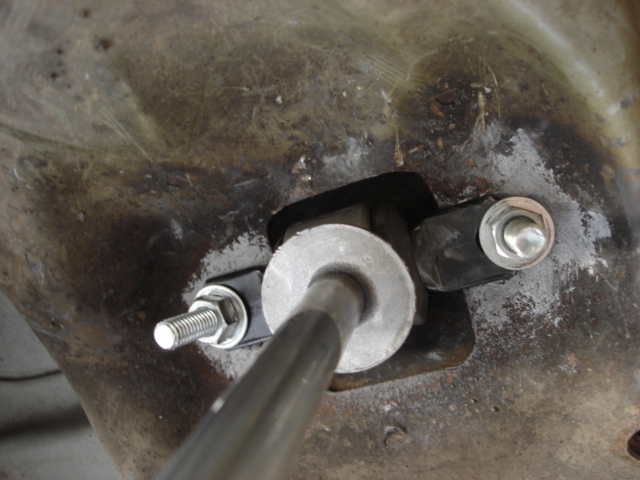
Remove factory hard brake lines
Remove factory soft brake line (to be replaced by RC extended brake line)
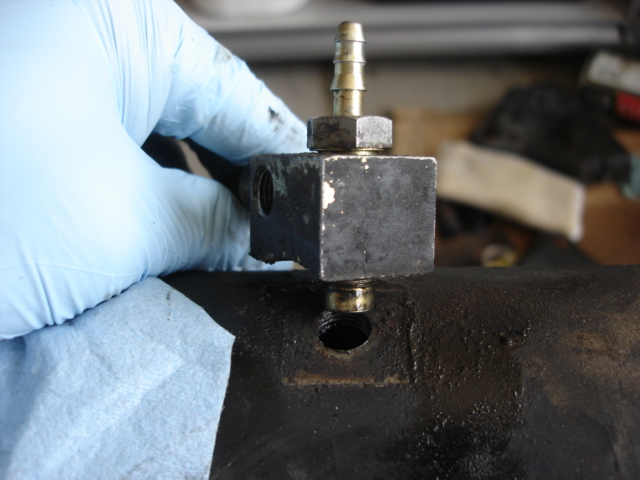
Factory vs RC
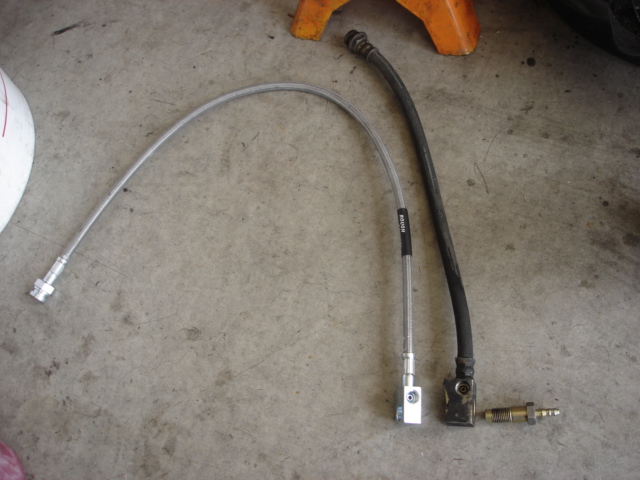
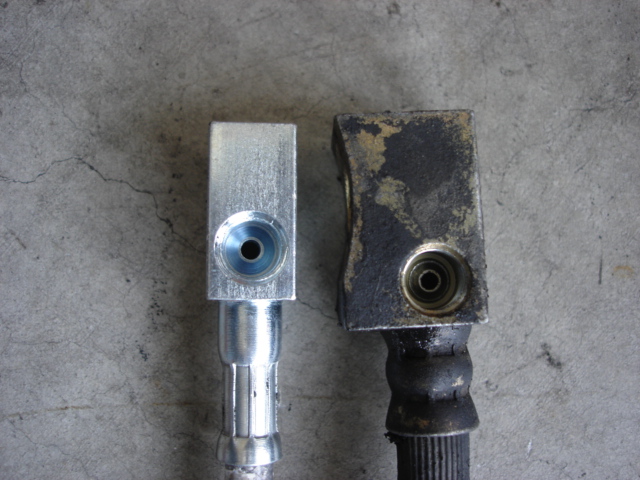
RC line that meets the axle is flat compared to the factory's.
Since is just a breather vent, i wasn't very concern.
With some thread sealant (for safe measure), i got them installed
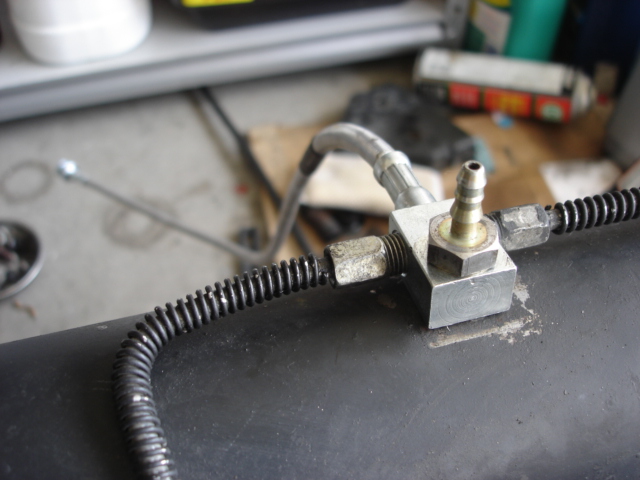
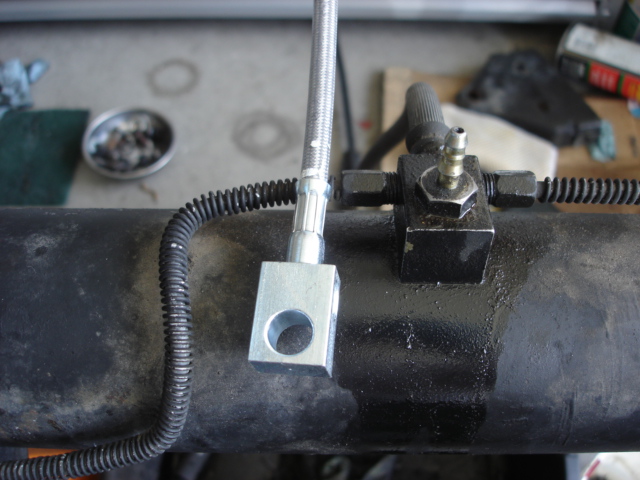
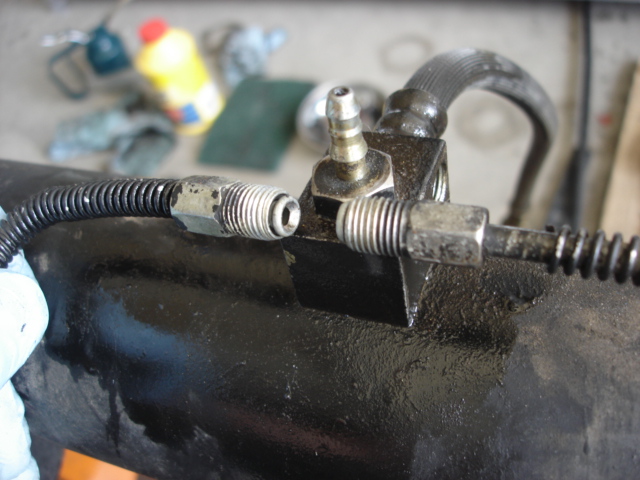
Install to factory bracket with RC clip
Connect factory to RC
Bleed brake system!
Done!
Need to get some extended breather tube tho
Install wheels and torque springs bolts to spec with Jeep on the ground.
.....
Here is a good write-up on rear pinion angle measurement and shims calculation.
I decided to go with 6* steel shims from Rubicon Express (RE1468).
Here are some pics
Btw, site says the shims comes with center pins but as usual, people at 4wheelparts ripped me off again (Mr Neal Shelton claimed that in his 14 yrs experience, they never came with center pins). Paid the man $4 for some center pins and i was on my way.
Note: To tilt the pinion upward, thicker end of shims to be installed toward the rear of the spring.
21)Install rear leaf springs
Note" Hand tighten all springs bolts for now, torque to spec with Jeep on the ground)
Install spring to frame
A little overkill
Install shackle (i replaced mine with a new set from Crown)
Install spring to shackle
Note: Common problem with RC springs.....too short!
A little persuasion with a jack
Installed
22)Install provided U-bolts and torque to spec
Aligning center pin to axle
My "new" u-bolt plate
Installed and torqued
Disc brake baby!
Passenger side looking from the rear
23)Install shocks
Install axle end
Frame end
Installed
24)Install RC Extended brake line
Remove factory hard brake lines
Remove factory soft brake line (to be replaced by RC extended brake line)
Factory vs RC
RC line that meets the axle is flat compared to the factory's
.Since is just a breather vent, i wasn't very concern.
With some thread sealant (for safe measure), i got them installed
Install to factory bracket with RC clip
Connect factory to RC
Bleed brake system!
Done!
Need to get some extended breather tube tho
Install wheels and torque springs bolts to spec with Jeep on the ground.
.....
Last edited by BotakBeng; 04-19-2012 at 11:30 AM.
04-08-2012, 03:28 PM
#59
CF Veteran
Thread Starter
Join Date: Jan 2011
Location: Las Vegas
Posts: 1,894
Likes: 0
Received 4 Likes
on
4 Posts
Year: 1999
Model: Cherokee
Engine: 4.0
Thank you!
I'm not really sure (bear in mind, i'm a complete newbie) but if my understanding is right, it has something to do with pinion angle (causing vibration).
Here is a little reading material.
I sure hope someone with more experience can chime in.
I'm not really sure (bear in mind, i'm a complete newbie) but if my understanding is right, it has something to do with pinion angle (causing vibration).
Here is a little reading material.
I sure hope someone with more experience can chime in.
04-08-2012, 03:38 PM
#60
CF Veteran
Thread Starter
Join Date: Jan 2011
Location: Las Vegas
Posts: 1,894
Likes: 0
Received 4 Likes
on
4 Posts
Year: 1999
Model: Cherokee
Engine: 4.0
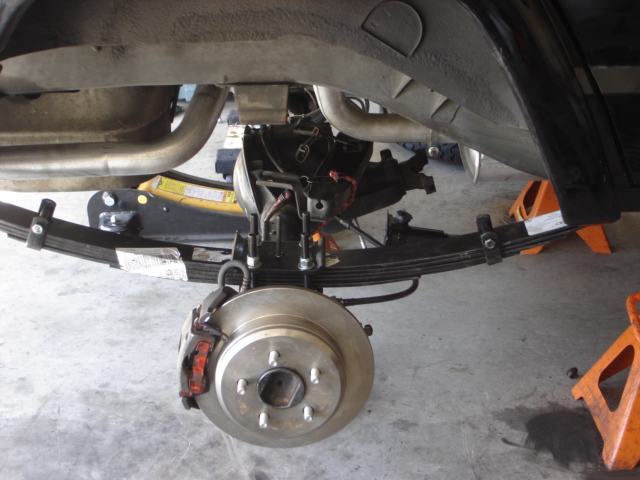
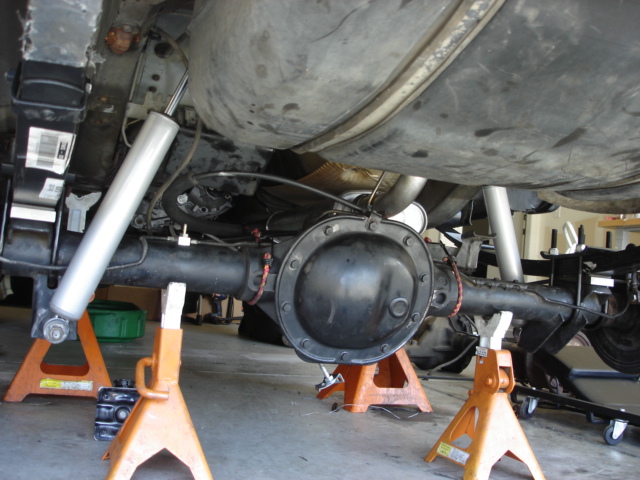
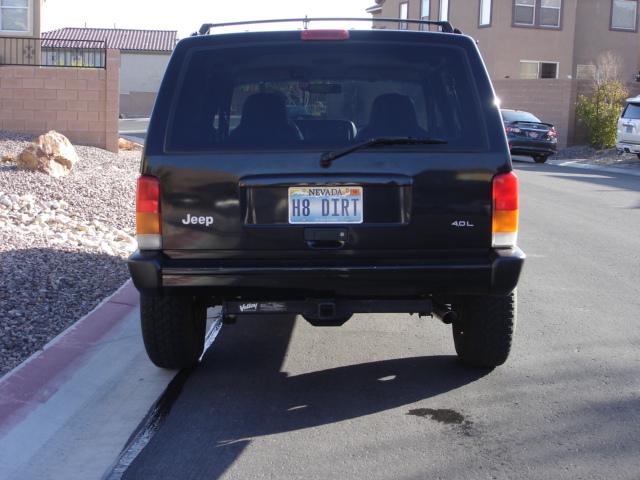
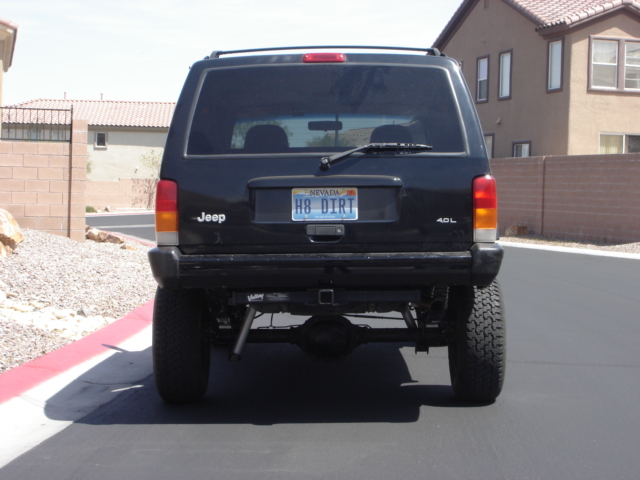
Here are some before/after pics (for those who care) 

Last edited by BotakBeng; 04-08-2012 at 03:44 PM.