1987 Wagoneer Limited

 07-07-2013, 11:08 PM
#62
Seasoned Member
Thread Starter
Join Date: Jan 2011
Location: Austin
Posts: 302
Likes: 0
Received 4 Likes
on
3 Posts
Year: 1987
Model: Wagoneer
Engine: 4.0
Time for shocks!
217,9XX
7/7/13
My shocks were shot. Like, they might even be the originals. Just plain bad. Been meaning to do them for quite some time, but the trick was finding the right combination of time to do the repair and money to afford the repair. This weekend, I had a bit of both.
End to end, from jacking up to test drive was about 2 hours for all 4 corners.
Decided to do the fronts first, just because I dreaded the infamous rear shock bolts.
I've only ever done shocks/struts once and that was on my wife's '07 Focus about a month ago.
I started out by hitting everything in the rear with PB blaster for the last week.
Fronts went up on jack stands and the wheels came off. Spent a bit of time trying to get a bite on the shock as I tried to loosen the top nut. Nothing worked until I put a set of channel locks in there.
Then spin the socket up top, and off she comes. 9/16" on top, and the bottom bolts and nuts are 1/2"
The two lower bolts on both sided were good, since I had taken them off to do my oil pan gasket and rear main.
Take it all off and put the new one in.
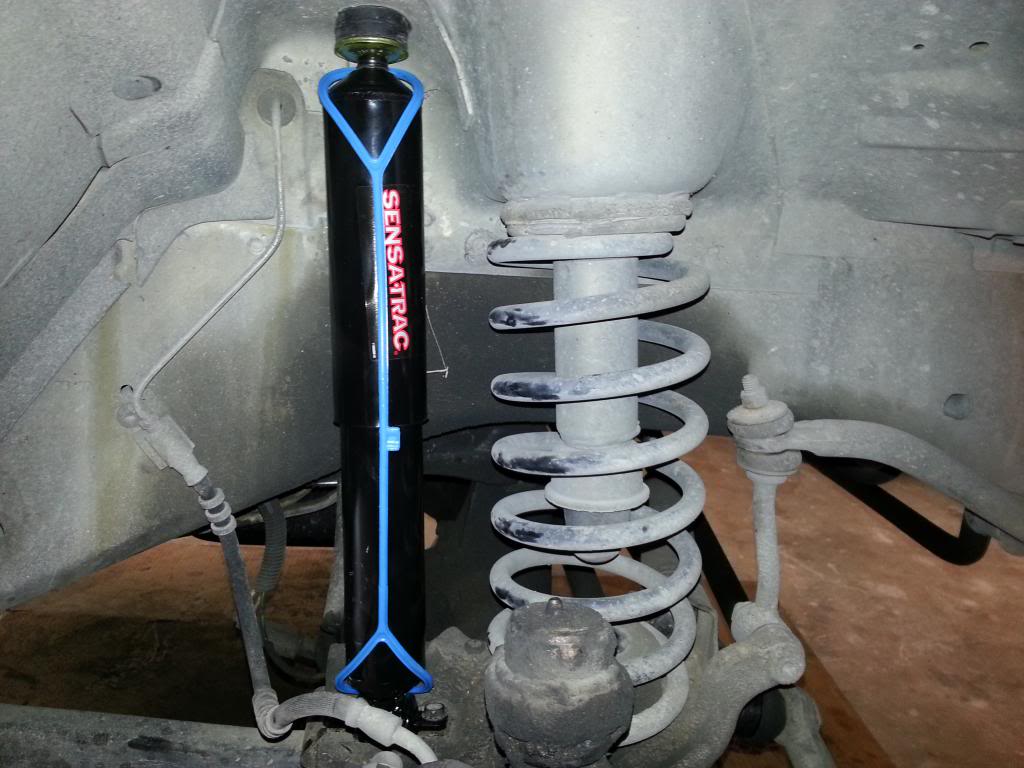
I decided to go with the Monroe Sensa-Trac because they got good reviews and I'm not lifted and don't do anything too extreme. Plus, for $44 a corner, not gonna break the bank.
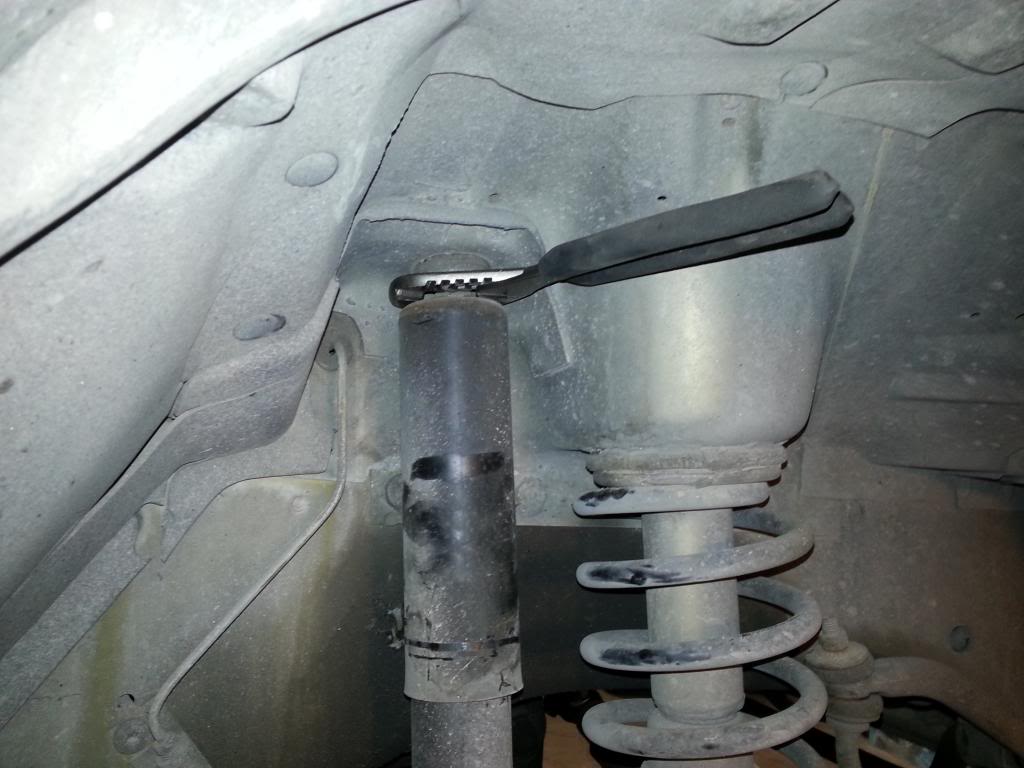
Put the bottom bolts in, add the bushing and backing plate over the stud in the engine compartment (the side of the bushing with the big nipple goes into the hole in the fender - little nipple faces the backing plate), and get your first lesson on how to properly take the nut off. The end of the stud and 2 flats, which you can hold with an adjustable wrench as you tighten the nut to keep the shock from spinning.
You can see the flats on either side of the end of the stud, above the wrench.
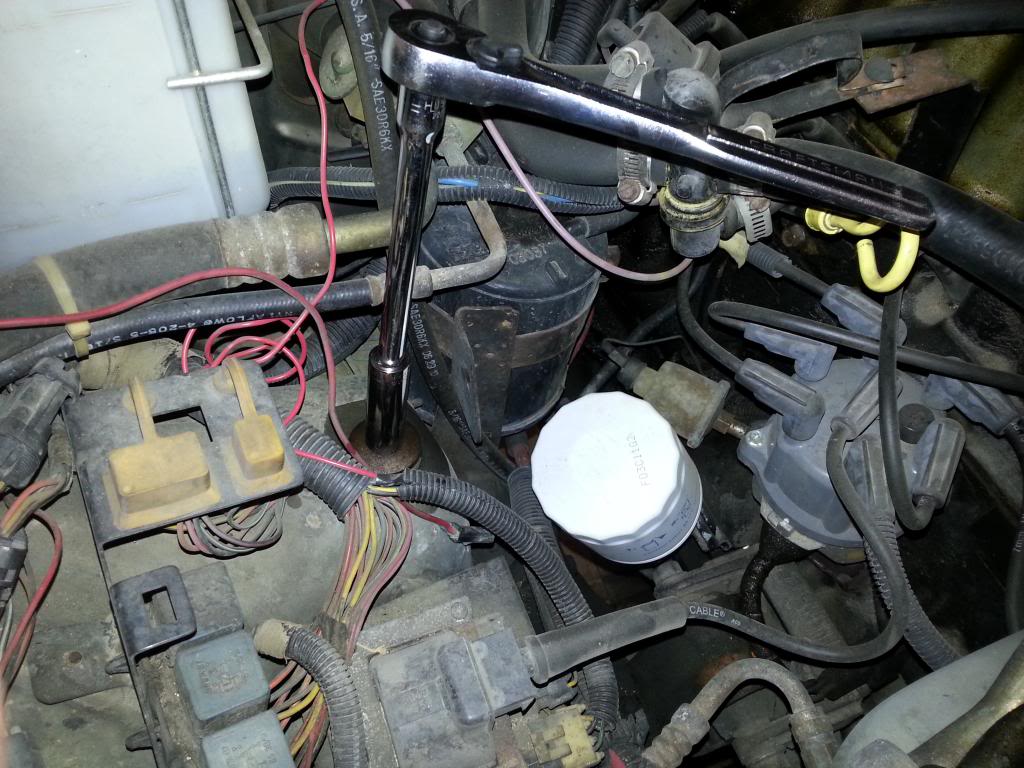
On to the driver's side. Do yourself a favor, save your time and knuckles, and just take the airbox out. A deepwell won't fit under the brake master cylinder, and getting both wrenches in there between brake lines and what not, is a royal pain.
The above photo is of the driver's side with the airbox out. Tons of room.
Bottom the same as the other side, and the front tires go on and the front comes off the jack stands.
After several sessions with PB, connect all your extensions, use a 1/2" socket and pull your 4 rear upper shock bolts off
Nothing broke, and they came right out

Don't know what the rest of you are complaining about...
The bottom nuts are 17mm....erm...might be 18mm. No problem - put a cheater bar on it and you're good to go.
I hit every fastener with a wire brush and put anti-seize on the bolts so I don't have to eat my words next time
Wheels back on, put 'em on the ground and off for a test drive.
Holy Batman, why did I wait so long?! The difference is night and day...a totally new XJ
217,9XX
7/7/13
My shocks were shot. Like, they might even be the originals. Just plain bad. Been meaning to do them for quite some time, but the trick was finding the right combination of time to do the repair and money to afford the repair. This weekend, I had a bit of both.
End to end, from jacking up to test drive was about 2 hours for all 4 corners.
Decided to do the fronts first, just because I dreaded the infamous rear shock bolts.
I've only ever done shocks/struts once and that was on my wife's '07 Focus about a month ago.
I started out by hitting everything in the rear with PB blaster for the last week.
Fronts went up on jack stands and the wheels came off. Spent a bit of time trying to get a bite on the shock as I tried to loosen the top nut. Nothing worked until I put a set of channel locks in there.
Then spin the socket up top, and off she comes. 9/16" on top, and the bottom bolts and nuts are 1/2"
The two lower bolts on both sided were good, since I had taken them off to do my oil pan gasket and rear main.
Take it all off and put the new one in.
I decided to go with the Monroe Sensa-Trac because they got good reviews and I'm not lifted and don't do anything too extreme. Plus, for $44 a corner, not gonna break the bank.
Put the bottom bolts in, add the bushing and backing plate over the stud in the engine compartment (the side of the bushing with the big nipple goes into the hole in the fender - little nipple faces the backing plate), and get your first lesson on how to properly take the nut off. The end of the stud and 2 flats, which you can hold with an adjustable wrench as you tighten the nut to keep the shock from spinning.
You can see the flats on either side of the end of the stud, above the wrench.
On to the driver's side. Do yourself a favor, save your time and knuckles, and just take the airbox out. A deepwell won't fit under the brake master cylinder, and getting both wrenches in there between brake lines and what not, is a royal pain.
The above photo is of the driver's side with the airbox out. Tons of room.
Bottom the same as the other side, and the front tires go on and the front comes off the jack stands.
After several sessions with PB, connect all your extensions, use a 1/2" socket and pull your 4 rear upper shock bolts off
Nothing broke, and they came right out
Don't know what the rest of you are complaining about...
The bottom nuts are 17mm....erm...might be 18mm. No problem - put a cheater bar on it and you're good to go.
I hit every fastener with a wire brush and put anti-seize on the bolts so I don't have to eat my words next time
Wheels back on, put 'em on the ground and off for a test drive.
Holy Batman, why did I wait so long?! The difference is night and day...a totally new XJ
11-20-2013, 08:18 PM
#63
Seasoned Member
Thread Starter
Join Date: Jan 2011
Location: Austin
Posts: 302
Likes: 0
Received 4 Likes
on
3 Posts
Year: 1987
Model: Wagoneer
Engine: 4.0
03 Nov 13
221,xxx
So, for whatever reason, the rubber boots around the TREs I put on the tie rods ripped and came off. Took me awhile to notice as I wasn't under the Jeep, so I didn't catch it till they were too far gone.
Replaced those two TREs and did a quick alignment.
19 Nov 13
222,289
Front brakes started grinding on my way home from from drill last weekend. Finally got to it last night. Replaced pads on both fronts, and the drivers rotor. Might do the passenger side rotor this weekend, just so they're all same same.
Changed oil and filter.
Oh, thought it was cool I was able to catch this on my odometer :-)
05-02-2014, 07:23 AM
#65
::CF Moderator::
Join Date: Aug 2011
Location: Prescott, Az
Posts: 43,876
Received 1,527 Likes
on
1,239 Posts
Year: 1990
Model: Cherokee (XJ)
Engine: 4.0
05-21-2014, 09:57 PM
#67
Seasoned Member
Thread Starter
Join Date: Jan 2011
Location: Austin
Posts: 302
Likes: 0
Received 4 Likes
on
3 Posts
Year: 1987
Model: Wagoneer
Engine: 4.0
Gents, thanks for the kind words - I'm glad I've posted something helpful (most of it was learned from cruiser54)!
Since this is my build thread where I keep track of stuff I'm doing to my heep, can we start another thread in OEM Tech to continue this discussion?
Thanks!
Since this is my build thread where I keep track of stuff I'm doing to my heep, can we start another thread in OEM Tech to continue this discussion?
Thanks!
Last edited by letinsh; 05-21-2014 at 10:34 PM.
05-21-2014, 10:40 PM
#68
::CF Moderator::
Join Date: Aug 2011
Location: Prescott, Az
Posts: 43,876
Received 1,527 Likes
on
1,239 Posts
Year: 1990
Model: Cherokee (XJ)
Engine: 4.0
Gents, thanks for the kind words - I'm glad I've posted something helpful (most of it was learned from cruiser54)!
Since this is my build thread where I keep track of stuff I'm doing to my heep, can we start another thread in OEM Tech to continue this discussion?
Thanks!
Since this is my build thread where I keep track of stuff I'm doing to my heep, can we start another thread in OEM Tech to continue this discussion?
Thanks!
05-22-2014, 12:41 PM
#69
Junior Member

Join Date: May 2014
Location: Fort Collins, CO
Posts: 53
Likes: 0
Received 0 Likes
on
0 Posts
Year: 1987
Model: Wagoneer
Engine: AMC 242 I6 (4.0 L)
Before I finish here, I saw that you replaced the headlight switch recently. I was wondering if anybody here knew how to wire the headlight switch and the lights so both sets stay on when you turn on your brights. Stock wiring has low beams on for one setting and switching to high beams, the low beams turn off. I want to be able to have all 4 lights on when I toggle highbeams. Electrical engineers help! Haha
05-22-2014, 03:31 PM
#70
Seasoned Member
Thread Starter
Join Date: Jan 2011
Location: Austin
Posts: 302
Likes: 0
Received 4 Likes
on
3 Posts
Year: 1987
Model: Wagoneer
Engine: 4.0
Before I finish here, I saw that you replaced the headlight switch recently. I was wondering if anybody here knew how to wire the headlight switch and the lights so both sets stay on when you turn on your brights. Stock wiring has low beams on for one setting and switching to high beams, the low beams turn off. I want to be able to have all 4 lights on when I toggle highbeams. Electrical engineers help! Haha
I didn't mention it earlier, but welcome!
05-22-2014, 09:50 PM
#71
Seasoned Member
Thread Starter
Join Date: Jan 2011
Location: Austin
Posts: 302
Likes: 0
Received 4 Likes
on
3 Posts
Year: 1987
Model: Wagoneer
Engine: 4.0
Before I finish here, I saw that you replaced the headlight switch recently. I was wondering if anybody here knew how to wire the headlight switch and the lights so both sets stay on when you turn on your brights. Stock wiring has low beams on for one setting and switching to high beams, the low beams turn off. I want to be able to have all 4 lights on when I toggle highbeams. Electrical engineers help! Haha
And here: https://www.cherokeeforum.com/showth...394&styleid=16
That should get you what you want :-)
06-09-2014, 09:52 AM
#72
Seasoned Member
Thread Starter
Join Date: Jan 2011
Location: Austin
Posts: 302
Likes: 0
Received 4 Likes
on
3 Posts
Year: 1987
Model: Wagoneer
Engine: 4.0
229,7xx
8 Jun 14
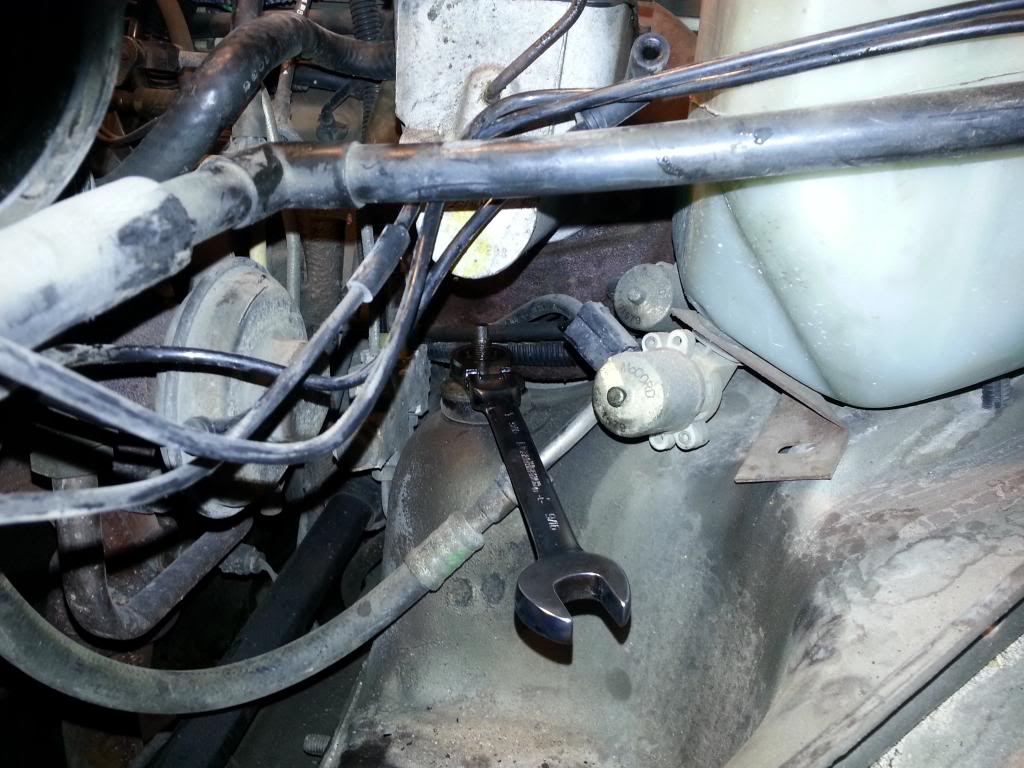
I had a few spare minutes yesterday and decided to flush my brake system because I've been having some braking issues, and it's a cheap first cut.
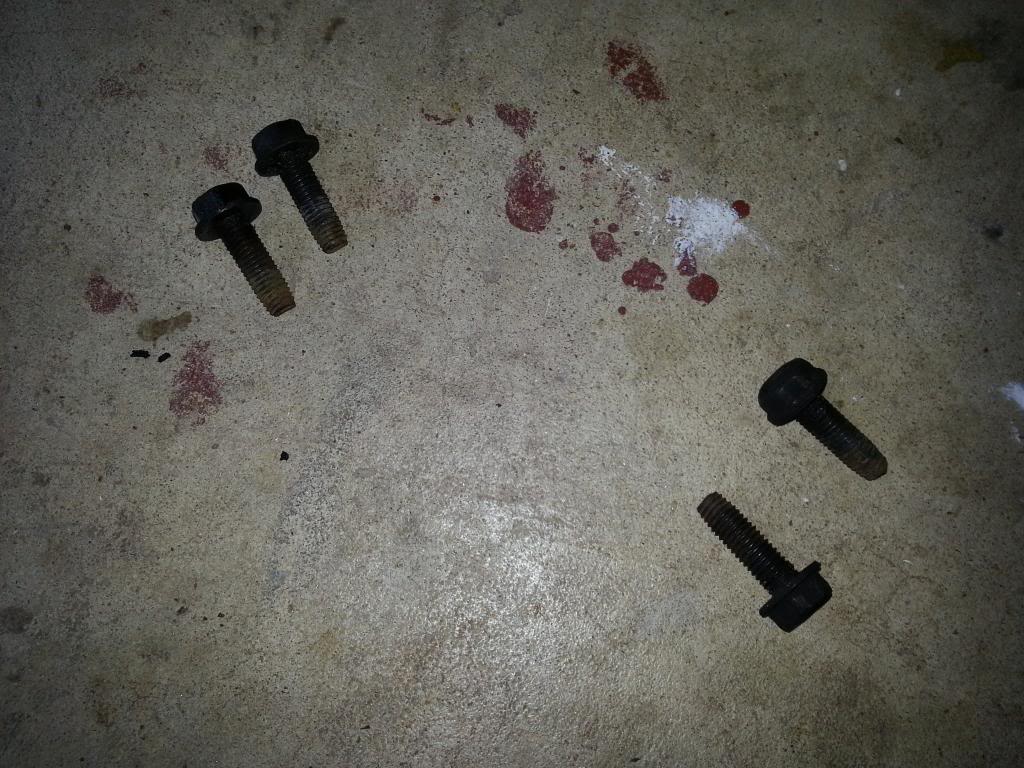
Jacked the xj up and pull all the tires.
Saw this on my LF rotor (these were new in November):
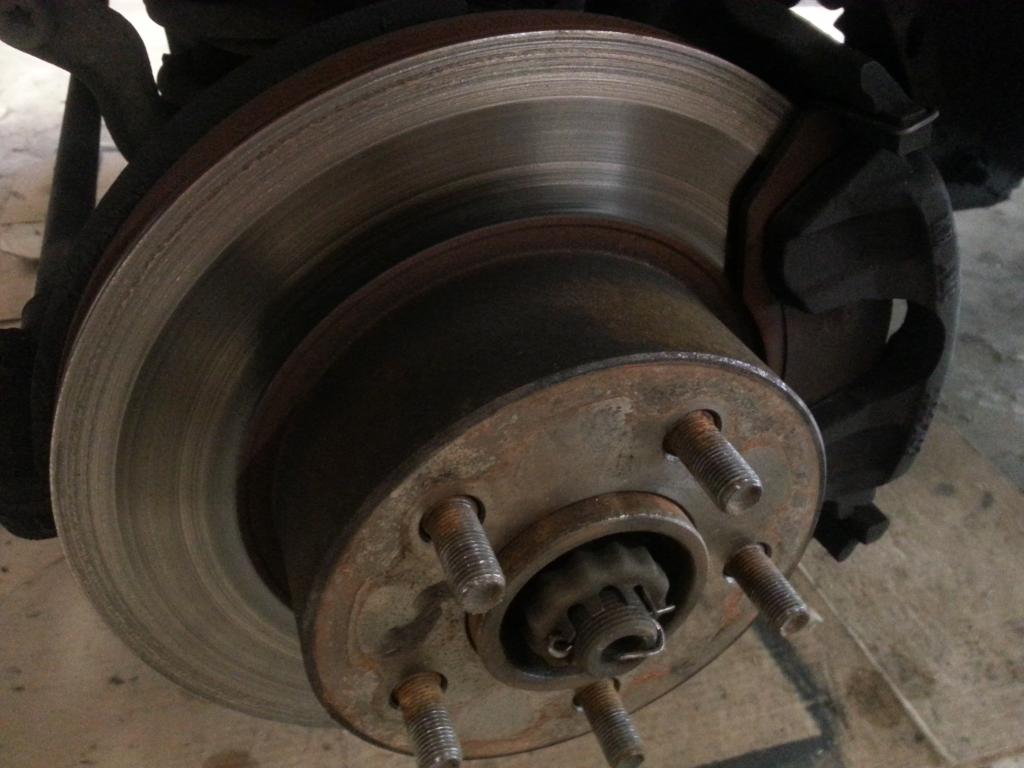
I had a new set of pads on-hand as well as an old rotor (only slightly worn) from my swap in November. On they went.
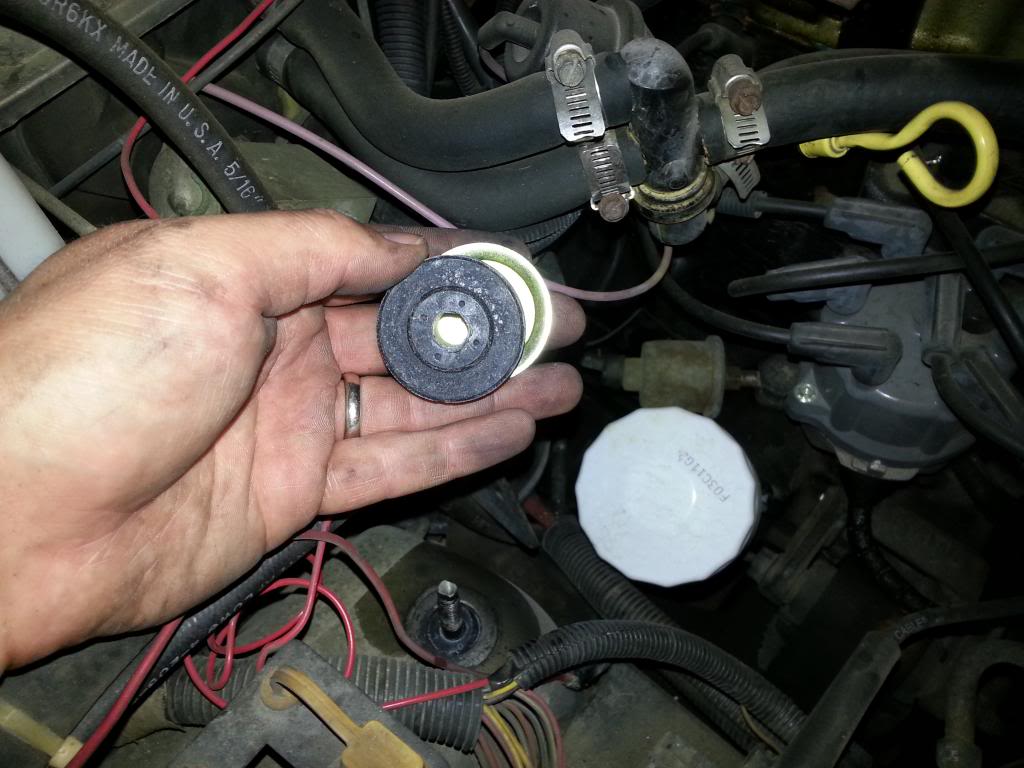
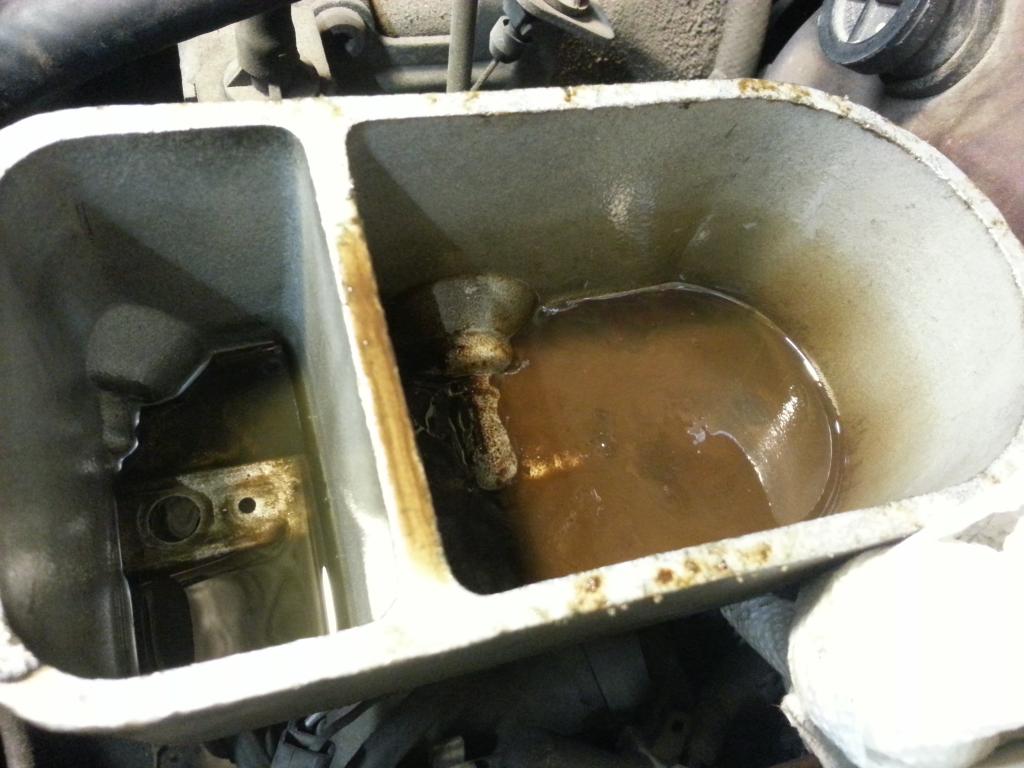
Now, back to the job at hand. Popped the cap to the master cylinder reservoir and was greeted with this:
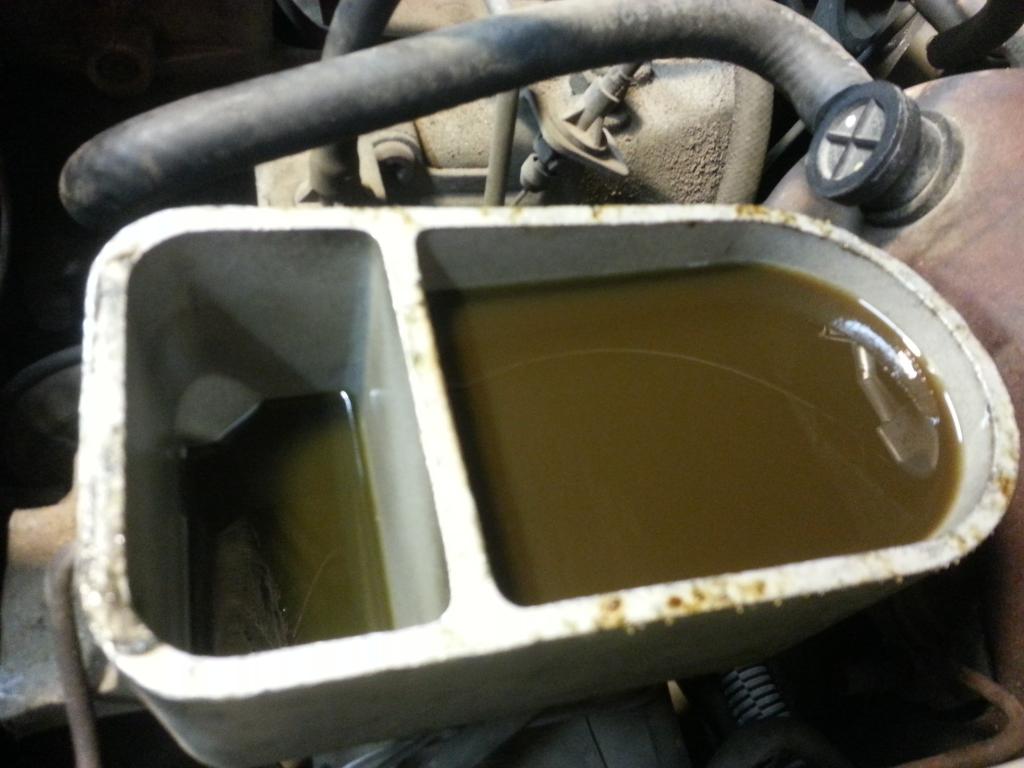
I don't know much about brakes, but I don't think it's supposed to look like that....
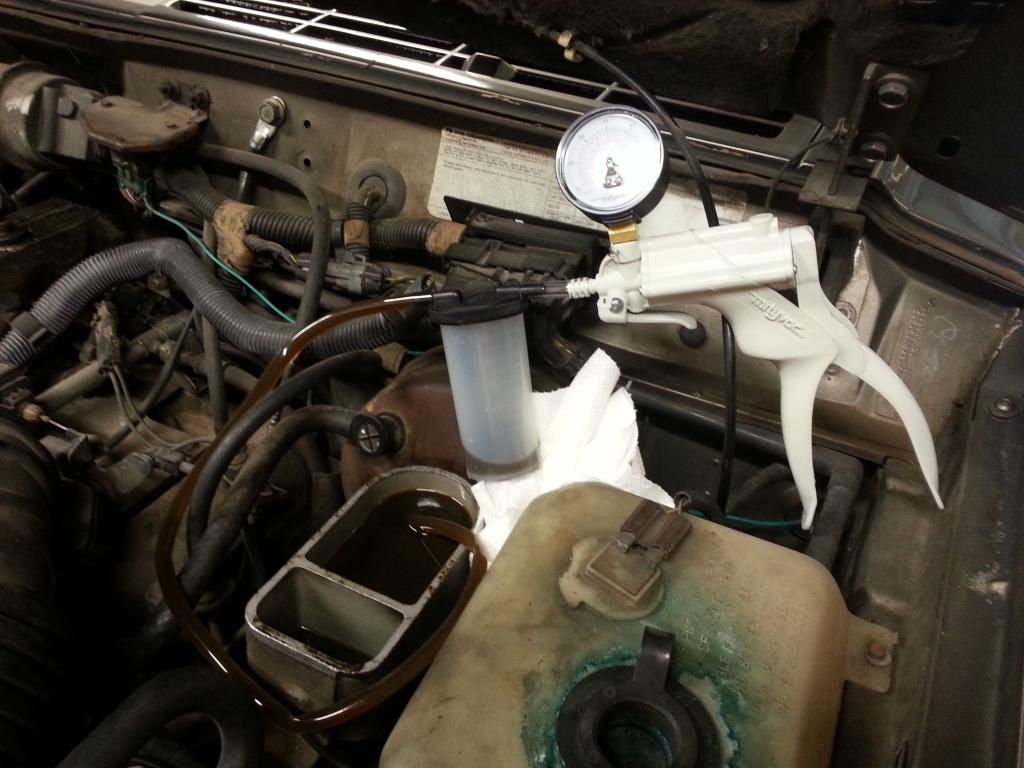
Using a little vacuum pump, I sucked it all out.
Then I wiped all the sludge out....no wonder I was having issues!
I filled both chambers with new fluid (I bought 32oz bottle from Pep Boys and used most of it, if you need a reference for how much fluid you will need to have on-hand to flush).
I tried bleeding the brakes by myself with that vacuum pump, but it didn't work at all. I had a buddy come over and we did it the old fashioned way.
RR, LR, RF, LF
Everything was working fine until I hit the RF caliper and rounded off the bleeder nut, so I left it alone and moved to the RF.
What a difference! My jeep actually stops now!
I'm still planning on replacing both calipers and the flexible lines up front, but this'll get me over until then!
8 Jun 14
I had a few spare minutes yesterday and decided to flush my brake system because I've been having some braking issues, and it's a cheap first cut.
Jacked the xj up and pull all the tires.
Saw this on my LF rotor (these were new in November):
I had a new set of pads on-hand as well as an old rotor (only slightly worn) from my swap in November. On they went.
Now, back to the job at hand. Popped the cap to the master cylinder reservoir and was greeted with this:
I don't know much about brakes, but I don't think it's supposed to look like that....
Using a little vacuum pump, I sucked it all out.
Then I wiped all the sludge out....no wonder I was having issues!
I filled both chambers with new fluid (I bought 32oz bottle from Pep Boys and used most of it, if you need a reference for how much fluid you will need to have on-hand to flush).
I tried bleeding the brakes by myself with that vacuum pump, but it didn't work at all. I had a buddy come over and we did it the old fashioned way.
RR, LR, RF, LF
Everything was working fine until I hit the RF caliper and rounded off the bleeder nut, so I left it alone and moved to the RF.
What a difference! My jeep actually stops now!
I'm still planning on replacing both calipers and the flexible lines up front, but this'll get me over until then!

 07-11-2014, 07:39 PM
#75
Junior Member
Join Date: May 2014
Location: Fort Collins, CO
Posts: 53
Likes: 0
Received 0 Likes
on
0 Posts
Year: 1987
Model: Wagoneer
Engine: AMC 242 I6 (4.0 L)
wanna ask why you have 4 new leaf packs? I have an old cheverlet truck trailer with huge leafs. I took them off today and going to try to bastard lift my rear this weekend. Will have to get longer u bolts at the part store though.