Jeep Grand Cherokee 1999-2004: How to Replace Oxygen Sensor
A bad oxygen sensor can make your Jeep run rough and exhibit a number of unpleasant symptoms. Thankfully, replacing it is relatively easy and inexpensive.
This article applies to the Jeep Grand Cherokee WJ (1999-2004).
Oxygen sensors measure the oxygen content in the exhaust gasses exiting the engine. This measurement of oxygen is commonly referred to the "Air:Fuel Ratio (AFR)," which is measured in parts of oxygen to part of fuel gasses. The PCM (powertrain control module) uses the inputs from these oxygen sensor to control engine performance. If the AFR is either too rich (too much fuel, i.e. 9:1 AFR) or too lean (too much air, i.e. 16:1 AFR), then the computer needs to adjust other parameters to compensate. However, as these sensors wear and age, they can be prone to becoming unreliable, giving incorrect readings, or ceasing to give readings all together, which causes engine performance to suffer greatly. Generally speaking, if your oxygen sensors make it past 100,000 miles, then you're a lucky one. If your Jeep is about due, then consider this an excellent idea of preventative maintenance and replace that old oxygen sensor.

Materials Needed
- New O2 sensor
- WD-40, or comparable liquid penetrating oil
- Oxygen sensor wrench (can purchase or rent for free from many auto parts stores)
- Jack and jack stands (optional, but makes it easier to get under the car)
Step 1 – Remove oxygen sensor
Before beginning, disconnect the battery. Then crawl underneath your Jeep on the driver's side. If necessary, you can jack up the front of the car and place it on jack stands if you don't fit underneath while it is on the ground. The O2 sensor is located on the exhaust pipe, close to the engine. Look at the catalytic converter and follow it forward to locate the sensor. Slide the oxygen sensor wrench over the sensor and twist it counterclockwise to unscrew it from the pipe. Disconnect the harness connected to the sensor and remove the sensor.

Figure 1. Locate the oxygen sensor. 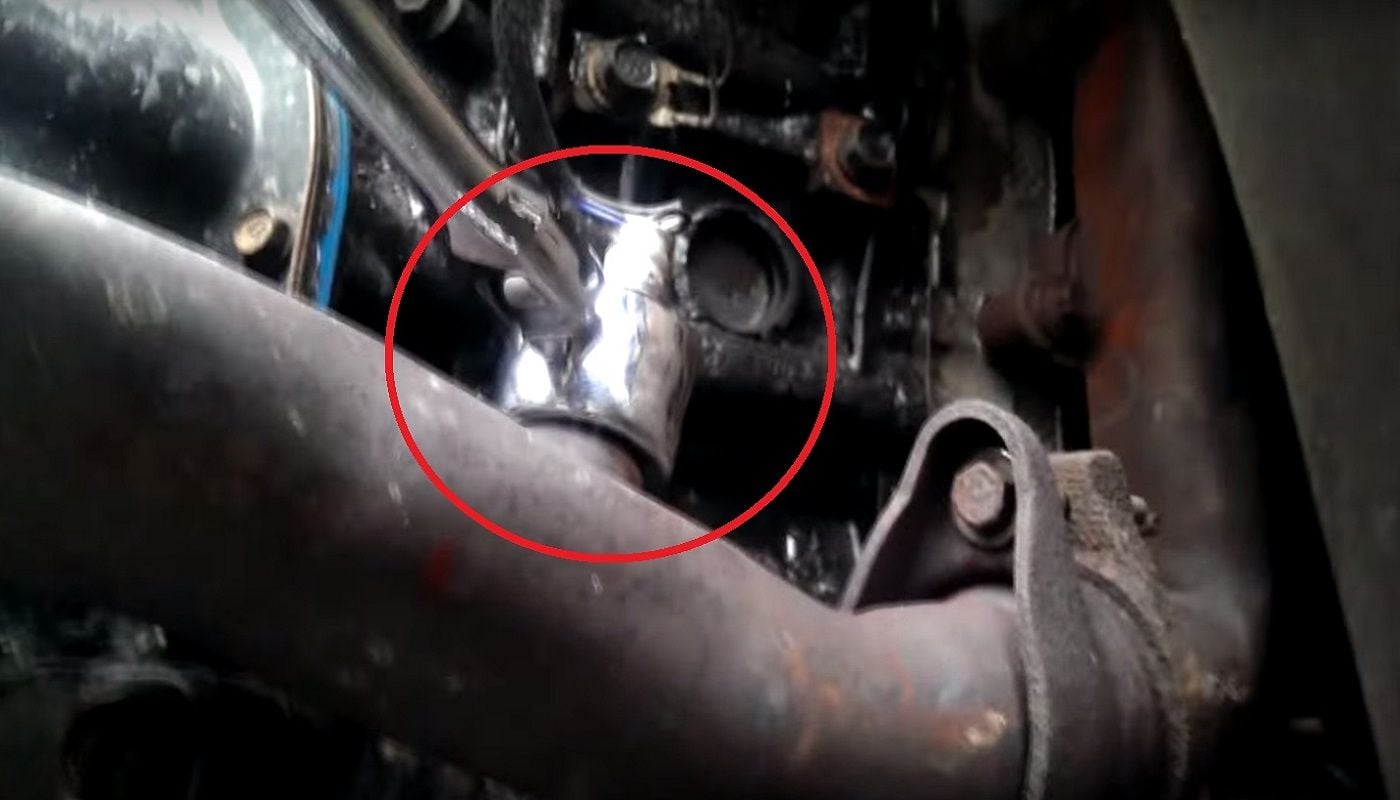
Figure 2. Unscrew the oxygen sensor. 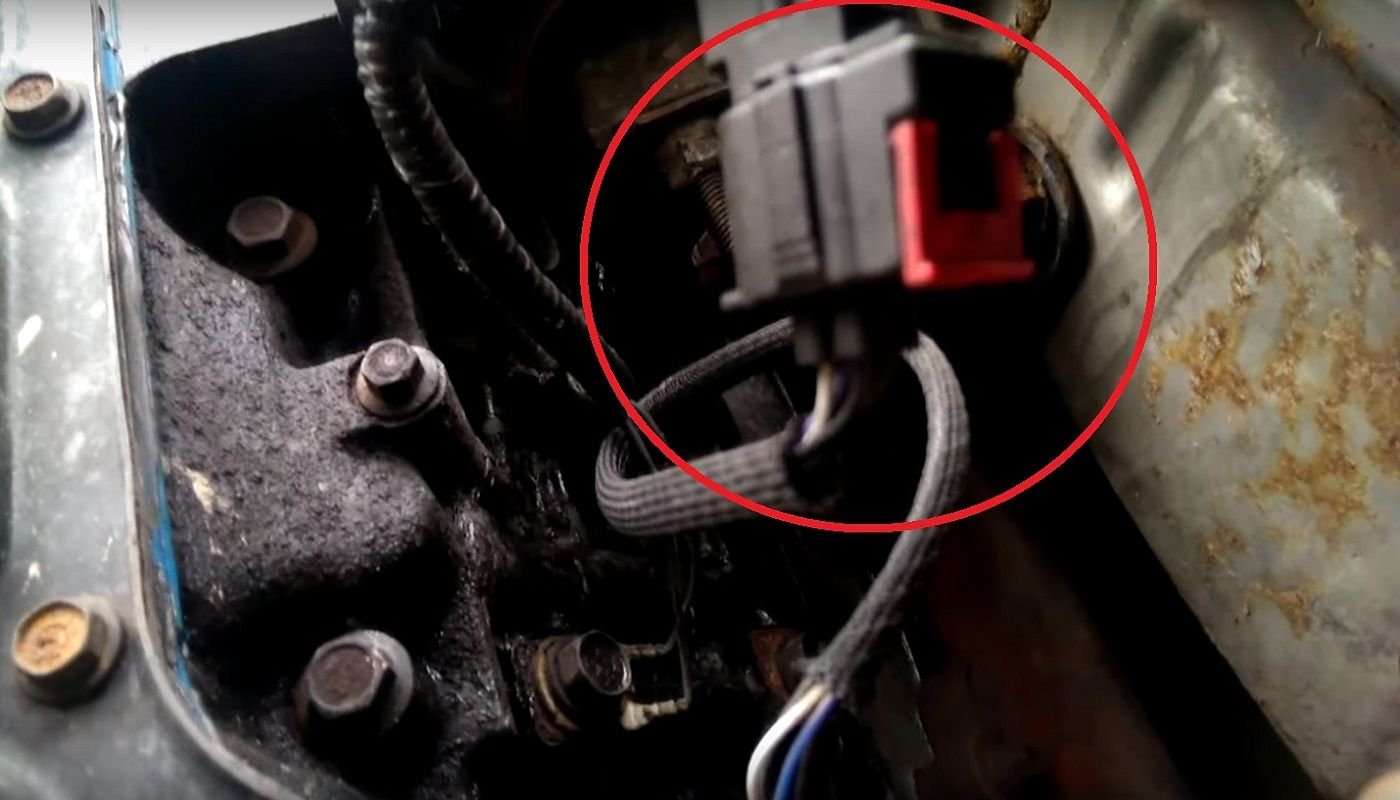
Figure 3. Disconnect and remove harness.
Step 2 – Install new oxygen sensor
Connect the wiring harness to the new oxygen sensor. Set it in the exhaust pipe and hand-tighten. Use the oxygen sensor wrench to finish tightening the sensor until it is snug, but not too tight. Reconnect the battery and start the car.

Featured Video: How to Replace Oxygen Sensor
Related Discussions
- Replacing Upstream O2 Sensor - CherokeeForum.com
- Replacing O2 Sensors Best Online - CherokeeForum.com