Jeep Grand Cherokee 1993-1998: How to Replace Crankshaft Position Sensor
The Crankshaft Position Sensor (CPS) is one small part, but a faulty one can cause your engine to start hard, run rough and even stall while driving. Read on to learn how to replace it yourself for a fraction of the cost of having it done professionally.
This article applies to the Jeep Grand Cherokee ZJ (1993-1998).
The Crankshaft Position Sensor (CPS) is a small electronic device that uses a magnetic field to detect the position or rotational speed of the crankshaft. This information is passed on to the engine control module for use in ignition system timing and other essential engine functions. This is why a CPS failure can prevent the engine from starting, or even cut off the fuel pump and stall the vehicle while driving. If you suspect that your CPS may be failing, you can replace it yourself now and avoid being stranded on the side of the road later.

Materials Needed
- Ramps and chocks
- Jack and jack stands (alternative)
- 3/8" ratchet
- 11mm or 7/16" socket
- 3/8" socket
- 10-12" extension
- Swivel
- Screwdriver
- Pliers
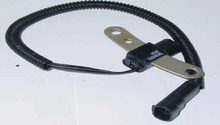
- Replacement CPS sensor
- String
It is highly suggested to use an OEM replacement part, as some aftermarket parts have inferior magnets that can compromise the quality and stability of the signal.
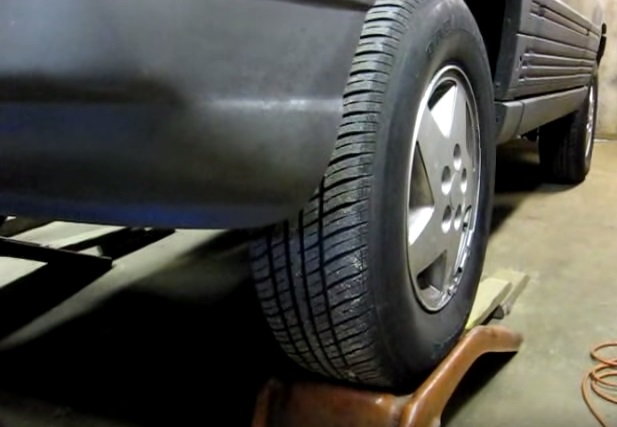
Step 1 – Lift the front of the vehicle using ramps
You will need to get under the front of the vehicle to remove the CPS, so get it lifted using ramps and be sure to use chocks to keep it in place.
Step 2 – Locate the CPS
The CPS is located on the driver's side of the bell housing for 4.0 engines, and on the passenger's side for the 5.2 and 5.9 engines.
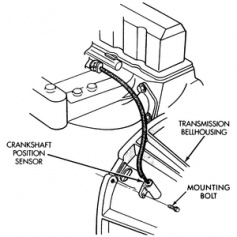
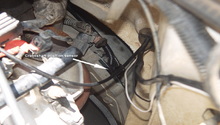
It will be easiest to access the sensor from under the vehicle, in the gap between the firewall and the engine. Figure 3 shows the view from the bottom.
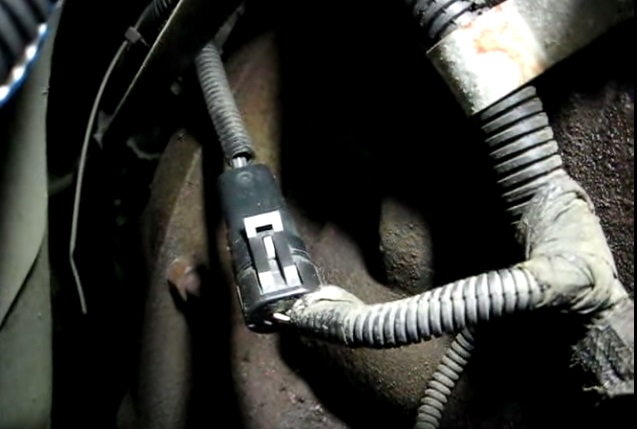
Step 3 – Unplug the wire connector
After locating the sensor, trace the wire up to the top of the engine, which is located just behind the oil filter as shown in Figure 4. Disconnect it from the main wire harness so that it is ready for removal.
Pro Tip
Tie some thin string to the end of the sensor wire connector, so that you can easily fish the connector for the new sensor back up through the engine after replacement.
Step 4 – Remove the transmission shifter cable bracket
In order to remove the sensor, you will first need to make room by removing the transmission shifter cable bracket. When looking up toward the sensor from underneath the vehicle (as shown in Figure 4), you will see the shifter cable and bracket blocking the access needed to remove its mounting bolt.
You will need to remove the two bolts indicated by the arrows in Figure 5. One will require a 3/8" socket and 11/16" for the other. You will also need to undo the spring and the arm linkage as shown in Figure 6 to make adequate room to get to the sensor.
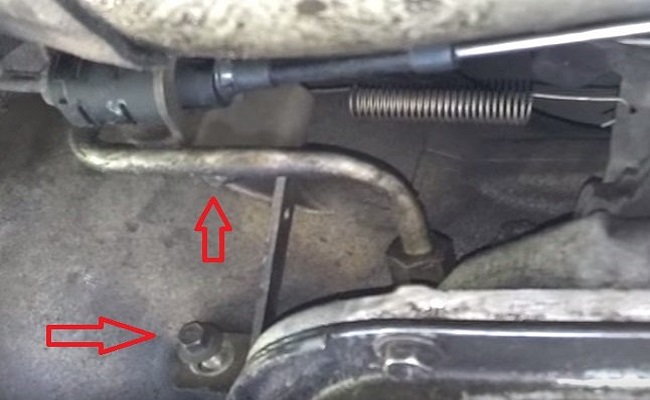
Figure 5. Remove the transmission cable bracket. 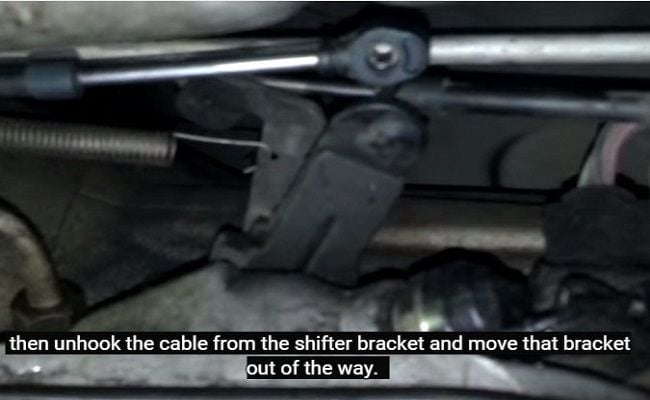
Figure 6. Undo arm linkage and spring.
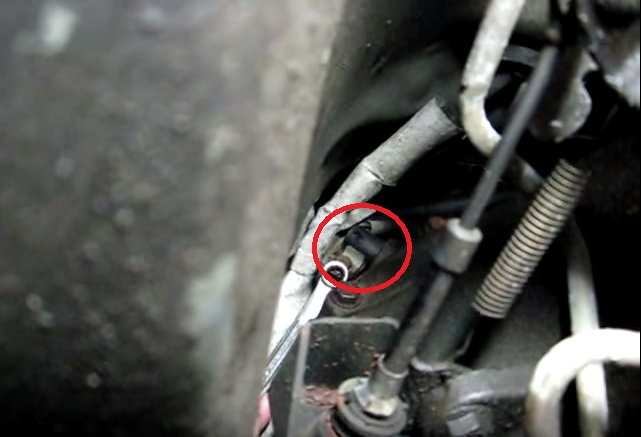
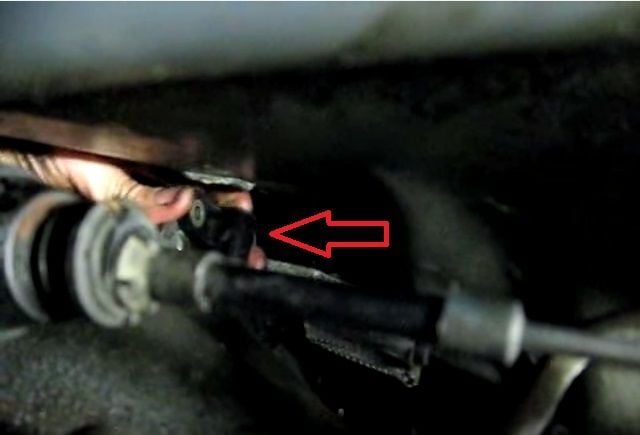
Step 5 – Remove defective sensor
With the transmission cable bracket out of the way, use a 12" socket extension to remove the 11mm bolt holding the CPS in place. Once the bolt is removed, slide the sensor out of the bell housing (see Figure 7) and remove it slowly, allowing the wire to make its way gently out of the engine compartment. Pull the string you attached earlier all the way through as you will need it in the next step.
Pro Tip
Be very cautious at this point; with the sensor removed, there is a hole in the bell housing. Any nuts, bolts or debris that falls in could result in a much more expensive repair.
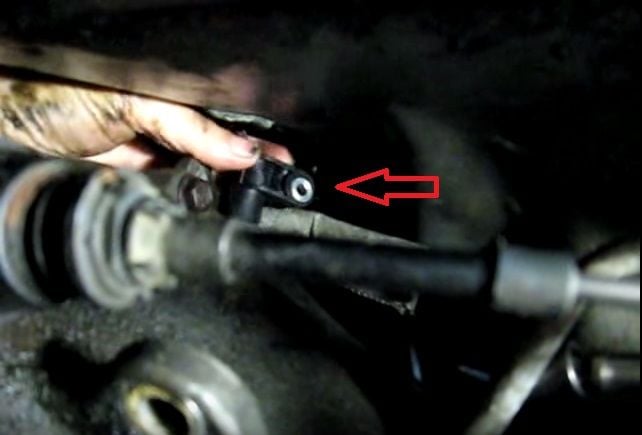
Step 6 – Install the new CPS
The string that you pulled through in the previous step can now be tied to the end of the wire connector of the new sensor. Pull the other end of the string slowly to fish the new wire up into the correct position for reconnecting it to the main wire harness.
Slide the new sensor into position and secure it with the 11mm bolt (see Figure 8). Reconnect the wire to the main harness by plugging in the connector
Pro Tip
The OEM replacement for the sensor should come with a paper cover on the end. Do not remove this because it serves as a spacer to provide the correct gap for the device to function properly. The paper will be sheared off once the engine starts.
Step 7 – Start your engine!
Your new sensor is in place and should be sending the proper signals to the engine control module. Verify that your vehicle starts and drives properly. If you continue to experience CPS related issues, double check the connection to the main wire harness.
Featured Video: Crankshaft Position Sensor Removal
Related Discussions and Video
- CPS Location on 95 Grand Cherokee 4.0 - CherokeeForum.com
- How Do I Replace the Crank Sensor? - CherokeeForum.com
- Jeep Crank Sensor Replacement - YouTube.com