Jeep Grand Cherokee 1993-1998: How to Install Fuel Filler Bezel
Give your Jeep the look of a combat vehicle with an upgraded bezel for your fuel filler.
This article applies to the Jeep Grand Cherokee ZJ (1993-1998).
Jeep vehicles are very commonly used for off-road driving and exploring on mountainous terrain or other rough areas. Fitting bigger tires, flares and a lift kit are all part of this look. An added detail is upgrading the fuel filler bezel with a more rugged one. This is more commonly found on Jeep Wranglers 1997+.

Materials Needed
- Socket wrench
- Flat tip screwdriver
- Star tip screwdriver
- Pliers
- Dremel
- Drill
- Epoxy
- Sharpie
Step 1 – Remove interior panel
In order to remove the existing gas door and fuel filler bezel, you will have to remove the panel behind it.
- Locate the interior panel on the opposite side of the fuel fill tank where the spare wheel well would be.
- Remove bolts holding the trim in.
- Use flat tip screwdriver to guide the trim off.
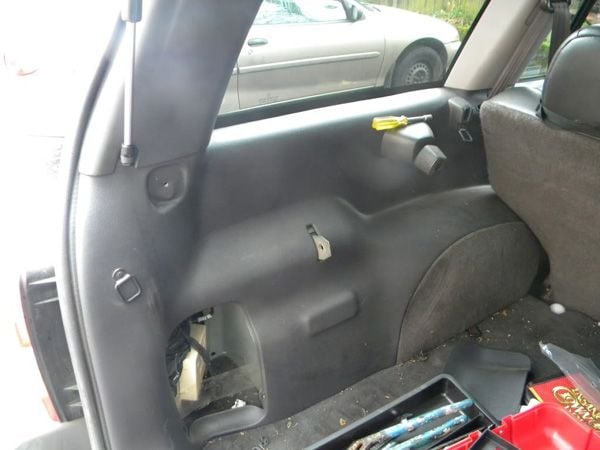
Figure 1. Remove clips holding the trim panel on. 
Figure 2. Remove the inner trim.
Pro Tip
You can loosely screw back in the bolts for the interior trim so you don't lose them.
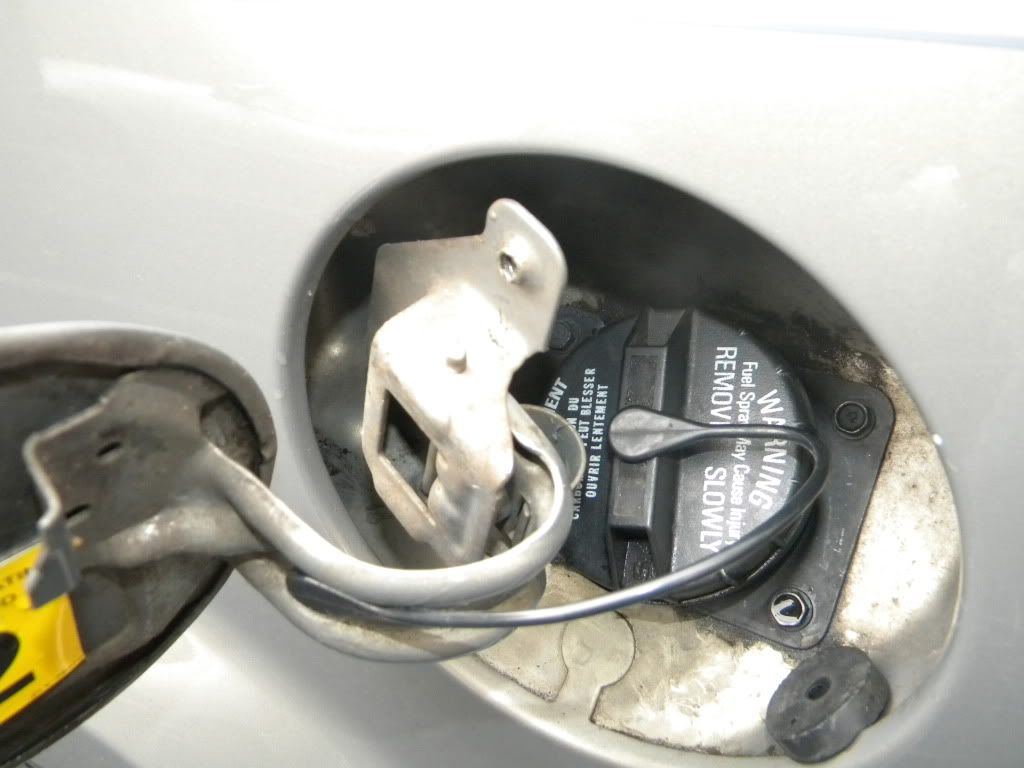
Step 2 – Remove gas door and filler
Now that the panel is removed and the gas door is fully exposed, we can begin removal.
- Unscrew two bolts on the gas door and remove the door.
- Remove the gas cap.
- Undo four bolts on gas filler neck and remove the rubber pieces.
Step 3 – Fit and secure new filler
Now that the gas door is off and the old filler rubber is out, the new filler can be screwed and secured into place.
- Fit the new filler against the opening and line it up with the bolts to the filler entry.
- Position the screws in an angle to conform to the shape of the new filler.
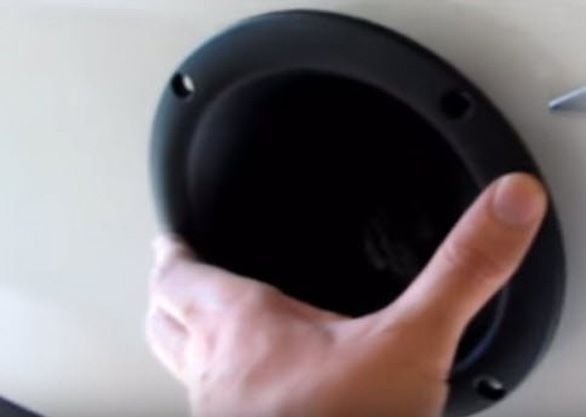
Figure 4. Line up the fuel filler opening. 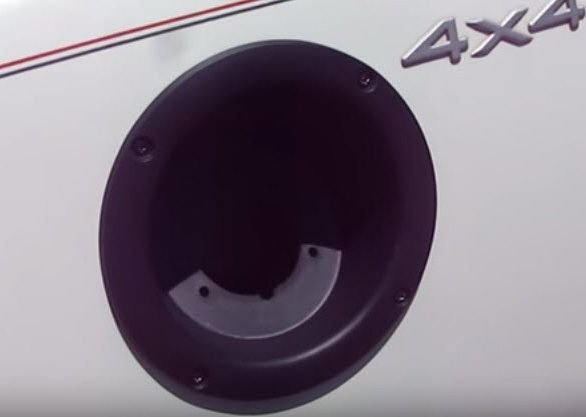
Figure 5. Fuel filler installed.
Pro Tip
It might be necessary to Dremel a little bit of the new filler to accommodate the not-so-shallow area of the old filler area. It is also a good idea to lay some Epoxy on the back of the new filler funnel, so it adheres to the body better. DO NOT cut any metal with the fuel cap open!
Step 4 – Secure bezel to body
Now that the new filler is in place and secure, it's time to wrap things up.
- Use the drill to drill the new unit to the body.
- Reinstall the gas cap.
- Secure the bolts to the interior panels.

Pro Tip
Before drilling into the body, you'll want to make marks using a Sharpie. Make sure the bolts will clear the body and not touch the filler neck, as they should not be very long bolts. Now that the gas cap is "exposed," you can opt for a "locking gas cap." Locking gas caps will cost between $10 to $15.
Featured Video: TJ Bezel Installation
Related Discussions
- Adding a "TJ Gas Bezel" to Your Jeep - CherokeeForum.com
- Tips on Removing the Gas door - CherokeeForum.com