The tale of SuperMJ

 11-03-2017, 10:13 AM
#272
CF Veteran
Thread Starter
Join Date: Jan 2013
Location: west chester, pa
Posts: 19,216
Likes: 0
Received 39 Likes
on
35 Posts
Year: 1999
Engine: 4.0
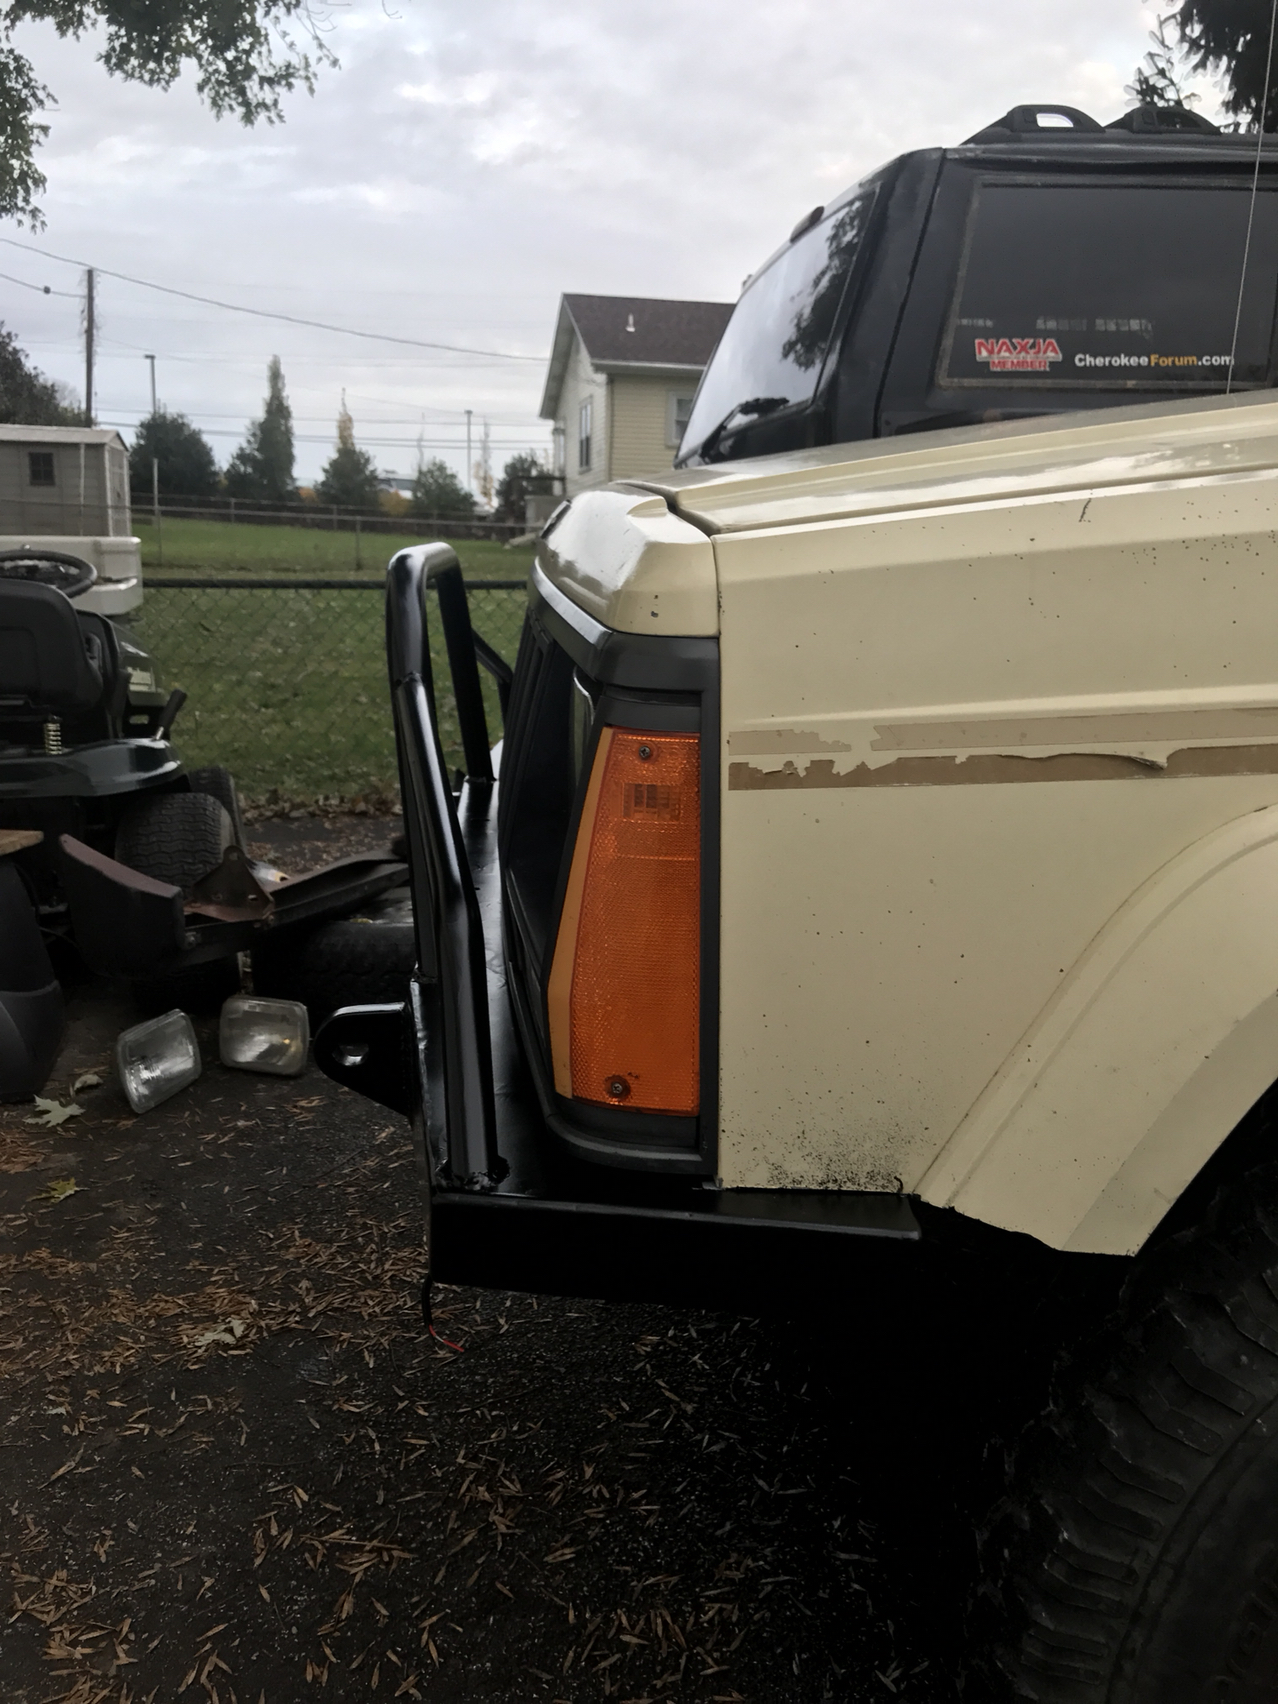
The MJ got a facelift.
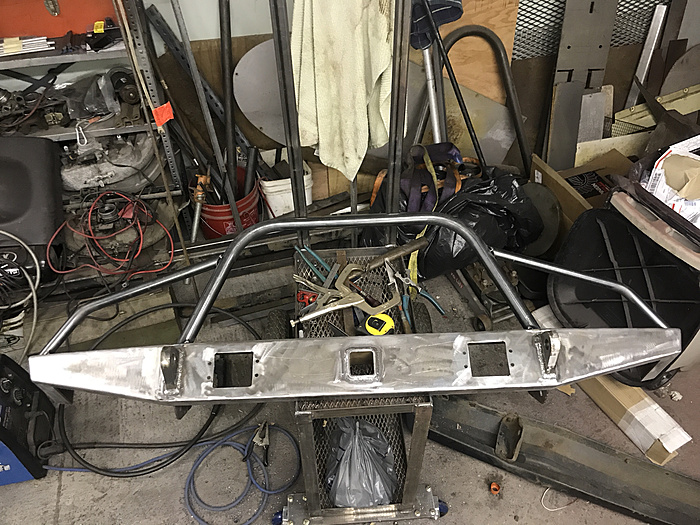
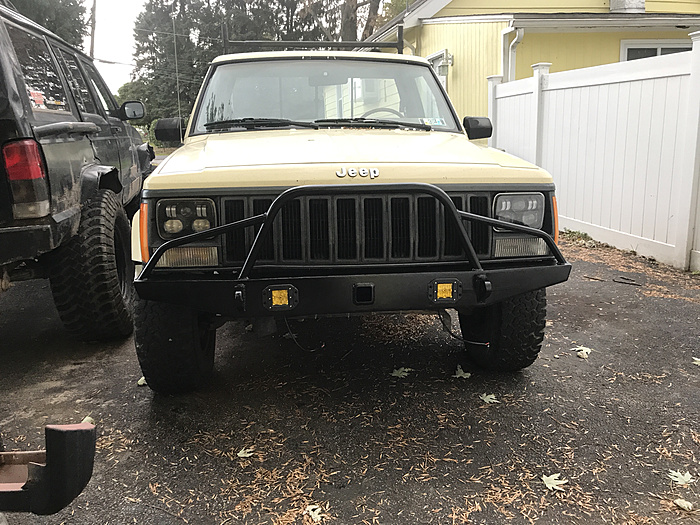
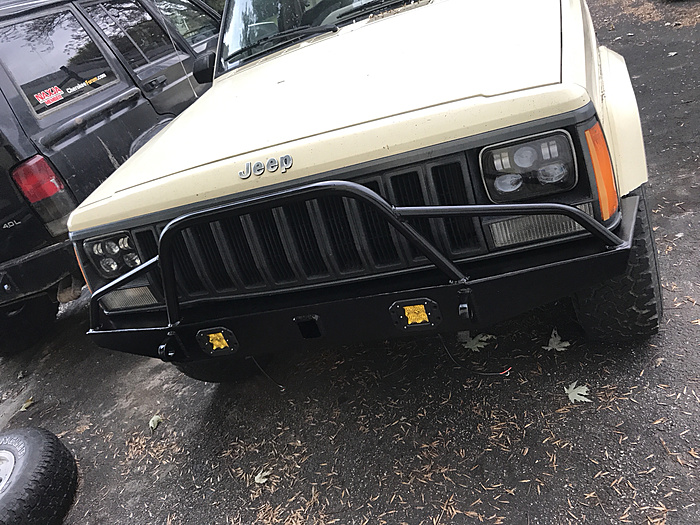
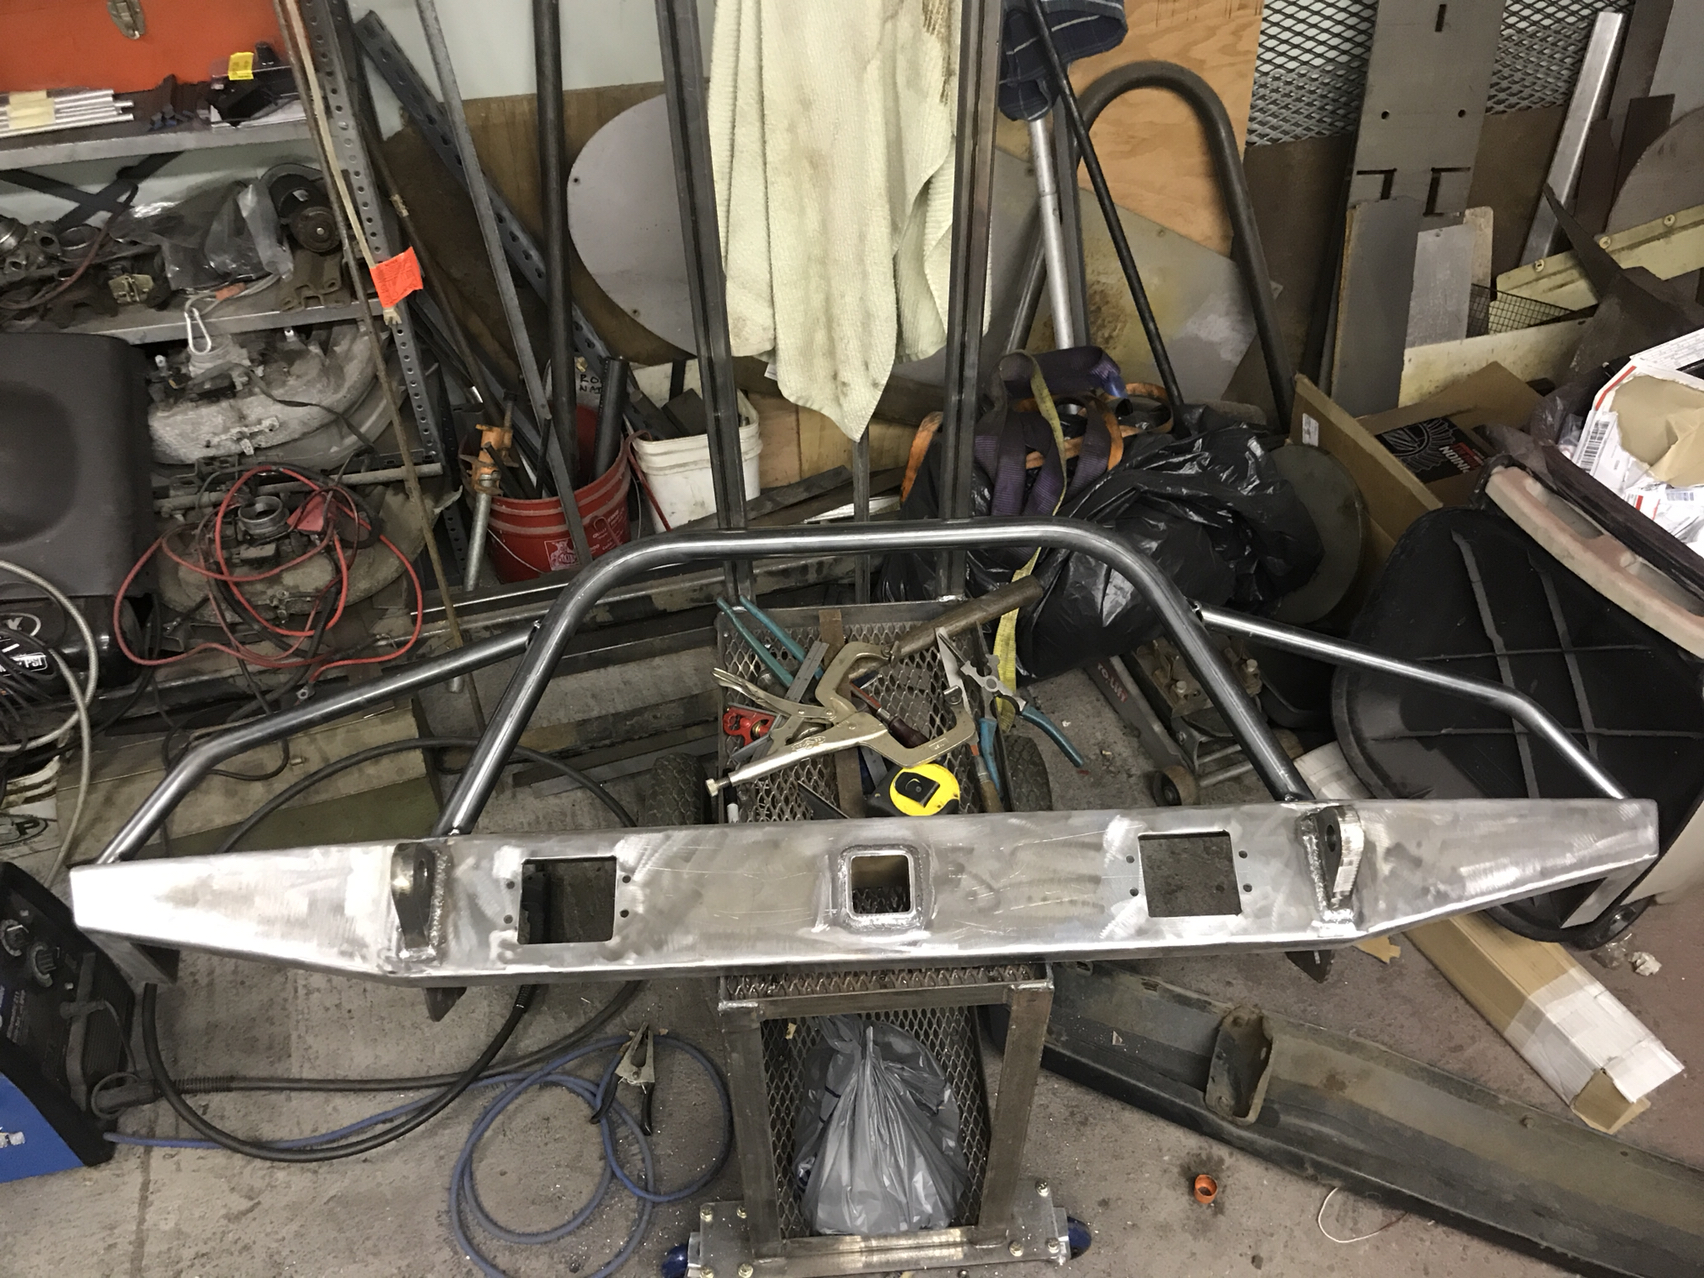
Cut the bottom portion of the fenders out, to make room for the JCR diy bumper I was working on.
(I needed to do this so I know where exactly to locate the mounting plates on it).
Mocked it up on the jeep and tacked the mounts in place.
Seems like I don't have pictures of that happening. Oh well.. moving on.

Those two holes are for the fogs
Bought some pipe & bent them
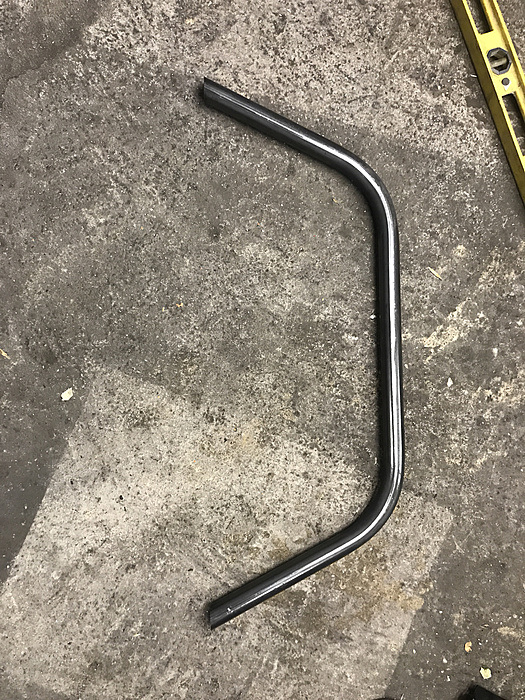
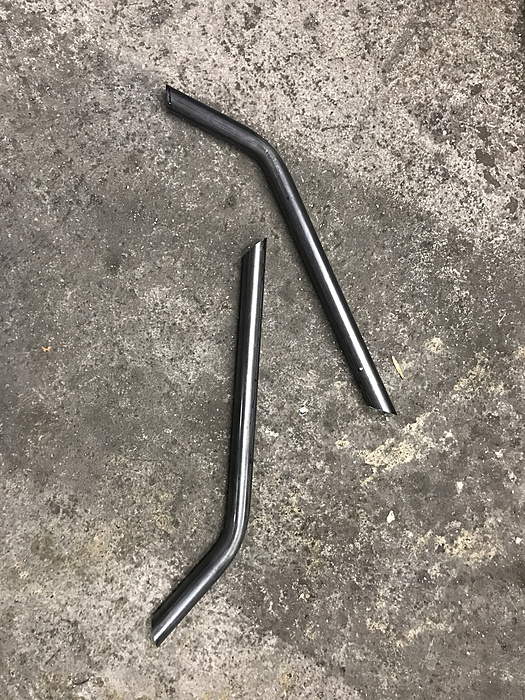
Welded them on the bumper.
The one I made for my XJ look better but I decided to use 1" pipe for the main hoop and 3/4" side pieces instead.
Primered and painted
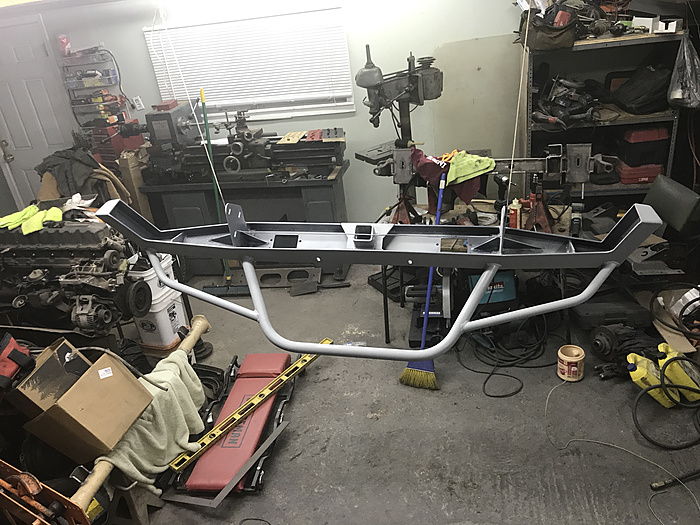
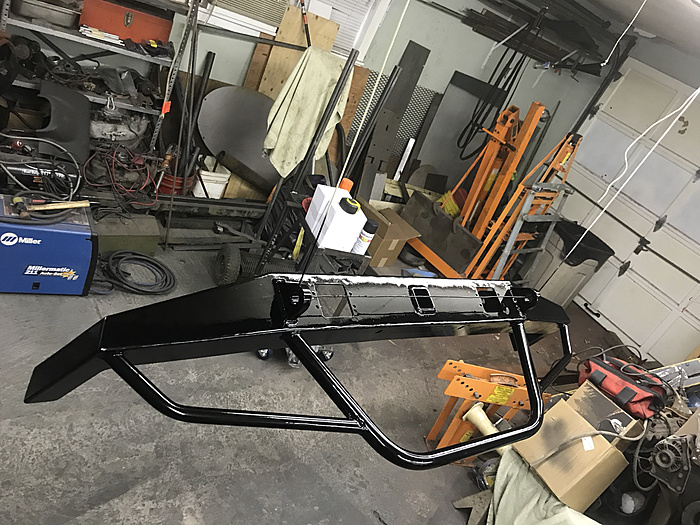
I love using enamel paint. Directions always say to apply few thin layers but I always lay it down thick. Sometimes using up 2-3 cans of paint in one shot. It always come out looking like it was powder coated.
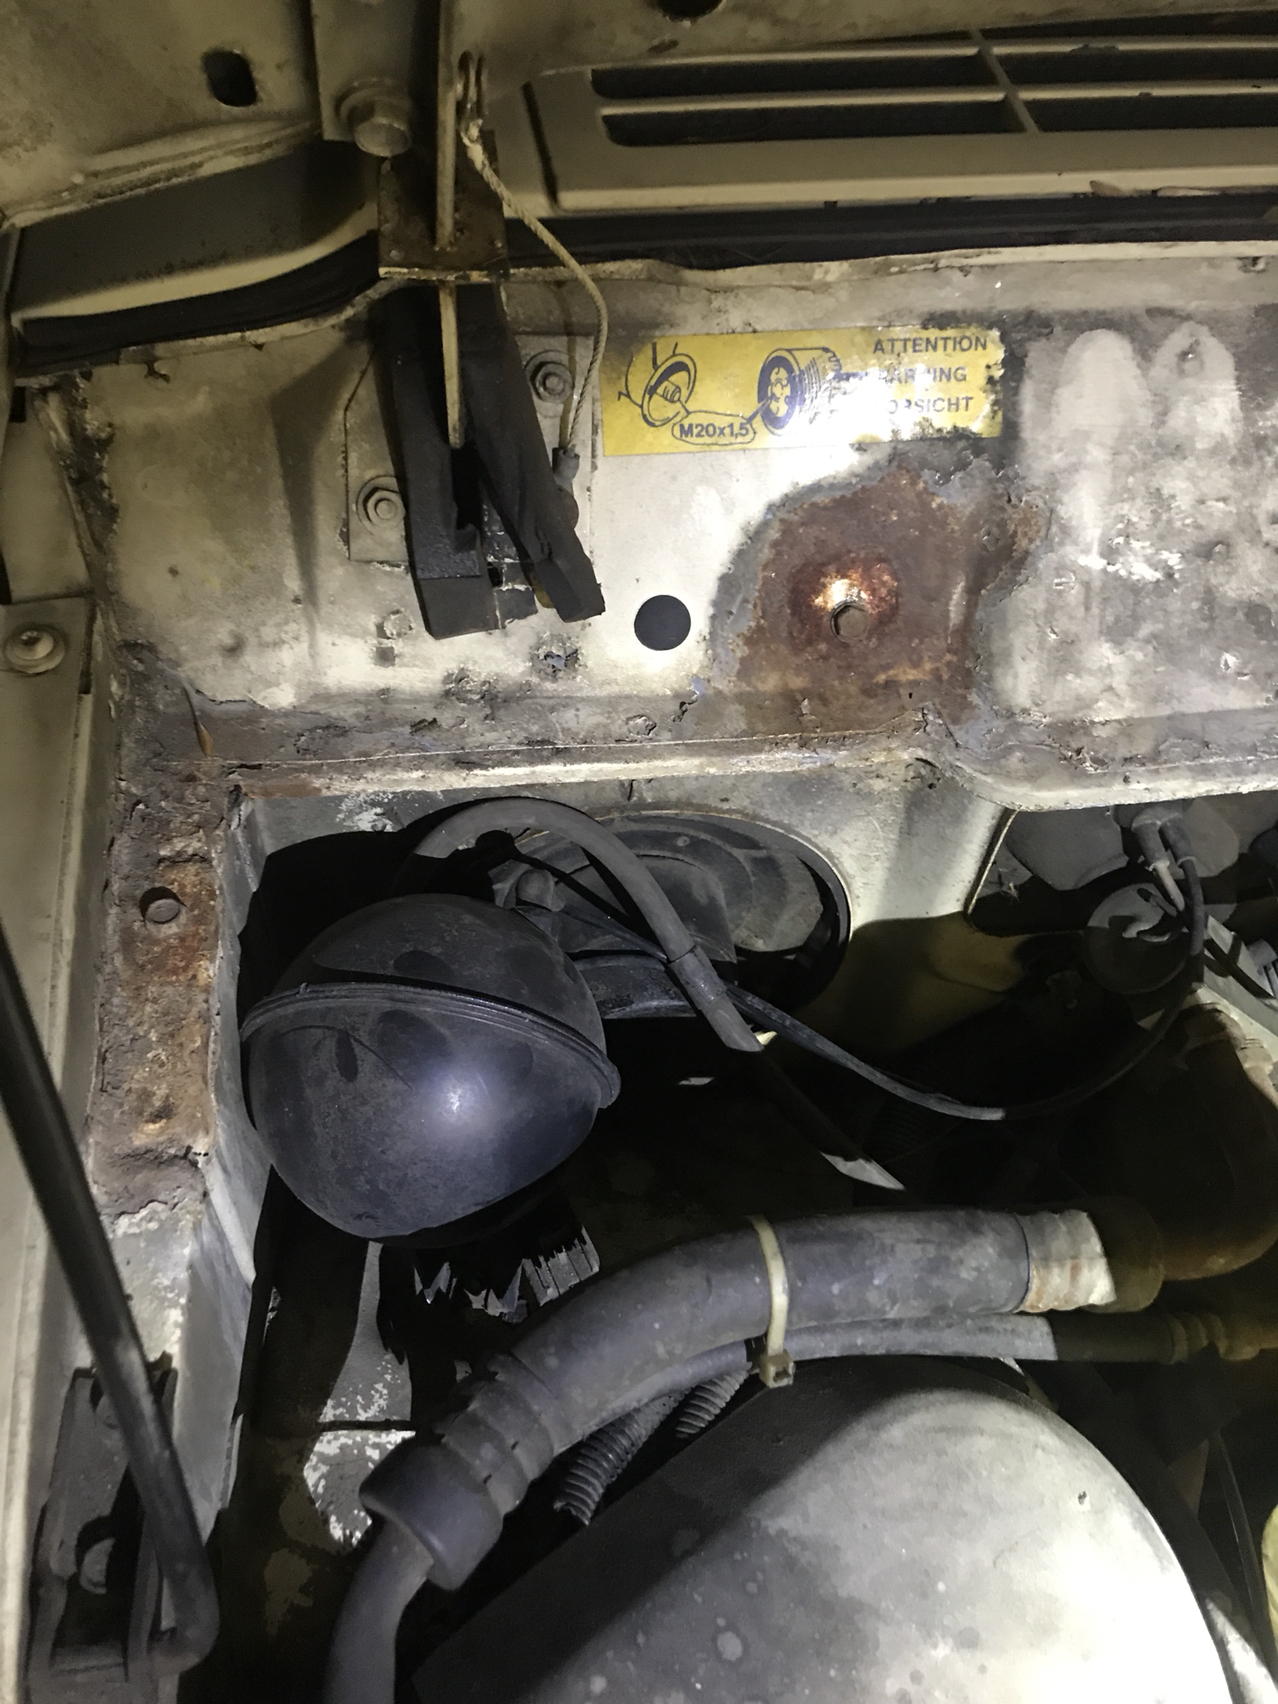
Oh yea. When I cut the bottom part out, & removed the old bumper, I also relocated the vacuum ball for now.

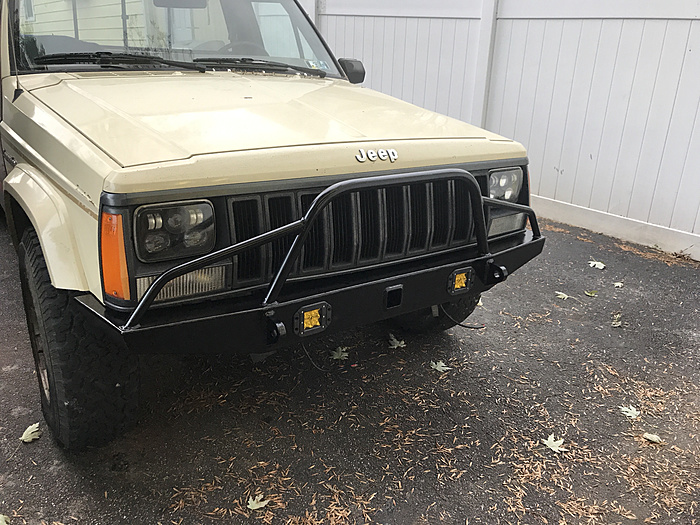
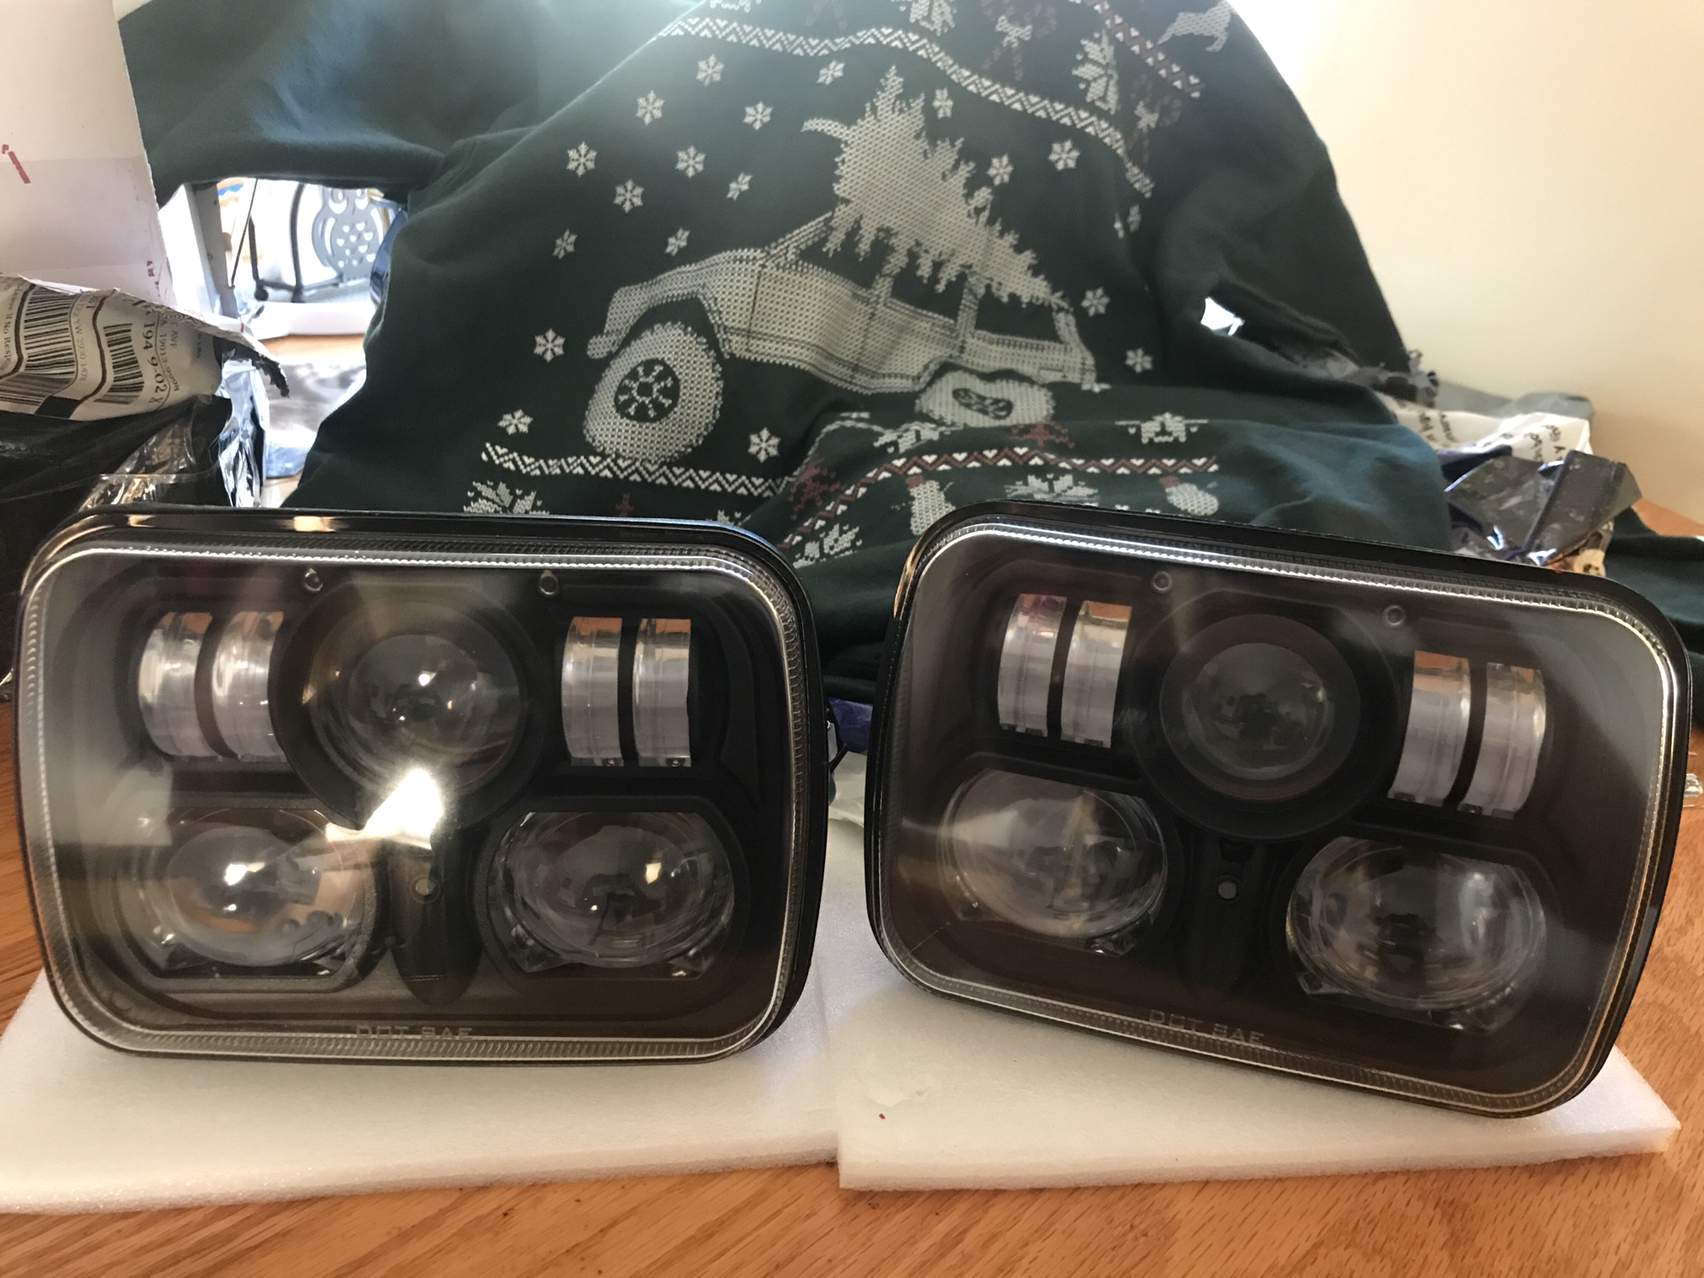
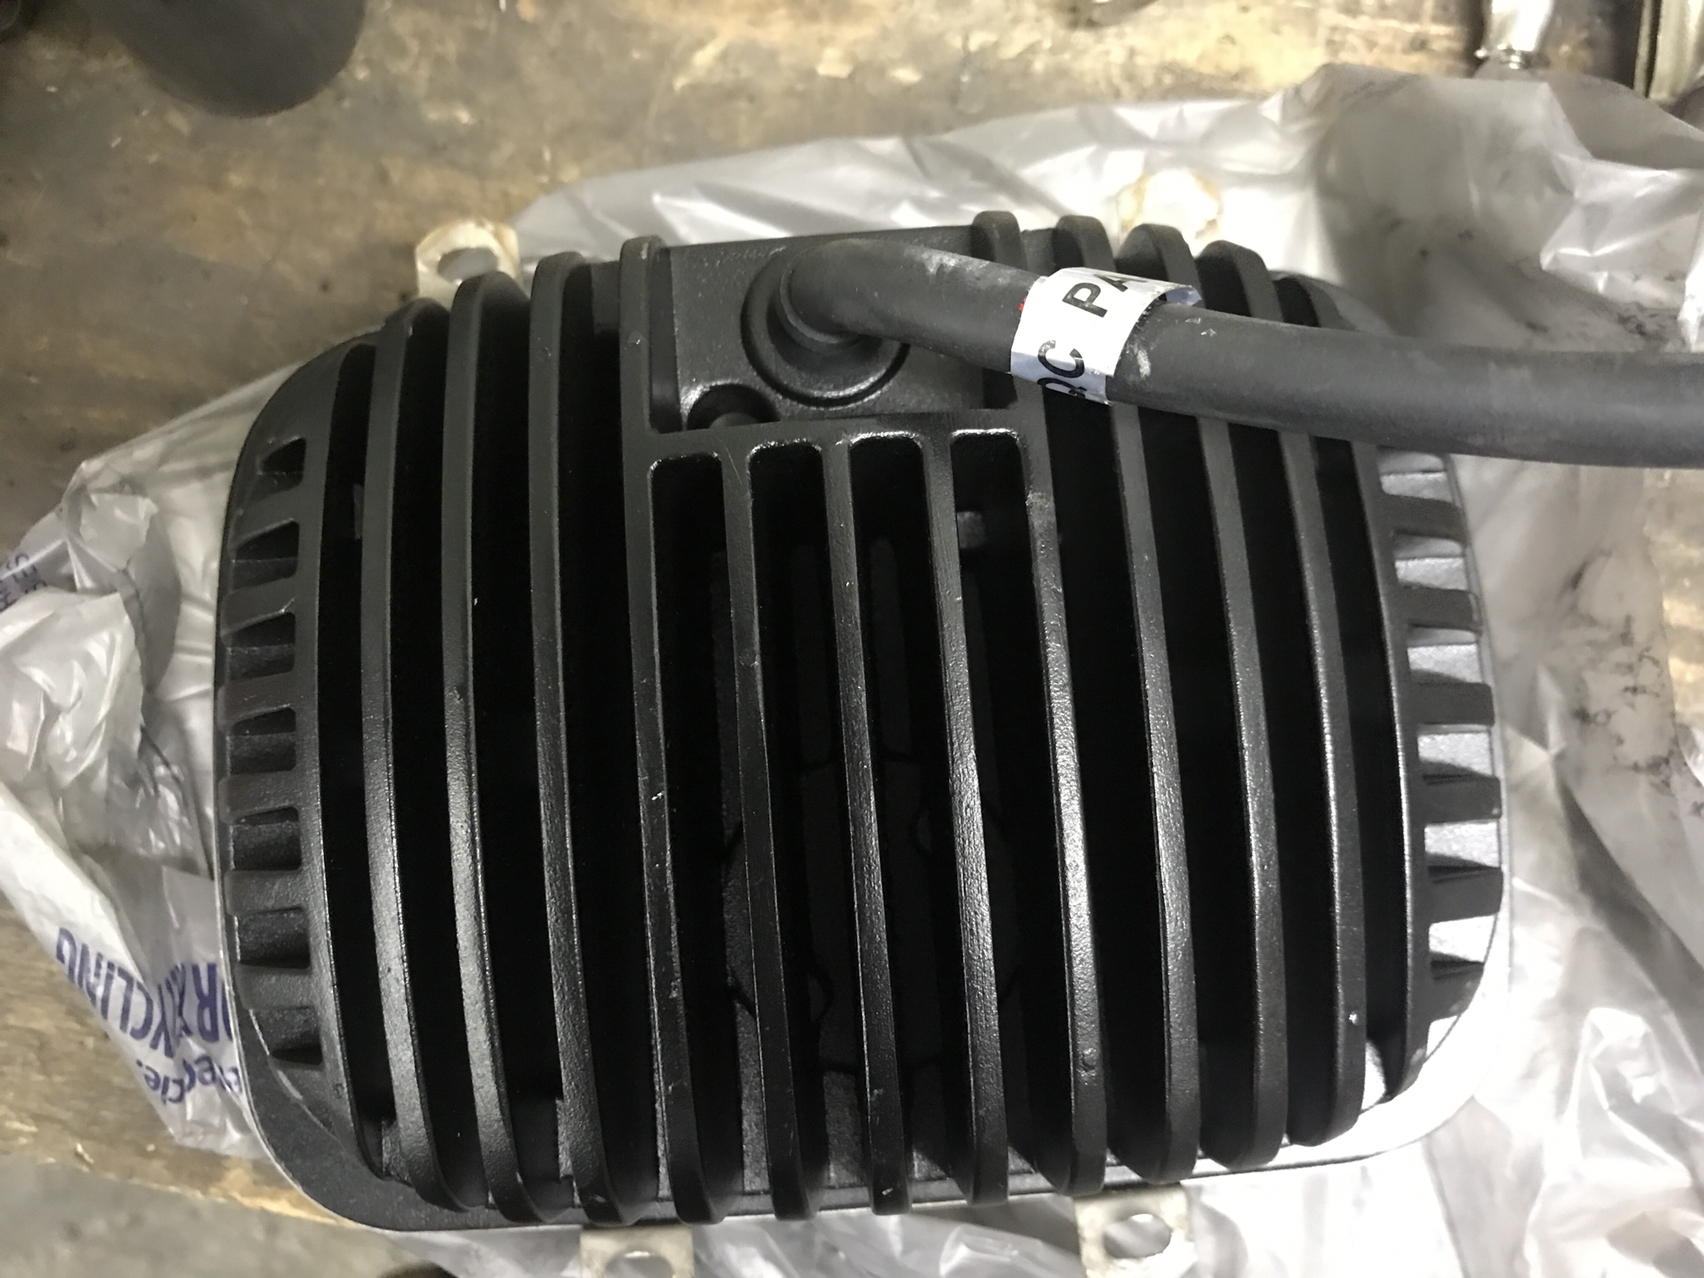
A a part of a deal I made with a fellow CF member, I traded a set of cables for DOT approved LED headlights and they arrived in nick of time...
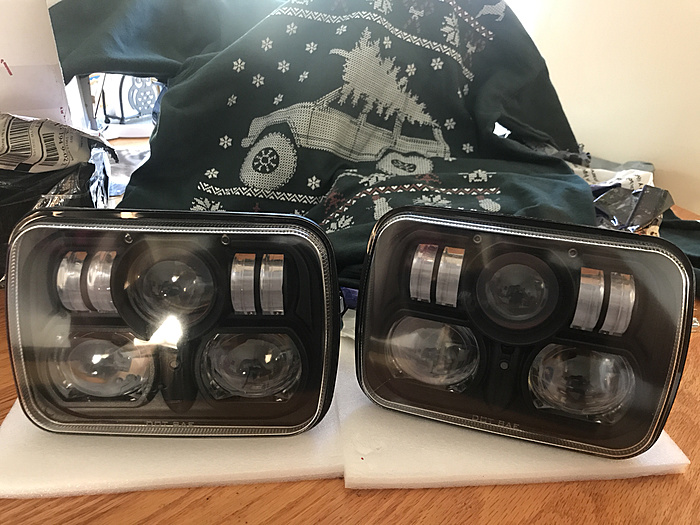
Yes I also bought an Ugly XJ sweater from Jeepology. Lol.
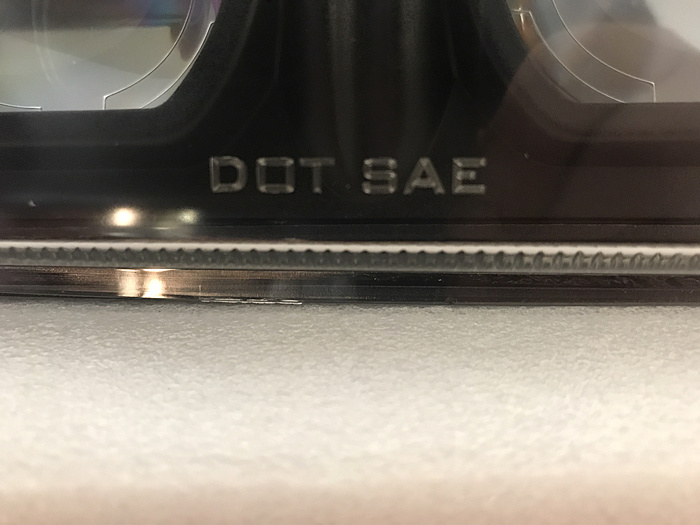
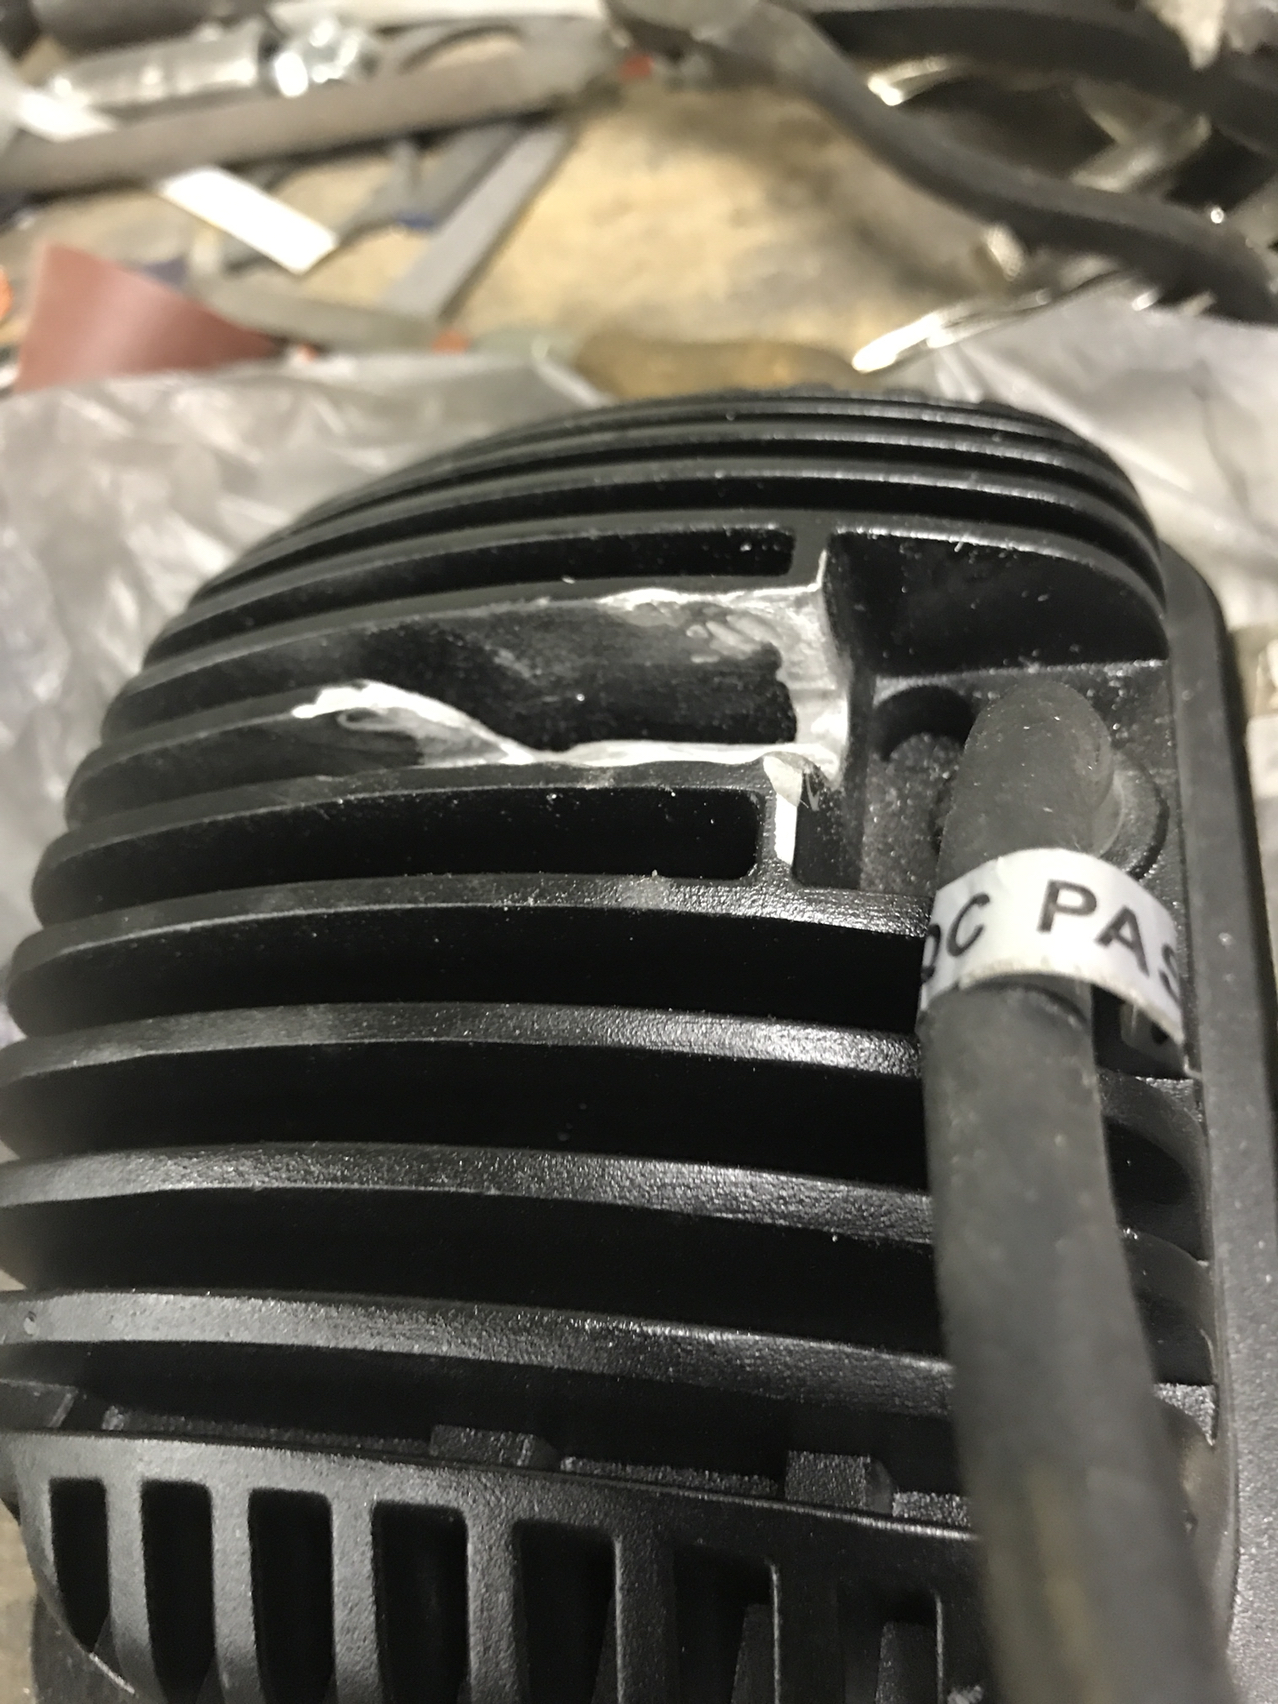
I came to find while installing those lights that they don't fit in the buckets properly. The wire pigtails wasn't centered. It exited at the bottom which interfered with the housing.
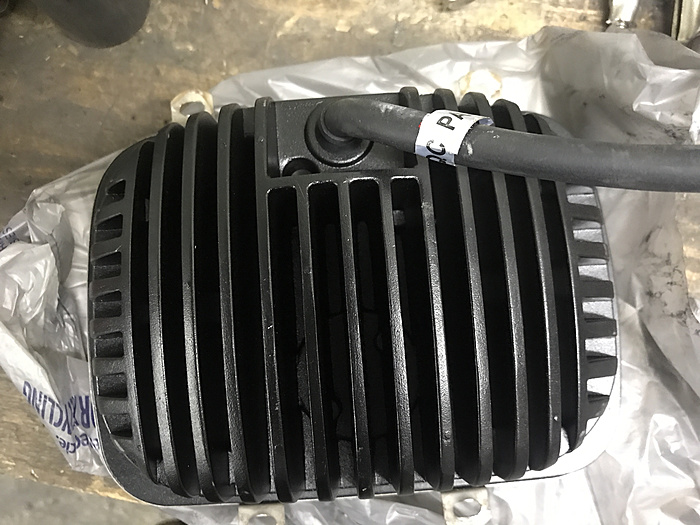
So my fix was to cut a part of the fin to make room for the wire.
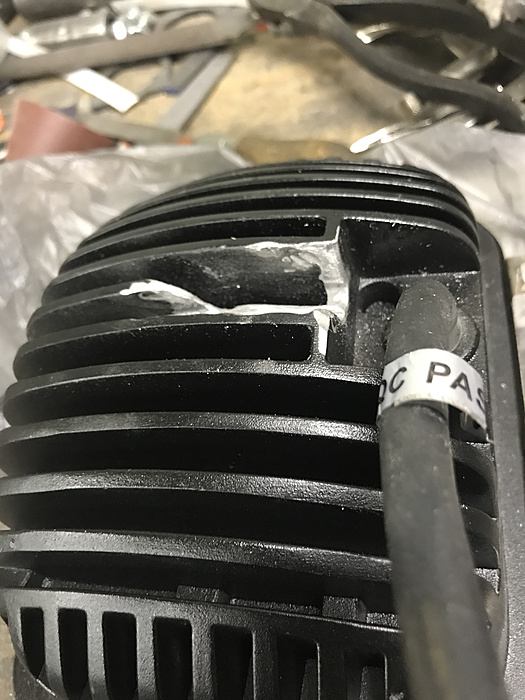
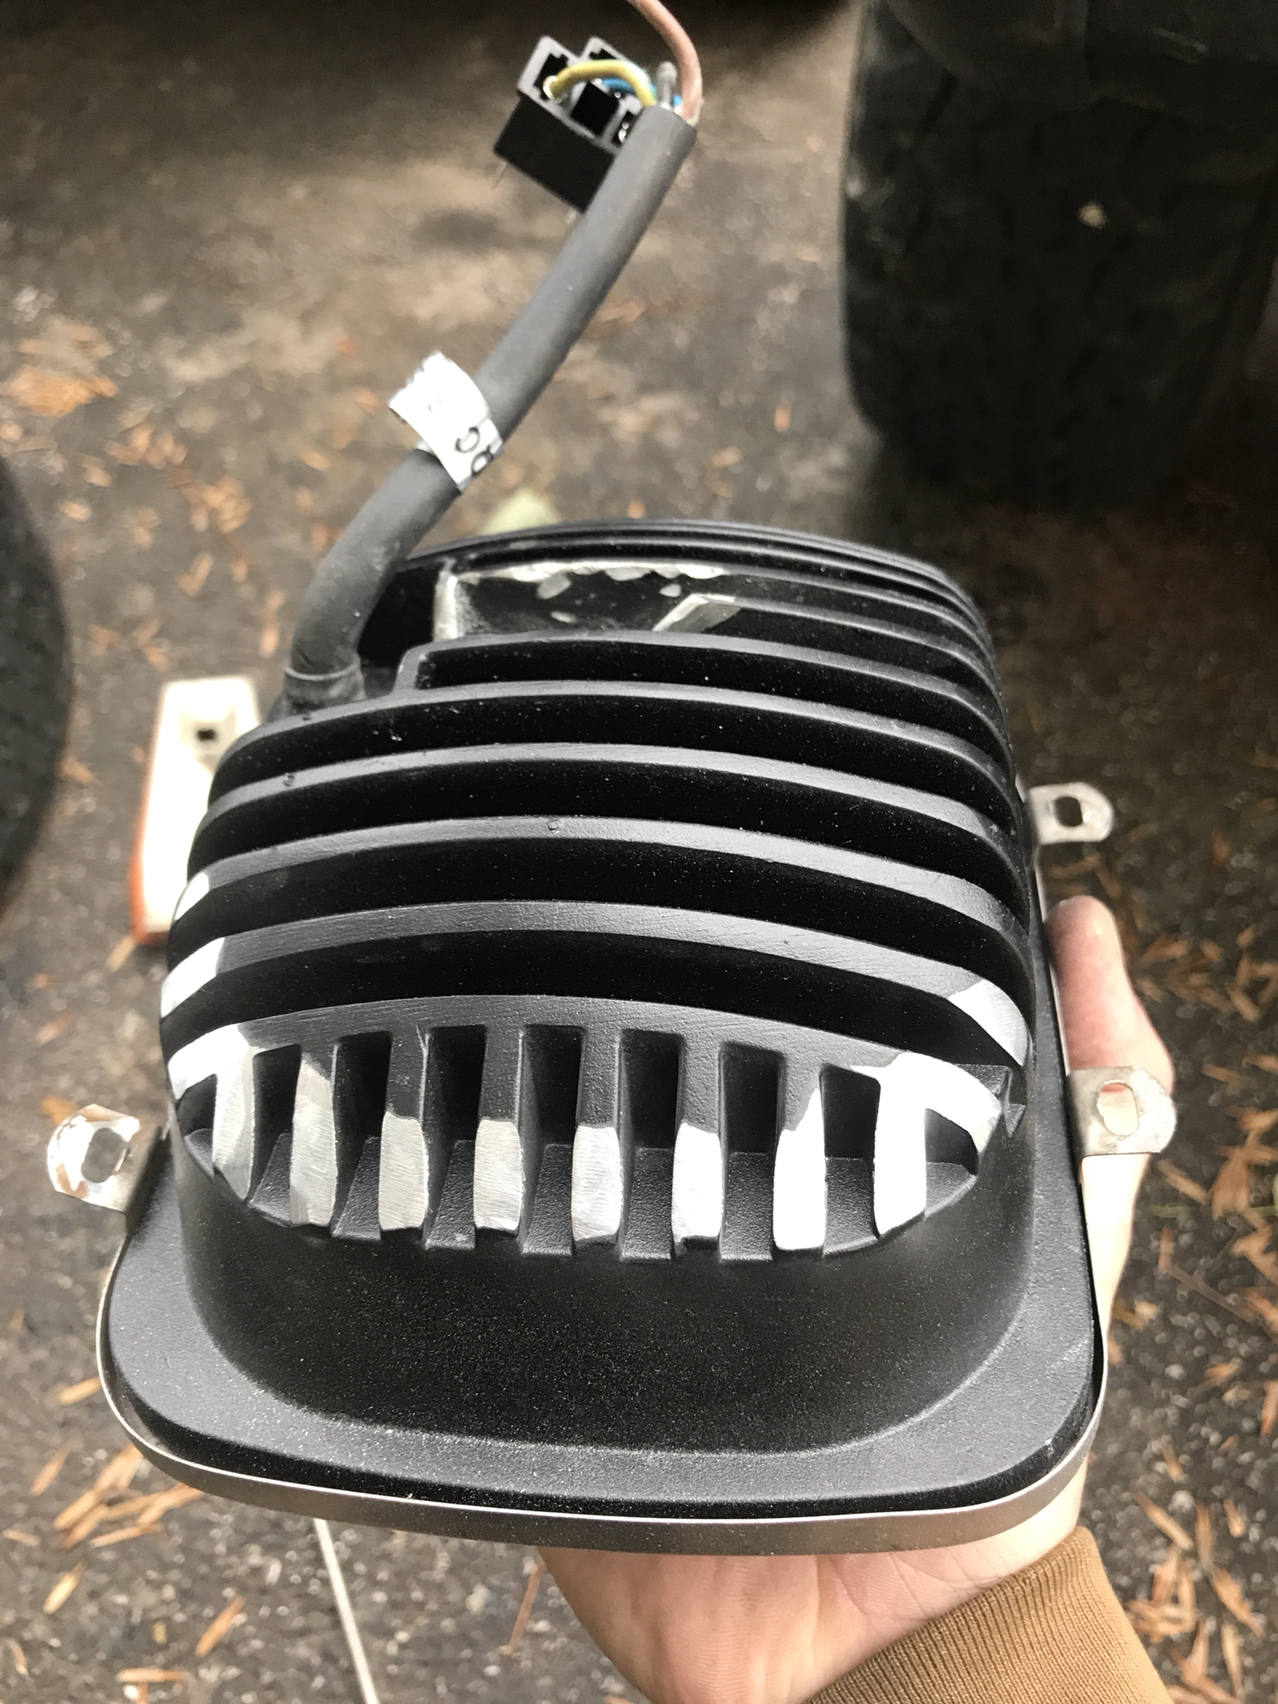
I tried again and found that the housings are still slightly bigger and doesn't match up with the stamped headlight buckets so I had to grind some more on the sides.
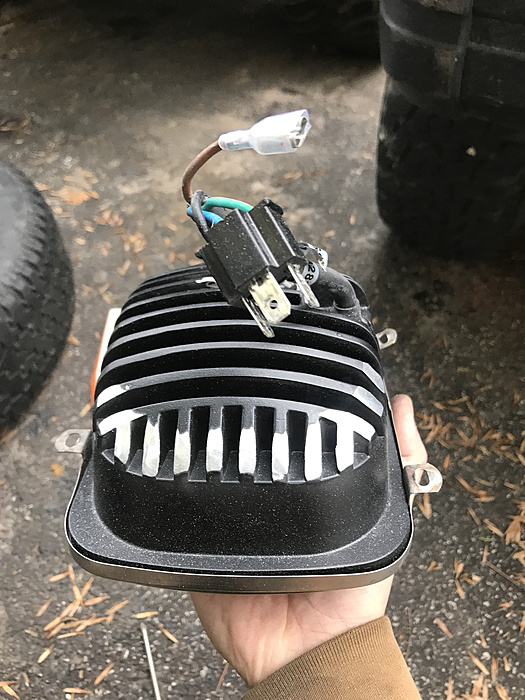
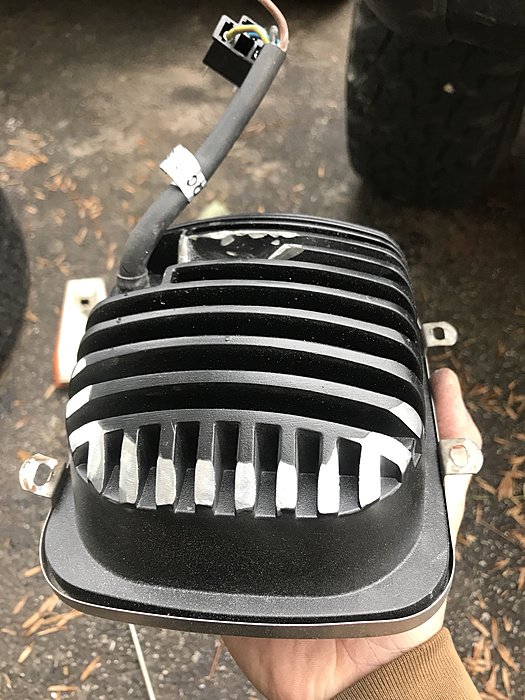
One more thing to note... the stainless steel rings that holds the headlight in place is very tight so I grinded some material off on the inside corners of the ring to make it seat in fully.
Sorry no pic
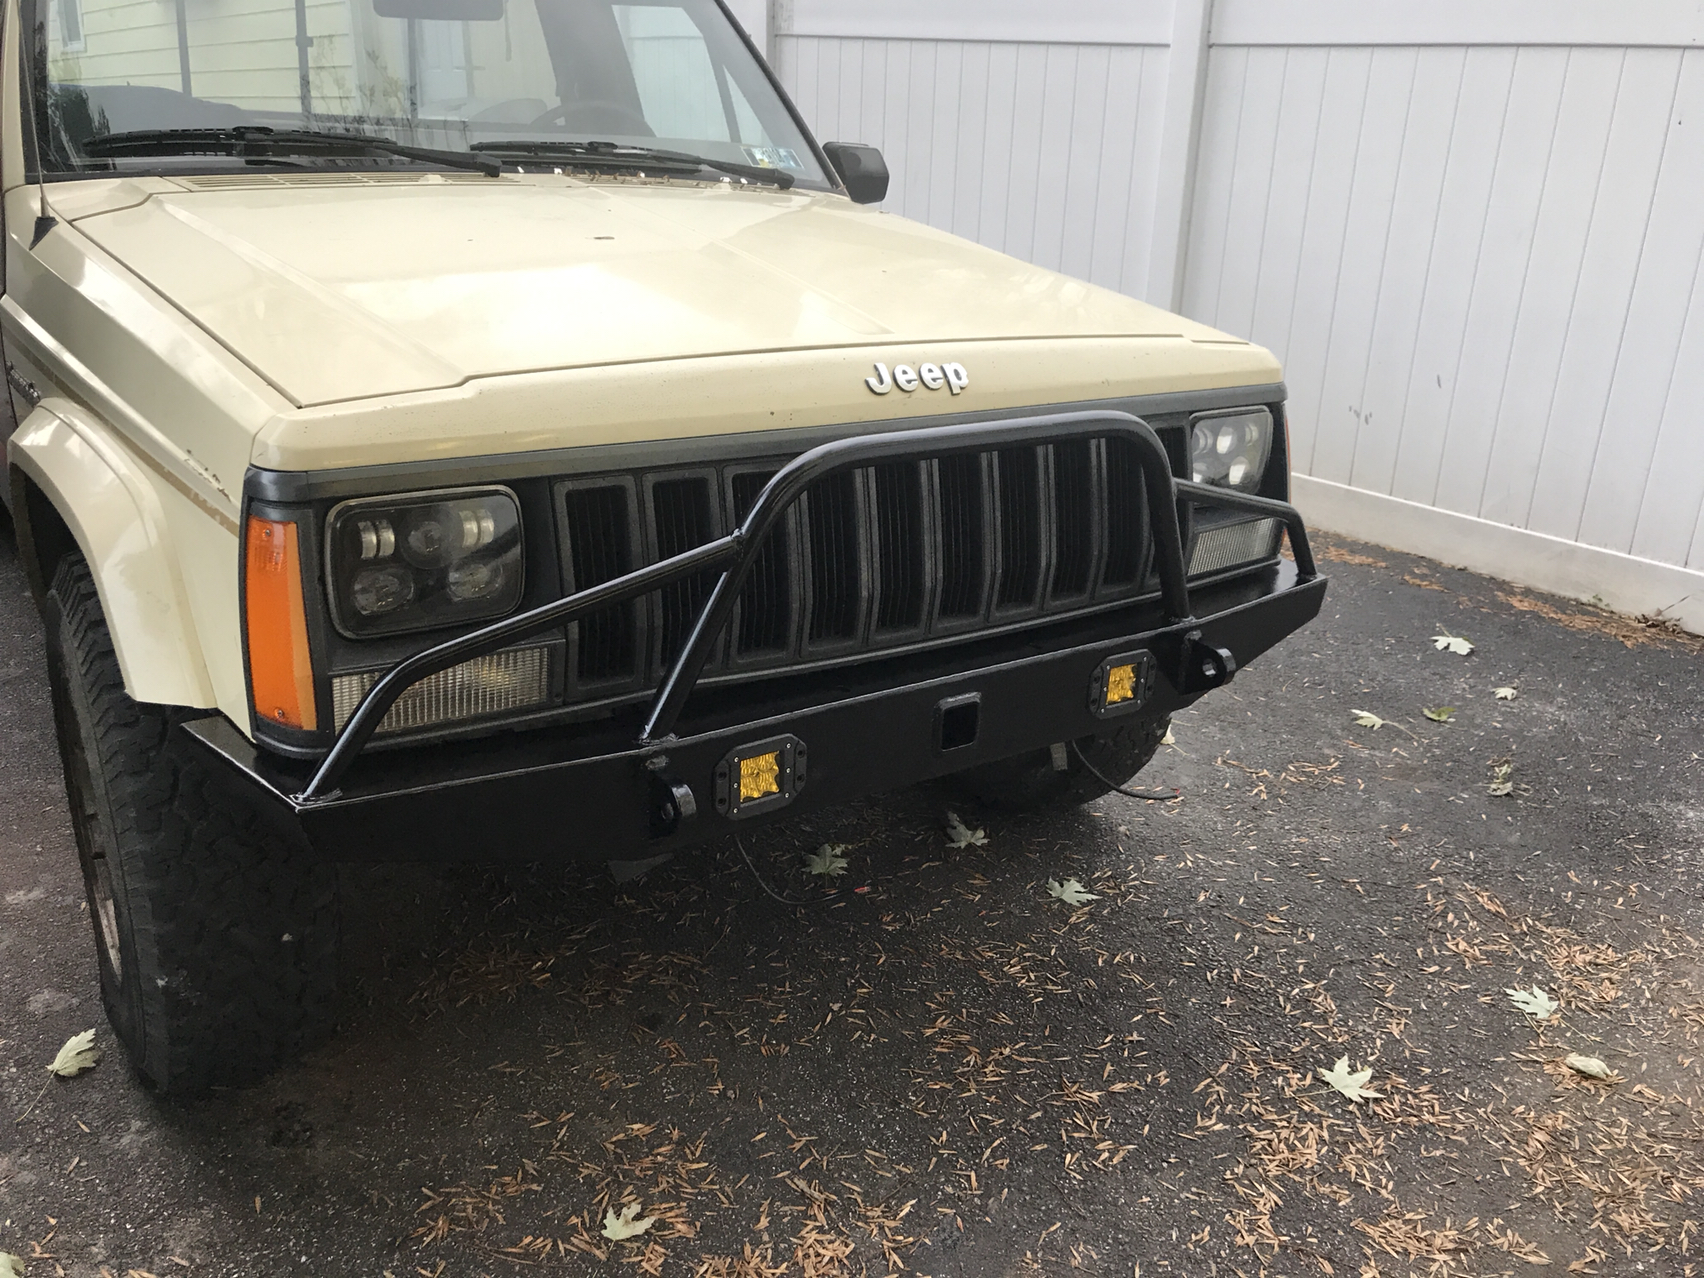
The end result is very satisfactory

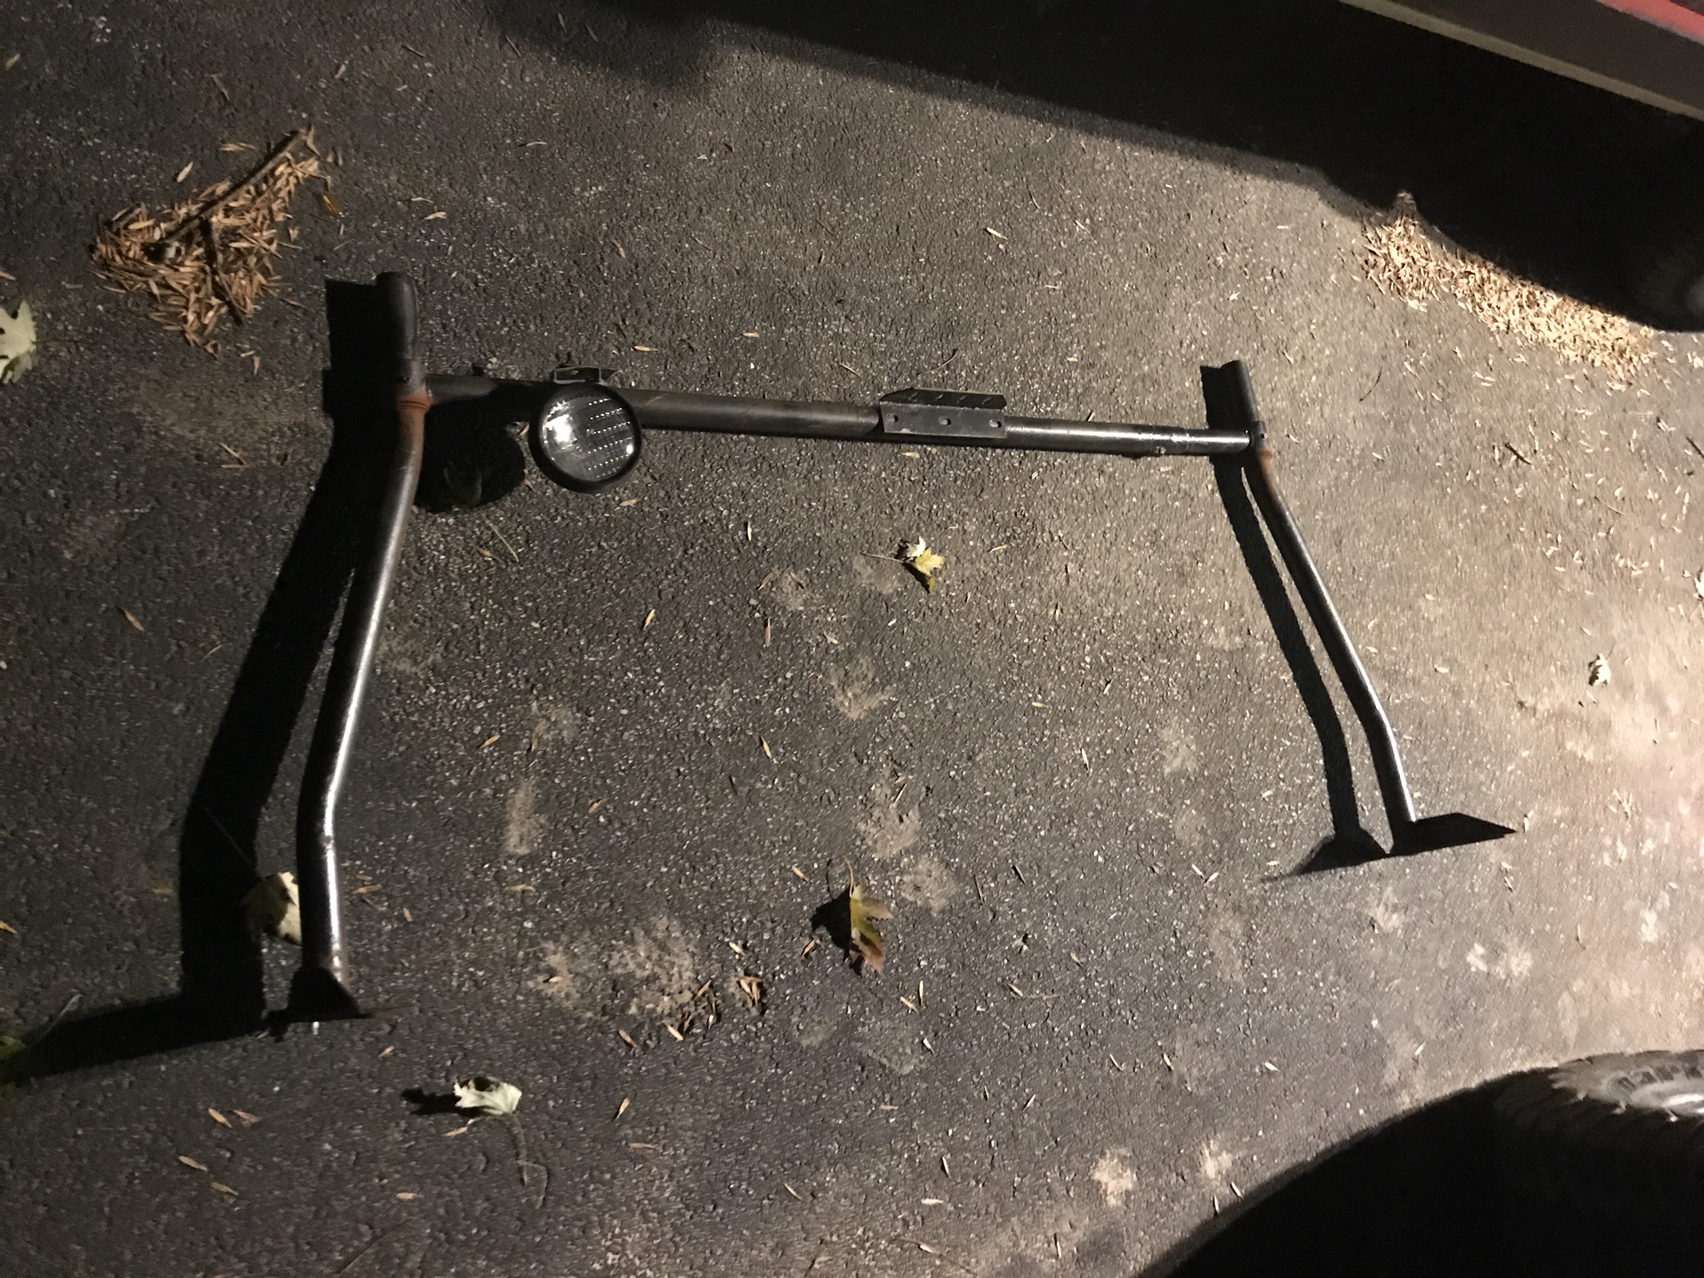
The next day I noticed that the rack was flopping around slightly. Found that the nutsert that someone installed on the bed to hold the screws finally pulled out
I always wanted to get rid of it anyway so I can build a better one, so instead of risking it falling off at speed on the highway so I removed it.
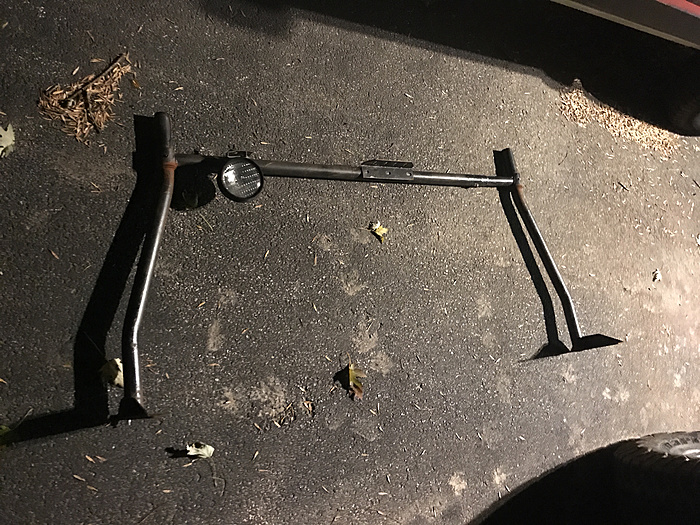
I wouldn't be mad if one of y'all wanted to have it. Lol.
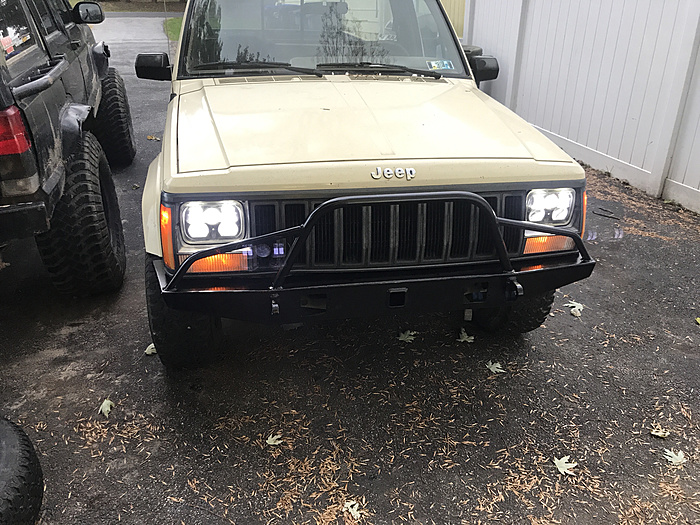
Last night I made the 300-mile 5 hour drive up to my hunting lease. The headlights really helped... the old ones were so bad that I barely can see more than 50 feet ahead of me.
When I come back home. I ll start on the wiring for all the lights, switches, and crap.
Cut the bottom portion of the fenders out, to make room for the JCR diy bumper I was working on.
(I needed to do this so I know where exactly to locate the mounting plates on it).
Mocked it up on the jeep and tacked the mounts in place.
Seems like I don't have pictures of that happening. Oh well.. moving on.
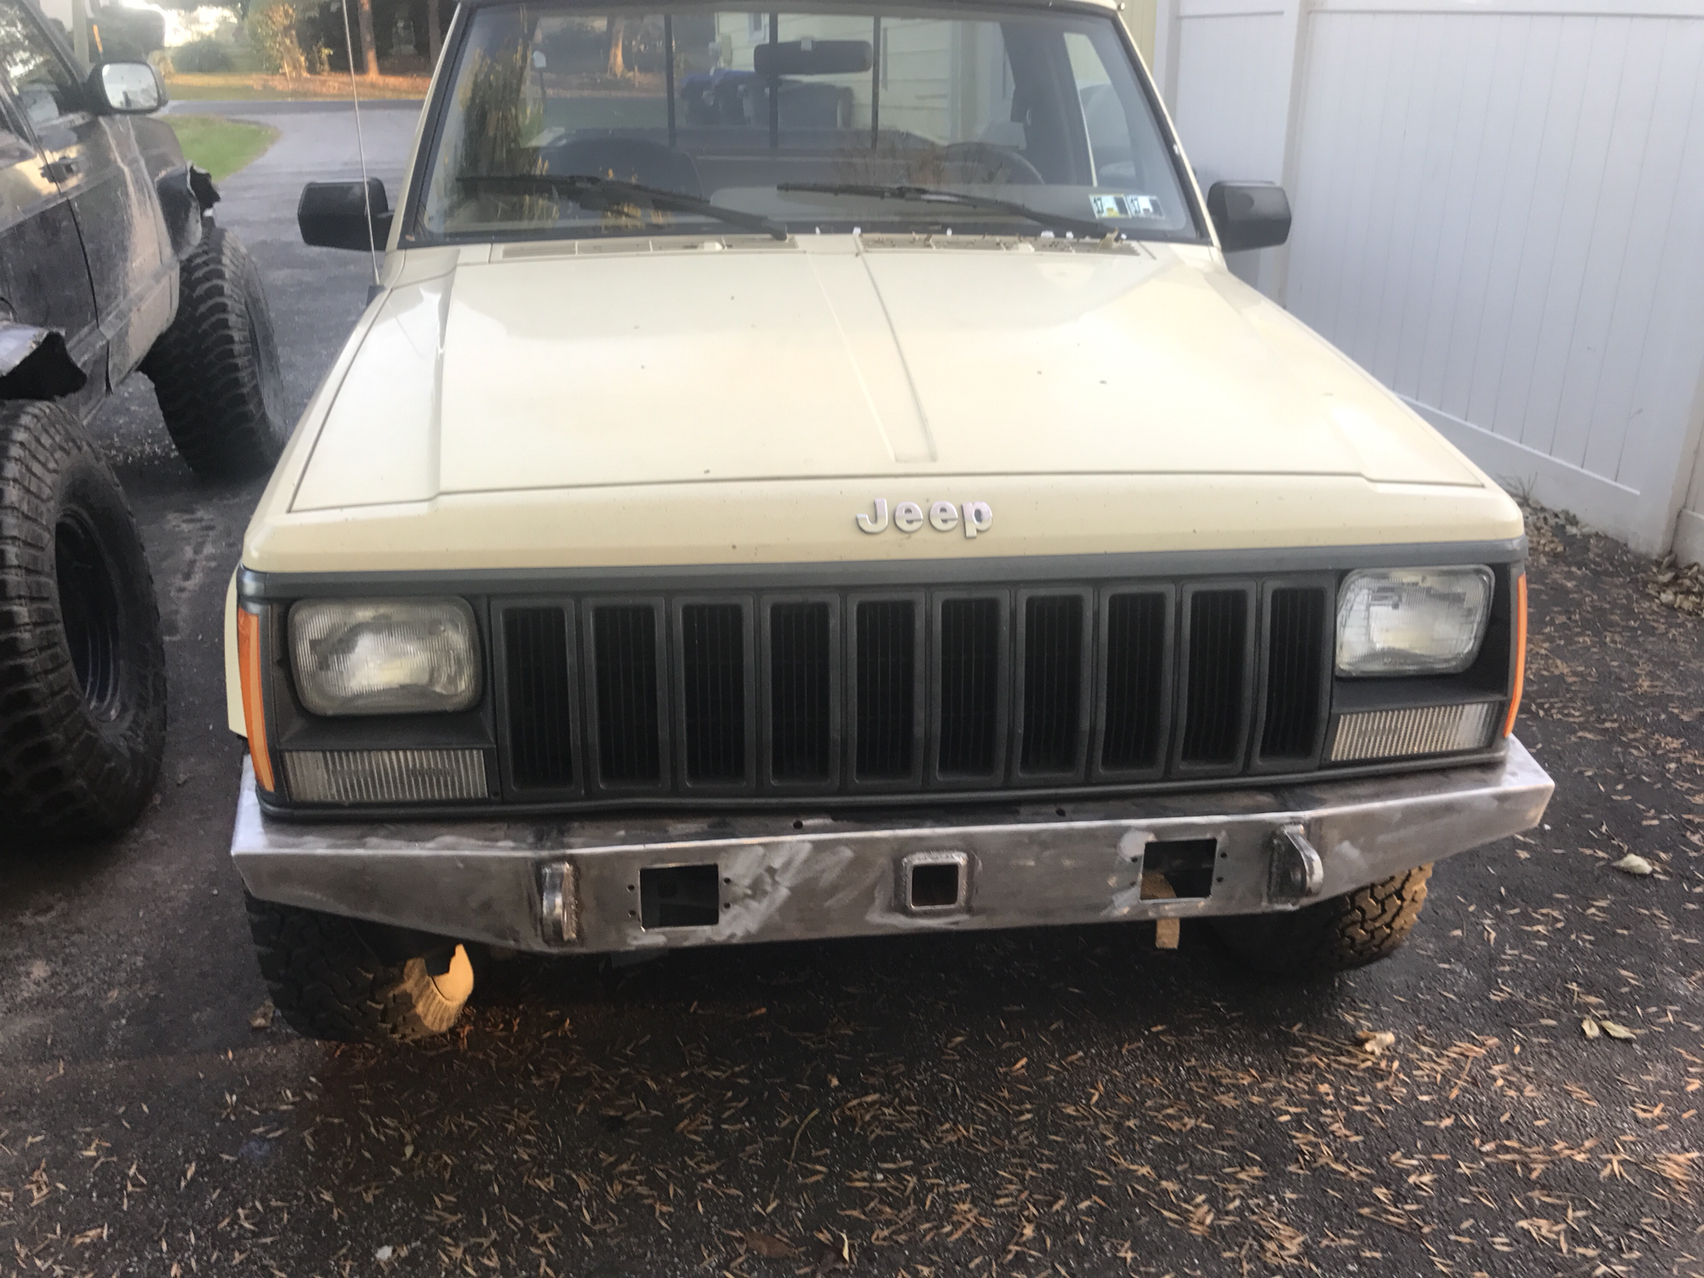
Those two holes are for the fogs
Bought some pipe & bent them
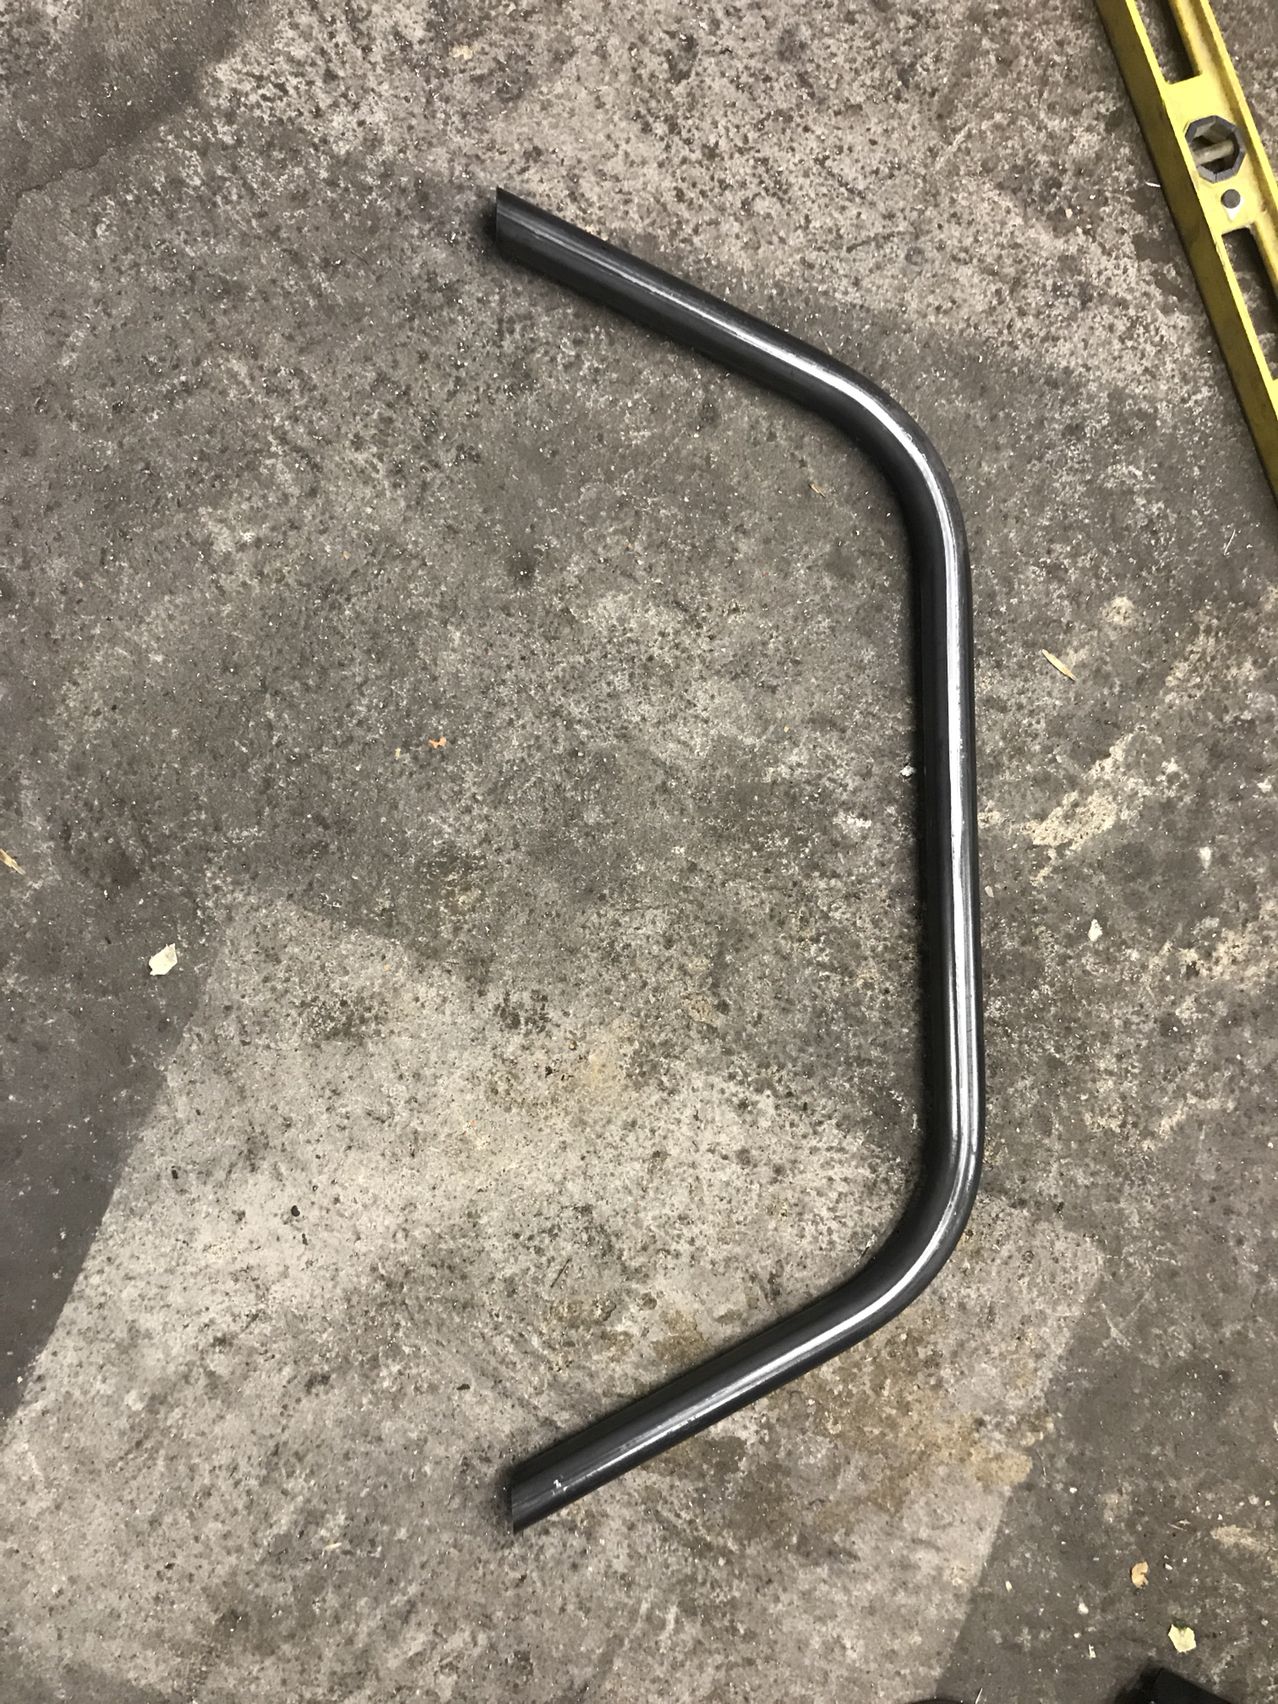
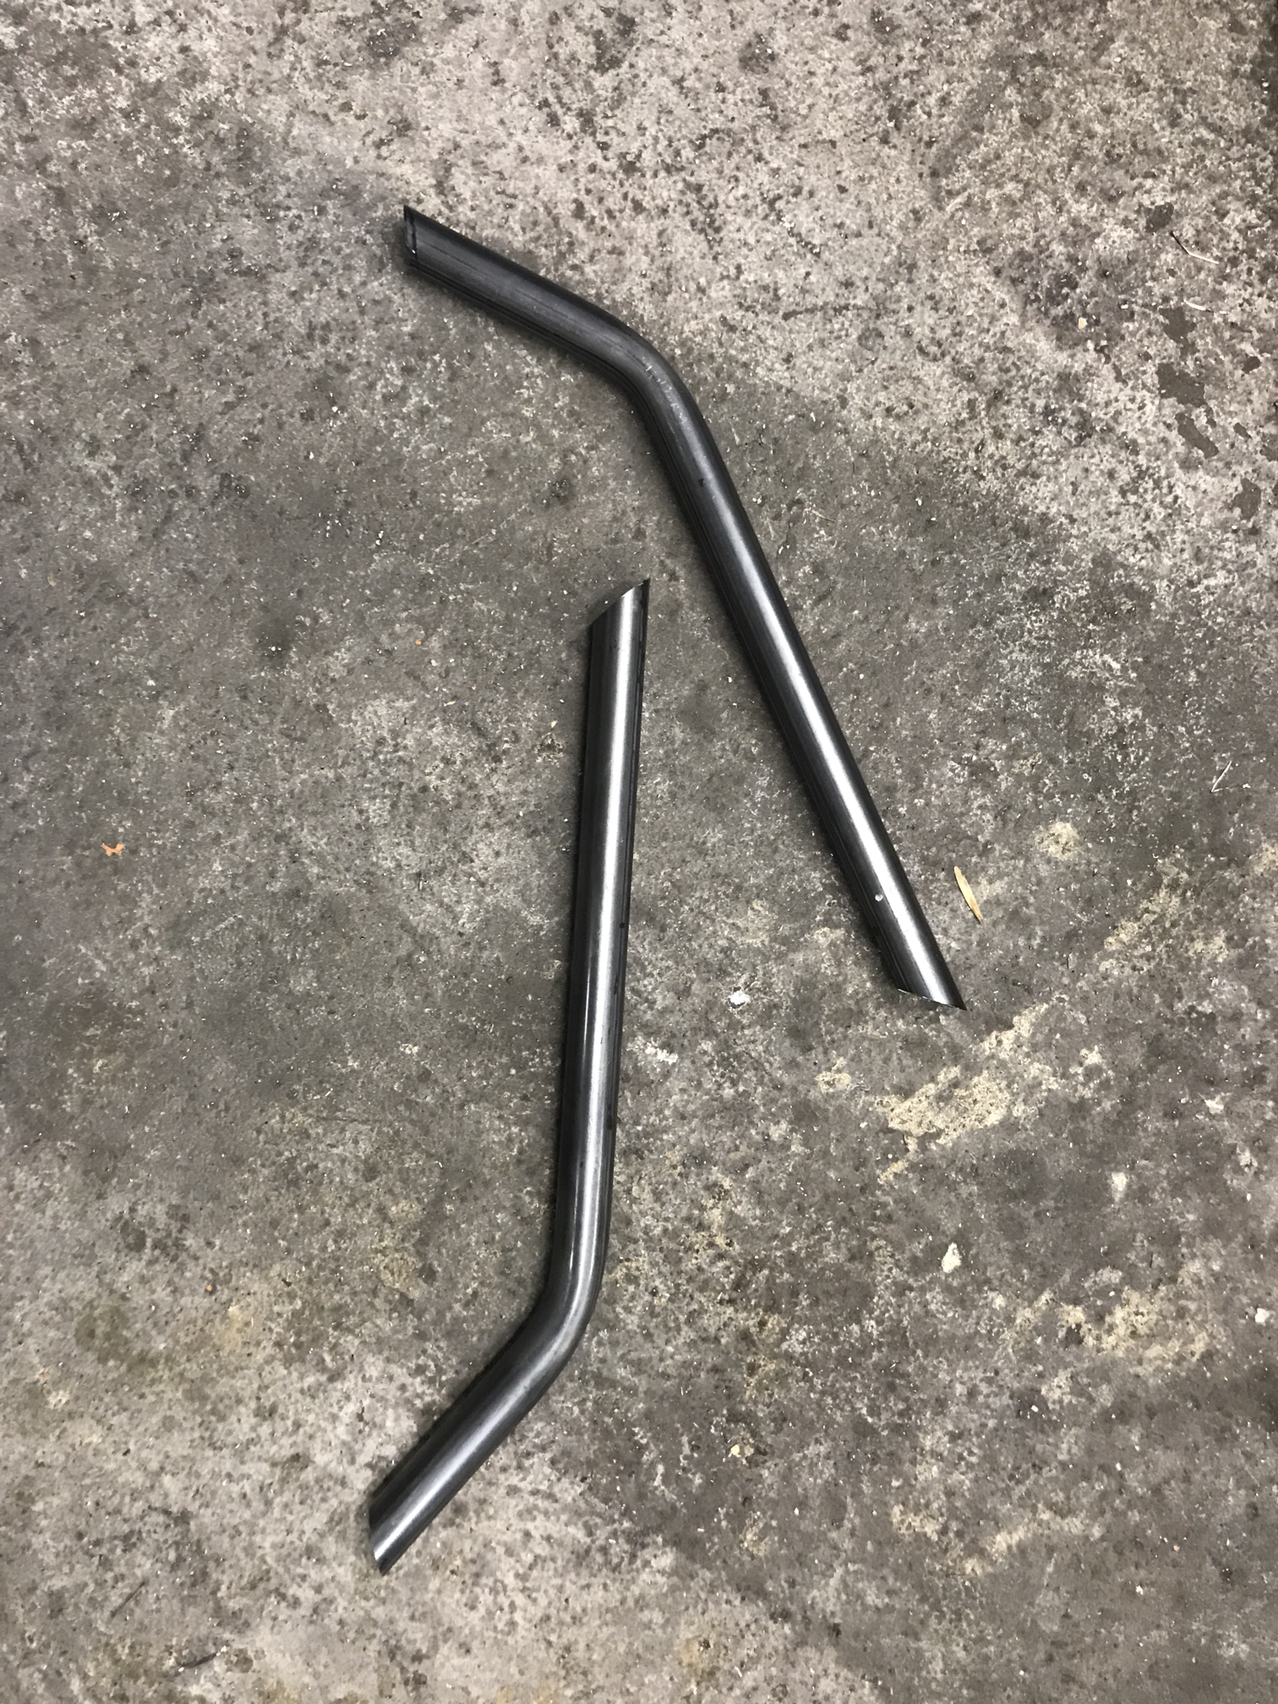
Welded them on the bumper.
The one I made for my XJ look better but I decided to use 1" pipe for the main hoop and 3/4" side pieces instead.
Primered and painted


I love using enamel paint. Directions always say to apply few thin layers but I always lay it down thick. Sometimes using up 2-3 cans of paint in one shot. It always come out looking like it was powder coated.
Oh yea. When I cut the bottom part out, & removed the old bumper, I also relocated the vacuum ball for now.
A a part of a deal I made with a fellow CF member, I traded a set of cables for DOT approved LED headlights and they arrived in nick of time...
Yes I also bought an Ugly XJ sweater from Jeepology. Lol.

I came to find while installing those lights that they don't fit in the buckets properly. The wire pigtails wasn't centered. It exited at the bottom which interfered with the housing.
So my fix was to cut a part of the fin to make room for the wire.
I tried again and found that the housings are still slightly bigger and doesn't match up with the stamped headlight buckets so I had to grind some more on the sides.

One more thing to note... the stainless steel rings that holds the headlight in place is very tight so I grinded some material off on the inside corners of the ring to make it seat in fully.
Sorry no pic
The end result is very satisfactory


The next day I noticed that the rack was flopping around slightly. Found that the nutsert that someone installed on the bed to hold the screws finally pulled out
I always wanted to get rid of it anyway so I can build a better one, so instead of risking it falling off at speed on the highway so I removed it.
I wouldn't be mad if one of y'all wanted to have it. Lol.
Last night I made the 300-mile 5 hour drive up to my hunting lease. The headlights really helped... the old ones were so bad that I barely can see more than 50 feet ahead of me.
When I come back home. I ll start on the wiring for all the lights, switches, and crap.
11-04-2017, 01:41 AM
#276
Seasoned Member
Just read your entire build thread. A bit of a concern. You mentioned moving the controls to the vent area. The issue with that is that the area behind that vent is a (dash side) box that mates directly to a vacuum controlled flapper (air box side). The controller is about 2.5" deep, and that open airflow will be right behind them if you manage to get it fit in there. I am totally NOT saying it can't be done. I am saying I would love to see how you manage that, if you decide to tackle that when you see what I am talking about. Subbed, maybe I can learn something here as well!
11-07-2017, 10:32 PM
#277
No, I don't lick fish.
Lookin' good, man. That JCR bumper closely resembles the design of yours that you created the thread for back in the day.... at least it seems so to me.
11-28-2017, 12:31 PM
#278
CF Veteran
Thread Starter
Join Date: Jan 2013
Location: west chester, pa
Posts: 19,216
Likes: 0
Received 39 Likes
on
35 Posts
Year: 1999
Engine: 4.0
I did a few things.
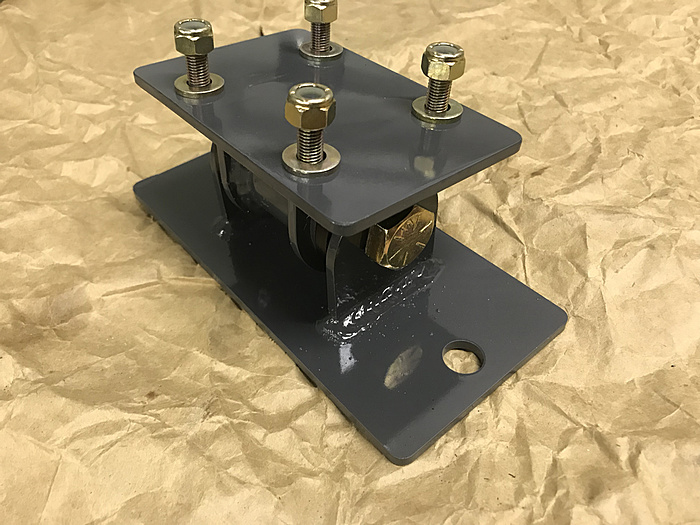
Built a transmission mount. I had to use the centered design because the CAVFAB crossmember I bought off Jeepology was designed & based off on Dave’s 2001 (which used the centered version). And with the way the crossmember was built, it couldn’t be modified to use offset version. No big deal, really.
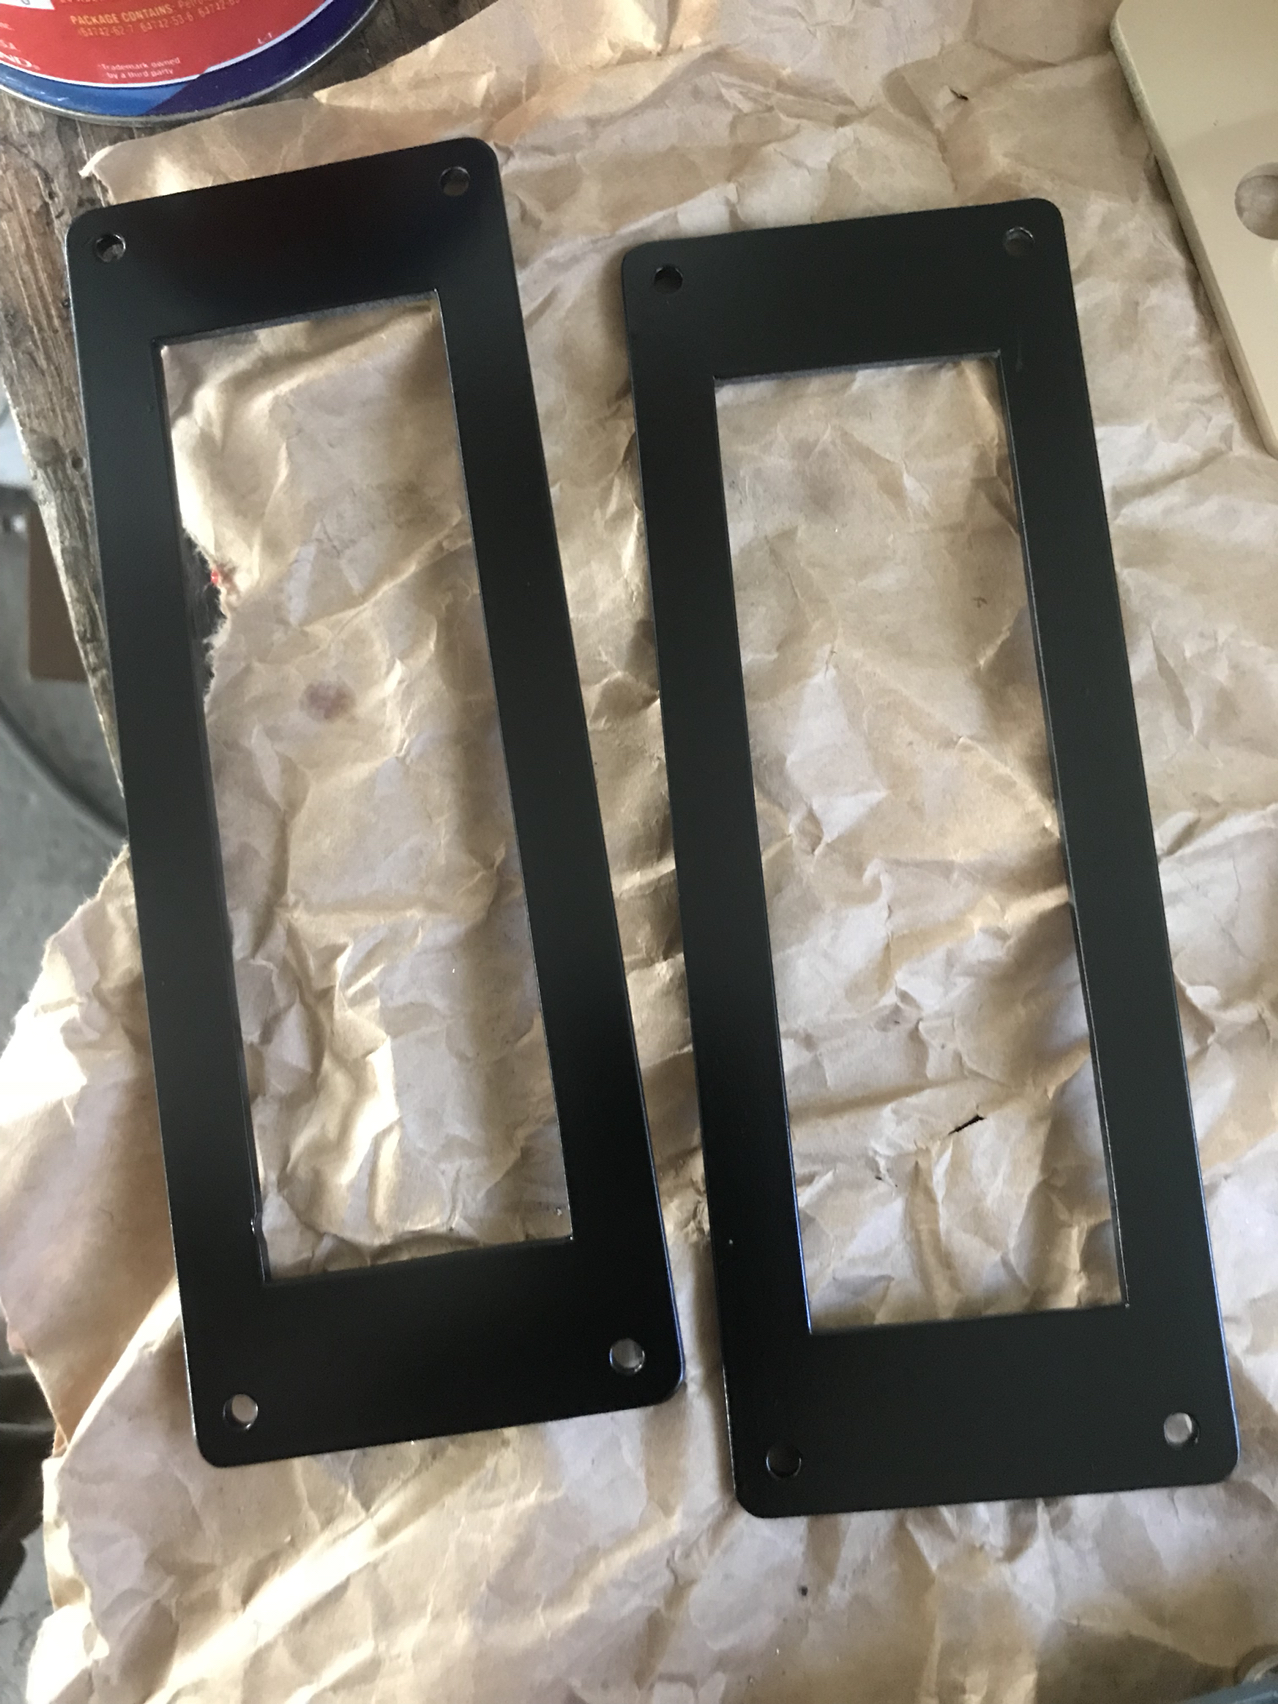
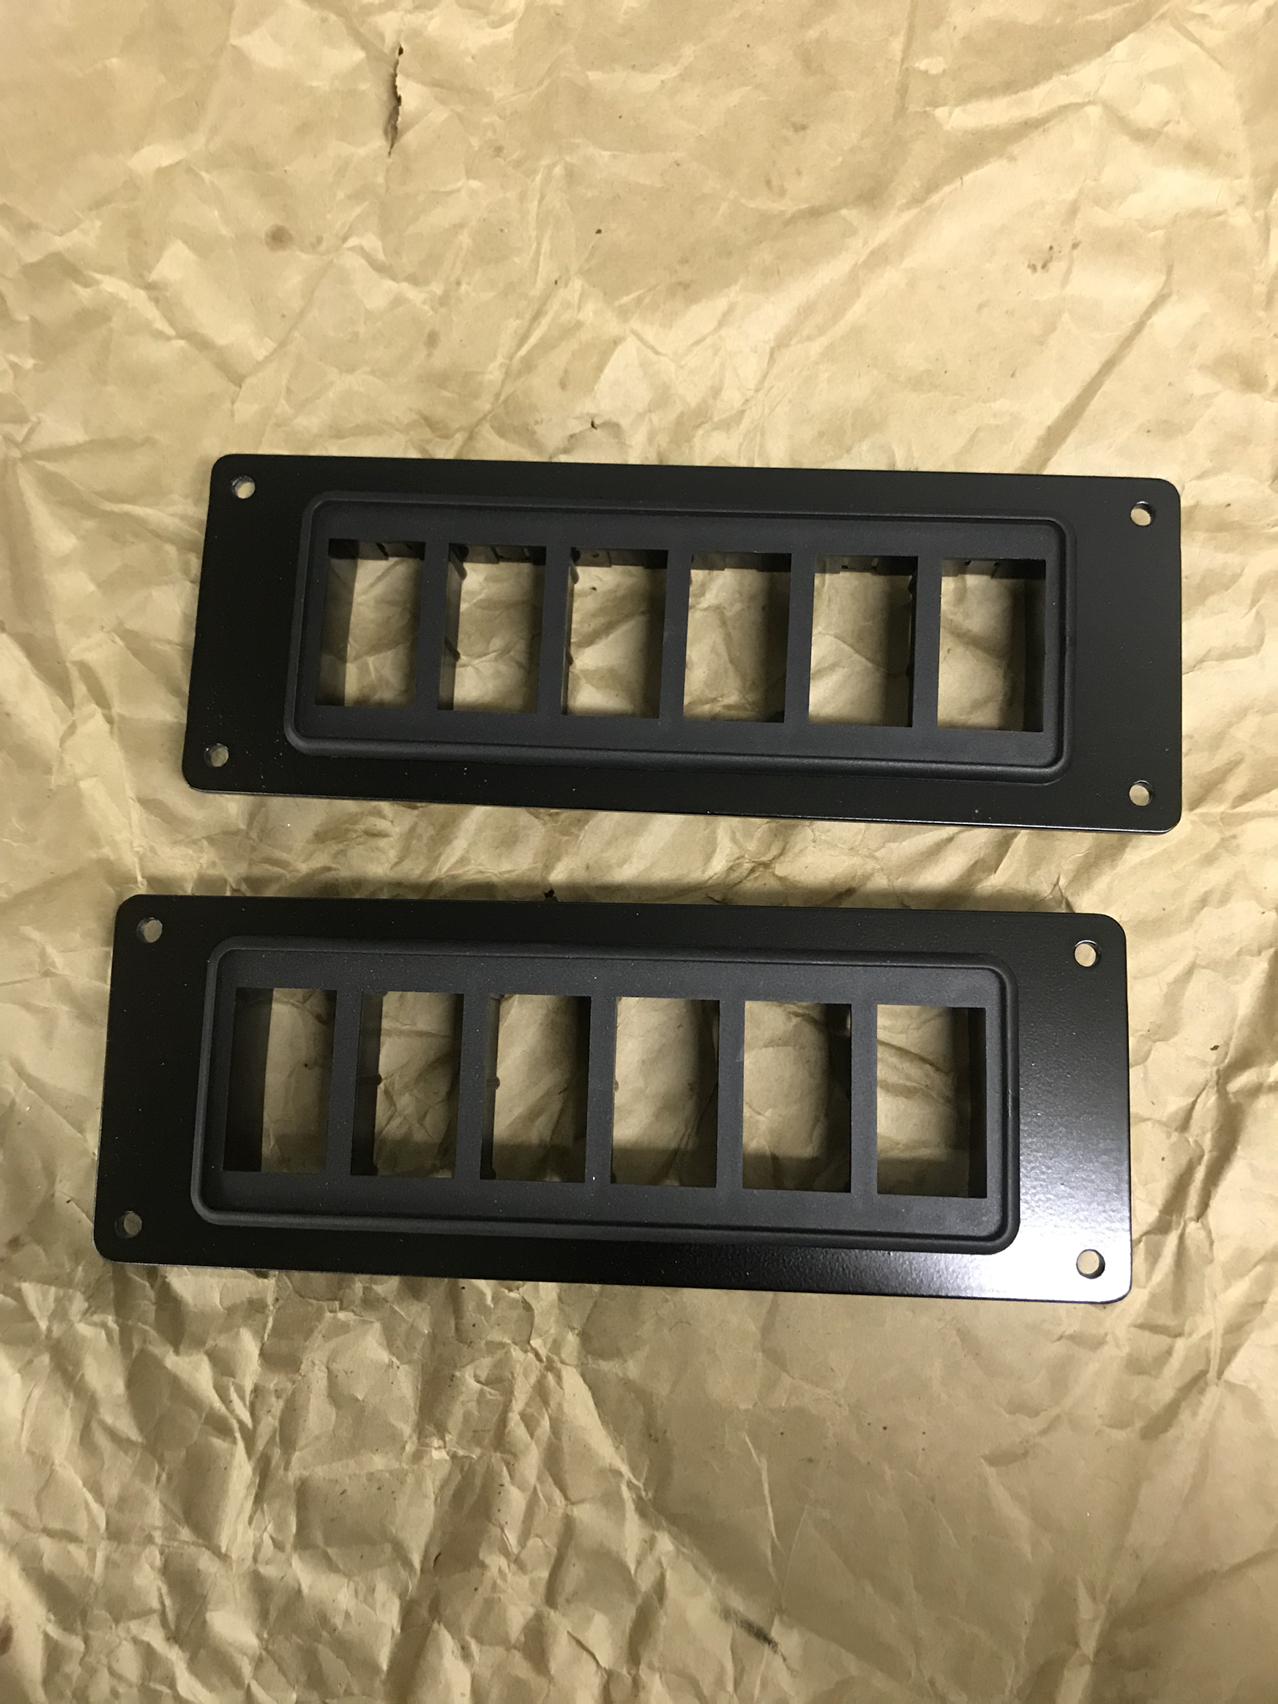
I also bought a couple aluminum flat bars & turned them into my switch panels. I had to buy a jig saw just for it but totally worth it.

Then added the 6-slot panel I bought off OTRATTW.com
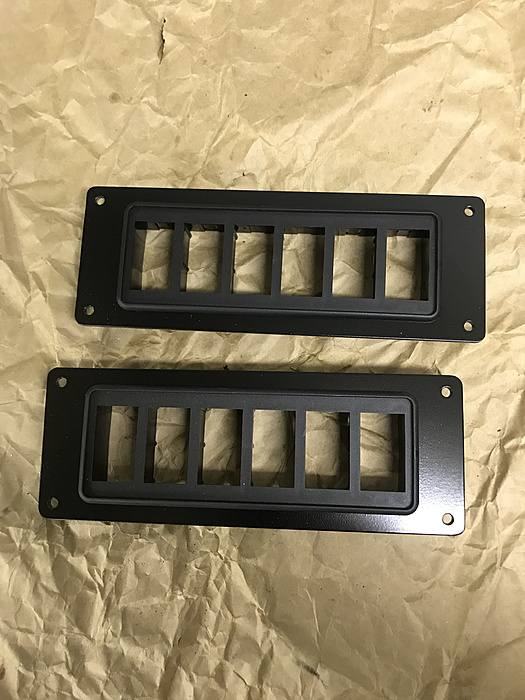
It should look nice on the dash.
Built a transmission mount. I had to use the centered design because the CAVFAB crossmember I bought off Jeepology was designed & based off on Dave’s 2001 (which used the centered version). And with the way the crossmember was built, it couldn’t be modified to use offset version. No big deal, really.

I also bought a couple aluminum flat bars & turned them into my switch panels. I had to buy a jig saw just for it but totally worth it.
Then added the 6-slot panel I bought off OTRATTW.com
It should look nice on the dash.
11-28-2017, 06:10 PM
#281
CF Veteran

Join Date: Apr 2016
Location: Pasquotank, NC
Posts: 1,679
Likes: 0
Received 15 Likes
on
13 Posts
Year: 1990
Model: Cherokee
Engine: 4.0
Ditching the radio all together? I installed
marine radio in my center console. I don't have any pics, but I bent up a simple bracket to mount it facing up in the forward section of the center console. The antennae wire reached ok, and I had to extend the radio harness. I have an AM radio in the dash, but wanted bluetooth for the phone. I work in the shipyard and the most basic aftermarket radio gets stolen, earning a smashed window.
Long story I know, but I might suggest you look into a similar setup if you want some tunes.
Long story I know, but I might suggest you look into a similar setup if you want some tunes.
11-28-2017, 06:16 PM
#282
CF Veteran
Thread Starter
Join Date: Jan 2013
Location: west chester, pa
Posts: 19,216
Likes: 0
Received 39 Likes
on
35 Posts
Year: 1999
Engine: 4.0
I remove radios from every vehicle I own lol.
I also don’t attend normal schools.
I don’t speak English
Let’s see if you catch the drift...
I also don’t attend normal schools.
I don’t speak English
Let’s see if you catch the drift...
11-28-2017, 09:49 PM
#284
CF Veteran
Thread Starter
Join Date: Jan 2013
Location: west chester, pa
Posts: 19,216
Likes: 0
Received 39 Likes
on
35 Posts
Year: 1999
Engine: 4.0
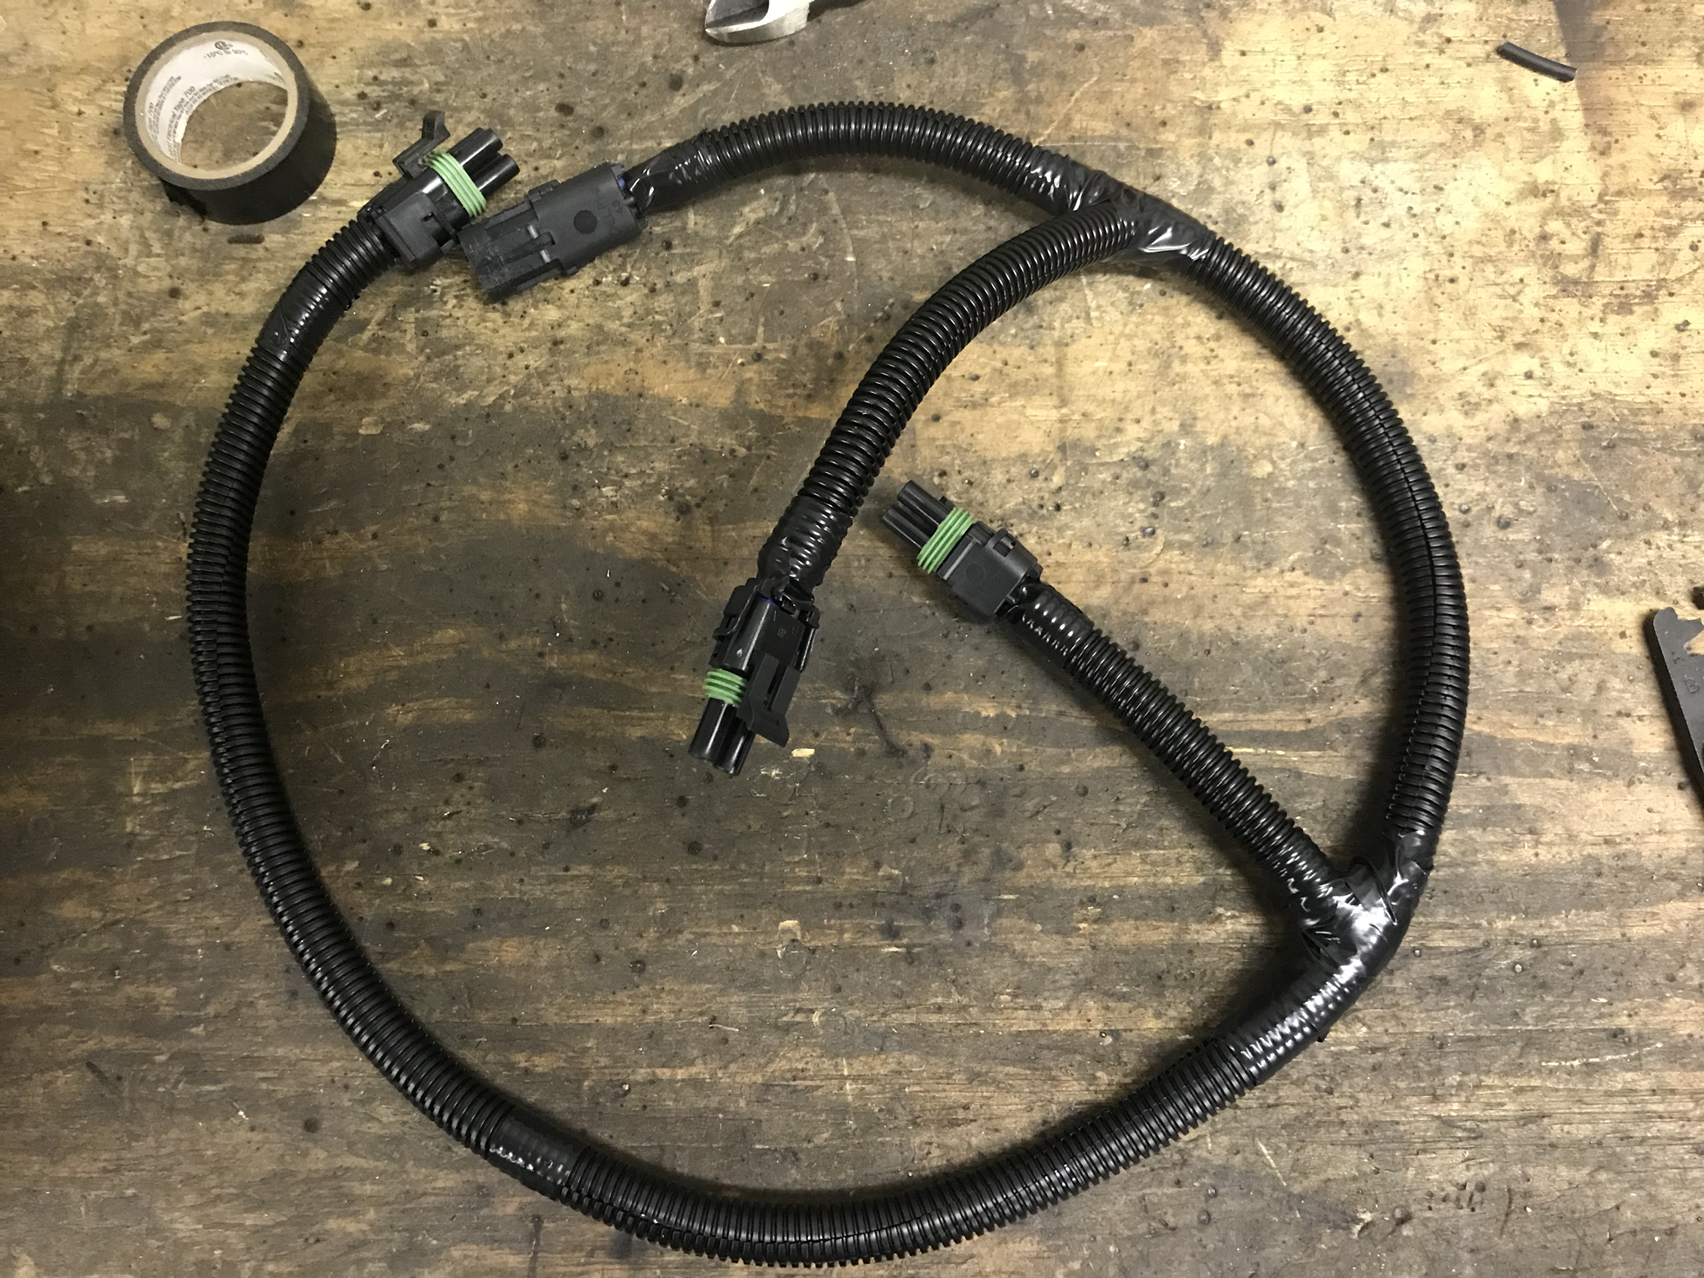
So today I made a front bumper wiring harness for the led lights.
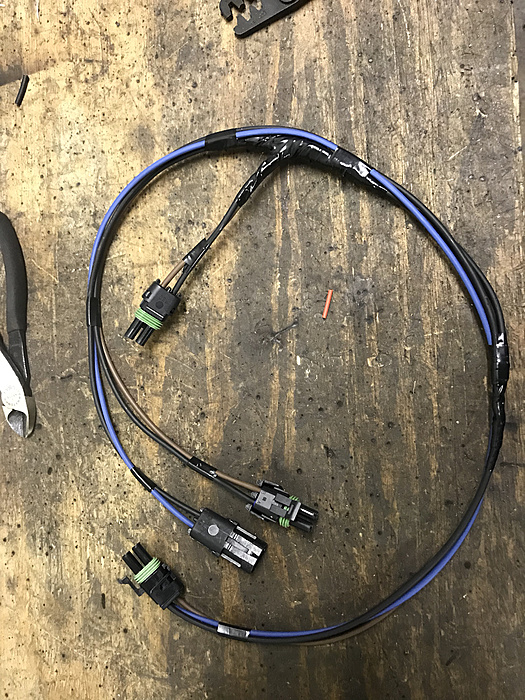

Used weatherpack type of connectors. Should do nicely.
I used 2 pin on all light connections and a 4 pin on the end. Used only three wires, and one plug. In case I need to add another wire for whatever in future.

Used weatherpack type of connectors. Should do nicely.
I used 2 pin on all light connections and a 4 pin on the end. Used only three wires, and one plug. In case I need to add another wire for whatever in future.