
Lawn Edging Fender Flares

Member
Joined: Aug 2011
Posts: 102
Likes: 0
From: Centreville MI
Year: 1988
Model: Cherokee
Engine: 4.0
Awesome idea, and you can always cut the mounting flange rounded for the naysayers. I love low budget fab ideas, especially when they outperform the high dollar original concept!
Thread Starter
Newbie
Joined: Jan 2011
Posts: 10
Likes: 0
From: Tulsa, OK
Year: 2000
Model: Cherokee
Engine: 4.0
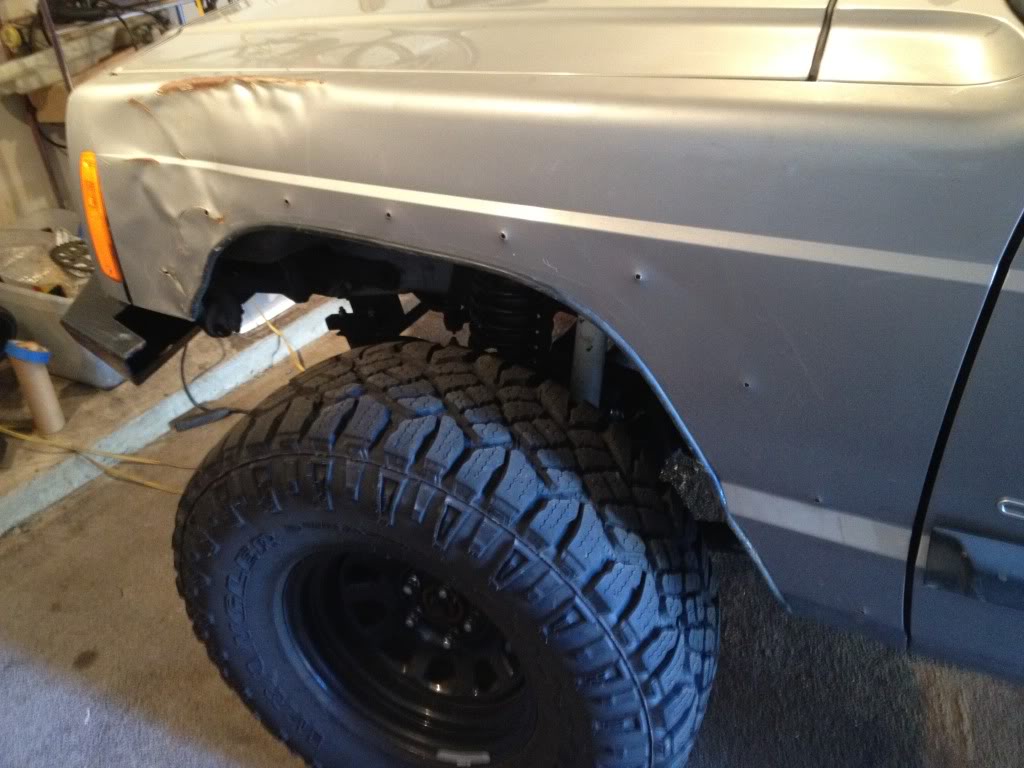
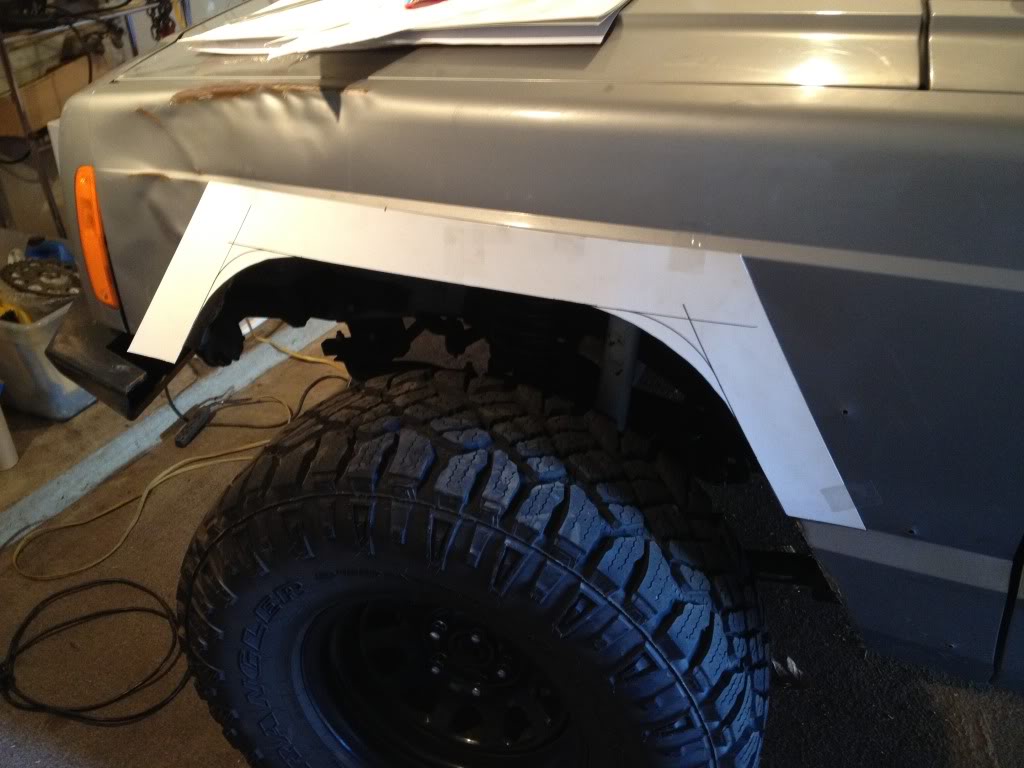
This is what I had to start out with (I know it is the other side, this is just the side I got pictures of). After the bushwhacker flares were ripped off, I was left a ton of screw holes and a poorly cut fender.
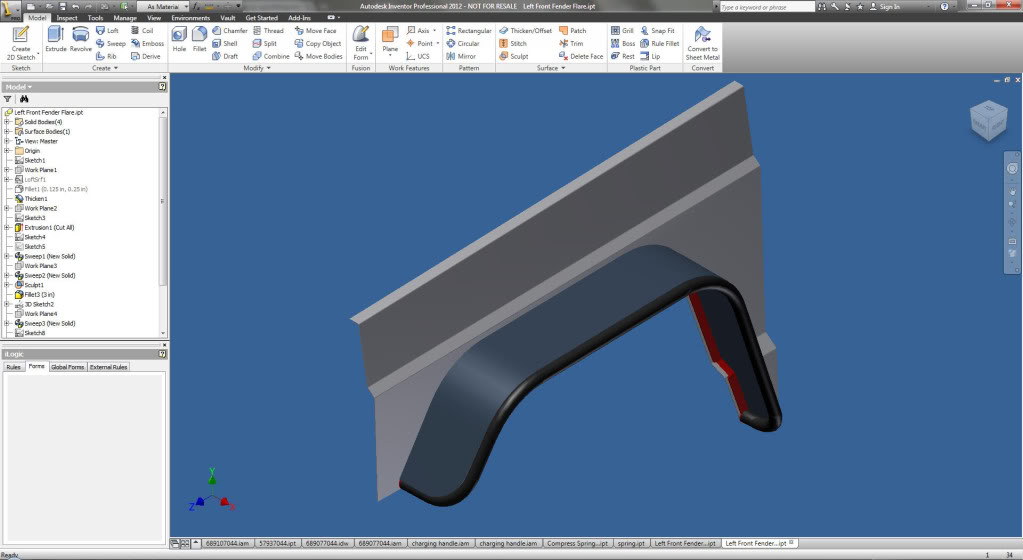
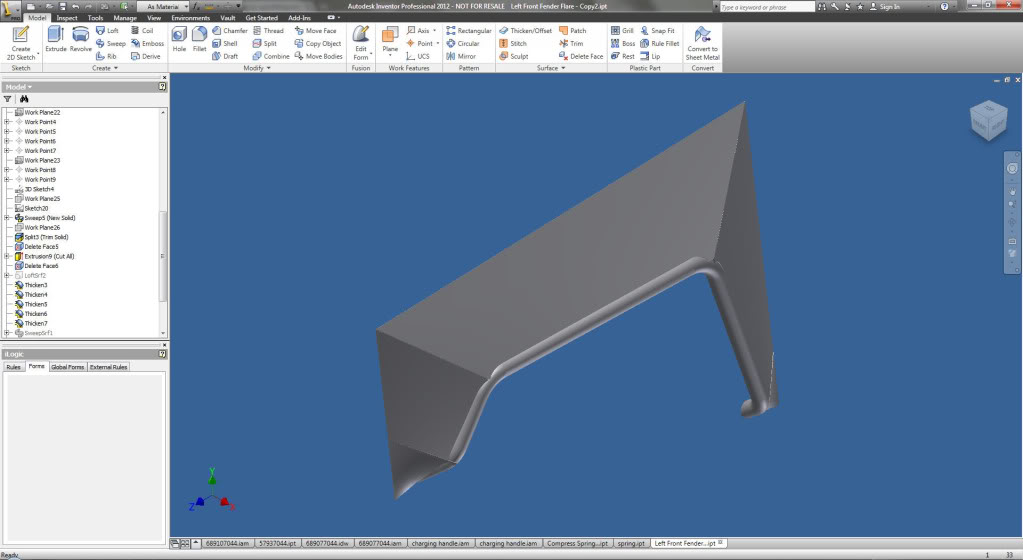
The first thing I did was model several concepts up in Inventor:
One with bent tube and flat plating:
Another with bent tube and angled plating:
And then, after seeing this on someone else's thread here, I incorporated landscape edging:
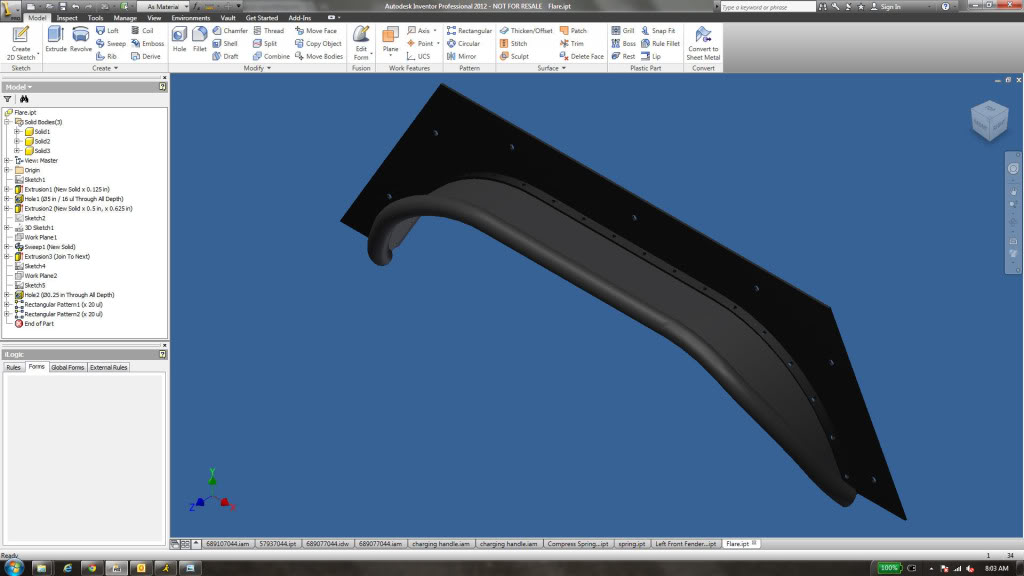
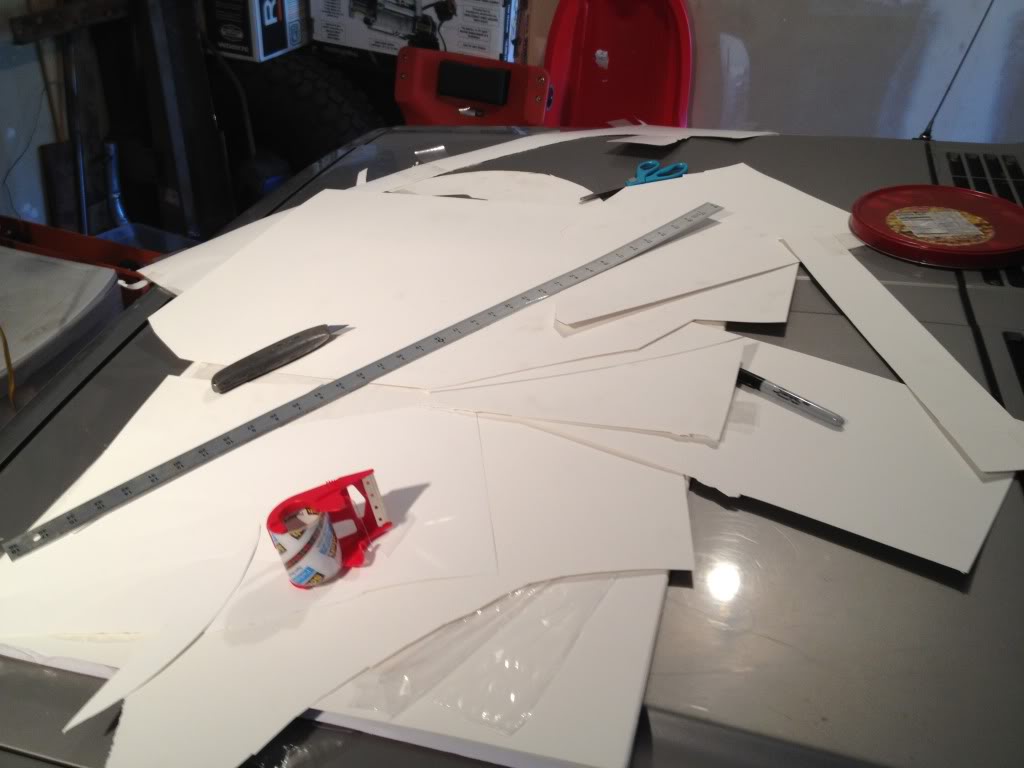
And that idea stuck. The first step was to make templates. I bought a 10 pack of poster boards and shaped up the first piece of plate I would need to cut. It was important in the process to do 3 things: cover as many holes as possible left by the bushwhacker flares (thus the "squarish" shape that many people don't like), follow the body line, and have the same template work for both sides. Turns out the previous cutting on the fenders was off by about a 1/2", so I need to make these flares so they would accommodate that much "off-ness". It is important to make line-up marks on your template and the fender so that when this is cut out of steel you know exactly where to mount it.
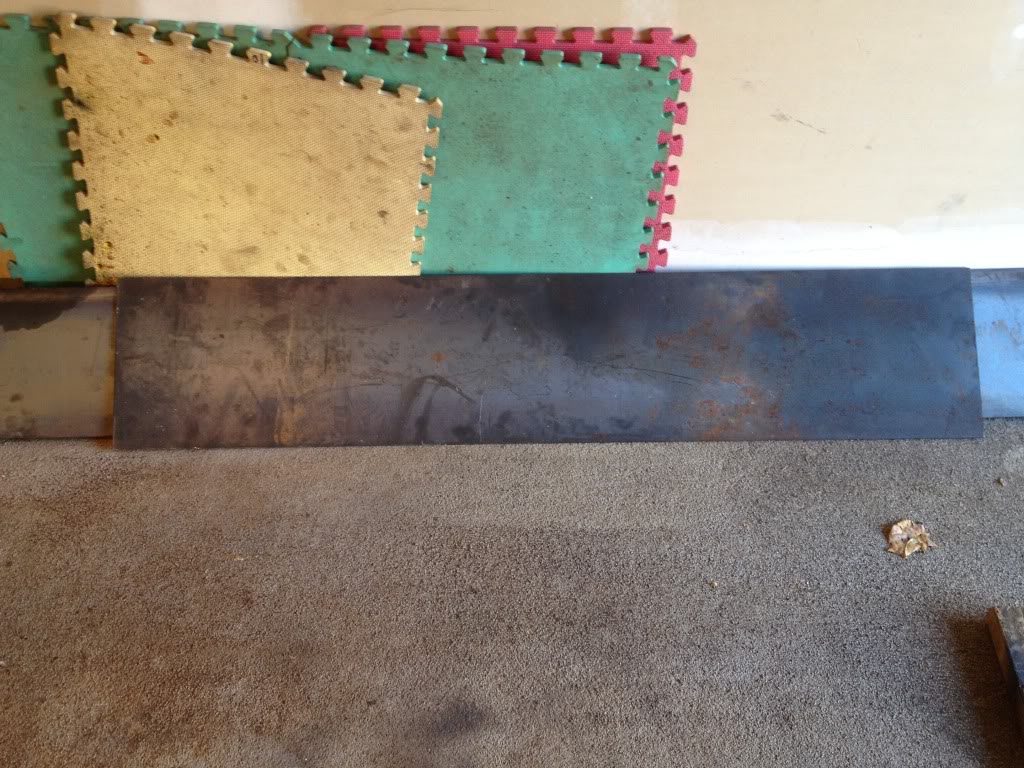
Then I had to pick my steel. I wanted something sturdy enough so that it wouldn't fold under a minor scrape, but thin enough that it wouldn't weight 20lbs. I went with either 11 or 12 ga, I cannot remember. I got all the steel I needed for all 4 flares for $10 because it was considered "drop steel" (i.e., it was the unwanted pieces from another customer's order, which they sell for 10 cents a pound.)
Transfer template onto the steel:
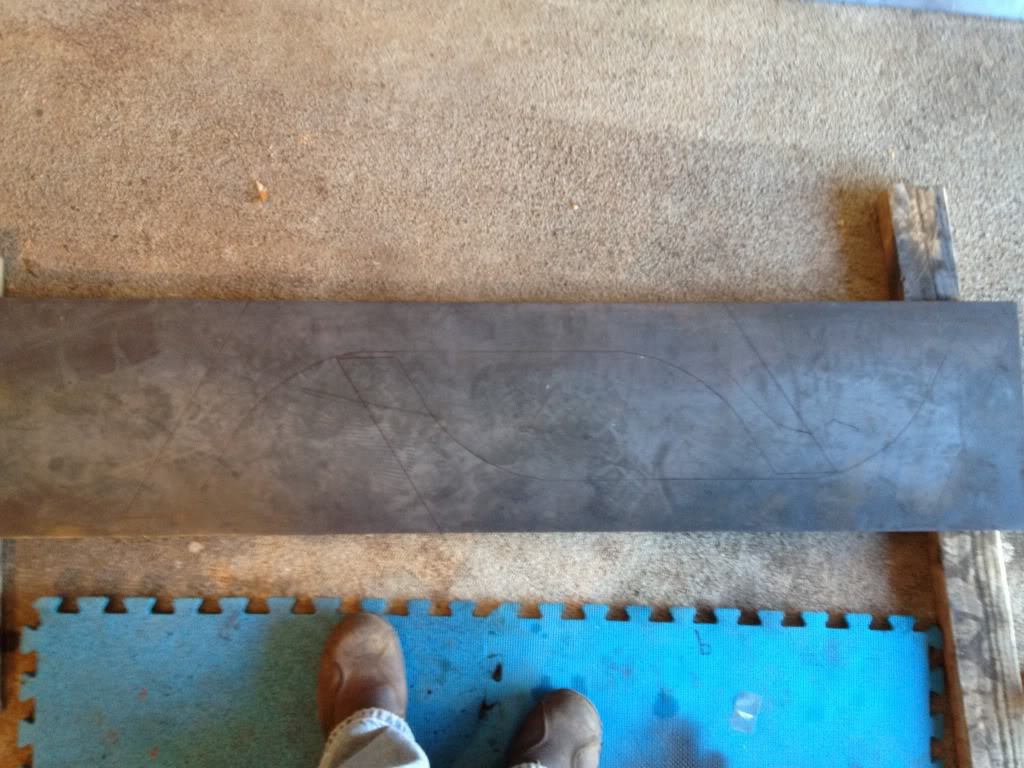
Cut out with angle grinder and cutoff wheel:
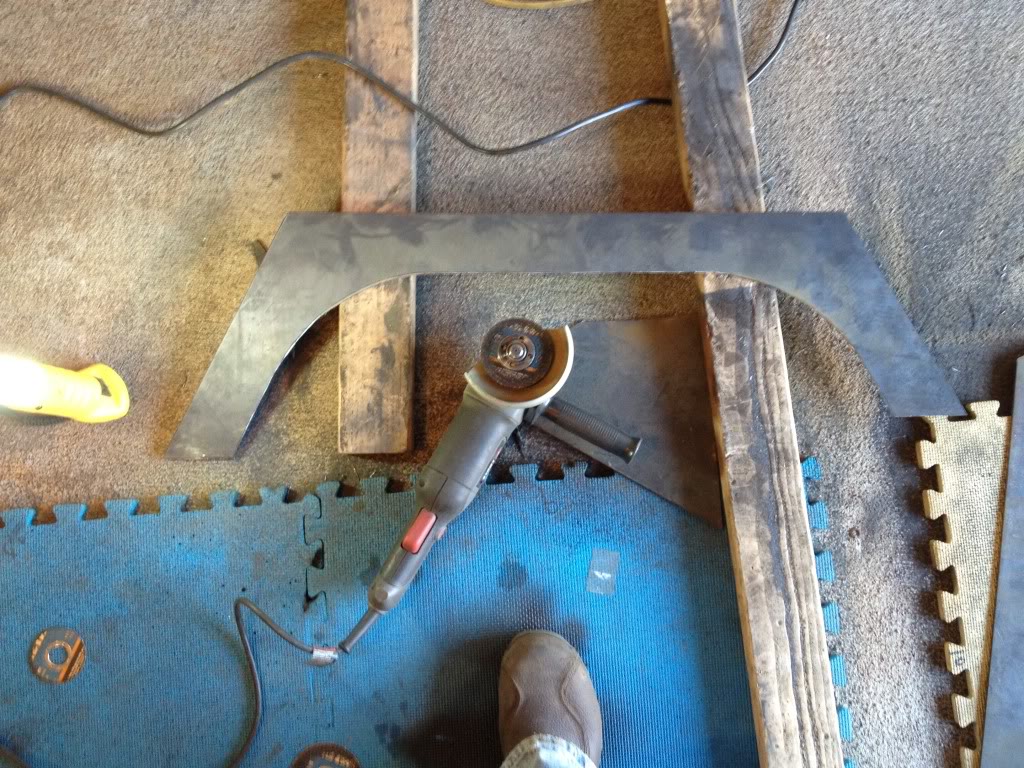
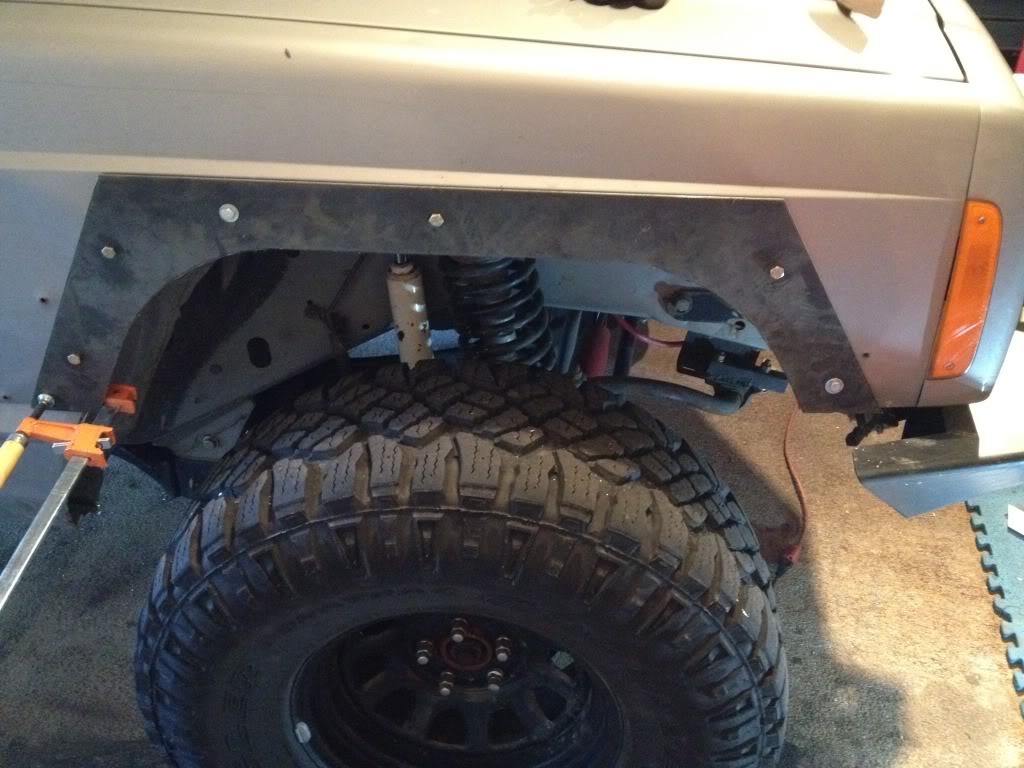
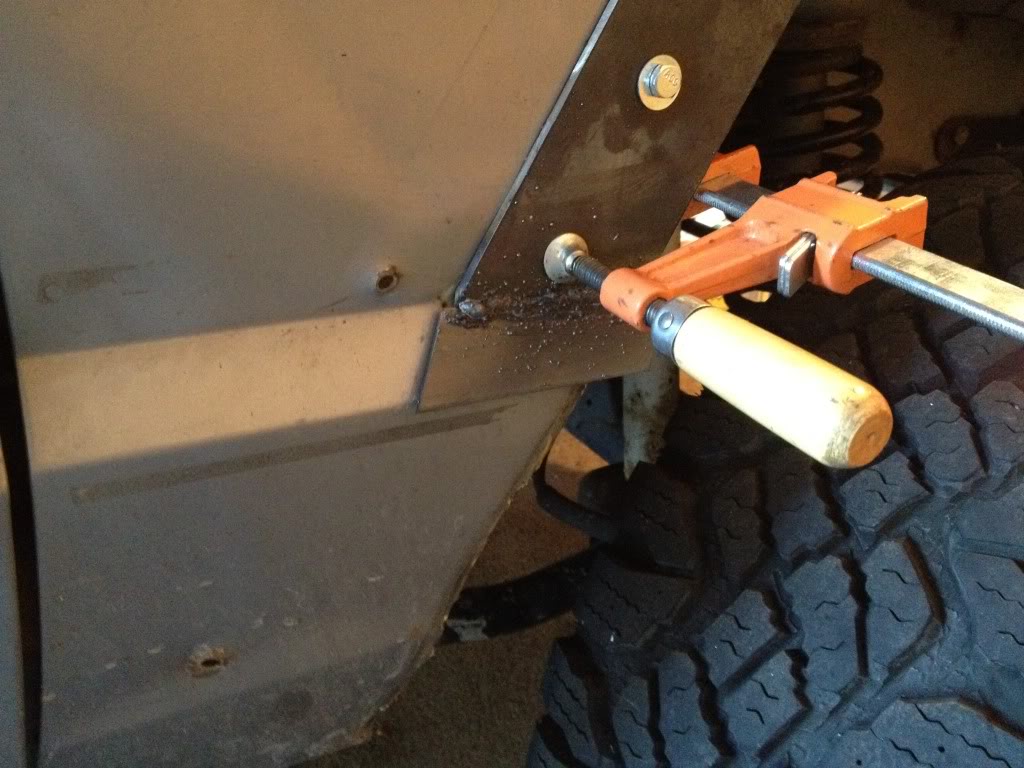
Mark and drill holes first, then clamp to fender and drill matching holes there. I used 1/4-20 hardware for mounting.
Continue making templates for the bends in the body lines, then cut, clamp, and carefully tack weld. I was able to follow the rest of the contour with 1 skinny piece as shown in the picture below, then one bent piece to make it the rest of the way down. Hooray for spattering Harbor Freight welders.

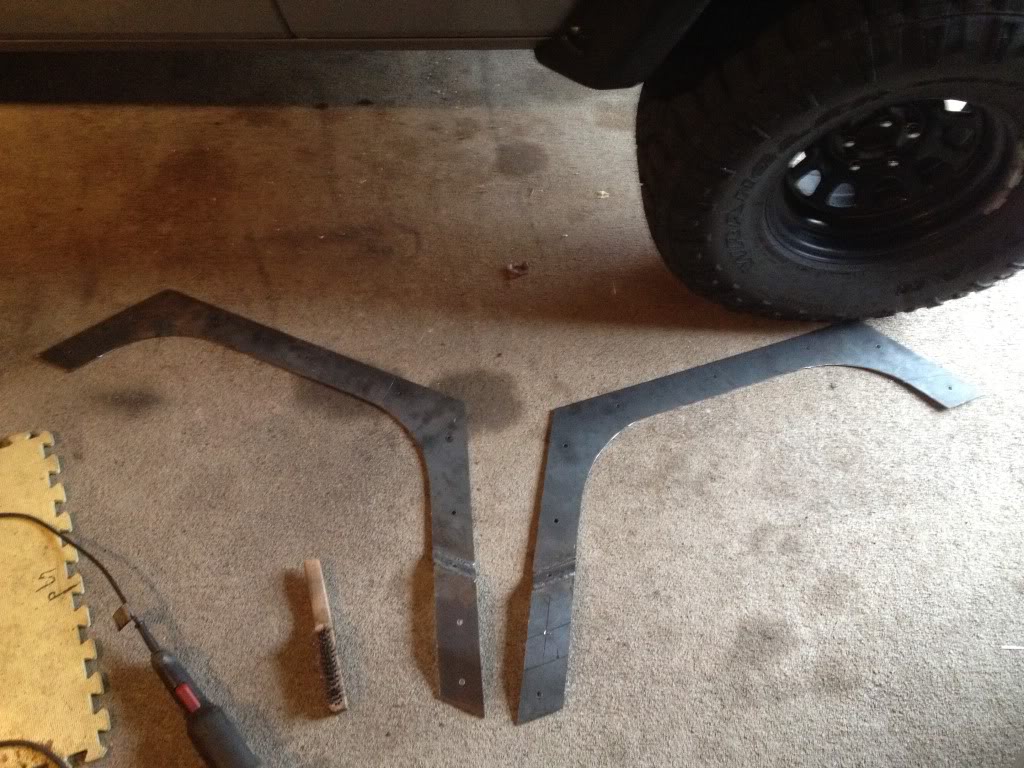
Matching set:
At this point I took a thin strip ( about 2 inches wide) with the holes predrilled in it and forced it to bend to the shape of the cutout contour using clamps, hammers, and tack welds. I made this part in 2 pieces: one for the consistent width portion, the other to follow the changing body line at the back of the flare:

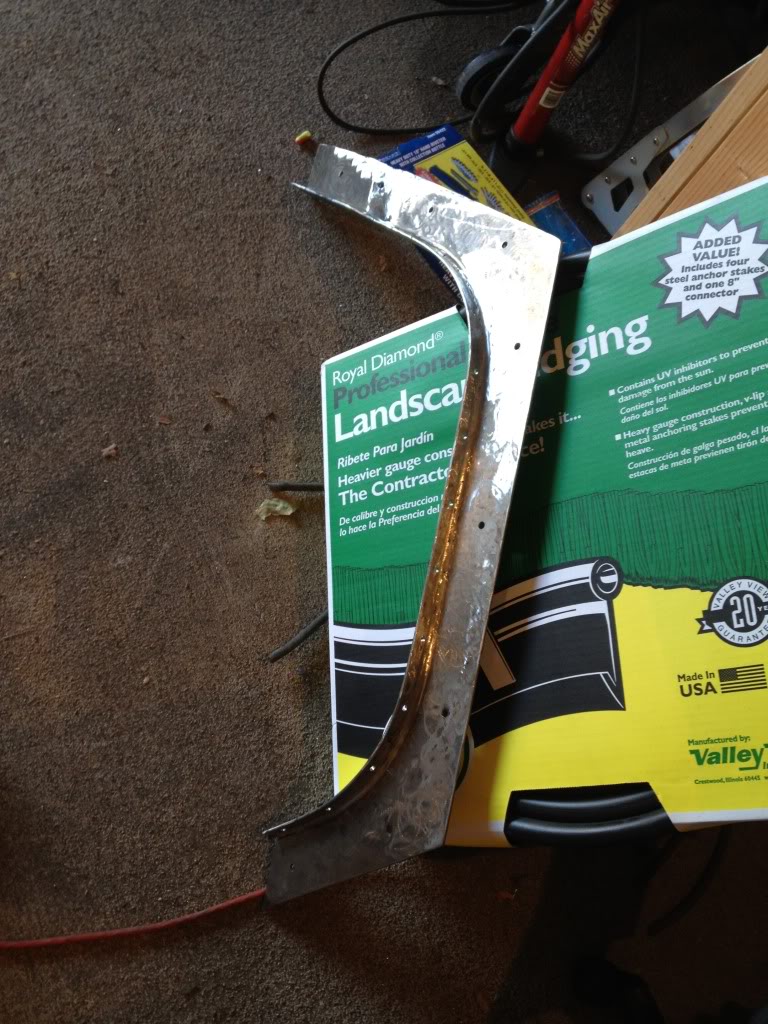
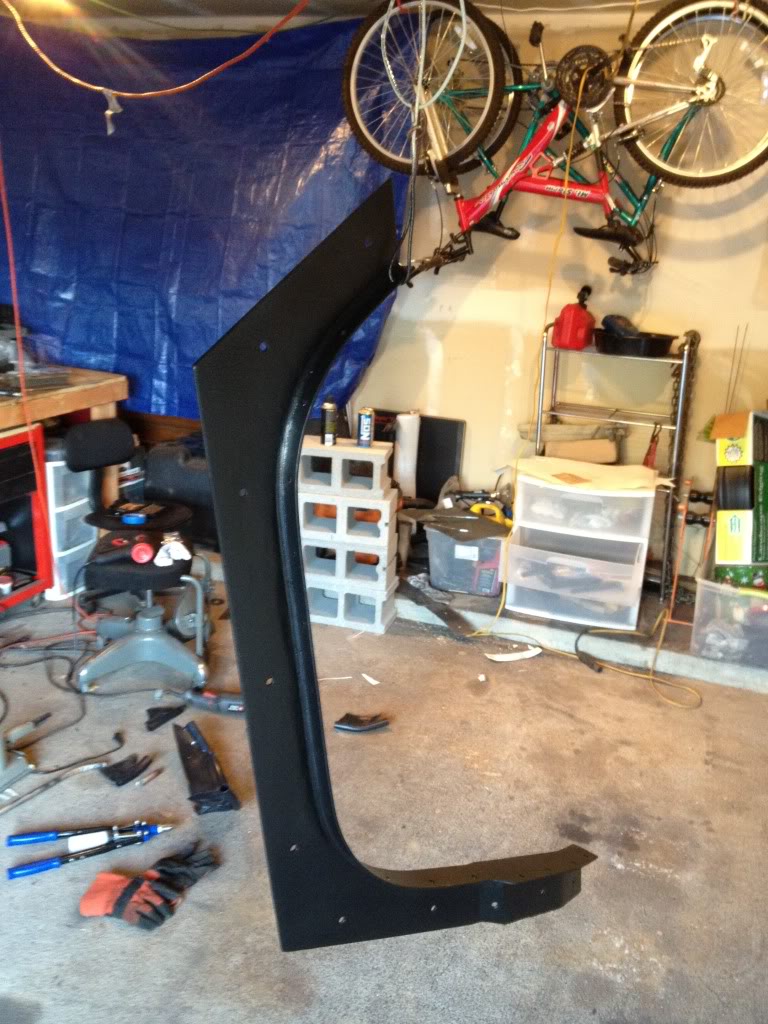
After that piece was fit up, I removed it and finish welded the exposed side and skip welded the hidden side. Of course, with a weld that long, make sure you weld in short beads and switch sides often to keep from heat warping the thin steel. After extensive grinding, it looked like this:
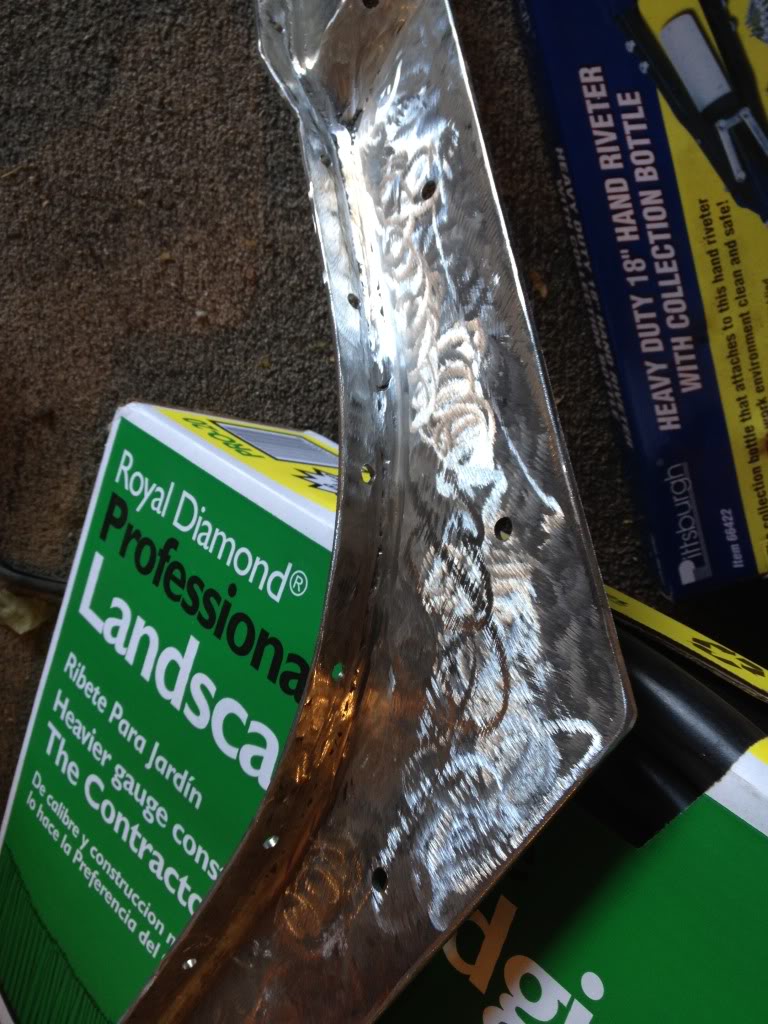
You can see the landscape edging I used in the background. Make sure you get the professional grade, the household grade is too weak and thin.
Test fit up with lawn edging loosely held in place:
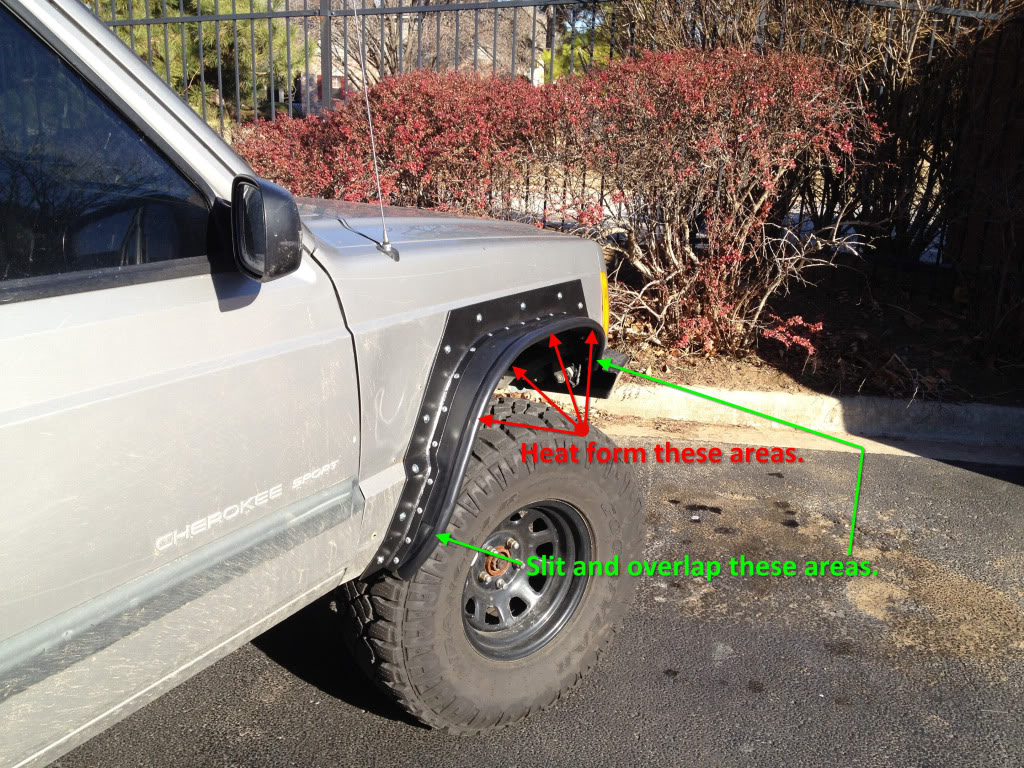
I tried many different methods of forming the lawn edging to the flare, and this is what I came up with finally. Unfortunately, I don't have pictures of this process. Clamp the lawn edging into place in the flare ensuring that it follows the contour exactly. Using a heat gun, gently heat 1 section at a time and push/pull the material into place. If the material is warping, you have heated it too much. You don't need much heat to get this material to pick up a new shape. I'll talk about the cut and overlap in a second.
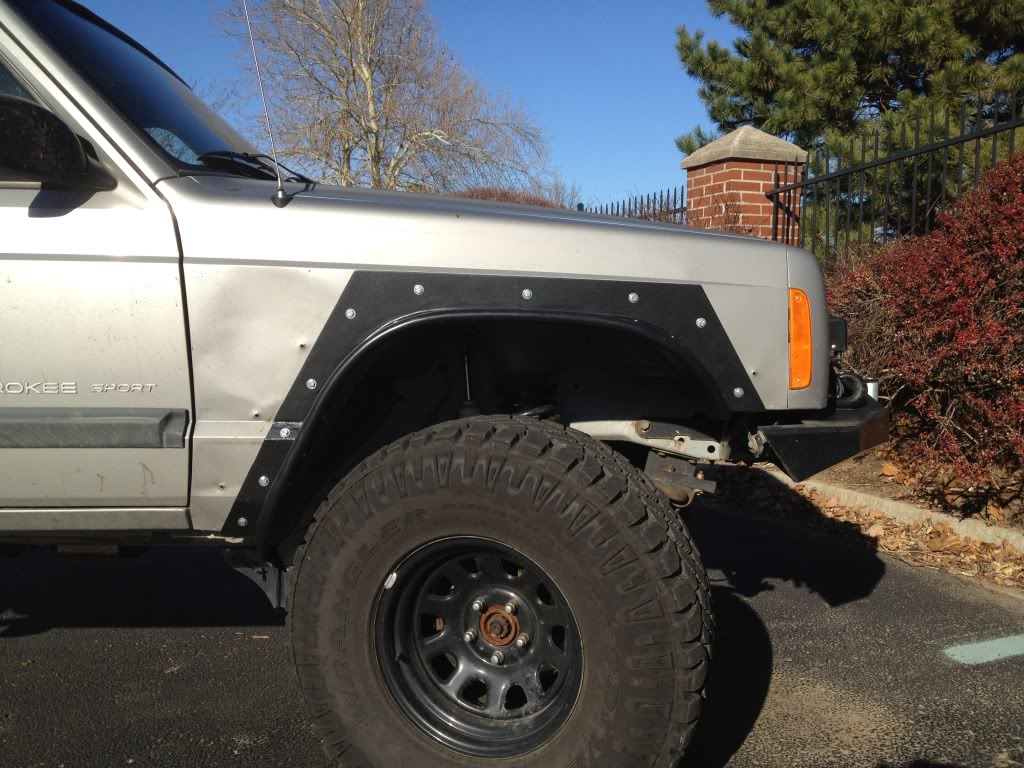
After heat forming the lawn edging, then paint to flare with the paint of your choice. I used bedliner. Of course, prep is key! Make sure you you have shiny metal everywhere and that you wiped it down with rubbing alcohol or some surface prep chemical.
Pop rivet most of the flare into place except for the last couple of holes. This is where we want to taper the width and transition back to the body. I tried heat forming this over and over and it turned out terrible every time, so I finally made 2 slits per side folded/overlapped the sections, and pop riveted them into place. See 2 pictures above.
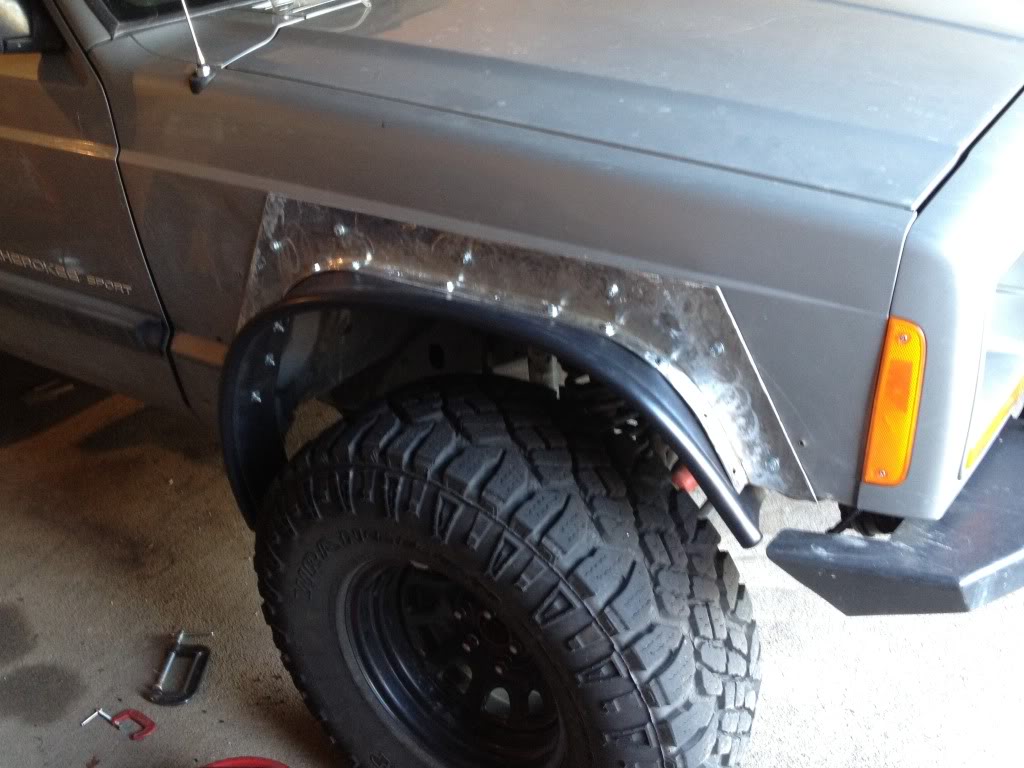
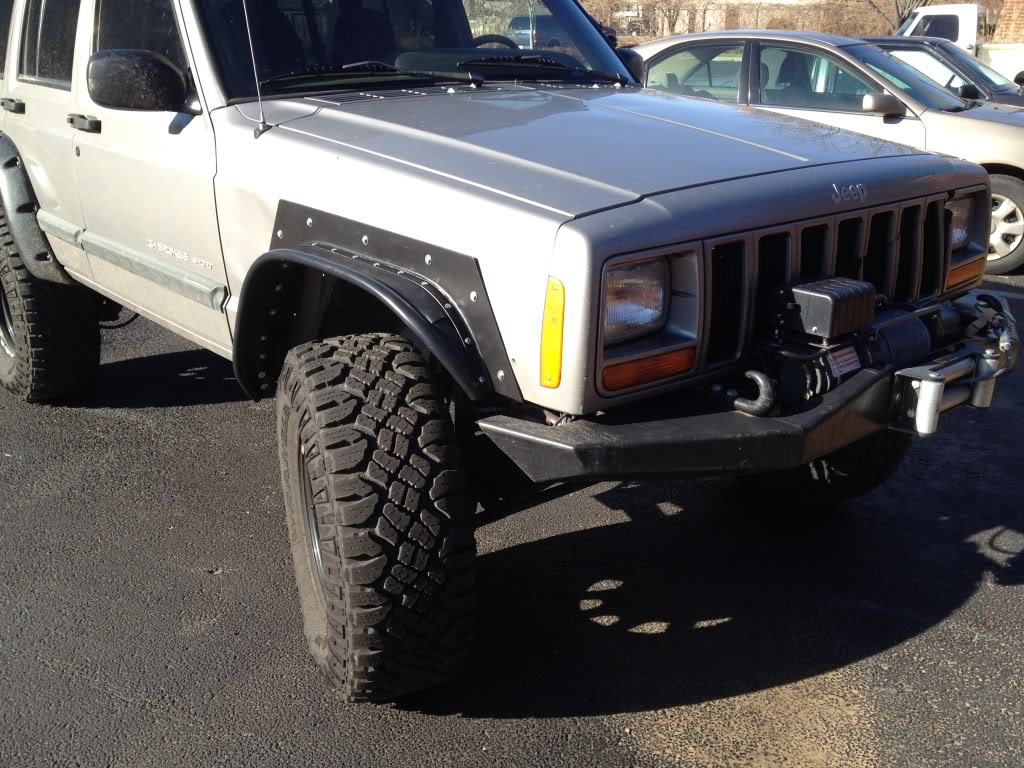
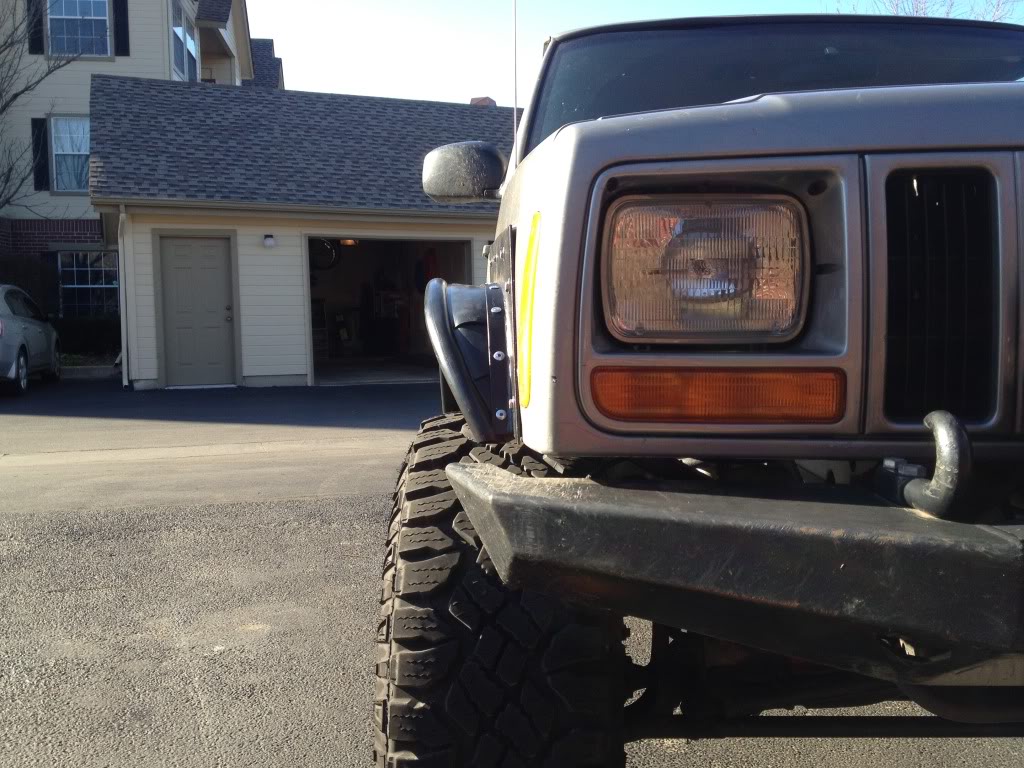
Finished product:

Let me know if you have any questions, I am sure I left something out.
The first thing I did was model several concepts up in Inventor:
One with bent tube and flat plating:
Another with bent tube and angled plating:
And then, after seeing this on someone else's thread here, I incorporated landscape edging:
And that idea stuck. The first step was to make templates. I bought a 10 pack of poster boards and shaped up the first piece of plate I would need to cut. It was important in the process to do 3 things: cover as many holes as possible left by the bushwhacker flares (thus the "squarish" shape that many people don't like), follow the body line, and have the same template work for both sides. Turns out the previous cutting on the fenders was off by about a 1/2", so I need to make these flares so they would accommodate that much "off-ness". It is important to make line-up marks on your template and the fender so that when this is cut out of steel you know exactly where to mount it.
Then I had to pick my steel. I wanted something sturdy enough so that it wouldn't fold under a minor scrape, but thin enough that it wouldn't weight 20lbs. I went with either 11 or 12 ga, I cannot remember. I got all the steel I needed for all 4 flares for $10 because it was considered "drop steel" (i.e., it was the unwanted pieces from another customer's order, which they sell for 10 cents a pound.)
Transfer template onto the steel:
Cut out with angle grinder and cutoff wheel:
Mark and drill holes first, then clamp to fender and drill matching holes there. I used 1/4-20 hardware for mounting.
Continue making templates for the bends in the body lines, then cut, clamp, and carefully tack weld. I was able to follow the rest of the contour with 1 skinny piece as shown in the picture below, then one bent piece to make it the rest of the way down. Hooray for spattering Harbor Freight welders.
Matching set:
At this point I took a thin strip ( about 2 inches wide) with the holes predrilled in it and forced it to bend to the shape of the cutout contour using clamps, hammers, and tack welds. I made this part in 2 pieces: one for the consistent width portion, the other to follow the changing body line at the back of the flare:
After that piece was fit up, I removed it and finish welded the exposed side and skip welded the hidden side. Of course, with a weld that long, make sure you weld in short beads and switch sides often to keep from heat warping the thin steel. After extensive grinding, it looked like this:
You can see the landscape edging I used in the background. Make sure you get the professional grade, the household grade is too weak and thin.
Test fit up with lawn edging loosely held in place:
I tried many different methods of forming the lawn edging to the flare, and this is what I came up with finally. Unfortunately, I don't have pictures of this process. Clamp the lawn edging into place in the flare ensuring that it follows the contour exactly. Using a heat gun, gently heat 1 section at a time and push/pull the material into place. If the material is warping, you have heated it too much. You don't need much heat to get this material to pick up a new shape. I'll talk about the cut and overlap in a second.
After heat forming the lawn edging, then paint to flare with the paint of your choice. I used bedliner. Of course, prep is key! Make sure you you have shiny metal everywhere and that you wiped it down with rubbing alcohol or some surface prep chemical.
Pop rivet most of the flare into place except for the last couple of holes. This is where we want to taper the width and transition back to the body. I tried heat forming this over and over and it turned out terrible every time, so I finally made 2 slits per side folded/overlapped the sections, and pop riveted them into place. See 2 pictures above.
Finished product:
Let me know if you have any questions, I am sure I left something out.


Senior Member
Joined: Oct 2011
Posts: 706
Likes: 0
From: Racine, Ohio
Year: 1999
Model: Grand Cherokee
Engine: 4.7
These look great. I don't car for the big squared off piece eith but that is (to each his own). My favorite part is how good it looks where you incorperated the piece at the bottom to match the molding of the body. Great job. They look really sweet. Two thumbs up from me.

