Taurus Fan Volvo 2 Speed Relay How-To
 10-03-2015, 04:17 PM
#1
Junior Member
Thread Starter
Join Date: Jan 2012
Location: N. Chesterfield, VA
Posts: 38
Likes: 0
Received 0 Likes
on
0 Posts
Year: 2000
Model: Grand Cherokee
Engine: 4.0 inline 6
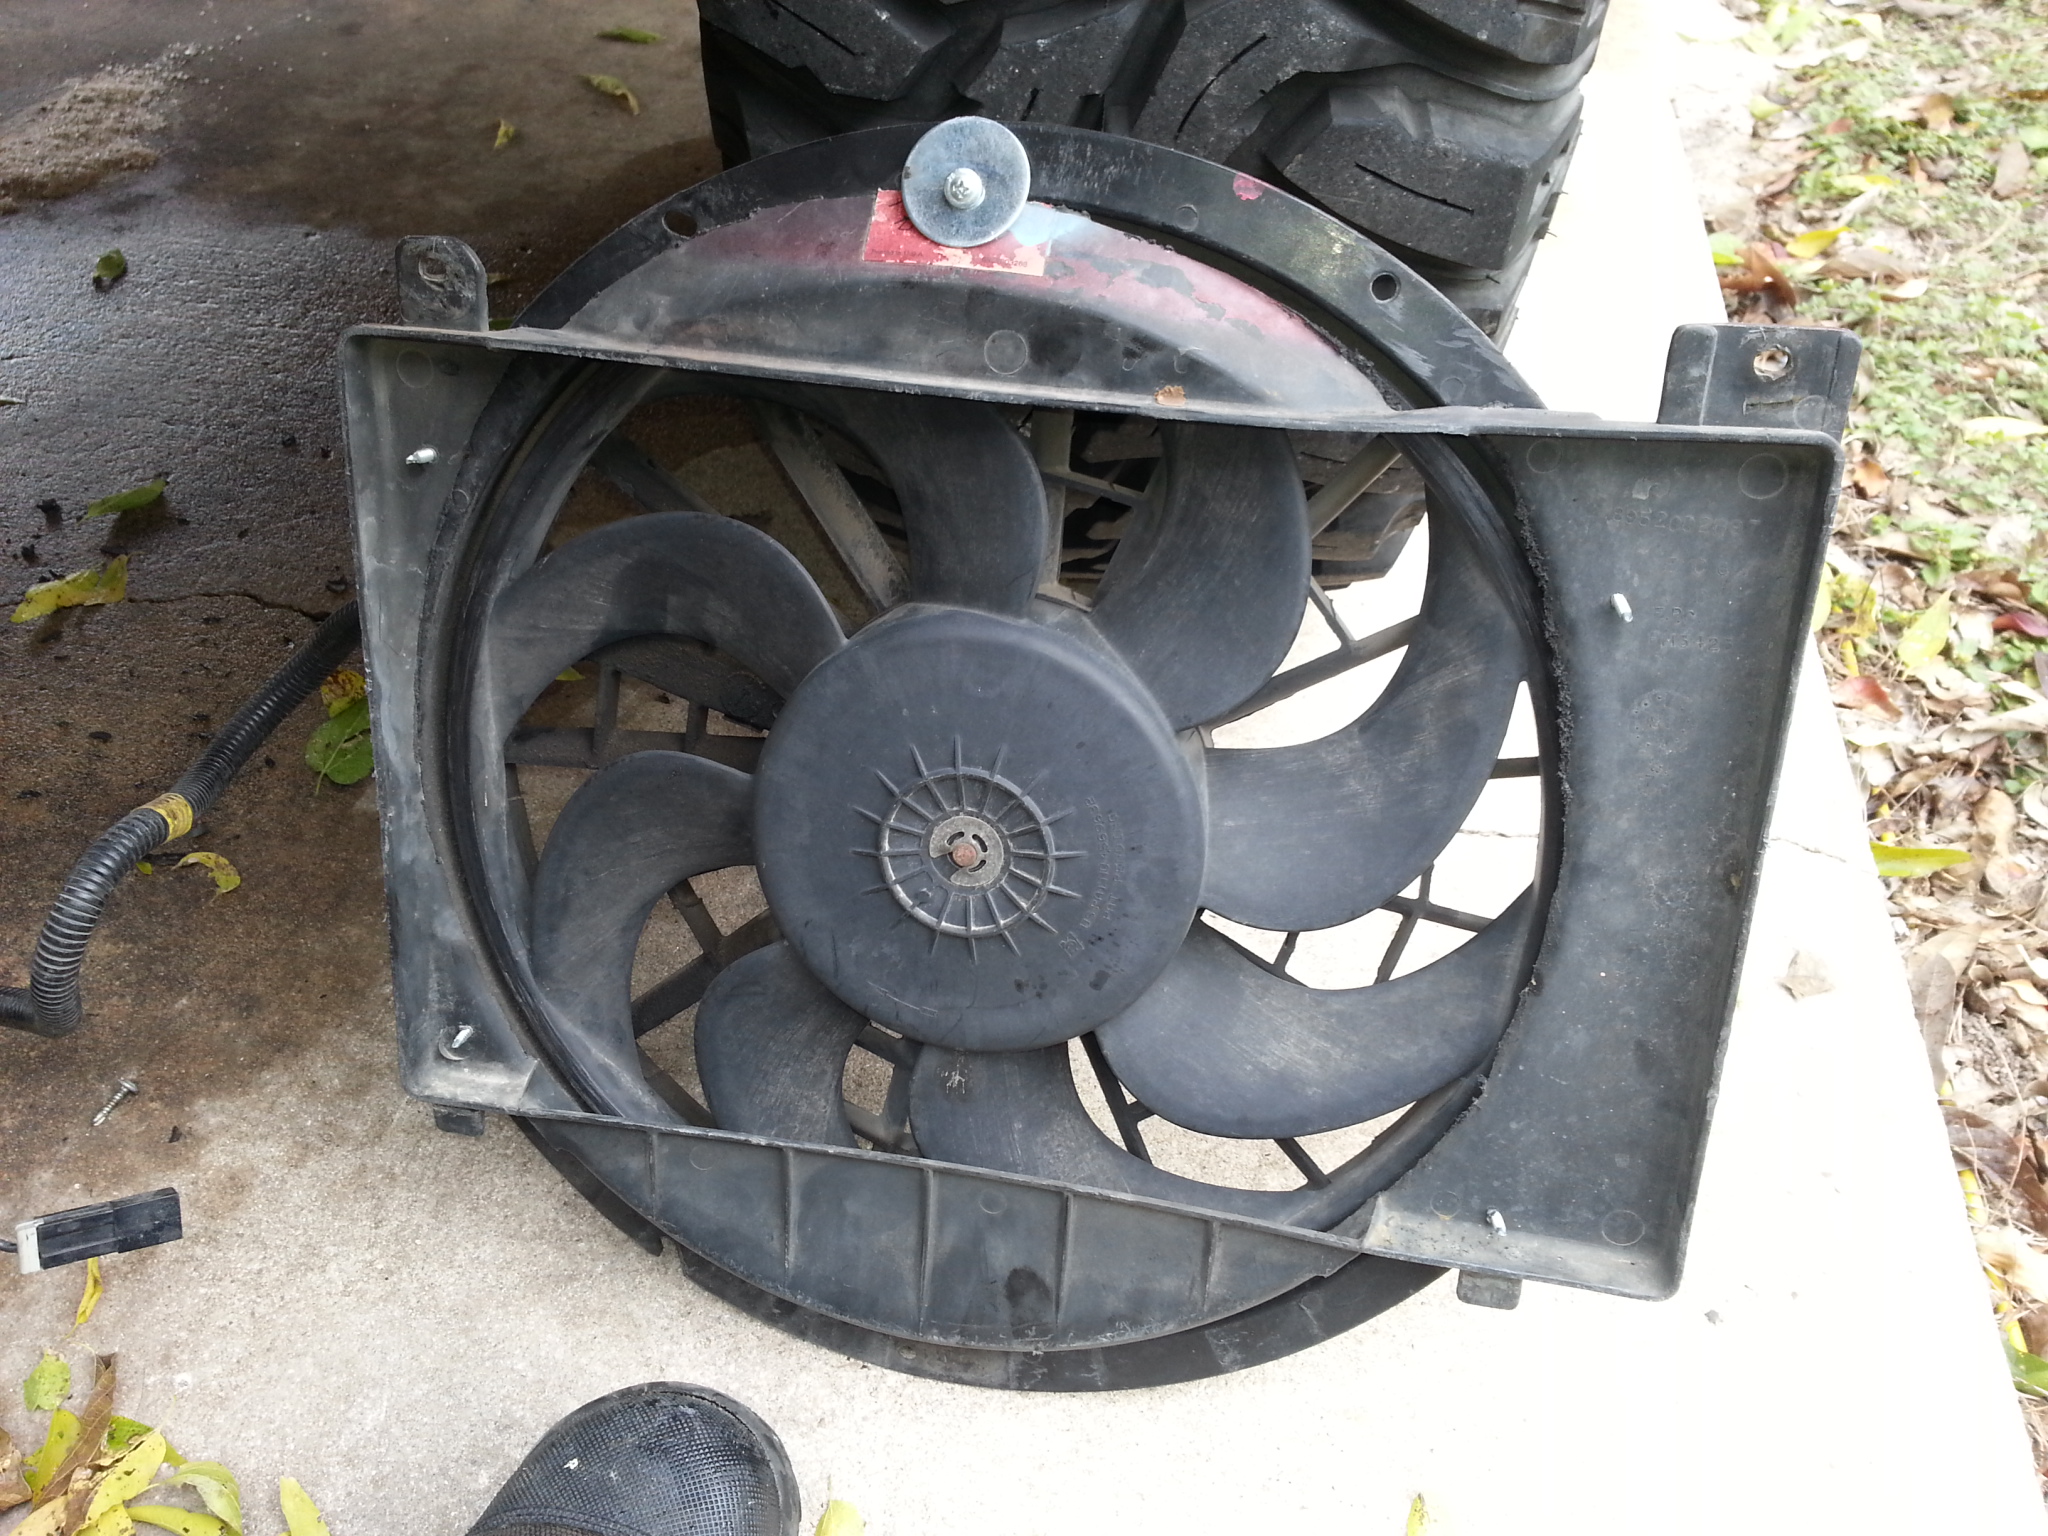
This is the budget setup to ensure the lowest cost up front and best
results for a Taurus 2 speed fan setup. Special thanks to Onovakind67 and
Aceshigh at NastyZ28.com for all of their work on this.
#1. You need 2 temp switches for 2 speeds.
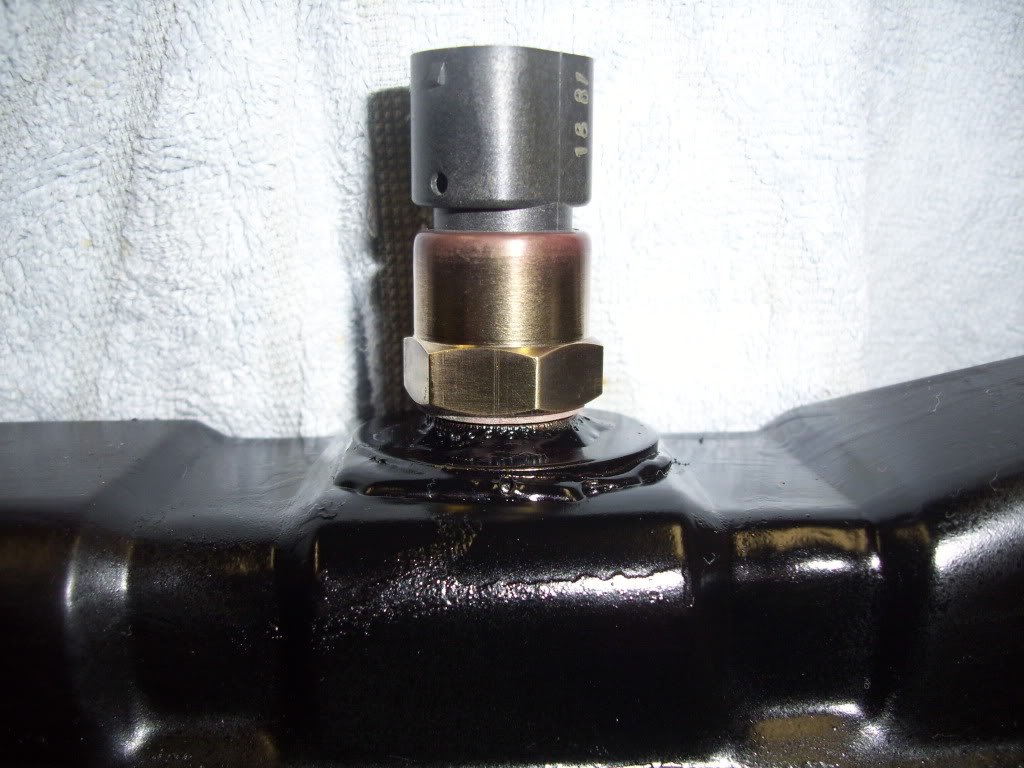
Solution = BMW 91 / 99* C (180/195*F) dual temp switch Part #61311378073< $12 from Rock Auto - can't beat that.
One single temp switch instead of 2, just gotta drill and tap a brass adapter fitting to accept the M14 x1.5 thread.
#2. Heavy duty controller for 2 speeds. (Thanks Onovakind67)
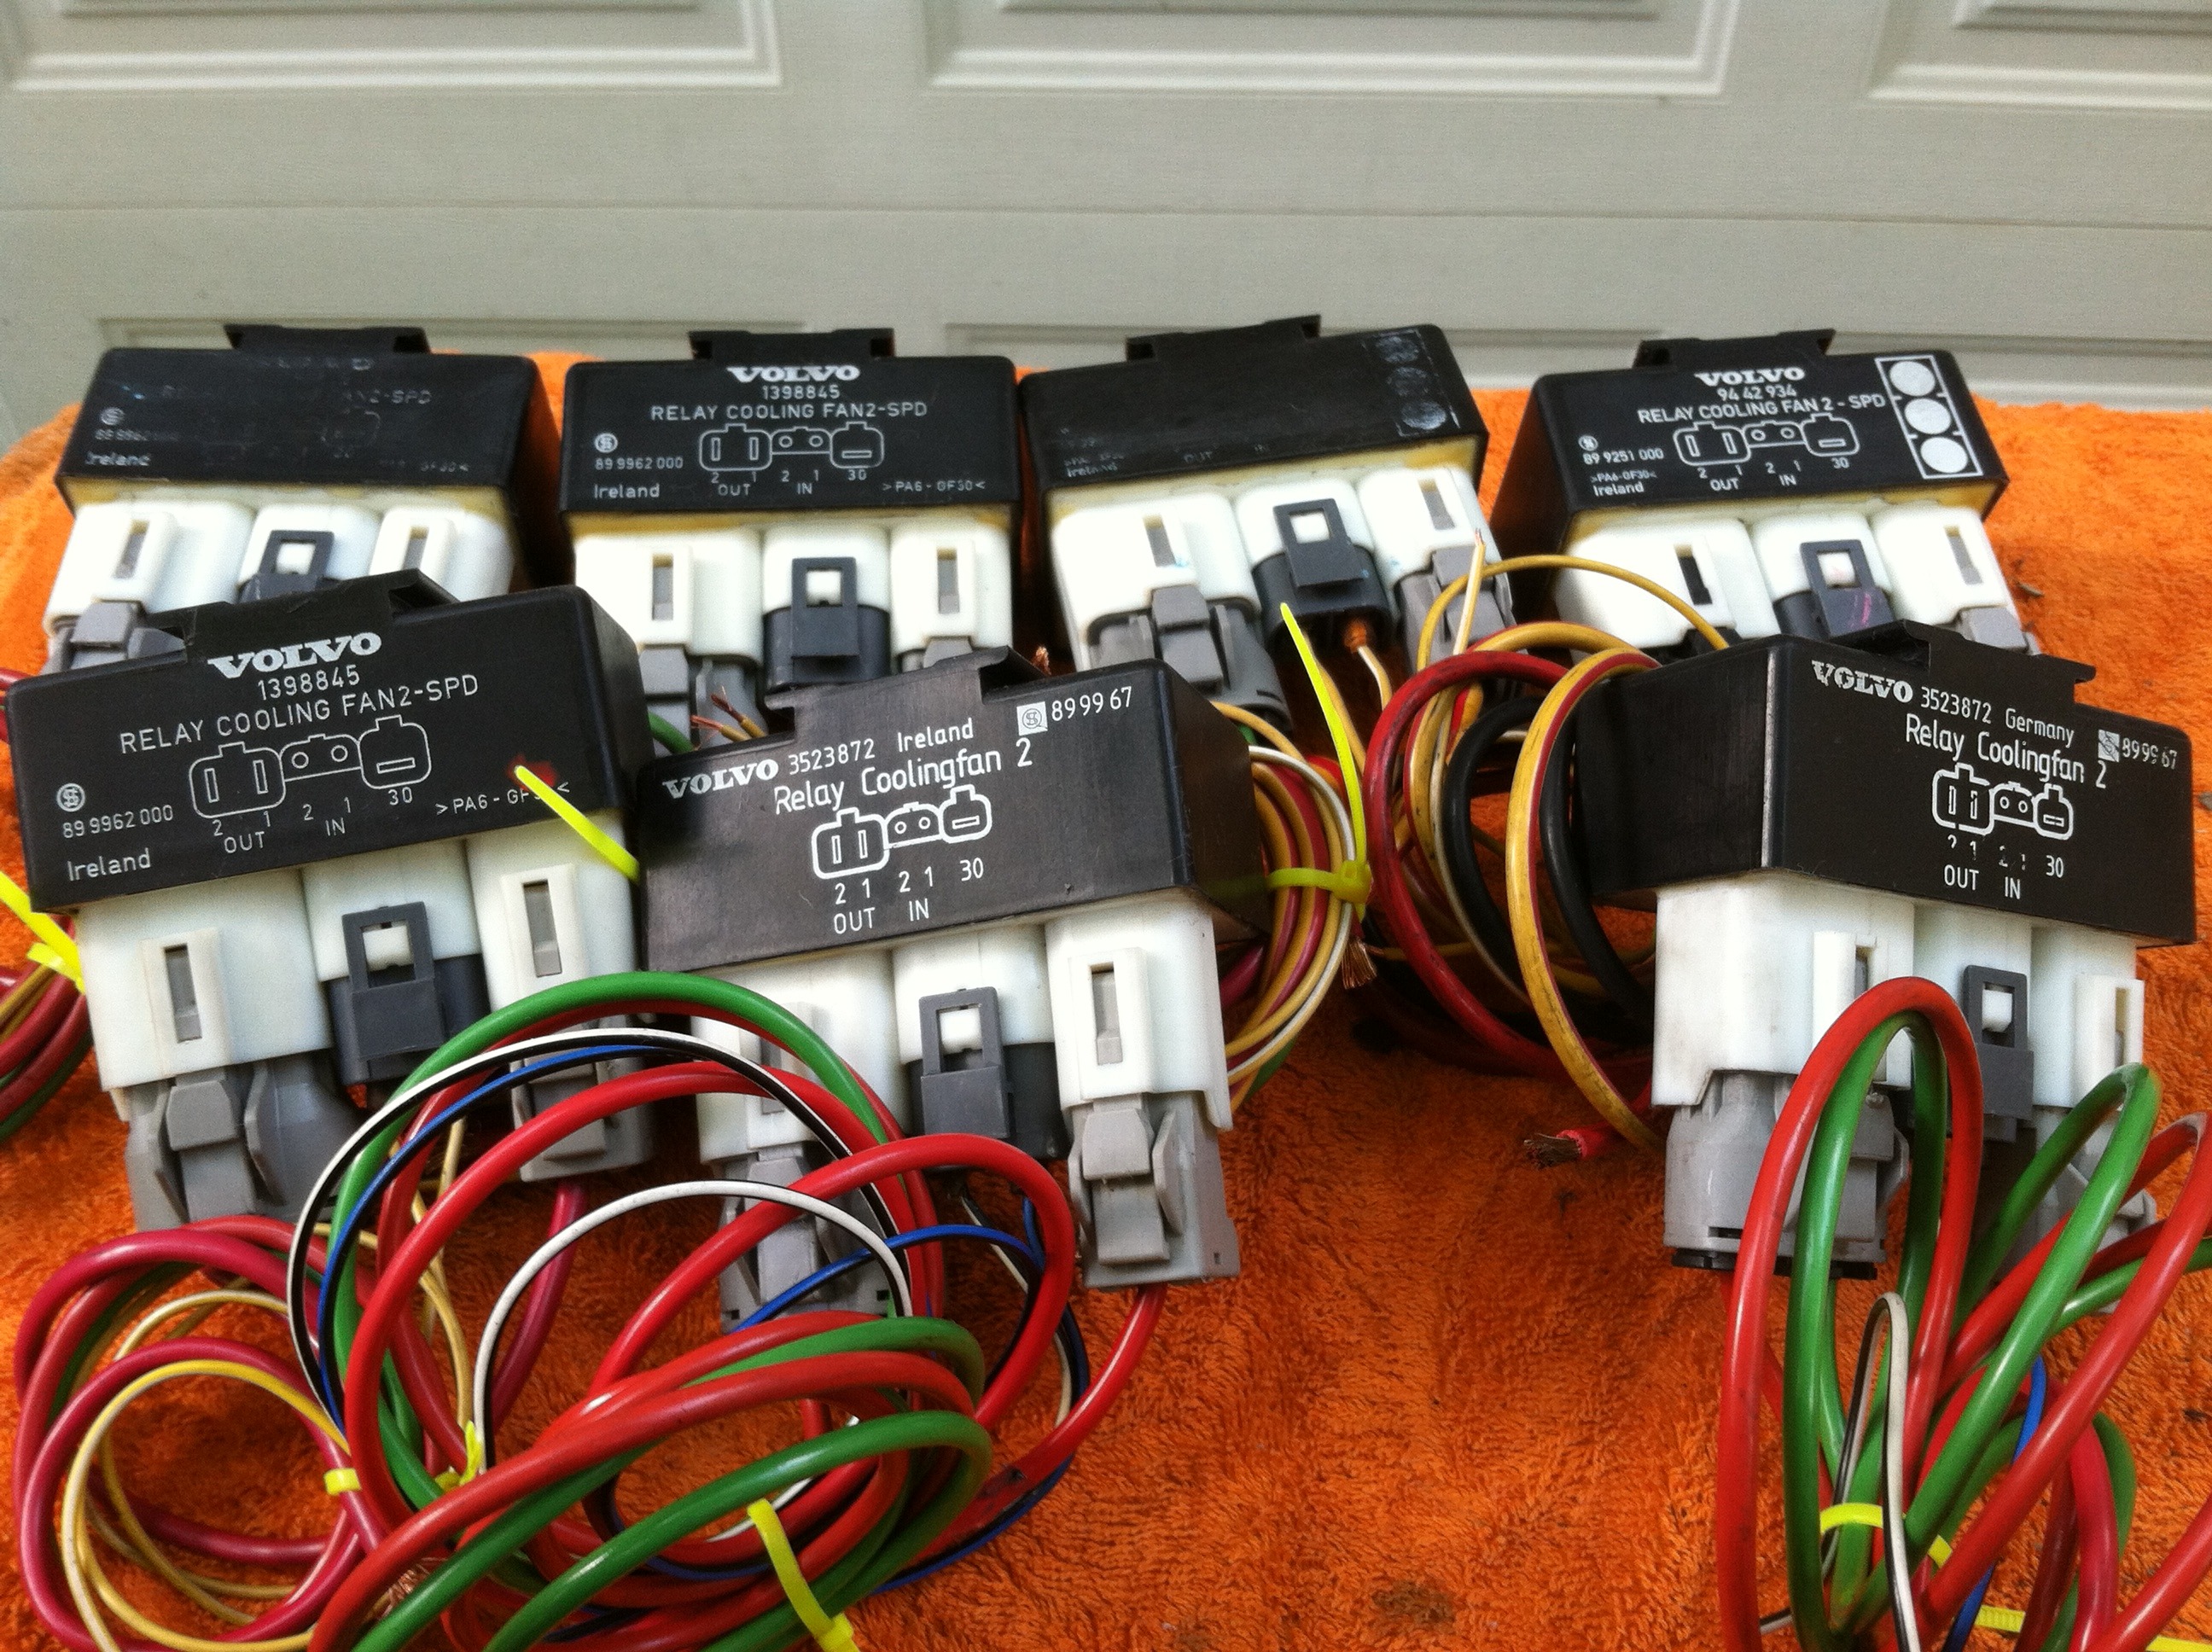
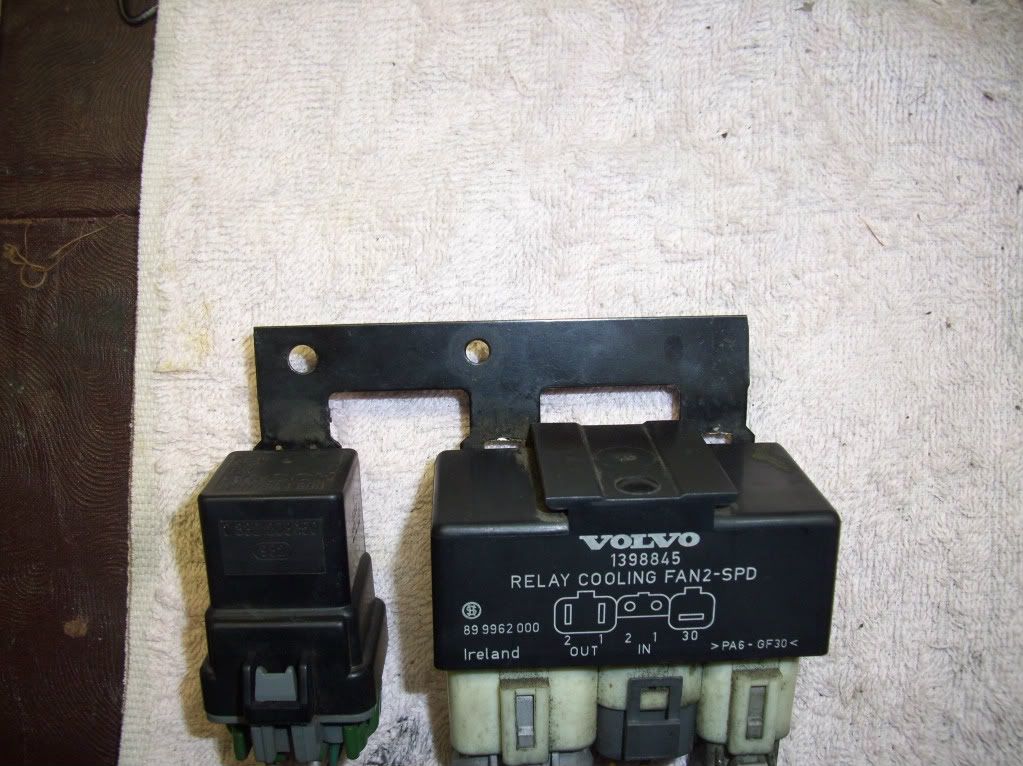
94-97 850 Volvo vehicles used a heavy duty relay dual fan controller part # 1398845
Cooling fan relay for any 960, 940 92-95, 850 all, 740 92, S/V90 all, S/V 70 98-00, C70 Turbo 98-04.
92-95 960 and 940
98-00 S/V 70
98-04 C70 Turbo
92 740
S/V 90 All
850 All
Volvo Controller = $10-$20 Salvage yard or ~$50 new.
BMW Dual Temp Switch = $11
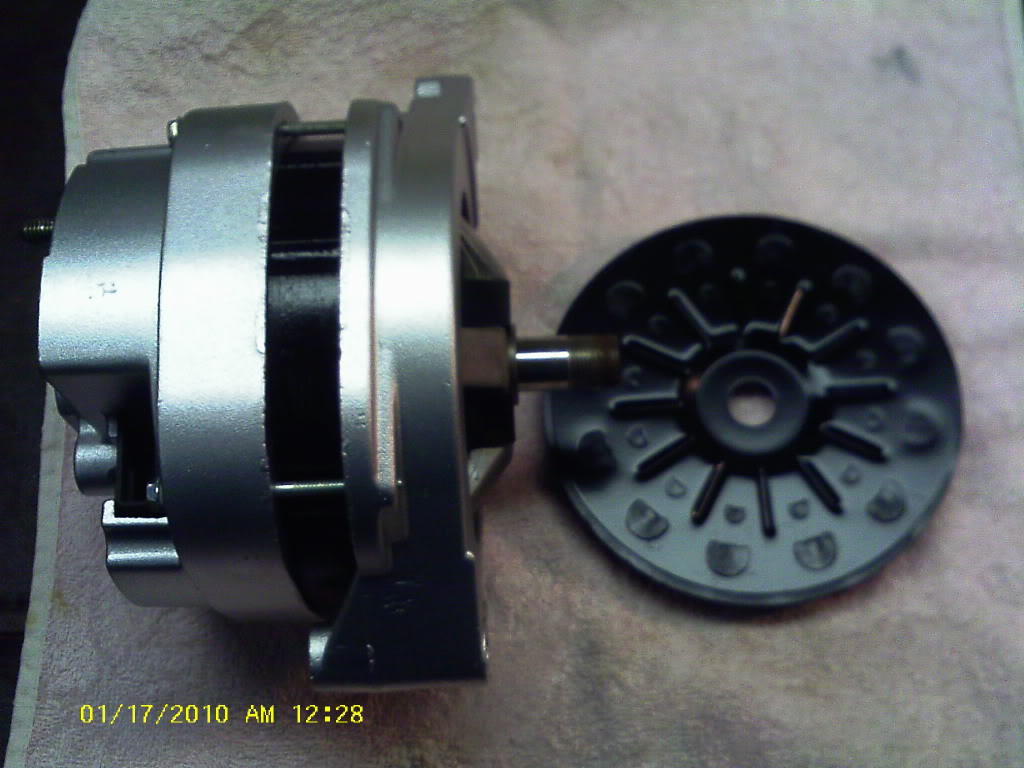
Make sure your alternator can handle the load. I switched to a 144amp unit
144amp alternator
Here's the simple schematic ,
You can optionally wire in 2 LED's so you know when each fan is on.
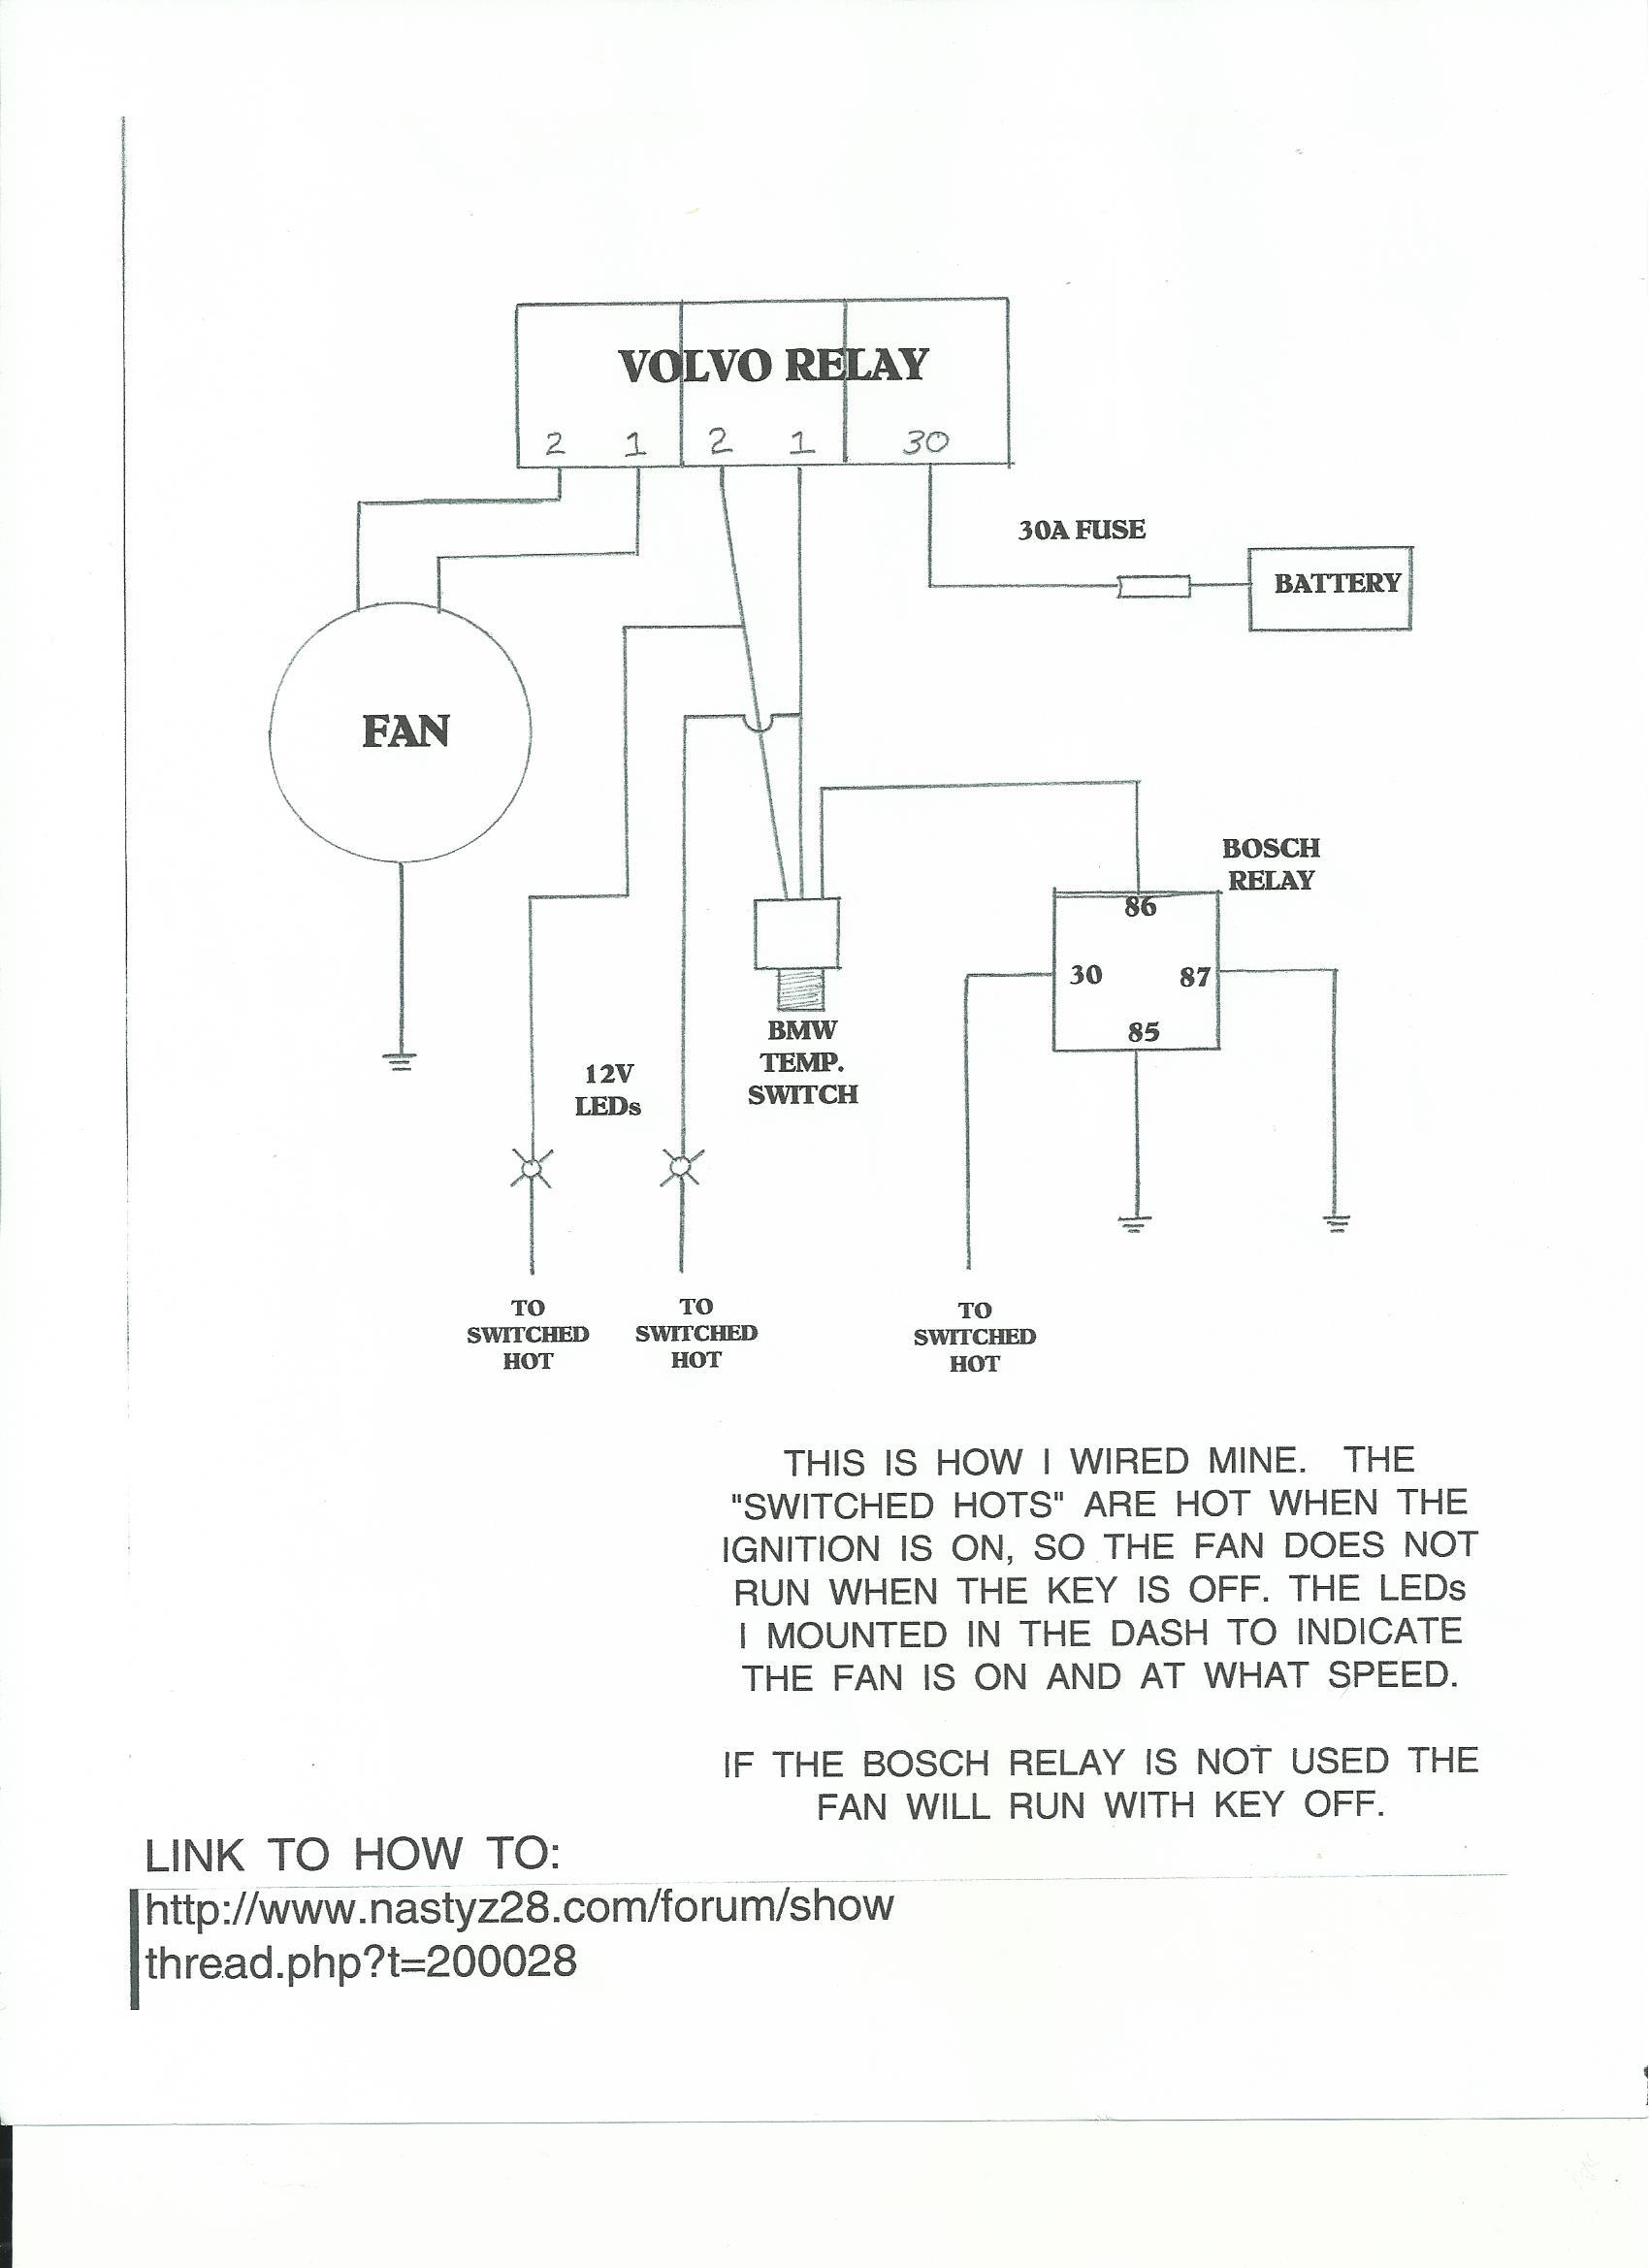
You don't want to interrupt the main batt wire to the volvo relay with the ignition relay. because you have now limited your hi amp volvo relay to 30-40amps. you want to interrupt the ground wire on the temp sensor.
85 ground
86 ignition
30 ground
87 to temp switch ground
87a nothing
this will allow the volvo to stay connected to the full power of the battery, and turn the fans off when the key is off
Relays for sale
http://www.ebay.com/itm/Volvo-2-Spee...-/321848927764
LEDs low speed
High speed

complete setup mounted without fenders
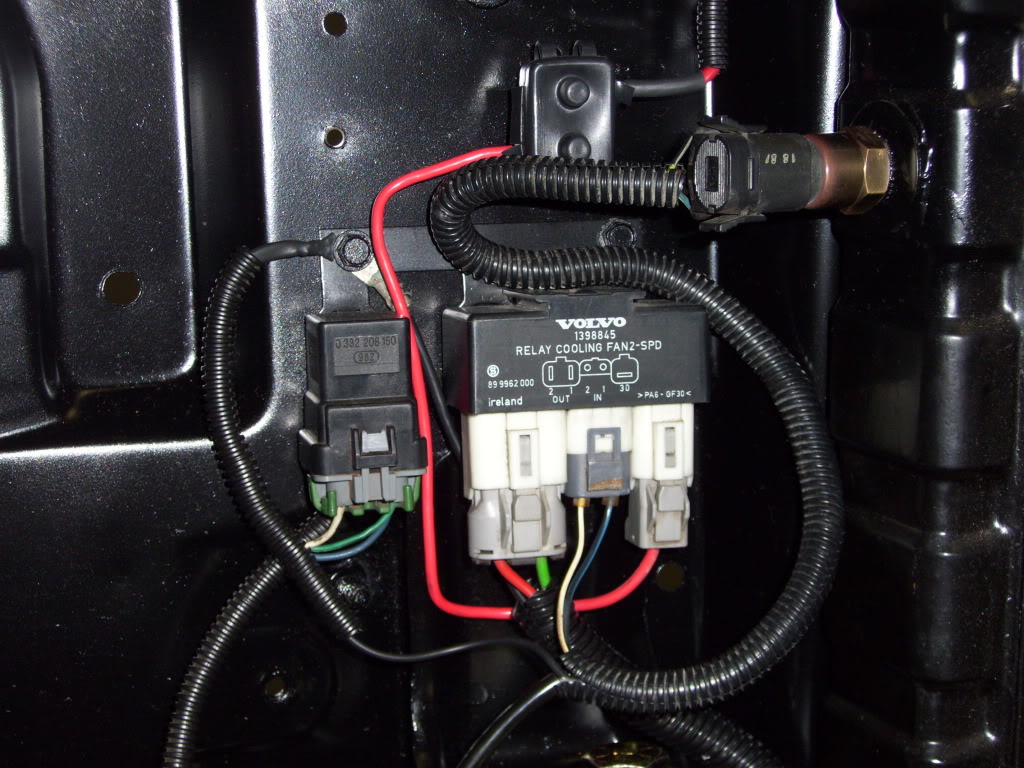
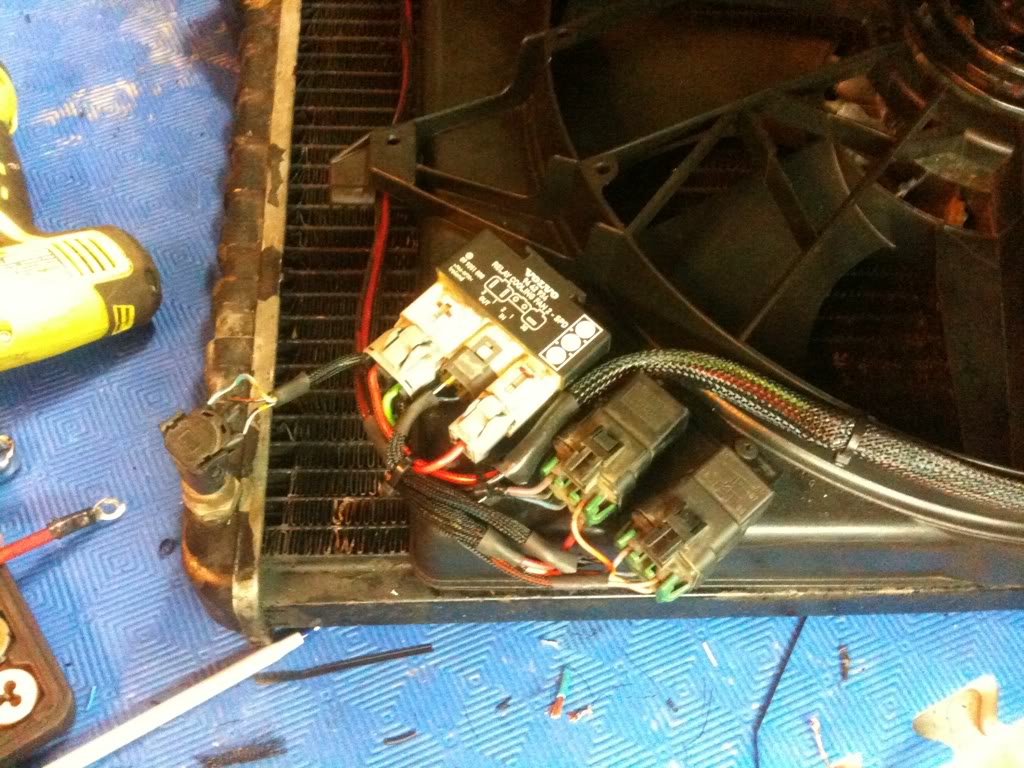
close up of completed relay mounted
bung in rad
results for a Taurus 2 speed fan setup. Special thanks to Onovakind67 and
Aceshigh at NastyZ28.com for all of their work on this.

#1. You need 2 temp switches for 2 speeds.
Solution = BMW 91 / 99* C (180/195*F) dual temp switch Part #61311378073< $12 from Rock Auto - can't beat that.
One single temp switch instead of 2, just gotta drill and tap a brass adapter fitting to accept the M14 x1.5 thread.
#2. Heavy duty controller for 2 speeds. (Thanks Onovakind67)
94-97 850 Volvo vehicles used a heavy duty relay dual fan controller part # 1398845
Cooling fan relay for any 960, 940 92-95, 850 all, 740 92, S/V90 all, S/V 70 98-00, C70 Turbo 98-04.
92-95 960 and 940
98-00 S/V 70
98-04 C70 Turbo
92 740
S/V 90 All
850 All
Volvo Controller = $10-$20 Salvage yard or ~$50 new.
BMW Dual Temp Switch = $11
Make sure your alternator can handle the load. I switched to a 144amp unit
144amp alternator

Here's the simple schematic ,
You can optionally wire in 2 LED's so you know when each fan is on.

You don't want to interrupt the main batt wire to the volvo relay with the ignition relay. because you have now limited your hi amp volvo relay to 30-40amps. you want to interrupt the ground wire on the temp sensor.
85 ground
86 ignition
30 ground
87 to temp switch ground
87a nothing
this will allow the volvo to stay connected to the full power of the battery, and turn the fans off when the key is off
Originally Posted by Turbo70Camaro
Okay guys/gals I have finally got all the parts with photos to help out further on this great thread.
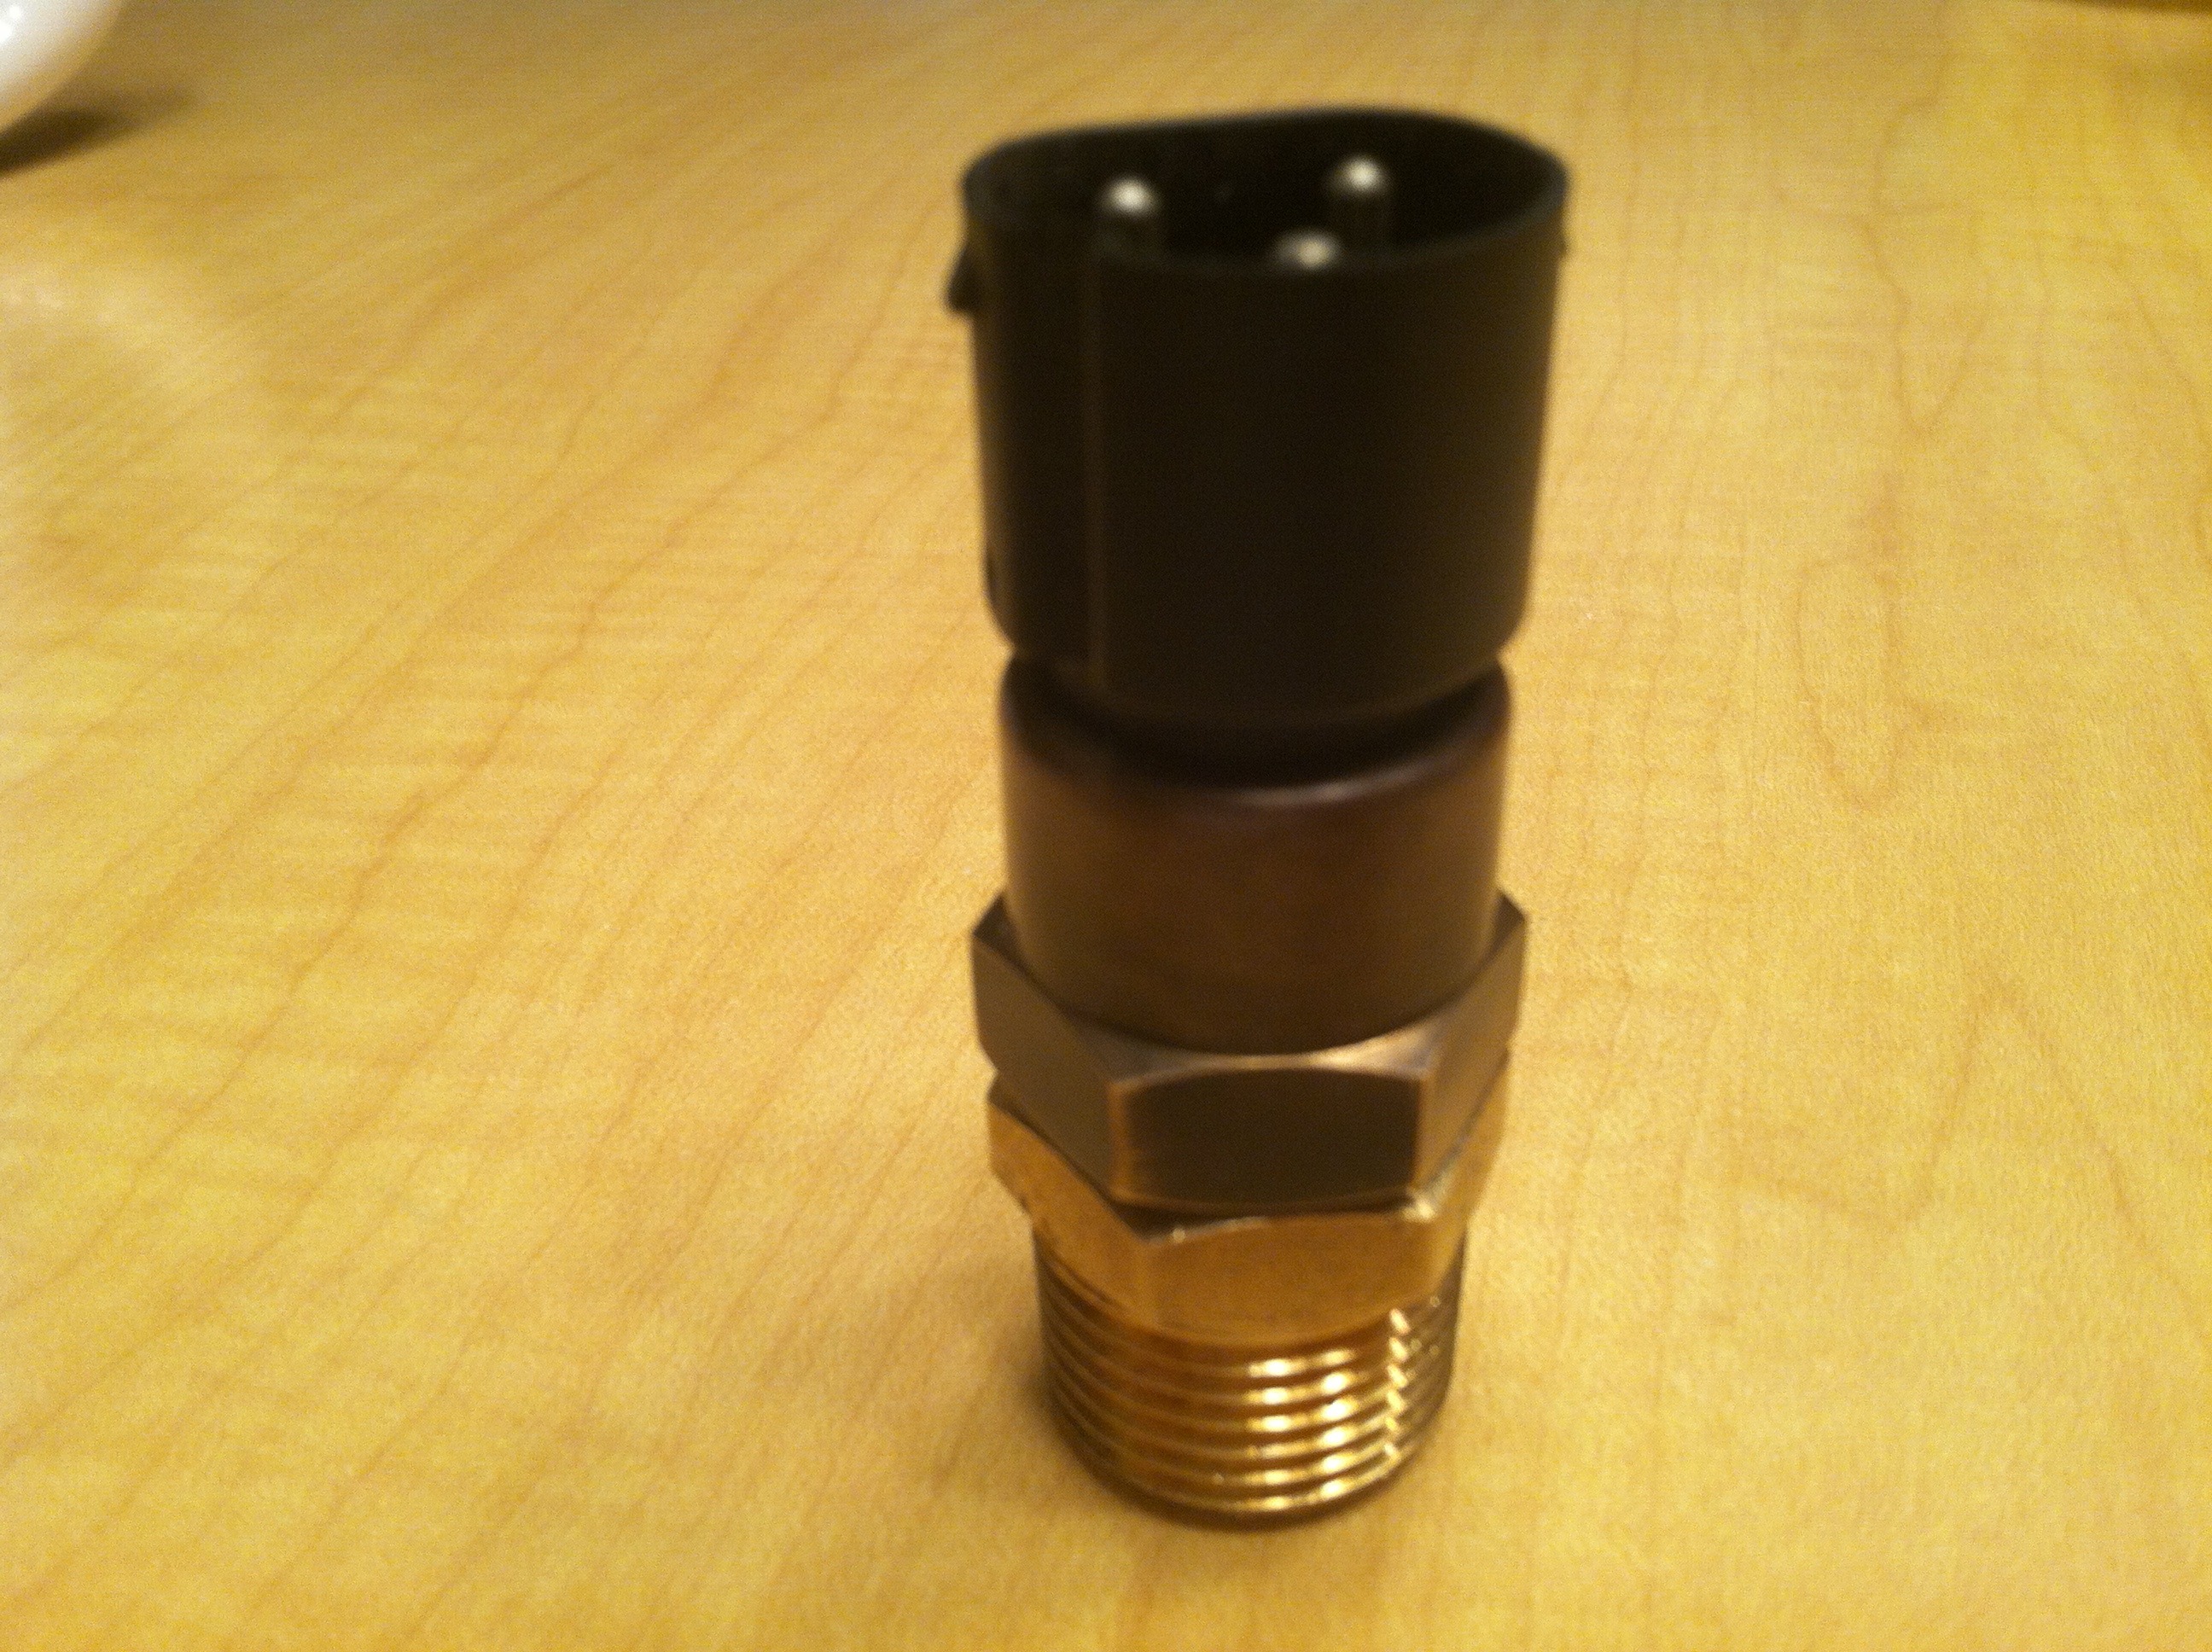
#61318361787--BMW temp switch 180*/195*
#61311378073--BMW temp switch 195*/210*
#61131378412--BMW 90* angle connector
#61130007445--BMW 90* green connector wires 2 required
#61130007446--BMW 90* green/black connector wire for ground
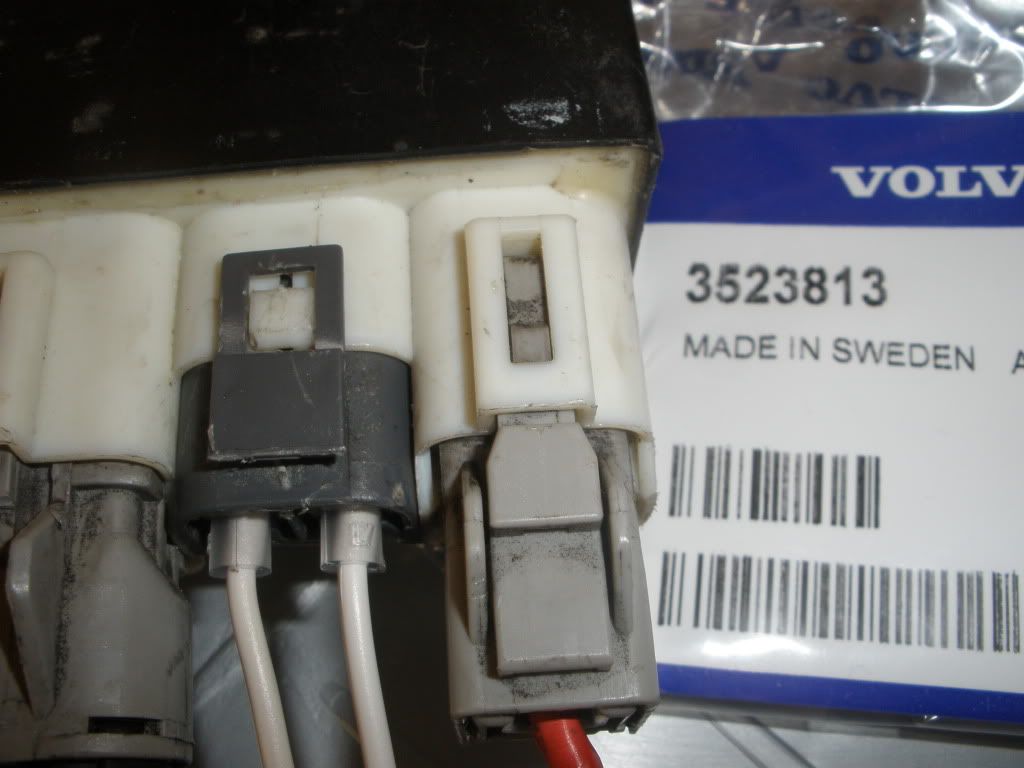
#1398845--------VOLVO dual fan relay, sorry no info on connectors(YET) except for the wires coming out for the temp switch high/low. Mine were completely disintegrated so I ordered 2 new wire assemblies and stuck them in the old connector.
#3523813--------VOLVO white wire assembly for temp switch 2 required.
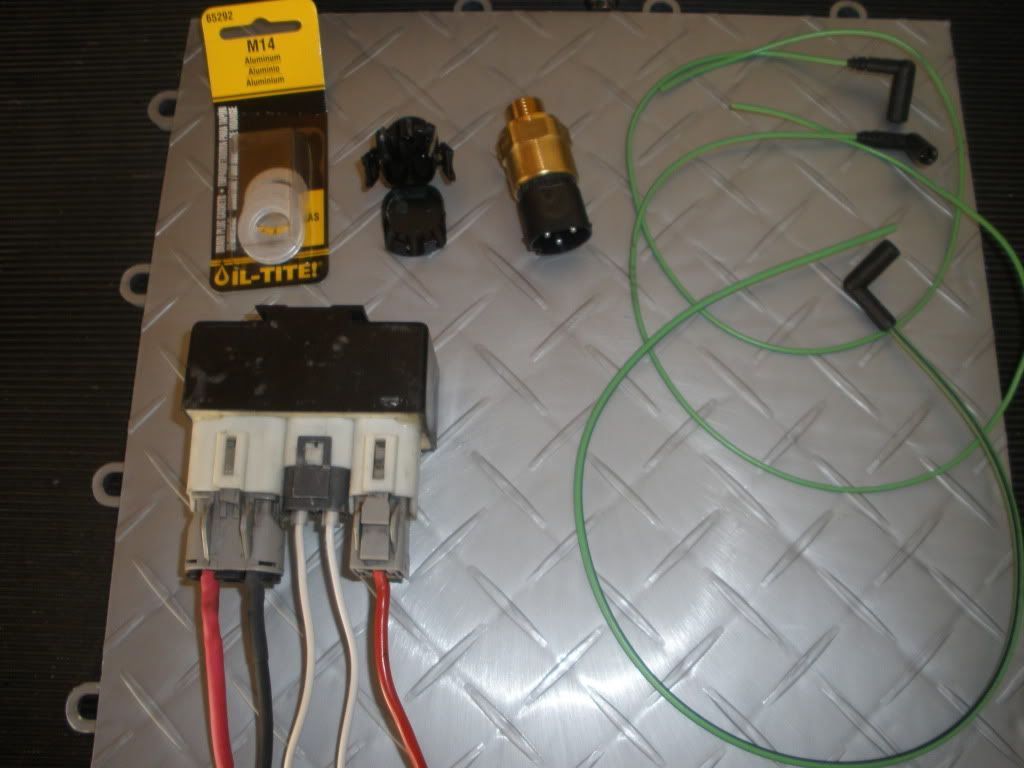

By the way the pack of aluminum washers is for the temp switch itself, my uncle who is a german car mechanic told me it is required to have an aluminum crush washer for leaks ? got it from local parts store for 3 bucks.
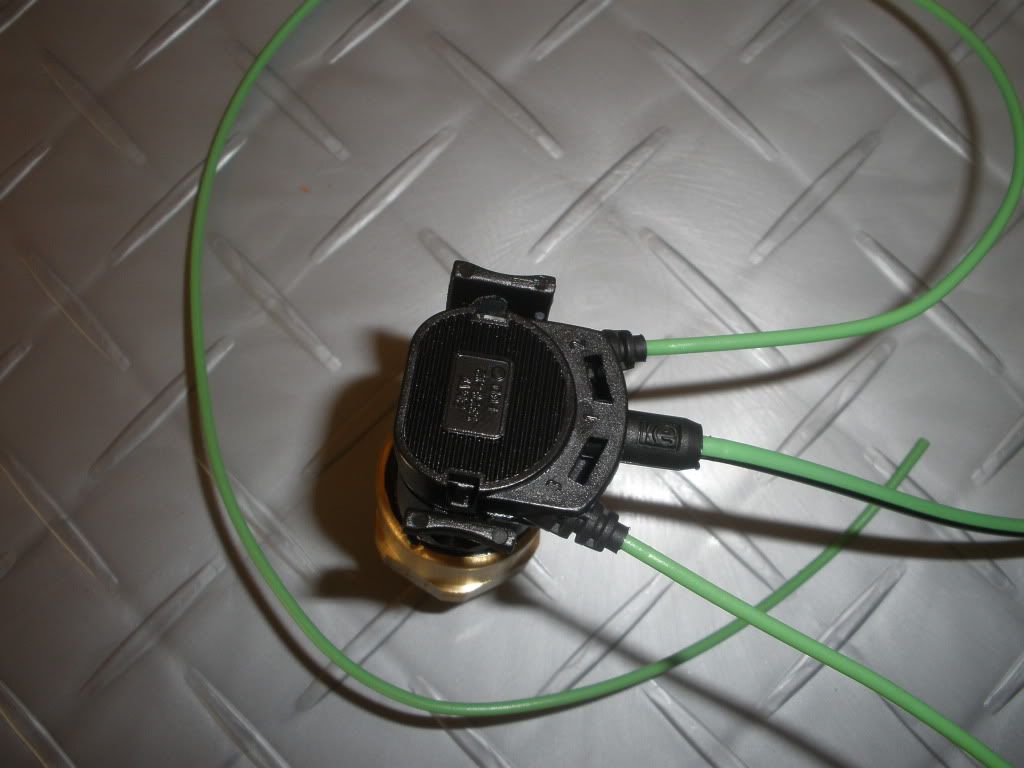
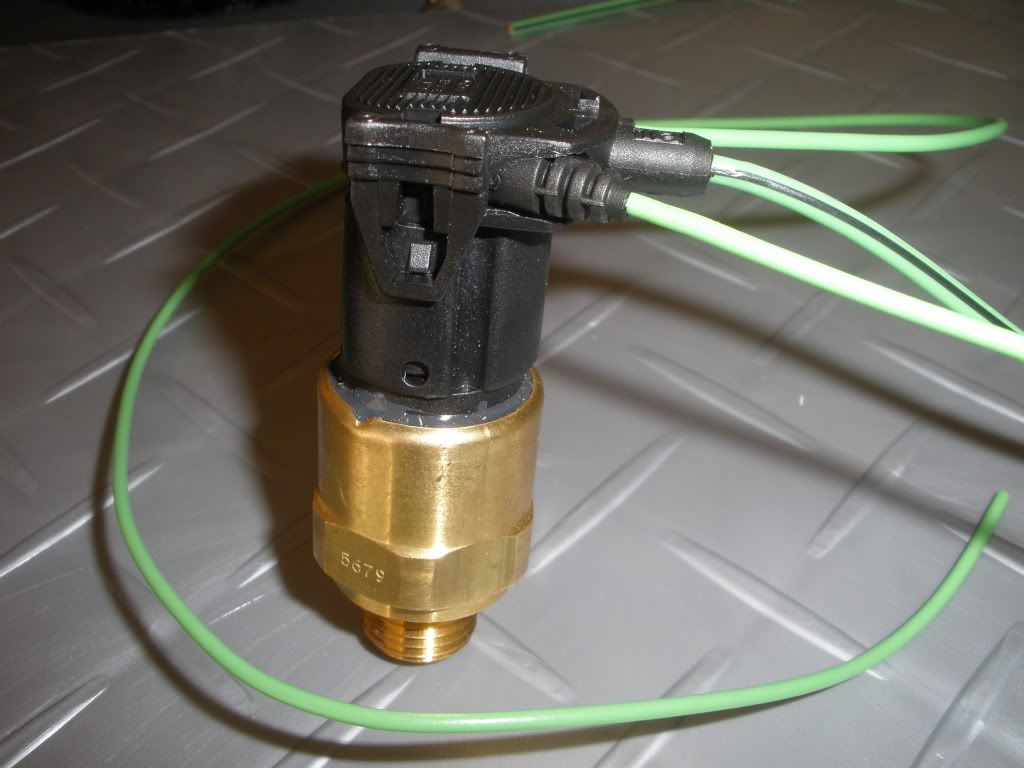
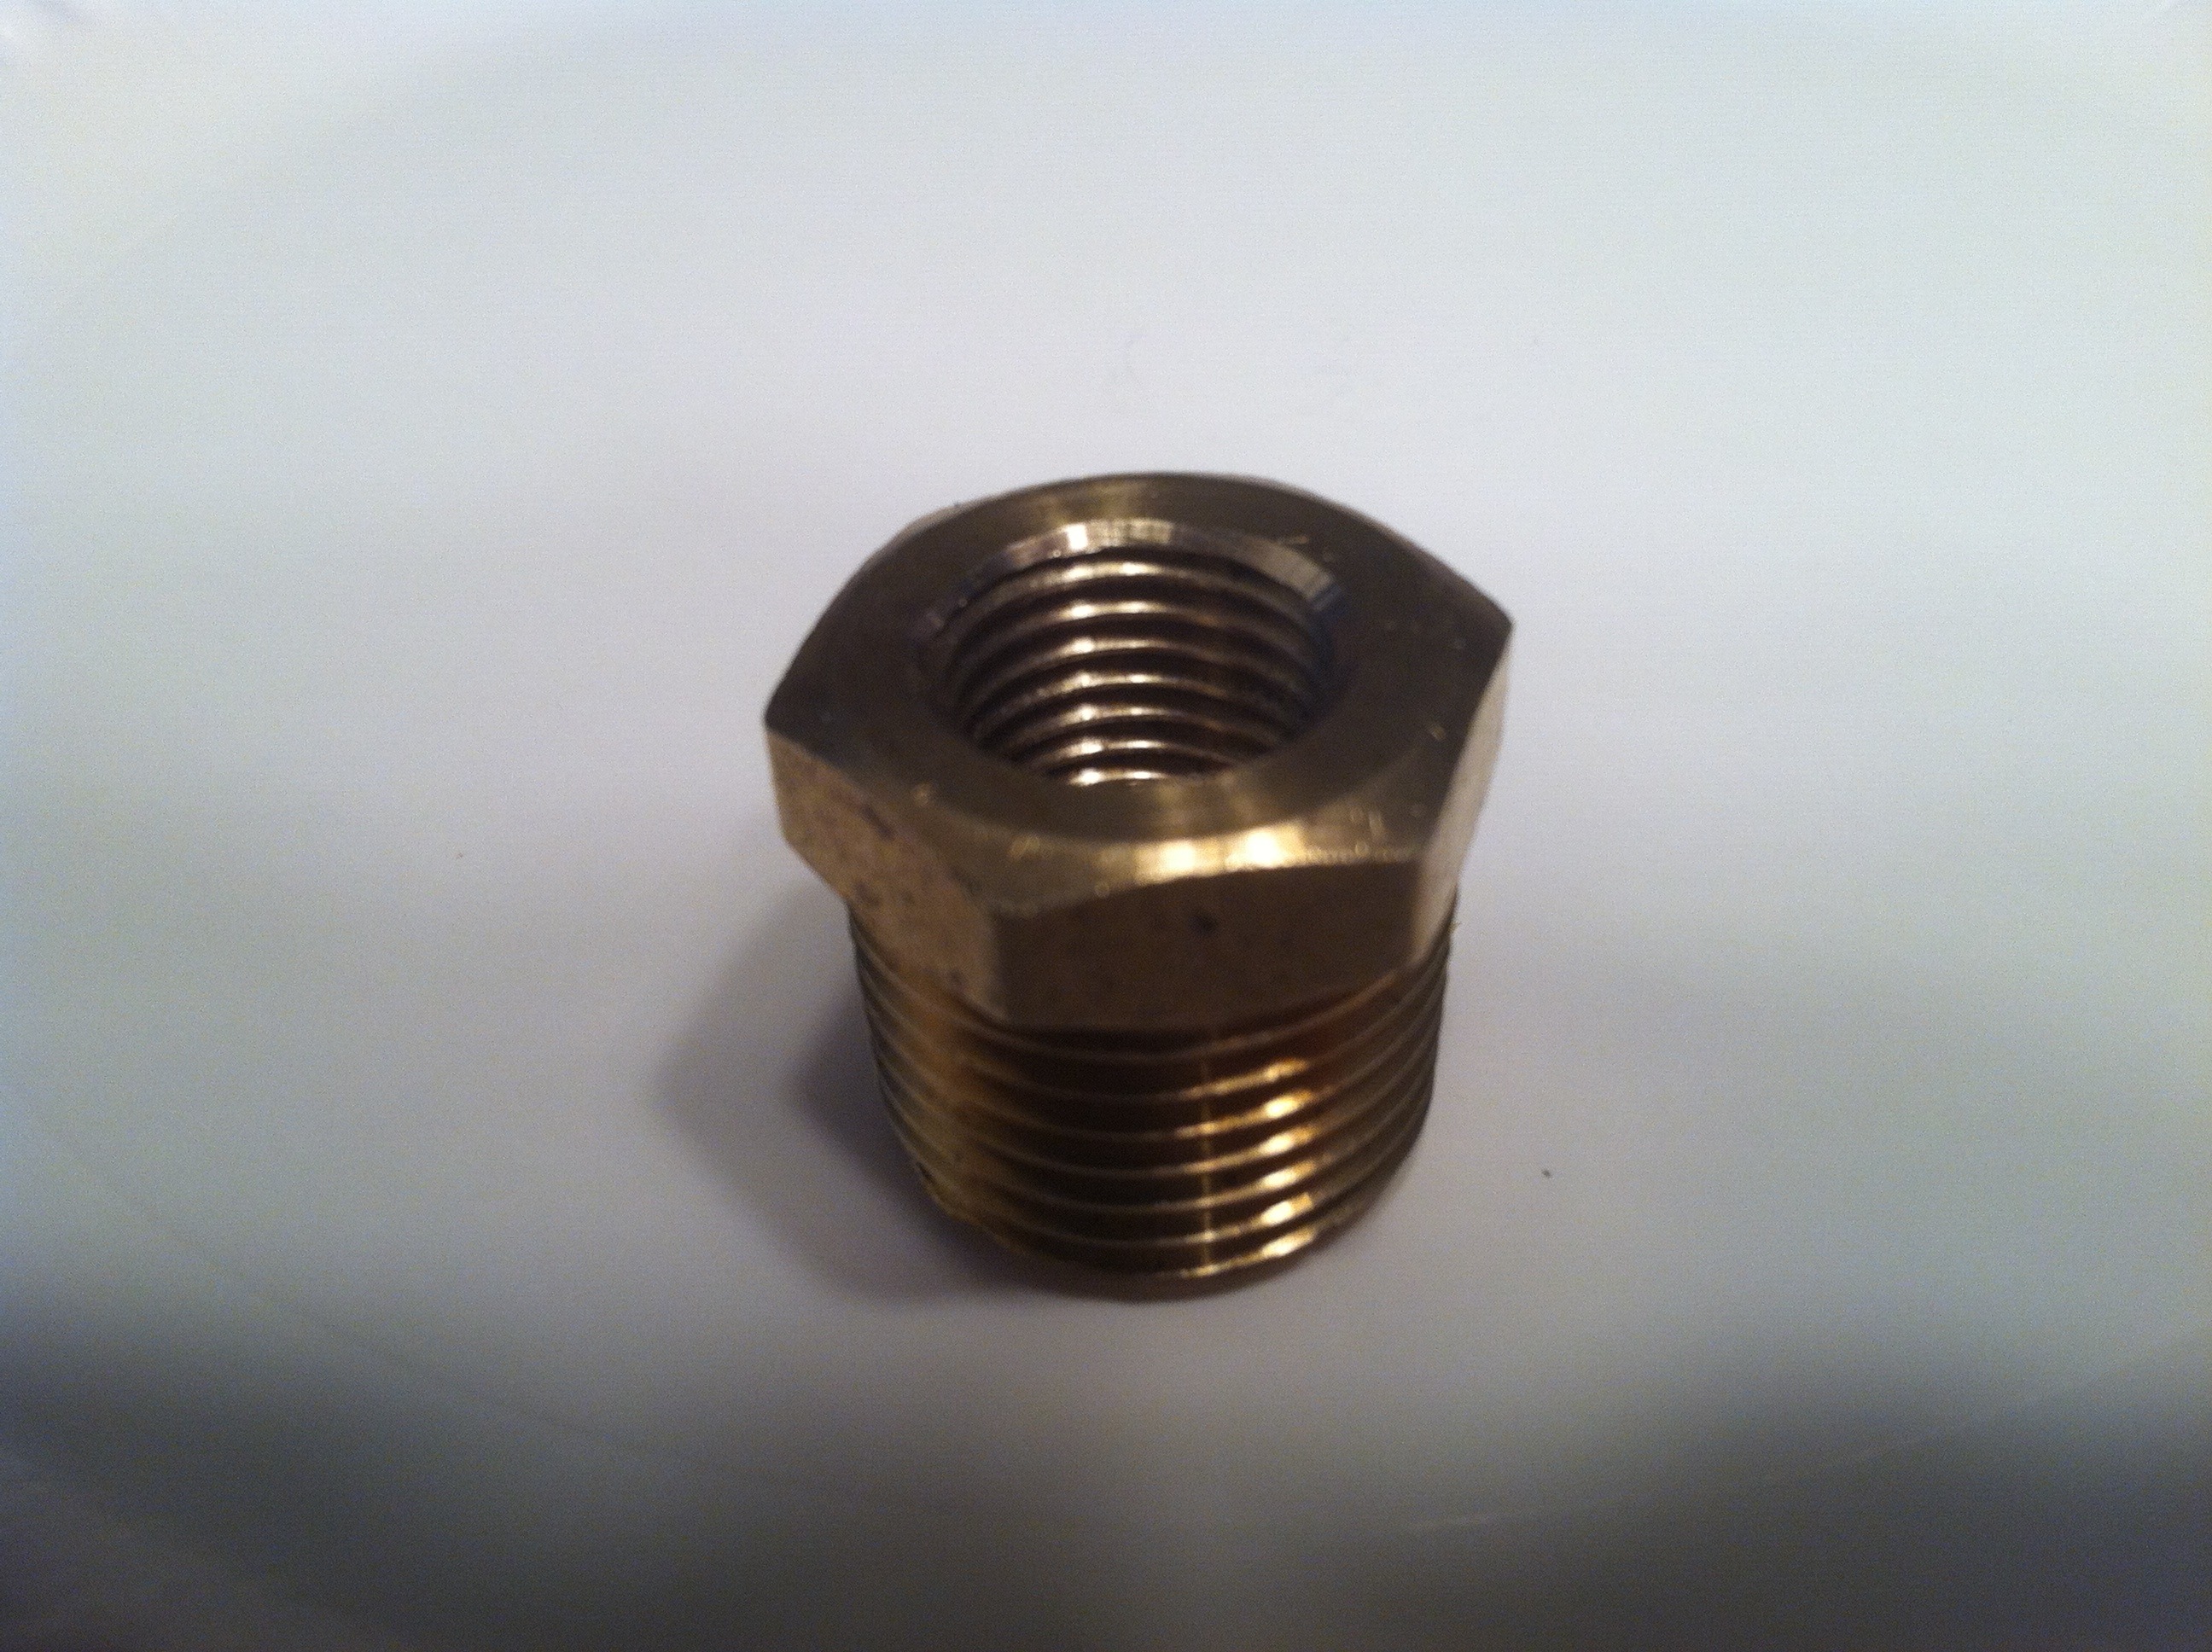
Brass hex head bushing, use for BMW temp sender. All you have to do is tap it with a 14mm x 1.5 tap. This brass fitting is short and no need to drill out just tap it.
Item #: 48938
HEX BUSHING 1/2X1/8"BRS

http://www.acefactorystore.com/prodd...asp?prod=48938
#61318361787--BMW temp switch 180*/195*
#61311378073--BMW temp switch 195*/210*
#61131378412--BMW 90* angle connector
#61130007445--BMW 90* green connector wires 2 required
#61130007446--BMW 90* green/black connector wire for ground
#1398845--------VOLVO dual fan relay, sorry no info on connectors(YET) except for the wires coming out for the temp switch high/low. Mine were completely disintegrated so I ordered 2 new wire assemblies and stuck them in the old connector.
#3523813--------VOLVO white wire assembly for temp switch 2 required.
By the way the pack of aluminum washers is for the temp switch itself, my uncle who is a german car mechanic told me it is required to have an aluminum crush washer for leaks ? got it from local parts store for 3 bucks.
Brass hex head bushing, use for BMW temp sender. All you have to do is tap it with a 14mm x 1.5 tap. This brass fitting is short and no need to drill out just tap it.
Item #: 48938
HEX BUSHING 1/2X1/8"BRS
http://www.acefactorystore.com/prodd...asp?prod=48938
Originally Posted by clay's70
Recap of my set up:
Stock radiator (new)
2 gals antifreeze + 2 gals water
Water Wetter
160* thermostat
BMW 195*/210* temp switch
Volvo Relay
2 speed Taurus fan
140 amp alternator
Finally fired up the motor. After timing I let it idle at 1500 rpm for 30 min. The thermostat opened at 160*, the fan kicked in at 195* the temp actually dropped and the fan cut off!! It cycled several times this way. Temp never went over 200*. High speed never cut on. This was in my garage 50*+ day. The alt. kept steady and the lights did not dim.
Originally Posted by clay's70
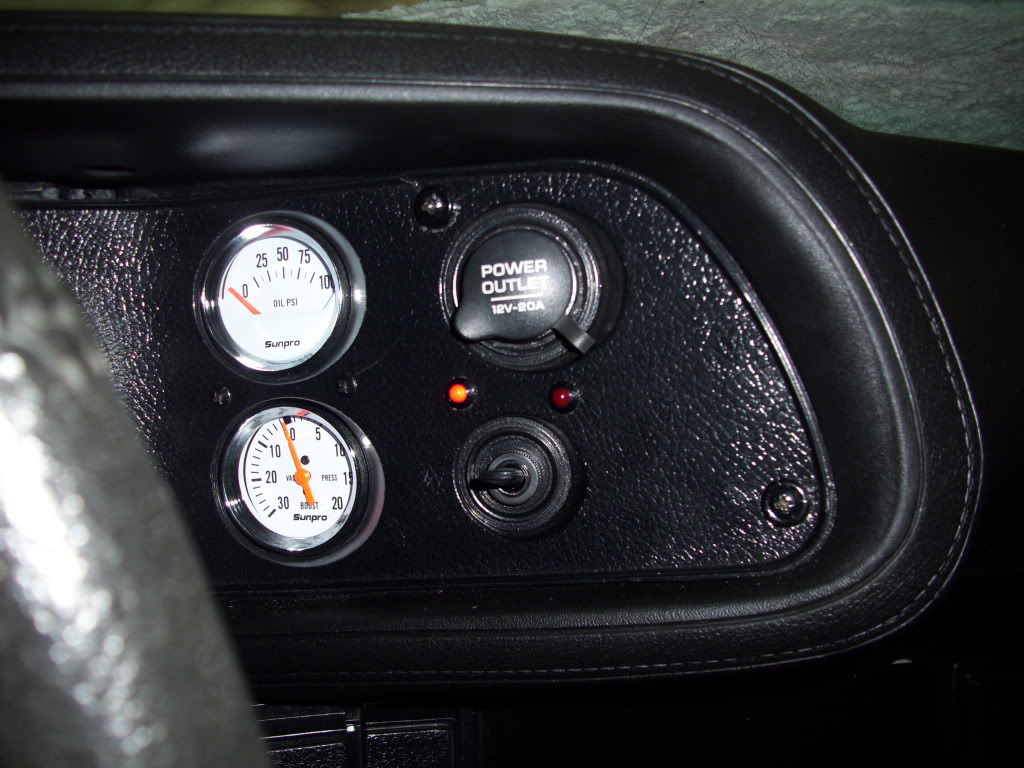
Using Ace's diagram I wired up the power outlet, cooling fan manual switch and the LEDs.
Low speed on
High speed on :crazy:
Low speed on
High speed on :crazy:
Originally Posted by clay's70
I found the bracket on a S10 firewall, I'm sure other Chevy's use the same bracket. I cut off one of the brackets.
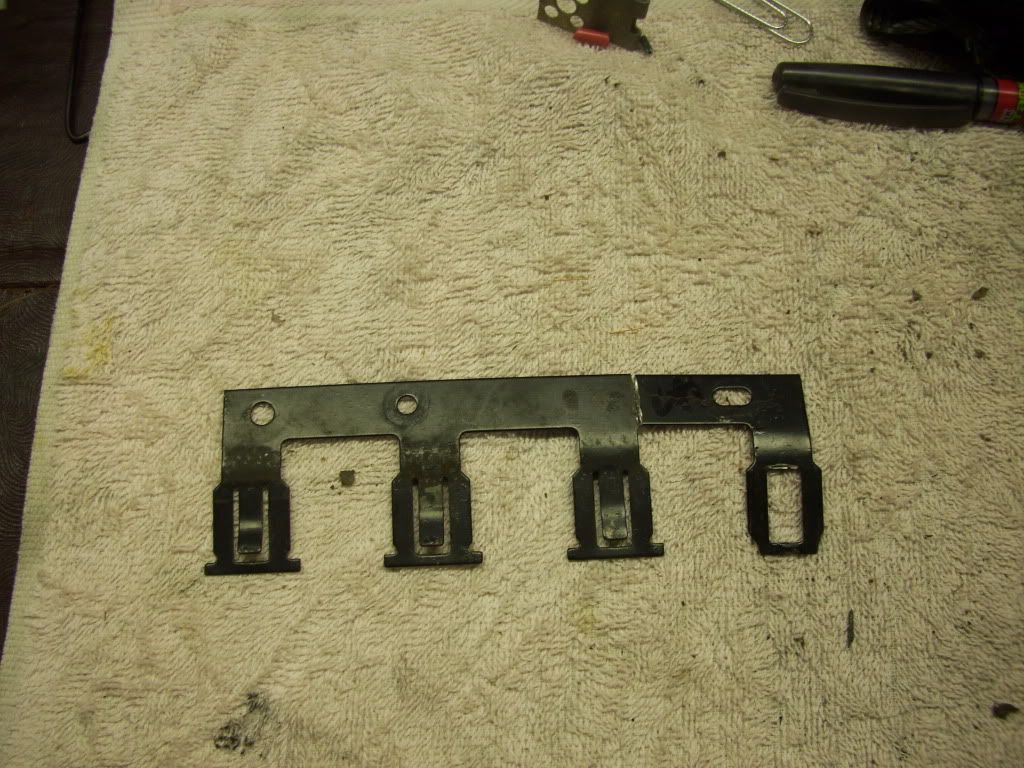
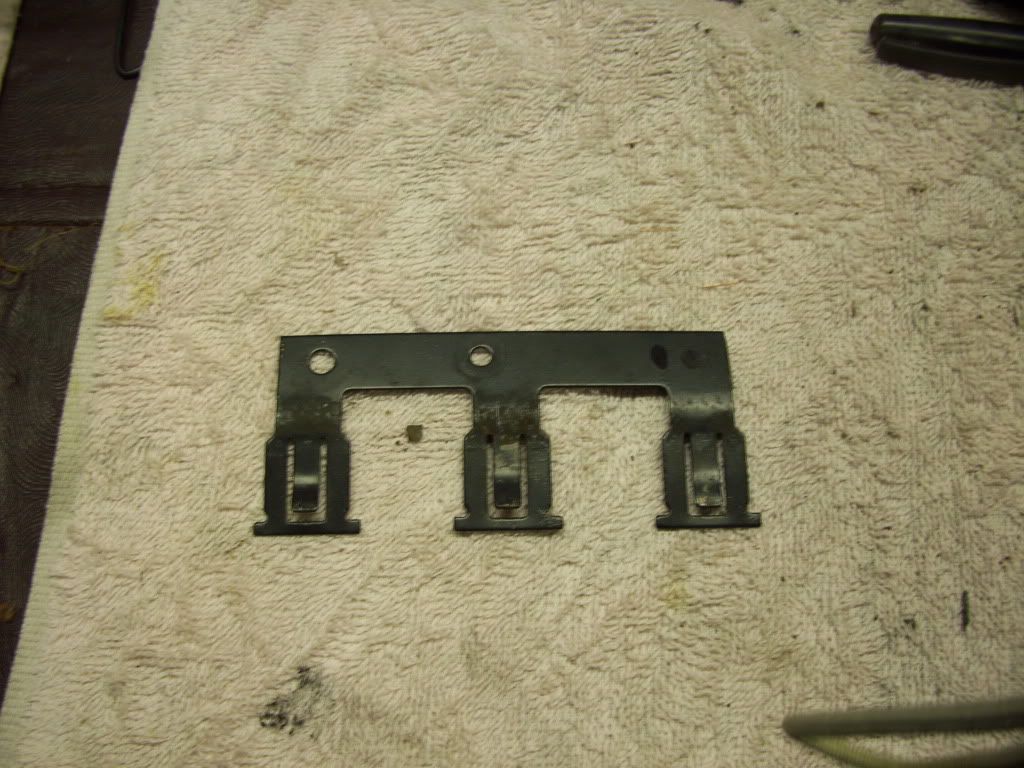
I cut with the Dremel the lock tabs and the ears off of two brackets.
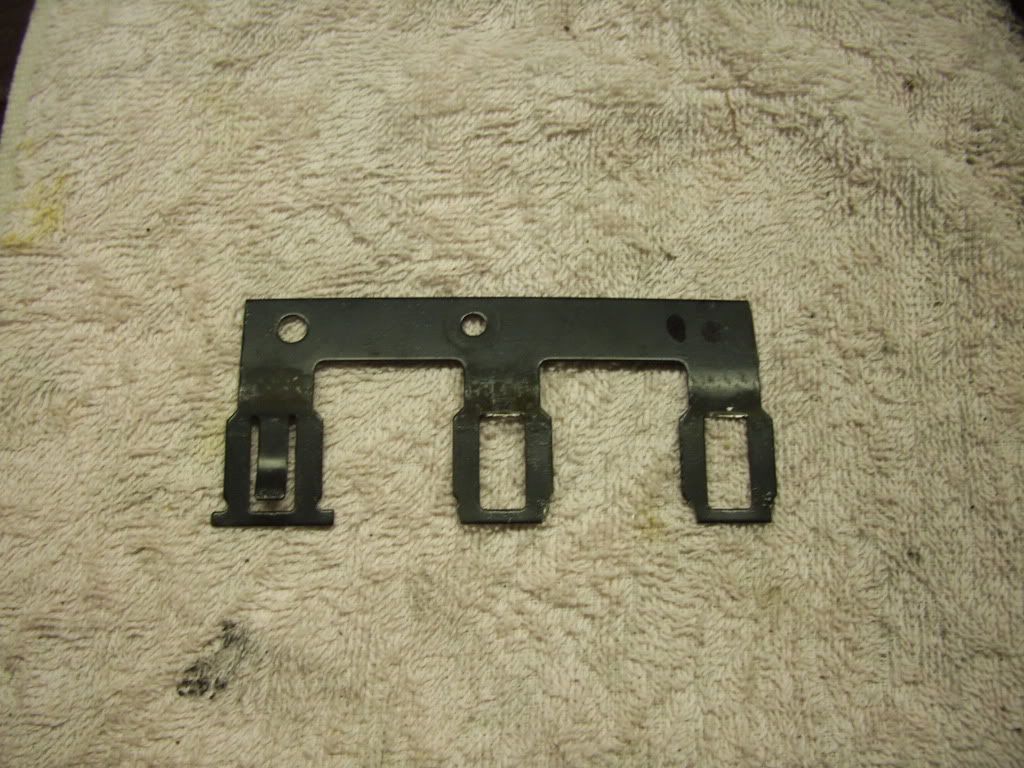
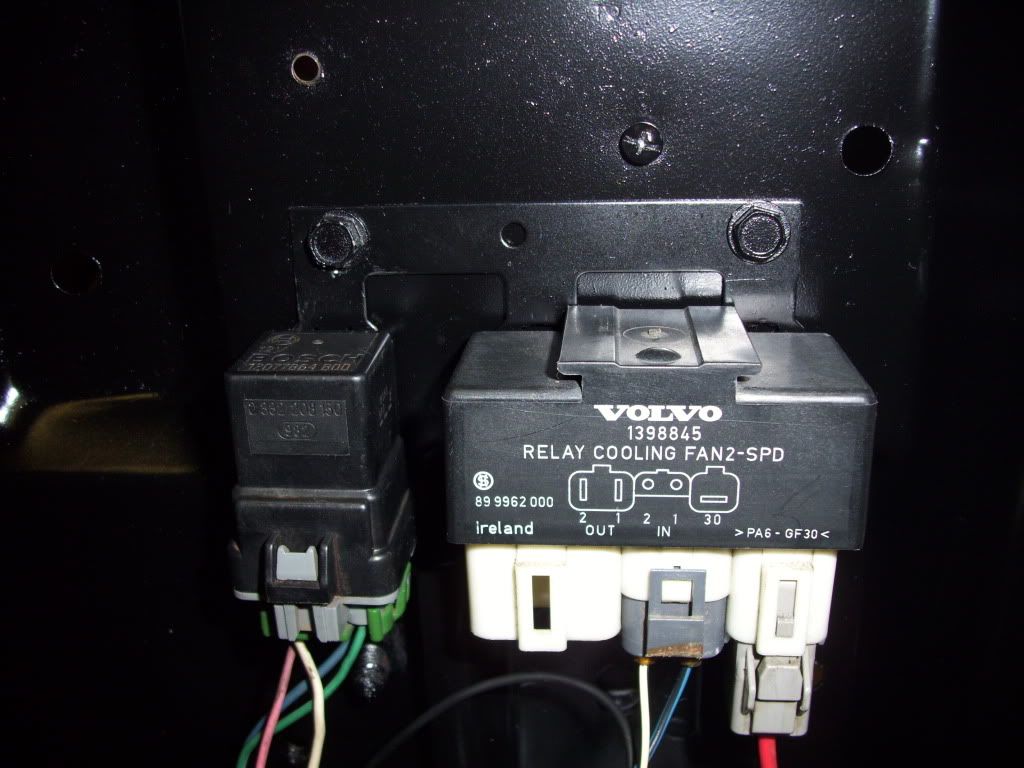
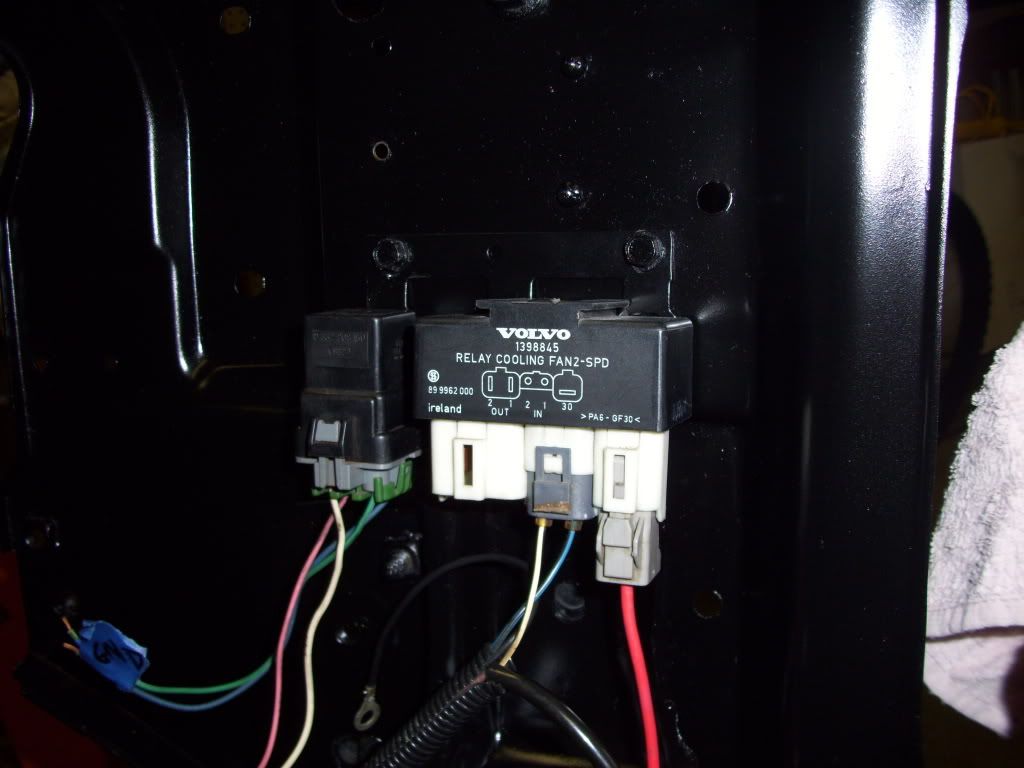
The brackets line up with the Volvo relay perfectly!! And lock on. You have another mount for the relay to switch the negative lead from the temp. sender.
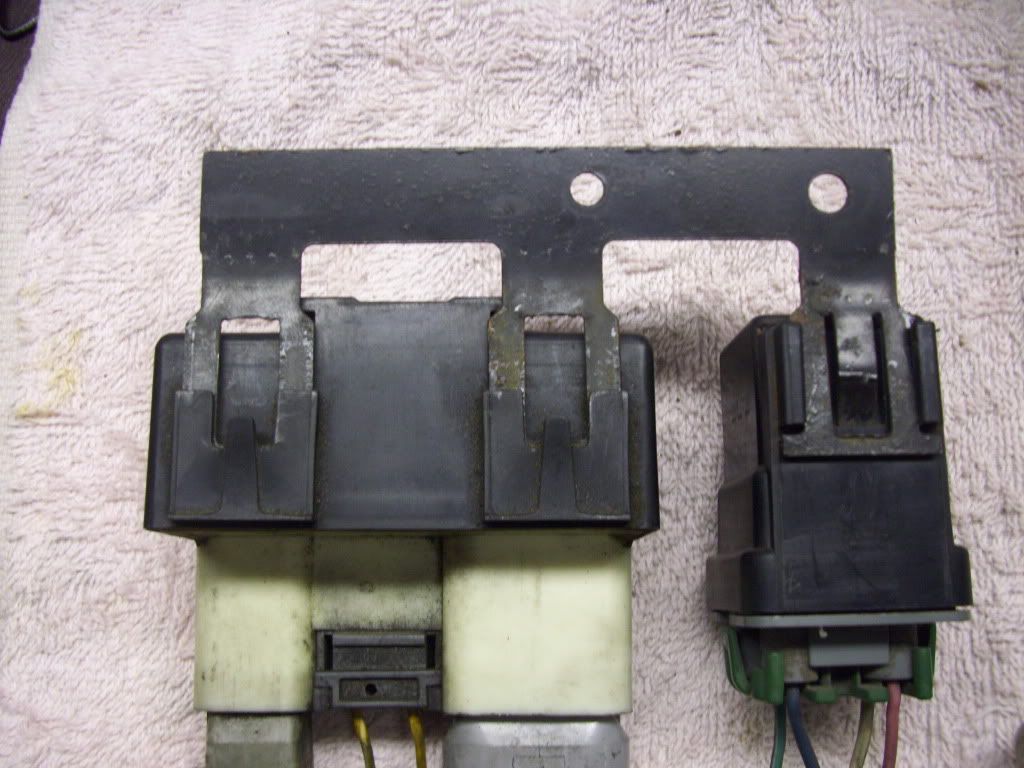
Front view.
I drilled another hole in the right side. and painted it.
Here it's mounted up
I cut with the Dremel the lock tabs and the ears off of two brackets.
The brackets line up with the Volvo relay perfectly!! And lock on. You have another mount for the relay to switch the negative lead from the temp. sender.
Front view.
I drilled another hole in the right side. and painted it.
Here it's mounted up
Originally Posted by Aceshigh
Be sure and check your T1 and T2 wires which should be LOW and HIGH settings are wired to the Volvo relay.
Then be sure the 3rd wire from the Temp Switch is grounded properly.
Then be sure the 3rd wire from the Temp Switch is grounded properly.

http://www.ebay.com/itm/Volvo-2-Spee...-/321848927764
LEDs low speed

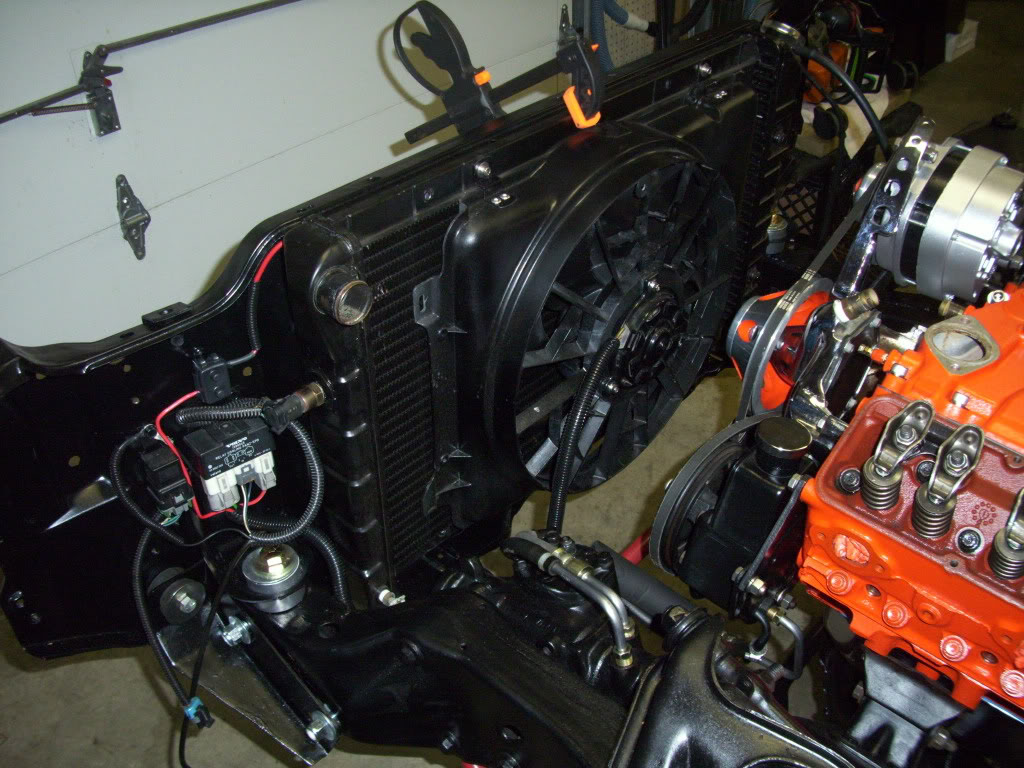
High speed

complete setup mounted without fenders

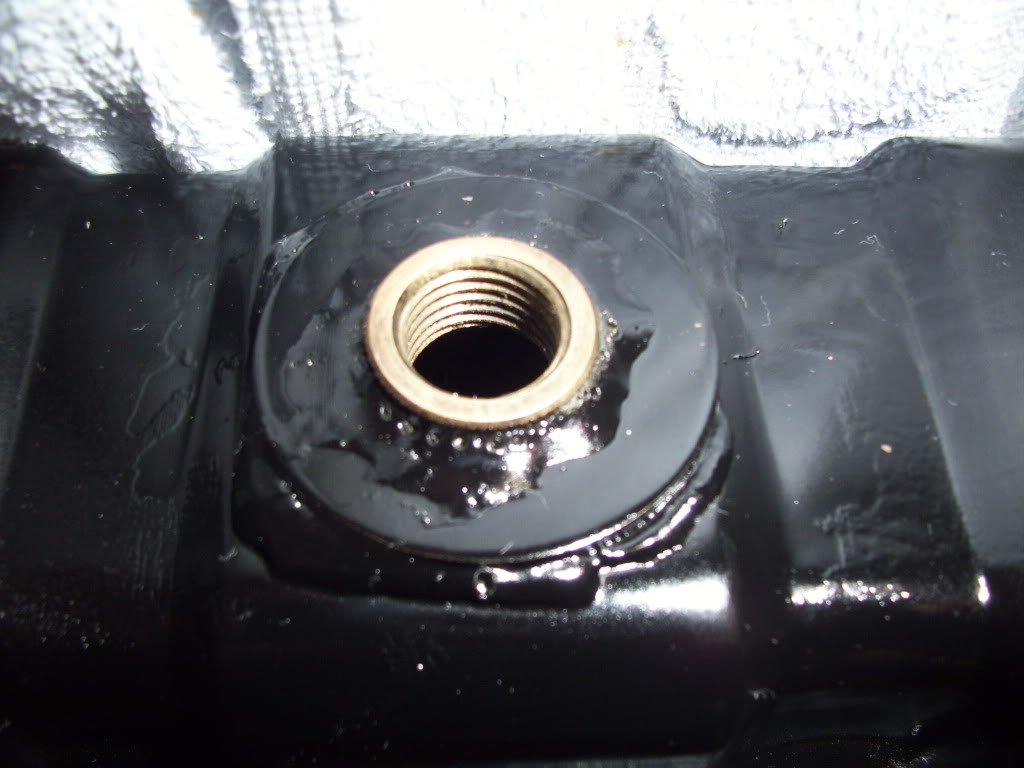
close up of completed relay mounted
bung in rad


 01-24-2016, 05:50 AM
#4
Junior Member
Thread Starter
Join Date: Jan 2012
Location: N. Chesterfield, VA
Posts: 38
Likes: 0
Received 0 Likes
on
0 Posts
Year: 2000
Model: Grand Cherokee
Engine: 4.0 inline 6
Bushing for the BMW temp switch. 1/2 MIP x 14MM female.
https://www.ebay.com.au/itm/BMW-Temp...75.c100623.m-1


https://www.ebay.com.au/itm/BMW-Temp...75.c100623.m-1
Last edited by DoubleAughtGC; 04-08-2018 at 04:58 AM.


Trending Topics
02-04-2019, 07:55 PM
#8
Newbie

Join Date: Feb 2019
Posts: 2
Likes: 0
Received 0 Likes
on
0 Posts
Model: Cherokee (XJ)
Bushing for the BMW temp switch. 1/2 MIP x 14MM female.
Attachment 310711
Attachment 310712
https://www.ebay.com.au/itm/BMW-Temp...75.c100623.m-1
Attachment 310711
Attachment 310712
https://www.ebay.com.au/itm/BMW-Temp...75.c100623.m-1
anyone think i could do this with a dual fan setup? Usinng all the same psrt numbers and methods of wiring, except using a dual fan (one fan wired to low, and one fan wired to high)? Im not sure how the valvo relay works exactly. Im guessing one lead goes HOT at a temp and then at another lead goes hot at another temp based on the temp sender gauge leads.
02-12-2019, 08:04 PM
#9
Member
Join Date: May 2018
Location: Arizona
Posts: 100
Likes: 0
Received 13 Likes
on
9 Posts
Year: 87
Model: Cherokee (XJ)
Engine: 4.0
Might be an old thread, but nobody ever noticed the wire diagram in the OP is wrong. 86 and 30 should be swapped.
I put dual Taurus fans on my DMAX. Works great. I just used two cheap "push in" type adjustable thermo switches, and 5 Bosch style relays. Don't forget to integrate the compressor clutch wire (and a diode) so the fan comes on with the A/C..
I put dual Taurus fans on my DMAX. Works great. I just used two cheap "push in" type adjustable thermo switches, and 5 Bosch style relays. Don't forget to integrate the compressor clutch wire (and a diode) so the fan comes on with the A/C..
05-13-2019, 03:09 PM
#10
Newbie

Join Date: Nov 2018
Posts: 4
Likes: 0
Received 0 Likes
on
0 Posts
Model: Cherokee (XJ)
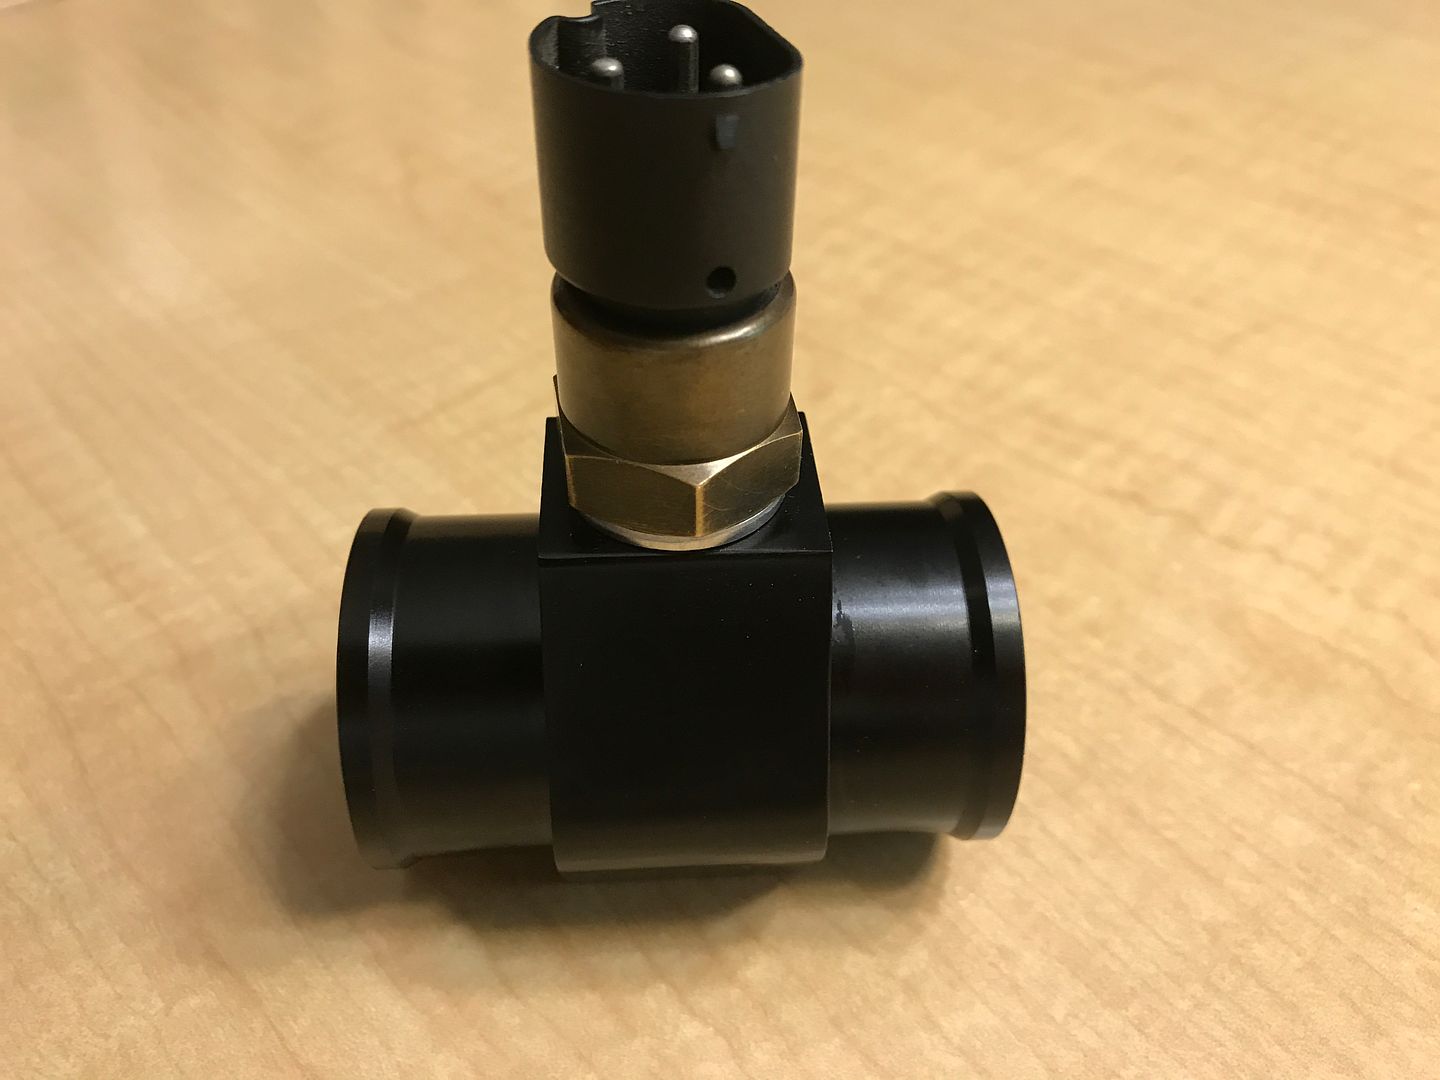
Another way of mounting the relay and temp switch.
Attachment 312411
Attachment 312411
Where do you find the single stand alone relay? Already have the controller.
09-02-2019, 09:35 AM
#11
Junior Member
Thread Starter
Join Date: Jan 2012
Location: N. Chesterfield, VA
Posts: 38
Likes: 0
Received 0 Likes
on
0 Posts
Year: 2000
Model: Grand Cherokee
Engine: 4.0 inline 6
I made some of these to see if there is any interest.
https://www.ebay.com/itm/32390059305...84.m1555.l2649


https://www.ebay.com/itm/32390059305...84.m1555.l2649
12-21-2019, 05:26 AM
#12
Newbie
Join Date: Nov 2018
Posts: 4
Likes: 0
Received 0 Likes
on
0 Posts
Model: Cherokee (XJ)
Hey where where can I find the single relay in the junkyard? Already picked up the Volvo fan controller type. Thanks.
I made some of these to see if there is any interest.
https://www.ebay.com/itm/32390059305...84.m1555.l2649
https://www.ebay.com/itm/32390059305...84.m1555.l2649