Durango Steering Box Upgrade
 09-03-2008, 09:17 PM
#1
Seasoned Member
Thread Starter
Join Date: Apr 2008
Location: Grand Junction, Colorado
Posts: 377
Likes: 0
Received 2 Likes
on
1 Post
Year: 1999
Model: Cherokee
Engine: 4.0L
Okay so this weekend I finally got around to doing my Durango steering box upgrade, with a C-Rok inner box brace. Overall everything went well exept for some reason they put a pitman arm on the new box before shipping. I ended up breaking 4 pitman arm pullers in all, before buying a $40 pitman puller from Napa.
The reason that I am doing this upgrade is #1 my box was worn out and making all sorts of popping noises when I would turn to the right. #2 I plan on running 35-36 inch tall tires and want a little more help with turning them. The box I ordered was from a 99 Durango V8 WITHOUT the snow plow package. From what I have heard some of the boxes are hit and miss as far as having the same turning radius. I see no difference in mine so far, if there is it's minimal.
Tool List
PB Blaster or equivlent. Soak everything for atleast 2-3 days
3/8 rachet
6" and 3" 3/8" extentions
13mm socket
17mm socket
19mm socket
18mm wrench, stubby prefered
32mm socket (I used a 3/4 drive)
Pitman Arm puller
needle nose pliers
regular pliers
a few rags
1 1/2 qts PS fluid
I ordered the steering box from a company called Everdrive. Here is the link to the exact steering box that I ordered http://usedautoparts.everdrive.com/p...px?sku=1693452 Just since I ordered the box 2 weeks ago, the price has already increased by $13 from $154 to $167. The swap is simple so I would suggest jumping on that price as fast as you can.
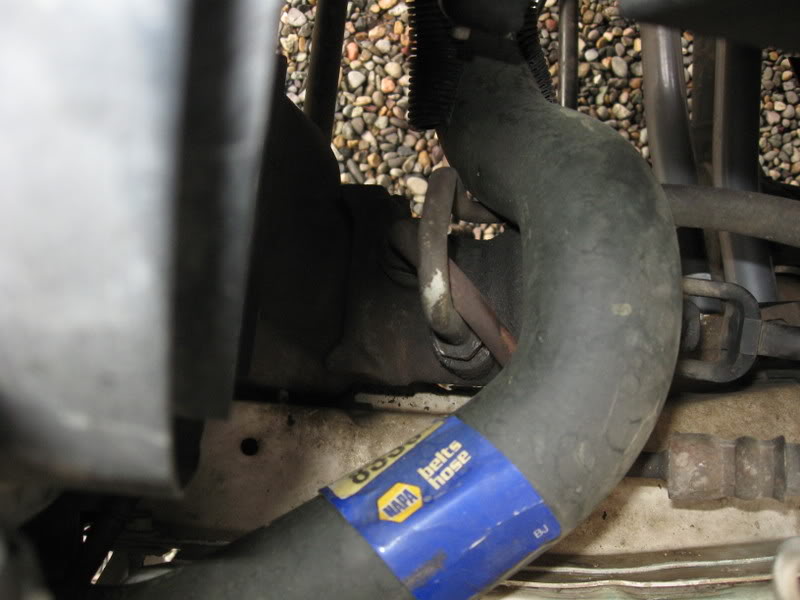
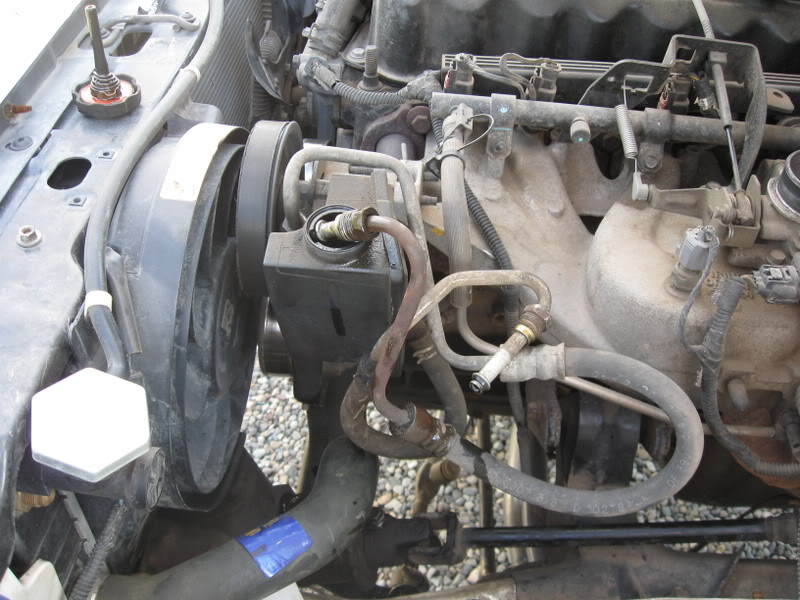
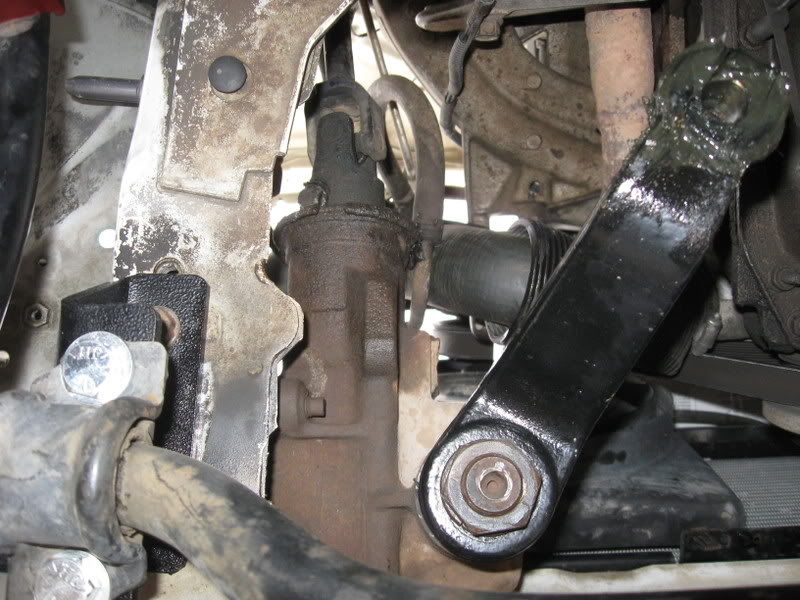
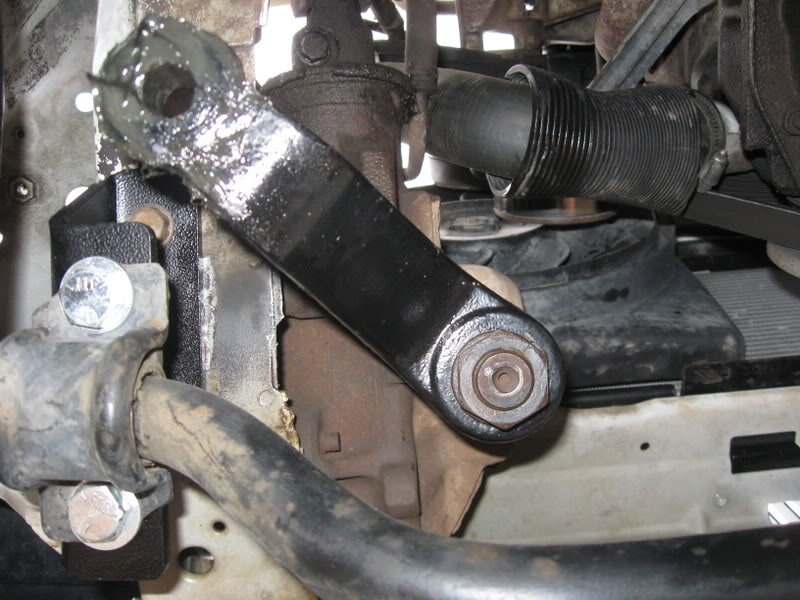
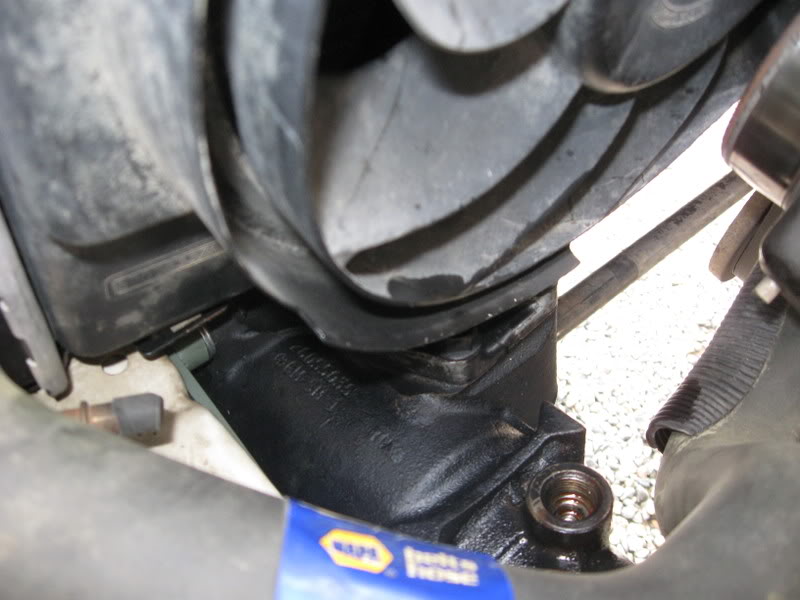
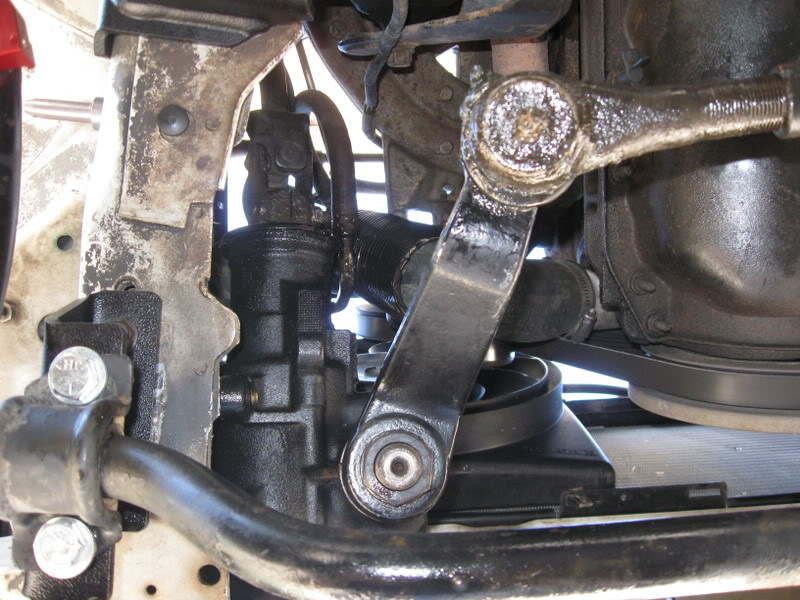
Okay on to the tech. First thing to do is soak everthing that will be coming apart in some sort of pennetrating oil like PB blaster. Do this about a week before the swap. Then place the vehicle on a level surface. Then remove your air filter housing and place it to the side. This will give you access to the Bolt that holds the steering shaft to the Box (13mm socket) and to the power steering lines (18mm wrench). Next thing I would do is disconnect the drag link from the pitman arm. So right now you should be at this point.
Power steering lines
Steering shaft bolt
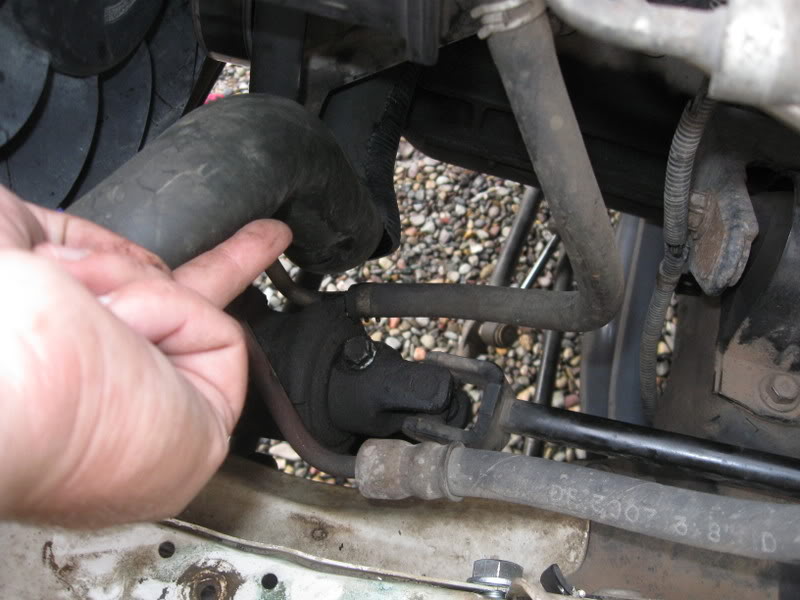
And the drag link seperated
Okay from there you need to disconnect the PS lines starting with the top one first. Then remove the lower one which is the high pressure line. I hung a small bucket off of the pitman arm to catch some of the PS fluid that leaks out of the 2 lines. After that I bent them up and kind of hung them by the PS reservoir.
Before pulling my pitman arm, I went ahead and took some pictures of the old gearbox being turned full lock both ways for reference to the new box.
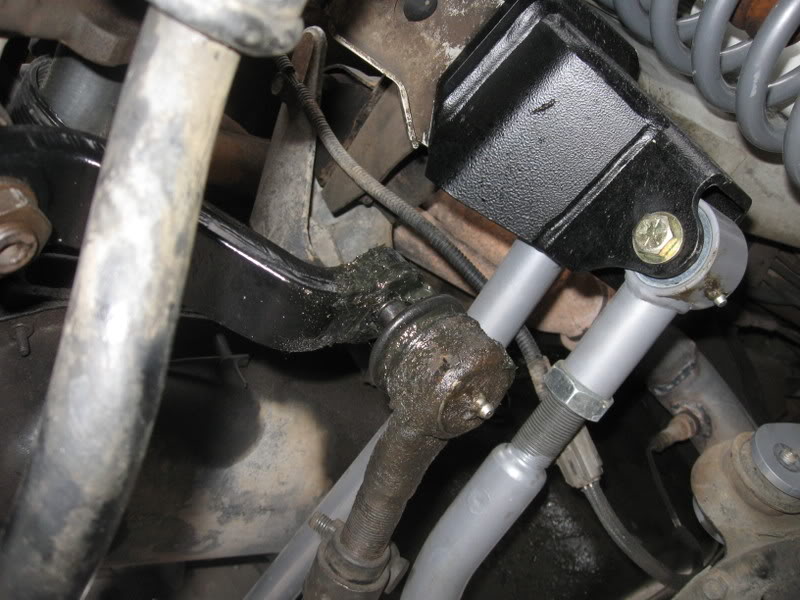
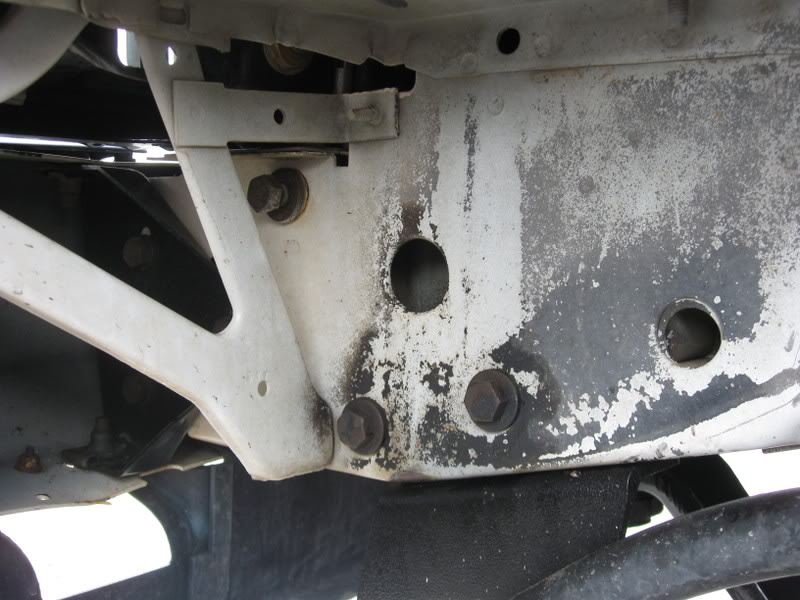
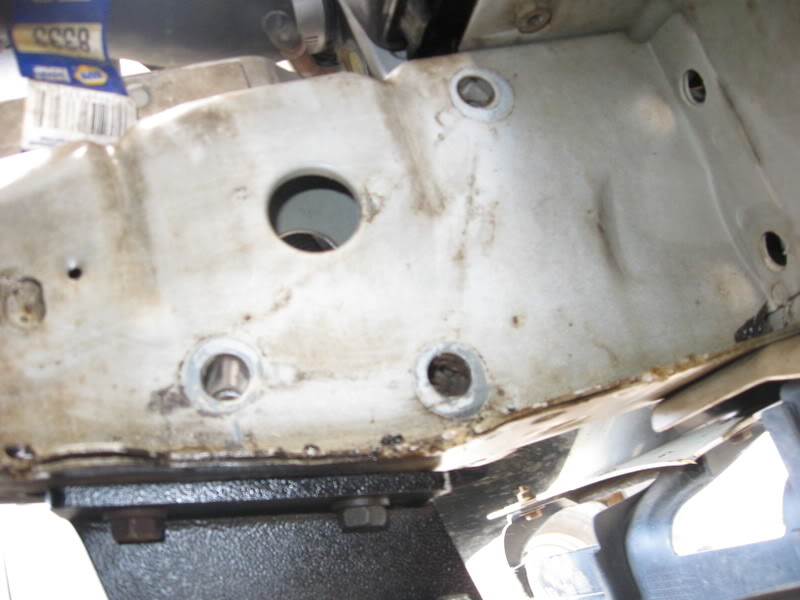
Next job is to remove the 32mm nut that holds on the pitman arm to the gearbox. Then with your trusty pitman arm puller, remove the pitman arm. I did this a couple of months ago when I installed my RE 5.5" LA so removal was a snap. If your new box comes with a pitman arm already, go ahead and soak that in PB Blaster also. Then you are going to remove the 3, 7/16" bolts that hold the steering box to the frame. I had a hard time getting the steering box to seperate from the steering shaft but made quick work of it with a large flat head screw driver.
Outside frame bolts
Inside frame after removal
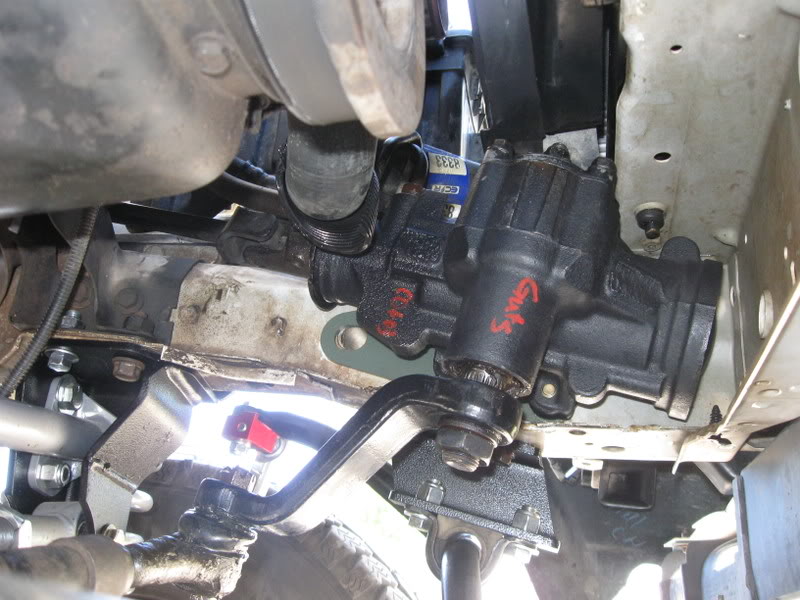
Okay now that the old gearbox is out how about a quck comparison to the new Durango box
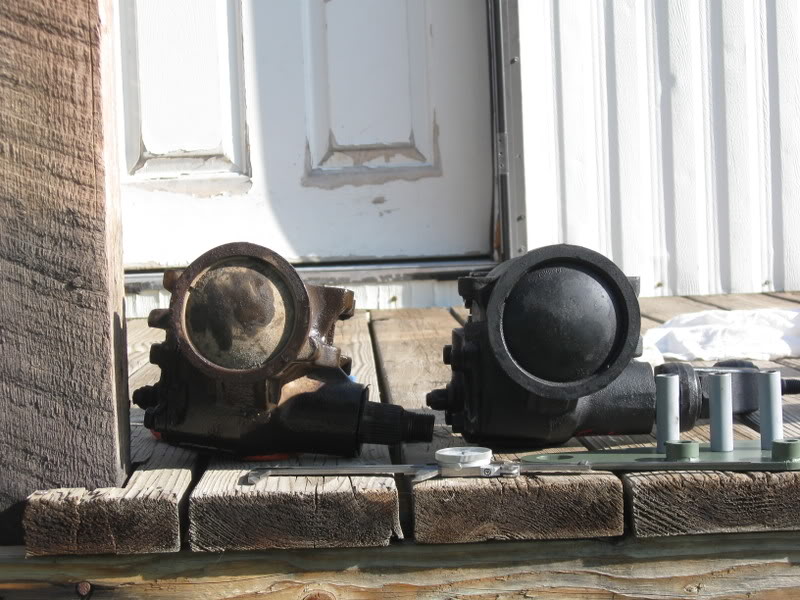
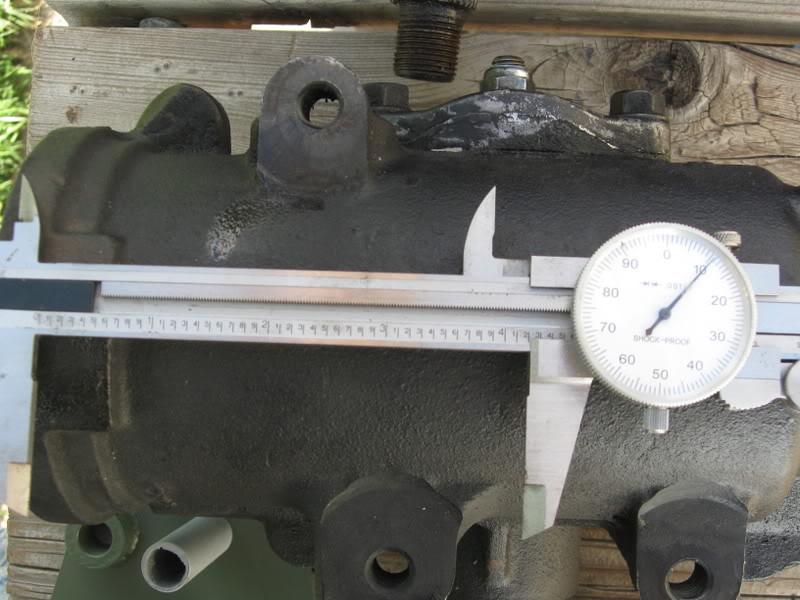
If you look at them good enough you can see that the new Durango box is definately more beefy. I weighed the old one on my bathroom scale and it was just over 20lbs. The packaging that the Durango gearbox came in said that it was only 15lbs so they are somewhere around there. As for actual size specs, I did measure the outside of the piston casing on both gearboxes. The old box measured in at 3.787" which is just a hair over the 3.75" that everyone says. The Durango box measured at 4.211" which is just under 4.25" so there is almost a .50 difference in the size of the cases.
The pictures are for reference to the box that the measurement was taken off of. I measured the round end of the casing and then layed the dial calipers on top.
Stock

Durango
You will want to inspect your frame for any cracks and take care of those first off. As you can see my frame is in fine shape. Before anymore steps can be taken you will need to paint your new C-Rock brace because it comes as raw steel. If you decide to reuse yours (I wouldn't) then skip this part. I first scuffed with some 220 grit paper and then primed, next I hit it again with the 220 grit and a couple of coats of paint. I had some left over from my wheels so that is what I used.
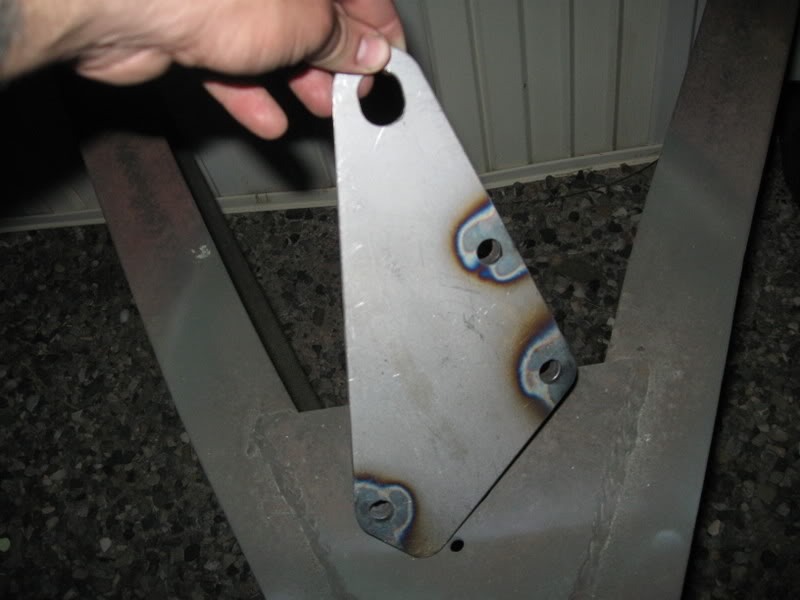
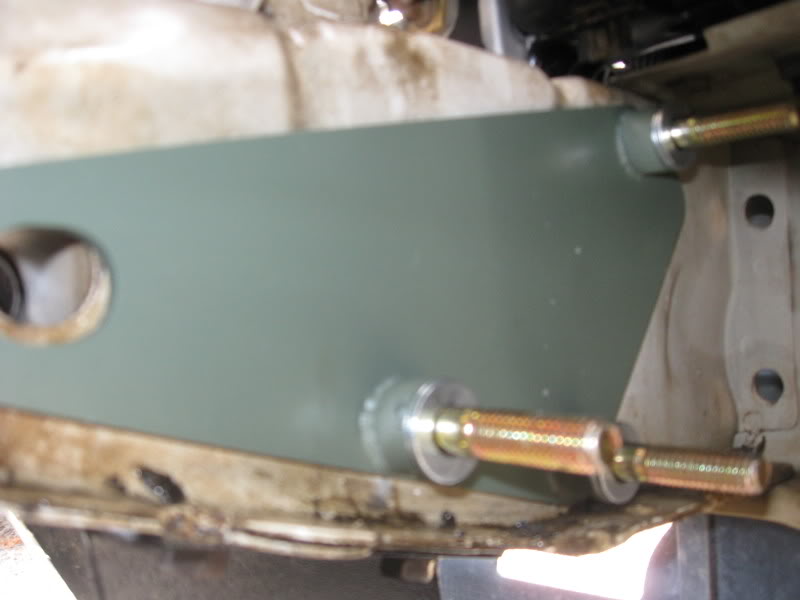
Okay so now that your new brace is all painted and ready to go, grab your new bolts. I bought 3 new 4" long 7/16" grade 8 bolts and 6 washers for extra spacers from Ace hardware. Double check to make sure there are no visible cracks again and then put the bolts in the frame holes. Then put your brace over them on the inside. After that is done add your washers 2 per bolt is what seems to be recommended. Also the C-Rok kit comes with some frame sleeves for the bolt holes. They require widening out the hole and then being tapped in. I didn't have a dremmel or anything else that would work so I left them out for now. I will be installing them before I go to bigger tires.
So right now you should be here.
After getting your brace and and spacer over the bolts you need to muscle the new box up into place on the new bolts. The gearbox its self only weighs 15lbs according to the shipping lable. I did it myself and don't think that it would be benificial to have someone to help becuase you have to line up the bolts to the box and really should be using both of your own hands to do this. If someone else helps you they will be blind to everything that is going on unless they lay under there with you.
Okay so after getting all 3 bolts started go ahead and run all 3 of them down untill they are tight. Don't forget to locktite them. I just put the locktite on the hole threads because I had already started the bolts. So now you are here

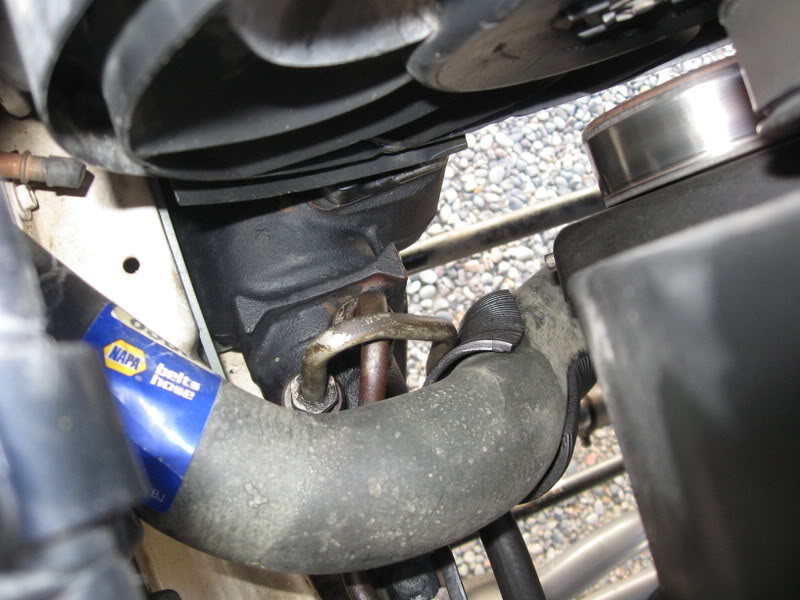
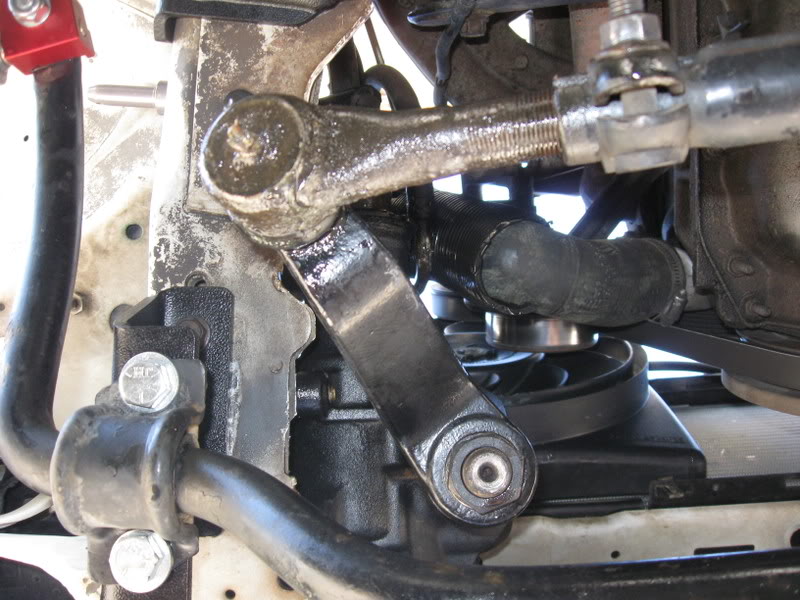
Next thing to do is to remove the pitman arm from the durango box. I waited to do this step while the gearbox was installed, for sability while I was using the pitman arm puller. After you get that off then you can put on your old pitman arm. The arms are not interchageable because the durango uses a pitman arm with the rod end built into the arm instead of on the drag link. Next step is to hook up your lines and your steering shaft. Don't hook up the drag link just yet. You need to be able to turn the wheel back and forth to refill your reservoir and new gearbox. Just add your new PS fluid and turn the wheel back and forth. Let it sit for a minute then do it again. Now you can go ahead and start the jeep and get ready to fill it up again right away. My system took Just over 1qt of new fluid to fill, but I made sure to let the hoses drain out all the way before hooking them back up.
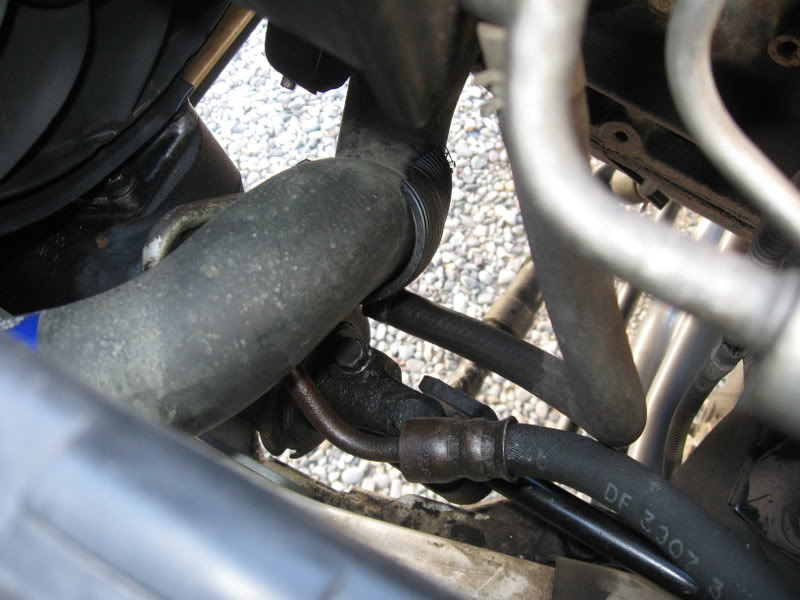
Now you can connect the drag link and don't forget your cotter pin. Double check all of your connections and bolts. Next step is to put back the air box and then take off for a little drive with your upgraded steering box. Your wheel will be off just a little bit to the left but just loosen the 2 nuts on the drag link and turn to recorrect. So now you should be here.
Steering box installed, lines hooked up, pitman arm on, draglink attached and ready for the road
Steering shaft reconnected
And just for refference the steering of the Durango box lock to lock. There is a little more steering to each side than it shows because I didn't have anyone to hold the wheel.
Any questions feel free to ask. I may have left a couple of things out, as this was a very long write up. Overall this upgrade is great. I feel as if my steering is faster lock to lock, touchier at speed and easier to turn the wheel for sure. I don't know how it does wheeling as of yet but will find out next weekend. If you are even considering doing this upgrade I would say to jump all over it for whatever reasons you have. On a scale of 1-10 it is a 3 or 4 and can be done with hand tools. The whole project took me under about 2 1/2 hours to do with the exception of the Durango Pitman arm giving me problems.
The reason that I am doing this upgrade is #1 my box was worn out and making all sorts of popping noises when I would turn to the right. #2 I plan on running 35-36 inch tall tires and want a little more help with turning them. The box I ordered was from a 99 Durango V8 WITHOUT the snow plow package. From what I have heard some of the boxes are hit and miss as far as having the same turning radius. I see no difference in mine so far, if there is it's minimal.
Tool List
PB Blaster or equivlent. Soak everything for atleast 2-3 days
3/8 rachet
6" and 3" 3/8" extentions
13mm socket
17mm socket
19mm socket
18mm wrench, stubby prefered
32mm socket (I used a 3/4 drive)
Pitman Arm puller
needle nose pliers
regular pliers
a few rags
1 1/2 qts PS fluid
I ordered the steering box from a company called Everdrive. Here is the link to the exact steering box that I ordered http://usedautoparts.everdrive.com/p...px?sku=1693452 Just since I ordered the box 2 weeks ago, the price has already increased by $13 from $154 to $167. The swap is simple so I would suggest jumping on that price as fast as you can.
Okay on to the tech. First thing to do is soak everthing that will be coming apart in some sort of pennetrating oil like PB blaster. Do this about a week before the swap. Then place the vehicle on a level surface. Then remove your air filter housing and place it to the side. This will give you access to the Bolt that holds the steering shaft to the Box (13mm socket) and to the power steering lines (18mm wrench). Next thing I would do is disconnect the drag link from the pitman arm. So right now you should be at this point.
Power steering lines
Steering shaft bolt
And the drag link seperated
Okay from there you need to disconnect the PS lines starting with the top one first. Then remove the lower one which is the high pressure line. I hung a small bucket off of the pitman arm to catch some of the PS fluid that leaks out of the 2 lines. After that I bent them up and kind of hung them by the PS reservoir.
Before pulling my pitman arm, I went ahead and took some pictures of the old gearbox being turned full lock both ways for reference to the new box.
Next job is to remove the 32mm nut that holds on the pitman arm to the gearbox. Then with your trusty pitman arm puller, remove the pitman arm. I did this a couple of months ago when I installed my RE 5.5" LA so removal was a snap. If your new box comes with a pitman arm already, go ahead and soak that in PB Blaster also. Then you are going to remove the 3, 7/16" bolts that hold the steering box to the frame. I had a hard time getting the steering box to seperate from the steering shaft but made quick work of it with a large flat head screw driver.
Outside frame bolts
Inside frame after removal
Okay now that the old gearbox is out how about a quck comparison to the new Durango box
If you look at them good enough you can see that the new Durango box is definately more beefy. I weighed the old one on my bathroom scale and it was just over 20lbs. The packaging that the Durango gearbox came in said that it was only 15lbs so they are somewhere around there. As for actual size specs, I did measure the outside of the piston casing on both gearboxes. The old box measured in at 3.787" which is just a hair over the 3.75" that everyone says. The Durango box measured at 4.211" which is just under 4.25" so there is almost a .50 difference in the size of the cases.
The pictures are for reference to the box that the measurement was taken off of. I measured the round end of the casing and then layed the dial calipers on top.
Stock
Durango
You will want to inspect your frame for any cracks and take care of those first off. As you can see my frame is in fine shape. Before anymore steps can be taken you will need to paint your new C-Rock brace because it comes as raw steel. If you decide to reuse yours (I wouldn't) then skip this part. I first scuffed with some 220 grit paper and then primed, next I hit it again with the 220 grit and a couple of coats of paint. I had some left over from my wheels so that is what I used.
Okay so now that your new brace is all painted and ready to go, grab your new bolts. I bought 3 new 4" long 7/16" grade 8 bolts and 6 washers for extra spacers from Ace hardware. Double check to make sure there are no visible cracks again and then put the bolts in the frame holes. Then put your brace over them on the inside. After that is done add your washers 2 per bolt is what seems to be recommended. Also the C-Rok kit comes with some frame sleeves for the bolt holes. They require widening out the hole and then being tapped in. I didn't have a dremmel or anything else that would work so I left them out for now. I will be installing them before I go to bigger tires.
So right now you should be here.
After getting your brace and and spacer over the bolts you need to muscle the new box up into place on the new bolts. The gearbox its self only weighs 15lbs according to the shipping lable. I did it myself and don't think that it would be benificial to have someone to help becuase you have to line up the bolts to the box and really should be using both of your own hands to do this. If someone else helps you they will be blind to everything that is going on unless they lay under there with you.
Okay so after getting all 3 bolts started go ahead and run all 3 of them down untill they are tight. Don't forget to locktite them. I just put the locktite on the hole threads because I had already started the bolts. So now you are here
Next thing to do is to remove the pitman arm from the durango box. I waited to do this step while the gearbox was installed, for sability while I was using the pitman arm puller. After you get that off then you can put on your old pitman arm. The arms are not interchageable because the durango uses a pitman arm with the rod end built into the arm instead of on the drag link. Next step is to hook up your lines and your steering shaft. Don't hook up the drag link just yet. You need to be able to turn the wheel back and forth to refill your reservoir and new gearbox. Just add your new PS fluid and turn the wheel back and forth. Let it sit for a minute then do it again. Now you can go ahead and start the jeep and get ready to fill it up again right away. My system took Just over 1qt of new fluid to fill, but I made sure to let the hoses drain out all the way before hooking them back up.
Now you can connect the drag link and don't forget your cotter pin. Double check all of your connections and bolts. Next step is to put back the air box and then take off for a little drive with your upgraded steering box. Your wheel will be off just a little bit to the left but just loosen the 2 nuts on the drag link and turn to recorrect. So now you should be here.
Steering box installed, lines hooked up, pitman arm on, draglink attached and ready for the road
Steering shaft reconnected
And just for refference the steering of the Durango box lock to lock. There is a little more steering to each side than it shows because I didn't have anyone to hold the wheel.
Any questions feel free to ask. I may have left a couple of things out, as this was a very long write up. Overall this upgrade is great. I feel as if my steering is faster lock to lock, touchier at speed and easier to turn the wheel for sure. I don't know how it does wheeling as of yet but will find out next weekend. If you are even considering doing this upgrade I would say to jump all over it for whatever reasons you have. On a scale of 1-10 it is a 3 or 4 and can be done with hand tools. The whole project took me under about 2 1/2 hours to do with the exception of the Durango Pitman arm giving me problems.
Last edited by 99xjlove; 09-05-2008 at 02:01 PM.

The following 2 users liked this post by 99xjlove:
chilidipper (02-16-2020),
Dave Maloney (09-07-2023)
09-05-2008, 04:45 PM
#2
Seasoned Member
Thread Starter
Join Date: Apr 2008
Location: Grand Junction, Colorado
Posts: 377
Likes: 0
Received 2 Likes
on
1 Post
Year: 1999
Model: Cherokee
Engine: 4.0L
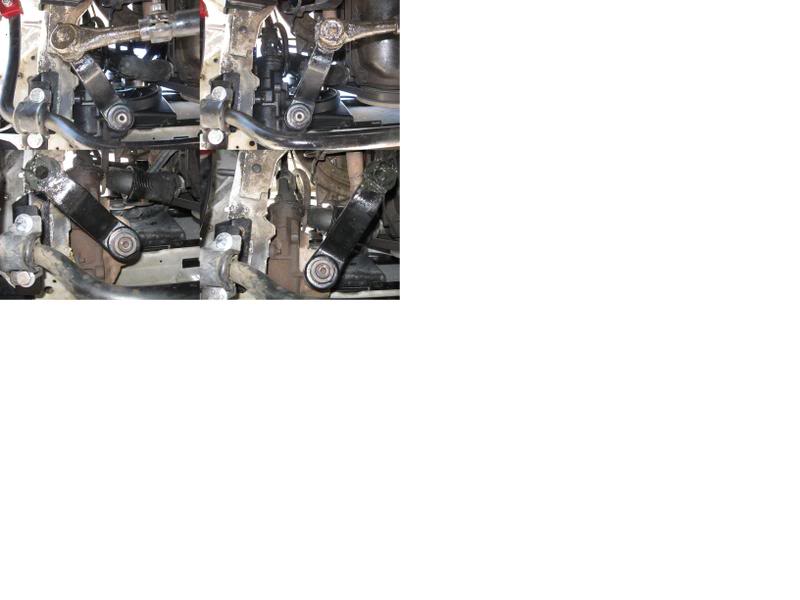
I couldn't post anymore pictures in the original thread. It only allows 22 and I had like 25 or 26 but a couple lof them weren't totaly necessary. Anyways here is a picture I made in paint of all 4 shots of lock to lock for comparison. The ones on the top are the Durango which still had a little further (almost a 1/4+ of a turn left) which is alot with the Durango box. And the bottom is the old box. Remember I didn't have anyone to help me hold the wheel at full lock and even with the vehicle on or off it would roll back atleast a 1/4 turn. I don't know if anyone else knows or can let me know about stock, but to make a 90* turn like onto a side street or parking lot, only takes about 1/2 wheels turn with the Durango box.

Thread
Thread Starter
Forum
Replies
Last Post
Currently Active Users Viewing This Thread: 1 (0 members and 1 guests)