Hood Pin Write-up
 10-23-2009, 09:32 AM
#1
Senior Member
Thread Starter
Join Date: Sep 2008
Location: Georgetown, KY
Posts: 596
Likes: 0
Received 0 Likes
on
0 Posts
Year: 1998
Model: Cherokee
Engine: 4.0L
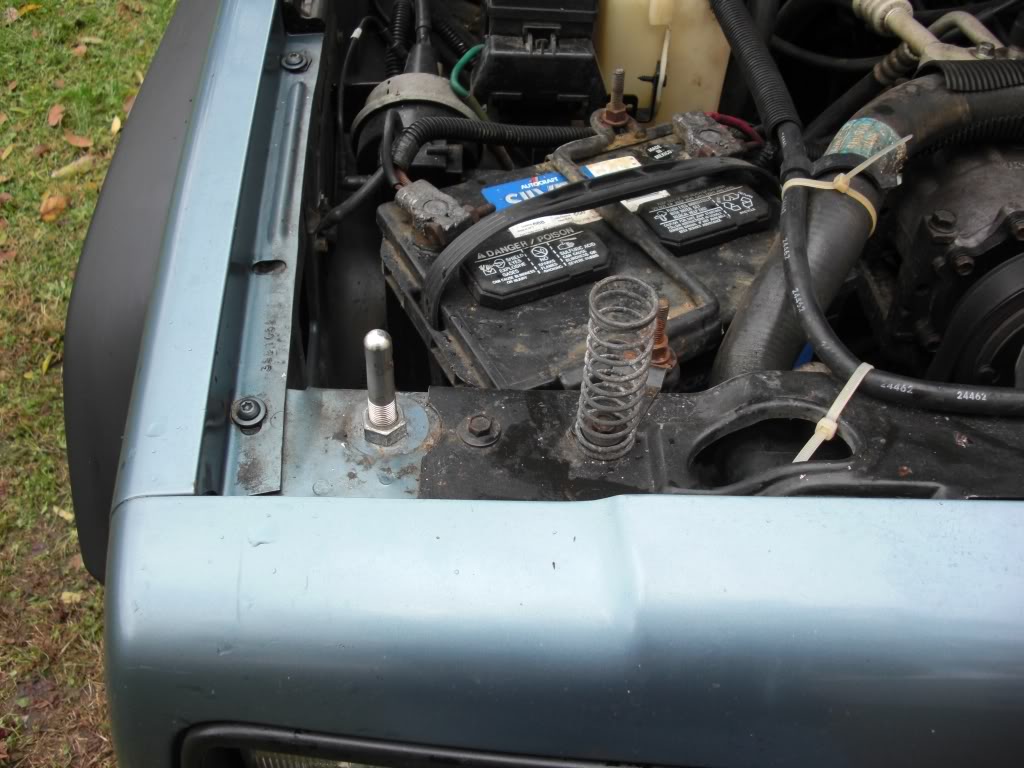
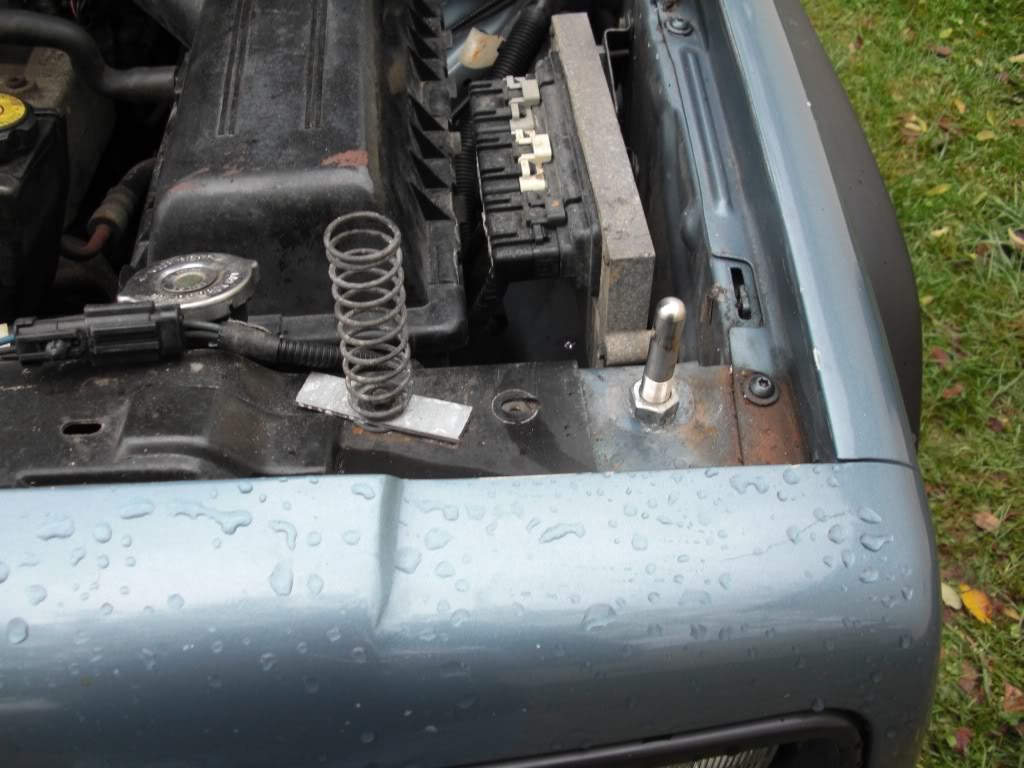
It's fairly straight forward.  A quick write up from memory.
1. Remove header panel.
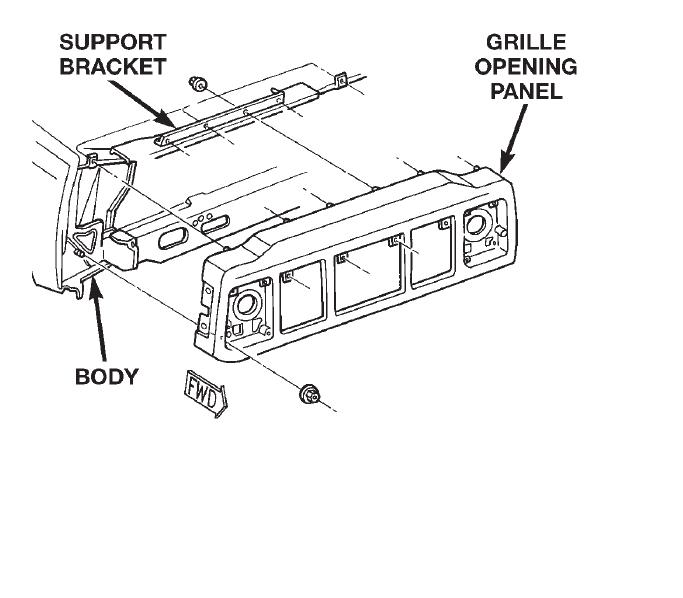
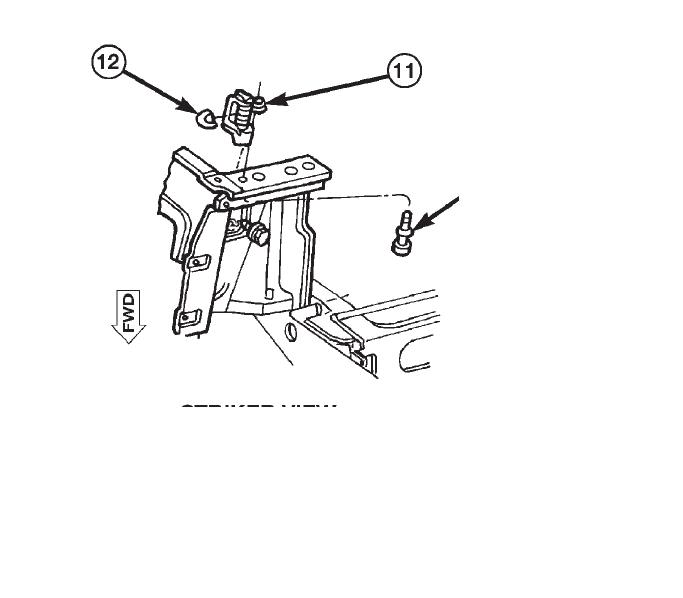
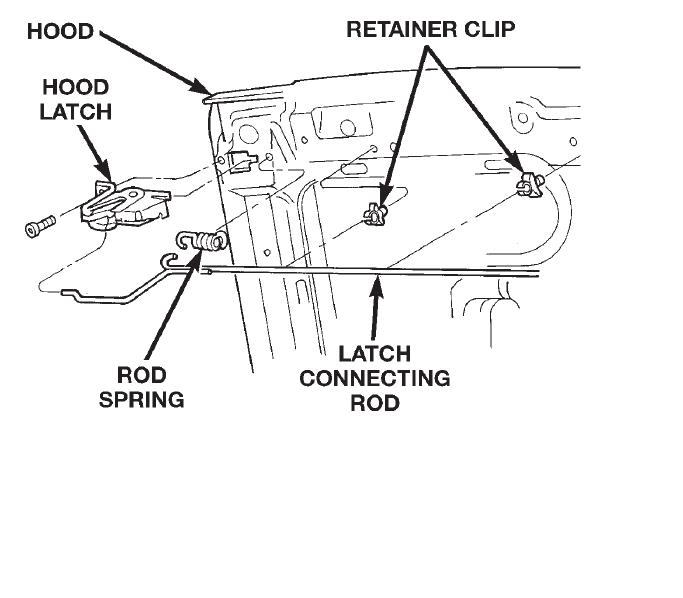
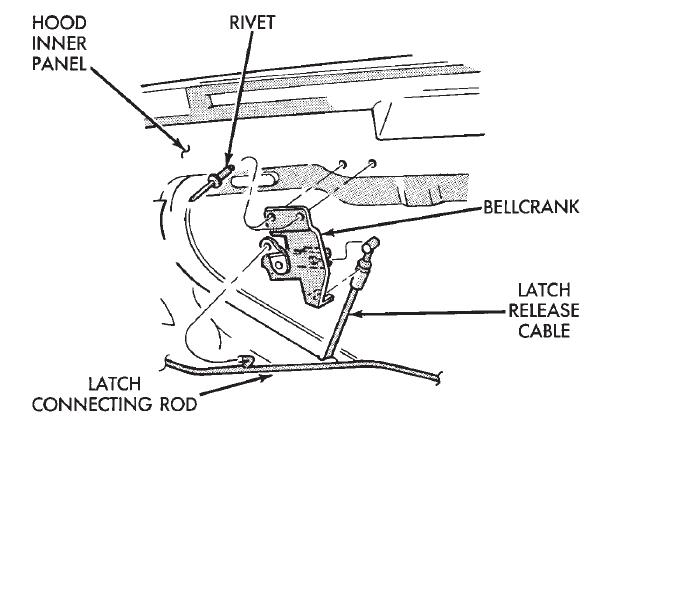
2. Remove both strikers, hood latch, hood release cable, and any associated hardware. Drill out rivets holding the bellcrank on.
3. Use existing hole from where the strikers were mounted.
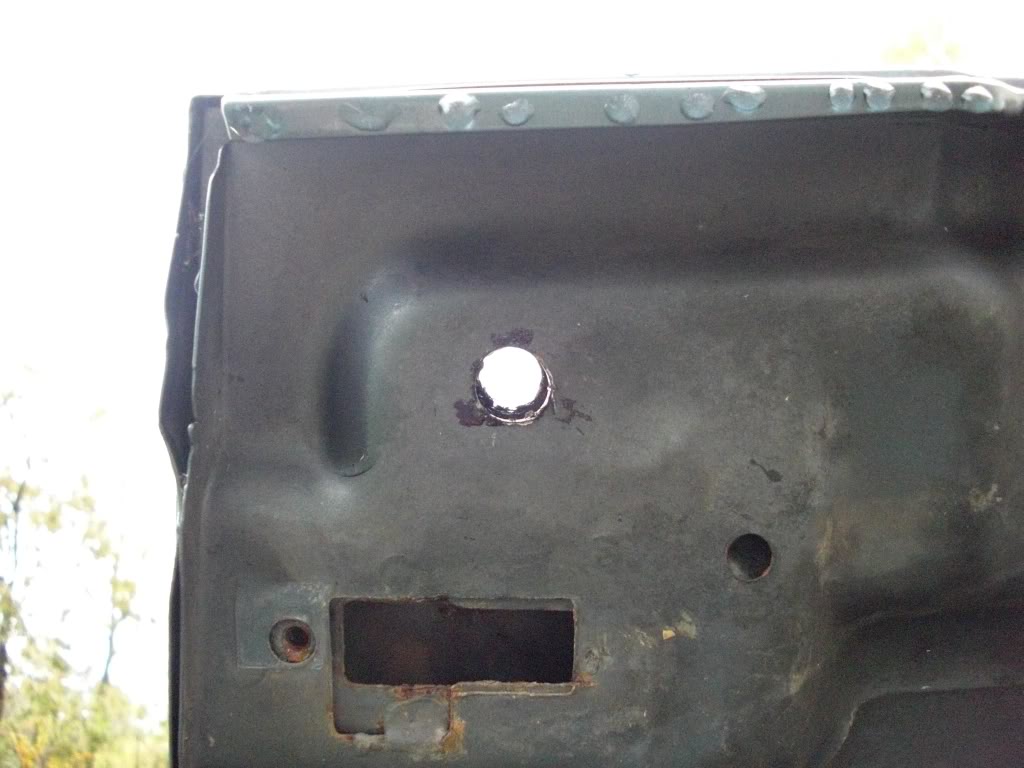
4. Using a dremel with a grinding stone (plan on using more than one), ream out existing bolt hole to fit the 1/2" diameter hood pin. (not necessary if using smaller pin diameter.)
5. Ream out hole from underneath to fit the bigger socket (13/16th I believe) to tighten hood pin nut.
6. Snug down both nuts to temporarily secure the hood pin to mark where you need to drill.
Left.
Right.
7. Mark hole on the inside of hood on where to drill a 1/2" hole for the hood pin. *May need to ream out the hole a bit or use next size up drill bit* (Hole size will be dependent on what diameter hood pin you are using.)
8. Repeat steps 2-7 to do the other side.
9. Now drop the hood gently down to see if everything is lined up. If you holes are drilled a bit off center of where you needed, simple ream them out until everything lines up.
10. Place the scuff plate over the hood pin and line it up where you want.
11. Mark the holes where you need to drill to secure the scuff plate.
12. Remove scuff plate and drill holes.
13. Replace the scuff plate and mount using the supplied screws.
14. Now your hood will be a pain to get back up because the springs, along with the strikers are go. I used a screwdriver to pop up the hood until I could grasp it to lift it up.
15. Use a dremel or other cutting tool to free the spring that is on the striker free.
16. Mount the springs on the radiator support using the second bolt from the hood pin.
17. On the left side, use the bolt that holds the bracket for the "J" bolt that is used for the battery tie down.
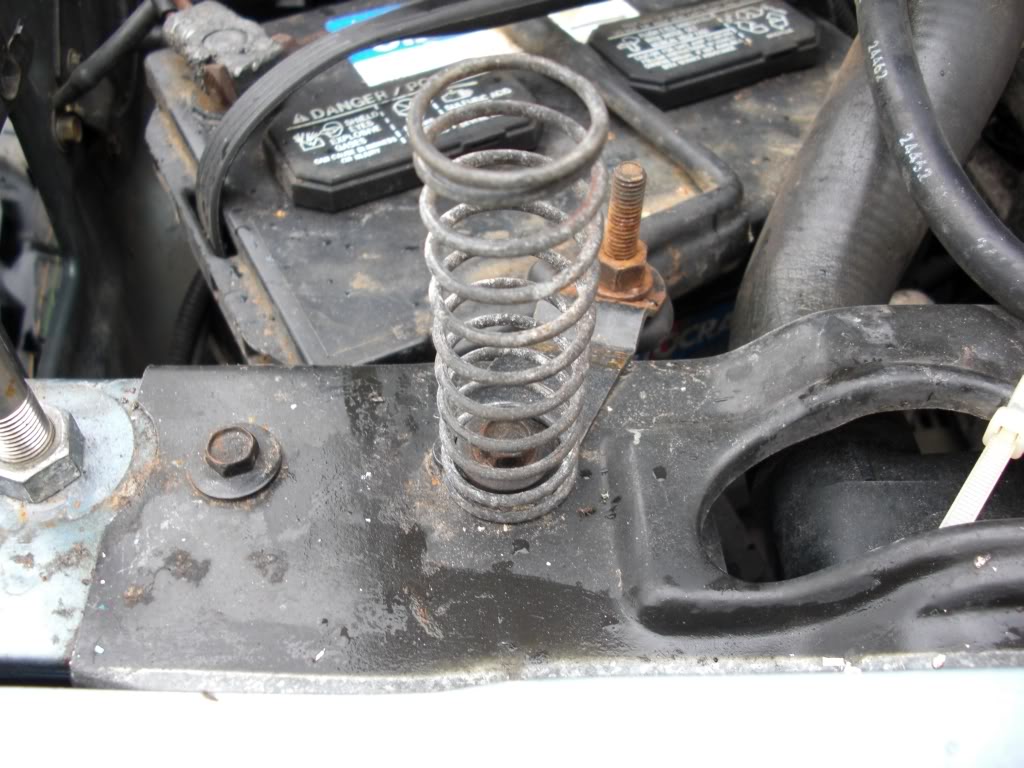
18. On the right side, use the second bolt over to the left of the hood pin. Use a piece of flat aluminum or steel with a hole drilled in the center to hold down the spring.
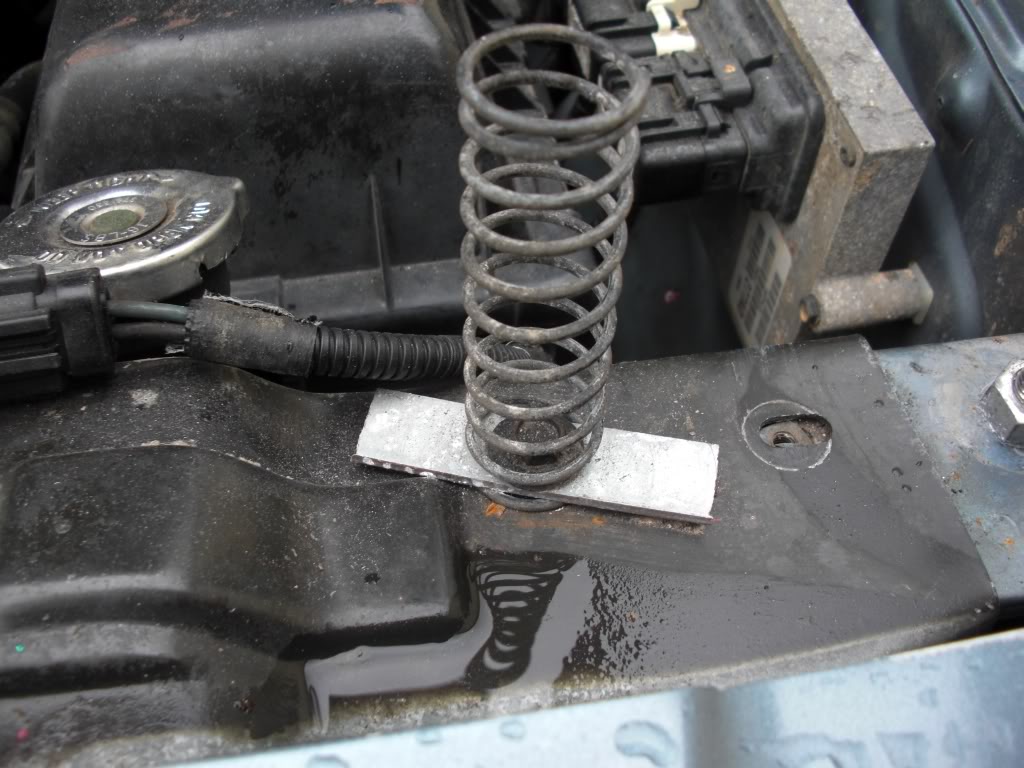
Springs doing their job.

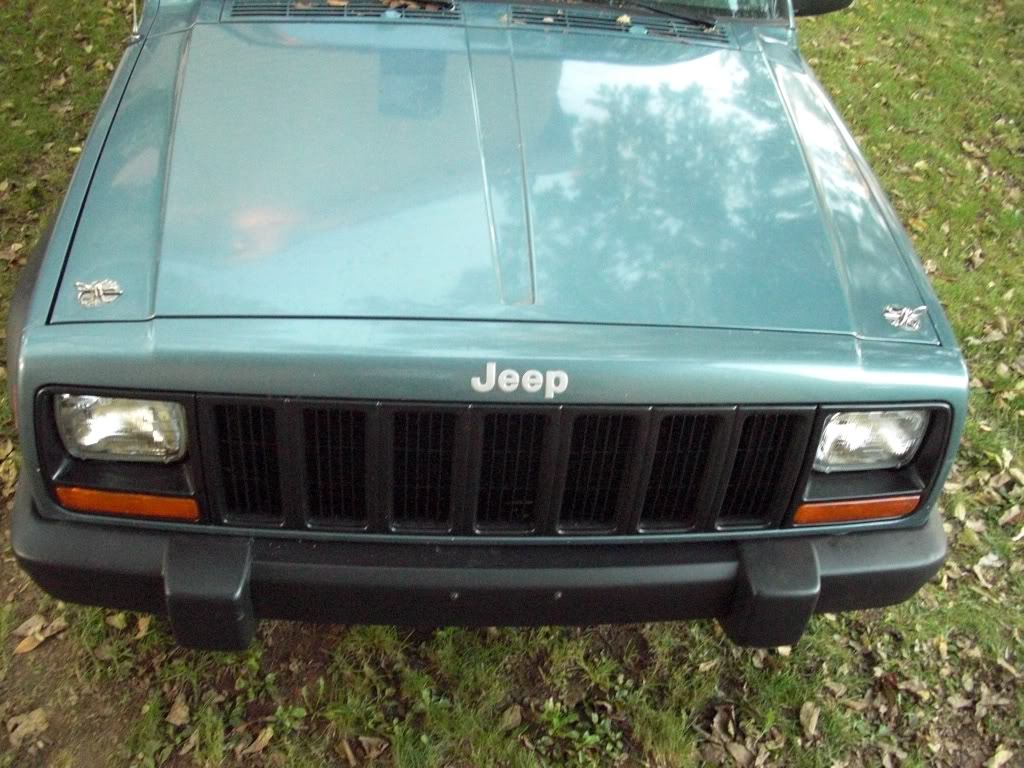
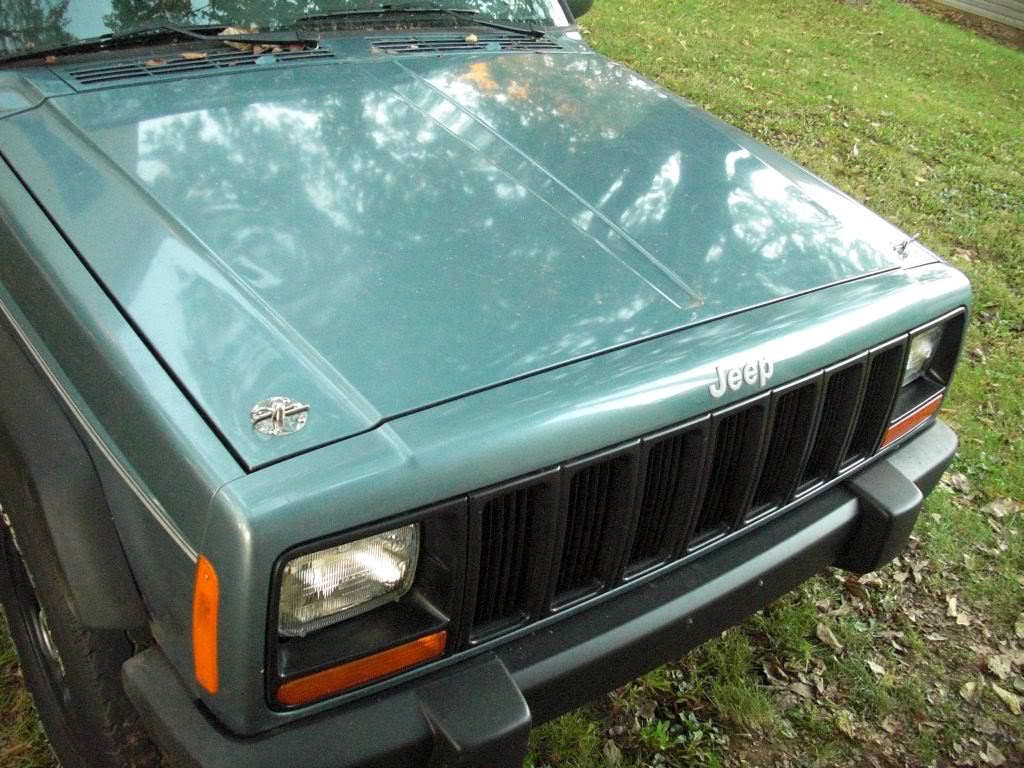
19. Now you can adjust the height of the hood pins to where you need them by using the nuts on the hood pin.
20. Once the hood pins are adjusted, lower the hood, and use the supplied pins to hold the hood down.
Finished product.
One important note:
Make sure you paint the bare metal from where you drill. If you don't or half-*** it like me (getting dark), it will rust and show up on the scuff plates and hood pins. The same goes for the holes drilled to mount he scuff plate.
I used this kit from SummitRacing.com.
http://www.summitracing.com/parts/SUM-G3870SS/
A quick write up from memory. 1. Remove header panel.
2. Remove both strikers, hood latch, hood release cable, and any associated hardware. Drill out rivets holding the bellcrank on.
3. Use existing hole from where the strikers were mounted.
4. Using a dremel with a grinding stone (plan on using more than one), ream out existing bolt hole to fit the 1/2" diameter hood pin. (not necessary if using smaller pin diameter.)
5. Ream out hole from underneath to fit the bigger socket (13/16th I believe) to tighten hood pin nut.
6. Snug down both nuts to temporarily secure the hood pin to mark where you need to drill.
Left.
Right.
7. Mark hole on the inside of hood on where to drill a 1/2" hole for the hood pin. *May need to ream out the hole a bit or use next size up drill bit* (Hole size will be dependent on what diameter hood pin you are using.)
8. Repeat steps 2-7 to do the other side.
9. Now drop the hood gently down to see if everything is lined up. If you holes are drilled a bit off center of where you needed, simple ream them out until everything lines up.
10. Place the scuff plate over the hood pin and line it up where you want.
11. Mark the holes where you need to drill to secure the scuff plate.
12. Remove scuff plate and drill holes.
13. Replace the scuff plate and mount using the supplied screws.
14. Now your hood will be a pain to get back up because the springs, along with the strikers are go. I used a screwdriver to pop up the hood until I could grasp it to lift it up.
15. Use a dremel or other cutting tool to free the spring that is on the striker free.
16. Mount the springs on the radiator support using the second bolt from the hood pin.
17. On the left side, use the bolt that holds the bracket for the "J" bolt that is used for the battery tie down.
18. On the right side, use the second bolt over to the left of the hood pin. Use a piece of flat aluminum or steel with a hole drilled in the center to hold down the spring.
Springs doing their job.
19. Now you can adjust the height of the hood pins to where you need them by using the nuts on the hood pin.
20. Once the hood pins are adjusted, lower the hood, and use the supplied pins to hold the hood down.
Finished product.
One important note:
Make sure you paint the bare metal from where you drill. If you don't or half-*** it like me (getting dark), it will rust and show up on the scuff plates and hood pins. The same goes for the holes drilled to mount he scuff plate.
I used this kit from SummitRacing.com.
http://www.summitracing.com/parts/SUM-G3870SS/
Last edited by dude in an xj; 10-23-2009 at 02:20 PM.


Thread
Thread Starter
Forum
Replies
Last Post
shelby5041
Stock XJ Cherokee Tech. All XJ Non-modified/stock questions go here
8
07-20-2016 04:38 PM
Currently Active Users Viewing This Thread: 1 (0 members and 1 guests)