The ultimate fast flash turn signal fix!
 03-19-2013, 07:04 AM
#1
Newbie
Thread Starter

Join Date: Feb 2013
Location: Goose Creek, SC
Posts: 9
Likes: 0
Received 0 Likes
on
0 Posts
Year: 1995
Model: Grand Cherokee
Engine: 4.0L
I posted this on jeepforum but figured I'd share it here as well. I'm sure many people here have experienced fast flashing of your turn signals that you can't seem to get rid of even after you replace any burnt out bulbs.
Here's what I did to fix the fast turn signal flashing in the ZJ. NOTE: All wiring pictures and color codes are based on a 95 ZJ Laredo, but the basics should carry over to all years, and this might even work for the folks that have a TJ, XJ, etc. I'm not sure if this fixes the problem when running LED lights, but it very well could.
QUICK BACKGROUND:
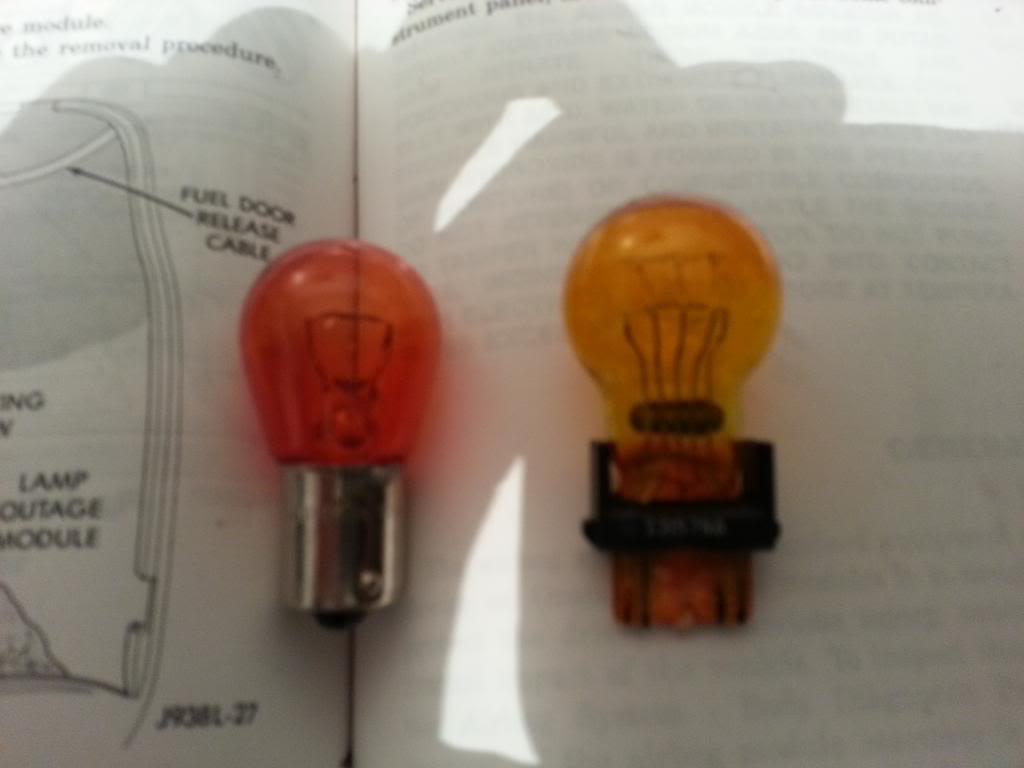
Many of us have experienced a problem with fast flashing turn signals. For me it was only when I had the headlights on. I found out that at some point my 95 ZJ was "converted" over to 97-98 corners, and that I had one correct bulb and one wrong bulb even though both fit and worked fine with the headlights off. From 93-96 Jeep used bulb 1295NA for the front turn signals in the ZJ. These are single filament bulbs rated at 37.5 watts and measure 4.1 ohms of resistance. for 97-98 the ZJ got a new dual filament bulb 3454NA rated at 33 watts and measuring 4.92 ohms of resistance, but only the high output side is used (they don't function as parking lights too). As a comparison, the 3157NA bulbs (used in 2001+ TJs) have 27 watts and 6.07 ohms, and 3457NA bulbs have 28.5 watts and 5.74 ohms. So, we have bulbs rated at a higher wattage output that have a lower resistance than newer bulbs. Adding to the problem is that the 1295NA bulbs are hard to find and pretty expensive, and the 3454NA bulbs are pretty much only available in junkyards. Here's a pic of the old and new:
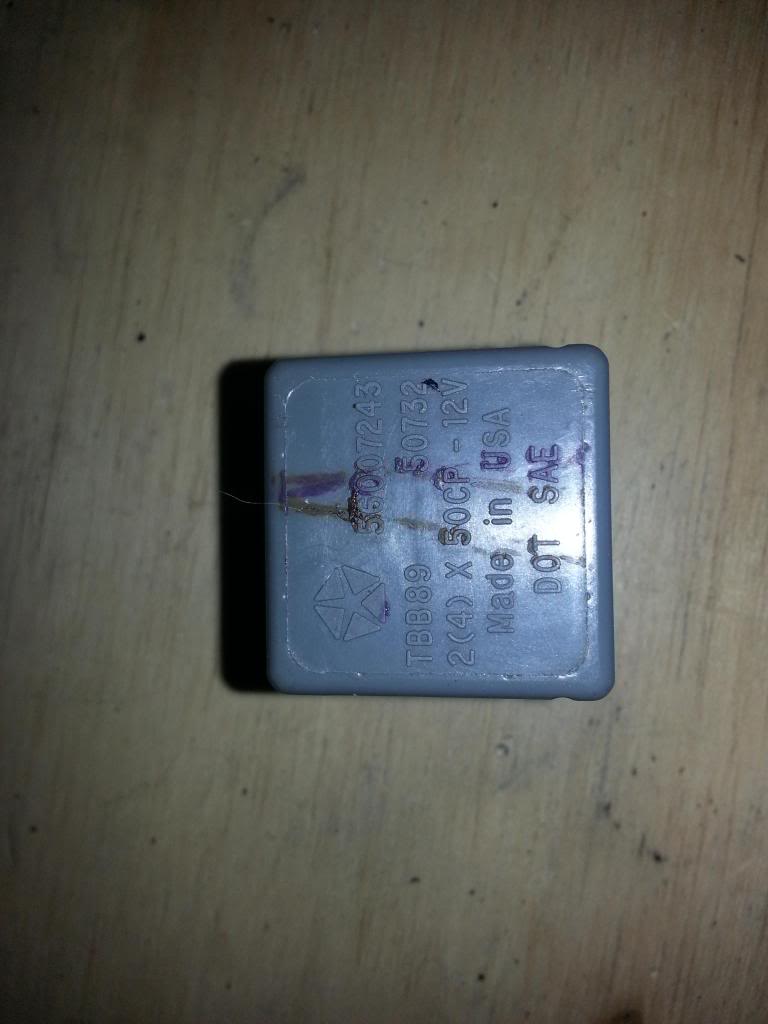
The problem is that the "newer" bulbs (3157NA and 3457NA) aren't completely compatible with our flashers. Our stock flasher has a rating of 50CP (capacitive protection factor I think). Compare this to "newer" flashers that are rated at 35CP. Here's a pic of the stock flasher:
So, what I did is "converted" over to the "newer" style flasher and bulbs, but it's slightly more than just plug and play. For the "donor" Jeep I selected a 2002 TJ (this was pretty arbitrary but I wanted to use a 2001+ TJ since they had a 5 pin flasher like ours whereas 97-2000 TJs used a 4 pin flasher). For the bulbs I went with 3457NA since I had bought a set to try and fix the problem early on before I did my homework, but 3157NA should work fine as well. For the flasher I went with what the parts store told me was a "direct replacement" number LM470:
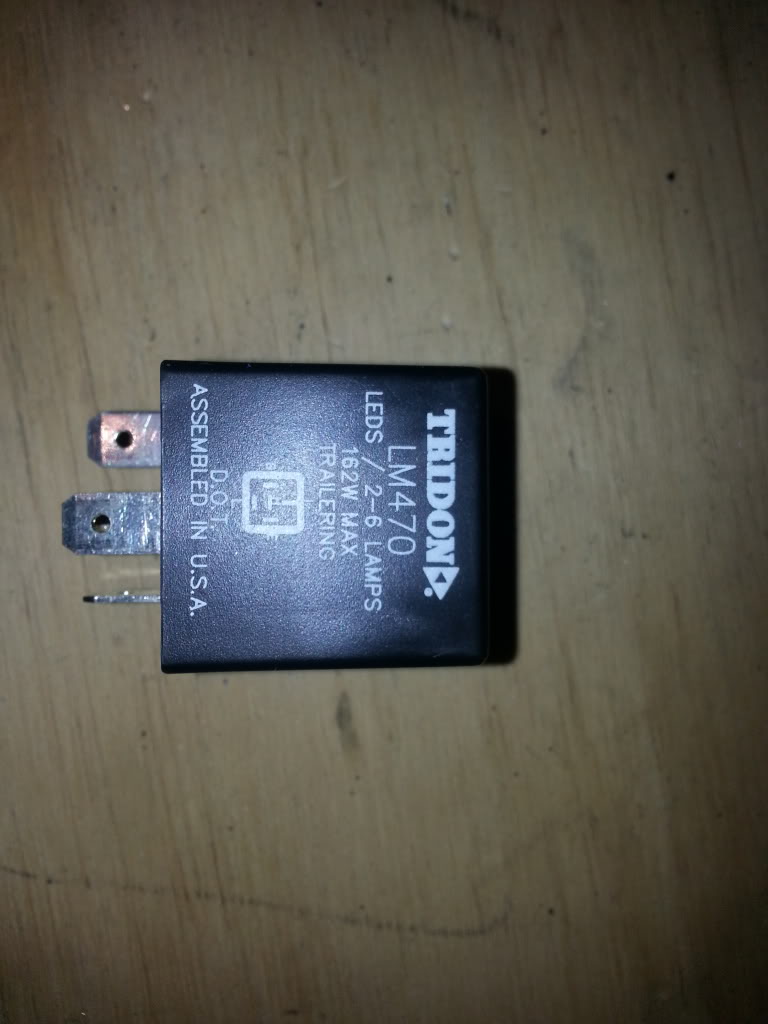
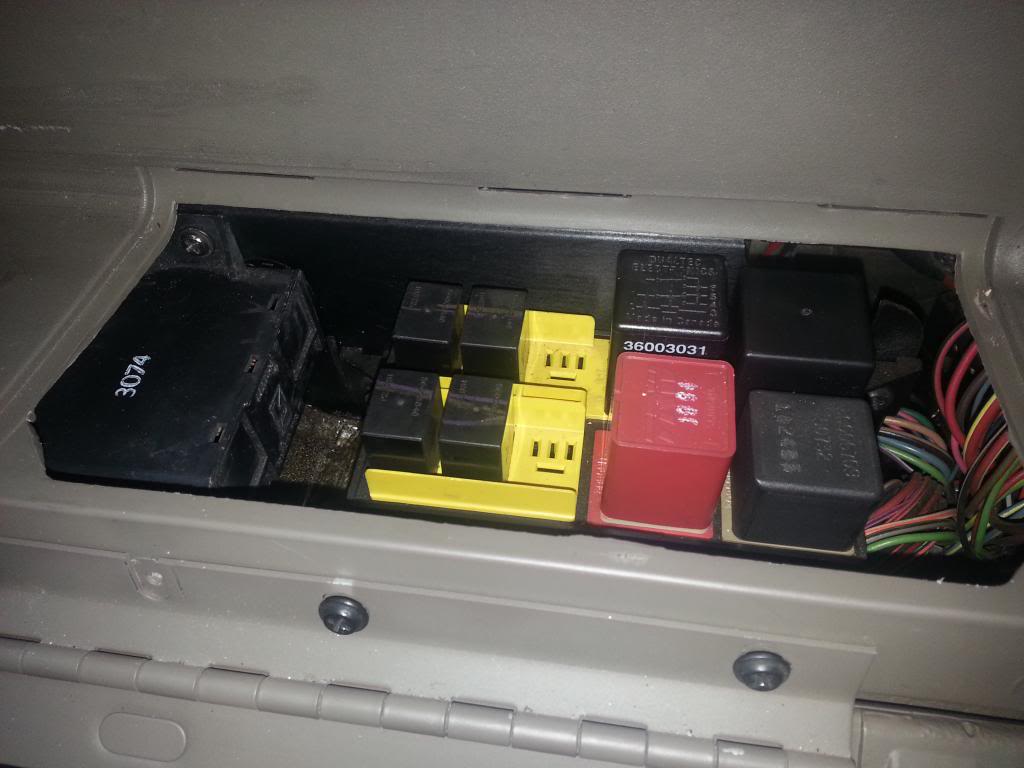
If you notice it does say LED on the side so those of you running LEDs might find this as a fix as well...I can't say for sure. Moving on, replacing the flasher is a piece of cake. Three phillips head screws hold the relay cover in place (located on the floor of the glove box). The flasher is the one all the way to the right and in back (towards the front of the Jeep). It's the one in the picture below with nothing written on top. Simply remove the old one and plug the new one in, then replace the relay cover and that part's done.
I'm not going to go into detail on how to change out the bulbs in this post, but it's literally plug and play. If you have the 1295NA bulbs and want to switch to the 97-98 style, just get the corner harnesses from a junkyard (they're about 2' long, so it's not much) and they just plug right in. If you have either style and want to incorporate the parking brake side, I think that XJ sockets will work. They are already 3 wire sockets, so it's just a matter of splicing them in as long as they'll fit the housing (I have some but haven't done that yet...once I'm done if it works I'll let you know). At this point though, you should have turn signals that work perfect (you'll probably be able to hear the clicking a little more, and they may flash a little slower than you're used to, but they work great). NOTE: some other flashers have been reported by others to click even when the turn signals are not on...this does not happen with this flasher!
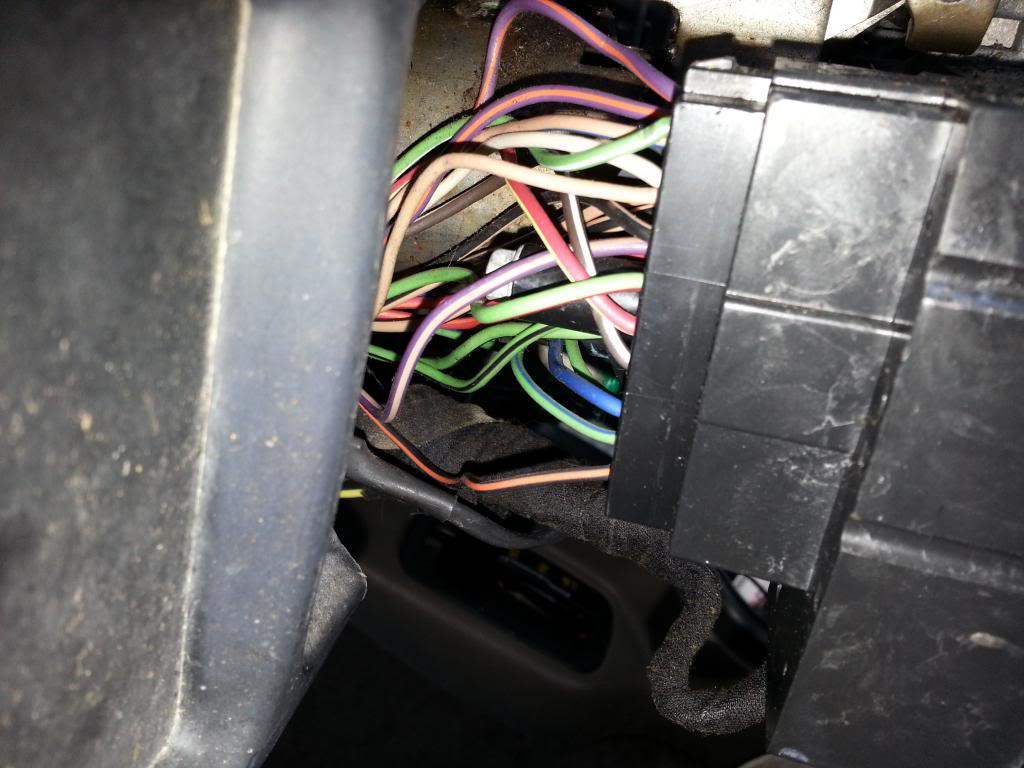
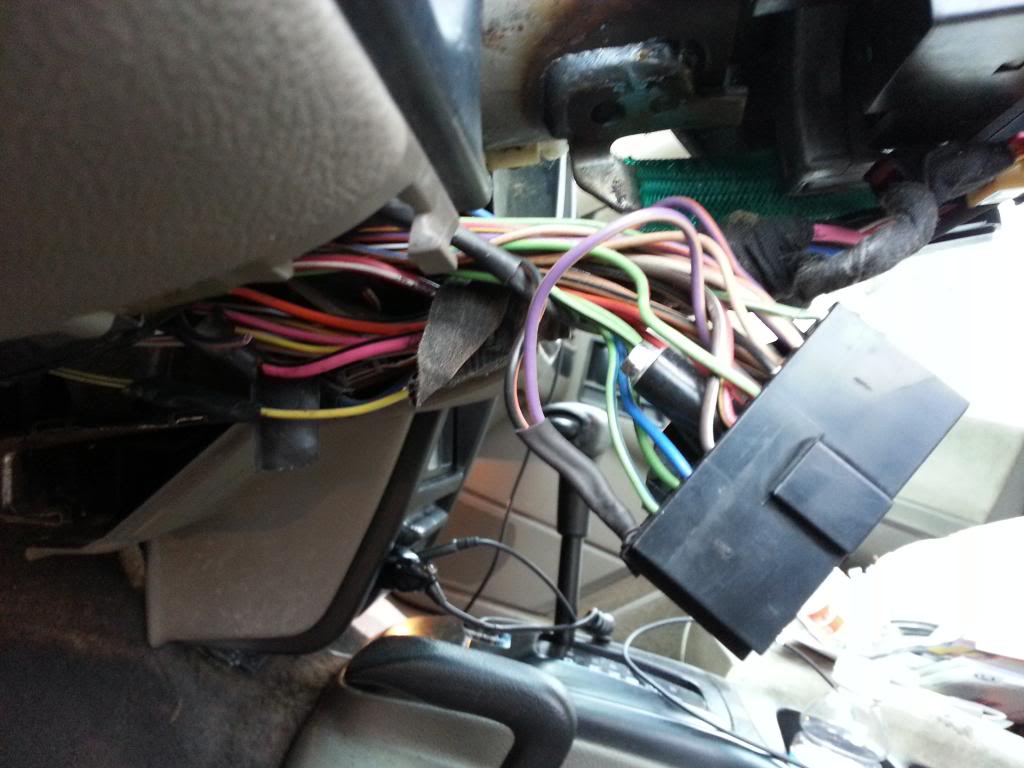
The biggest change is the wiring, and it's not that bad. The stock 5 pin flasher uses one terminal as an output to the turn signal portion of the multifunction switch and another as the output to the hazard lights portion of the multifunction switch. Although the turn signals work great, you may have noticed that you no longer have hazard lights! Have no fear, we're about to fix that! First, remove the panel under the steering column held on by 4 phillips head screws. Next, unscrew the tilt lever and take it out. Now remove the panels surrounding the multifunction switch (between the dash and the steering wheel) held on by 3 T-20 torx head screws. Now we're ready to remove the connector from the back of the multifunction switch...it's held on by a 7mm screw in the middle of the wires shown in below:
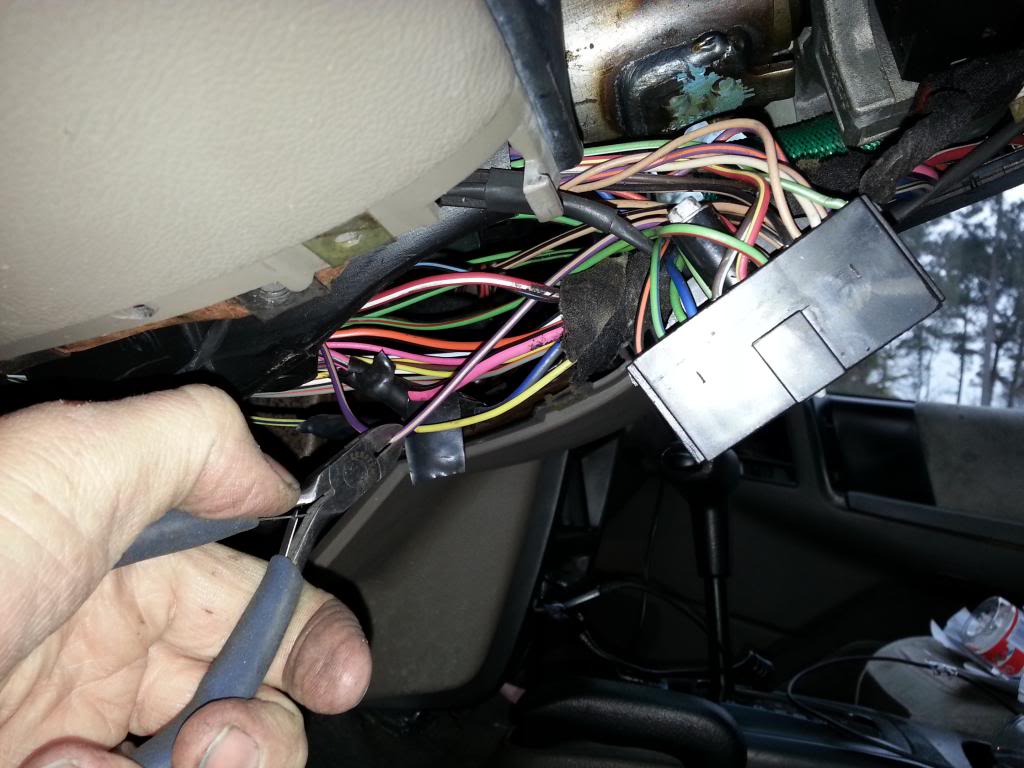
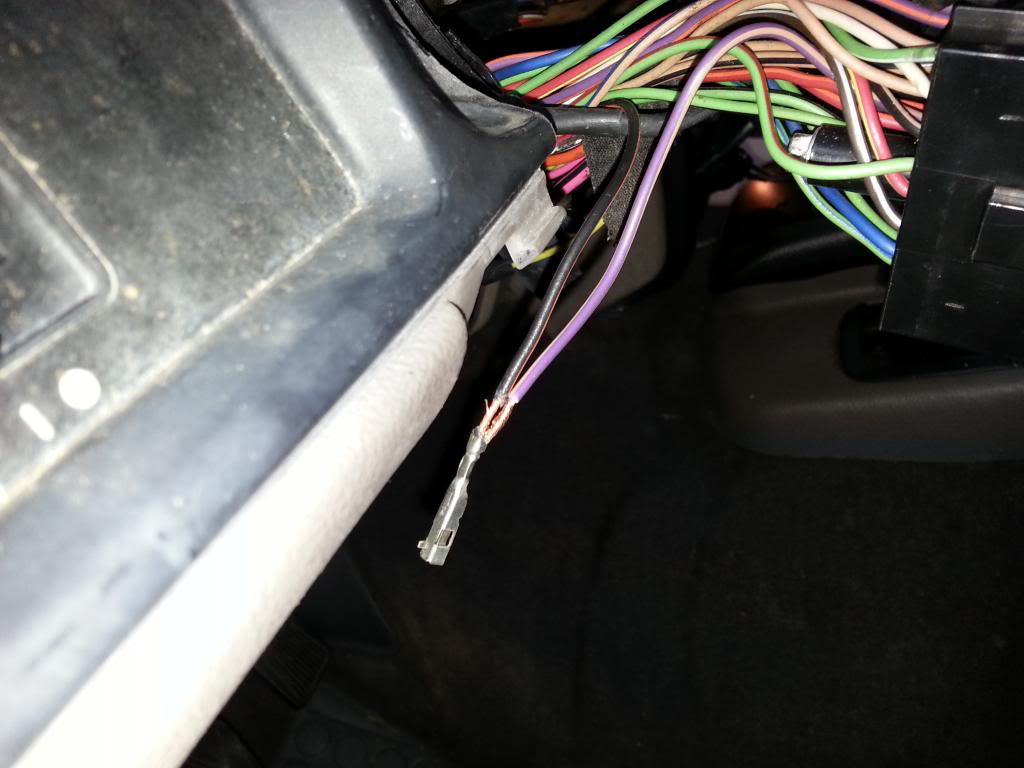
Now we're ready to modify the harness. Start by cutting the wire that goes from the flasher to the hazard switch part of the multifunction switch. For a 95 ZJ it is the violet wire with a tan tracer. It should be the third wire from the top in the middle row (just above the 7mm screw). Cut it down a ways from the the connector so you have room to work with it as shown here:
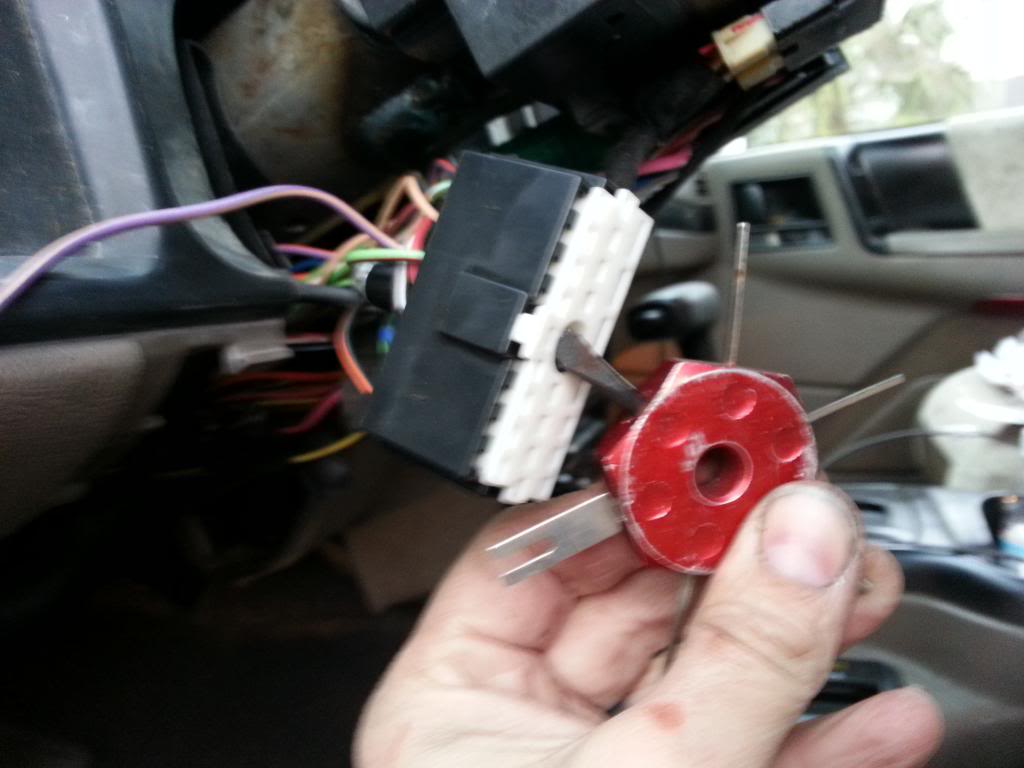
Strip the end of this wire and we're ready to move on. Now remove the white terminal lock from the front of the connector by taking a flat screw driver or similar tool and gently prying it out from the center hold as seen here:
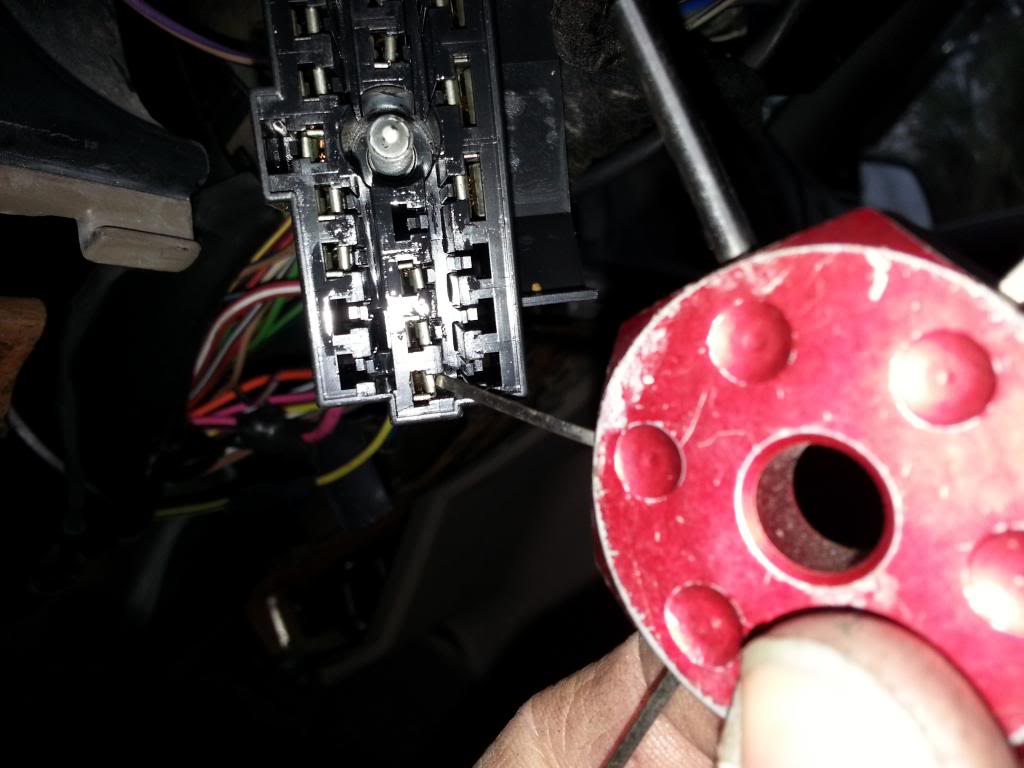
Looking at the front of the connector you should see little plastic tabs next to each terminal. Locate the wire going from the flasher to the turn signal part of the multifunction switch. On a 95 ZJ it is black with an orange tracer and is located at the very bottom of the connector. NOTE: My FSM shows it to be in the first row (to the left of the vehicle) but mine was in the center row). Now that you have that wire located, gently pry the small plastic tab next to it's terminal to the side and pull the terminal out the back as shown here:
Now carefully strip enough insulation off the wire just above the terminal to be able to make a good connection and get the wires ready for solder as shown here:
Solder the wires together making sure you have a good strong connection. Give it a minute to cool and then shrink wrap over the soldered area. Reinsert the terminal back in the same spot it was in and lock it in place. NOTE: I had to bend the plastic lock back towards the terminal to get it to lock in place. Once it's back in it should look like this:
Now you're ready to put reattach the connector to the back of the multifunction switch using the same 7mm screw. Next reattach the covers that go over the multifunction switch using the 3 T-20 torx screws. Reinsert and screw in the tilt lever. Reinstall the panel under the steering column using the 4 phillips head screws.
That's it...you're done! You now have turn signals and hazard lights that work!
NOTE: The hazards will not work with the ignition switch turned to off...they will now only work with the key in and the ignition switch turned to on, just like the turn signals. It's a small price to pay, but definitely worth it in my opinion.
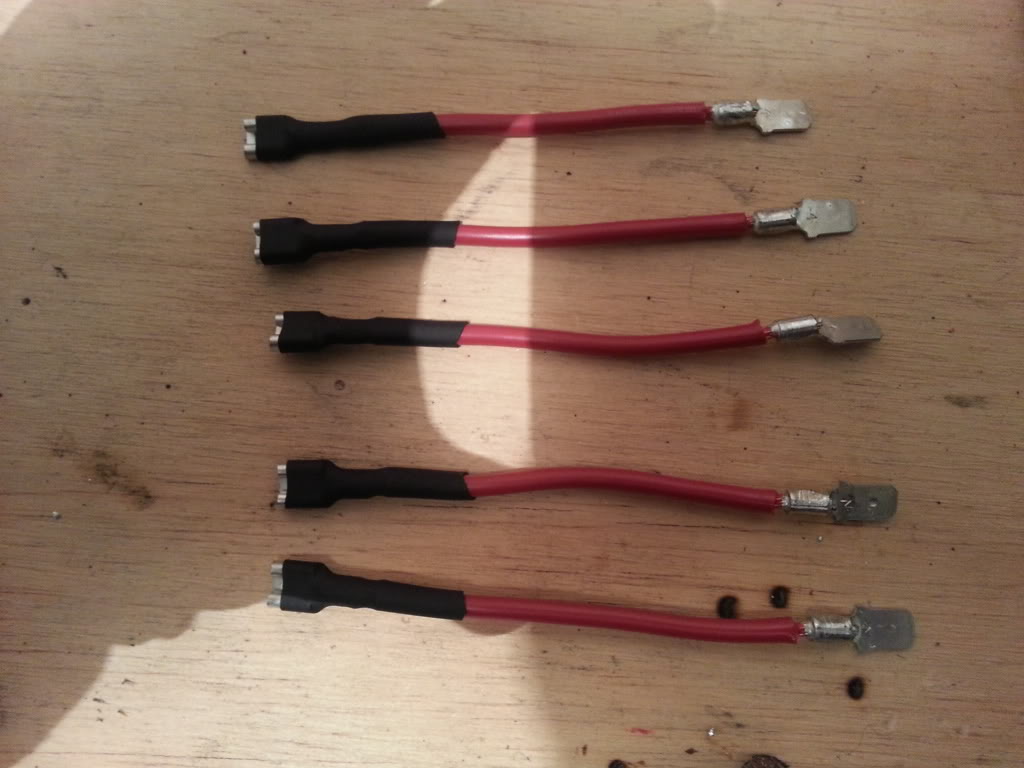
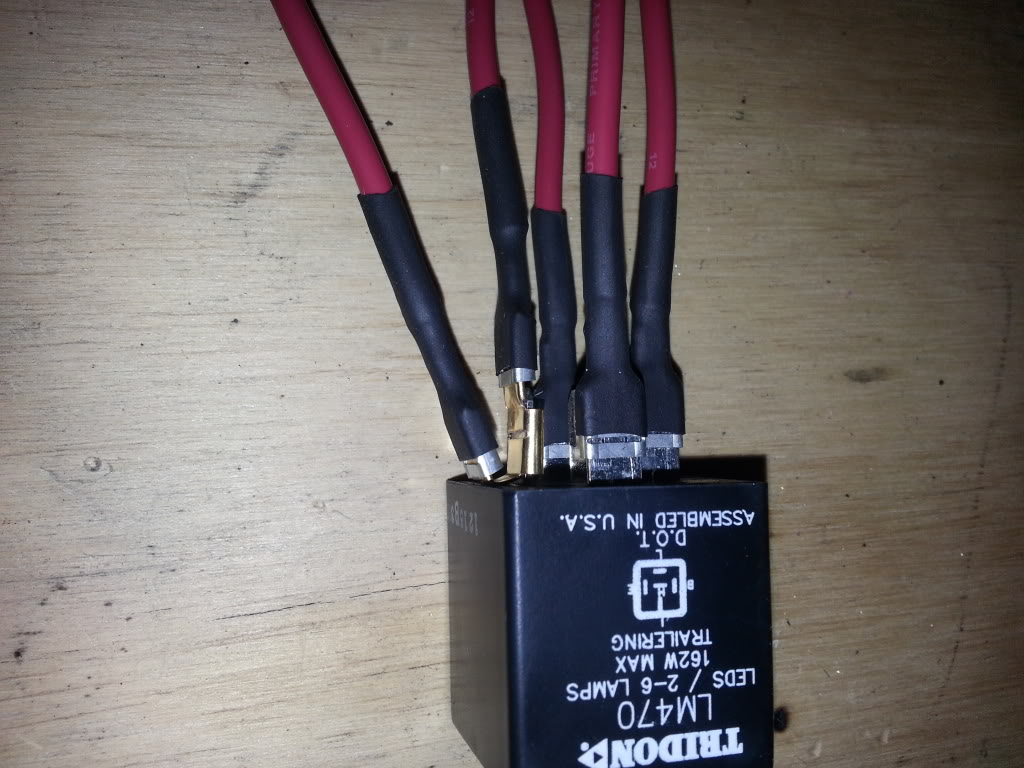
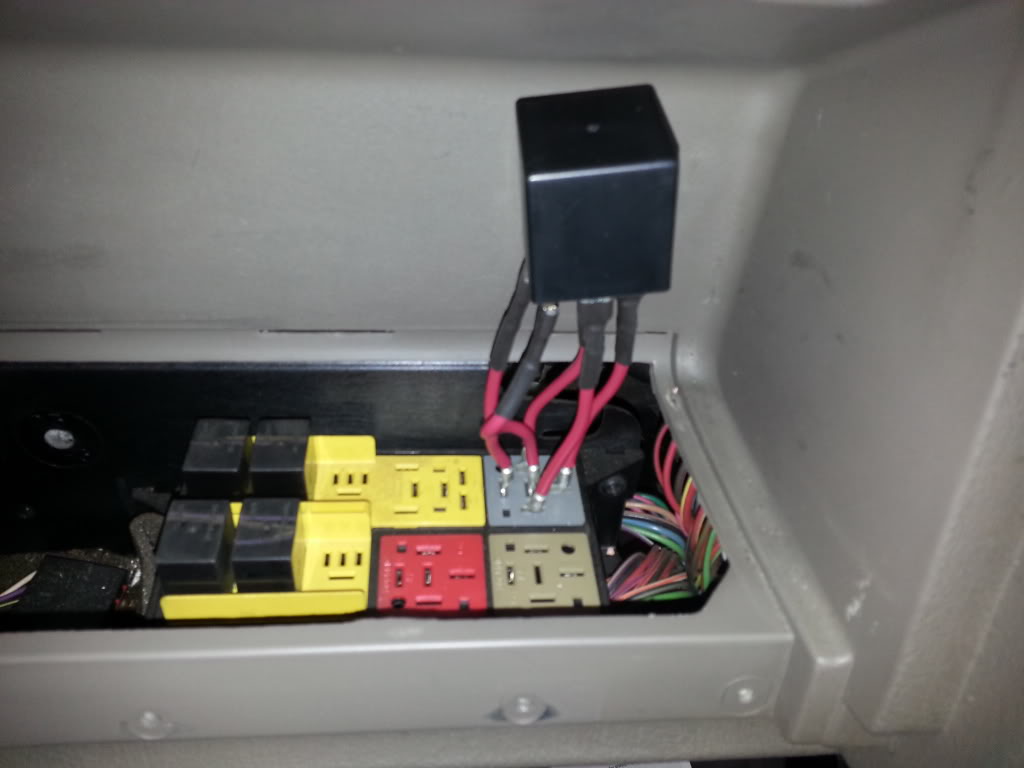
Oh, and it is possible to make this work without cutting and soldering if you'd prefer not to modify your harness, but I'd recommend the permanent fix if you can. To do this, make 5 jumper wires that have a female spade connector on one end and a male spade connector on the other. These will attach between the flasher and the relay block in the glove box...I initially did this to check the functionality before I cut and soldered and it works just fine. I used 12 gauge wire, but you don't need it that thick, and I'd make the jumpers longer than I did so you can tuck the flasher away and reinstall the relay cover. Anyways, the jumpers all match up to their corresponding terminal in its socket except for the two horizontal ones. You will not be using the center terminal on the flasher. Instead, both horizontal terminals in the socket will be connected to the outer horizontal terminal on the flasher (the one to the left as it sits in the vehicle)...I used a piggyback terminal in order to hook both up to the same one. Here area couple pics to show how it goes. Again, I'd recommend cutting and soldering as I did though.
Let me know if you have any questions!
Here's what I did to fix the fast turn signal flashing in the ZJ. NOTE: All wiring pictures and color codes are based on a 95 ZJ Laredo, but the basics should carry over to all years, and this might even work for the folks that have a TJ, XJ, etc. I'm not sure if this fixes the problem when running LED lights, but it very well could.
QUICK BACKGROUND:
Many of us have experienced a problem with fast flashing turn signals. For me it was only when I had the headlights on. I found out that at some point my 95 ZJ was "converted" over to 97-98 corners, and that I had one correct bulb and one wrong bulb even though both fit and worked fine with the headlights off. From 93-96 Jeep used bulb 1295NA for the front turn signals in the ZJ. These are single filament bulbs rated at 37.5 watts and measure 4.1 ohms of resistance. for 97-98 the ZJ got a new dual filament bulb 3454NA rated at 33 watts and measuring 4.92 ohms of resistance, but only the high output side is used (they don't function as parking lights too). As a comparison, the 3157NA bulbs (used in 2001+ TJs) have 27 watts and 6.07 ohms, and 3457NA bulbs have 28.5 watts and 5.74 ohms. So, we have bulbs rated at a higher wattage output that have a lower resistance than newer bulbs. Adding to the problem is that the 1295NA bulbs are hard to find and pretty expensive, and the 3454NA bulbs are pretty much only available in junkyards. Here's a pic of the old and new:
The problem is that the "newer" bulbs (3157NA and 3457NA) aren't completely compatible with our flashers. Our stock flasher has a rating of 50CP (capacitive protection factor I think). Compare this to "newer" flashers that are rated at 35CP. Here's a pic of the stock flasher:
So, what I did is "converted" over to the "newer" style flasher and bulbs, but it's slightly more than just plug and play. For the "donor" Jeep I selected a 2002 TJ (this was pretty arbitrary but I wanted to use a 2001+ TJ since they had a 5 pin flasher like ours whereas 97-2000 TJs used a 4 pin flasher). For the bulbs I went with 3457NA since I had bought a set to try and fix the problem early on before I did my homework, but 3157NA should work fine as well. For the flasher I went with what the parts store told me was a "direct replacement" number LM470:
If you notice it does say LED on the side so those of you running LEDs might find this as a fix as well...I can't say for sure. Moving on, replacing the flasher is a piece of cake. Three phillips head screws hold the relay cover in place (located on the floor of the glove box). The flasher is the one all the way to the right and in back (towards the front of the Jeep). It's the one in the picture below with nothing written on top. Simply remove the old one and plug the new one in, then replace the relay cover and that part's done.
I'm not going to go into detail on how to change out the bulbs in this post, but it's literally plug and play. If you have the 1295NA bulbs and want to switch to the 97-98 style, just get the corner harnesses from a junkyard (they're about 2' long, so it's not much) and they just plug right in. If you have either style and want to incorporate the parking brake side, I think that XJ sockets will work. They are already 3 wire sockets, so it's just a matter of splicing them in as long as they'll fit the housing (I have some but haven't done that yet...once I'm done if it works I'll let you know). At this point though, you should have turn signals that work perfect (you'll probably be able to hear the clicking a little more, and they may flash a little slower than you're used to, but they work great). NOTE: some other flashers have been reported by others to click even when the turn signals are not on...this does not happen with this flasher!
The biggest change is the wiring, and it's not that bad. The stock 5 pin flasher uses one terminal as an output to the turn signal portion of the multifunction switch and another as the output to the hazard lights portion of the multifunction switch. Although the turn signals work great, you may have noticed that you no longer have hazard lights! Have no fear, we're about to fix that! First, remove the panel under the steering column held on by 4 phillips head screws. Next, unscrew the tilt lever and take it out. Now remove the panels surrounding the multifunction switch (between the dash and the steering wheel) held on by 3 T-20 torx head screws. Now we're ready to remove the connector from the back of the multifunction switch...it's held on by a 7mm screw in the middle of the wires shown in below:
Now we're ready to modify the harness. Start by cutting the wire that goes from the flasher to the hazard switch part of the multifunction switch. For a 95 ZJ it is the violet wire with a tan tracer. It should be the third wire from the top in the middle row (just above the 7mm screw). Cut it down a ways from the the connector so you have room to work with it as shown here:
Strip the end of this wire and we're ready to move on. Now remove the white terminal lock from the front of the connector by taking a flat screw driver or similar tool and gently prying it out from the center hold as seen here:
Looking at the front of the connector you should see little plastic tabs next to each terminal. Locate the wire going from the flasher to the turn signal part of the multifunction switch. On a 95 ZJ it is black with an orange tracer and is located at the very bottom of the connector. NOTE: My FSM shows it to be in the first row (to the left of the vehicle) but mine was in the center row). Now that you have that wire located, gently pry the small plastic tab next to it's terminal to the side and pull the terminal out the back as shown here:
Now carefully strip enough insulation off the wire just above the terminal to be able to make a good connection and get the wires ready for solder as shown here:
Solder the wires together making sure you have a good strong connection. Give it a minute to cool and then shrink wrap over the soldered area. Reinsert the terminal back in the same spot it was in and lock it in place. NOTE: I had to bend the plastic lock back towards the terminal to get it to lock in place. Once it's back in it should look like this:
Now you're ready to put reattach the connector to the back of the multifunction switch using the same 7mm screw. Next reattach the covers that go over the multifunction switch using the 3 T-20 torx screws. Reinsert and screw in the tilt lever. Reinstall the panel under the steering column using the 4 phillips head screws.
That's it...you're done! You now have turn signals and hazard lights that work!
NOTE: The hazards will not work with the ignition switch turned to off...they will now only work with the key in and the ignition switch turned to on, just like the turn signals. It's a small price to pay, but definitely worth it in my opinion.
Oh, and it is possible to make this work without cutting and soldering if you'd prefer not to modify your harness, but I'd recommend the permanent fix if you can. To do this, make 5 jumper wires that have a female spade connector on one end and a male spade connector on the other. These will attach between the flasher and the relay block in the glove box...I initially did this to check the functionality before I cut and soldered and it works just fine. I used 12 gauge wire, but you don't need it that thick, and I'd make the jumpers longer than I did so you can tuck the flasher away and reinstall the relay cover. Anyways, the jumpers all match up to their corresponding terminal in its socket except for the two horizontal ones. You will not be using the center terminal on the flasher. Instead, both horizontal terminals in the socket will be connected to the outer horizontal terminal on the flasher (the one to the left as it sits in the vehicle)...I used a piggyback terminal in order to hook both up to the same one. Here area couple pics to show how it goes. Again, I'd recommend cutting and soldering as I did though.
Let me know if you have any questions!


Thread
Thread Starter
Forum
Replies
Last Post
BayArea93xj
Stock XJ Cherokee Tech. All XJ Non-modified/stock questions go here
8
06-11-2016 10:43 AM
Jeepy11
Stock Grand Cherokee Tech. All ZJ/WJ/WK Non-modified/stock questions go here!
2
09-03-2015 09:32 AM
WTT[NorAtl]: Looking for a cabover truck, 1980s through 1990s
Cherokee_Laredo
Wanted
0
09-02-2015 01:00 AM
rusty_bucket
Stock XJ Cherokee Tech. All XJ Non-modified/stock questions go here
3
08-29-2015 06:42 AM
Currently Active Users Viewing This Thread: 1 (0 members and 1 guests)