Trail Buggy XJ
 08-10-2017, 07:04 PM
#1
Junior Member
Thread Starter
Join Date: Nov 2015
Location: Central Arkansas
Posts: 51
Likes: 0
Received 2 Likes
on
1 Post
Year: Started as a 1987
Model: Cherokee
Engine: 4.0 Renix
I haven't posted much on the forum but figured I should go ahead and share my build. I already have this going on another forum but figured a Cherokee specific forum would like to see it also.
This is the build up of what I am calling my Trail Buggy XJ. I started with a 1987 XJ that I had been wheeling and modifying for about 10 years. I was to the point where I was ready to buy something with a real frame. Even though the unibody had been reinforced it was still nearly 30 years old and was showing its age. I had looked at getting a YJ or TJ and building it up but while I would gain a real frame, I would still have to deal with body damage. Then I started thinking that a buggy might be a better route. I looked around at buying one of the IBEX kits and using my old XJ parts but knew that I would never have time to build a chassis myself (even a kit like the IBEX) and have a rig ready to wheel anytime this summer. That was when I saw the the Tomahawk chassis that Action Fab posted in the Project Nillionaire thread on Pirate4x4. I contacted Chris, he is local to me, and we talked about chassis options. A couple weeks later I went down to his shop and put my deposit down.
What sold me was the ability to reuse much of my XJ on the buggy, sure any buggy can be set up to use anything, but it was nice to have someone design a chassis with then intent of using factory Jeep parts. I am reusing the engine, transmission, t-case, axles, gauge cluster, steering column, and steering box. My XJ was already setup with a 3-link front and coilovers and I will be reusing the coilovers also. The original plan was to also use leaf springs in the rear and then swap to a 4 link with coilovers in the rear after wheeling the buggy for a year or so.
Onto some preliminary specs. I will post final specs once the rig is done.
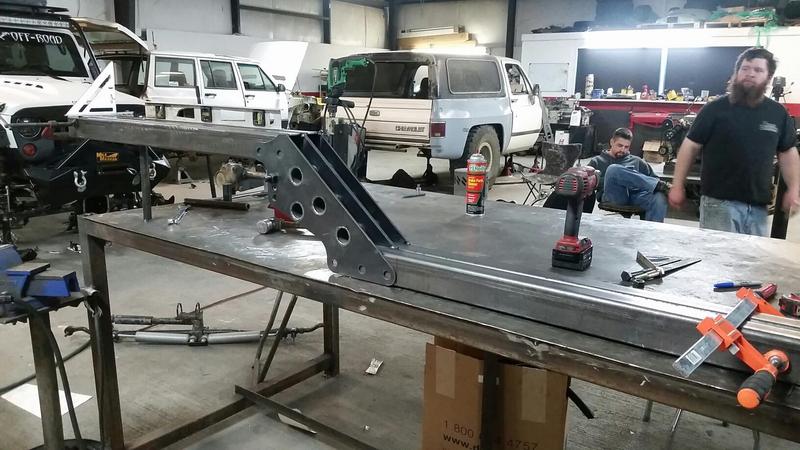
Tomahawk Chassis:
2� x 3� rectangle tube and 3/16� plate for the lower rails
1.5� x .120� DOM for the tubing, with a little 1.25� x .120� DOM mixed in.
Integrated winch mount in the front of the frame.
4 seater with 36� rear bench.
Drivetrain:
Engine � Renix 4.0
Transmission � AW4
T-case � NP231
Front axle � Dana 30 with sleeved axle tubes, RCV's, ARB, and Bluetorch cross over steering conversion bracket.
Rear axle � Dana 44 with Alloy USA shafts, Disc brake conversion, and ARB.
For tires, I will start out with the 35� x 12.50� Goodyear Kevlar MTR's that I was running on the XJ.
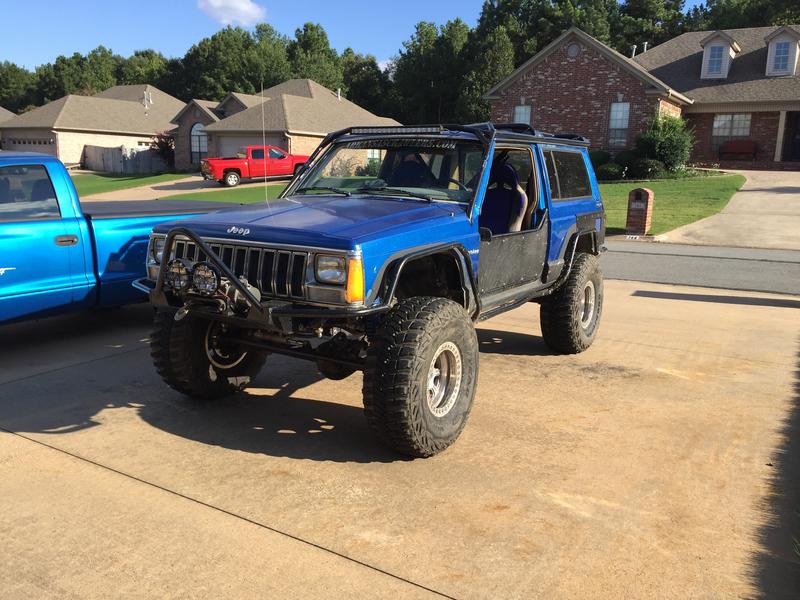
Here is the Jeep that I had and will be reusing the parts from.
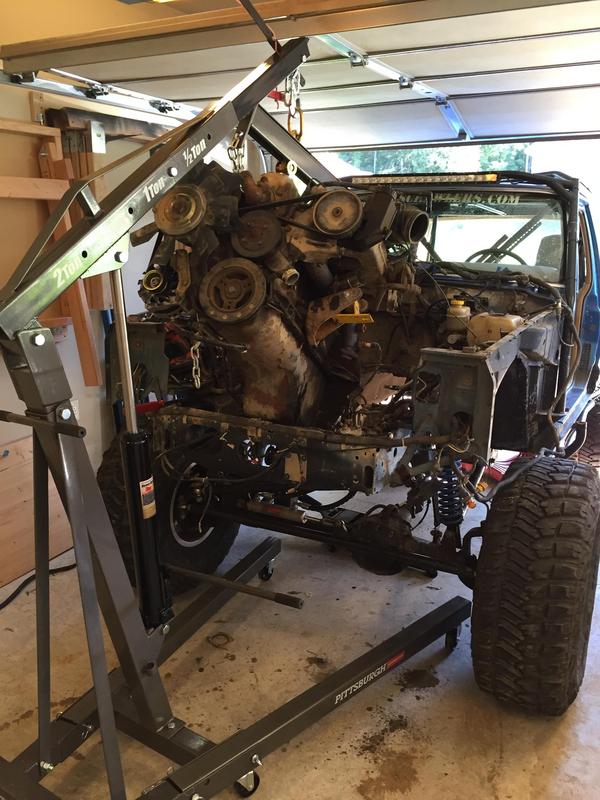
Pulling the engine from the old Jeep.
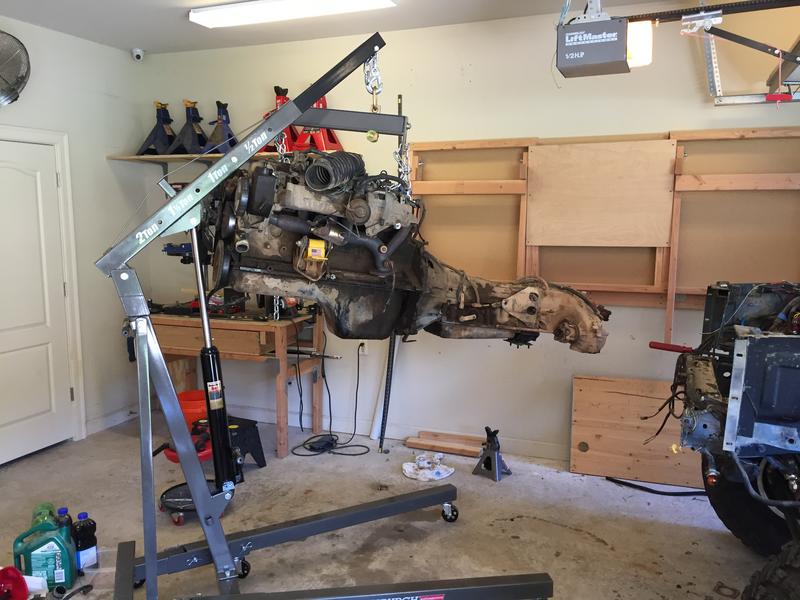
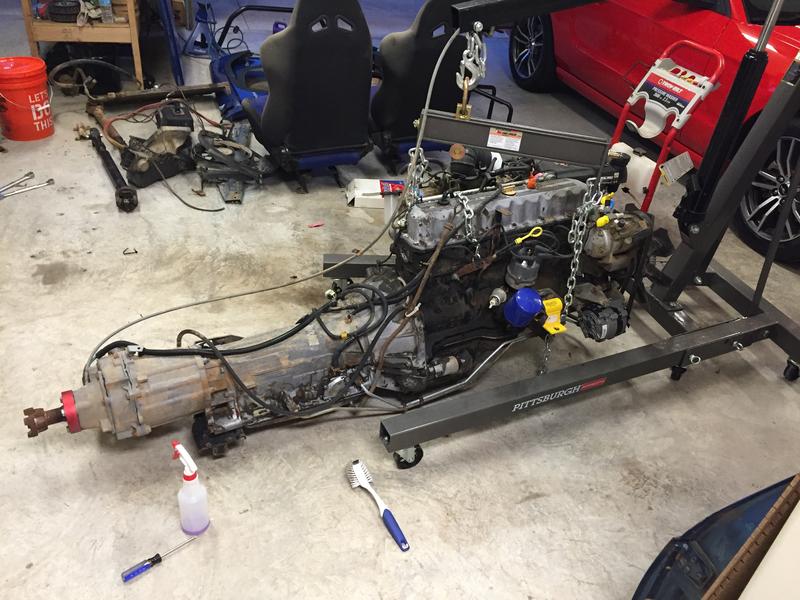
Engine cleaned up some.
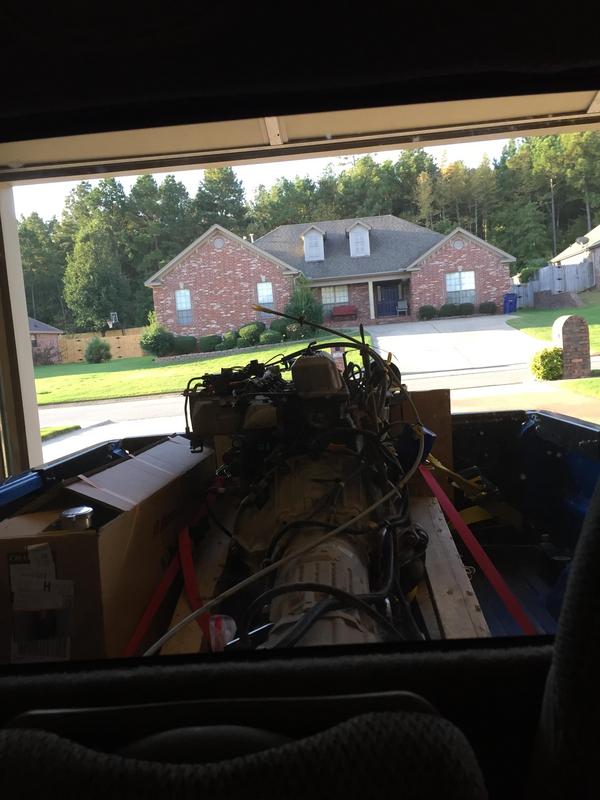
Loaded the truck up with parts to take to Chris for the chassis build.
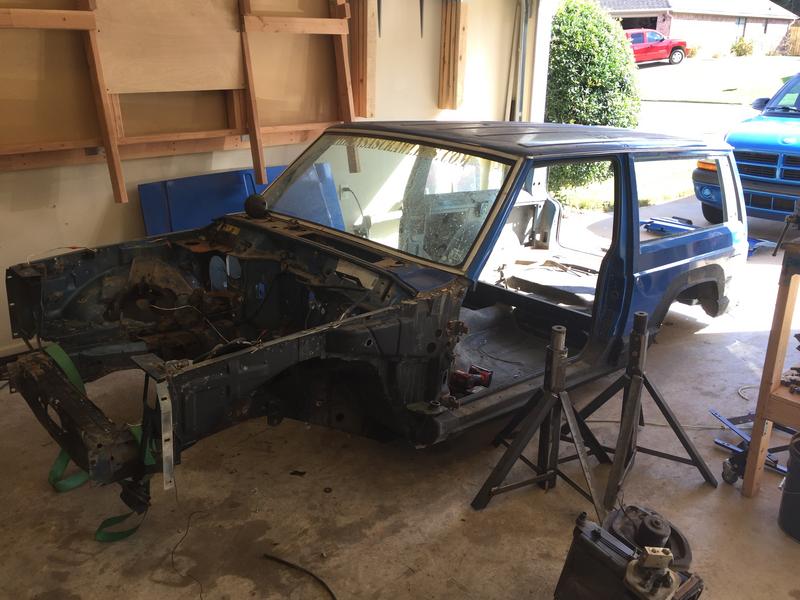
Totally stripped XJ. I sold off everything that wasn't getting reused.
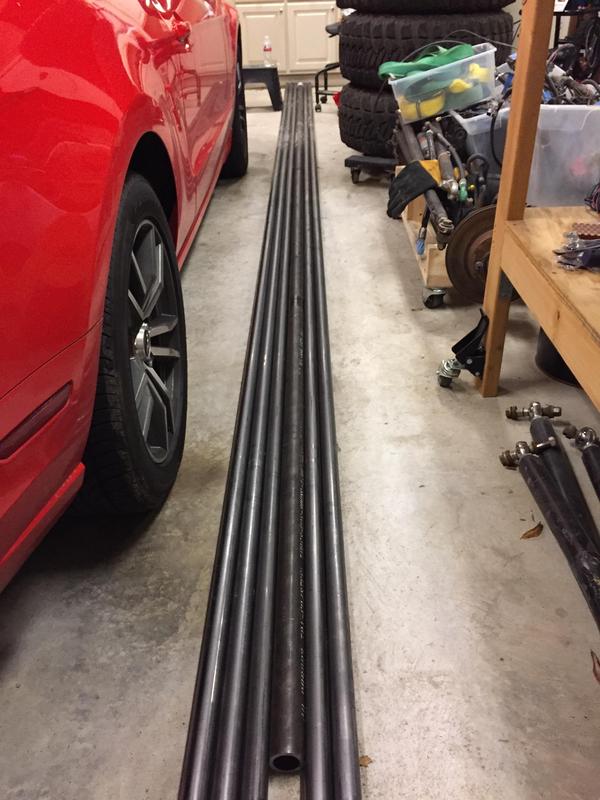
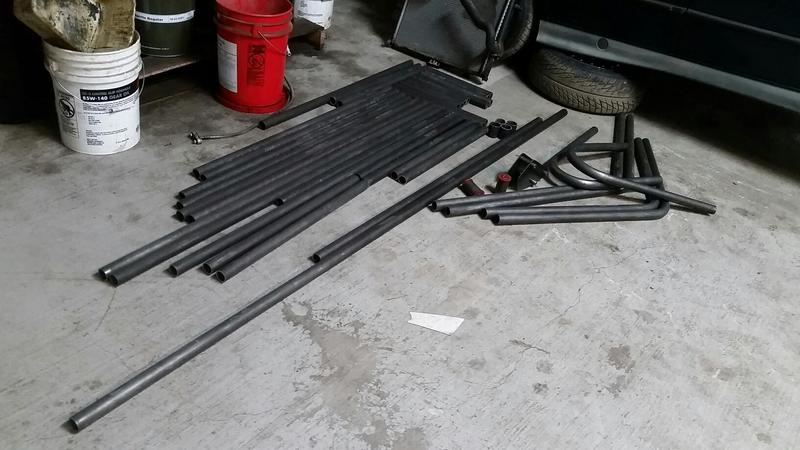
Delivery of steel and aluminum came in. 1.5� x .120 wall tube for misc chassis additions, 2� x .250 wall tube for links, 2 5x10 sheets of .090� and 1 5x10 sheet of .060� aluminum.
This is the build up of what I am calling my Trail Buggy XJ. I started with a 1987 XJ that I had been wheeling and modifying for about 10 years. I was to the point where I was ready to buy something with a real frame. Even though the unibody had been reinforced it was still nearly 30 years old and was showing its age. I had looked at getting a YJ or TJ and building it up but while I would gain a real frame, I would still have to deal with body damage. Then I started thinking that a buggy might be a better route. I looked around at buying one of the IBEX kits and using my old XJ parts but knew that I would never have time to build a chassis myself (even a kit like the IBEX) and have a rig ready to wheel anytime this summer. That was when I saw the the Tomahawk chassis that Action Fab posted in the Project Nillionaire thread on Pirate4x4. I contacted Chris, he is local to me, and we talked about chassis options. A couple weeks later I went down to his shop and put my deposit down.
What sold me was the ability to reuse much of my XJ on the buggy, sure any buggy can be set up to use anything, but it was nice to have someone design a chassis with then intent of using factory Jeep parts. I am reusing the engine, transmission, t-case, axles, gauge cluster, steering column, and steering box. My XJ was already setup with a 3-link front and coilovers and I will be reusing the coilovers also. The original plan was to also use leaf springs in the rear and then swap to a 4 link with coilovers in the rear after wheeling the buggy for a year or so.
Onto some preliminary specs. I will post final specs once the rig is done.
Tomahawk Chassis:
2� x 3� rectangle tube and 3/16� plate for the lower rails
1.5� x .120� DOM for the tubing, with a little 1.25� x .120� DOM mixed in.
Integrated winch mount in the front of the frame.
4 seater with 36� rear bench.
Drivetrain:
Engine � Renix 4.0
Transmission � AW4
T-case � NP231
Front axle � Dana 30 with sleeved axle tubes, RCV's, ARB, and Bluetorch cross over steering conversion bracket.
Rear axle � Dana 44 with Alloy USA shafts, Disc brake conversion, and ARB.
For tires, I will start out with the 35� x 12.50� Goodyear Kevlar MTR's that I was running on the XJ.
Here is the Jeep that I had and will be reusing the parts from.
Pulling the engine from the old Jeep.
Engine cleaned up some.
Loaded the truck up with parts to take to Chris for the chassis build.
Totally stripped XJ. I sold off everything that wasn't getting reused.
Delivery of steel and aluminum came in. 1.5� x .120 wall tube for misc chassis additions, 2� x .250 wall tube for links, 2 5x10 sheets of .090� and 1 5x10 sheet of .060� aluminum.
 08-11-2017, 08:47 PM
#3
Junior Member
Thread Starter
Join Date: Nov 2015
Location: Central Arkansas
Posts: 51
Likes: 0
Received 2 Likes
on
1 Post
Year: Started as a 1987
Model: Cherokee
Engine: 4.0 Renix
Now for the part that everyone wants to see. Here are some photos of the chassis build.
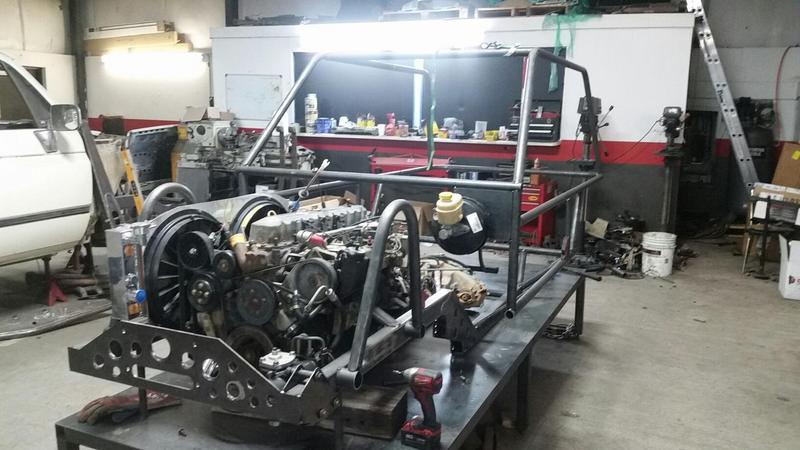
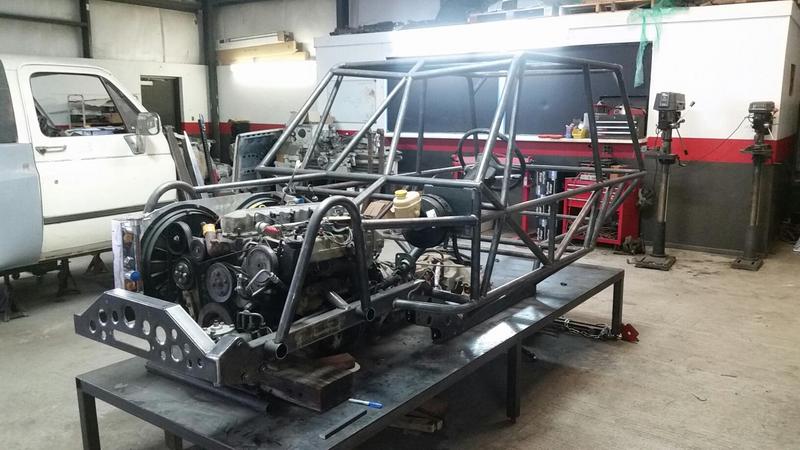
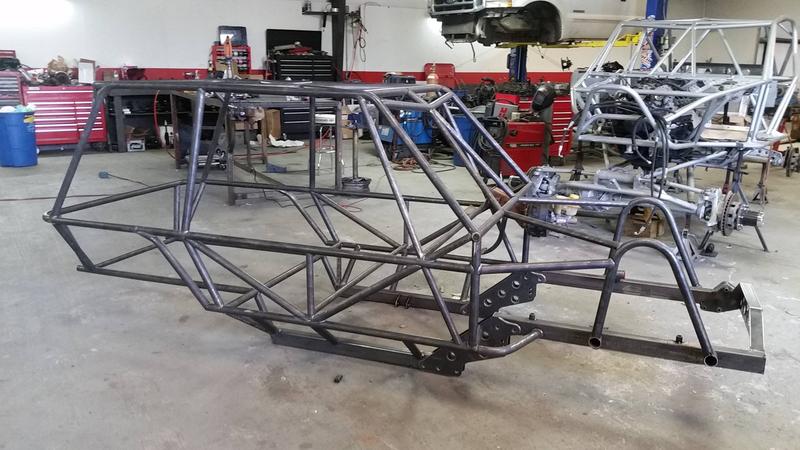
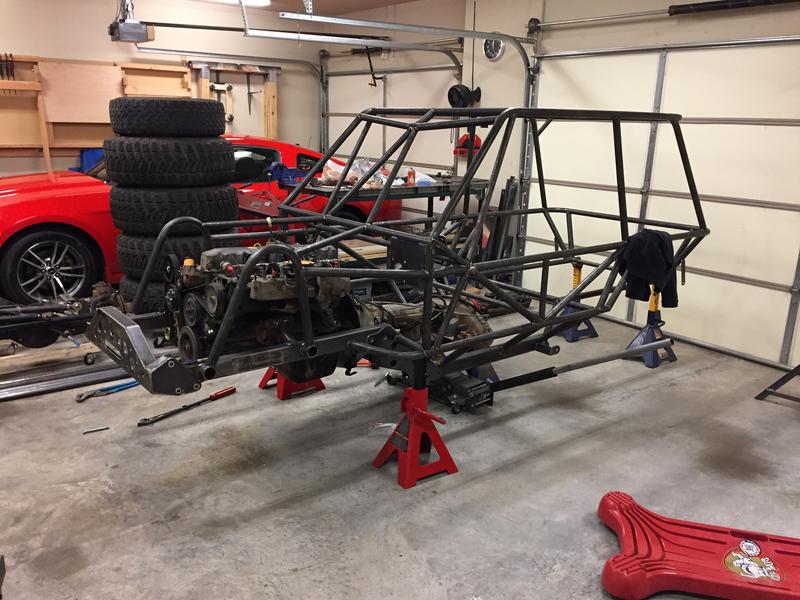
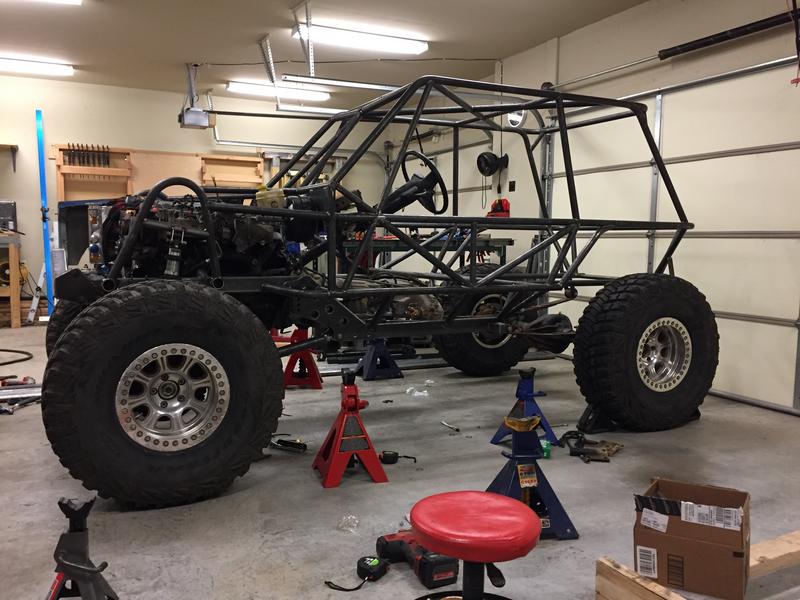
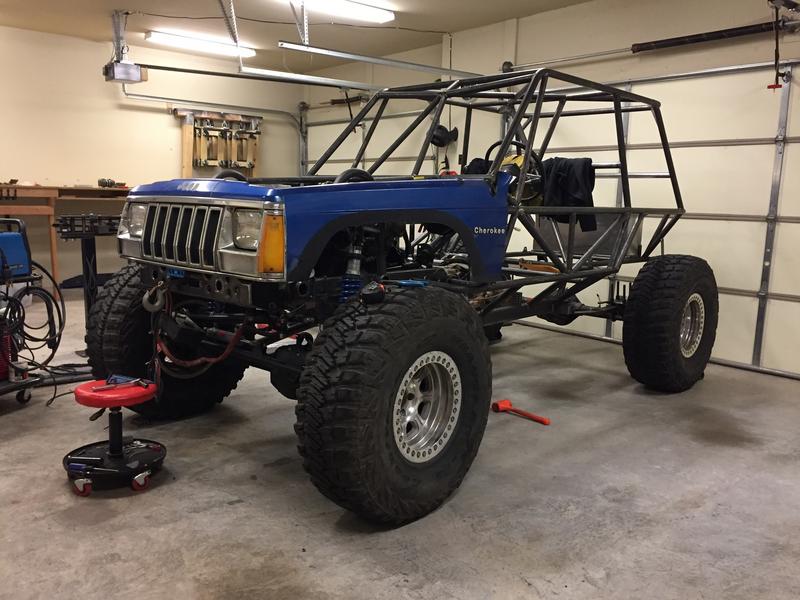
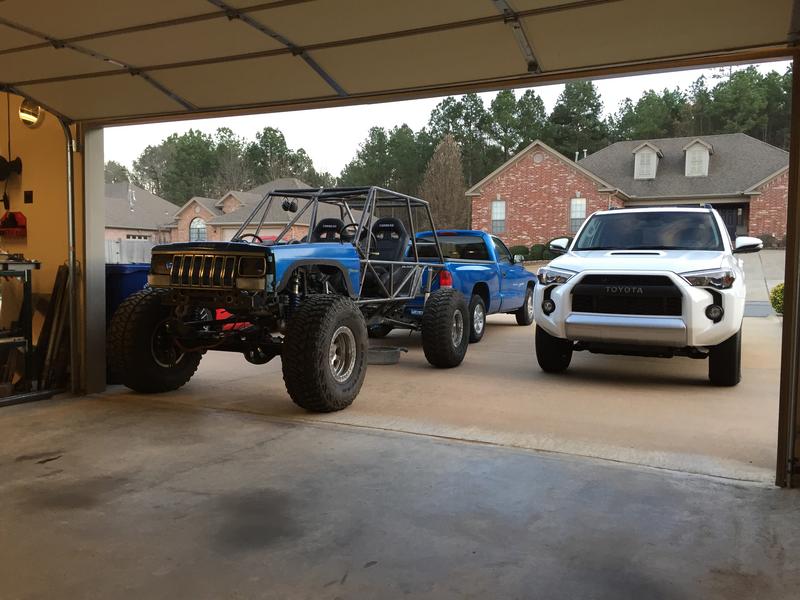
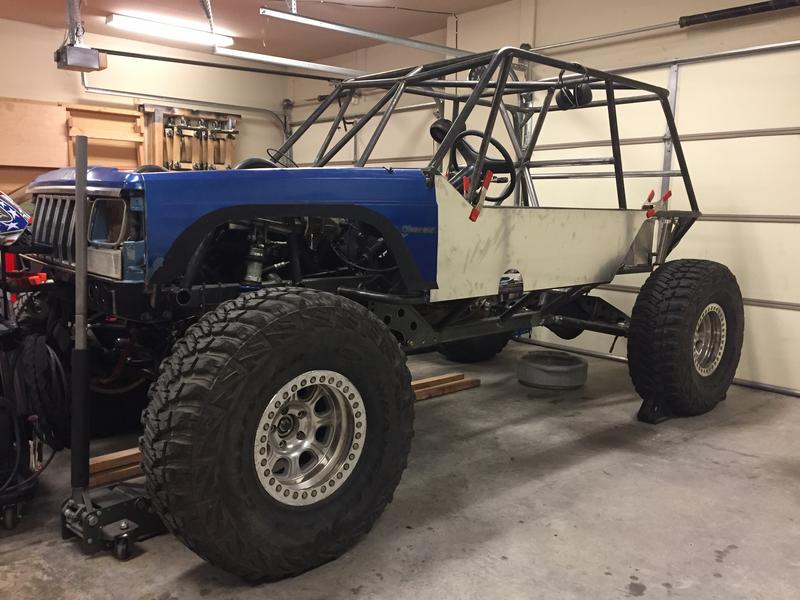
Here is the chassis at home and in my garage. I took delivery of the chassis mid January this year. My chassis ended up being Tomahawk chassis #1.
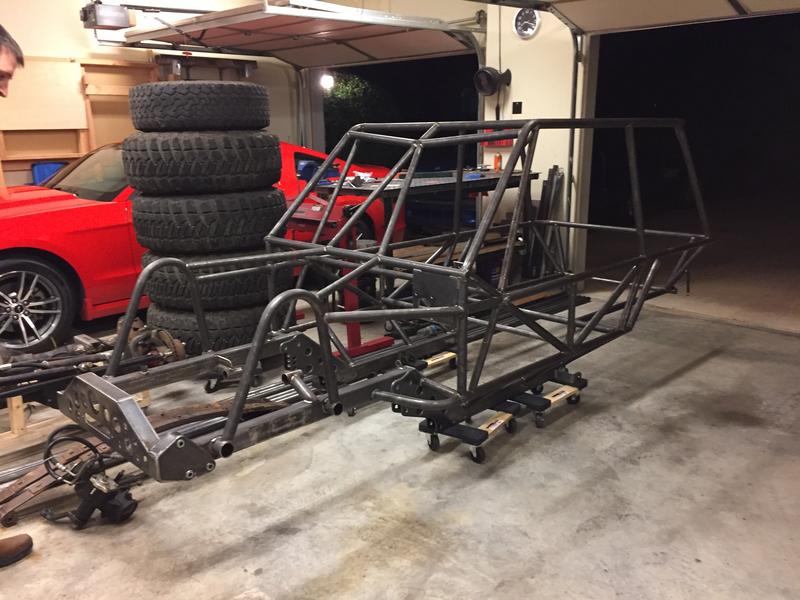
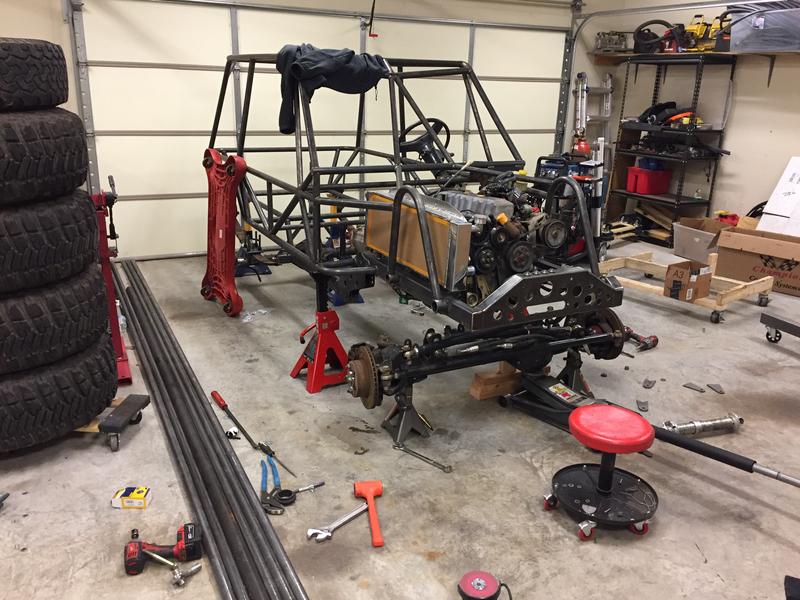
I quickly got to work and was able to make the chassis a roller a couple of days later.
Here is the chassis at home and in my garage. I took delivery of the chassis mid January this year. My chassis ended up being Tomahawk chassis #1.
I quickly got to work and was able to make the chassis a roller a couple of days later.
08-11-2017, 08:49 PM
#4
Junior Member
Thread Starter
Join Date: Nov 2015
Location: Central Arkansas
Posts: 51
Likes: 0
Received 2 Likes
on
1 Post
Year: Started as a 1987
Model: Cherokee
Engine: 4.0 Renix
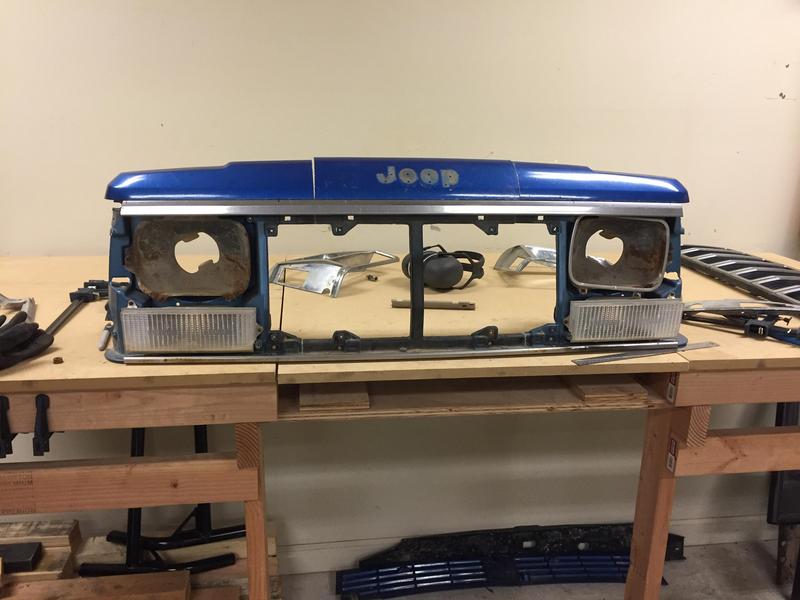
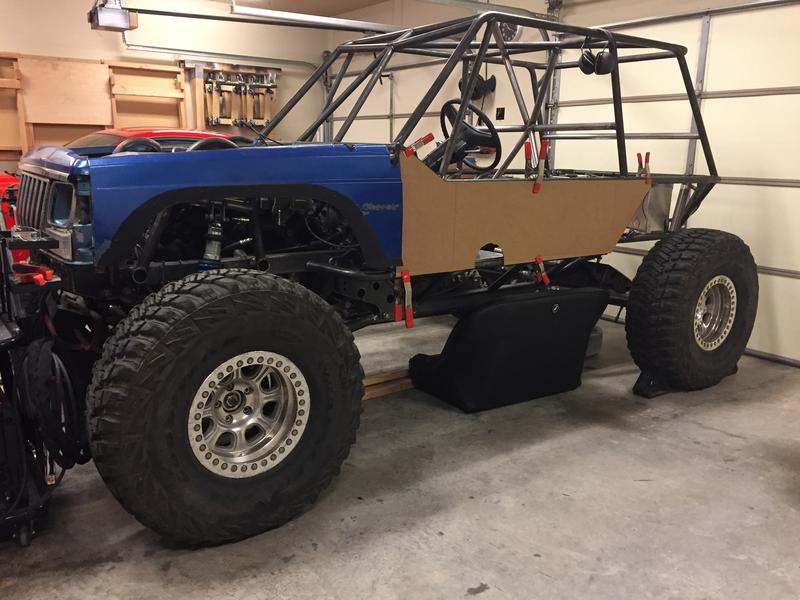
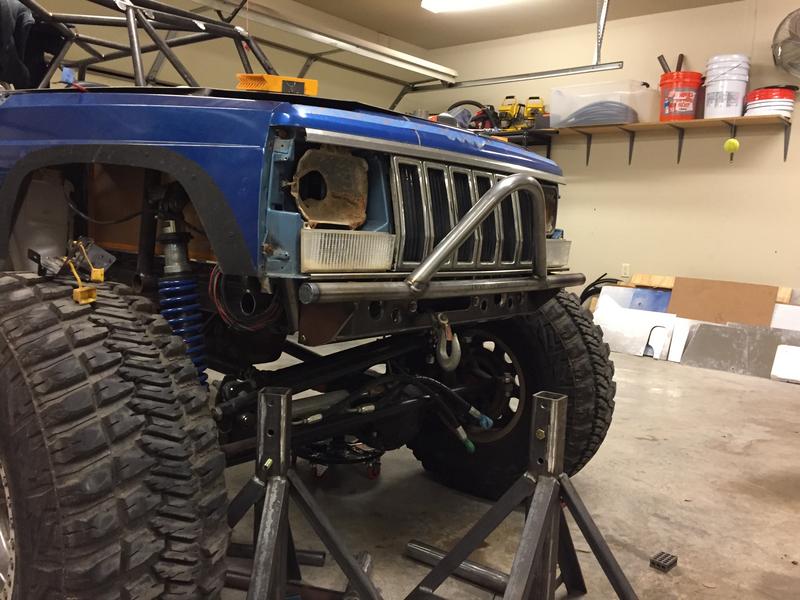
Here is the first mock-up of the fenders and grille. I am using XJ fenders and a narrowed grille. I will not be able to reuse the factory hood.

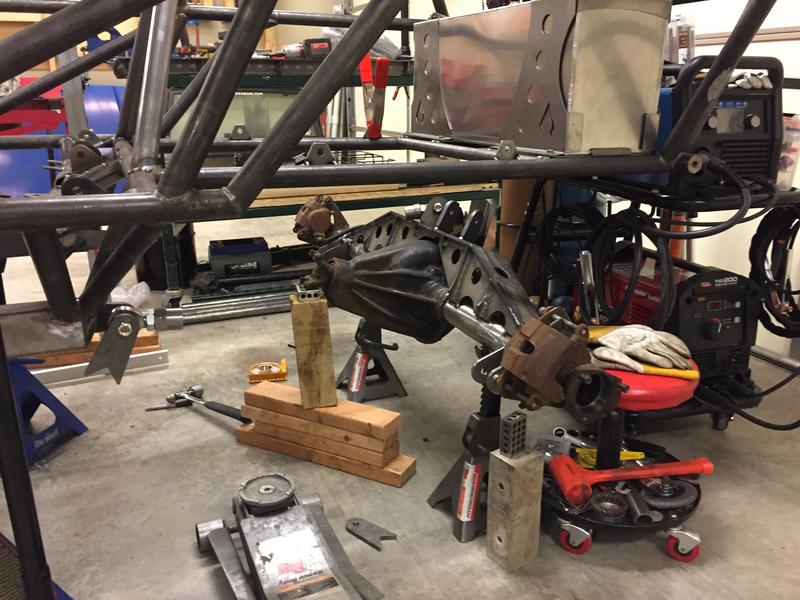
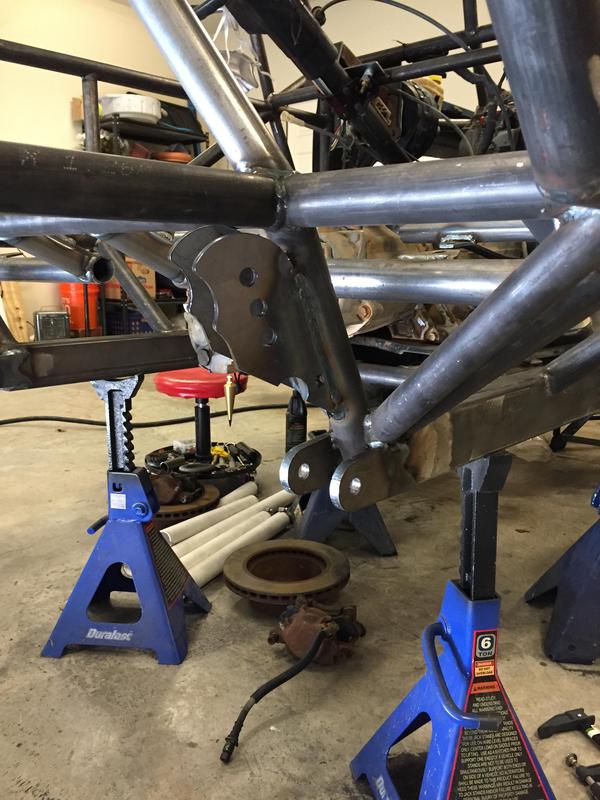
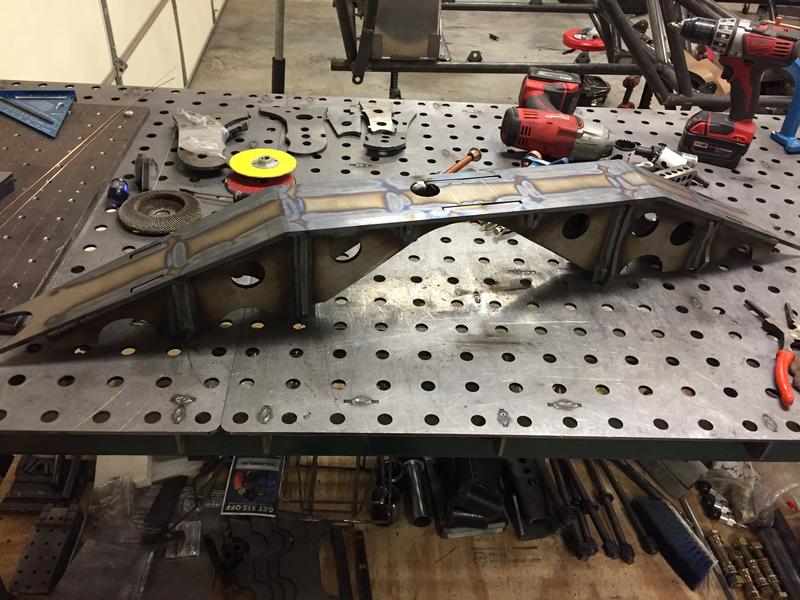
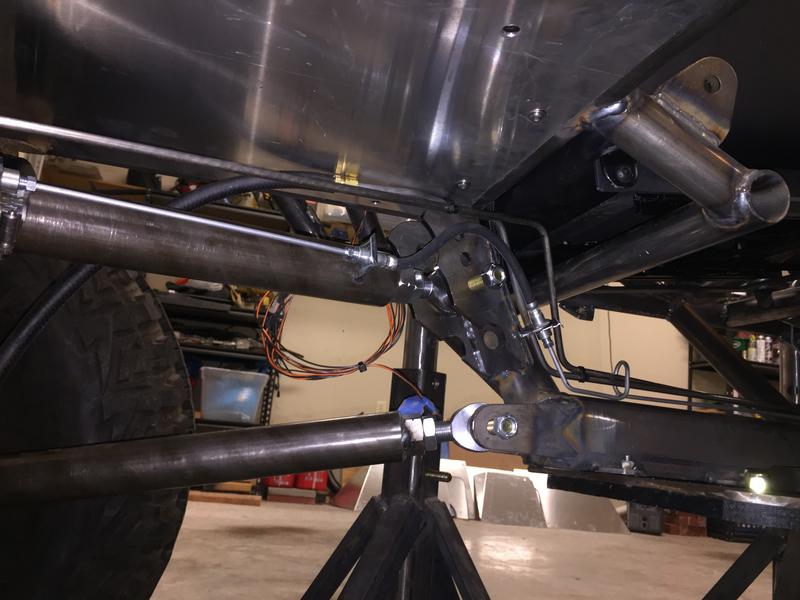
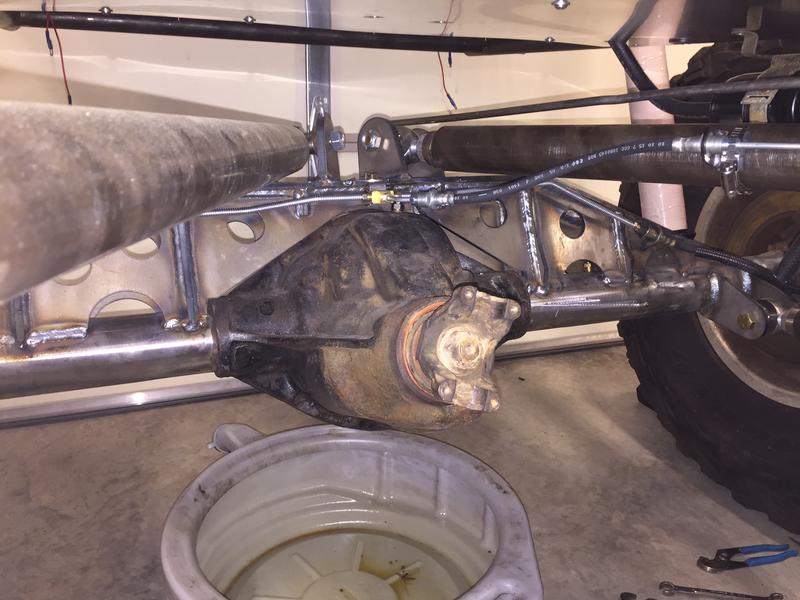
Then I got a smokin' deal on some coilovers and heim joints so I decided to go ahead and 4-link the rear suspension now. I am using an Artec truss for the rear axle. The truss is very nice and went together very easily. I only had to clearance for the axle tube vent and the ARB air line. For the chassis side upper links, I am using Artec track bar mounts that I cut and modified. I was then able to take the part of track bar mount that I cut off and use it for gussets on the upper shock mounts. The rest of the rear link mounts are random tabs and a shock mount from Ruffstuff.


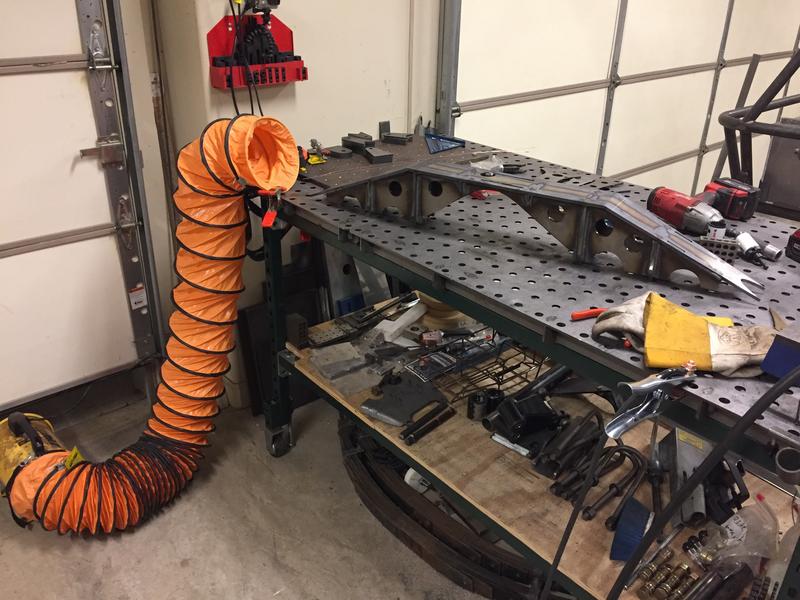
My redneck fume extractor for welding with the garage doors shut.
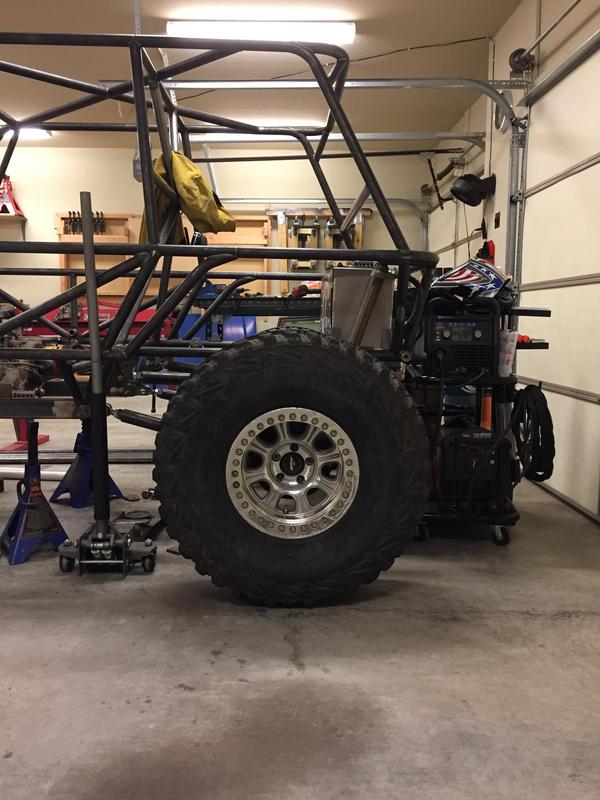
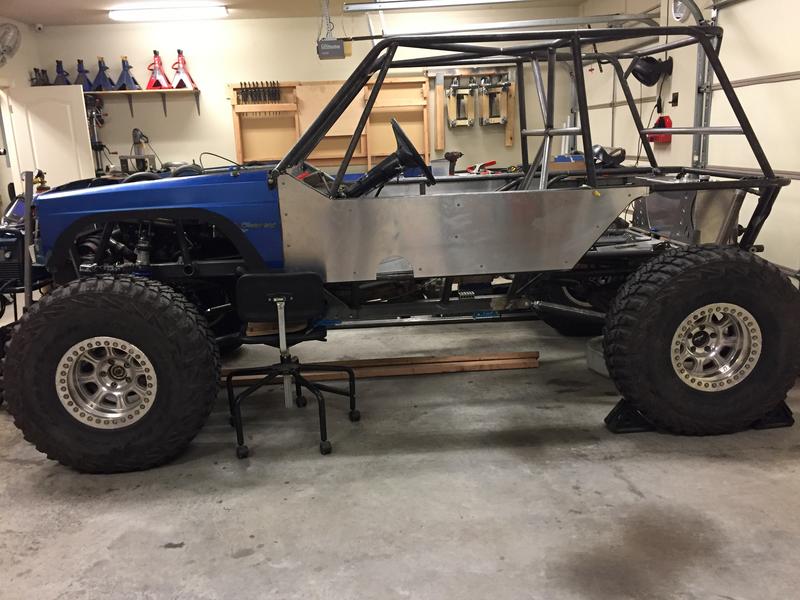
Quick look at what the approach and departure angles will look like.


Then I got a smokin' deal on some coilovers and heim joints so I decided to go ahead and 4-link the rear suspension now. I am using an Artec truss for the rear axle. The truss is very nice and went together very easily. I only had to clearance for the axle tube vent and the ARB air line. For the chassis side upper links, I am using Artec track bar mounts that I cut and modified. I was then able to take the part of track bar mount that I cut off and use it for gussets on the upper shock mounts. The rest of the rear link mounts are random tabs and a shock mount from Ruffstuff.
My redneck fume extractor for welding with the garage doors shut.
Quick look at what the approach and departure angles will look like.
 08-12-2017, 03:12 PM
#7
Junior Member
Thread Starter
Join Date: Nov 2015
Location: Central Arkansas
Posts: 51
Likes: 0
Received 2 Likes
on
1 Post
Year: Started as a 1987
Model: Cherokee
Engine: 4.0 Renix
I tried posting more updates yesterday but it sounds like there was some glitches. Hopefully this doesn't end up being a double post.
Here is the first mock-up of the fenders and grille. I am using XJ fenders and a narrowed grille. I will not be able to reuse the factory hood.


Then I got a smokin' deal on some coilovers and heim joints so I decided to go ahead and 4-link the rear suspension now. I am using an Artec truss for the rear axle. The truss is very nice and went together very easily. I only had to clearance for the axle tube vent and the ARB air line. For the chassis side upper links, I am using Artec track bar mounts that I cut and modified. I was then able to take the part of track bar mount that I cut off and use it for gussets on the upper shock mounts. The rest of the rear link mounts are random tabs and a shock mount from Ruffstuff.


My redneck fume extractor for welding with the garage doors shut.

Quick look at what the approach and departure angles will look like.

Here is the first mock-up of the fenders and grille. I am using XJ fenders and a narrowed grille. I will not be able to reuse the factory hood.
Then I got a smokin' deal on some coilovers and heim joints so I decided to go ahead and 4-link the rear suspension now. I am using an Artec truss for the rear axle. The truss is very nice and went together very easily. I only had to clearance for the axle tube vent and the ARB air line. For the chassis side upper links, I am using Artec track bar mounts that I cut and modified. I was then able to take the part of track bar mount that I cut off and use it for gussets on the upper shock mounts. The rest of the rear link mounts are random tabs and a shock mount from Ruffstuff.
My redneck fume extractor for welding with the garage doors shut.
Quick look at what the approach and departure angles will look like.
Trending Topics
08-12-2017, 11:15 PM
#9
Junior Member
Thread Starter
Join Date: Nov 2015
Location: Central Arkansas
Posts: 51
Likes: 0
Received 2 Likes
on
1 Post
Year: Started as a 1987
Model: Cherokee
Engine: 4.0 Renix
Thanks guys. I have been trying to post the rest of the build but for some reason the posts keep saying that they have to be approved.
Here is the first mock-up of the fenders and grille. I am using XJ fenders and a narrowed grille. I will not be able to reuse the factory hood.

Then I got a smokin' deal on some coilovers and heim joints so I decided to go ahead and 4-link the rear suspension now. I am using an Artec truss for the rear axle. The truss is very nice and went together very easily. I only had to clearance for the axle tube vent and the ARB air line. For the chassis side upper links, I am using Artec track bar mounts that I cut and modified. I was then able to take the part of track bar mount that I cut off and use it for gussets on the upper shock mounts. The rest of the rear link mounts are random tabs and a shock mount from Ruffstuff.


My redneck fume extractor for welding with the garage doors shut.

Quick look at what the approach and departure angles will look like.

Here is the first mock-up of the fenders and grille. I am using XJ fenders and a narrowed grille. I will not be able to reuse the factory hood.
Then I got a smokin' deal on some coilovers and heim joints so I decided to go ahead and 4-link the rear suspension now. I am using an Artec truss for the rear axle. The truss is very nice and went together very easily. I only had to clearance for the axle tube vent and the ARB air line. For the chassis side upper links, I am using Artec track bar mounts that I cut and modified. I was then able to take the part of track bar mount that I cut off and use it for gussets on the upper shock mounts. The rest of the rear link mounts are random tabs and a shock mount from Ruffstuff.
My redneck fume extractor for welding with the garage doors shut.
Quick look at what the approach and departure angles will look like.
08-12-2017, 11:17 PM
#10
Junior Member
Thread Starter
Join Date: Nov 2015
Location: Central Arkansas
Posts: 51
Likes: 0
Received 2 Likes
on
1 Post
Year: Started as a 1987
Model: Cherokee
Engine: 4.0 Renix
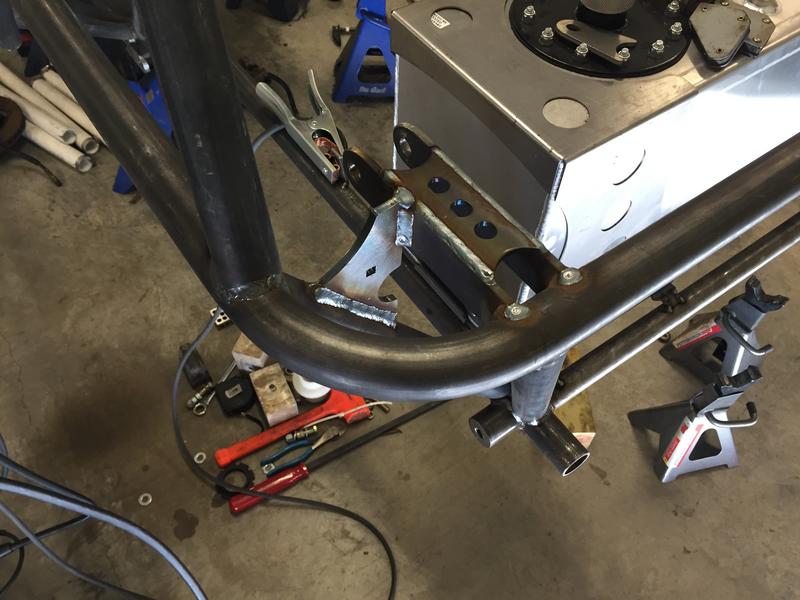
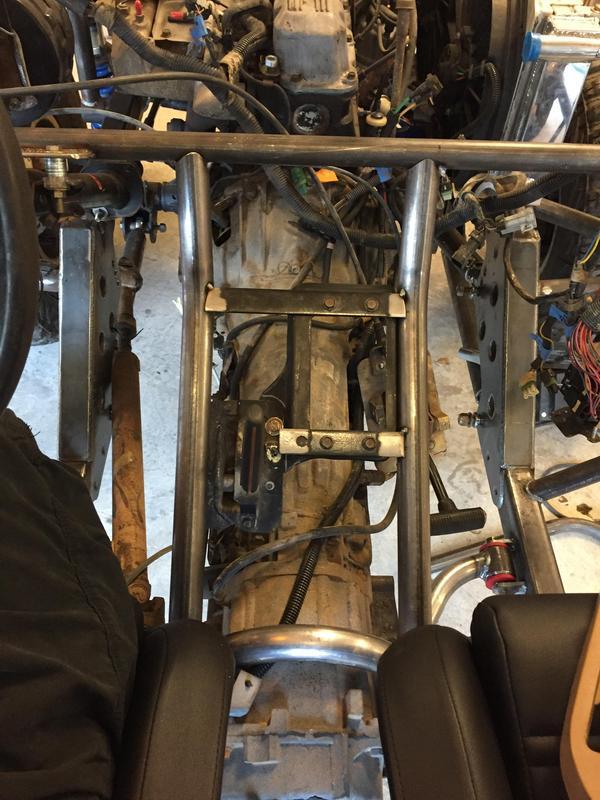
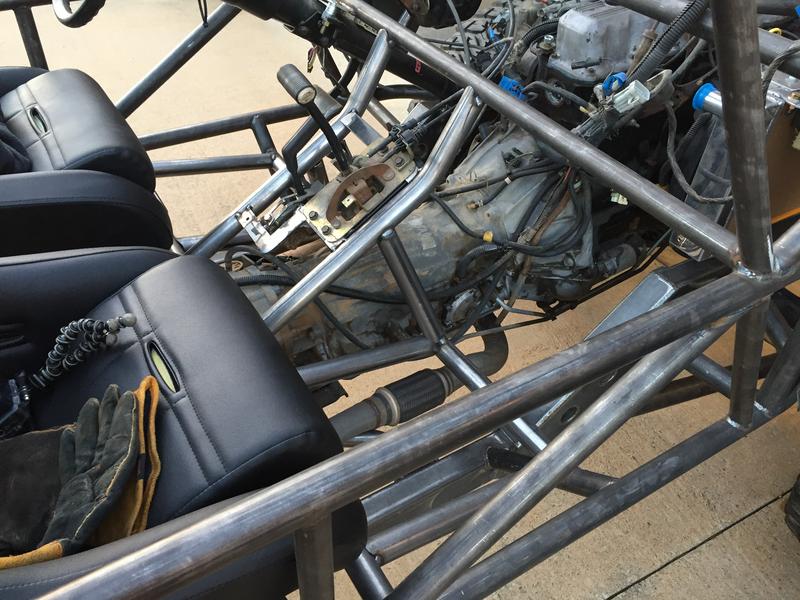
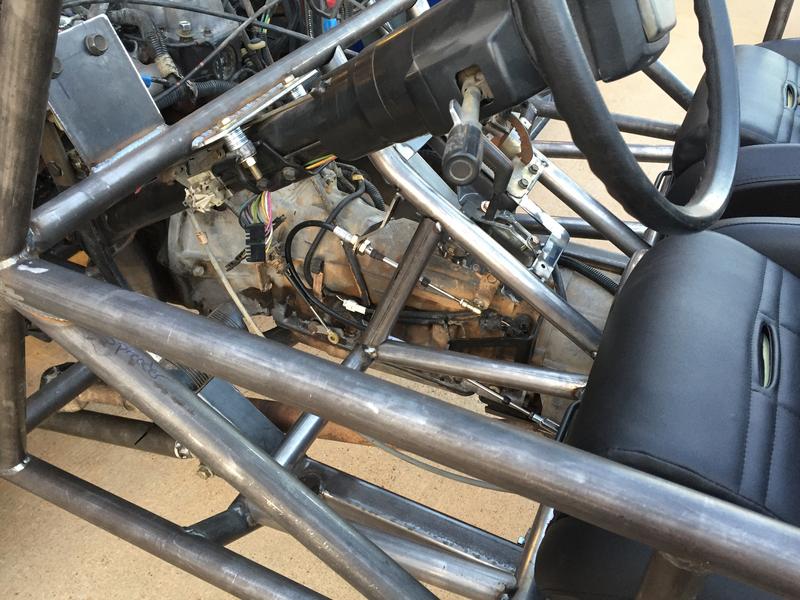
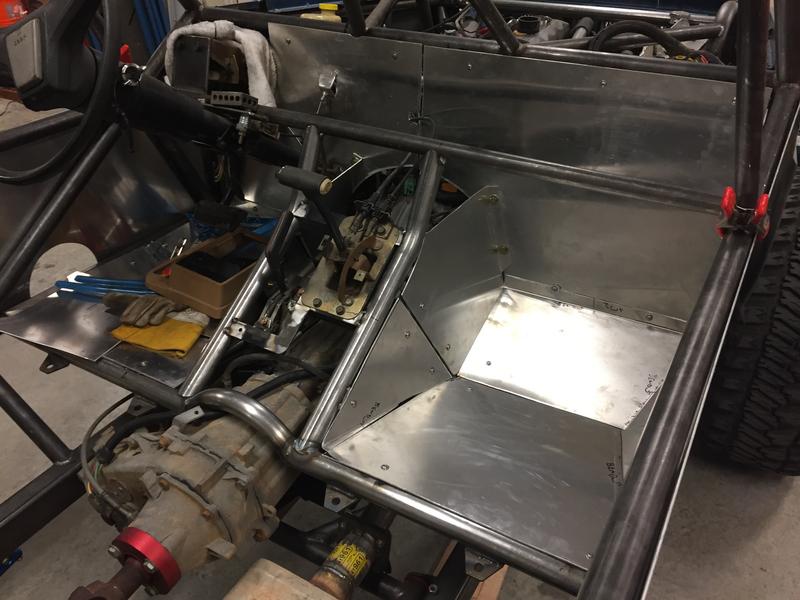
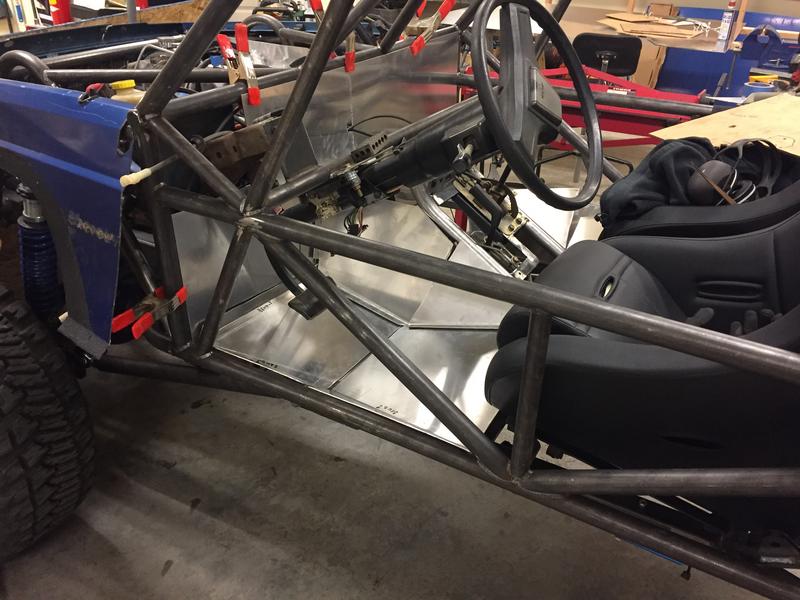
Here is some work on the floor and center console. I am reusing the factory transmission and t-case shifters. I am able to reuse the factory transmission cable. For the t-case, I am using a Novak cable shifter for an XJ. From the Novak kit, I am able to use the cable and the bracket for the transmission. I had to make my own chassis side bracket obviously. The chassis side bracket for the t-case shifter gets reinforced later on.
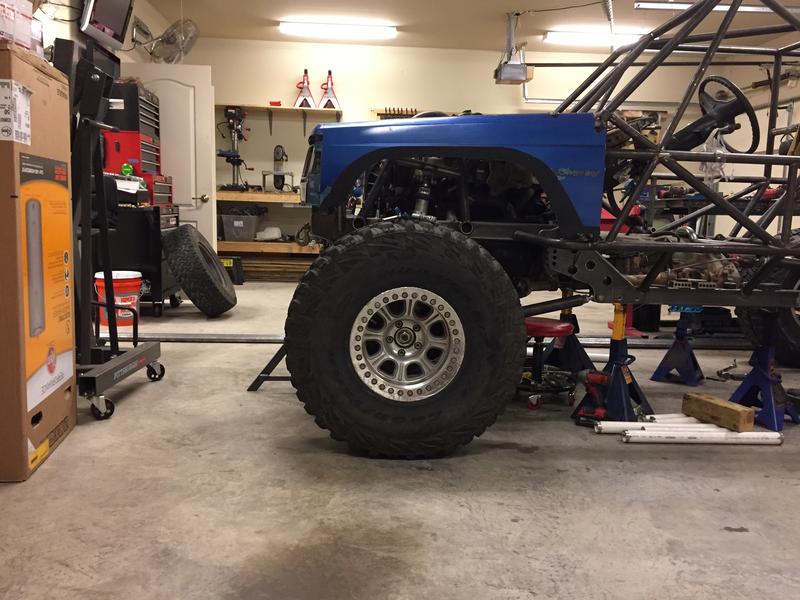
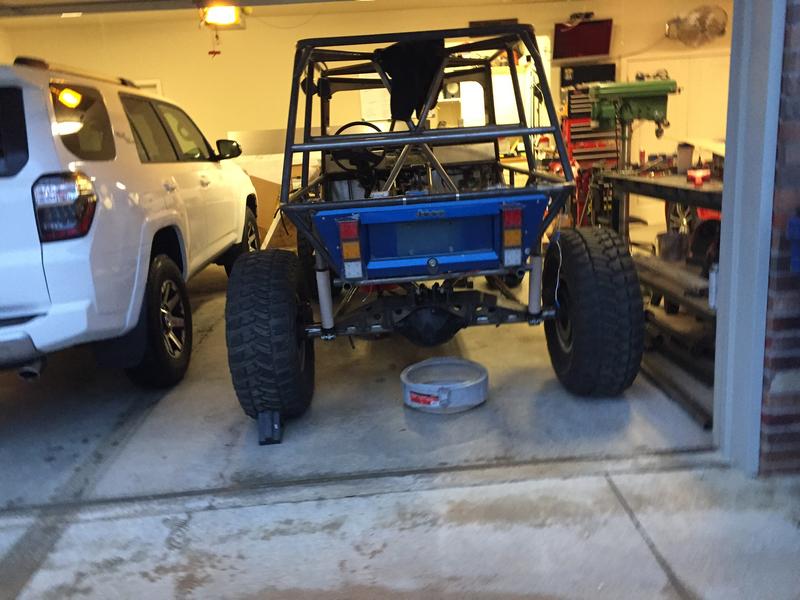
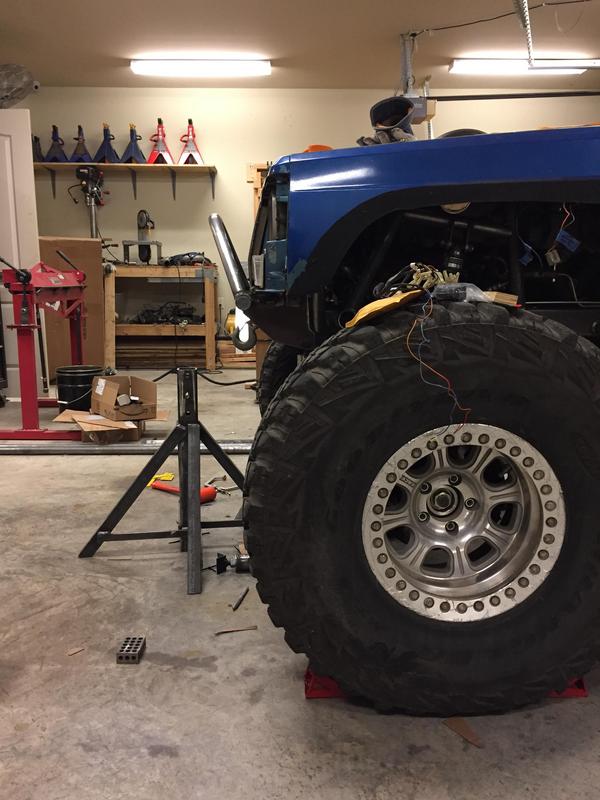
Here is the first shot of the buggy rolled out of the garage.
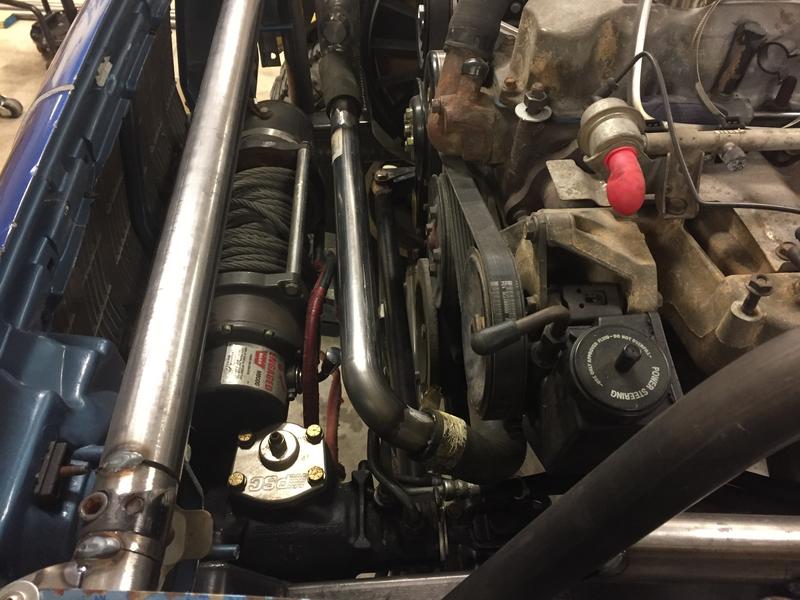
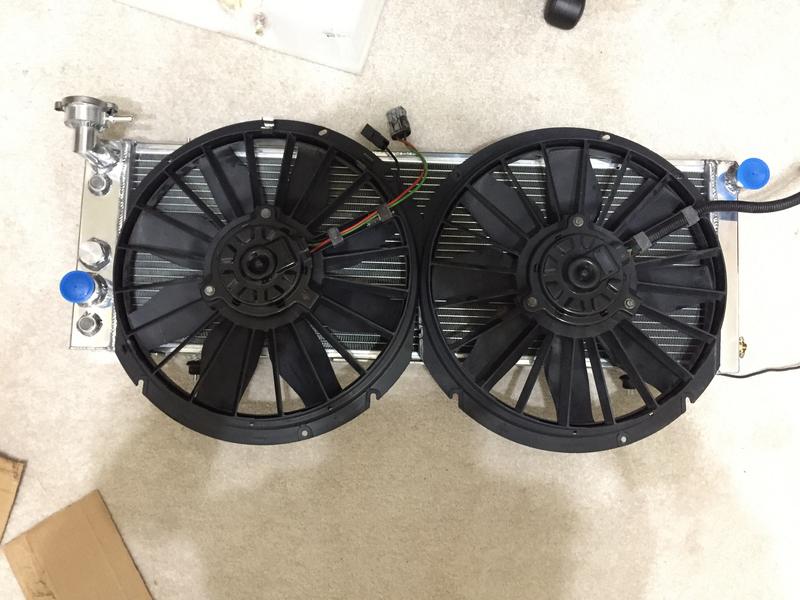
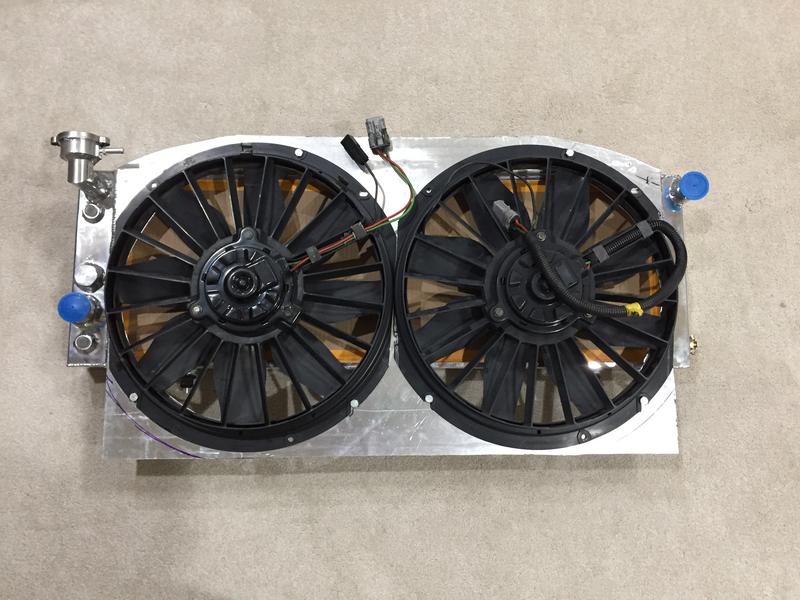
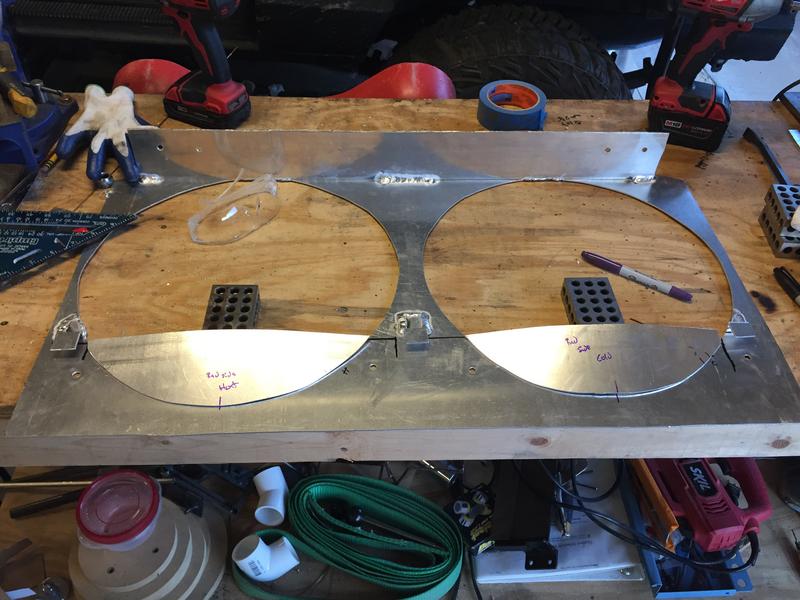
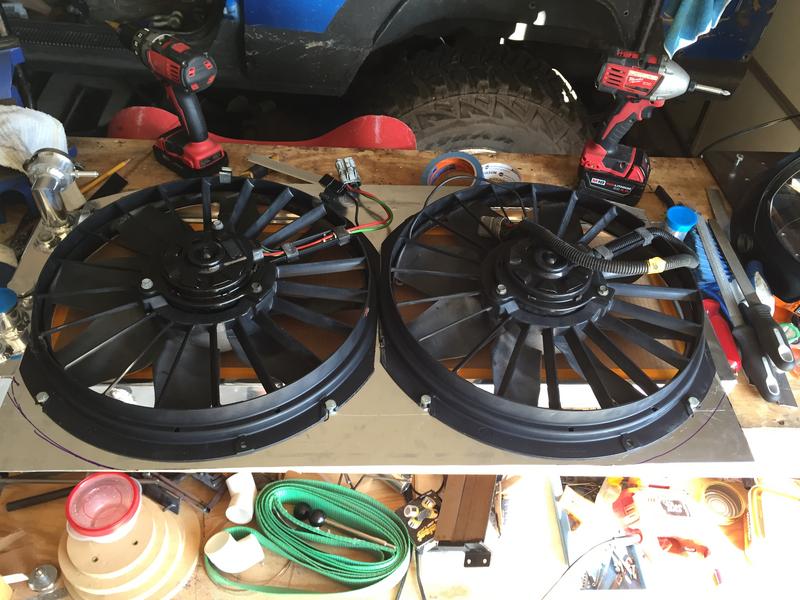
For coolant lines, I am using 1.25” and 1.5” exhaust tubing with the factory rubber hose connecting the tubing to the radiator. The radiator is a later model XJ aluminum unit. For fans, I am running 2 Volvo 2-speed fans with a custom shroud. The shroud is from .090” aluminum and it was my first aluminum project with my TIG welder.
Coolant lines

Here is the first shot of the buggy rolled out of the garage.
For coolant lines, I am using 1.25” and 1.5” exhaust tubing with the factory rubber hose connecting the tubing to the radiator. The radiator is a later model XJ aluminum unit. For fans, I am running 2 Volvo 2-speed fans with a custom shroud. The shroud is from .090” aluminum and it was my first aluminum project with my TIG welder.
Coolant lines
08-12-2017, 11:18 PM
#11
Junior Member
Thread Starter
Join Date: Nov 2015
Location: Central Arkansas
Posts: 51
Likes: 0
Received 2 Likes
on
1 Post
Year: Started as a 1987
Model: Cherokee
Engine: 4.0 Renix
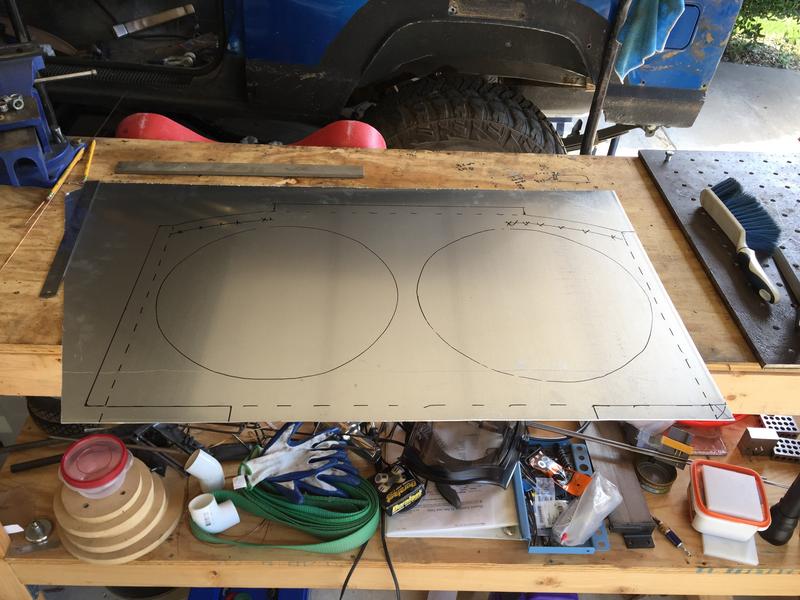
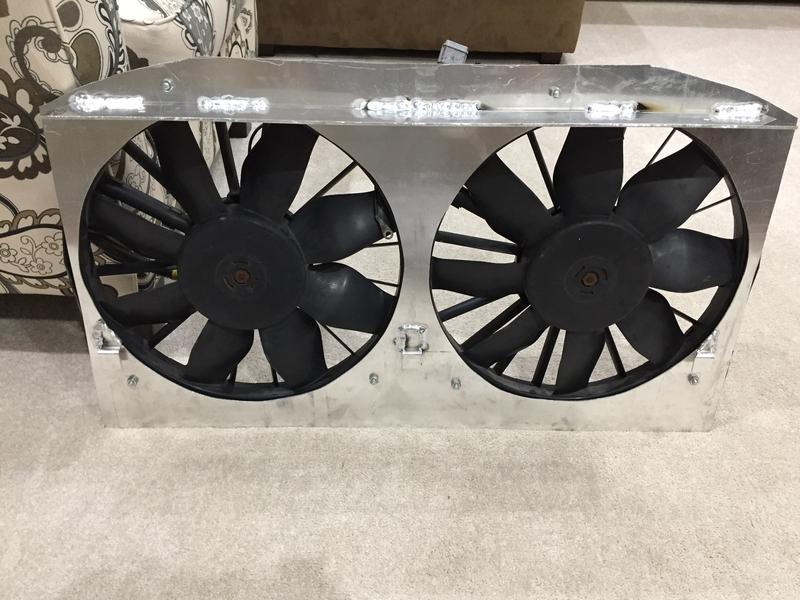
Here is the radiator fan shroud. I actually built this before stripping the Jeep down. I wanted to have it ready so it would be in place while the chassis was being built. The shroud is made from 0.090” aluminum. This was my first aluminum TIG project.
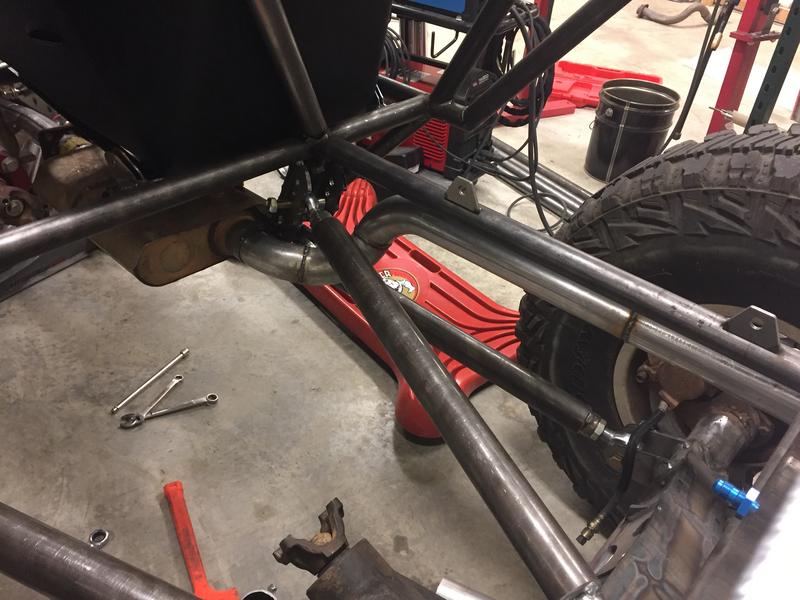
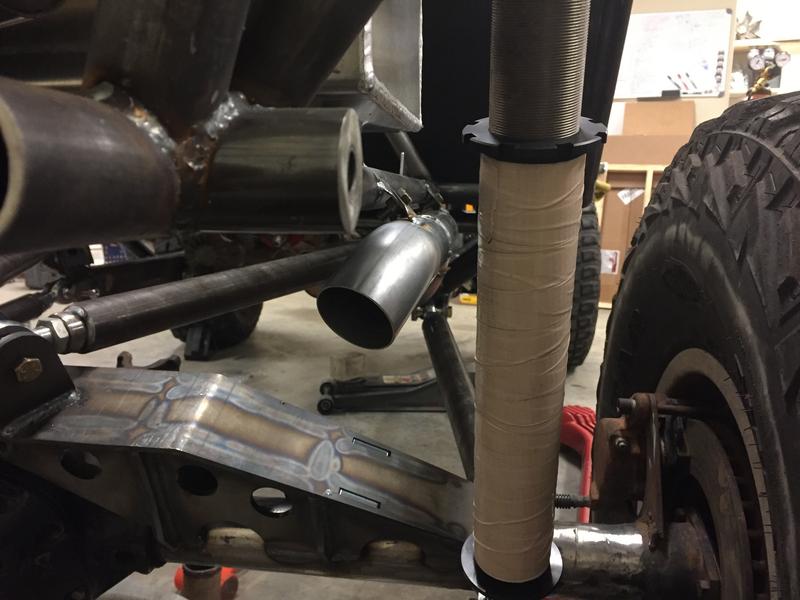
Here is the exhaust. It is just some generic mandrel bends from JEGS. I am able to reuse the factory front pipe that comes off of the exhaust manifold. I ordered a new front pipe and it may require some extra clearance once I get a new drive shaft. The front pipes have a dent in them to clear the front drive shaft and it looks like mine may need to be dented a little lower down (no photo on the dent). I will probably heat wrap the exhaust. I am a little worried about the heat right next to the heims, but I never had an issue on the XJ with the upper link on the front suspension being right next to the exhaust pipe.
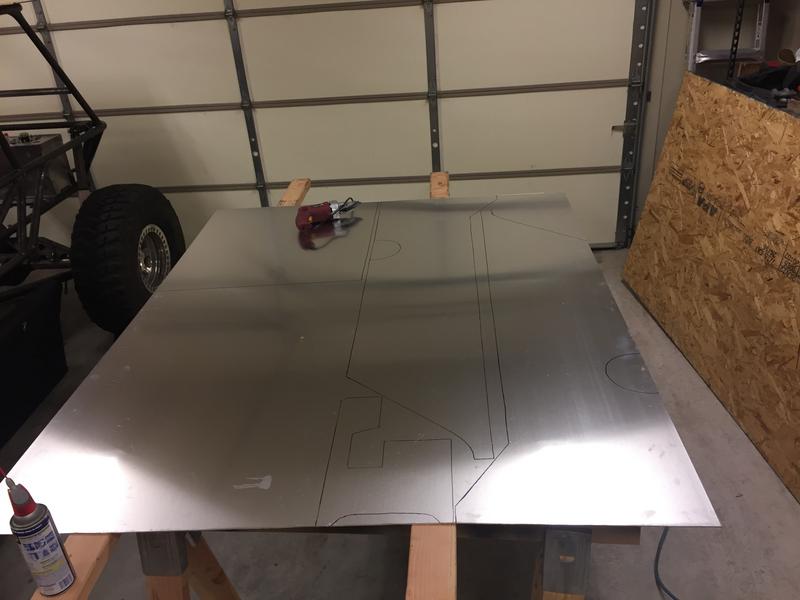
Here is a quick layout of the floor and firewall. The floor and firewall are .090” aluminum For tabs, I am using some body mount tabs that I got from A&A Mfg. that I then welded a nut to the back of.
Here is the exhaust. It is just some generic mandrel bends from JEGS. I am able to reuse the factory front pipe that comes off of the exhaust manifold. I ordered a new front pipe and it may require some extra clearance once I get a new drive shaft. The front pipes have a dent in them to clear the front drive shaft and it looks like mine may need to be dented a little lower down (no photo on the dent). I will probably heat wrap the exhaust. I am a little worried about the heat right next to the heims, but I never had an issue on the XJ with the upper link on the front suspension being right next to the exhaust pipe.
Here is a quick layout of the floor and firewall. The floor and firewall are .090” aluminum For tabs, I am using some body mount tabs that I got from A&A Mfg. that I then welded a nut to the back of.
08-12-2017, 11:20 PM
#12
Junior Member
Thread Starter
Join Date: Nov 2015
Location: Central Arkansas
Posts: 51
Likes: 0
Received 2 Likes
on
1 Post
Year: Started as a 1987
Model: Cherokee
Engine: 4.0 Renix
Here are the tabs. This is just a small batch, I probably used 200+ of these things with the nuts welded to them.

Working on the side panels. These are also .090” aluminum.
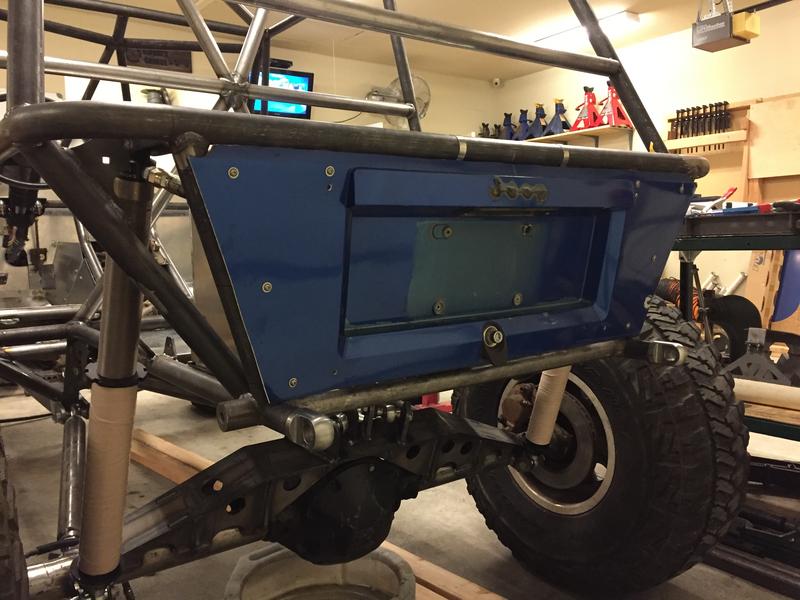
I am reusing some of the fiberglass from the factory hatch for the rear panel. This buggy will be registered and street legal, so I needed a license plate mount.
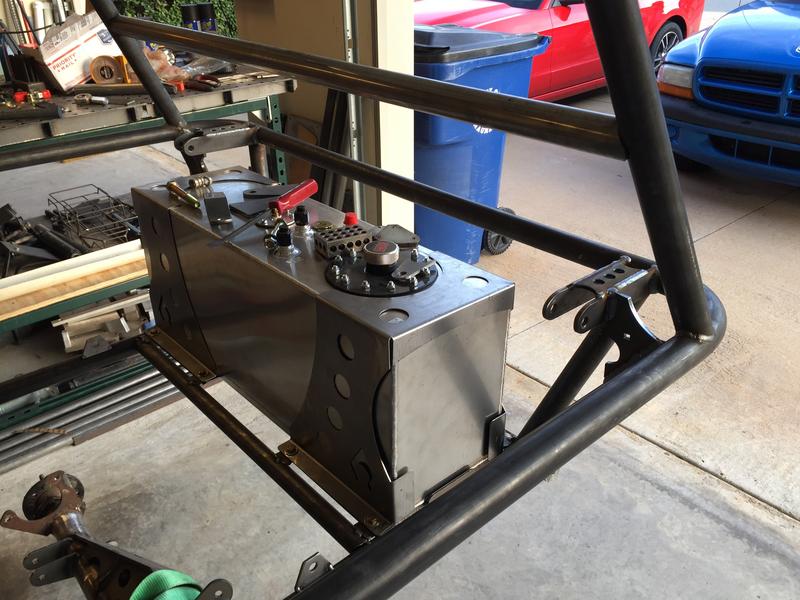
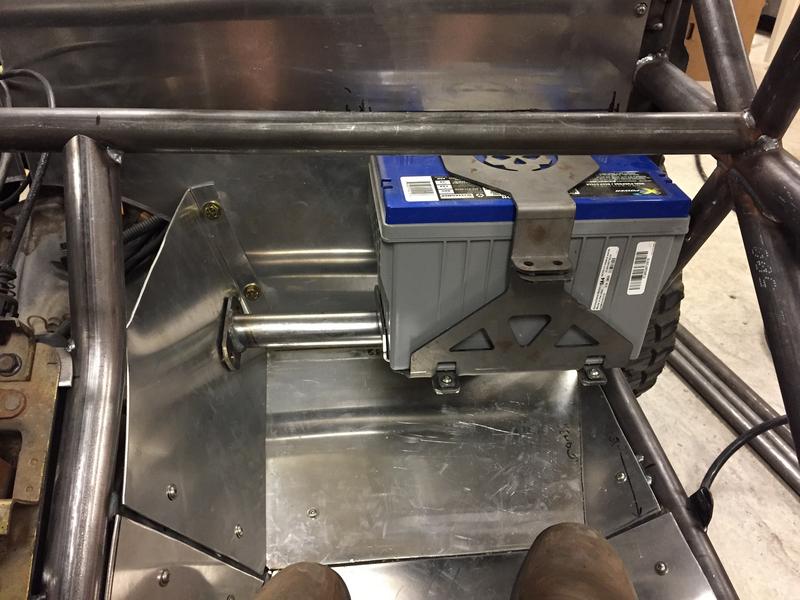
Battery mount. I couldn't find anywhere else that I liked to put the battery, so it is going against the firewall on the passenger side. It is not in the way of the passengers feet and it is sealed so it won't leak on anyone.
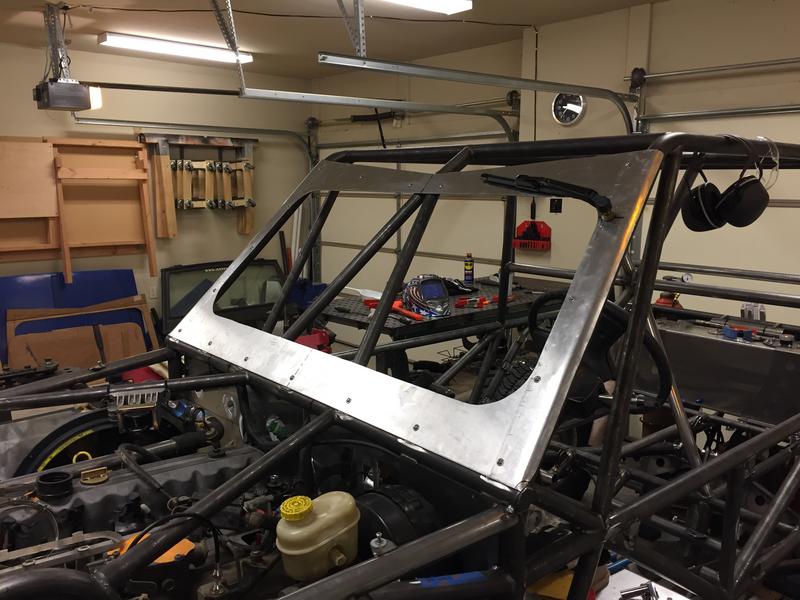
I will have a windshield. With manual wipers. I will be using glass for the windshield. I had a couple pieces cut locally for a little over $100 each. The wiper is just a generic UTV wiper but it uses a normal wiper blade vs the hot rod versions that basically use a squeegee.
Here are the tail lights that I found. These are just some LED truck/trailer lights from Super Bright LED's. These are the only ones I could find that were DOT approved and fit in the space that I have.
Working on the side panels. These are also .090” aluminum.
I am reusing some of the fiberglass from the factory hatch for the rear panel. This buggy will be registered and street legal, so I needed a license plate mount.
Battery mount. I couldn't find anywhere else that I liked to put the battery, so it is going against the firewall on the passenger side. It is not in the way of the passengers feet and it is sealed so it won't leak on anyone.
I will have a windshield. With manual wipers. I will be using glass for the windshield. I had a couple pieces cut locally for a little over $100 each. The wiper is just a generic UTV wiper but it uses a normal wiper blade vs the hot rod versions that basically use a squeegee.
Here are the tail lights that I found. These are just some LED truck/trailer lights from Super Bright LED's. These are the only ones I could find that were DOT approved and fit in the space that I have.
08-12-2017, 11:21 PM
#13
Junior Member
Thread Starter
Join Date: Nov 2015
Location: Central Arkansas
Posts: 51
Likes: 0
Received 2 Likes
on
1 Post
Year: Started as a 1987
Model: Cherokee
Engine: 4.0 Renix
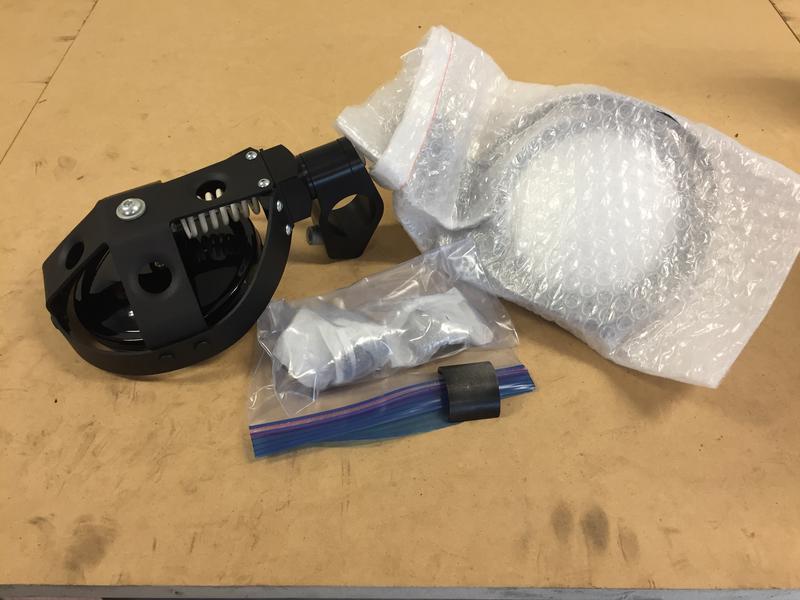
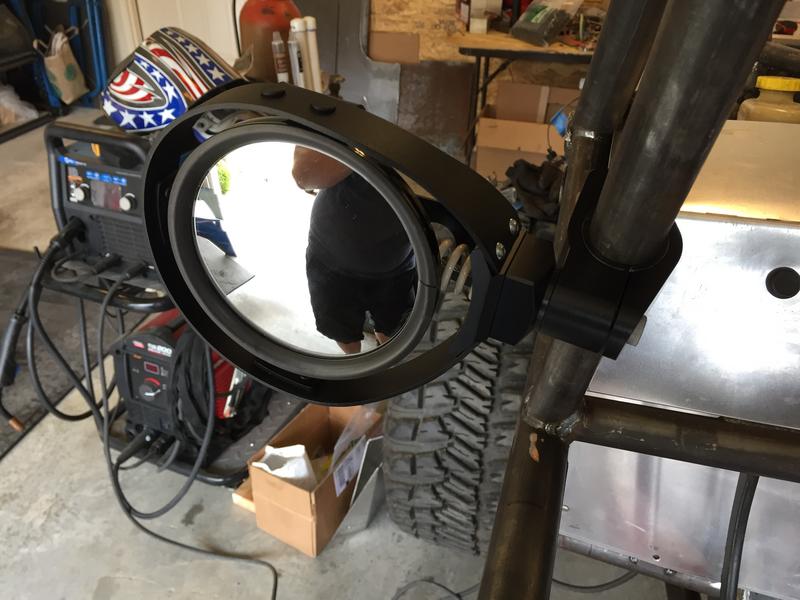
I picked up a set of Race Mirrors. These things look awesome and I shouldn't have to worry about re-adjusting the mirror every time I rub against a tree.
Boatsides and bellypan are done. They are .250” steel with .375” UHMW skins. These are freakin' heavy. I may swap the steel for aluminum later on.
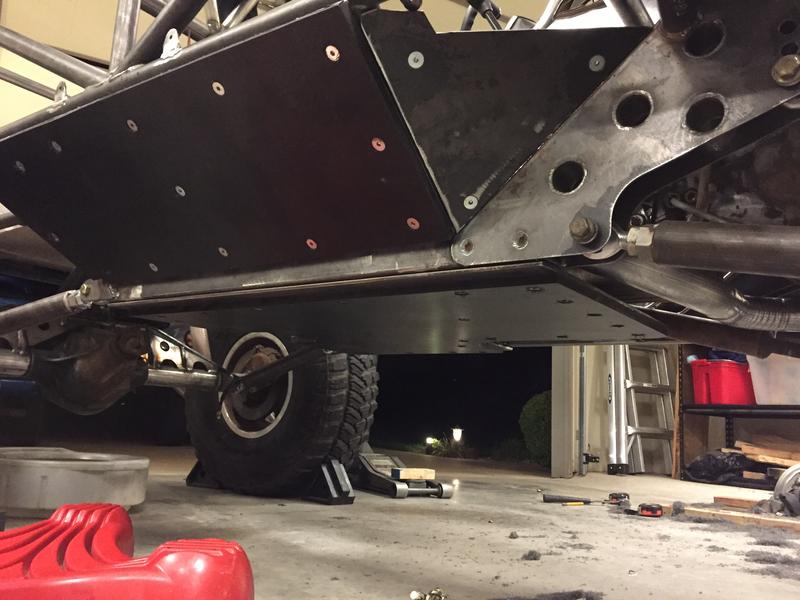
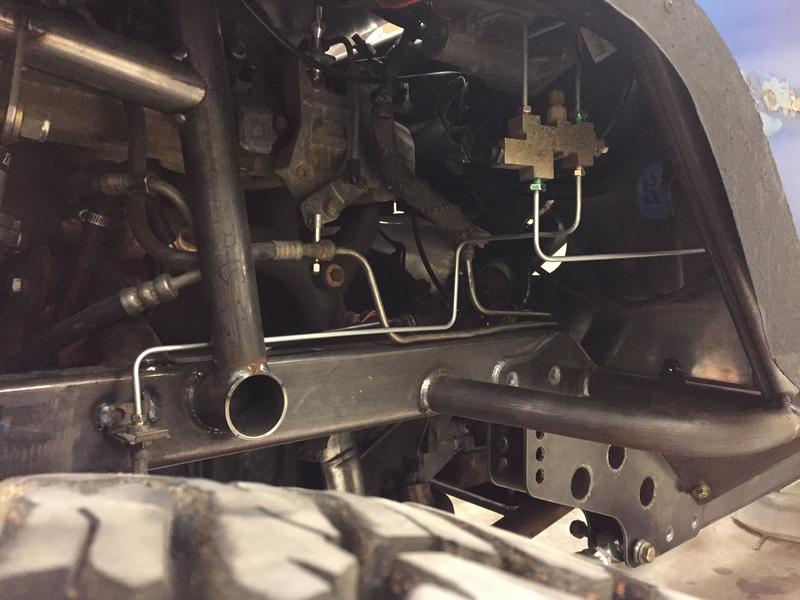
Brake lines. I am using the factory booster and master cylinder, along with the factory proportional valve. For the rear, I have hard lines along the chassis, a flex line to one of the upper links, another hard line, and flex line to the rear axle with a tee and then down to the calipers. For the front, I have hard lines to a flex line that drops down to the caliper.
I built a tiny bumper for the front.
Boatsides and bellypan are done. They are .250” steel with .375” UHMW skins. These are freakin' heavy. I may swap the steel for aluminum later on.
Brake lines. I am using the factory booster and master cylinder, along with the factory proportional valve. For the rear, I have hard lines along the chassis, a flex line to one of the upper links, another hard line, and flex line to the rear axle with a tee and then down to the calipers. For the front, I have hard lines to a flex line that drops down to the caliper.
I built a tiny bumper for the front.


