When you click on links to various merchants on this site and make a purchase, this can result in this site earning a commission. Affiliate programs and affiliations include, but are not limited to, the eBay Partner Network.
Under the Hood
360 cu. in. (5,899 cc) V8
Mopar Performance ECU
160 amp Durango alternator
Optima Yellowtop battery
MSD Ignition Coil
Double platinum spark plugs
180 degree stainless thermostat
K&N Cold Air Intake
1/4 Aluminum Plenum Plate
Edelbrock Headers
3" exhaust from headers back
Magnaflow catalytic converter
Flowmaster Super 44
Stainless tip Drivetrain
46RE Transmission
-1st 2.45
-2nd 1.45
-3rd 1.00
-4th 0.69
Low pinion Dana 30/Dana 44A w/limited slip
-Axle gear ratio: 3.73:1
-U-Joint Front Shafts
Transfercase: NV242
-(seamless swap i.e. display rewired and shifter bezel changed)
-(2wd, 4 part-time, 4 full-time, N, 4 Low)
Low gear ratio: 2.72:1
Overall crawl ratio: 24.86:1 Brakes
95 GMC 1500 2wd 5.7 V8 front brake lines (5.25" longer over stock) Wheels and Tires
16X7 Silverstar Wheels (stock 5.25" backspacing)
265X75R16 BFG KO2's
1" wheel spacers for 4.25" overall backspacing Suspension and Steering
Moog dual rate springs in front
OME HD springs in rear
JKS bpe's in front
Rancho RS9000 shocks (2-3" lift)
Grease-able anti-sway bar bushings
JKS Front ACOS for 3.5"
JKS/KOR Rear ACOS for 3.5"
KOR double shear trackbar
JKS rear trackbar
WJ front lower control arms
JKS quicker disconnects
'98 Durango non-snow plow steering box
Steering fluid cooler (I6 ZJ transmission cooler) Exterior
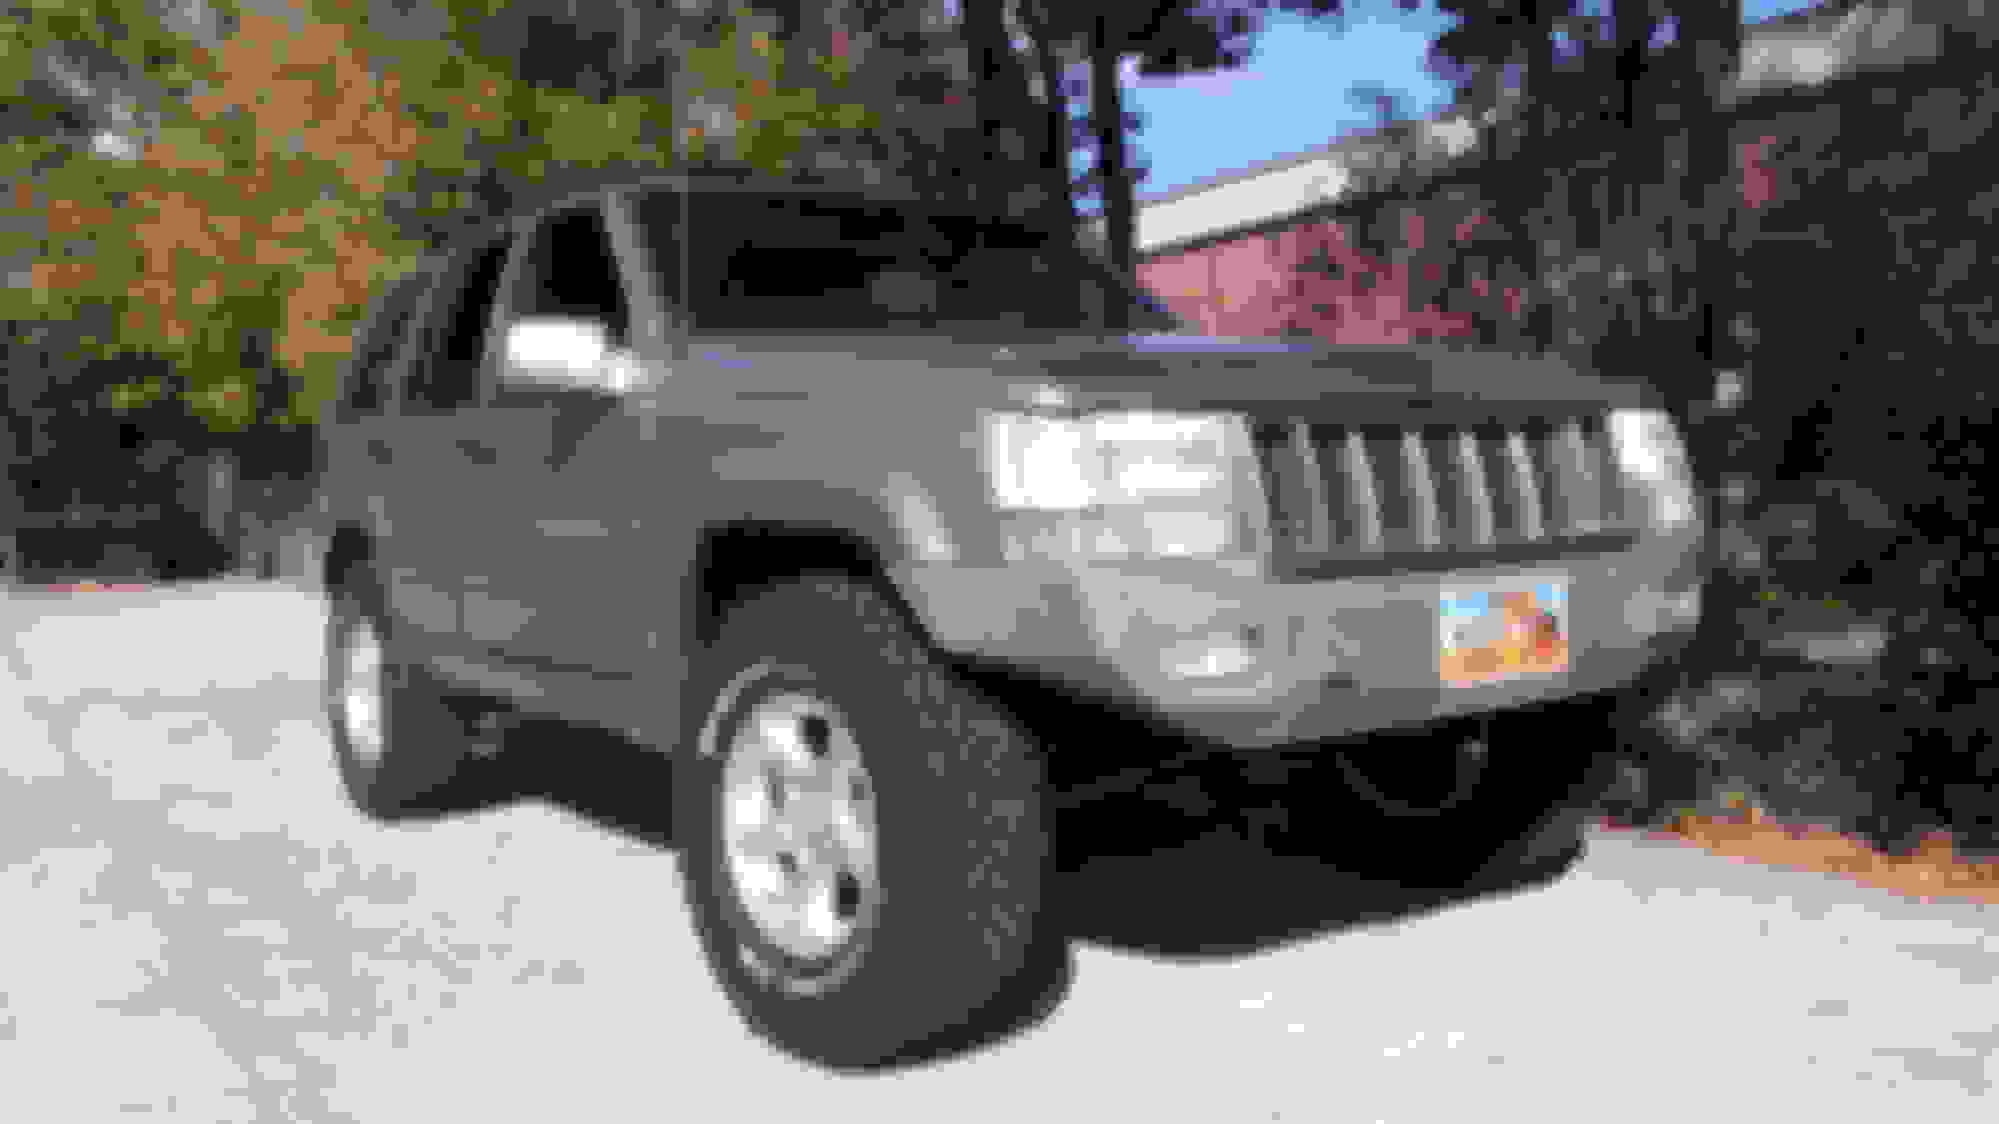
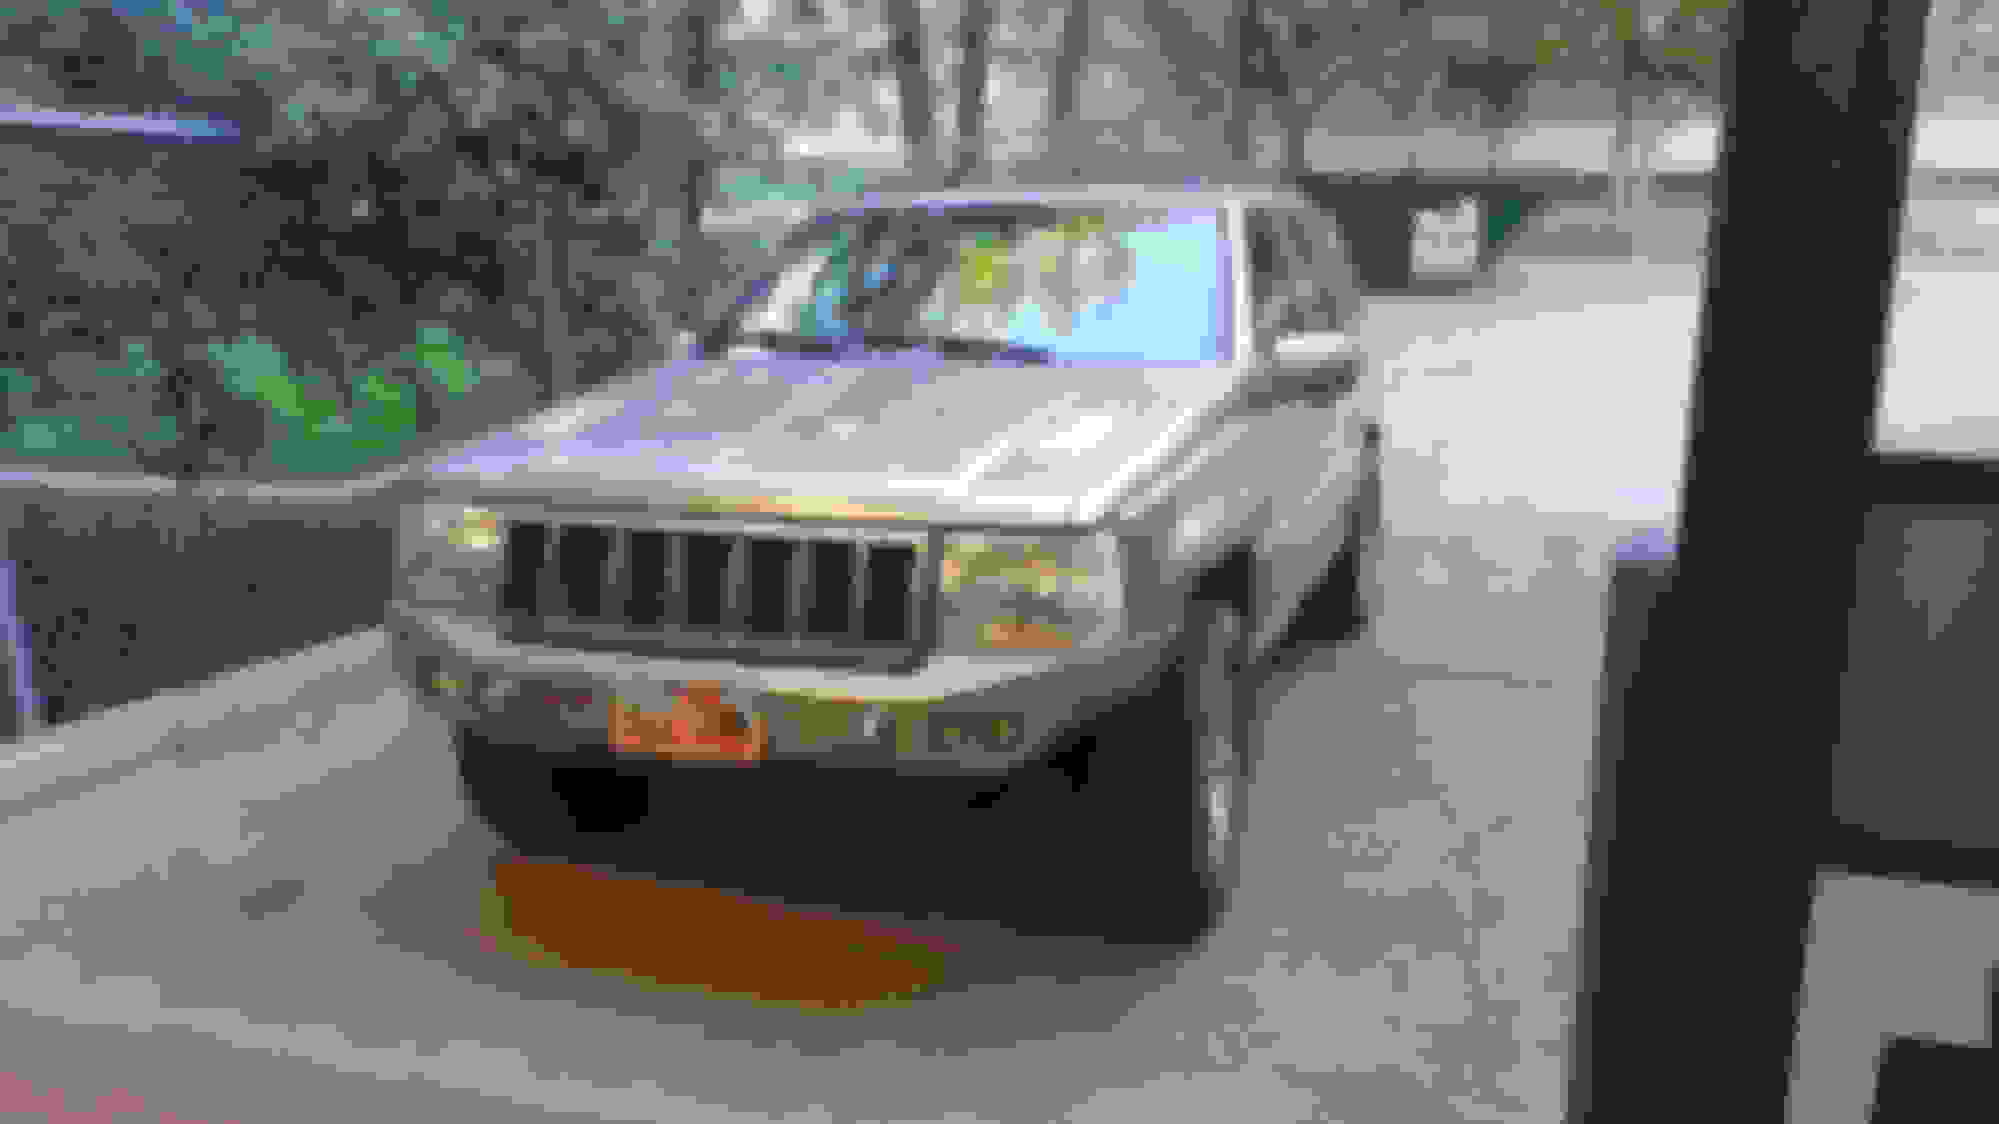
Bright Platinum paint
Hand built bumpers powder coated to match
-(color is called dark almond sparkle by the supplier)
Stock gas tank skid
Parking light mod
Quad tail-light mod
Clear turn signals (amber bulbs, white reflectors)
Stock 5.9 hood louvres
3M Color Stable Tint
-Rear, sides and sunroof 5%
-Front Sides 50%
Badge delete
-all but "5.9 Limited" and "V8"
Side cladding removed (mounting studs need to be removed and holes filled) Interior
Rugged Ridge floor mats
-front, rear and cargo area
Replaced front 'infinity' speaker covers with plain rear ones
Hand built cargo area shelf with Maxpedition Centurion bag full of gear. Sound system
Pioneer head unit: DEH80-PRS
PAC steering wheel control adapter: SWI-RC
Rocksford Fosgate wiring kit: RFK1D
Rocksford Fosgate fuse kit (x2): RFFMXI
Pioneer 4-channel amp: GM-D8604
Pioneer speakers (x3): TS-A1605C
-(6 midrange and 4 tweeters)
Pioneer amp: GM-D8601
Pioneer sub: TS-SW2501S4
JL Audio Stealthbox Sub Enclosure
After two years of research, planning and slacking off I'm finally making some real changes to my ZJ.
Built bumpers over the summer. First time attempting anything like this. I was inspired by gojeep's modifications on front ARB's to put in a hitch, that and just about everything that caught my eye and looked decent but not quite what I felt like paying for.
This photo was taken just outside of the welding lab at school where I built it. Powder coated to match as close as possible.
Those are the stock fog lights, there is a 2 inch receiver behind the license plate and the inside is gusseted along the entire length. 3/16 steel. D-ring tabs from TMR Customs.
Tools used; a huge shear capable of up to 1/2" thick 12' wide 4' cuts, piranha ironworker, belt sander, DoAll band saw, vices, cut off wheels, flap discs, 5" and 9" grinders, Miller Syncrowave 250, Miller 212, oxy-acetylene torch, all sorts of clamps and measurement instruments.
Just so I'm understanding correctly, you built those bumpers completely from scratch?! Fine work, looks amazing! I'm liking this build so far.
Thanks!
It's all from scratch, integrating ideas I liked. No CAD and no cardboard mock up. The stock covers were removed and I started cutting, bolting, tacking, appraising, adjusting, bending, removing, replacing, welding, grinding etc. until I was satisfied.
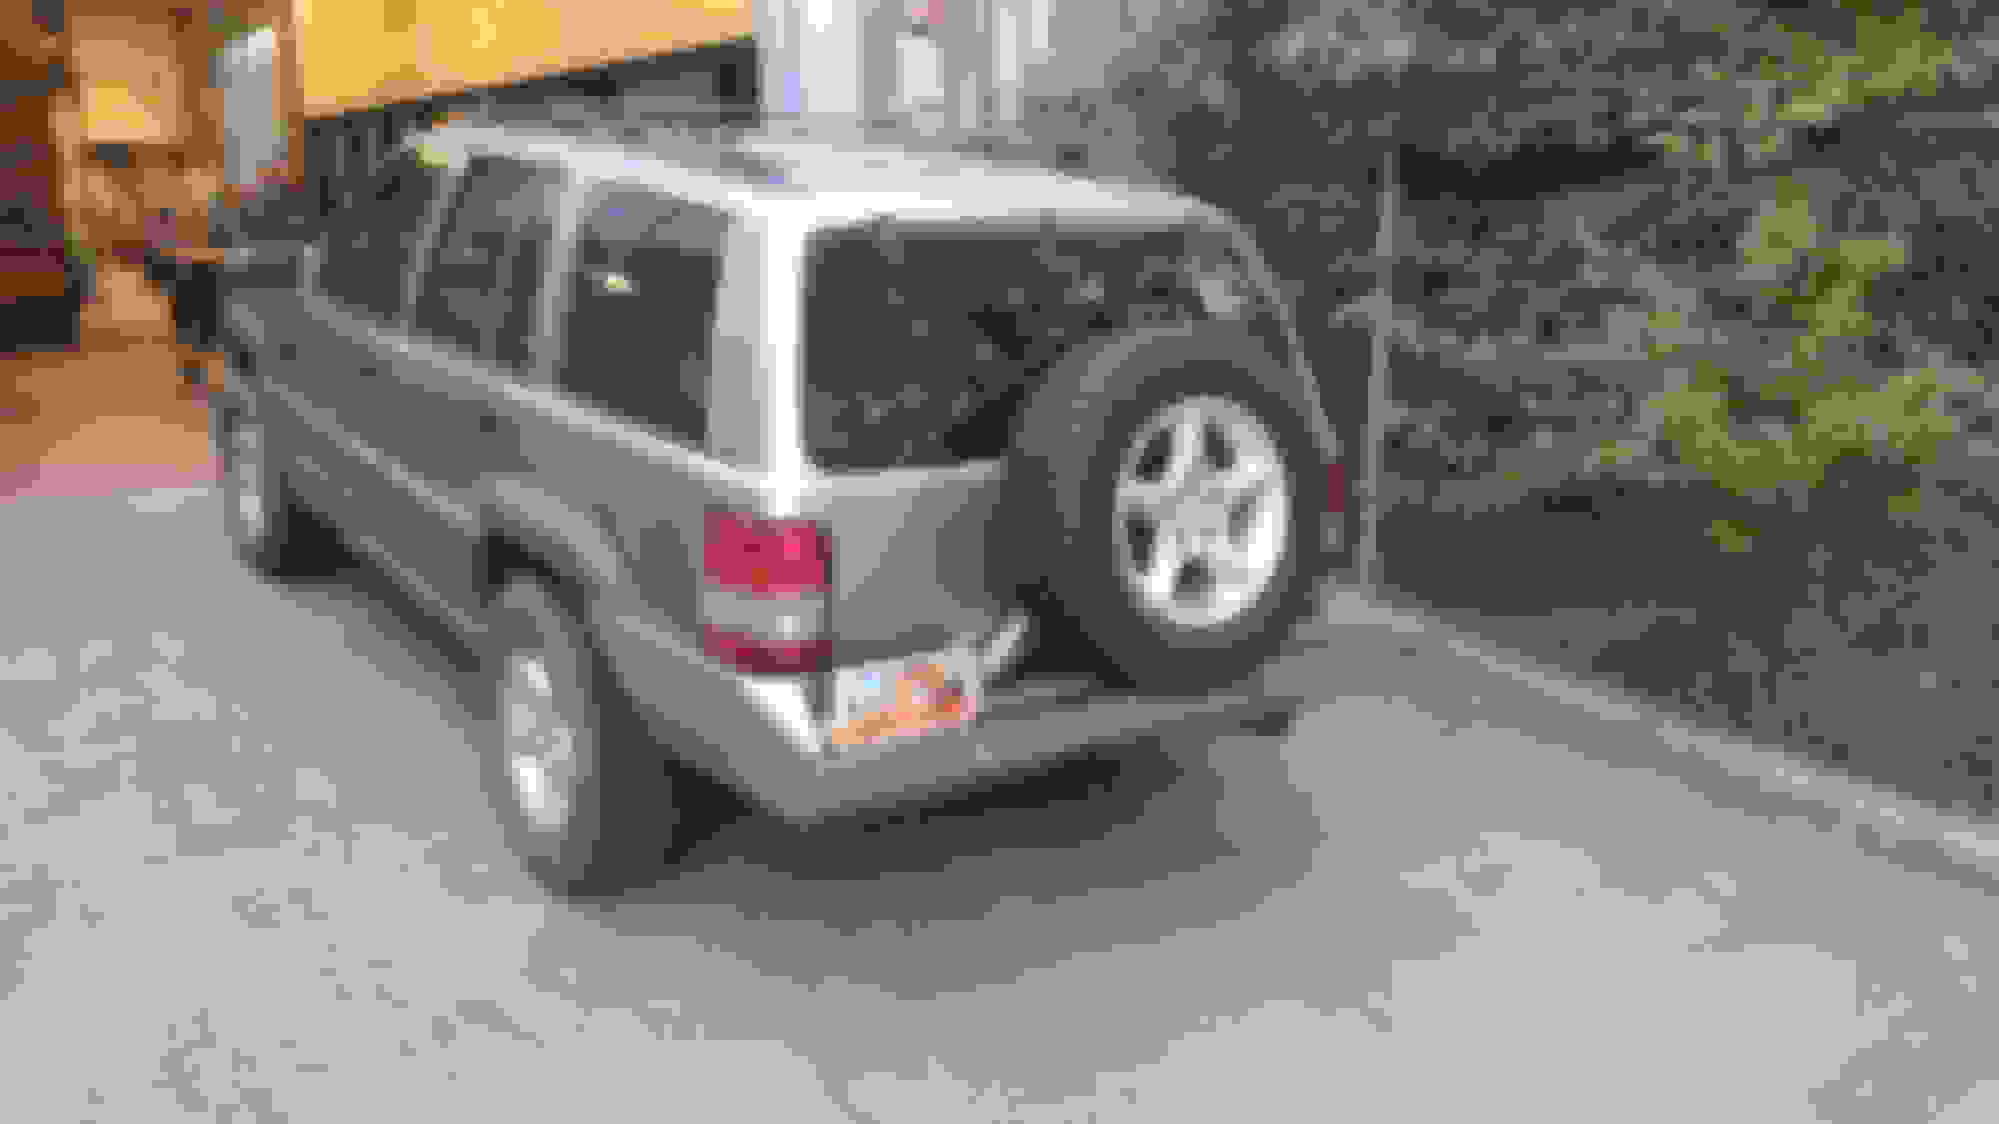
The rear is a similar construction, 3/16" and lots of gusseting.
The swing gate spindle is from TMR customs. I recessed the bottom into the bumper because the entire assembly was 8" tall and the arm is only 2" square. Recessing it also means excess grease from the lower seal won't ooze out all over the top of the bumper.
The gas strut is for the drivers side of the lift gate on a 98 ZJ. It is easy enough to close and definitely holds it open in an extreme off camber position. When closed it's at least parallel with the swing gate. If not, it's pushing in by one or two degrees.
The latch is a double bear jaw style I bought off ebay. I had a friend suggest I secure the gate with a threaded fastener of some kind on rough trails. It is just as likely, however, to come open as any door or the hood. It's a pretty much a beefier car door latch with a two stage latching mechanism.
The Rubber stop is also for the lift gate on a 98 ZJ. Grommets for the wiring are from the firewall on a 99 Ford Expedition my brother was parting out. The license plate light is from a 98 Dodge Ram 2500, which is wired into the passenger tail-light.
The arm is 2" square tubing with a 3/16" wall. The cut out portion for the gas strut is 3/16 angle iron cut to fit. 3/8" was used for the spare tire mount. The housing for the latch is 1/16" that is reinforced with a solid 1" square bar (inside above the latch). Opening is very easy, it takes a light upwards pull on the handle for around a 1 1/2 inch travel at the end.
I have to say that I like the look of the front one more. I do love how well the the mechanics came together for the rear. It's pretty neat to pull the handle, open it six inches and have it swing the rest of the way by itself.
If I could change a few things, I would have made the rearmost part higher (not hang down so much). Though it would mean the base of the spindle wouldn't be as solidly supported and braced. There's that and remove more of the spatter. Armour Coat is one of the best powder-coating business in Utah, with the most thorough cleaning system. They coat all of axles TeraFlex produces. I just wish they had removed the spatter, or at the very least let me take care of it before applying the powder. One other thing is where the rear meets the wheel well, not the best transition in my opinion.
Of course it's easy to critique oneself. Overall I am very happy with the way they turned out for my first time and am more experienced because of this project.
Total Cost: $941
-Not bad considering a front ARB is $964 before tax at 4-Wheel parts.
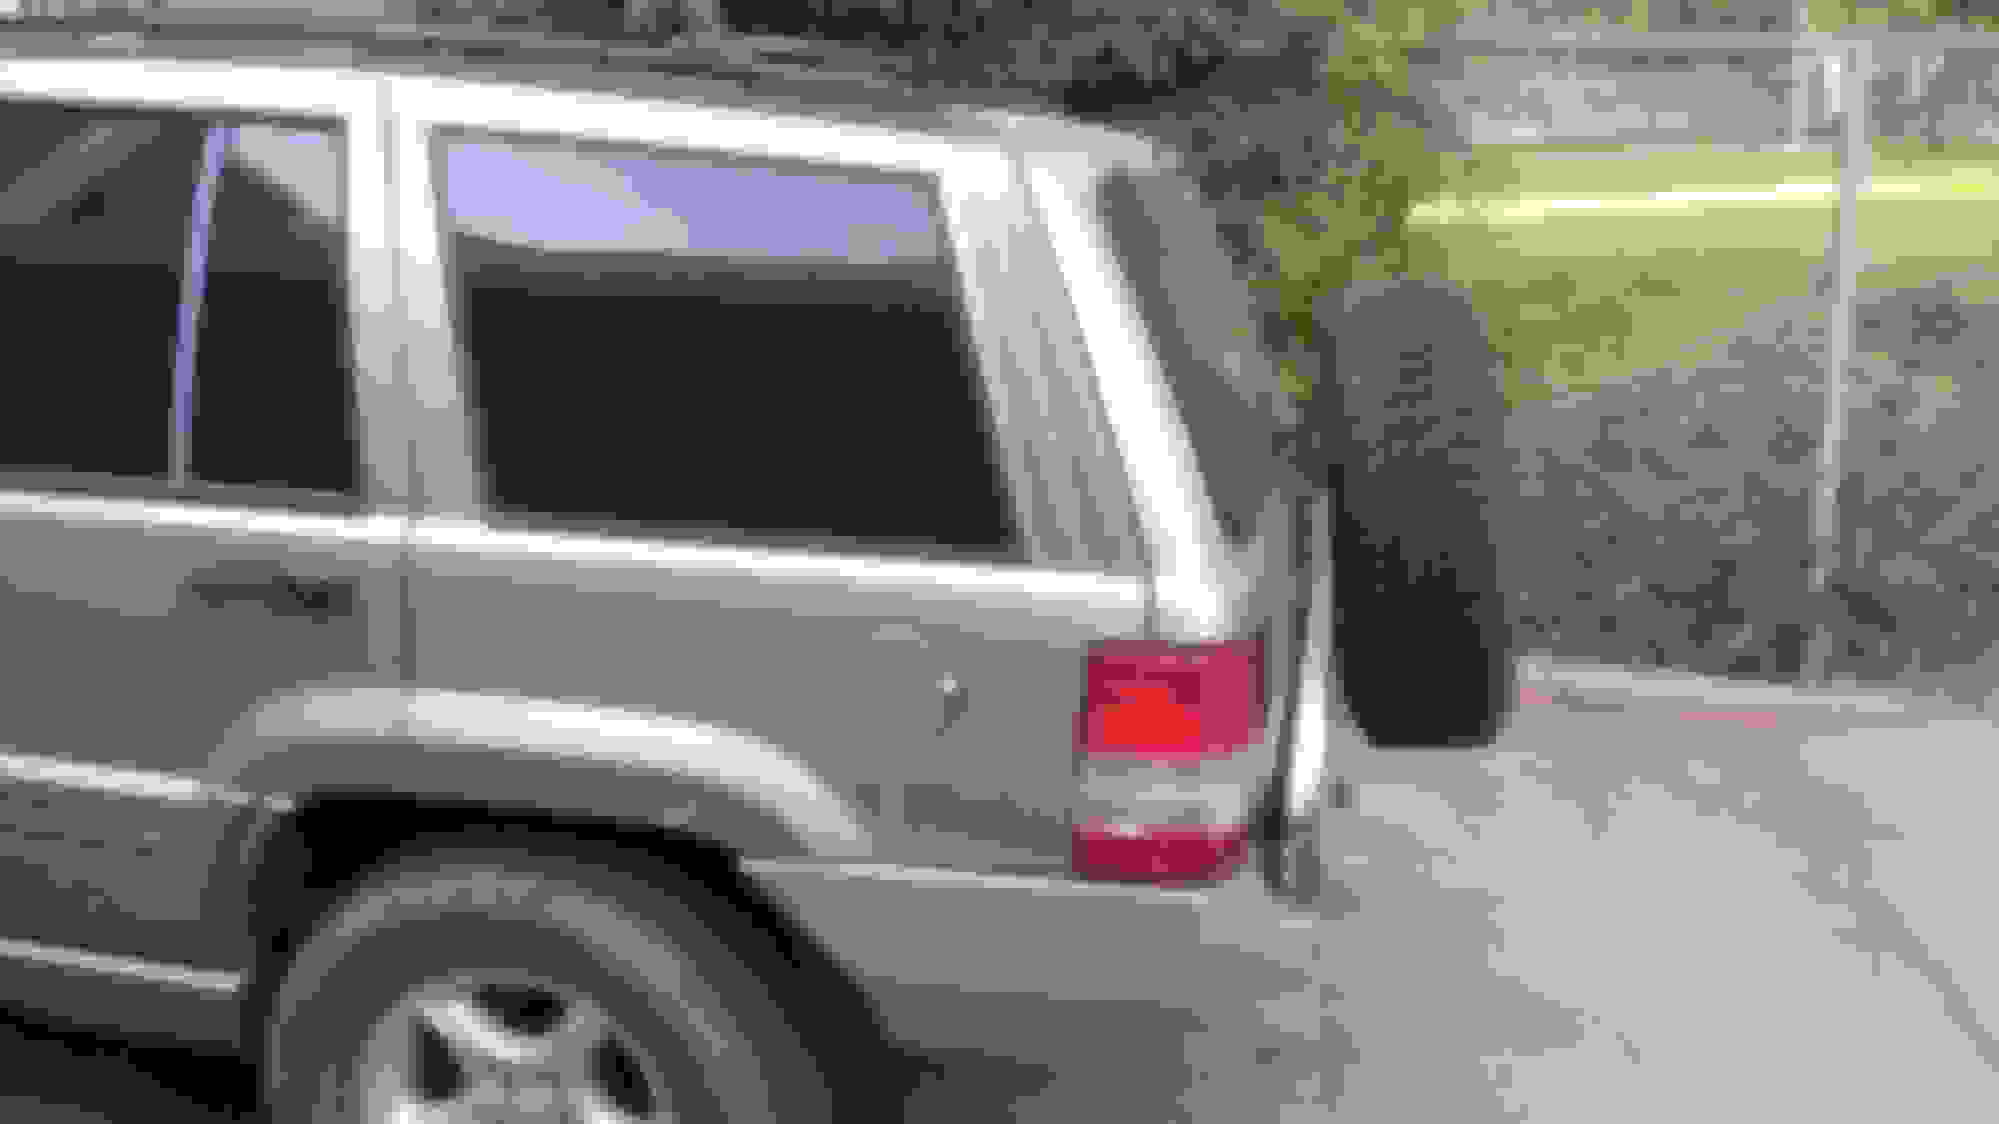
Anyone who has had a 5.9 is familiar with the leather tire cover. It was nice to have all those pouches for tools, straps, first aid kit, jumper cables, rope, emergency blankets, paracord, duct tape, WD-40... all sorts of useful things. Moving the spare to the bumper meant I had to put my 30+ lbs of stuff in a bag. I liked the functionality of having the pouches high and out of the way on the tire cover. So I built a shelf that hangs on the spare tire mount with a single 3/8" bolt.
For ease of removal it's held in place with set of nylon straps; 1" horizontal and 2" vertical. The fire extinguisher drops out easily by flipping open the white tab.
The shelf pivots on the stock spare tire mount and is braced against the wheel well with the 45 degree member behind the fire extinguisher. It's currently holding between 40 and 50 pounds of gear.
I wanted to leave floor space clear (very cluttered in the picture) and have the bag close enough to the side that it wouldn't interfere with the cargo cover. I went with a Maxpedition Centurion duffel and it's just right. Everything I use most is in an exterior pouch or secured to the molle webbing (ex. tape measure on side, basic hand tools in zippered pouch above tape measure, knife and hatchet on top, mechanics gloves wrapped in red rag next to blue shop towels).
One of these days I'll have to go through the contents of my road side bag and list my recovery gear which is pictured above under my lift kit parts and homework.
I always appreciated details I found like that here. Though I am a member on many sites, Cherokee forum was the most helpful group when I had my XJ 5 years ago. So I'm sharing here!
Put a 2" lift on over the weekend:
JKS Front ACOS for 2"
JKS/KOR Rear ACOS for 2"
KOR double shear trackbar
JKS rear trackbar
WJ front lower control arms
JKS quicker disconnects
The rear trackbar was a bear to get out. On the axle side was a T55 Torx which stripped out with one turn. I welded a nut on with 6010 and it came right out. For the frame end however, the bolt and bushing sleeve had been pinched and rusted together. It took cutting and grinding both sides down to flush and then prying open the bracket to pull the track bar free. Total time spent for the whole project was 15 hrs. Pics to come with tires, hopefully in the next two weeks after I get the alignment checked.
There's death wobble and there's wobbles. About a month ago, I started getting a little bit of a shake going down the highway. In a few weeks it got to the point where if I hit a bump just the right/wrong way going 30 mph a wobble would start. I let it be, cause I'd be lifting soon and changing out a few suspension/alignment components and looking over everything. With a new trackbar, balanced tires and checking the alignment myself (tomorrow it will be checked professionally) the wobbles persisted. There's only a slight amount of play in the steering gearbox. The steering stabilizer had been leaking, so I went ahead and replaced it with a Monroe brand one from the local parts store. It's held the vibrations and wobbles at bay until I can put in a Durango box.
Had a "Coolant Sensor Bad" on the VIC. Did this fix: here. (edit: looks like thespeadfreaks.net is defunct) The circuit board had to be soldered. Very good write up, I liked the extra info. I already did a 242 swap and switched plugs in #3. While the dash is apart the High beam/fog light mod (#4) is going to happen too, because why not?
Jeez your rig is looking fantastic and i love those bumpers very nicely done
Thanks very much.
It's been a while, I'm working on a set of removable mud flaps. I need to build a cross member that sits up higher and control arms sometime soon. Also have a set of OME springs to put on that should add about 1.5". I'm nearly 'done'.
I just came across this thread and wanted to know if you would be interested in making your bumpers for sale. They are exactly what I'm looking for to put on my 95 ZJ.
 09-28-2015, 09:26 PM