My XJ Rough Country 6.5" Long Arm install w/other stuff as well... The long way...
 04-22-2010, 12:30 AM
#16
Seasoned Member
Thread Starter
Join Date: Sep 2009
Location: MA
Posts: 377
Likes: 0
Received 1 Like
on
1 Post
Year: 2001
Model: Cherokee
Engine: 4.0
Hi All,
My work has been busy this week so I haven't had much time to do any work on the Jeep.
BUT
I cut all 8 of the u-bolts down.
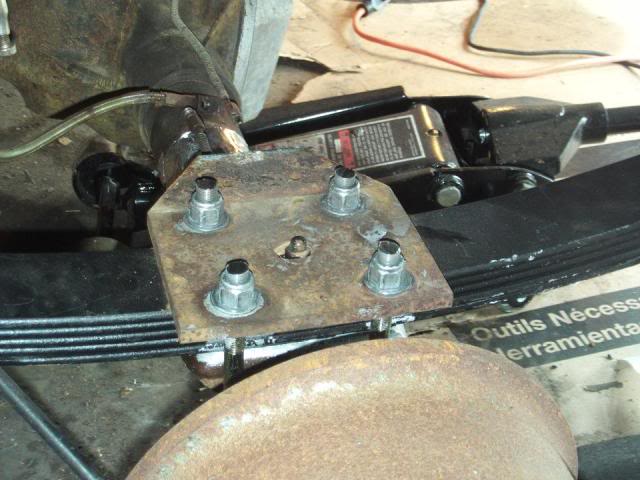
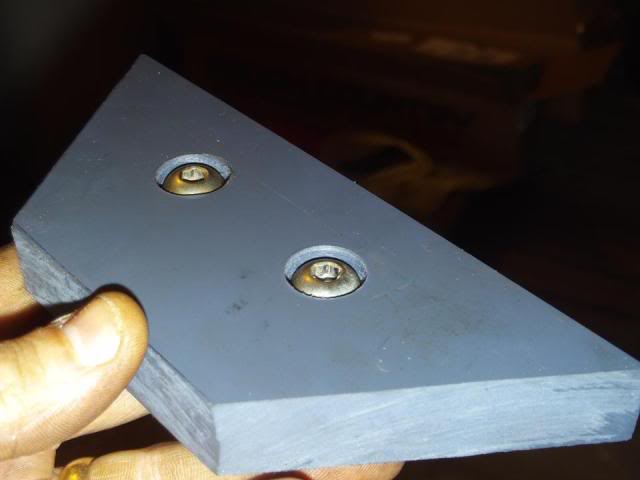
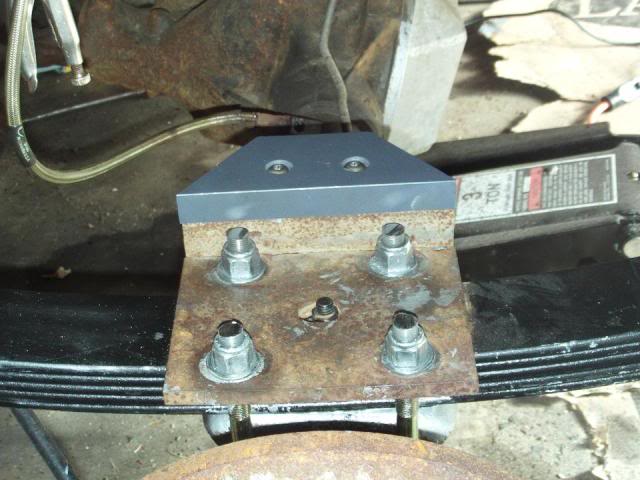
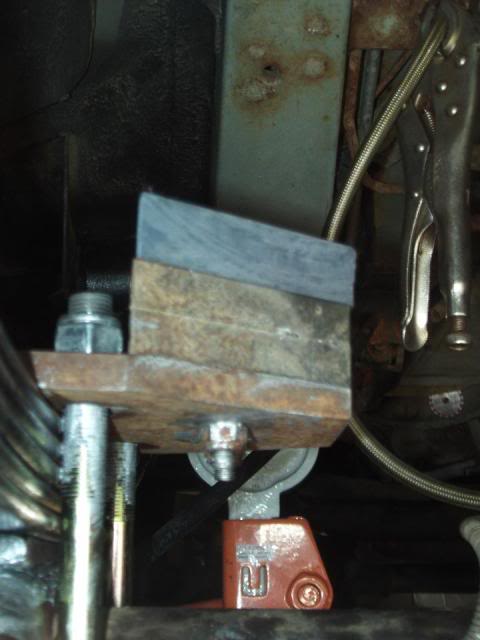
Then I had wanted to extend the bump stops because the new leaf springs where thinner (less leafs) and I wanted to keep the tires from rubbing.
It was setup perfect before I installed the new leafs, so I kind of estimated and added a little.
I hope its still good, if not I can remove or add more.
this was hard delrin plastic.
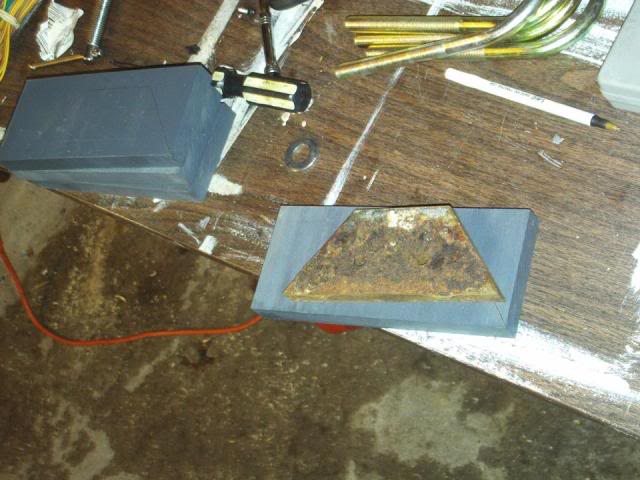
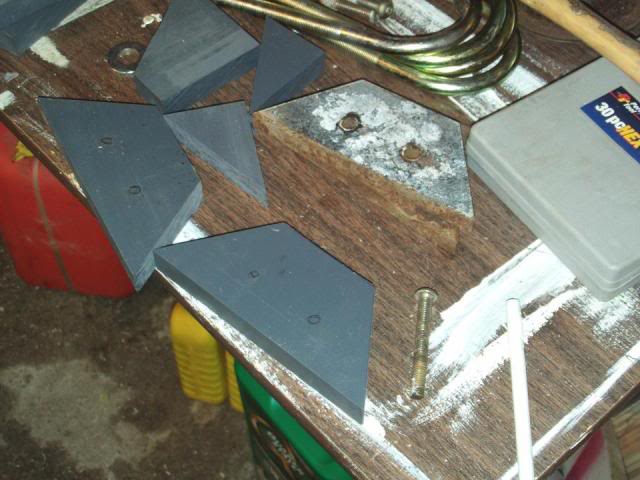
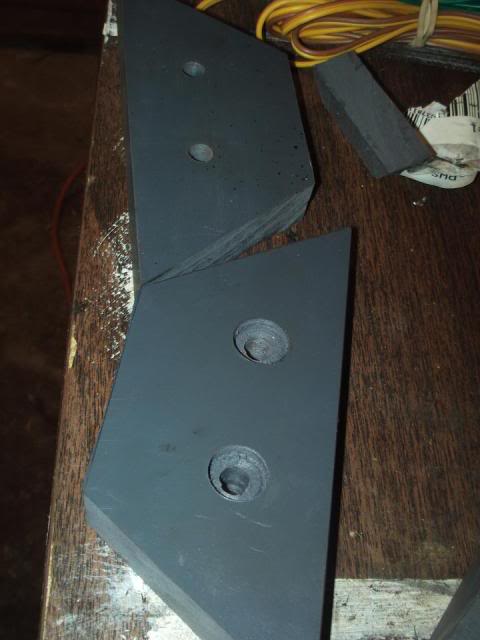
re-used old bolts, just countersunk holes as well.
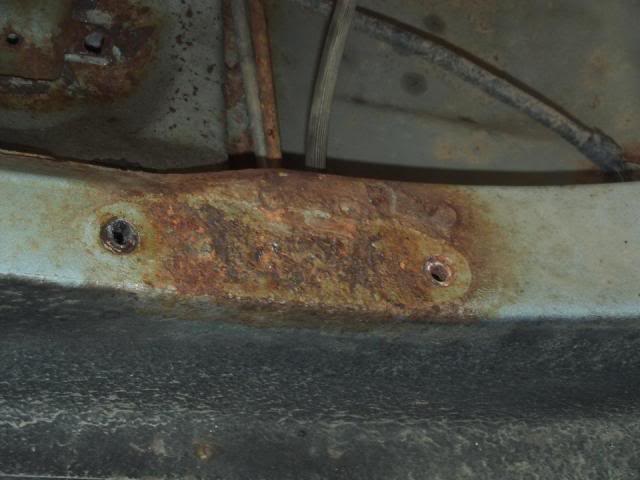
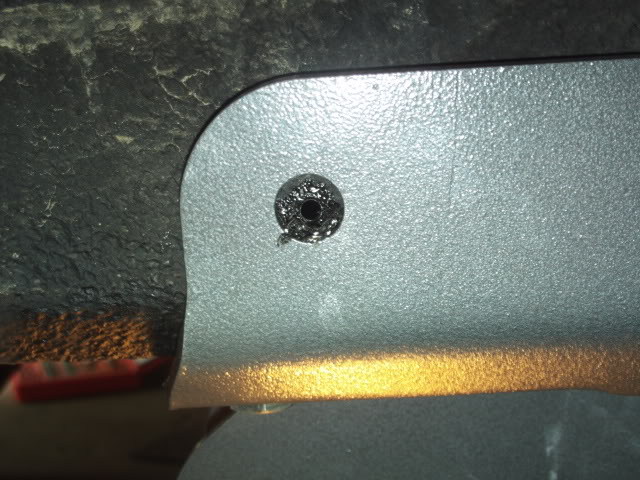
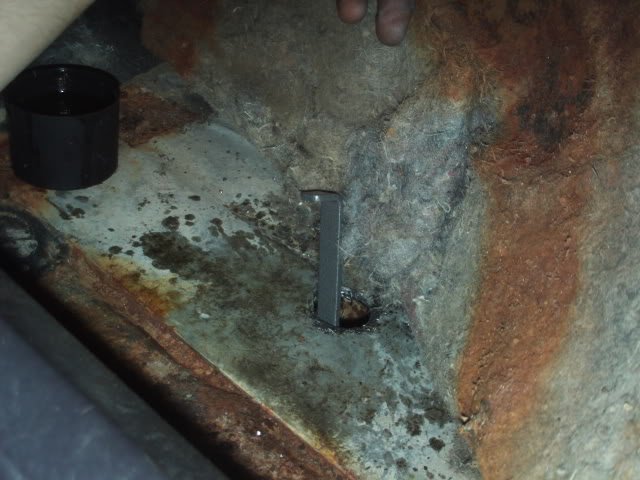
Also I forgot to post a pic the other day, but I managed to drill out the broken bolt on the bump stop. The bump stop was hanging on by a thread.
I bought two, but may only install the one side so I dont have to drill any more holes right away. lol
Also (not in pics, but I tapped the hole yesterday)
Update you all later.
g2g
thanks for looking and letting me know what you think.
My work has been busy this week so I haven't had much time to do any work on the Jeep.
BUT
I cut all 8 of the u-bolts down.
Then I had wanted to extend the bump stops because the new leaf springs where thinner (less leafs) and I wanted to keep the tires from rubbing.
It was setup perfect before I installed the new leafs, so I kind of estimated and added a little.
I hope its still good, if not I can remove or add more.
this was hard delrin plastic.
re-used old bolts, just countersunk holes as well.
Also I forgot to post a pic the other day, but I managed to drill out the broken bolt on the bump stop. The bump stop was hanging on by a thread.
I bought two, but may only install the one side so I dont have to drill any more holes right away. lol
Also (not in pics, but I tapped the hole yesterday)
Update you all later.
g2g
thanks for looking and letting me know what you think.
 04-22-2010, 01:11 PM
#18
Senior Member
Join Date: Apr 2009
Location: Ontario
Posts: 522
Likes: 0
Received 0 Likes
on
0 Posts
Year: 98' and 99'
Model: Cherokee
Engine: 4.0
nice,,, im about to buy the same lift, so its a good build to follow.
Im in the process on removing old parts and prepping it before i get the lift.
Keep up the good work..
Im in the process on removing old parts and prepping it before i get the lift.
Keep up the good work..
04-23-2010, 11:38 AM
#19
Member
Join Date: Mar 2010
Location: Eastern Pennsylvania
Posts: 238
Likes: 0
Received 0 Likes
on
0 Posts
Year: 1998
Model: Cherokee
Engine: 4.0
Hey man I just started mine yesterday she is fighting me too. I got everything out except the stock shackles in the back. How long did it take them to ship it to ya? Took over a month for me to get mine 
04-24-2010, 08:27 PM
#20
Seasoned Member
Thread Starter
Join Date: Sep 2009
Location: MA
Posts: 377
Likes: 0
Received 1 Like
on
1 Post
Year: 2001
Model: Cherokee
Engine: 4.0
thanks man
Cool it has been a fun project so far. Old parts rusty parts suck!
Hmm I order mine right ine the 1st week they came out and it came in a week. maybe because they had them in stock?
not sure. but yeah its fighting me and i get side tracked as well.
check it out.
I copied and pasted all this from my other local forum. BTW

Hey again
I played a little today trying to prep some metal for the Rust Bullet paint.
I got side tracked once I found some things out.
You see when I used bed liner on my doors and lower rockers it looked great!
then a few days later these bubble where appearing and I popped them like a zit but there was water inside!
I was like WTF, oh well I will get it right next time.
So then another day I ground down all the bed liner in those spots and did it again.
What do you know a few days later they came back!
So i said screw it for then I will need to fix better later when in the garage.
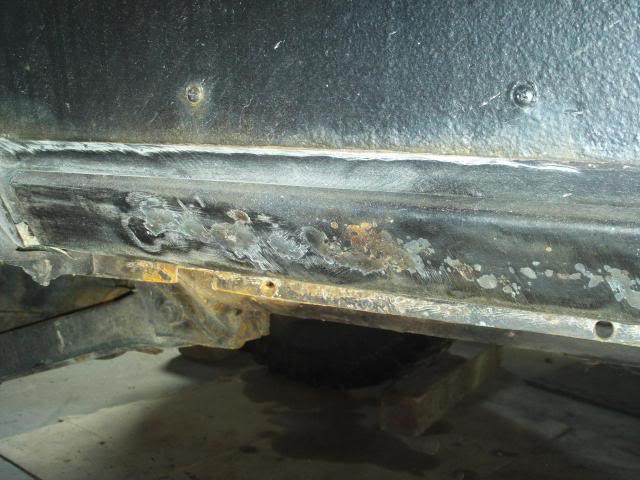
So as i was under there scraping and grinding everything I came to those bubbles again.
I buzzed off the bed liner and there they where, little pin holes, one had a few drips of water come out! :ack
That led me to search for what was happening.
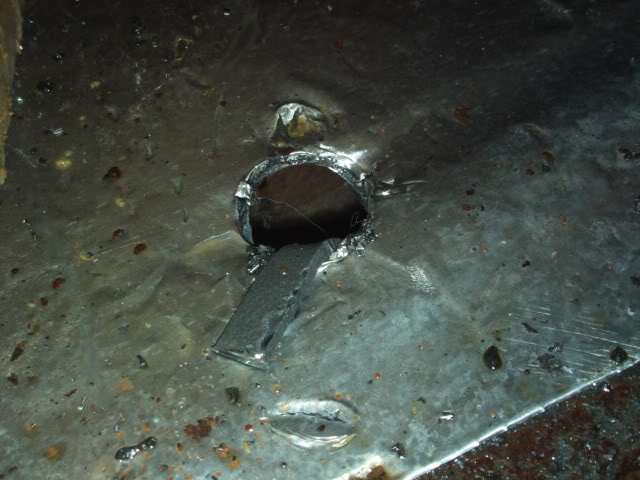
Found that in the rear where the Bushwacker flares where mounted and the metal was cut it was letting sand and water in.
Now I am trying to think of a way to repair it.
On the outside I plan on using the Rust Bullet paint and then using bed liner over that again.
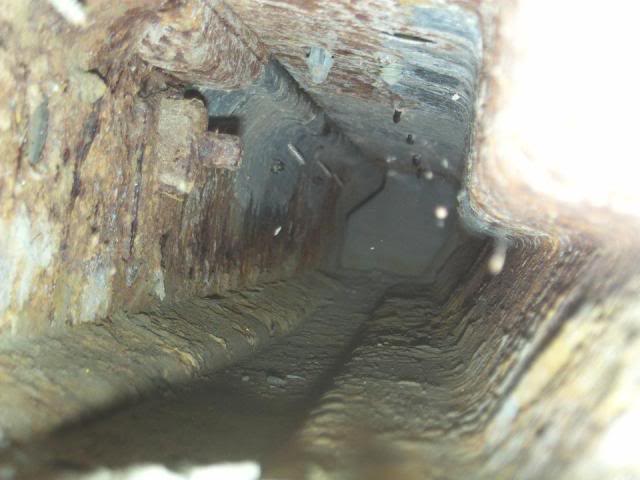
But on the inside it will be tricky.
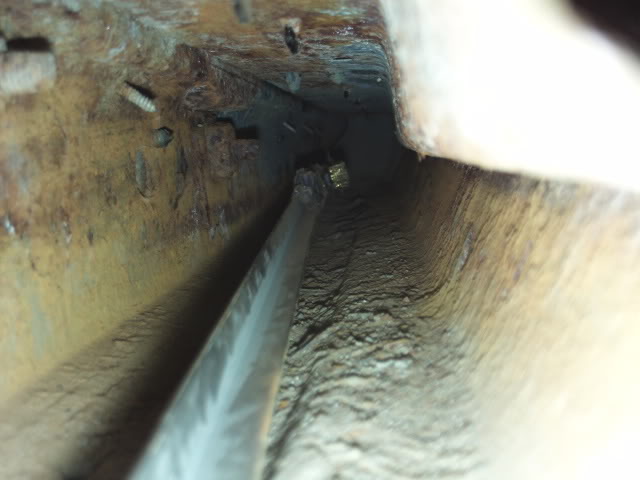
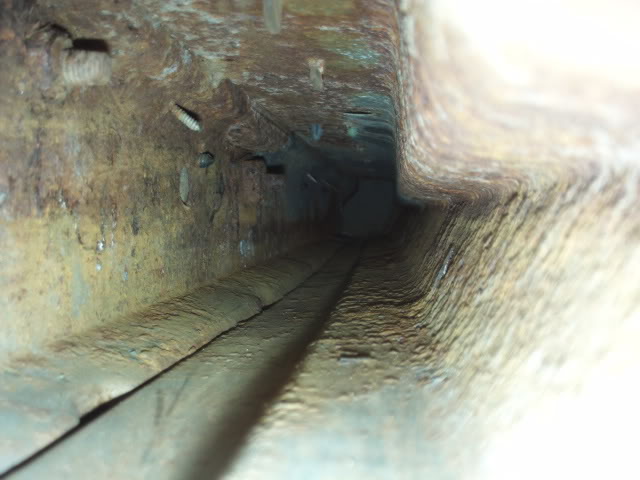
I want to clean out all of the dirt and sand out of the inside.
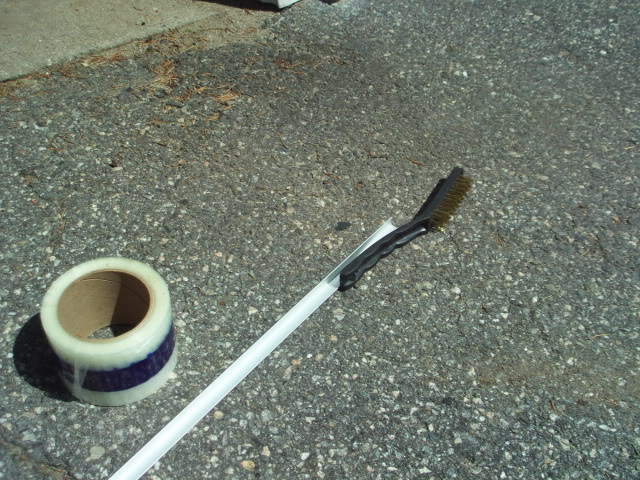
Then if possible I want to tape a paint brush or spoung of some type to a long handle and possibly paint rust bullet on the inside of the cavity as well.
Think that will work and possibly keep my rockers from rotting out fast!
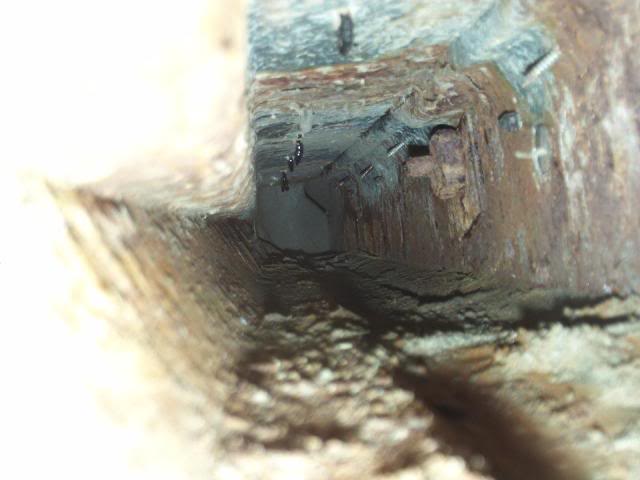
here is what I am talking about.
Started scraping here
here is the rear peice that once removed showed me where it all was getting in.
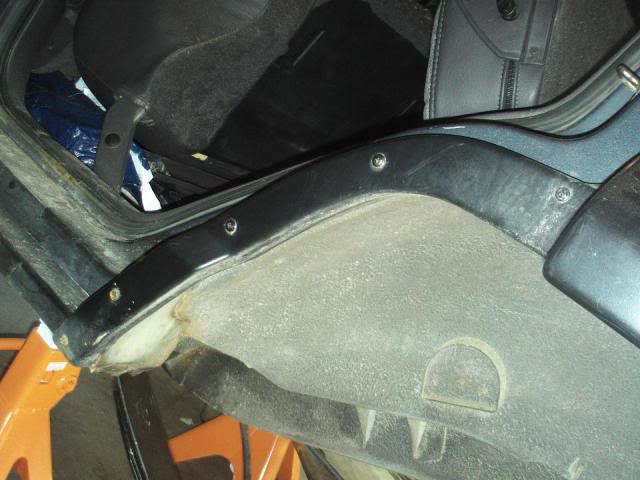
I bent the metal to make it easier to remove the dirt.


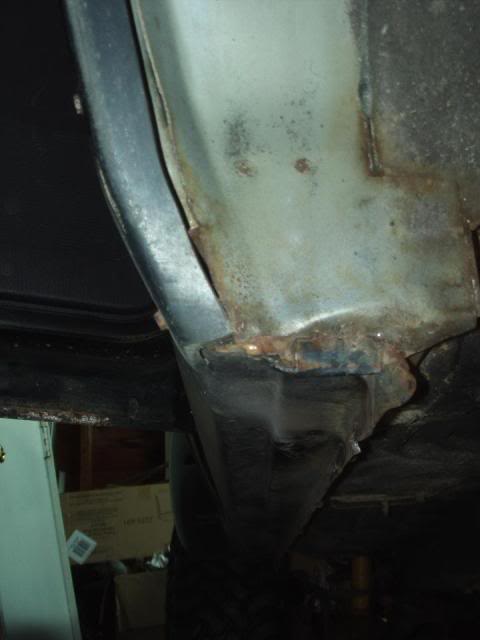
Cleaned it out a bit, but its still messy. Also in both sides I see a small slit/crack of light coming through from where the front fender was cut for that bushwacker.
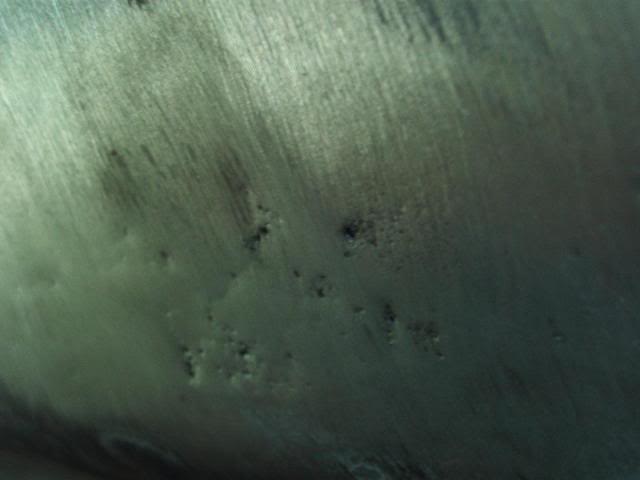
pile from one side! (put a butt stub in there for size reference,,, I don't smoke just found in my garage! MATT haha)
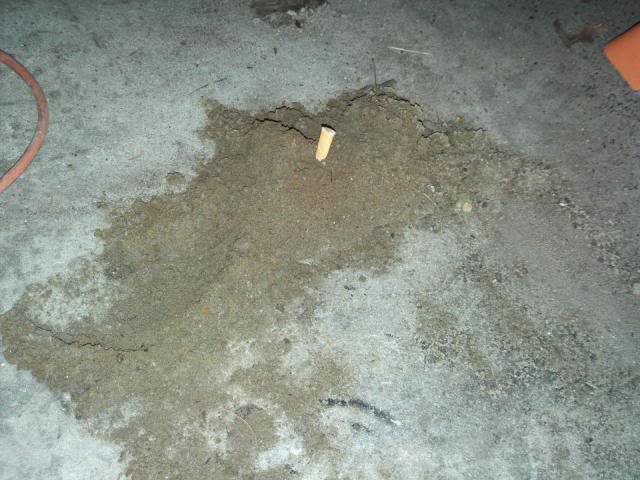
other side.
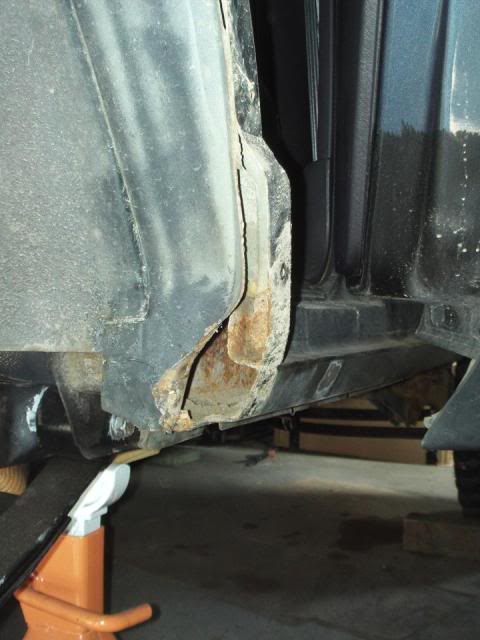
this is why it was bubbling my bed liner.!
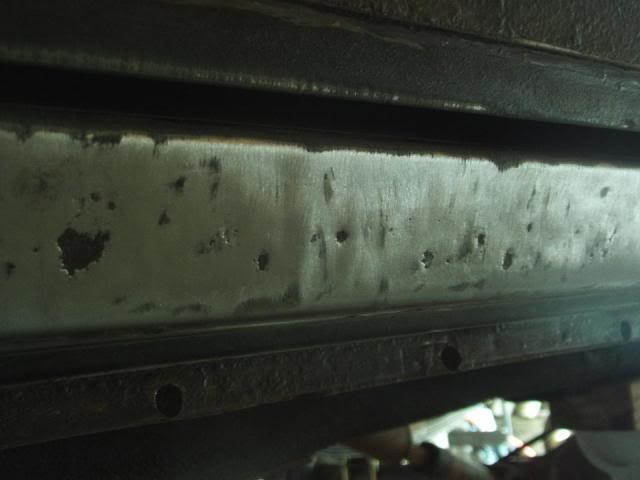
Cleaned up the bad spots on this side.
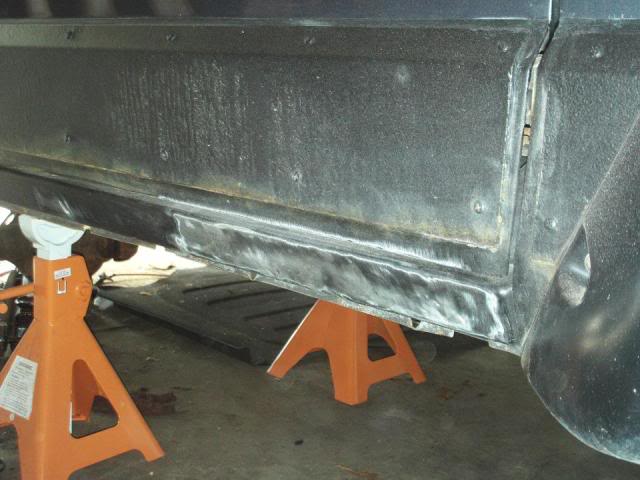
then the drivers side again.
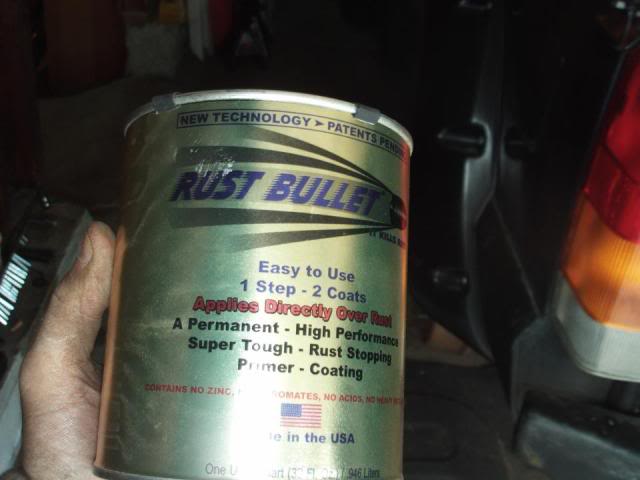
This stuff says it will stop rust and add strength for 10 years! thats long enough for me!
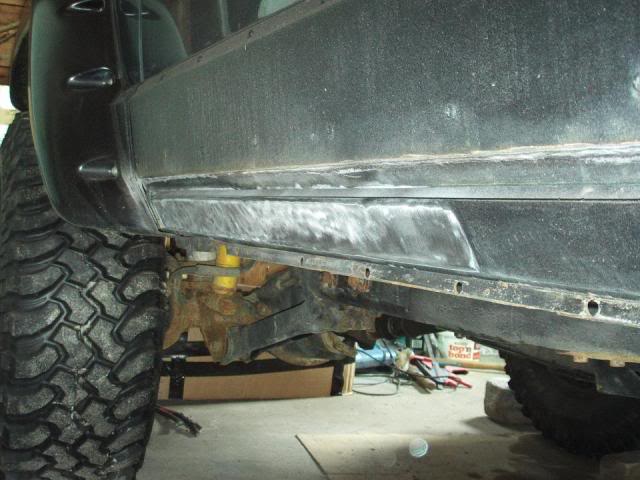
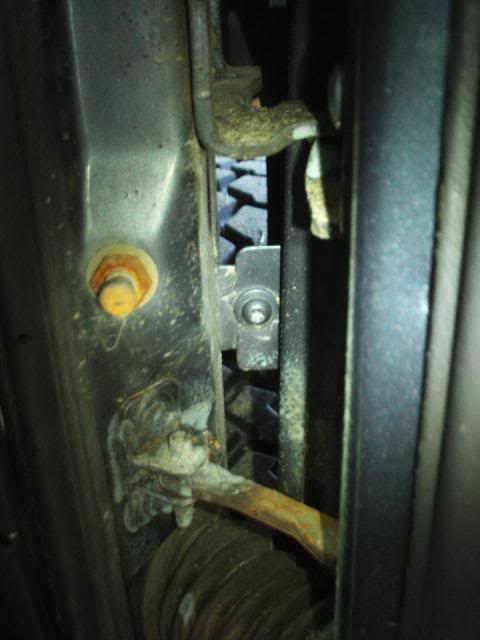
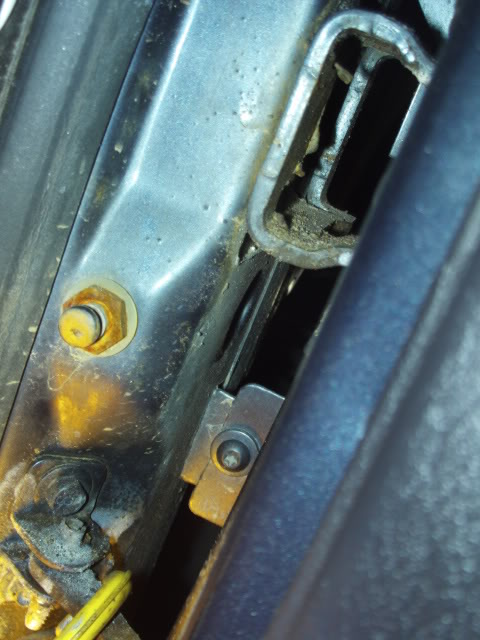
Also looking for idea's of what to do about being able to see my wheels when I open my doors because of metal that was removed.
I have been wanting to figure that out because its always dirty in there where the door hinge is.
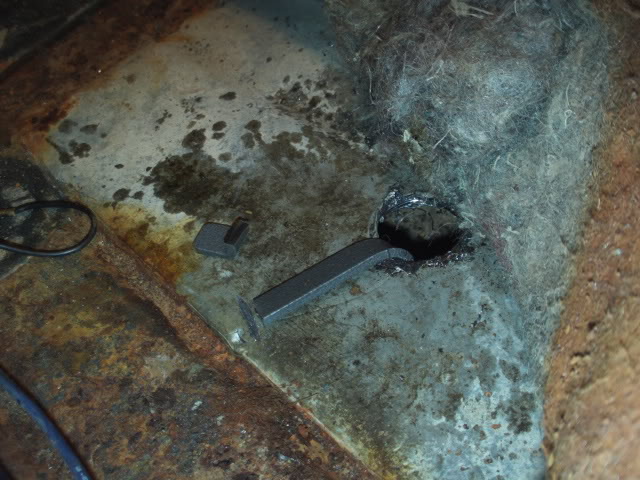
I also decided to remove the other bump stop because it had a hole in it and sand was coming out of it. haha
didn't break any bolts on that one, but could see that the 2 original bolts where broken off and the guy put new ones right next to them haha.
cleaned all that up as well as using the wire wheel on the flaky rust every where I saw it.
I want that Rust Bullet all over this thing.
I am not sure I bought enough, but it was pricey so its better to re-order more later if needed.
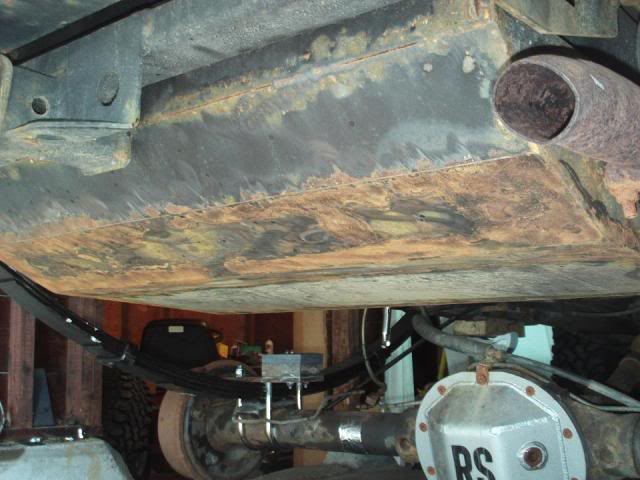
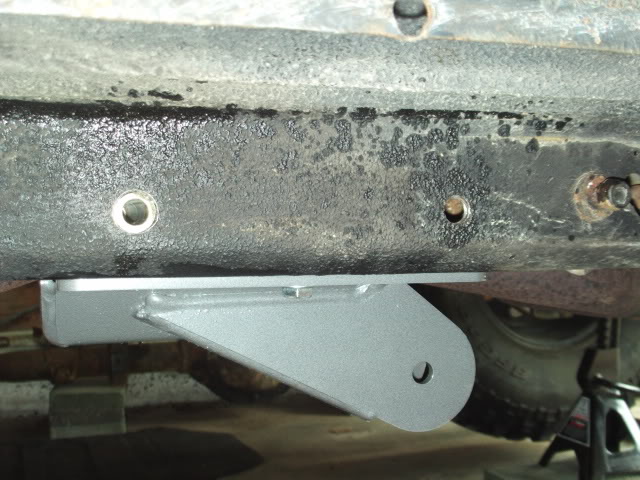
Gas tank skid after some rust and paint removal.
Ok anyway I hope to make some more progress over the weekend.
I want to get it all painted and let it dry so I can put the rear back together and weld on the shock mounts and move to the front. lol
anyway how should I seal up those holes after I paint the rockers and inside them?
not sure. but yeah its fighting me and i get side tracked as well.
check it out.
I copied and pasted all this from my other local forum. BTW
Hey again
I played a little today trying to prep some metal for the Rust Bullet paint.
I got side tracked once I found some things out.
You see when I used bed liner on my doors and lower rockers it looked great!
then a few days later these bubble where appearing and I popped them like a zit but there was water inside!
I was like WTF, oh well I will get it right next time.
So then another day I ground down all the bed liner in those spots and did it again.
What do you know a few days later they came back!
So i said screw it for then I will need to fix better later when in the garage.
So as i was under there scraping and grinding everything I came to those bubbles again.
I buzzed off the bed liner and there they where, little pin holes, one had a few drips of water come out! :ack
That led me to search for what was happening.
Found that in the rear where the Bushwacker flares where mounted and the metal was cut it was letting sand and water in.
Now I am trying to think of a way to repair it.
On the outside I plan on using the Rust Bullet paint and then using bed liner over that again.
But on the inside it will be tricky.
I want to clean out all of the dirt and sand out of the inside.
Then if possible I want to tape a paint brush or spoung of some type to a long handle and possibly paint rust bullet on the inside of the cavity as well.
Think that will work and possibly keep my rockers from rotting out fast!
here is what I am talking about.
Started scraping here
here is the rear peice that once removed showed me where it all was getting in.
I bent the metal to make it easier to remove the dirt.
Cleaned it out a bit, but its still messy. Also in both sides I see a small slit/crack of light coming through from where the front fender was cut for that bushwacker.
pile from one side! (put a butt stub in there for size reference,,, I don't smoke just found in my garage! MATT haha)
other side.
this is why it was bubbling my bed liner.!
Cleaned up the bad spots on this side.
then the drivers side again.
This stuff says it will stop rust and add strength for 10 years! thats long enough for me!
Also looking for idea's of what to do about being able to see my wheels when I open my doors because of metal that was removed.
I have been wanting to figure that out because its always dirty in there where the door hinge is.
I also decided to remove the other bump stop because it had a hole in it and sand was coming out of it. haha
didn't break any bolts on that one, but could see that the 2 original bolts where broken off and the guy put new ones right next to them haha.
cleaned all that up as well as using the wire wheel on the flaky rust every where I saw it.
I want that Rust Bullet all over this thing.
I am not sure I bought enough, but it was pricey so its better to re-order more later if needed.
Gas tank skid after some rust and paint removal.
Ok anyway I hope to make some more progress over the weekend.
I want to get it all painted and let it dry so I can put the rear back together and weld on the shock mounts and move to the front. lol
anyway how should I seal up those holes after I paint the rockers and inside them?
04-24-2010, 08:28 PM
#21
Seasoned Member
Thread Starter
Join Date: Sep 2009
Location: MA
Posts: 377
Likes: 0
Received 1 Like
on
1 Post
Year: 2001
Model: Cherokee
Engine: 4.0
Hi All, I didn's get home until 5:30 AM this morning (work late night) and I slept half the day away. But Greg and Matt stopped by to motivate me to do some work.
They said they will come back tomorrow as well.
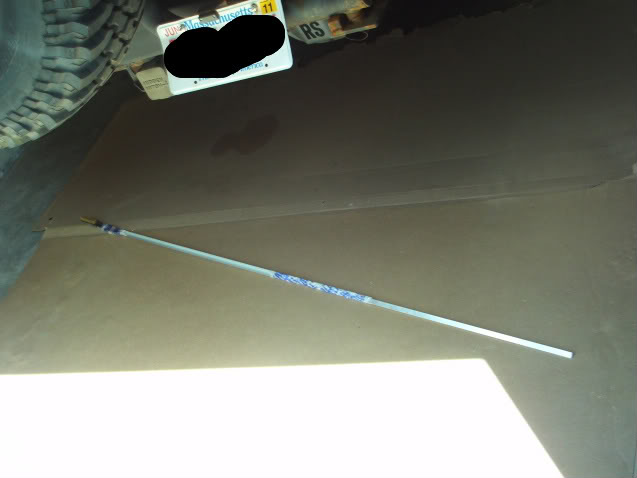
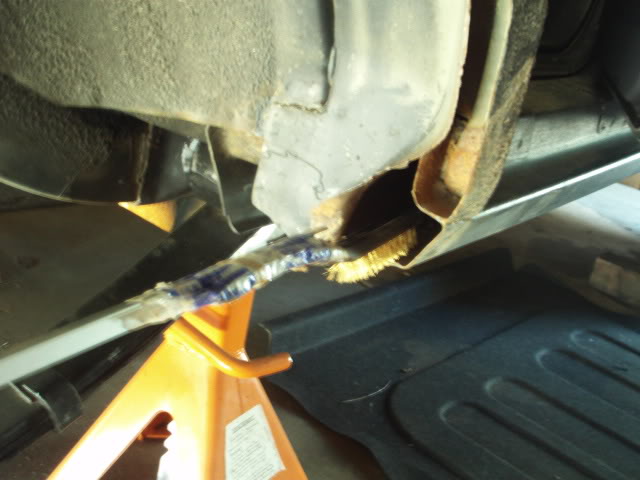
I made a cool tool to scrape the inside of my rockers with.
then we used compressed air and a vacuum with a few extenders on it to clean out the rockers good!
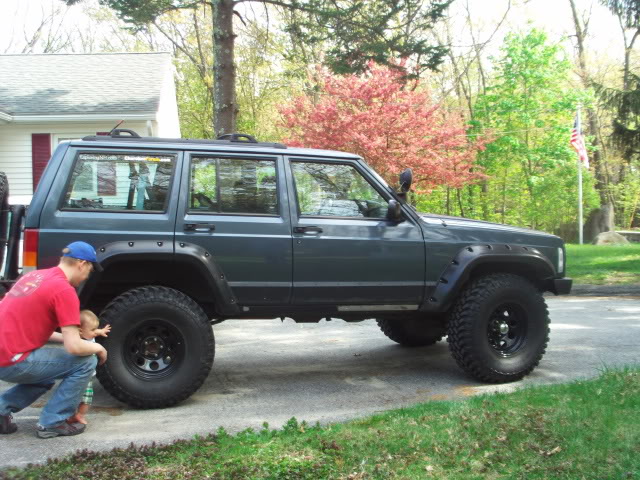
ready for paint now, but they made me put tires on and flip around to start on front.
Hope we will get some good work on front done tomorrow. :smile:
thanks gents!
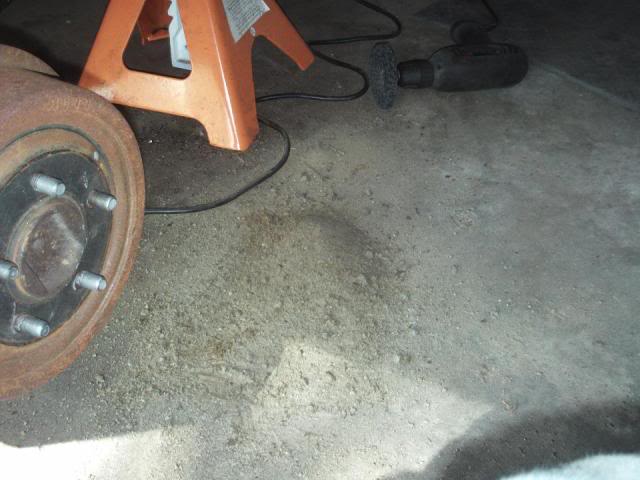
Got the brakes back together.
Pulled it out to switch it around in garage.
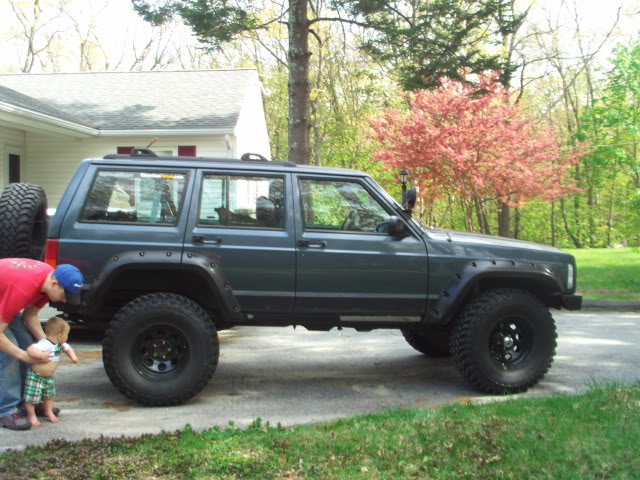
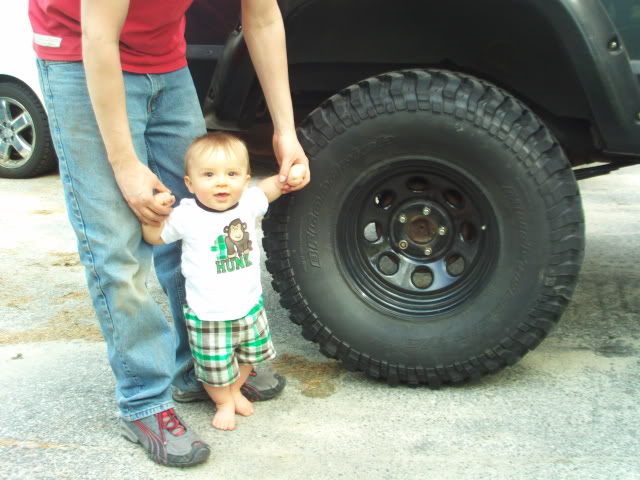
Greg Showing Logan the tire haha
I love the rear! can't wait to finish the front.
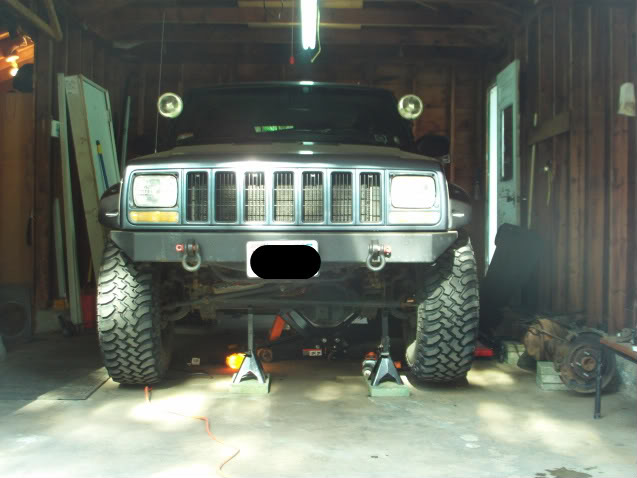
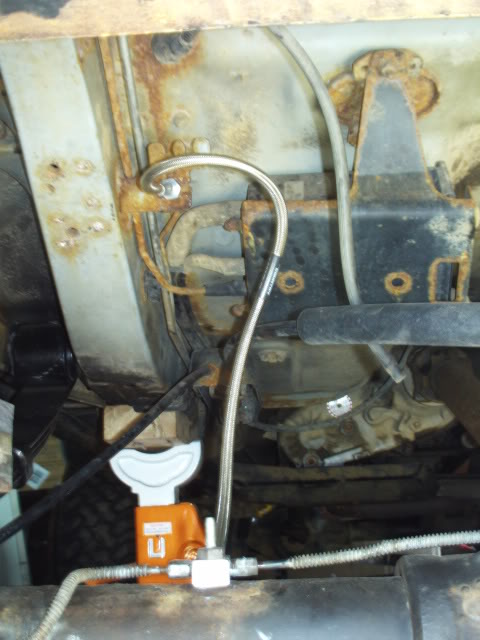
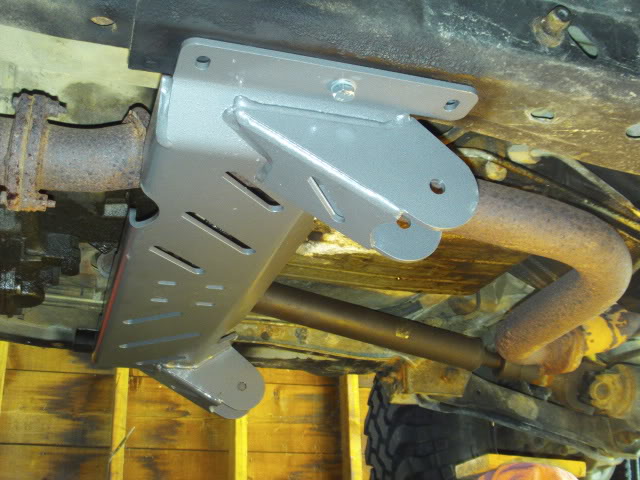
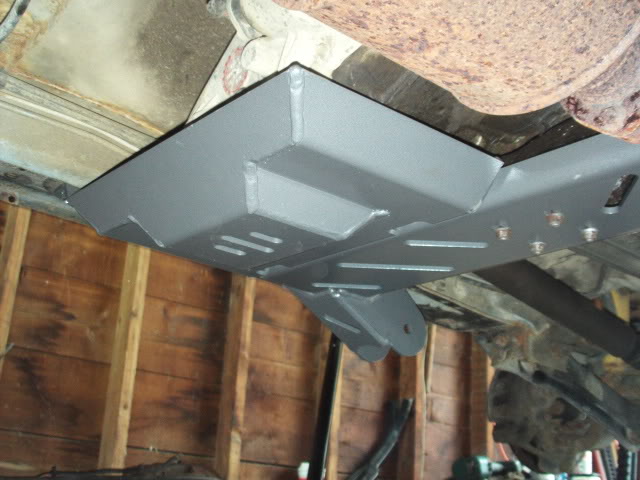
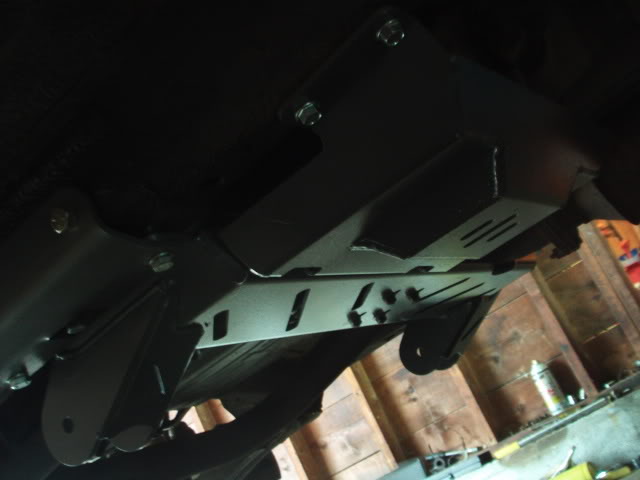
Decided to start with T-case and skids.
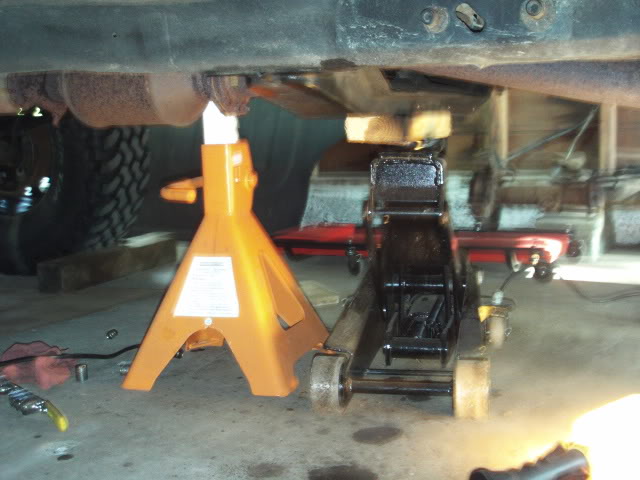
Figured it may help me place the jack stands on them for the front.
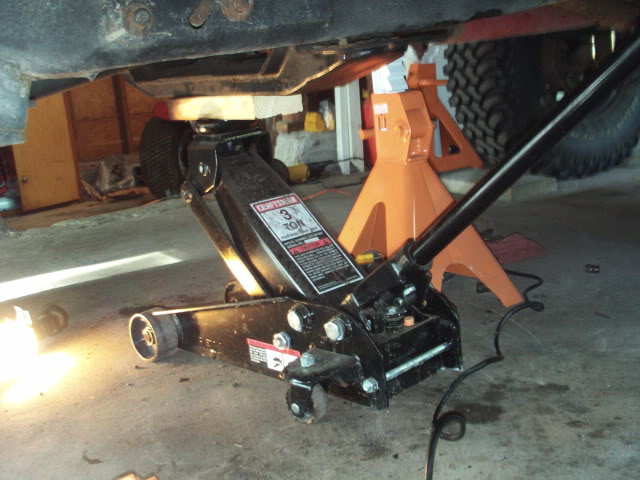
really oily under my Jeep along with rust. :ack
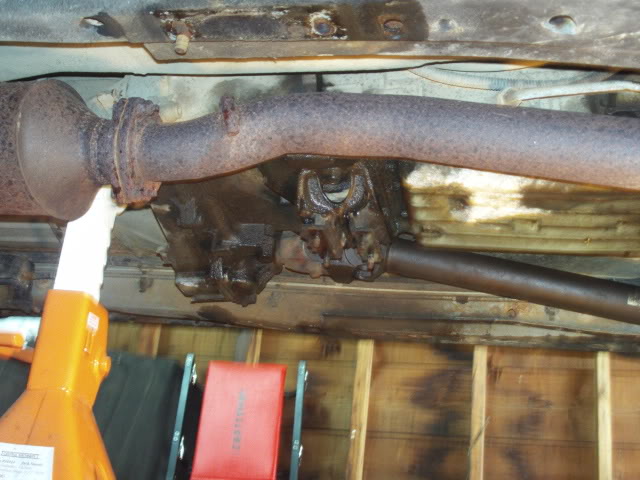
Cross member out.

thats it for today.
:smile:
They said they will come back tomorrow as well.
I made a cool tool to scrape the inside of my rockers with.
then we used compressed air and a vacuum with a few extenders on it to clean out the rockers good!
ready for paint now, but they made me put tires on and flip around to start on front.
Hope we will get some good work on front done tomorrow. :smile:
thanks gents!
Got the brakes back together.
Pulled it out to switch it around in garage.
Greg Showing Logan the tire haha
I love the rear! can't wait to finish the front.
Decided to start with T-case and skids.
Figured it may help me place the jack stands on them for the front.
really oily under my Jeep along with rust. :ack
Cross member out.
thats it for today.
:smile:
Last edited by Brian; 04-24-2010 at 08:42 PM.
04-25-2010, 03:38 PM
#23
Member
Join Date: Mar 2010
Location: Eastern Pennsylvania
Posts: 238
Likes: 0
Received 0 Likes
on
0 Posts
Year: 1998
Model: Cherokee
Engine: 4.0
Still looking good i'll be done with my lift today and gotta drive it 4 hours back to pittsburgh :/ hopefully start my thread tonight.
 04-25-2010, 06:32 PM
#25
Seasoned Member
Thread Starter
Join Date: Sep 2009
Location: MA
Posts: 377
Likes: 0
Received 1 Like
on
1 Post
Year: 2001
Model: Cherokee
Engine: 4.0
yeah she's fighting me. cant wait to see it!
In the middle
Today we started early, and got a lot done.
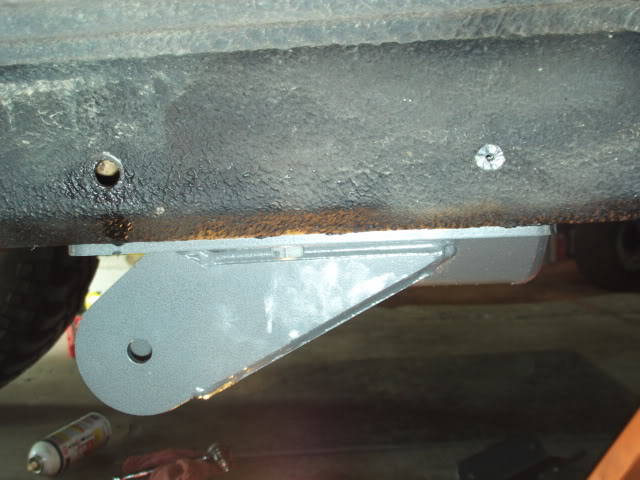
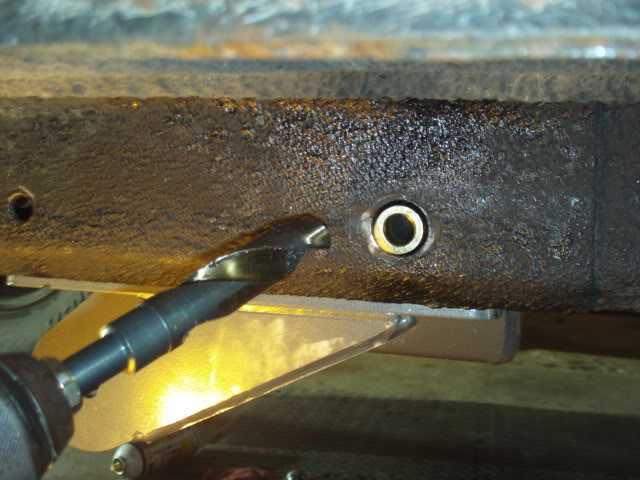
Despite the fact that we had to run to Matts work to get some tools, then had to go out again to Lowes and get a $20 drill bit to open the holes up to fit the sleeve in the uni-body.
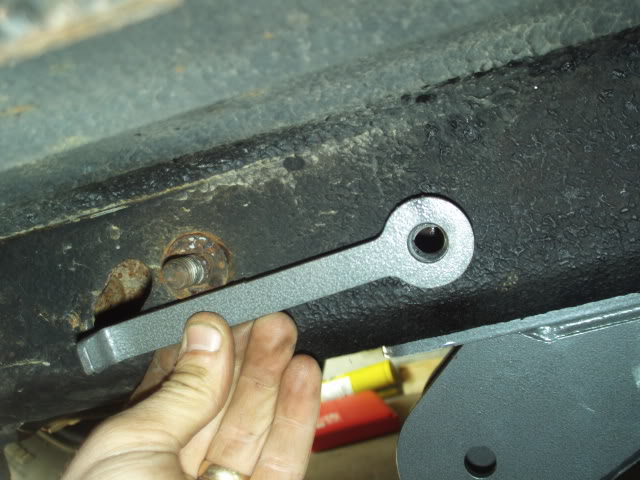
Went to install one of the bolts that went in to the side brackets and noticed my Slider bolts where in the way of the nuts you feed into uni-body.
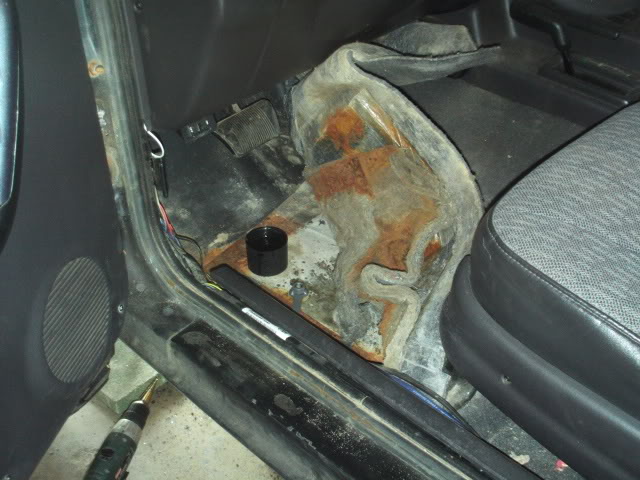
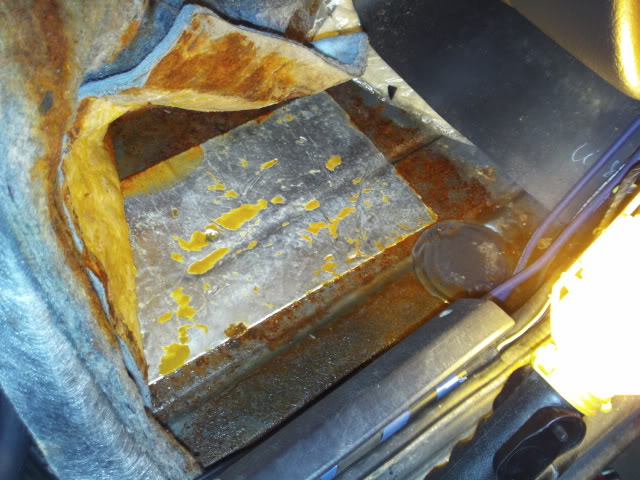
So I decided to peel carpet back and drill a hole in the floor through into the uni-body.
That worked great, but I noticed wet water and more rust.
Its not that bad and I am glad I cought it now.!
Matt was thinking I should rip the carpet out and use more rust bullet and bed line the inside.
I just know it gets hot inside when you do that.
So not sure yet.
But we think we figured out where the water was flowing in from so I am just going to seal that up as well.
Just more things unexpected.
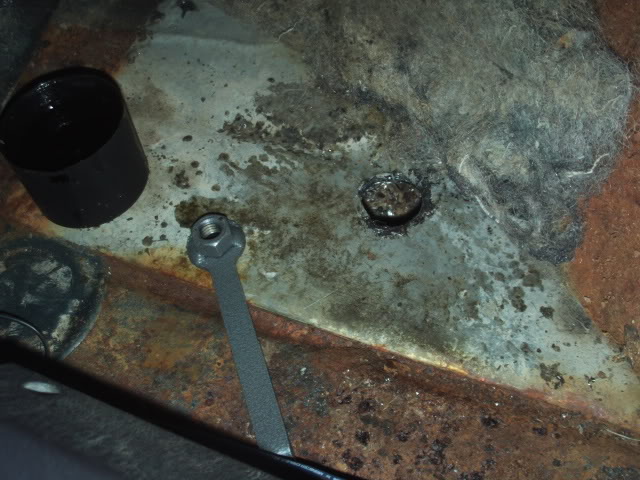
There was bolts in there that had nothing connected to them and where rusty so I re-tapped them to the right size.
The bolts went in a lot better after that.
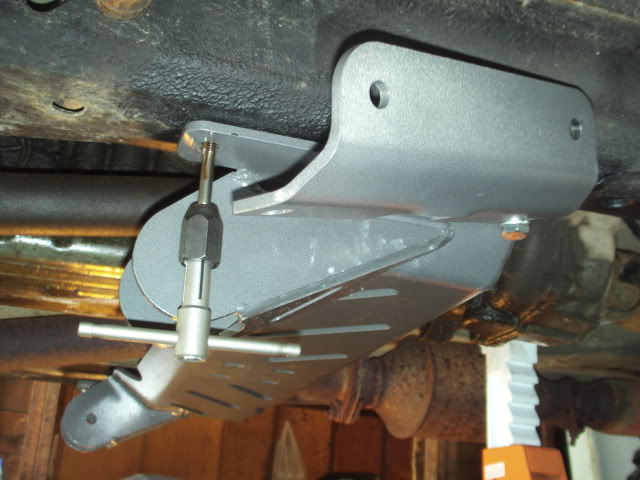
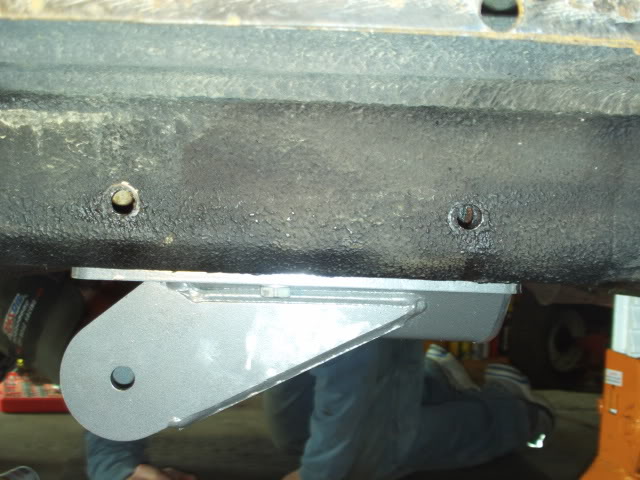
Drilled pilot holes
removed and drilled bigger hole.
Tried using this for the sleeves,
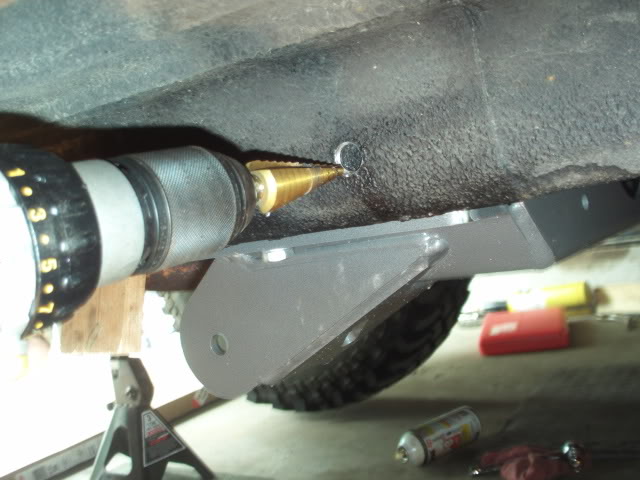
turns out there are other pieces of metal to drill through on the inside and the step bit wasn't working so good. So I went to Lowes and bought this big bit.
here you can see my slider bolts are not allowing me to use the hole to feed the nut inside.
We tried to remove the bolt and sleeve, but they where just so seized I thought of a better idea.
cut the floors.
this is where we found the rust!
Hole I cut
cut off end and bent down.
Same deal on the other side.
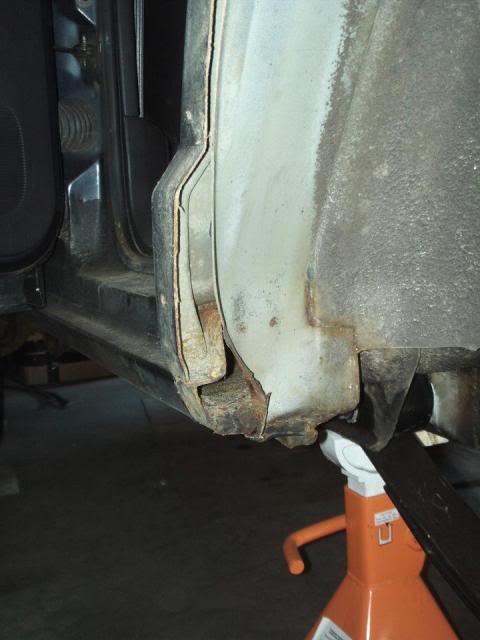
Here is where we think it was coming in, the hole on the side.
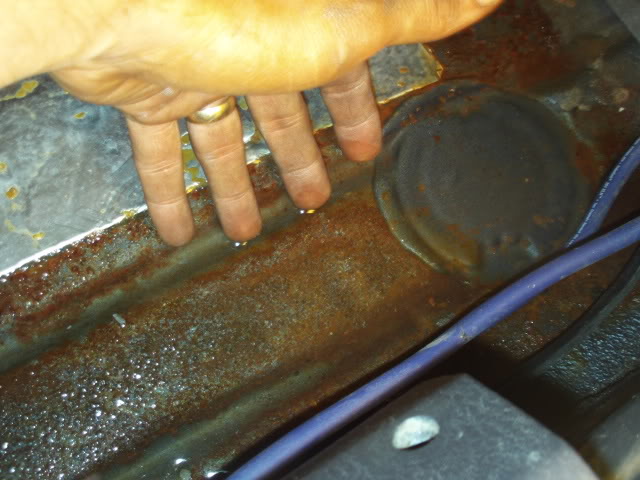
its tough to see.
Water still in here.
I dried and have fans drying it all now.
More drilling! and hammering
more in part 2
04-25-2010, 06:33 PM
#26
Seasoned Member
Thread Starter
Join Date: Sep 2009
Location: MA
Posts: 377
Likes: 0
Received 1 Like
on
1 Post
Year: 2001
Model: Cherokee
Engine: 4.0
Water yuck!!
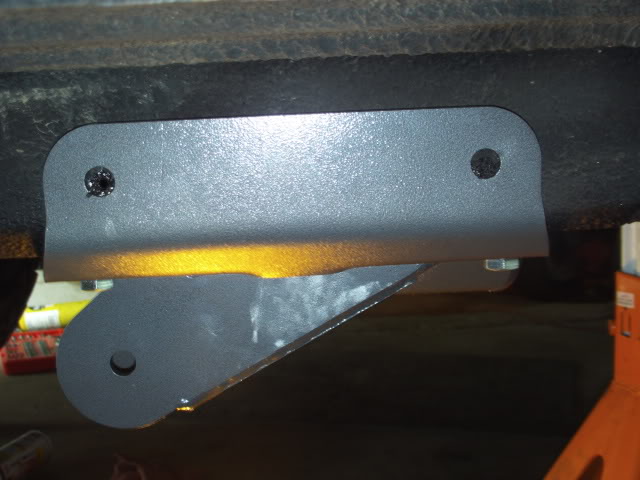
Cut another hole
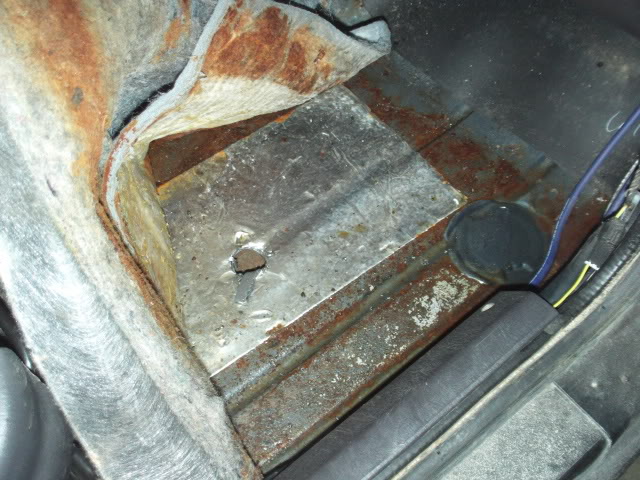
bent tab over. :smile:
bolted reset of cross member

One more part done!
Cut another hole
bent tab over. :smile:
bolted reset of cross member
One more part done!
04-26-2010, 12:19 AM
#30
Member
Join Date: Mar 2010
Location: Eastern Pennsylvania
Posts: 238
Likes: 0
Received 0 Likes
on
0 Posts
Year: 1998
Model: Cherokee
Engine: 4.0
I didn't have those 15/32 and 25/32 drill bits so i didnt do those side braces on the crossmember. But besides that I finished today got the pilot holes drilled for them, tough little unibody. Looks great man can't wait to see it finished besides the alignment im all but done I love it. Drove around in it for hours today.