My XJ Rough Country 6.5" Long Arm install w/other stuff as well... The long way...
 04-17-2010, 09:38 PM
#1
Seasoned Member
Thread Starter
Join Date: Sep 2009
Location: MA
Posts: 377
Likes: 0
Received 1 Like
on
1 Post
Year: 2001
Model: Cherokee
Engine: 4.0
Hi All,
I am finally getting around to starting my XJ rebuild thread. lol
What will go on here:
Install RC 6.5" Long Arm kit (minus there shocks)
Relocate rear lower shock mounts using ZONE shock tabs.
Relocate rear axle breather.
Installing Ford 8.8 4:10's with locker and rear disks. (probably next year. lol 2011. I have axle with 4:10's just no money for everything else at the moment.)
and so on...
Here is a lost of specs/Mods before installing the lift.
2001 Cherokee XJ
4.0 I6 Auto, just turned 110,000
Dana 30 / Chrysler 8.25
Mods:
Bushwacker Fender Flares
Rock Lizard Front bumper
Olympic 4x4 Rear Rock Bumper
Olympic Tire Swing out
Rock Lizard Light mounts
Rock Lizard - Gila Monster Lower Quarter Guards (3/16" Plate steel)
Rock Lizard - Gila Monster Door guards
WARN Front D30 Diff Guard
Ruff stuff Chrysler 8.25 cover with drain and countersunk holes.
WARN T-case Skid Plate
Powertank Gas tank skid plate
Big Daddy Off road tire-rod
Rubicon Express SYE
Rubicon Express Rear CV Drive shaft
Hidden Hitch trailer hitch
Welded on Front Lower Control Arm skid plates
Rubicon Express Extended rear brake lines
JKS Rear BPE's
Cragar Soft 8 wheels
33x12.5x15 BFGoodrich Mud Terrain
Flex-a-lite Trimline electric cooling fan
Hood Vents (with custom covers I made)
Extended rear bump stops
Adjustable bump stop lower purch (rear)
CB Radio/4' Firestick
Hi-Lift Jack
IPF H-4 Headlight conversion
Remote Starter
Alpine CD/MP3/iPOD player
Infinity Door speakers w/separate tweeter
600w Amp 10" sub
Optima Yellow Top Battery
Roof Rack
Tow straps and a lot of gear/tools
Old Lift probably sitting around 4"
(FRONT: dual rate coil springs/ 3" coil spacers/OME shocks, REAR: bastard pack leafs with 2.5" Drop shackle)
New lift Rough Country 6.5" Long Arm.
Bilstein 5150's going on in place of RC 2.2 shocks.
anyway this project is going to be slow going mostly. I want it done, but I do not want to rush.
but I still want to go wheelin this year. lol
Today I hoped to spend most of the day working on the XJ but it didn't happen like that.
Still I managed to get started and a few hours of work into it.
There are lots of rusted seized bolts and some surprises.
I will show you in the pictures and tell you.
a few before shots.
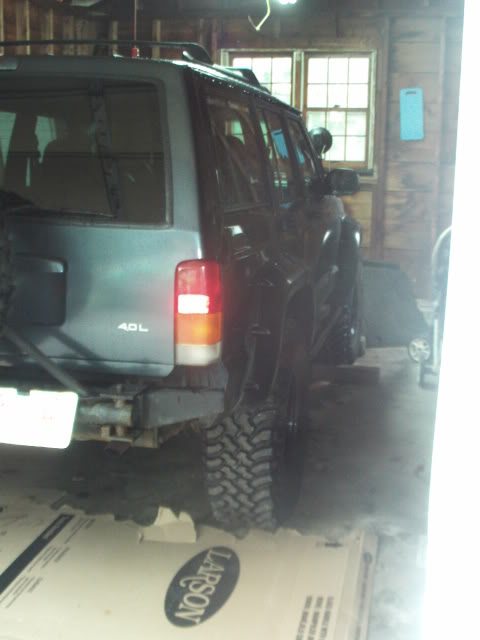
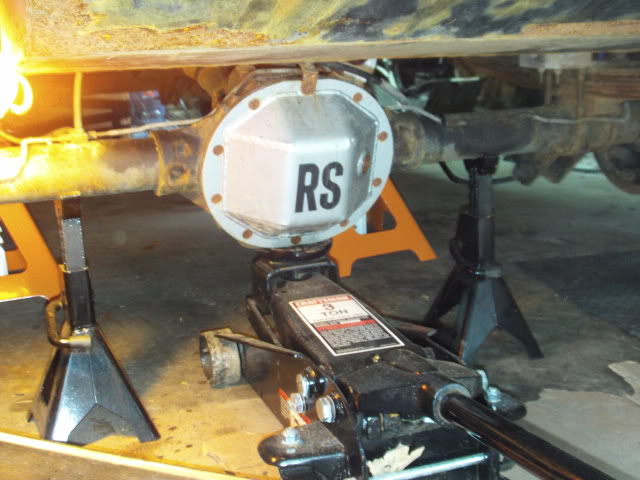
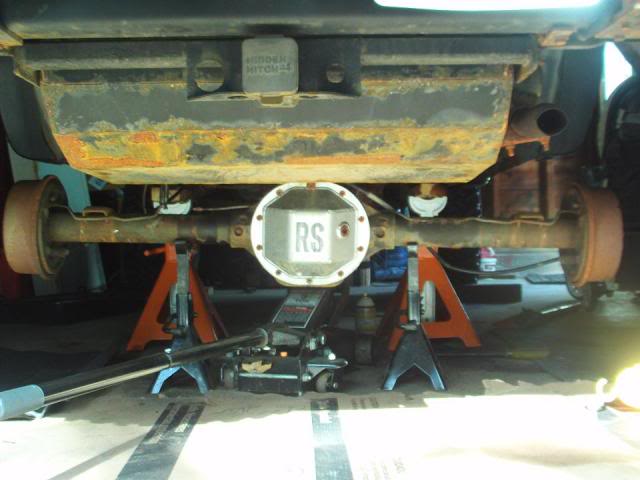
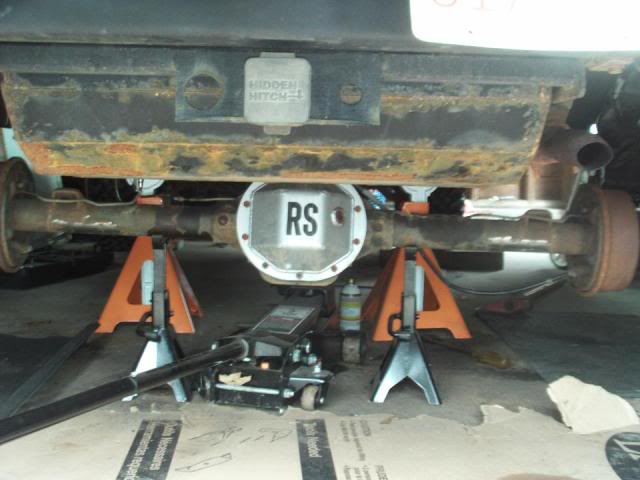
OK So I went out last night and picked up these jack stands.
they worked good on the back so far, along with my smaller craftsman ones.
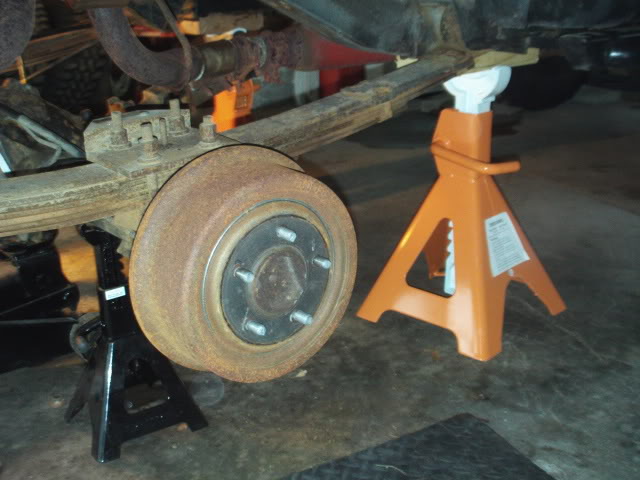
Well after removing the wheels I broke a bolt on the lower shock mount 1st thing I touch. :ack this is great start I said.!
but luckily I planned on cutting them off anyway.

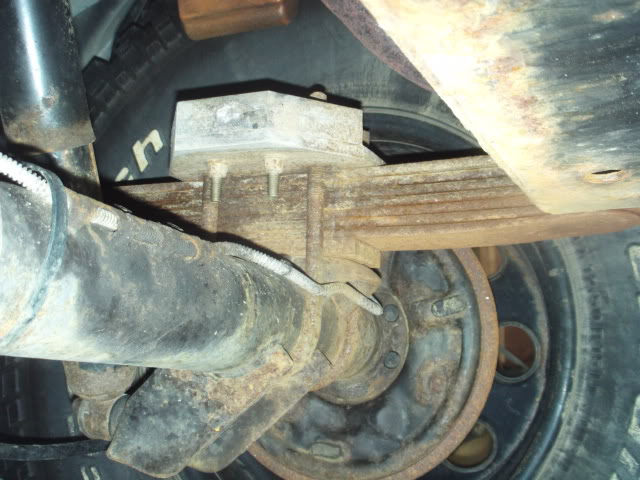
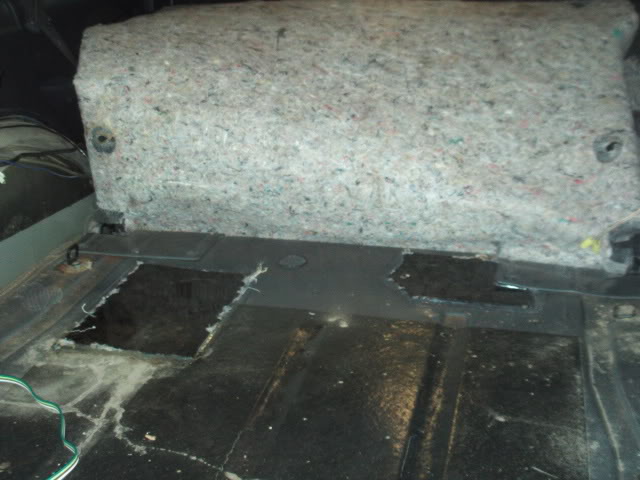
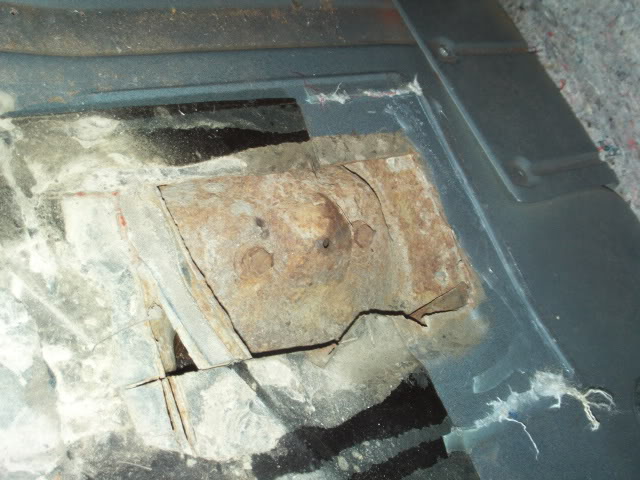
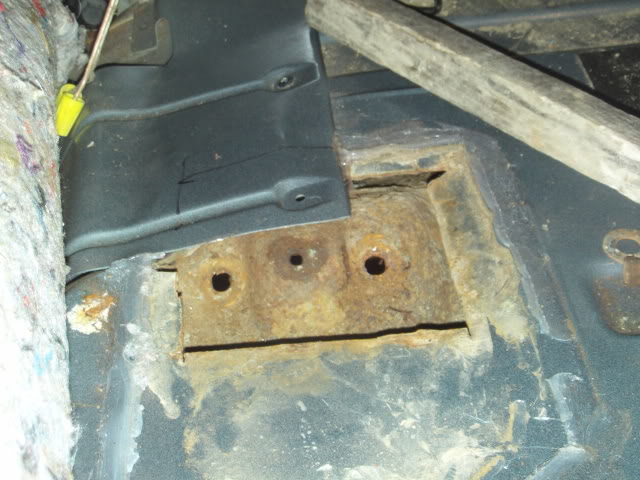
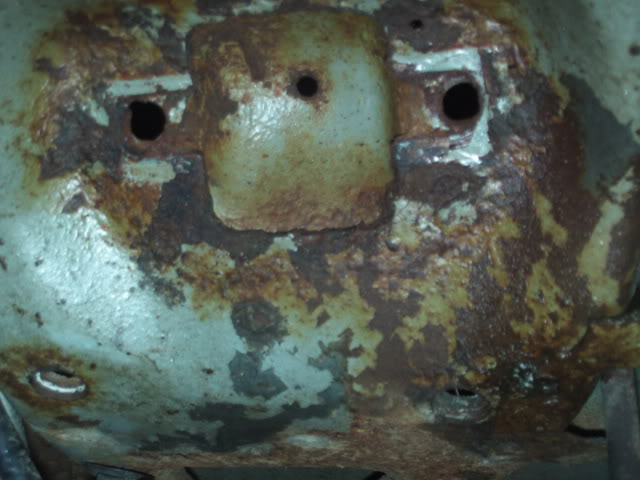
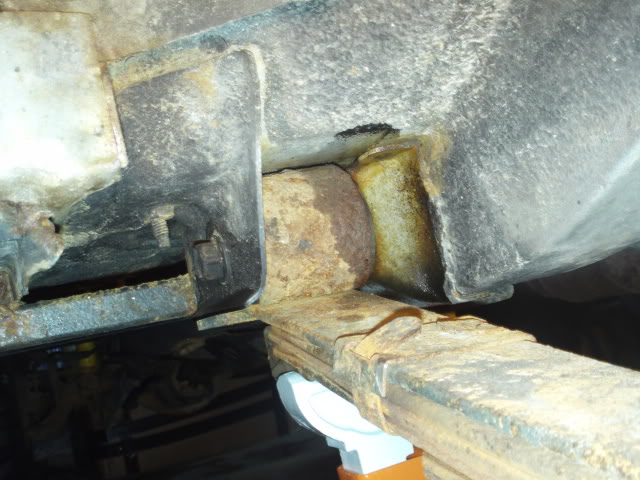
Next thing we moved onto was the upper shock mounts, where I didnt even know there was a set of BPS there already,. but they where badly rusted.
We could not get the bolts off and figured we would peel the rug back and cut holes to get to the back of the bolts.
well that was already done!
kinda sloppy but done.
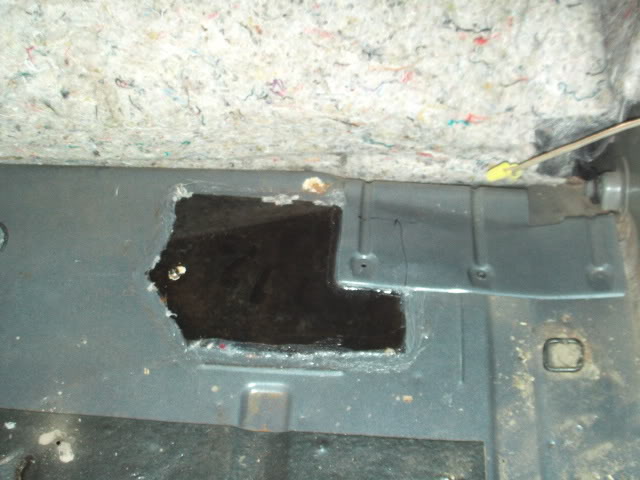
I plan on fixing this area back up better than the previous owner did.
Like using some sheet metal and welding it in there.
Possibly with a few rubber caps to still leave access to the bolts I put it.
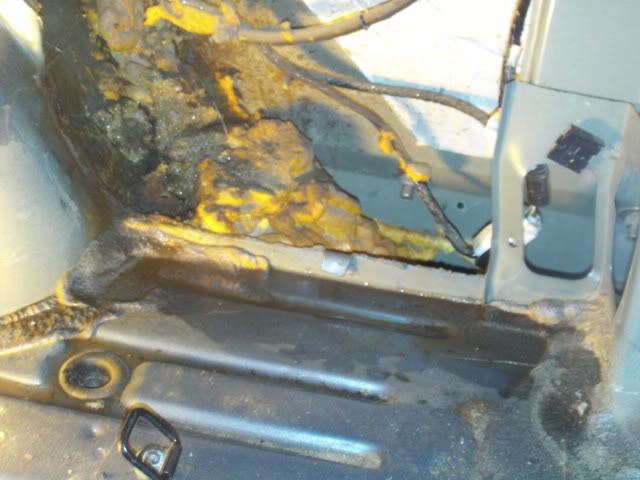
check this out!
Silicon in Plexiglas, Also noticed lots of foam from Bushwacker install and water pool... :ack
We found where that leak was coming from and my friend Matt said he can get me some seam sealer to use as well.
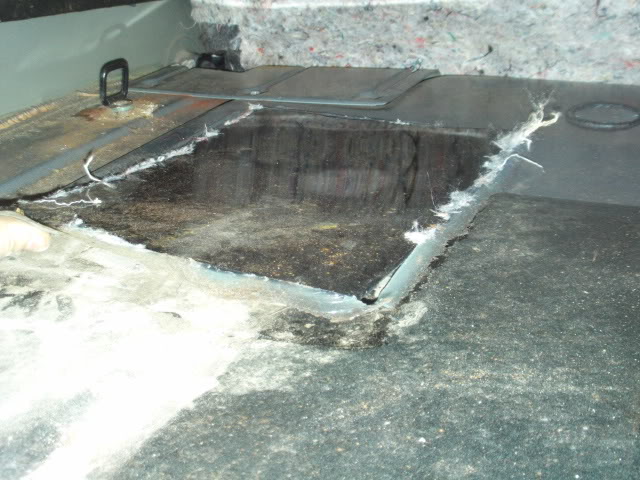
you never know what you will find I guess. :sm_laughing:
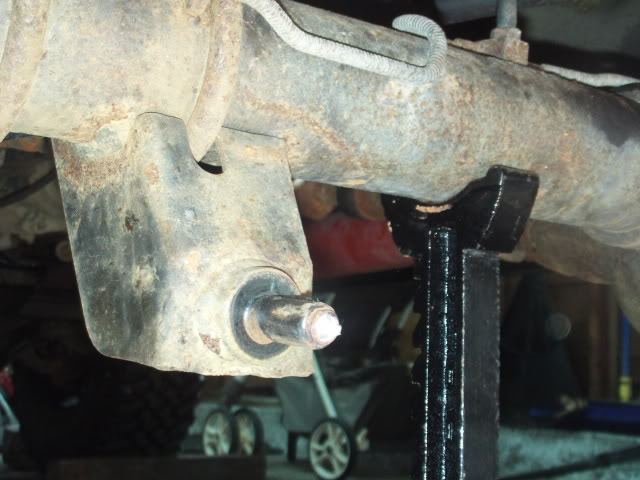
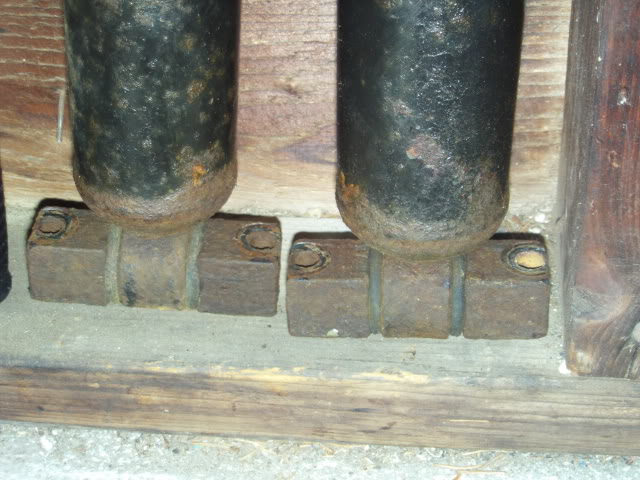
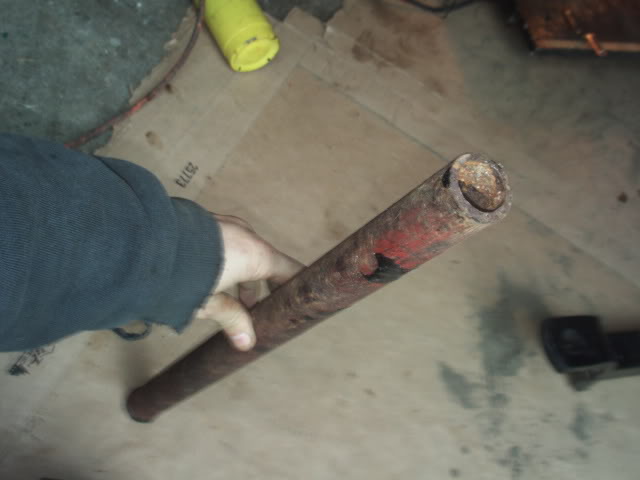
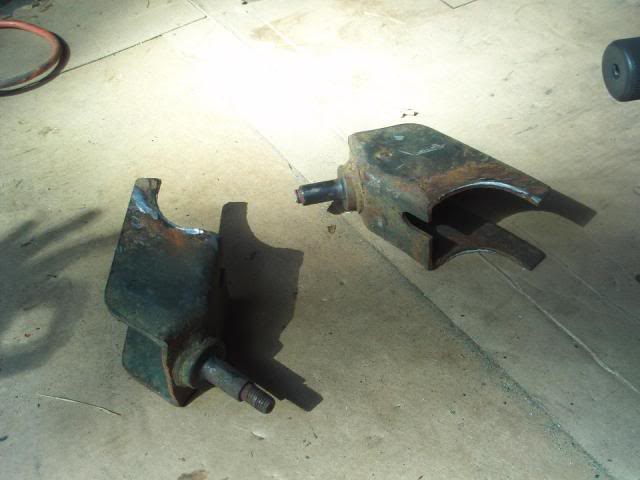
here you can see how rusted the BPE's are I could not get these apart.! Junk!! glad I bought new ones!
I am finally getting around to starting my XJ rebuild thread. lol
What will go on here:
Install RC 6.5" Long Arm kit (minus there shocks)
Relocate rear lower shock mounts using ZONE shock tabs.
Relocate rear axle breather.
Installing Ford 8.8 4:10's with locker and rear disks. (probably next year. lol 2011. I have axle with 4:10's just no money for everything else at the moment.)
and so on...
Here is a lost of specs/Mods before installing the lift.
2001 Cherokee XJ
4.0 I6 Auto, just turned 110,000
Dana 30 / Chrysler 8.25
Mods:
Bushwacker Fender Flares
Rock Lizard Front bumper
Olympic 4x4 Rear Rock Bumper
Olympic Tire Swing out
Rock Lizard Light mounts
Rock Lizard - Gila Monster Lower Quarter Guards (3/16" Plate steel)
Rock Lizard - Gila Monster Door guards
WARN Front D30 Diff Guard
Ruff stuff Chrysler 8.25 cover with drain and countersunk holes.
WARN T-case Skid Plate
Powertank Gas tank skid plate
Big Daddy Off road tire-rod
Rubicon Express SYE
Rubicon Express Rear CV Drive shaft
Hidden Hitch trailer hitch
Welded on Front Lower Control Arm skid plates
Rubicon Express Extended rear brake lines
JKS Rear BPE's
Cragar Soft 8 wheels
33x12.5x15 BFGoodrich Mud Terrain
Flex-a-lite Trimline electric cooling fan
Hood Vents (with custom covers I made)
Extended rear bump stops
Adjustable bump stop lower purch (rear)
CB Radio/4' Firestick
Hi-Lift Jack
IPF H-4 Headlight conversion
Remote Starter
Alpine CD/MP3/iPOD player
Infinity Door speakers w/separate tweeter
600w Amp 10" sub
Optima Yellow Top Battery
Roof Rack
Tow straps and a lot of gear/tools
Old Lift probably sitting around 4"
(FRONT: dual rate coil springs/ 3" coil spacers/OME shocks, REAR: bastard pack leafs with 2.5" Drop shackle)
New lift Rough Country 6.5" Long Arm.
Bilstein 5150's going on in place of RC 2.2 shocks.
anyway this project is going to be slow going mostly. I want it done, but I do not want to rush.
but I still want to go wheelin this year. lol
Today I hoped to spend most of the day working on the XJ but it didn't happen like that.
Still I managed to get started and a few hours of work into it.
There are lots of rusted seized bolts and some surprises.
I will show you in the pictures and tell you.
a few before shots.
OK So I went out last night and picked up these jack stands.
they worked good on the back so far, along with my smaller craftsman ones.
Well after removing the wheels I broke a bolt on the lower shock mount 1st thing I touch. :ack this is great start I said.!
but luckily I planned on cutting them off anyway.
Next thing we moved onto was the upper shock mounts, where I didnt even know there was a set of BPS there already,. but they where badly rusted.
We could not get the bolts off and figured we would peel the rug back and cut holes to get to the back of the bolts.
well that was already done!
kinda sloppy but done.
I plan on fixing this area back up better than the previous owner did.
Like using some sheet metal and welding it in there.
Possibly with a few rubber caps to still leave access to the bolts I put it.
check this out!
Silicon in Plexiglas, Also noticed lots of foam from Bushwacker install and water pool... :ack
We found where that leak was coming from and my friend Matt said he can get me some seam sealer to use as well.
you never know what you will find I guess. :sm_laughing:
here you can see how rusted the BPE's are I could not get these apart.! Junk!! glad I bought new ones!
Last edited by Brian; 04-18-2010 at 08:42 PM.
 04-17-2010, 09:39 PM
#2
Seasoned Member
Thread Starter
Join Date: Sep 2009
Location: MA
Posts: 377
Likes: 0
Received 1 Like
on
1 Post
Year: 2001
Model: Cherokee
Engine: 4.0
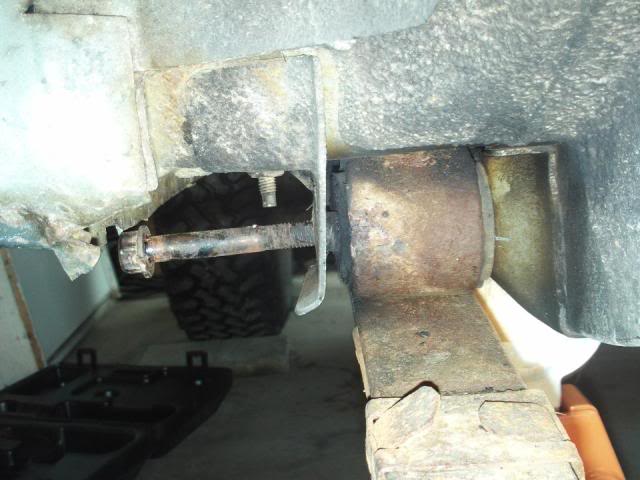
I plan on applying the rust bullet I picked up under here as well as other places.
tried to get this off... Failed!
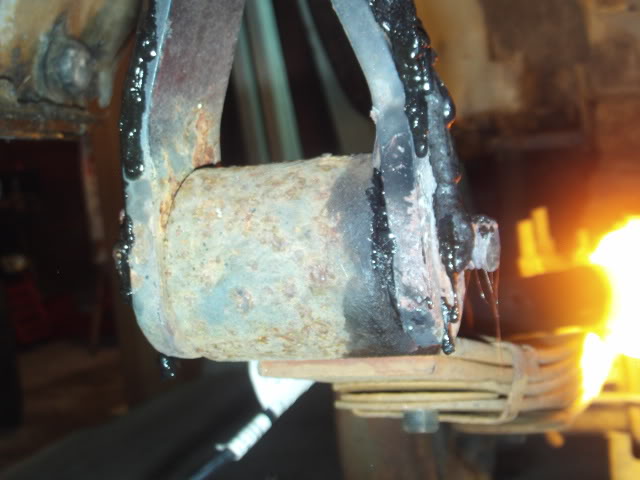
I should have just cut bolts and reused my old shackles but didnt and went onto removing the upper mount.
man o man, that bolt was seized to the bushing sleeve.
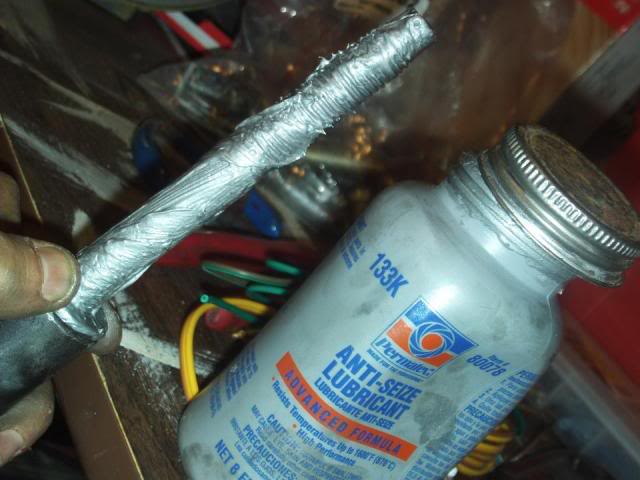
note to self use lots of anti-seize when installing new ones.!
bent metal, melted toxic bushing, heated sleeve, used vise grips to hold glowing sleeve, then used beaker bar to break bolt free from sleeve. :ack stunk royally!
here is the bolt removed finally.
tool that I found in my garage when I moved into this house last year.
glad I have it! it works great to assist me in bolt removal!
my breaker bar. :smile:
tried to remove leaf bolts, would not budge.
Decided to cut them, when i was almost through it broke and made a loud bang! Matt said it was under a lot of pressure.
it scared the crap out of me! :sm_laughing:

called it a night after this pretty much.
looked at what I will start in the morning.
the other end of the leaf.
this looks like it is going to be NO fun as well
I tried to see if it would budge and I broke a socket side wall!
lol
so since then I have sprayed it 3 times in hopes thats all it takes for tomorrow.
but sadly my buddy Matt thinks I will need to use more heat because the same issue is probably there that the sleeve is seized to the bolt.
man this stinks.
I am using MAPP gas so its better than propane, but not much. :sm_laughing:
Anyway tomorrow Morning Matt is coming back over and we are going to get those leafs out of there some how....
then I can start cutting off the shock mounts probably.
let you all in on whats next once I get more progress.
its going to be slow btw. I want to take care of a lot of stuff while under here. Everything takes me twice as long as it would take any one else I swear.
thanks for reading.
tried to get this off... Failed!
I should have just cut bolts and reused my old shackles but didnt and went onto removing the upper mount.
man o man, that bolt was seized to the bushing sleeve.
note to self use lots of anti-seize when installing new ones.!
bent metal, melted toxic bushing, heated sleeve, used vise grips to hold glowing sleeve, then used beaker bar to break bolt free from sleeve. :ack stunk royally!
here is the bolt removed finally.
tool that I found in my garage when I moved into this house last year.
glad I have it! it works great to assist me in bolt removal!
my breaker bar. :smile:
tried to remove leaf bolts, would not budge.
Decided to cut them, when i was almost through it broke and made a loud bang! Matt said it was under a lot of pressure.
it scared the crap out of me! :sm_laughing:
called it a night after this pretty much.
looked at what I will start in the morning.
the other end of the leaf.
this looks like it is going to be NO fun as well
I tried to see if it would budge and I broke a socket side wall!
lol
so since then I have sprayed it 3 times in hopes thats all it takes for tomorrow.
but sadly my buddy Matt thinks I will need to use more heat because the same issue is probably there that the sleeve is seized to the bolt.
man this stinks.
I am using MAPP gas so its better than propane, but not much. :sm_laughing:
Anyway tomorrow Morning Matt is coming back over and we are going to get those leafs out of there some how....
then I can start cutting off the shock mounts probably.
let you all in on whats next once I get more progress.
its going to be slow btw. I want to take care of a lot of stuff while under here. Everything takes me twice as long as it would take any one else I swear.
thanks for reading.
04-18-2010, 03:57 PM
#3
Seasoned Member
Join Date: Jan 2010
Location: Former Tampa Fl. now Southern Indiana
Posts: 412
Likes: 0
Received 0 Likes
on
0 Posts
Year: 1990
Model: Cherokee
Engine: 4.0 HO
Looks like your jeep is fighting you the whole way..Talk to it and tell it you are only trying to make it better and stronger then stock, and if that don't work get a big hammer and the torch..........LOL
 04-18-2010, 08:22 PM
#5
Seasoned Member
Thread Starter
Join Date: Sep 2009
Location: MA
Posts: 377
Likes: 0
Received 1 Like
on
1 Post
Year: 2001
Model: Cherokee
Engine: 4.0
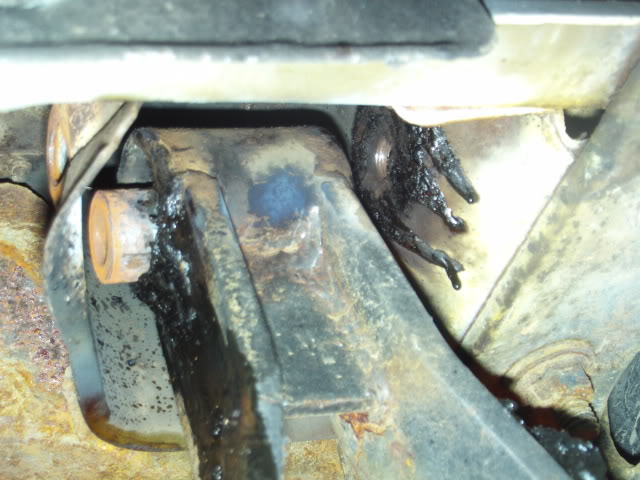
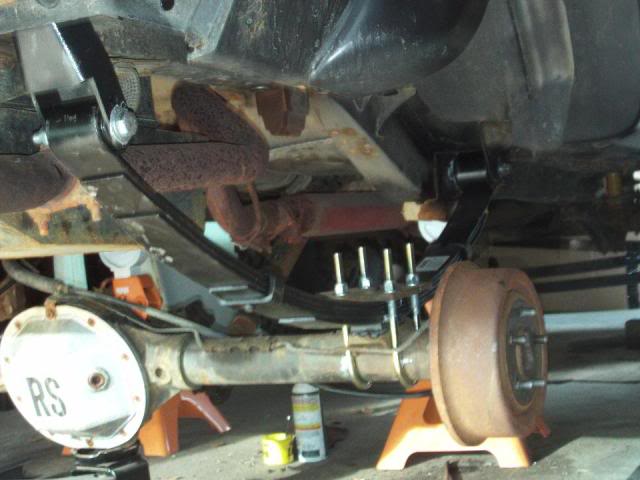
So Today we hit more rust and seized bolts as expected.
Had to heat the crap out of everything before we where able to remove anything.
:ack
It definitely went a little faster on the right side, just because we knew which way to go about it.
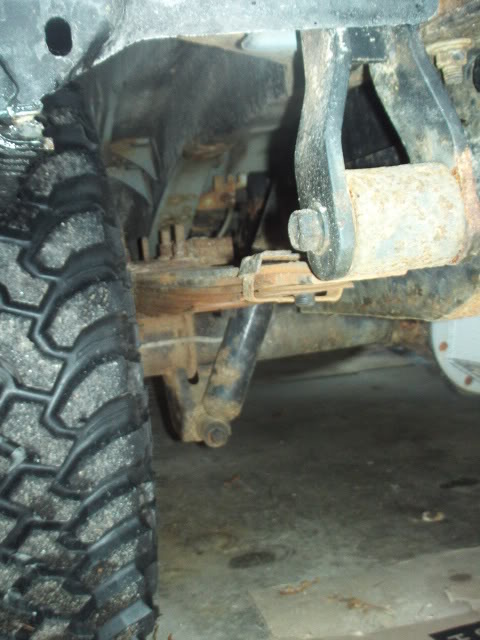
I removed one rock slider and Matt removed the other.
We did this to be able to use the impact wrench on the front bolt holding the leaf springs on. Also I had to remove them anyway because I think I may need to mod the front of them a little.
After using the breaker bar, then heating the uni-body, then the sleeve, Managed to get this one out. :sm_laughing:
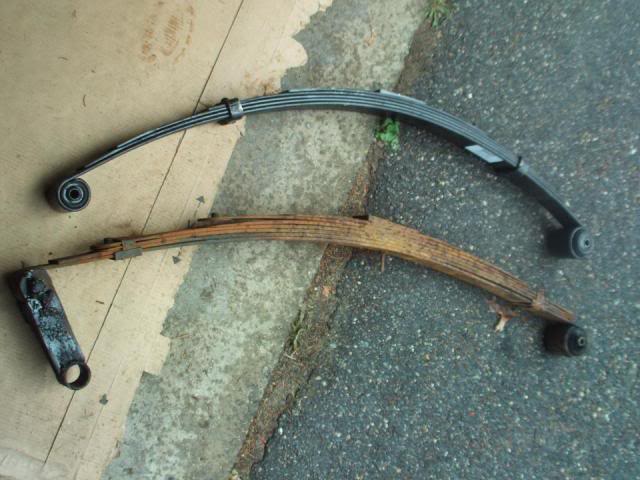
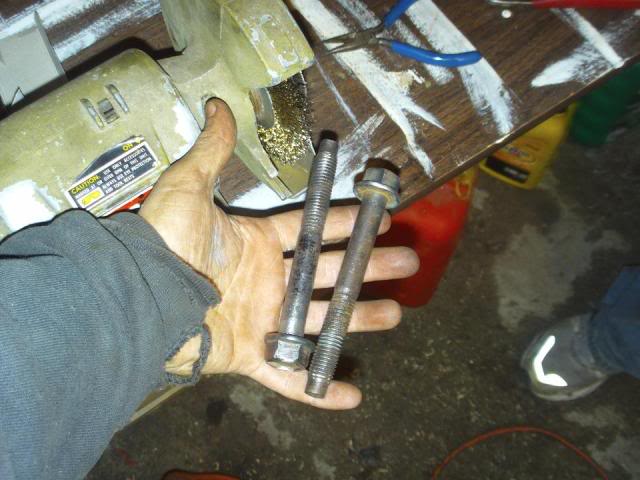
I Saluted this leaf because it was such a pain to remove! :eek6:

Comparing it to new leafs. (at least I know if these sag in future I should be ok replacing them myself again. lol)
Me cutting the u-bolts on the last leaf.
(those things snap when the metal gets thin and scare the do-do out of me! :sm_laughing

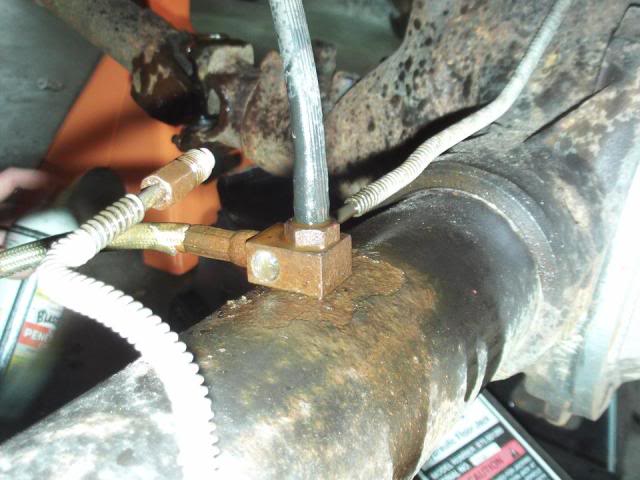
Matt spraying and removing drive shaft.
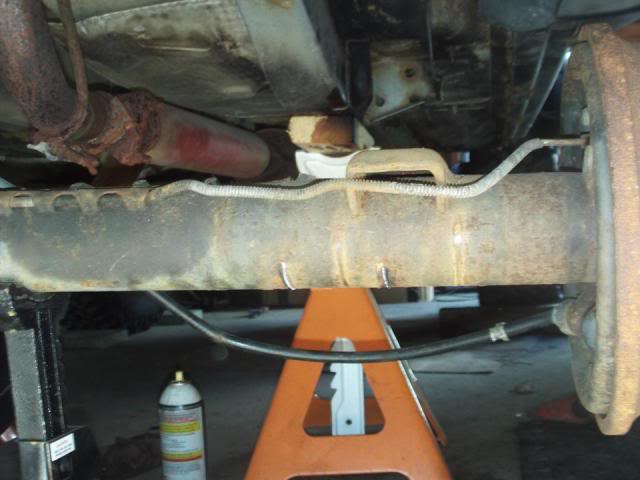
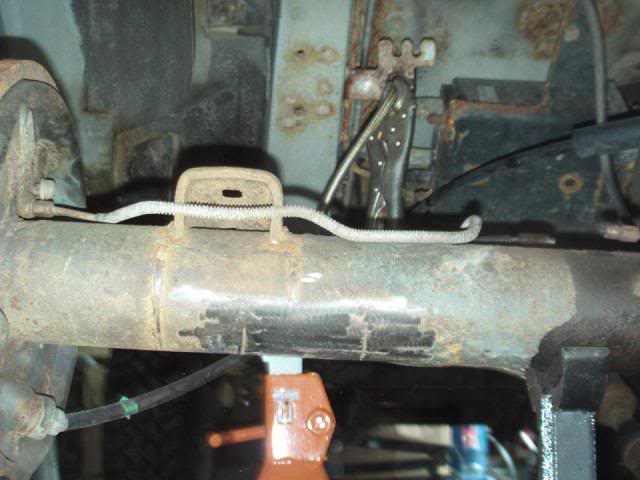
I was working on brake lines, had to use some heat on these as well.
The brake lines in the rear where Rubicon Express but the new ones where like 4 inches longer.!


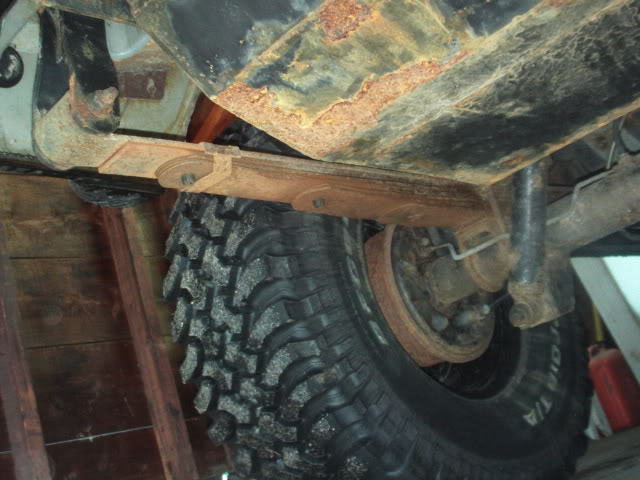
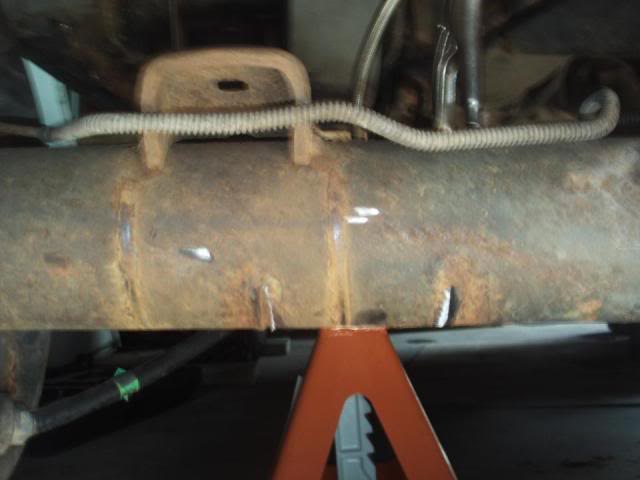
Using the cut-off wheel to cut the welds on the lower shock mounts was fun. :sm_excited:
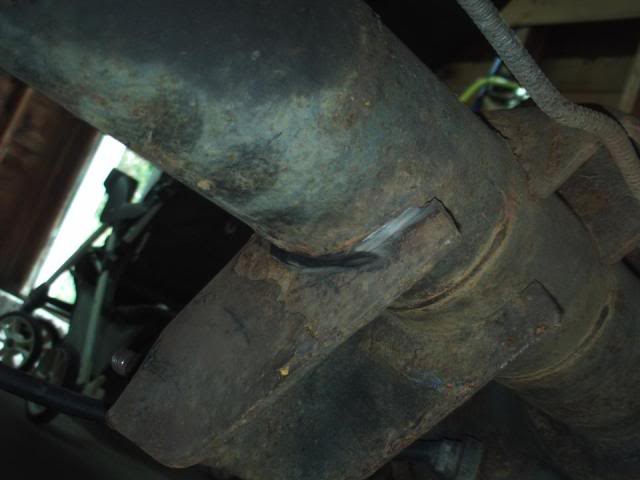
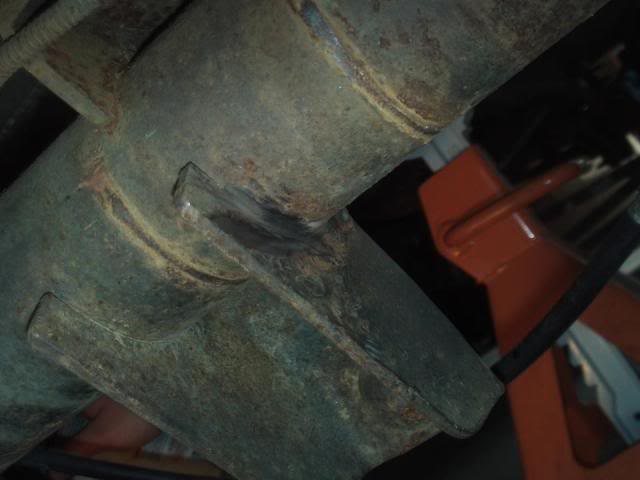
Hitting them and breaking them off with my hammer/axe was fun as well! :willy_nilly: (really though it was.)
easy peazy here
Had to heat the crap out of everything before we where able to remove anything.
:ack
It definitely went a little faster on the right side, just because we knew which way to go about it.
I removed one rock slider and Matt removed the other.
We did this to be able to use the impact wrench on the front bolt holding the leaf springs on. Also I had to remove them anyway because I think I may need to mod the front of them a little.
After using the breaker bar, then heating the uni-body, then the sleeve, Managed to get this one out. :sm_laughing:
I Saluted this leaf because it was such a pain to remove! :eek6:
Comparing it to new leafs. (at least I know if these sag in future I should be ok replacing them myself again. lol)
Me cutting the u-bolts on the last leaf.
(those things snap when the metal gets thin and scare the do-do out of me! :sm_laughing
Matt spraying and removing drive shaft.
I was working on brake lines, had to use some heat on these as well.
The brake lines in the rear where Rubicon Express but the new ones where like 4 inches longer.!
Using the cut-off wheel to cut the welds on the lower shock mounts was fun. :sm_excited:
Hitting them and breaking them off with my hammer/axe was fun as well! :willy_nilly: (really though it was.)
easy peazy here
04-18-2010, 08:23 PM
#6
Seasoned Member
Thread Starter
Join Date: Sep 2009
Location: MA
Posts: 377
Likes: 0
Received 1 Like
on
1 Post
Year: 2001
Model: Cherokee
Engine: 4.0
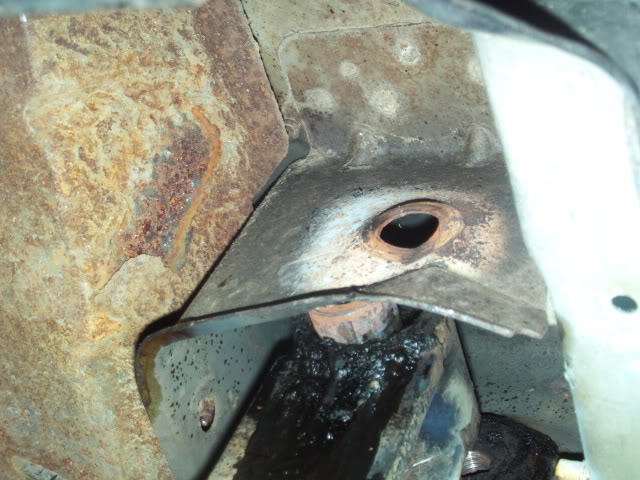
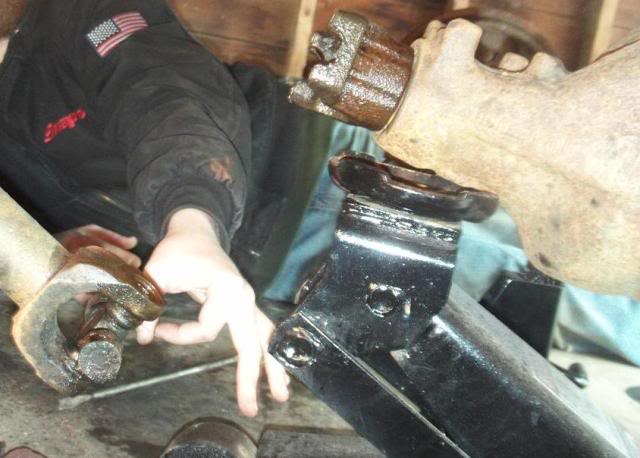
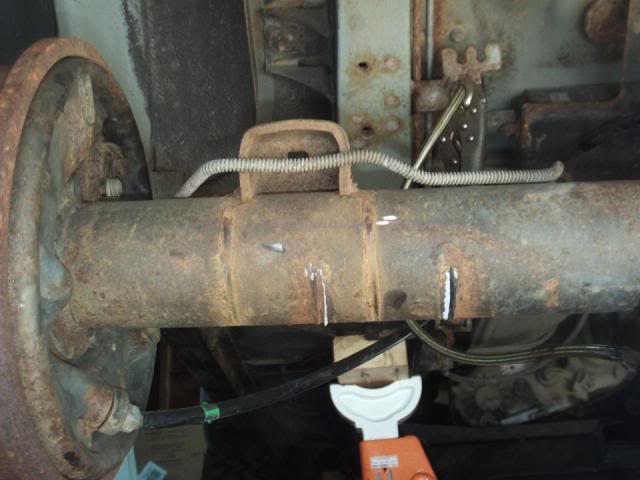
whats that shadow? MATT
Lookin...... hmmm rusty.!
right side
used grinder.

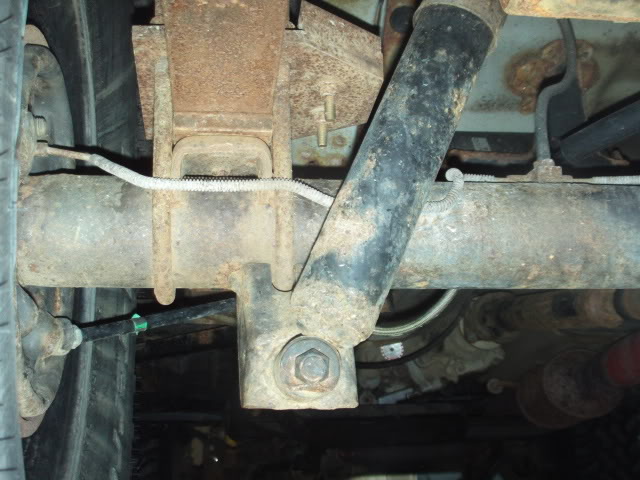
said to reuse front bolts for leafs, so Matt used my wire wheel and cleaned them up a bit..
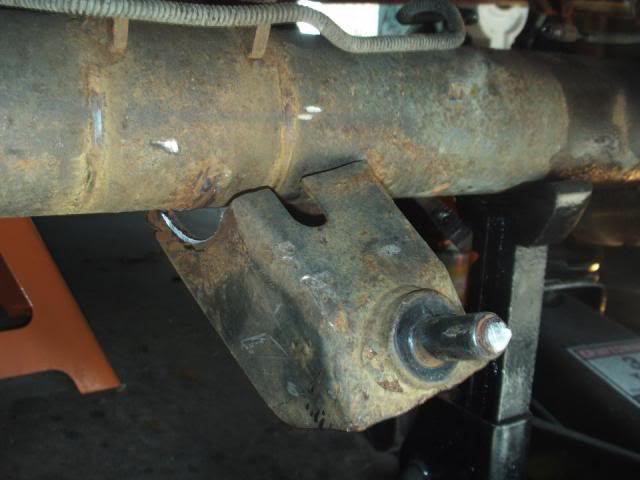
had to unbolt custom bump stops to get new bolts on, but figured I would add another plate because of the leafs being shorter.

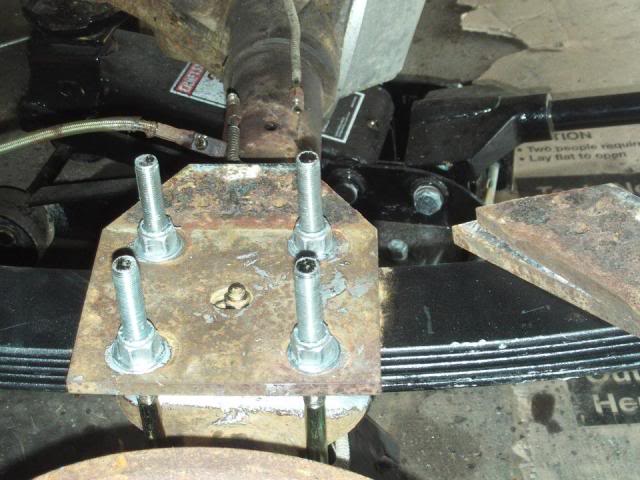
did this to every bolt that we put in so far.... We called it butter.. Butter it up!!!!
leafs in!! tada!.
Just have to cut the bolts shorter & lower truck down and torque bolts tight!
Well after this we ran out of time for our day.
Matt had to go eat and I promised my wife I would grill chicken.....
So next I am going to be taking my time and making everything all purdy.
then after its back on its wheels I will attempt to weld on the new lower brakets, flex out rear then get those Bilsteins on order!
this is fun stuff.:sm_excited:
what you think?
Lookin...... hmmm rusty.!
right side
used grinder.
said to reuse front bolts for leafs, so Matt used my wire wheel and cleaned them up a bit..
had to unbolt custom bump stops to get new bolts on, but figured I would add another plate because of the leafs being shorter.
did this to every bolt that we put in so far.... We called it butter.. Butter it up!!!!
leafs in!! tada!.
Just have to cut the bolts shorter & lower truck down and torque bolts tight!
Well after this we ran out of time for our day.
Matt had to go eat and I promised my wife I would grill chicken.....
So next I am going to be taking my time and making everything all purdy.
then after its back on its wheels I will attempt to weld on the new lower brakets, flex out rear then get those Bilsteins on order!
this is fun stuff.:sm_excited:
what you think?
Last edited by OverlandZJ; 04-25-2010 at 11:32 AM. Reason: License plate deleted by request
Trending Topics
04-18-2010, 08:58 PM
#8
Seasoned Member
Thread Starter
Join Date: Sep 2009
Location: MA
Posts: 377
Likes: 0
Received 1 Like
on
1 Post
Year: 2001
Model: Cherokee
Engine: 4.0
thanks bud.
Not sure if I told you but I picked up a Ford 8.8 with 4:10 gears for 150 bucks.
Thinking I could just pick up a High Pinion D30 w/4:10's as well (since mine is a low pinion 3:55).
But then realized it was going to take more than that to do the swap so I am puttin it on hold so I can actually do some wheelin this year. lol
It needs a few new seals, and I need to buy the MORE kit for the weld on stuff and there is also a MORE kit for the parking brake.
and I want to get a locker for it as well.
so yeah definitely not this year.
I still am welding the 8.25 shock mounts up on the axle so when I flex and get the right length shocks I can do the same thing on the 8.8 and I wont need new shocks then as well.
good practice to, after all this is my 1st major operation on any vehicle I have ever owned. lol
BTW the kid who I bought the XJ off of, his parents bought it for him a few years before that off of EBAY from a guy in Wisconsin for like $10k.
You may have wheeled with it before or knew the guy who owned it? haha
Imagine that!
I have his name and everything its all over all the receipts.
he was awesome to save all them for the next owner. I need to continue the same just incase I sell someday.
(never!!!)
Last edited by Brian; 04-18-2010 at 09:01 PM.
04-19-2010, 02:03 AM
#10
CF Veteran
Join Date: Aug 2008
Location: Hollidaysburg, PA
Posts: 5,603
Likes: 0
Received 0 Likes
on
0 Posts
Year: 1990
Model: Cherokee
Engine: 4.0 lt. 242 cu.in.
Looks great man! Looks like you're having the same amount of trouble I did when I installed my lift. lol fun fun.