My Forever Jeep
 06-05-2010, 10:39 PM
#1
CF Veteran
Thread Starter
Join Date: Oct 2009
Location: Fauquier County, Virginia
Posts: 2,867
Likes: 0
Received 14 Likes
on
12 Posts
Year: 1991
Model: Cherokee
Engine: I-6 4.0 HO
So, I bought my XJ back in October last year. She's my daily driver, has more issues than you can shake a stick at, worries me to death if she is gonna blow up one day, and yet hauls *** better than half my friends trucks and SUVS and has been realible to me since day one. All my repairs so far have been routine things such as the harmonic balancer, power steering pump, fan clutch, and water pump. I finally decided to make a build thread because (and laugh if you want) I plan on keeping this Jeep forever, hence the title. She's not the sexiest thing as of now, and needs a lil TLC in the engine, but I plan on fixing all of this.
So, here I begin with my log. Tomorrow I plan on really degreasing and cleaning the engine compartment. I will post pics tomorrow and am also going to write a how to thing for it since there really isnt one.
So, here I begin with my log. Tomorrow I plan on really degreasing and cleaning the engine compartment. I will post pics tomorrow and am also going to write a how to thing for it since there really isnt one.
Last edited by 1991Jeep_Man; 07-04-2014 at 05:36 PM.
 06-07-2010, 12:15 AM
#2
CF Veteran
Thread Starter
Join Date: Oct 2009
Location: Fauquier County, Virginia
Posts: 2,867
Likes: 0
Received 14 Likes
on
12 Posts
Year: 1991
Model: Cherokee
Engine: I-6 4.0 HO
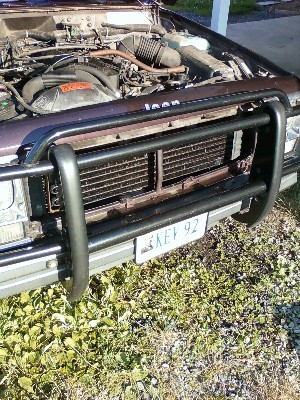
So, I didnt get around to degreasing today. Unexpected events ruined that possibility. However I did get the chance to clean the radiator out. The ol' girl has been runnin warm all summer, and I figured cleanin the bugs and gunk out of the fins couldn't hurt. Removed the fan shroud, e-fan, and front grille to spray a hose outwards. Nothin big, but I was happy.
Will probably degrease and clean engine on tuesday if I can.
Will probably degrease and clean engine on tuesday if I can.
07-19-2010, 01:10 PM
#3
CF Veteran
Thread Starter
Join Date: Oct 2009
Location: Fauquier County, Virginia
Posts: 2,867
Likes: 0
Received 14 Likes
on
12 Posts
Year: 1991
Model: Cherokee
Engine: I-6 4.0 HO
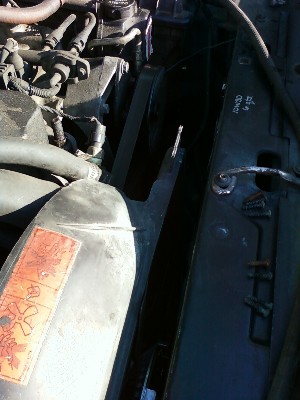
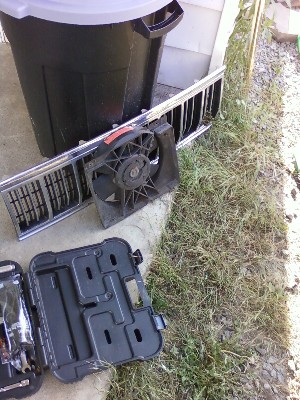
Alright, so I just installed my new all metal 2 row radiator I ordered from radiatorbarn.com and I would tell everyone that if they need a new rad to go to that website.. top notch stuff. Basically, as soon as late spring/early summer arrived, the ol girl started running hot, almost overheating all the time. So, I decided to replace/upgrade everything in the front of my cooling system except the fans.
Before:
Notice how the DAPO decided to trim the upper rad hose and ended up making it too short. His solution; just tuck it under the fan shroud against the compressor rather than replace it. Idiot.
AND AFTER!
I didnt get pics of the new/old rad side by side It is an incredible difference. The end tanks are slightly larger, the core is twice as thick and BA looking, and the whole assembly is gloss black in color. Very nice.
Results? I went from trying to overheat to my Jeep hardly ever hitting 210 degrees. It always runs below the 210 mark unless I stop in traffic or sit at idle, but even then it doesnt warm up. It is really awesome to watch, during the first warm up phase, when the temp gauge hits that point before 210 where the t-stat opens and then instantly drops down halfway between the 210 mark and the 2 white line. I love it. Best mod yet, and MUCH MORE TO COME!
Before:
Notice how the DAPO decided to trim the upper rad hose and ended up making it too short. His solution; just tuck it under the fan shroud against the compressor rather than replace it. Idiot.
AND AFTER!
I didnt get pics of the new/old rad side by side
It is an incredible difference. The end tanks are slightly larger, the core is twice as thick and BA looking, and the whole assembly is gloss black in color. Very nice. Results? I went from trying to overheat to my Jeep hardly ever hitting 210 degrees. It always runs below the 210 mark unless I stop in traffic or sit at idle, but even then it doesnt warm up. It is really awesome to watch, during the first warm up phase, when the temp gauge hits that point before 210 where the t-stat opens and then instantly drops down halfway between the 210 mark and the 2 white line. I love it. Best mod yet, and MUCH MORE TO COME!
09-15-2010, 06:37 PM
#4
CF Veteran
Thread Starter
Join Date: Oct 2009
Location: Fauquier County, Virginia
Posts: 2,867
Likes: 0
Received 14 Likes
on
12 Posts
Year: 1991
Model: Cherokee
Engine: I-6 4.0 HO
Sorry I haven't updated for a while.. been really busy with both work, college, and the Heep LOL. I will get some pics up tomorrow when I get home from college. I have recently done A SERIOUSLY LARGE HUGE MASSIVE amount of body work fixing little surprises the PO left me. I also changed my VC gasket and painted the VC.
10-17-2010, 05:15 PM
#5
CF Veteran
Thread Starter
Join Date: Oct 2009
Location: Fauquier County, Virginia
Posts: 2,867
Likes: 0
Received 14 Likes
on
12 Posts
Year: 1991
Model: Cherokee
Engine: I-6 4.0 HO
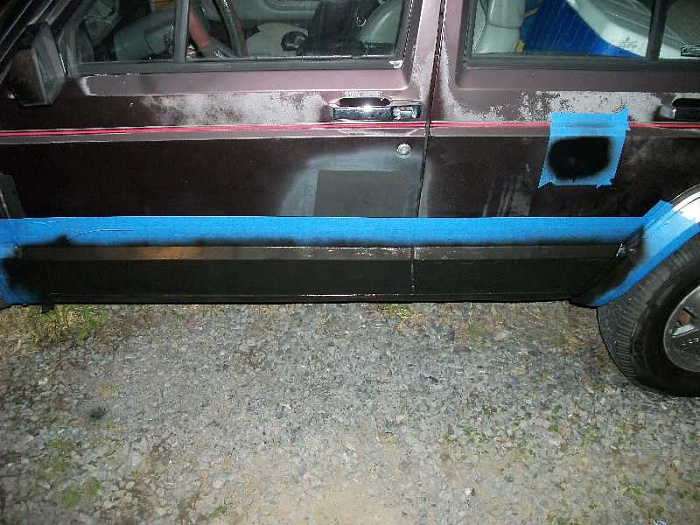
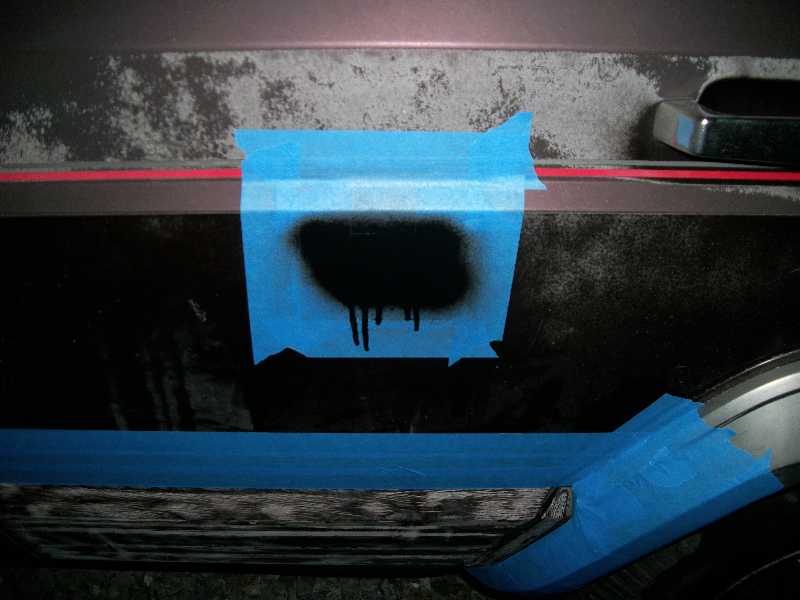
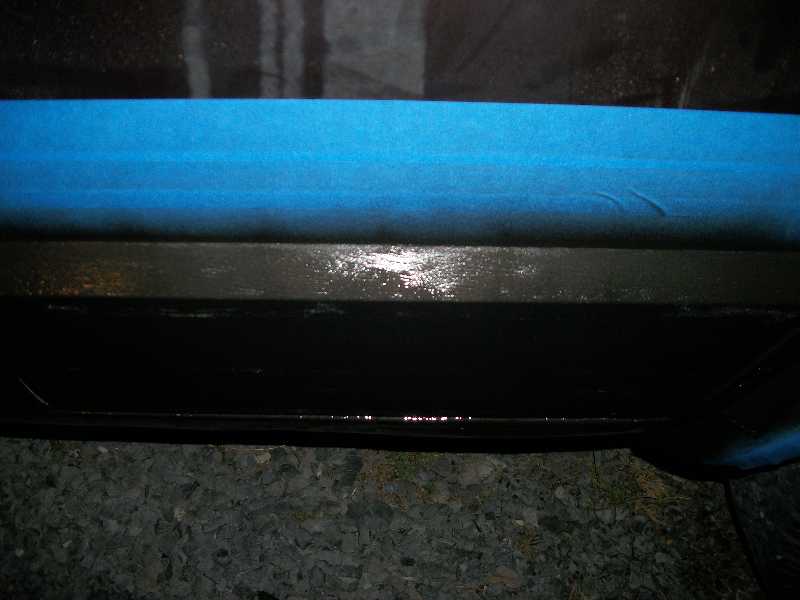
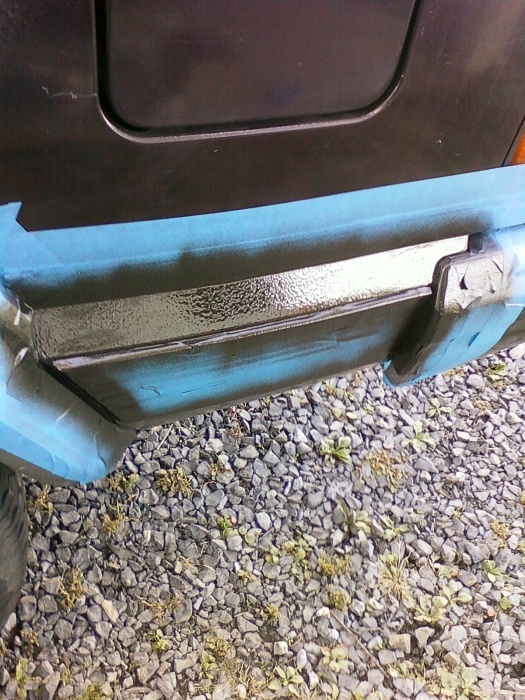
So, I finally got around to getting the trim/body work on my XJ done. Basically the DAPO left me with a rediculous amount of rust under the driver's door trim and on the driver side rocker, all which he 'tried' and failed to fix. So, after filling many holes and sanding much rust, all the crud was gone and bonded up. Sorry I dont have pics of the rust such.. my old hardrive crashed and lost all the pics. But, I can start from where I sprayed Rust-o-leum Rust Reformer over the fresh Bondo as a precaution.
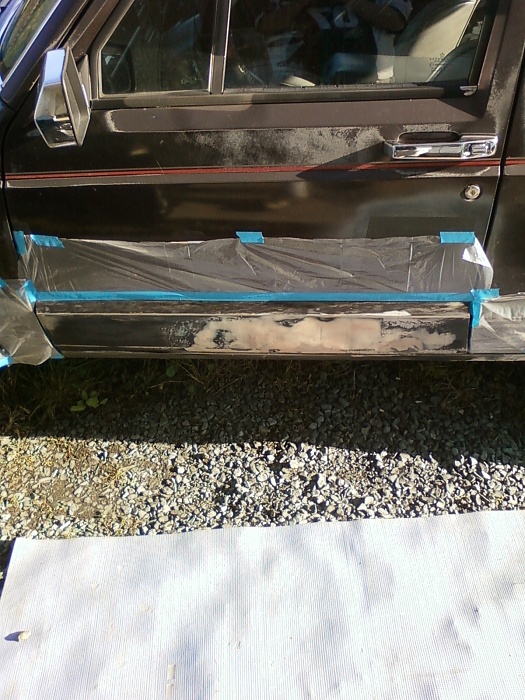
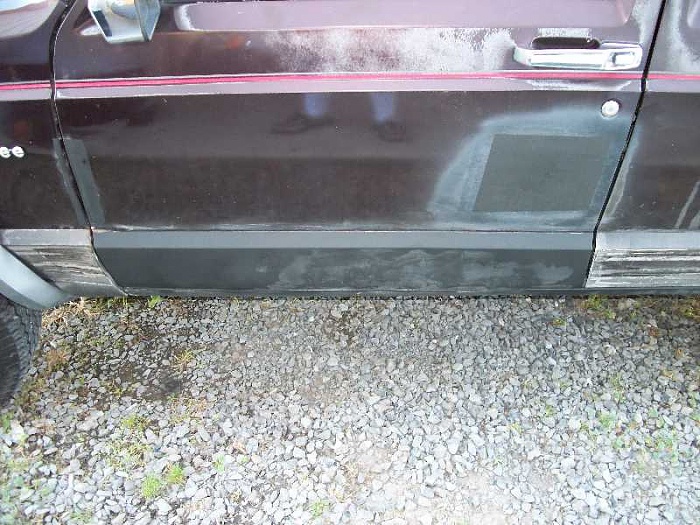
Then I taped off the area to be painted. I used Rust-o-leum Hammered Finish Black for the lower raised portion of the body. All of the trim is painted a different black.

I also fixed yet ANOTHER little rust spot trying to poke its head. This was just one of MANY that I fixed.


Then I taped off the area to be painted. I used Rust-o-leum Hammered Finish Black for the lower raised portion of the body. All of the trim is painted a different black.

I also fixed yet ANOTHER little rust spot trying to poke its head. This was just one of MANY that I fixed.
 10-17-2010, 05:21 PM
#6
CF Veteran
Thread Starter
Join Date: Oct 2009
Location: Fauquier County, Virginia
Posts: 2,867
Likes: 0
Received 14 Likes
on
12 Posts
Year: 1991
Model: Cherokee
Engine: I-6 4.0 HO
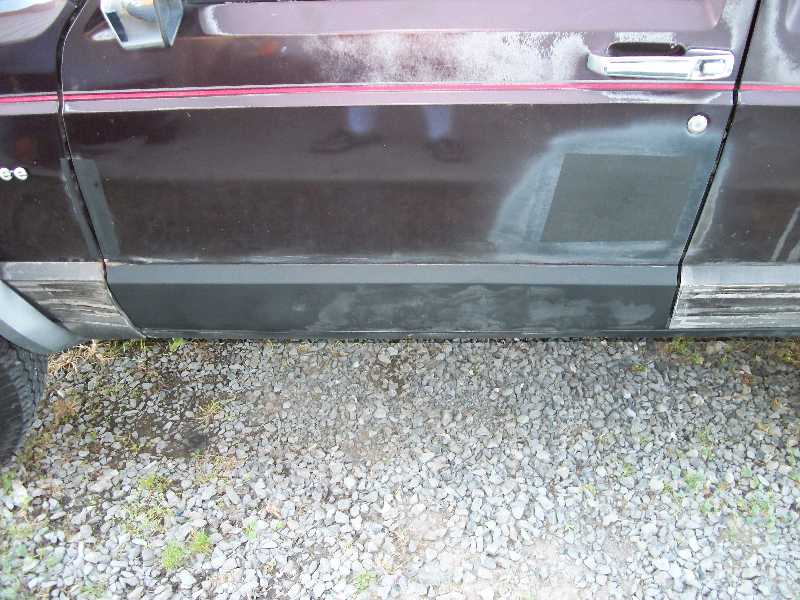
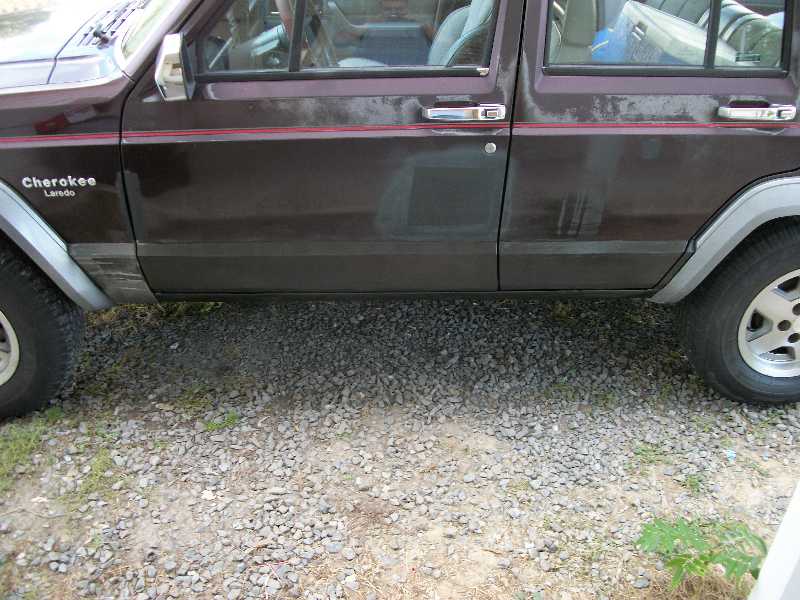
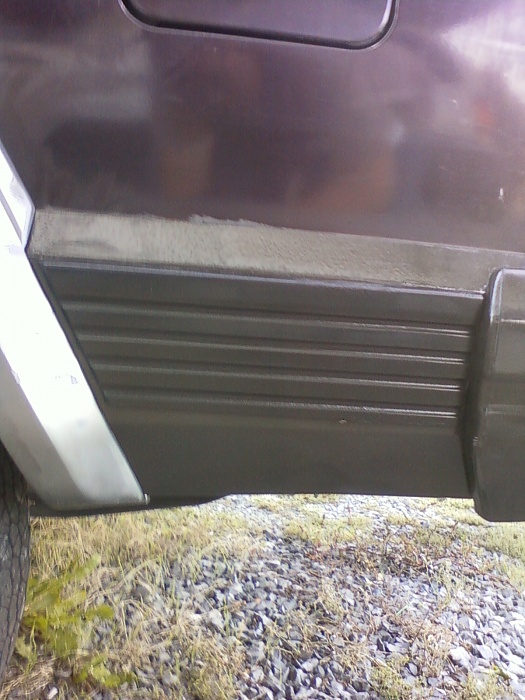
These are some close ups of the painted body from the above post.
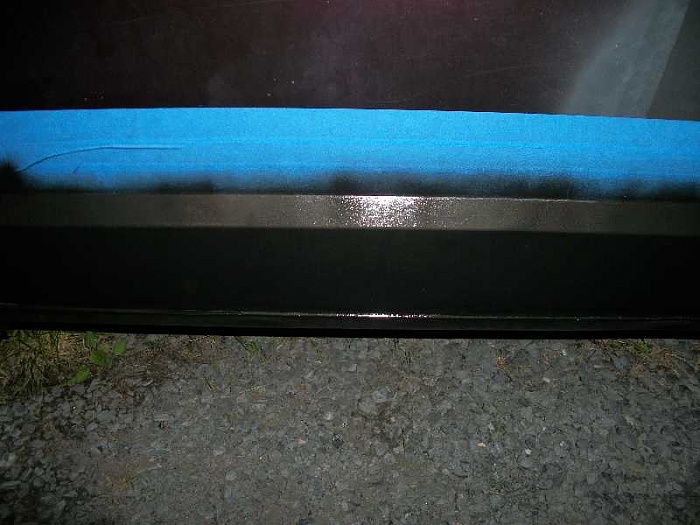

Then the 'finished' product after drying...
After all the rust (yeah right... until next time lol ) was taken care of and the lower body painted, I started painting the trim... both the pieces still on the XJ and off.

More pics on the way...

Then the 'finished' product after drying...
After all the rust (yeah right... until next time lol
) was taken care of and the lower body painted, I started painting the trim... both the pieces still on the XJ and off.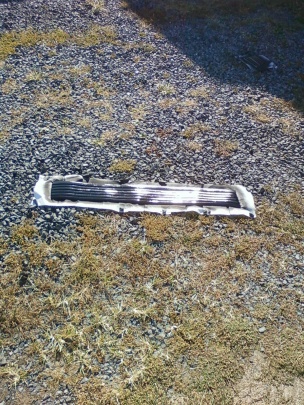

More pics on the way...
10-17-2010, 05:28 PM
#7
CF Veteran
Thread Starter
Join Date: Oct 2009
Location: Fauquier County, Virginia
Posts: 2,867
Likes: 0
Received 14 Likes
on
12 Posts
Year: 1991
Model: Cherokee
Engine: I-6 4.0 HO
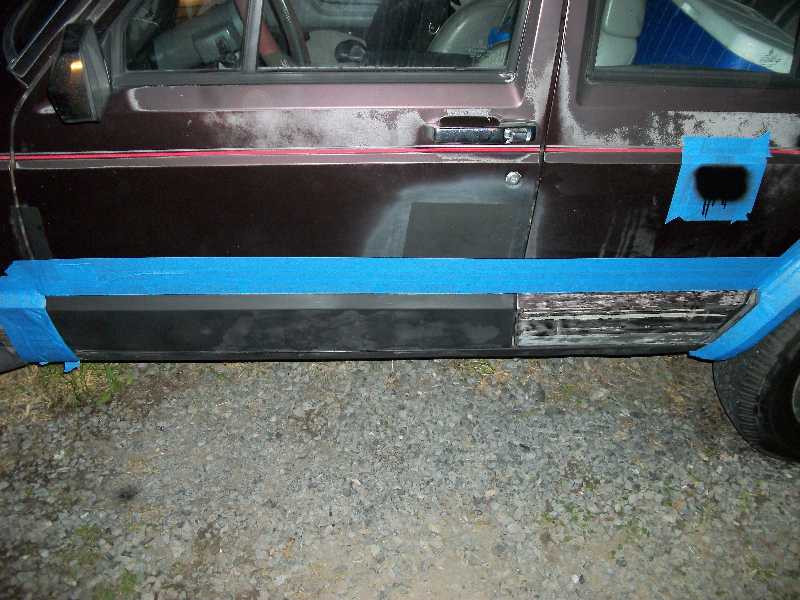
So, as promised, more pics of the work thus far. Just some more of the trim work...
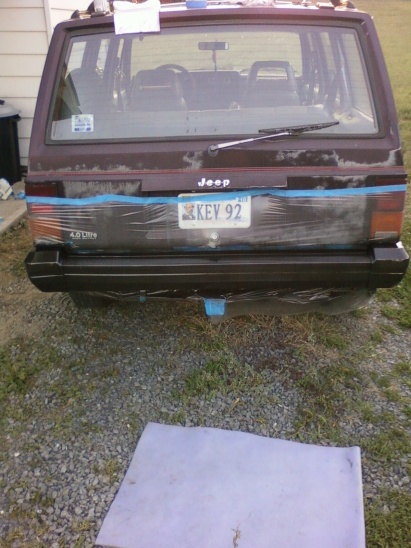
O, but before post more pics of the trim, I also painted the rear bumper.

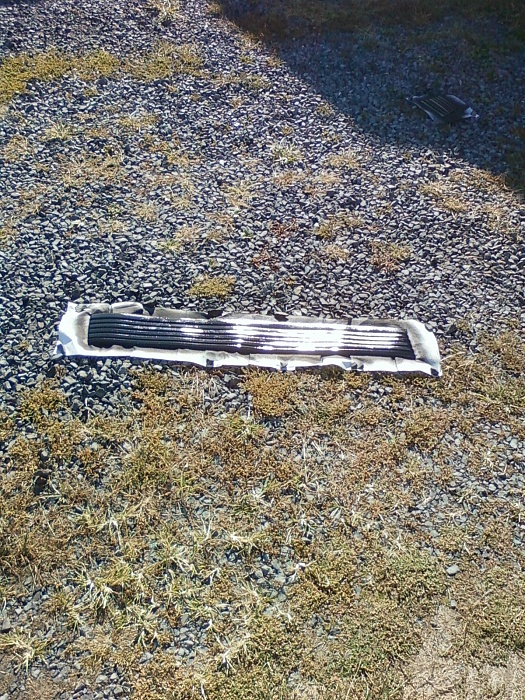
Then the rear trim on the passenger side (I didnt get pics of the two other pieces on the ground nor the two on the passenger. I figured you guys would get the just of what I am doing lol. I didnt want to bore you.)
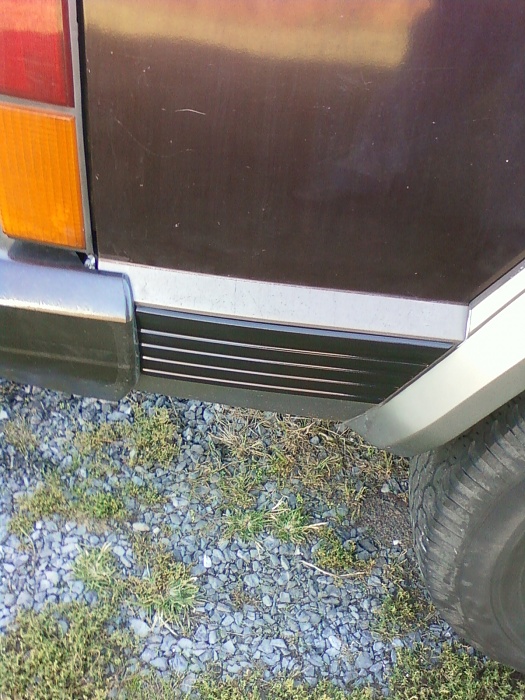
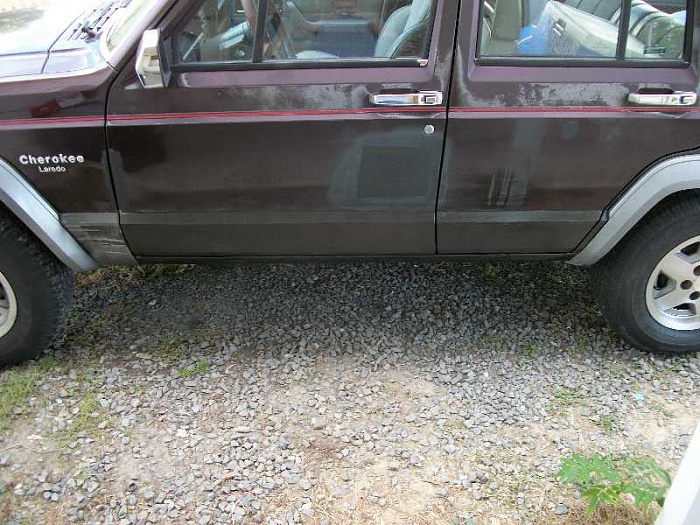
Now, here is what made me happy. With the remaining little bit of my first can of paint, I painted the body around the first piece of trim so I could I get an idea of how it will all look.
I was really happy with what I got, and I think it will look REALLY good when me and my uncle paint the rest of the body red. Now, here is where I need some opinions. After reviewing the work, I now cant decide if I should paint the fender flare black like the rest of the lower body, or just give it another coat of the gray/silver that it already is. Any ideas?
O, but before post more pics of the trim, I also painted the rear bumper.
Then the rear trim on the passenger side (I didnt get pics of the two other pieces on the ground nor the two on the passenger. I figured you guys would get the just of what I am doing lol. I didnt want to bore you.)

Now, here is what made me happy. With the remaining little bit of my first can of paint, I painted the body around the first piece of trim so I could I get an idea of how it will all look.


I was really happy with what I got, and I think it will look REALLY good when me and my uncle paint the rest of the body red. Now, here is where I need some opinions. After reviewing the work, I now cant decide if I should paint the fender flare black like the rest of the lower body, or just give it another coat of the gray/silver that it already is. Any ideas?
Trending Topics
12-16-2010, 09:52 PM
#11
CF Veteran
Thread Starter
Join Date: Oct 2009
Location: Fauquier County, Virginia
Posts: 2,867
Likes: 0
Received 14 Likes
on
12 Posts
Year: 1991
Model: Cherokee
Engine: I-6 4.0 HO
Ok, so I guess it's time to update again.
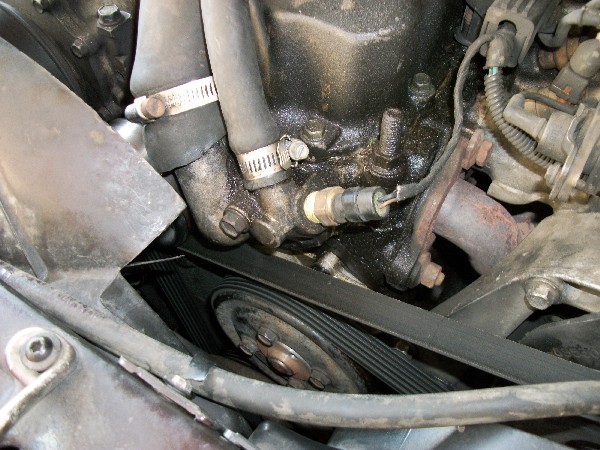
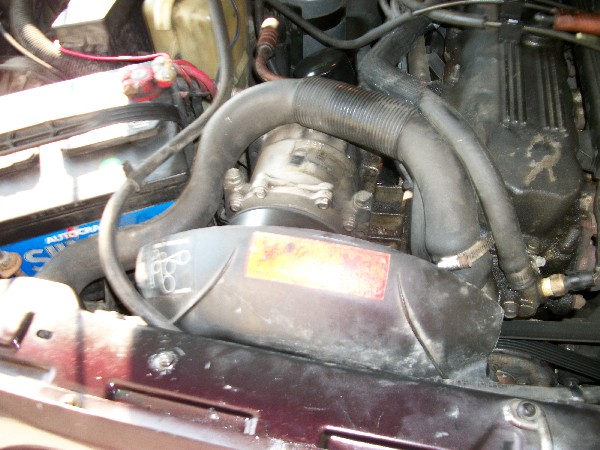
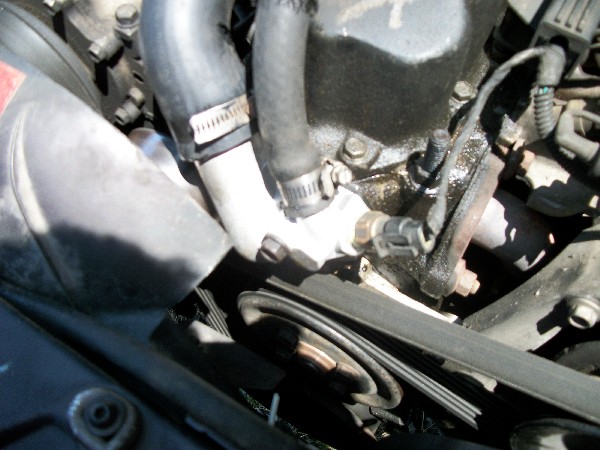
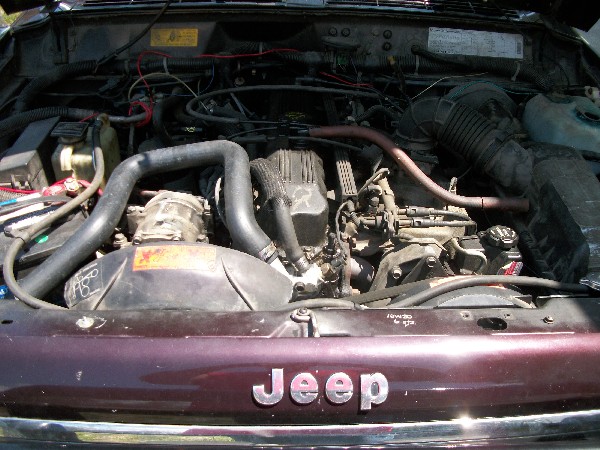
I changed the valve cover gasket and CCV grommets to fix my oil leak and blow-by issue. I also painted the VC while it was off... just to make things look pretty good under the hood.
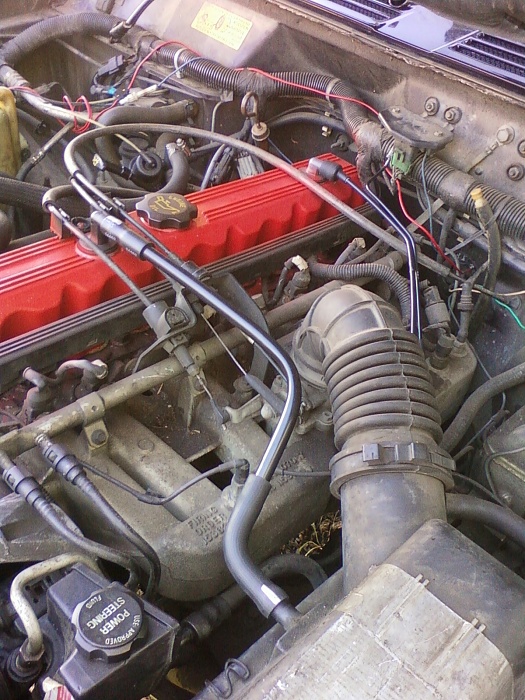
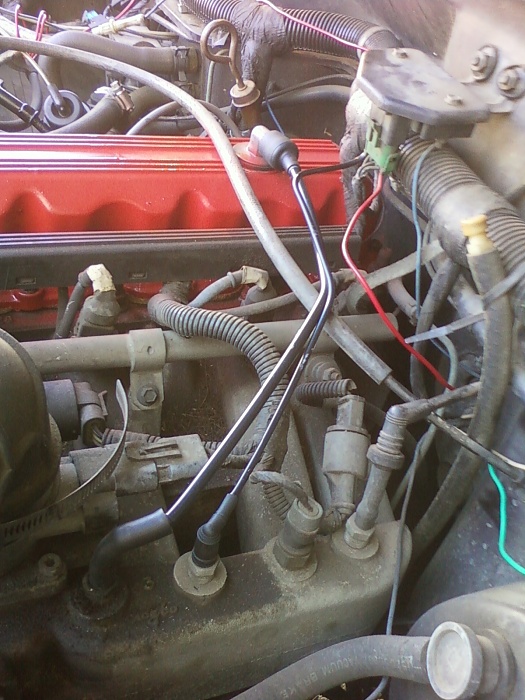
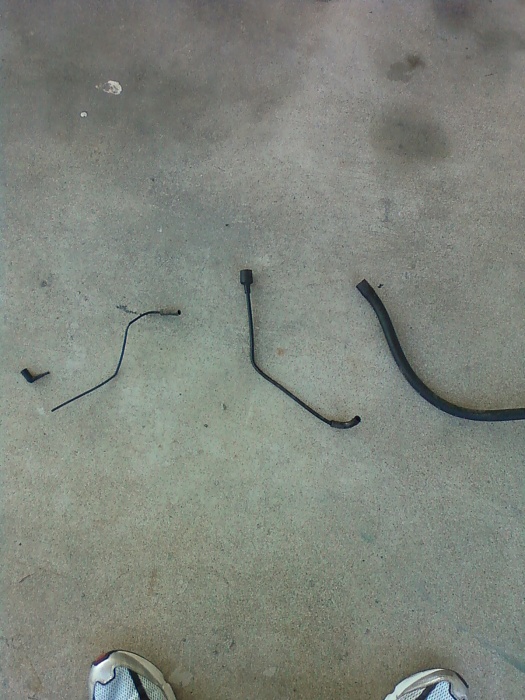
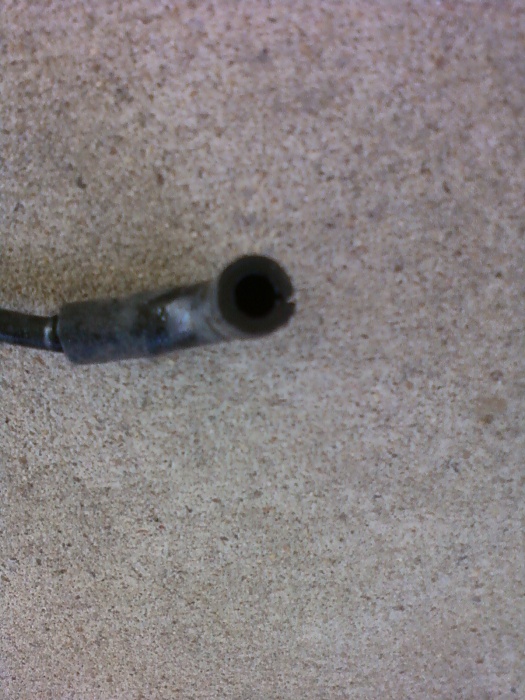
I also changed 3 of the vacuum lines, including the two valve cover CCV hoses and the hose running from the intake manifold to some junction near the firewall. Below are the pics of the old hoses. Half of them were being held together by electrical tape... all laziness and neglect of the past owner.
I changed the valve cover gasket and CCV grommets to fix my oil leak and blow-by issue. I also painted the VC while it was off... just to make things look pretty good under the hood.


I also changed 3 of the vacuum lines, including the two valve cover CCV hoses and the hose running from the intake manifold to some junction near the firewall. Below are the pics of the old hoses. Half of them were being held together by electrical tape... all laziness and neglect of the past owner.

 12-16-2010, 10:00 PM
#12
CF Veteran
Thread Starter
Join Date: Oct 2009
Location: Fauquier County, Virginia
Posts: 2,867
Likes: 0
Received 14 Likes
on
12 Posts
Year: 1991
Model: Cherokee
Engine: I-6 4.0 HO
I have a thread floating around in Fabrication about this fix, but I figured it deserved a spot on the build thread. I was actually really proud with this fix because it was the first fab project I have ever done with a vehicle. Granted it was just some cutting and drilling, but I was happy with it.
Basically I have the annoying gangster lean in my drivers seat. The Jeep had when I bought her back in '09.
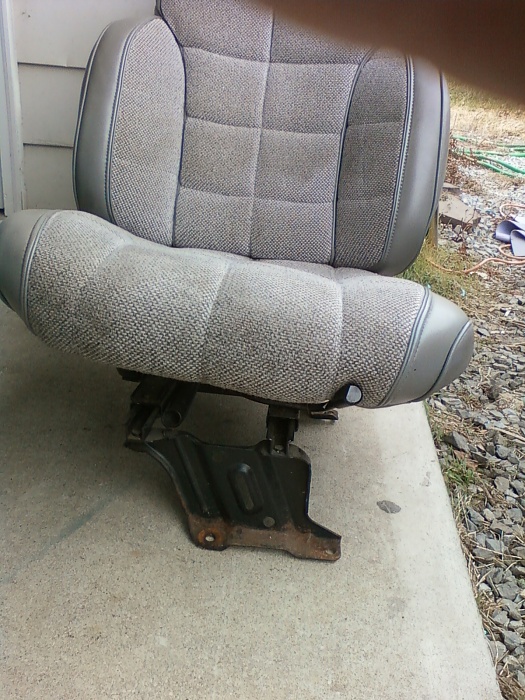
So I pulled the seat out and pulled the lower cushion to find the culprit. Either the PO cannonballed into his seat or was just really fat at one point, because the cause was a crack that ran all the way down the seat pan.
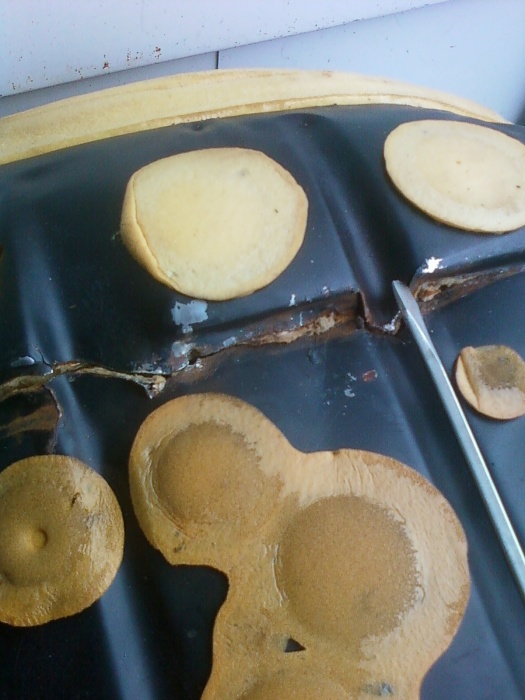
So I designed a cross-member to fix the issue, and made a template out of cardboard.
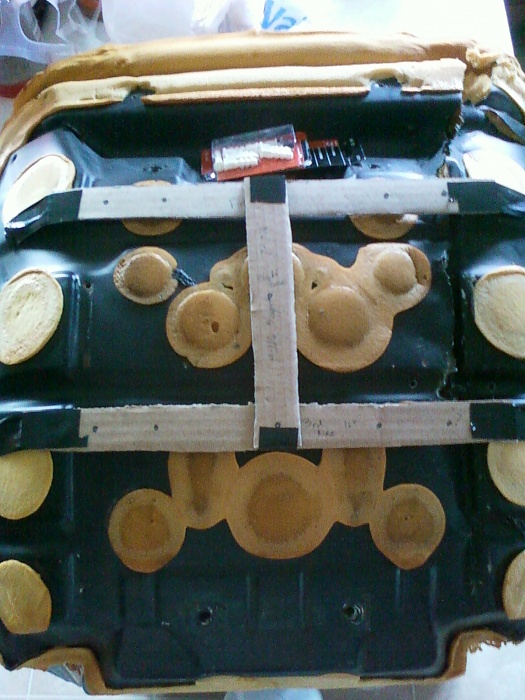
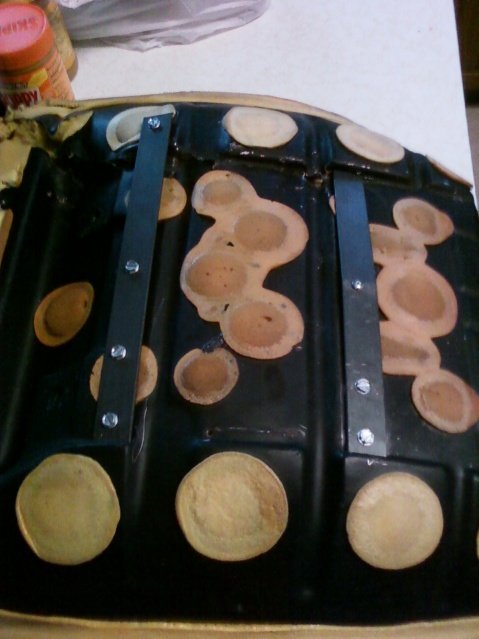
I cut my metal, drilled my holes, and was very happy with the result. The middle bar ended up not being needed as it would pose a clearance issue and was simply not needed.

And VIOLA! No more seat lean. When I installed the seat back in the Jeep, the new brace took my weight (and I'm a big fellow. Tall and hefty lol) and all it does now is make a very slight creak when I get in and out.

Basically I have the annoying gangster lean in my drivers seat. The Jeep had when I bought her back in '09.

So I pulled the seat out and pulled the lower cushion to find the culprit. Either the PO cannonballed into his seat or was just really fat at one point, because the cause was a crack that ran all the way down the seat pan.

So I designed a cross-member to fix the issue, and made a template out of cardboard.

I cut my metal, drilled my holes, and was very happy with the result. The middle bar ended up not being needed as it would pose a clearance issue and was simply not needed.
And VIOLA! No more seat lean. When I installed the seat back in the Jeep, the new brace took my weight (and I'm a big fellow. Tall and hefty lol) and all it does now is make a very slight creak when I get in and out.
 03-03-2011, 03:36 PM
#15
Seasoned Member

Join Date: May 2010
Location: Suffolk long island
Posts: 406
Likes: 0
Received 0 Likes
on
0 Posts
Year: 1994
Model: Cherokee
Engine: 4.0 L I6
I have a thread floating around in Fabrication about this fix, but I figured it deserved a spot on the build thread. I was actually really proud with this fix because it was the first fab project I have ever done with a vehicle. Granted it was just some cutting and drilling, but I was happy with it.
Basically I have the annoying gangster lean in my drivers seat. The Jeep had when I bought her back in '09.
Attachment 32119
So I pulled the seat out and pulled the lower cushion to find the culprit. Either the PO cannonballed into his seat or was just really fat at one point, because the cause was a crack that ran all the way down the seat pan.
Attachment 32120
So I designed a cross-member to fix the issue, and made a template out of cardboard.
Attachment 32121
I cut my metal, drilled my holes, and was very happy with the result. The middle bar ended up not being needed as it would pose a clearance issue and was simply not needed.
Attachment 32122
And VIOLA! No more seat lean. When I installed the seat back in the Jeep, the new brace took my weight (and I'm a big fellow. Tall and hefty lol) and all it does now is make a very slight creak when I get in and out.
Attachment 32123
i thought those were a bunch of pancakes at first


