View Poll Results: Need to get new wheels...can't decide black or polished aluminum...what do you think?


Voters: 20. You may not vote on this poll
My first build page after 6 years worth of work
 11-21-2010, 12:29 PM
#46
Senior Member
Join Date: Mar 2010
Location: Southern California
Posts: 855
Likes: 0
Received 0 Likes
on
0 Posts
Year: 1989 Laredo
Model: Cherokee
Engine: 4.0 Inline 6 Renix
Very cool build thread, a lot of pics, pic of off-road shows, AND some pics of a nice lookin' girl, you got it all right here!  keep it up man, you know it's a good thread when you get motivated to do some of the same things... thanks!
p.s.
Red XJ's rule!
keep it up man, you know it's a good thread when you get motivated to do some of the same things... thanks!p.s.
Red XJ's rule!
 11-22-2010, 08:56 AM
#47
Member
Thread Starter
Join Date: Jul 2009
Location: Glendale, AZ
Posts: 232
Likes: 0
Received 1 Like
on
1 Post
Year: 1999
Model: Cherokee
Engine: 4.0 I6
By far improved it...however, it worked so well because I have a manual trans...top end is a little rough, but I live in a small town and rarely need to go over 45...she will cruise at 75 smooth though.
03-19-2011, 12:58 PM
#51
Member
Thread Starter
Join Date: Jul 2009
Location: Glendale, AZ
Posts: 232
Likes: 0
Received 1 Like
on
1 Post
Year: 1999
Model: Cherokee
Engine: 4.0 I6
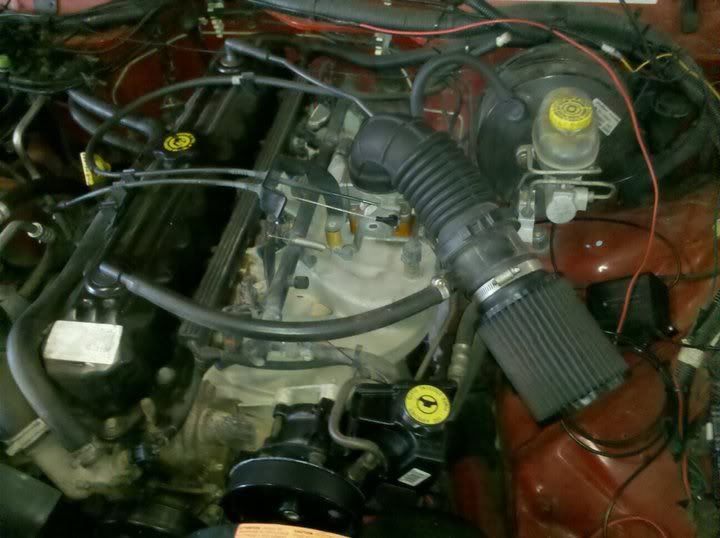
Well now that its finally starting to thaw out here in Michigan, I can finally get back to workin on my Jeep. I have done a few small jobs over the past couple of weeks such as a new power steering pump, idler pulley, serp. belt, and I rebuilt the rear cv driveshaft because I have a severe case of the angry sparrows syndrome. Sorry no pics of any of those jobs, but since they are pretty much the same on all jeeps you can imagine what it looked like. Two days ago I finally got around to ordering a new exhaust manifold because like most all other cherokees mine cracked at the collector. After all was said and done, I did the exhaust manifold, motor mounts, and also fixed a few little things on the jeep. The job took about 5 hours with a nice lunch break.
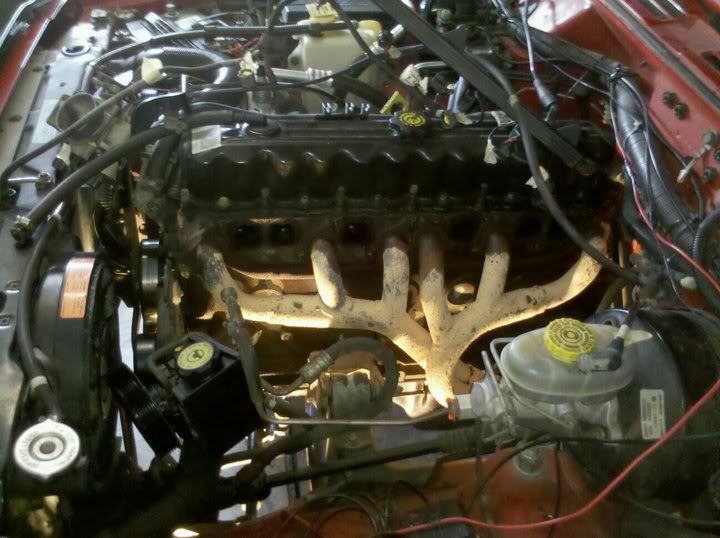
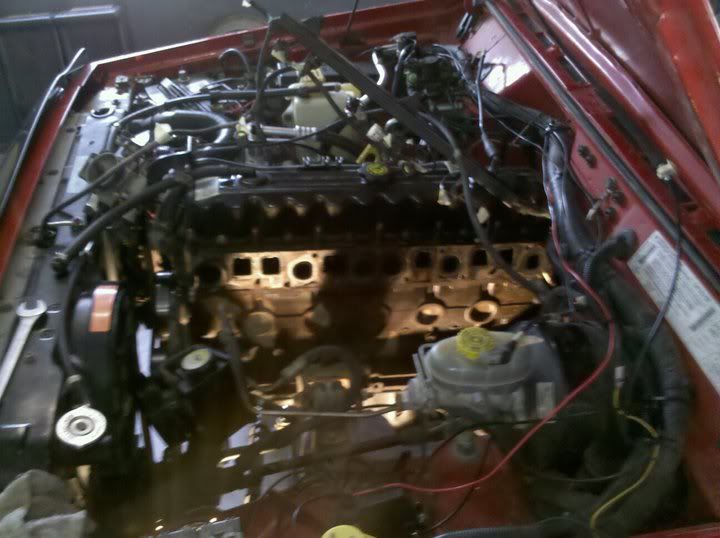
Photo of engine before install for reference when putting it back together. I spent a good 45 minutes labeling everything to make sure that it would go smooth.
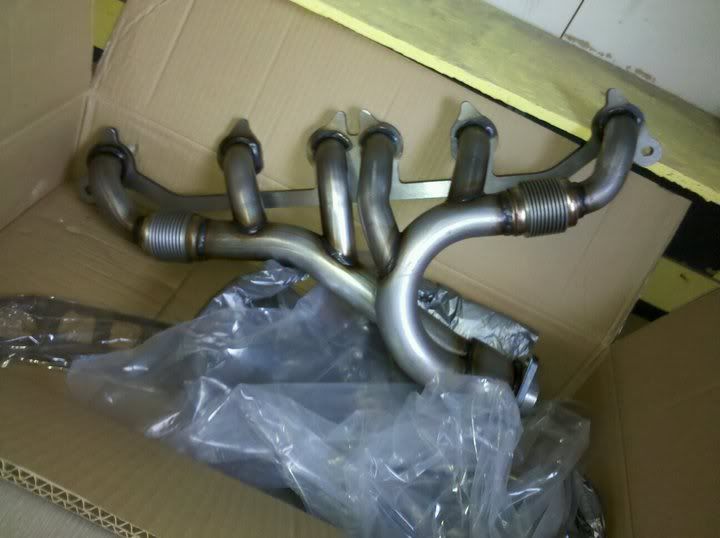
New header...I ordered the cheap one on ebay with the flex pipe in it because after a lot of research it sounded like this one holds up better than even the banks headers because they also tend to crack in the same place.
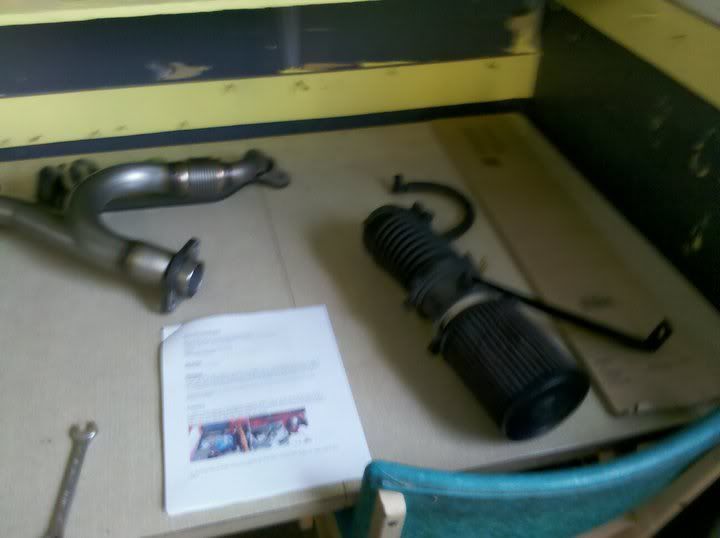
Air filter and tube removed...
Throttle body, spacer, and wire rail removed...
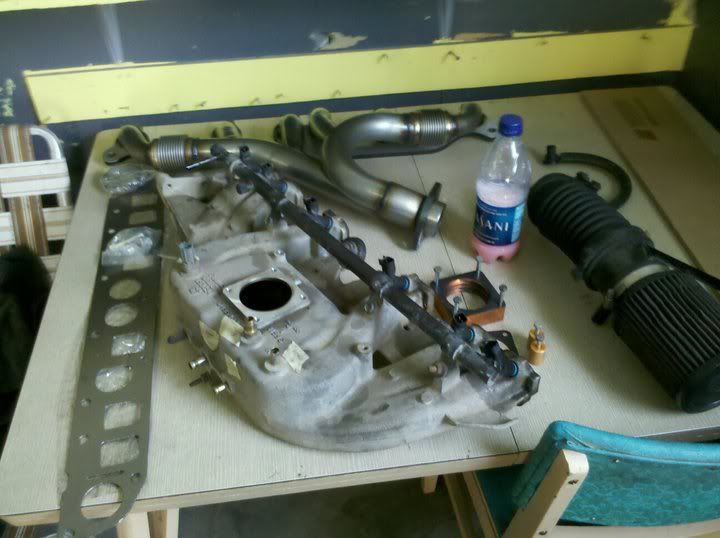
Intake manifold out...
Nice pile of parts building up...
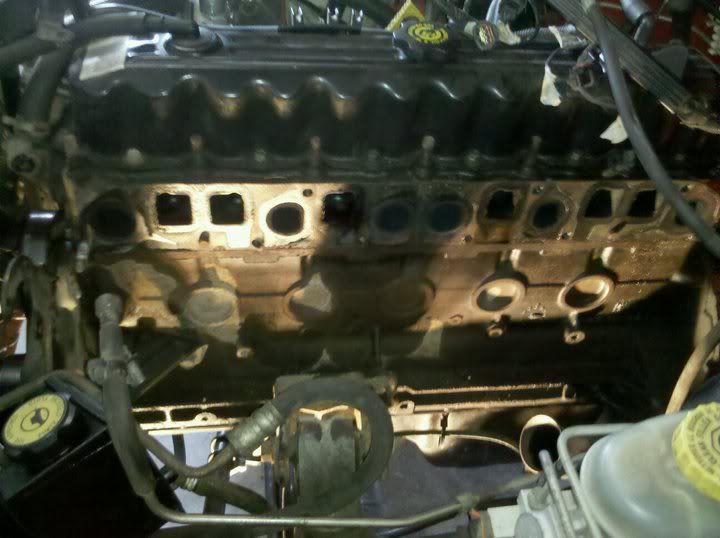
Surprising low amount of carbon buildup inside the intake ports for 135,000 miles...
Totally bare...
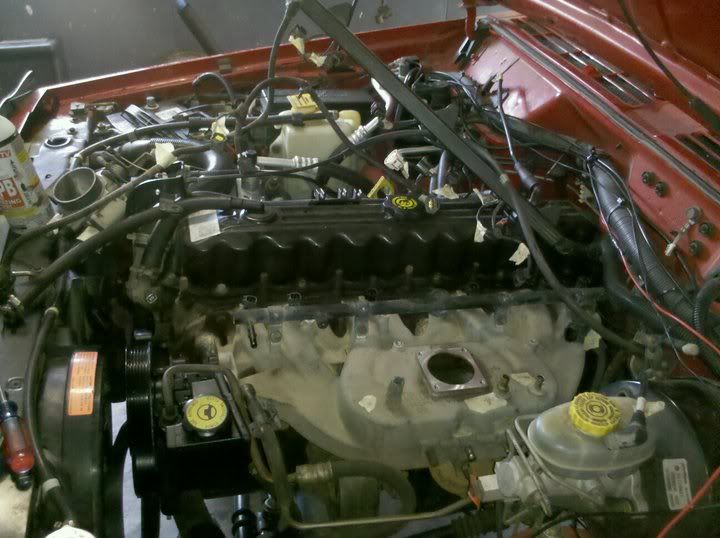
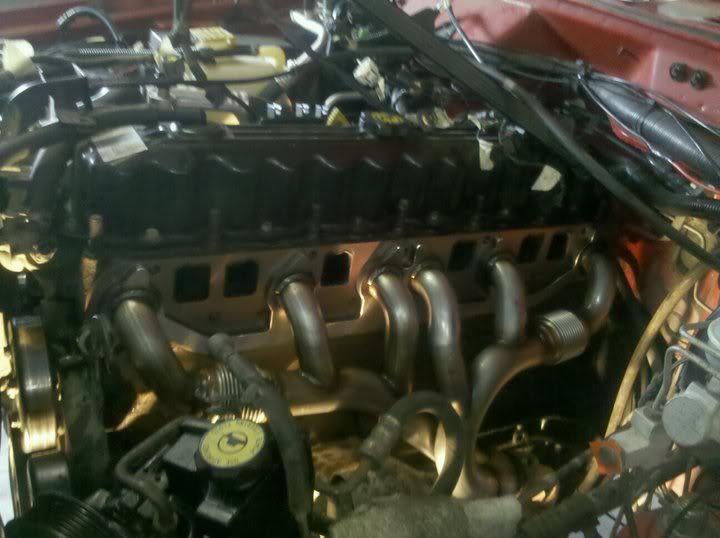
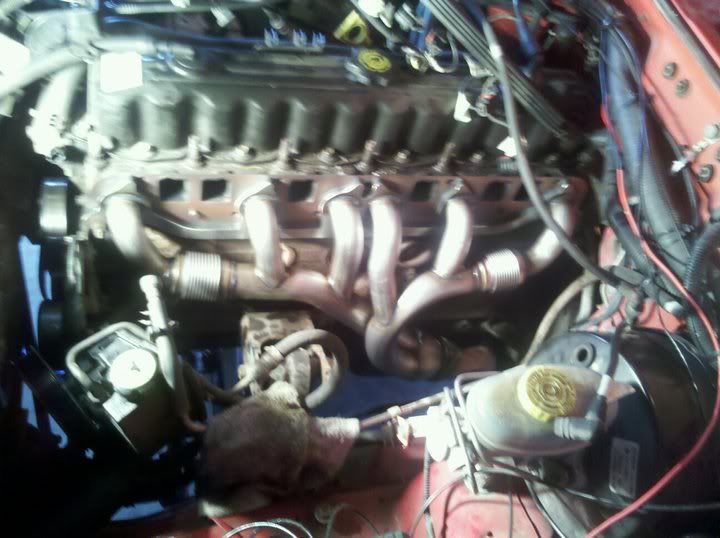
New header going in...
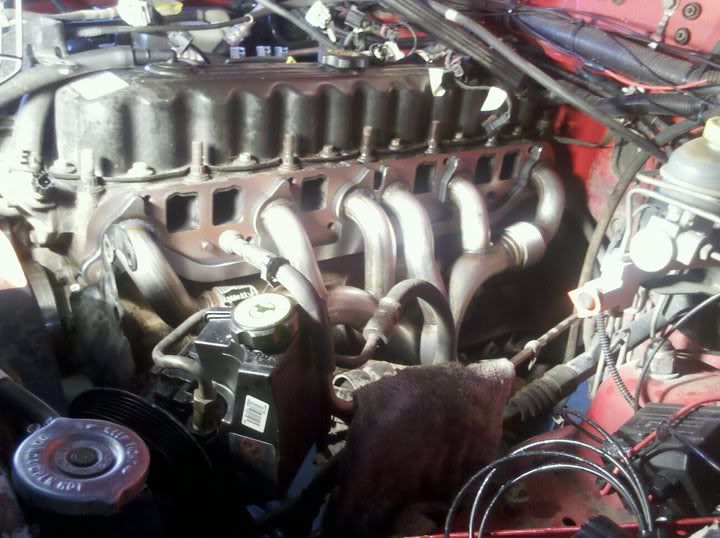
Finishing the install was a breeze since I labeled everything so well...After getting all the bolts torqued to spec it took maybe 30 min. to get everything running.
Here is the crack in the collector
I would definitely recommend doing this job if you have a leak in the manifold because it definitely improved gas mileage, power, and steadied out my idle.
Photo of engine before install for reference when putting it back together. I spent a good 45 minutes labeling everything to make sure that it would go smooth.
New header...I ordered the cheap one on ebay with the flex pipe in it because after a lot of research it sounded like this one holds up better than even the banks headers because they also tend to crack in the same place.
Air filter and tube removed...
Throttle body, spacer, and wire rail removed...
Intake manifold out...
Nice pile of parts building up...
Surprising low amount of carbon buildup inside the intake ports for 135,000 miles...
Totally bare...
New header going in...
Finishing the install was a breeze since I labeled everything so well...After getting all the bolts torqued to spec it took maybe 30 min. to get everything running.
Here is the crack in the collector
I would definitely recommend doing this job if you have a leak in the manifold because it definitely improved gas mileage, power, and steadied out my idle.
03-19-2011, 02:05 PM
#52
Seasoned Member
Join Date: Nov 2010
Location: Monroe NC
Posts: 289
Likes: 0
Received 0 Likes
on
0 Posts
Year: 1998
Model: Cherokee
Engine: 4.0 I6
great job! and just wonderin how long did it take you to finish all of that bec im pretty sure i have the same problem and i just havent gotten around to it and how does that header sound? any better than stock?
03-19-2011, 09:43 PM
#53
Member
Thread Starter
Join Date: Jul 2009
Location: Glendale, AZ
Posts: 232
Likes: 0
Received 1 Like
on
1 Post
Year: 1999
Model: Cherokee
Engine: 4.0 I6
The job took about 4 and a half hours all together, including a lunch break. the most time consuming part is getting to the bottom bolts. Your best bet is to just take your time and be patient with the job. Don't rush it and it will go smooth and make sure you label everything because it will make the install go so much easier. It didn't really make that much difference in sound because I went with a header that was basically the same design as the factory manifold. The one from factory is actually designed very well for flow and installing a really expensive performance header won't actually net you any more noticable power or sound.
03-26-2011, 11:06 AM
#55
Member
Thread Starter
Join Date: Jul 2009
Location: Glendale, AZ
Posts: 232
Likes: 0
Received 1 Like
on
1 Post
Year: 1999
Model: Cherokee
Engine: 4.0 I6
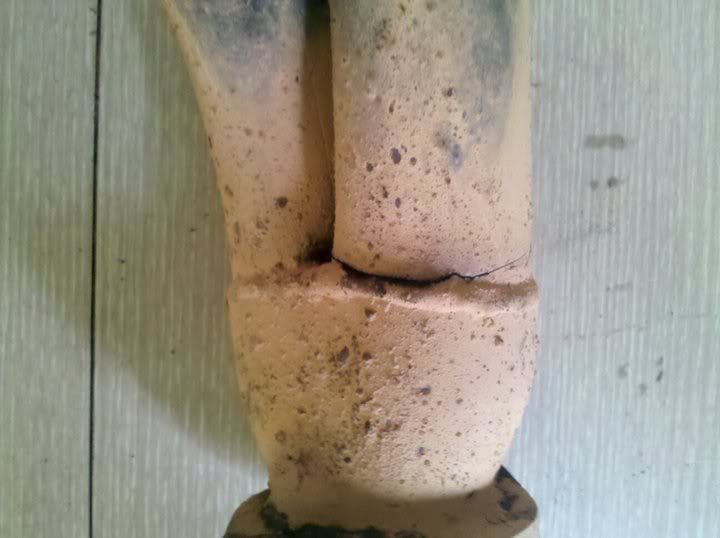
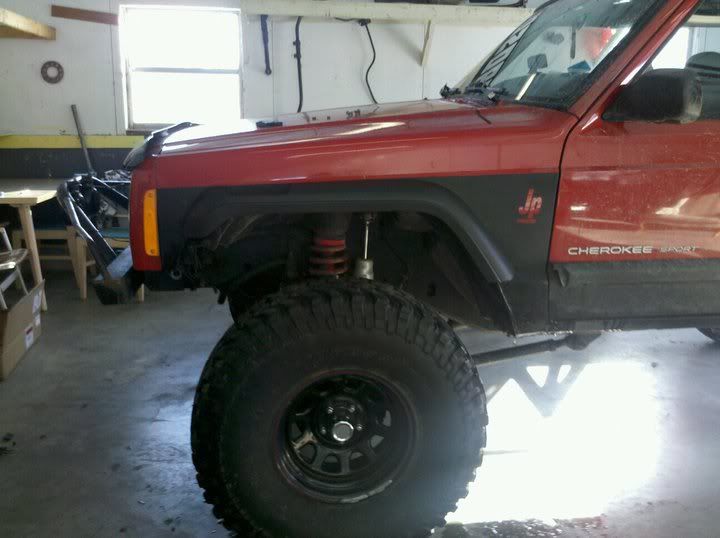
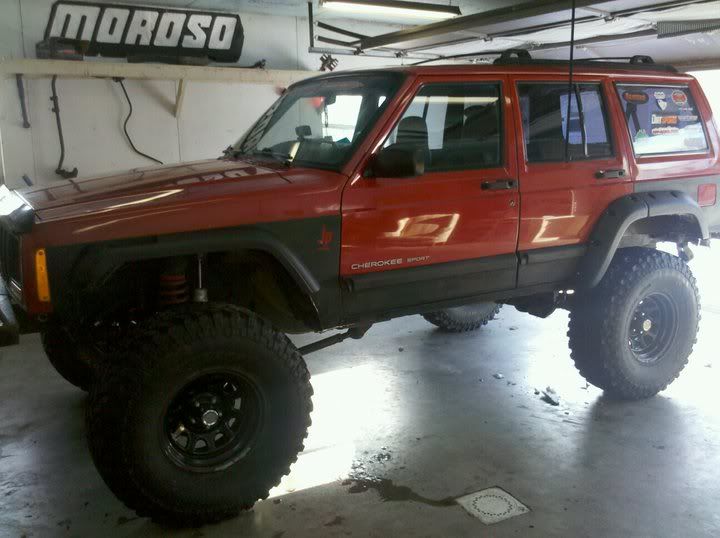
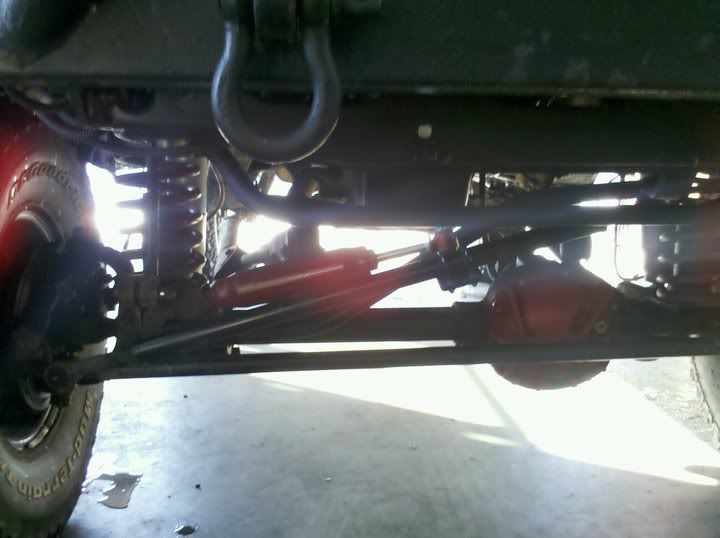
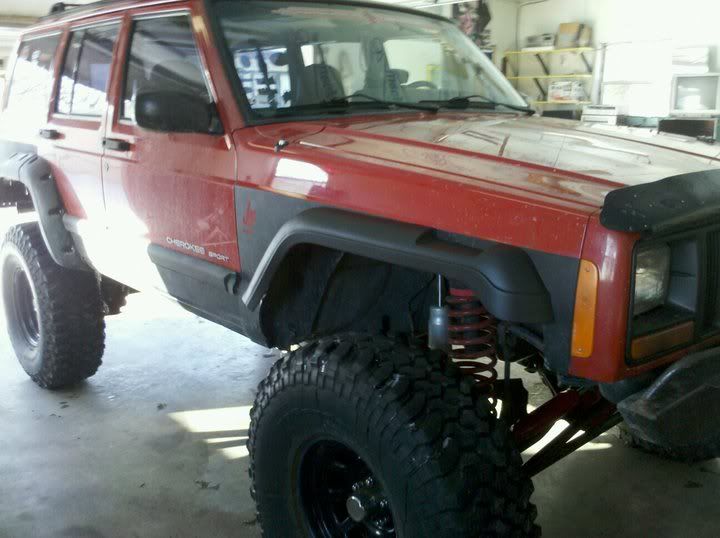
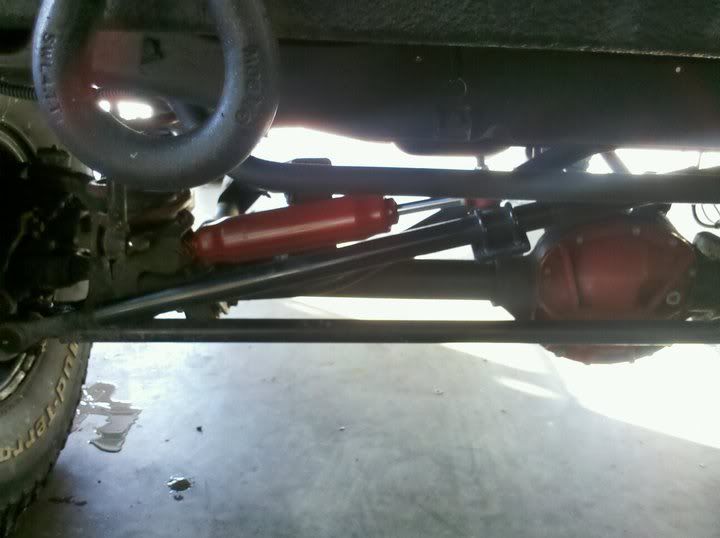
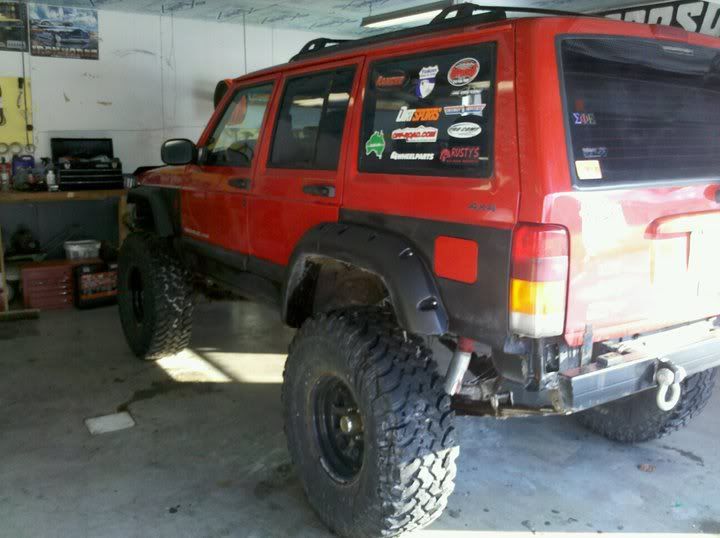
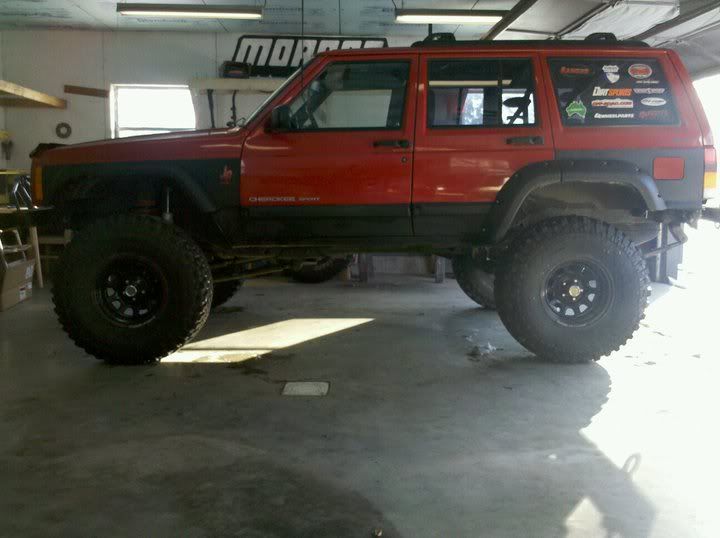
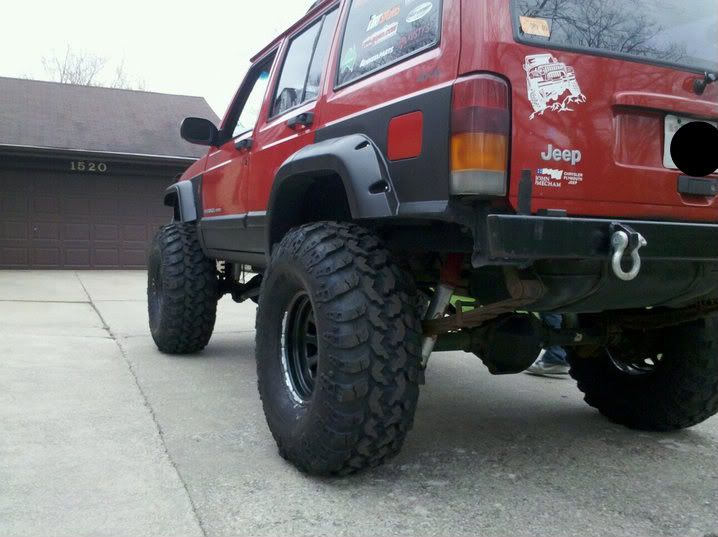
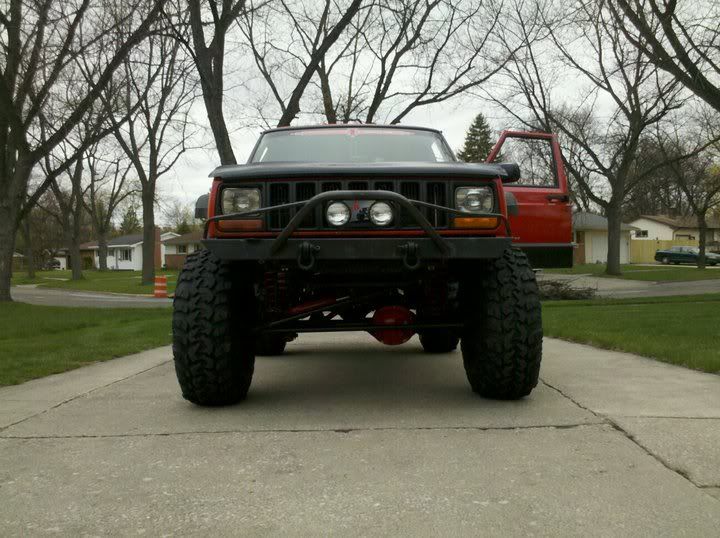
Well I had a little more time to work out in my garage this weekend. I got tired of how my jeep looked with only rear fender flares, so I cut my YJ flares to fit a little better and painted them so they don't look like crap any more. I also sanded and painted my steering stabilizer as the rusty white just wasn't doing it for me. I replaced my door hinges on the driver side as well because I was really tired of having to lift up the door everytime I wanted to close it. No pics of the door hinge replacement, but it was pretty straightforward. Here are the rest of the pics and how it sits today.
04-26-2011, 04:06 PM
#56
Member
Thread Starter
Join Date: Jul 2009
Location: Glendale, AZ
Posts: 232
Likes: 0
Received 1 Like
on
1 Post
Year: 1999
Model: Cherokee
Engine: 4.0 I6
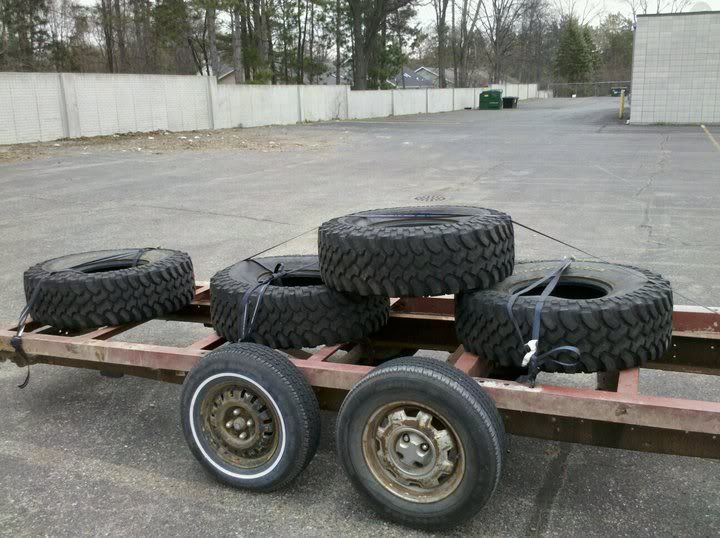
Well I went out to my shop to work on the jeep the other day and found a nice big slit in my sidewall of my tires. I also noticed that I have some serious sidewall damage on most of the tires and now they are starting to bubble.
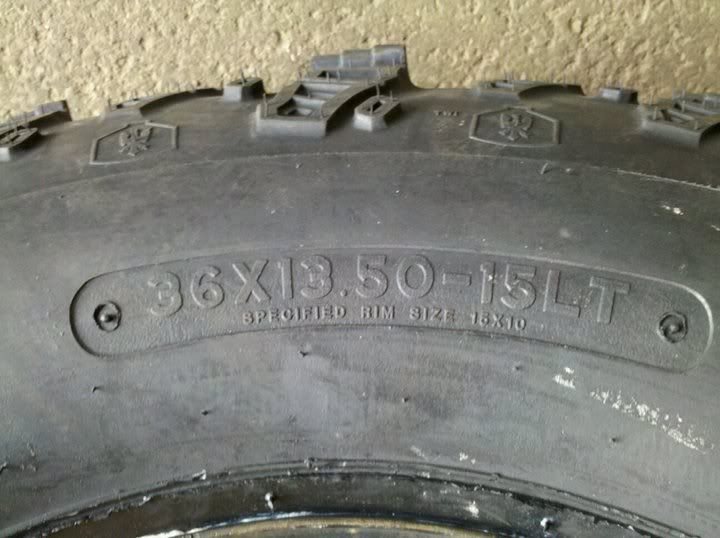
Well this gave me the motivation I needed to get new tires like I've wanted so a set of brand new 36x13.5/15 IROKs are on the way...pics to come hopefully on friday when they get here
Well this gave me the motivation I needed to get new tires like I've wanted so a set of brand new 36x13.5/15 IROKs are on the way...pics to come hopefully on friday when they get here
05-04-2011, 10:16 AM
#57
Member
Thread Starter
Join Date: Jul 2009
Location: Glendale, AZ
Posts: 232
Likes: 0
Received 1 Like
on
1 Post
Year: 1999
Model: Cherokee
Engine: 4.0 I6
Finally got the new tires installed...surprisingly, they are smoother on the road than my old mud terrains. They do howl a bit, but not nearly as bad as I expected and they do wander a little bit. All in all I am very pleased and will let you know more as I put some miles on them.
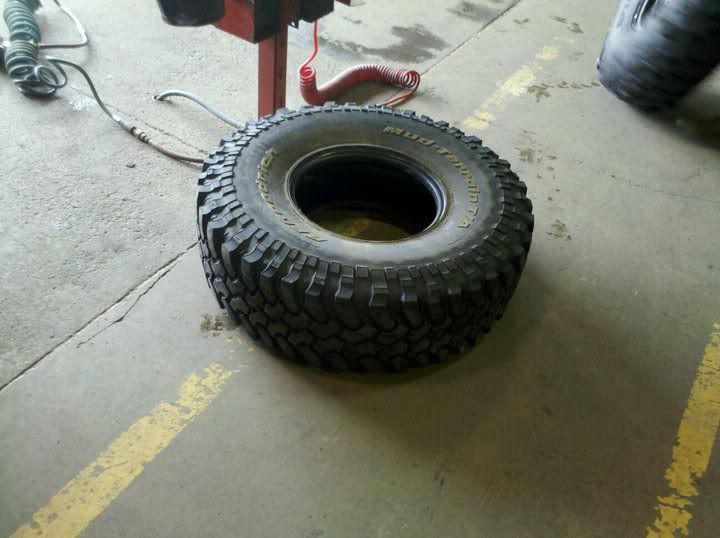
Old 35" mud terrain off the rim
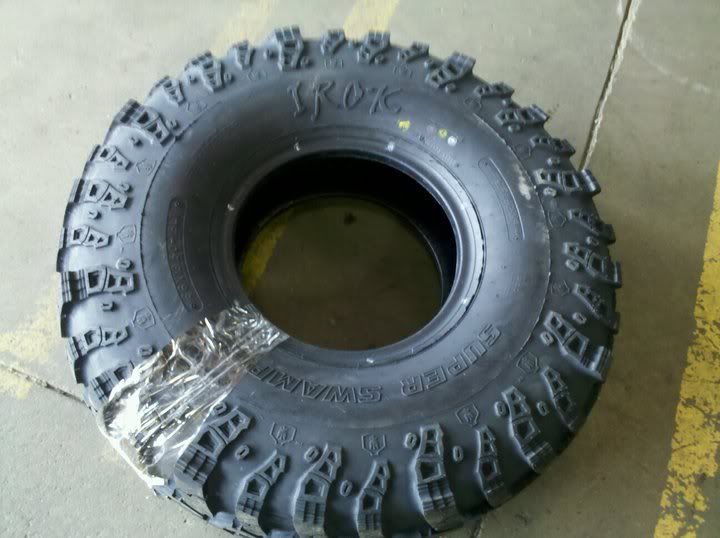
New 36" IROK...measures 37" off the rim
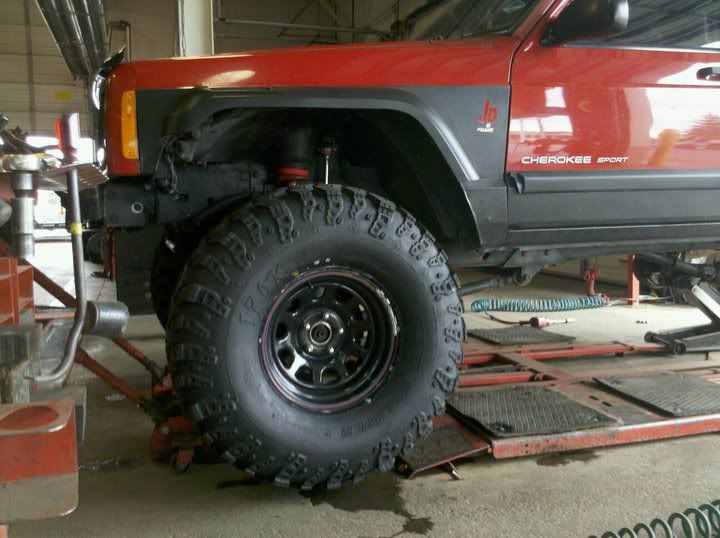
First tire mounted
After I got home

Saying good bye to the old tires ...sold them 20 minutes after I got home
I must admit, for a dd/weekend wheeler, the bfg mud terrains were awesome, they lasted me five years and a LOT of miles, but now that she's being retired from daily duties I figured it was time to upgrade!
Old 35" mud terrain off the rim
New 36" IROK...measures 37" off the rim
First tire mounted
After I got home
Saying good bye to the old tires
I must admit, for a dd/weekend wheeler, the bfg mud terrains were awesome, they lasted me five years and a LOT of miles, but now that she's being retired from daily duties I figured it was time to upgrade!
05-04-2011, 10:52 AM
#59
Member
Join Date: Jan 2011
Location: Arizona
Posts: 144
Likes: 0
Received 0 Likes
on
0 Posts
Year: 1999
Model: Cherokee
Engine: 4.0L
The job took about 4 and a half hours all together, including a lunch break. the most time consuming part is getting to the bottom bolts. Your best bet is to just take your time and be patient with the job. Don't rush it and it will go smooth and make sure you label everything because it will make the install go so much easier. It didn't really make that much difference in sound because I went with a header that was basically the same design as the factory manifold. The one from factory is actually designed very well for flow and installing a really expensive performance header won't actually net you any more noticable power or sound.
Does that header happen to have to use little D shaped washer to space things out to match intake manifold?