When you click on links to various merchants on this site and make a purchase, this can result in this site earning a commission. Affiliate programs and affiliations include, but are not limited to, the eBay Partner Network.
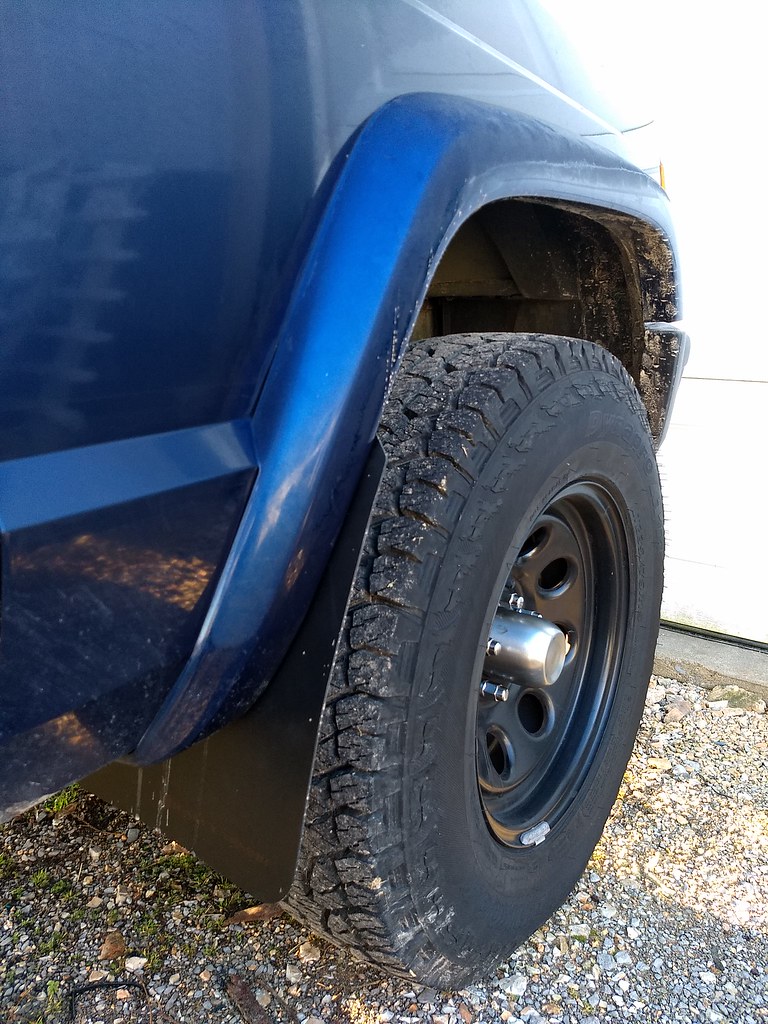
So I'm officially unhappy with these. When I order them for $48 I expected to be a little bit more resistant to warping and they have already started to curl. I will be probably replacing them with thick sheets of Kydex trimmed to look like mud flaps so that I know they will remain stiff.
I'm pretty happy with the Rally Armor set of 4 I bought on Amazon for $24. They haven't curled, but I don't have mine mounted to extend as low as yours, so I don't know how that would affect them. I also have more backspacing than you so I don't need to extend them as far outward.
I'm pretty happy with the Rally Armor set of 4 I bought on Amazon for $24. They haven't curled, but I don't have mine mounted to extend as low as yours, so I don't know how that would affect them. I also have more backspacing than you so I don't need to extend them as far outward.
I'm pretty happy with the Rally Armor set of 4 I bought on Amazon for $24. They haven't curled, but I don't have mine mounted to extend as low as yours, so I don't know how that would affect them. I also have more backspacing than you so I don't need to extend them as far
I've got them ordered with blue lettering, and the first part of my jeep emblems.
Last edited by Ozark Mountain Ranger; 04-12-2018 at 02:55 PM.
I've got them ordered with blue lettering, and the first part of my jeep emblems.
They arrived today and I got them installed. I must say the quality on these is infinitely better. I think the Sparco flaps didn't work because they are intended for cars where the wheel arch goes straight down and since the ones on the Jeep are more trapezoidal it caused them to bend and curl more easily.
Last edited by Ozark Mountain Ranger; 04-26-2018 at 09:36 AM.
Decided to do a black stripe down the middle of the hood Groove. I have to say I think it turned out quite nice. It is of course a rattle can paint job so it looks good at a distance and when you get up on it it's kind of ****y. Bought these made in China Jeep emblems off of eBay for probably $10 for the pair. If you are going to replace your emblems take care that you pay attention exactly what you're getting. These had crappy knock off brand 3M tape on the back and the company who made them was so lazy the 3M tape actually stuck out from underneath. The way I mounted these is I stuck them to a 3in wide piece of masking tape and adjusted their placement so that they were all level and space evenly. I removed the crappy 3M tape from the back and filled up the little holes on the back with Crazy Glue and then stuck it to the front end and let it sit and attached for about 45 minutes.
Last edited by Ozark Mountain Ranger; 04-26-2018 at 09:42 AM.
Since adding the lift I've now got about 20 inches of upward travel. That's with the sway bar connected. I have no intention of running it disconnected so I didn't bother to measure that.
My front approach angle is currently about 60 degrees, my ground clearance is almost exactly 2ft, and my rear departure angle is 45 degrees.
Last edited by Ozark Mountain Ranger; 04-27-2018 at 02:42 PM.
So I recently decided to heck with it and just installed the non-Idiot light instrument cluster. I like it but with the red LED dash lights it was still pretty hard to see at night, so I went and got a white face gauge kit. I'll try to remember to take a picture at night and post it.
In other news I went to change out my Speedo sensor from the factory 30 tooth to a 27 tooth to accompany my lift and 31 inch tires. In the process of changing out the sensor plug positive wire broke, forcing me to make this fix. Thankfully I have a whole bunch of small connectors lying around at work.
Digging your build man, and love that it's got family history back to day one. Awesome.
Yeah I've got a lot more things coming up in the next few weeks. Finally planning on installing those work lights building a DIY cowl intake, replacing little things like shock boots, steering stabilizer, and putting me correct sensors on for the dash. While simultaneously I will also be finishing my paint job
Something you see in a lot of cooking shows is a little thing called 'mise en place', a French term that means to set up. What I am working on this next week is setting up to do some major work. The first thing I felt I needed to do was get a layout for how I am doing the switches on my dash. I find it's always best to draw your thoughts, so I did a basic template for a 84 to 96 dash that anyone can use.
Then I went back and drew in the features that I already have incorporated it into my dash including the factory rear wiper switch, the usb chargers and the new dash clock I haven't wired up yet.
So then the next step and possibly the most unnerving is figuring out the best way to install the switches that is feng shui and doesn't impede functions that I need while driving.
For now I think this will work. The switches for the maintenance lights will be located on the lower right by the headlight switch, as I find when sitting in my jeep that this area is least visible and therefore not a distraction while driving. I've located the rear cargo lamp switch next to the rear wiper switch in case a backseat passenger was in need to find something in the cargo area, say while on a road trip. I have to do more research but I am considering making this one of two switches for the rear cargo area. The first would be located on the driver's dash and the second would be located somewhere in the rear cargo area where would not be accidentally bumped on by cargo.
There is still a large open space beneath my clock which I am considering using for switches for fog lights which I might be installing.
Last edited by Ozark Mountain Ranger; 05-20-2018 at 08:48 AM.
The next part of mise en place is accounting for all of your materials.
Yesterday I could have sworn that I had 7 switches plus the one large switch and today I go back and do a recount and realize I only had five switches plus the one large switch. I'll need to pick up two more when it's all said and done but for now this will be fine. I also realize that my black housings on the lights does not match the grey trim color of my interior so I will be painting the light housings to match. I have plenty of lights, 10 in total,
one under the driver side dash for the fuse box so that when I go to check fuses I can actually see what I'm working on without trying to position a wonky flashlight,
three under the hood,
two cargo lights,
one on either side of the transmission and transfer case
one facing the front diff
and one facing the gas tank and rear diff.
Since I am finally integrating everything I will be changing from fuse taps to a junction box. Regrettably this is made in China but it is the only one of this style I have found and it runs only $10. What I like about it is when the fuse goes out the red light goes on. I will most likely end up needing two of these but that can wait until later time.
Of course that junction box is only for the positive leads so I found one of these for the negatives. All of these switches and lights are extremely low power draw which is why I am fine using chinese-made electrical components because I know that the strain on the system isn't going to be very high.
Last edited by Ozark Mountain Ranger; 05-20-2018 at 02:24 PM.
 04-11-2018, 12:22 PM