Clifford the big red jeep build
 04-17-2012, 08:31 PM
#1
Newbie
Thread Starter

Join Date: Apr 2012
Location: Casper, WY
Posts: 12
Likes: 0
Received 0 Likes
on
0 Posts
Year: 2001
Model: Cherokee
Engine: 4.0 L H.O.
I bought a red 2001 Cherokee Sport a few years back from my buddy's dad's lot. It was a repo so I got it for 1000 bucks even though it had a few problems that was still a great deal. I didn't know the extents if the problems till I had it for a while, turns out the guy that had it before me had swapped a nissan xterra rear axle into it with 4.625 gearing and tried wheeling it with the stock (3.73) gearing in front, needless to say my transfer case was destroyed, even though I drove it for a year or so before this happened.
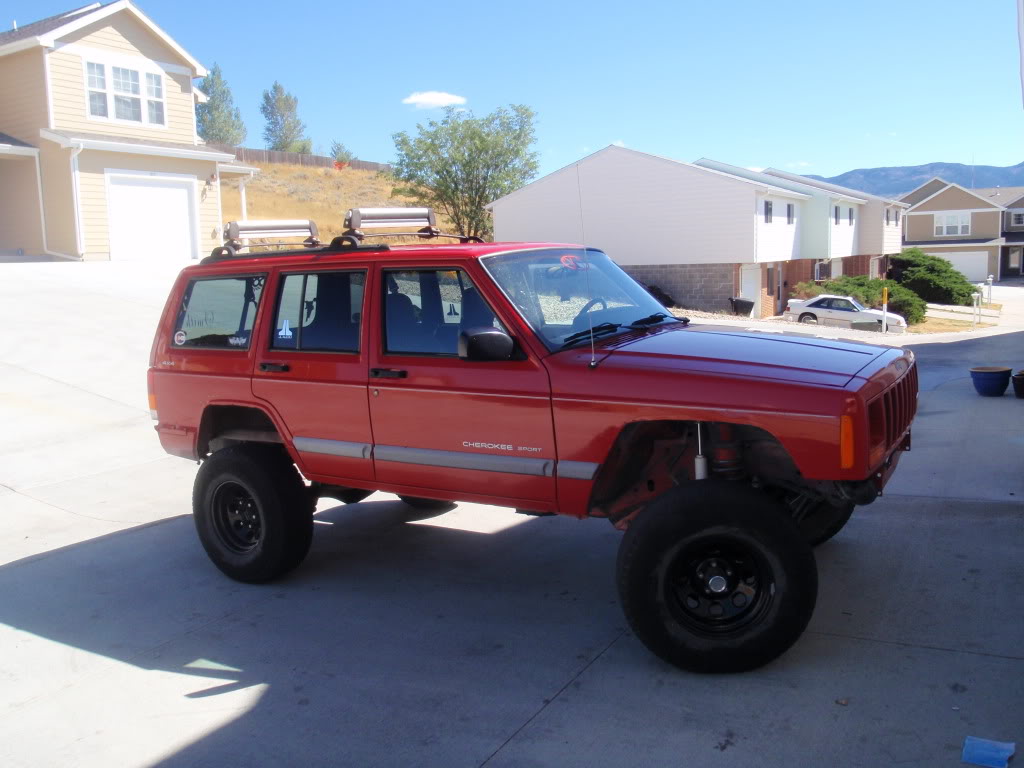
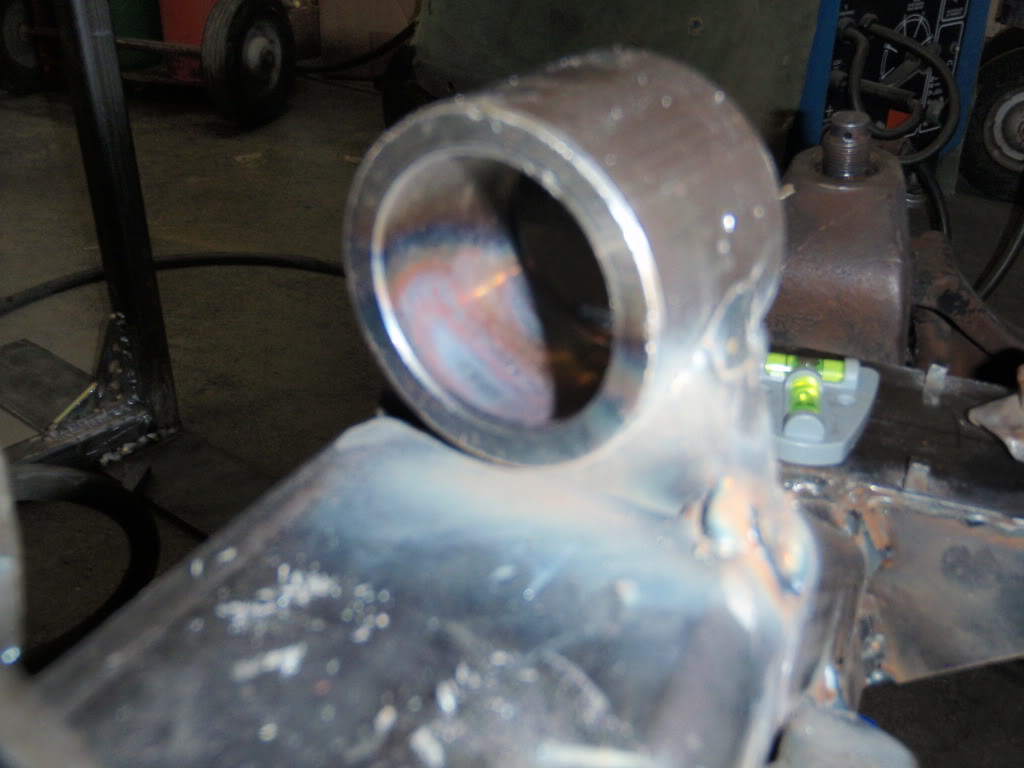
Before

Measuring for new shocks
Before
Measuring for new shocks
Last edited by Jeepin307; 08-07-2012 at 11:29 PM. Reason: photo links didnt work
 04-17-2012, 08:51 PM
#2
Newbie
Thread Starter
Join Date: Apr 2012
Location: Casper, WY
Posts: 12
Likes: 0
Received 0 Likes
on
0 Posts
Year: 2001
Model: Cherokee
Engine: 4.0 L H.O.
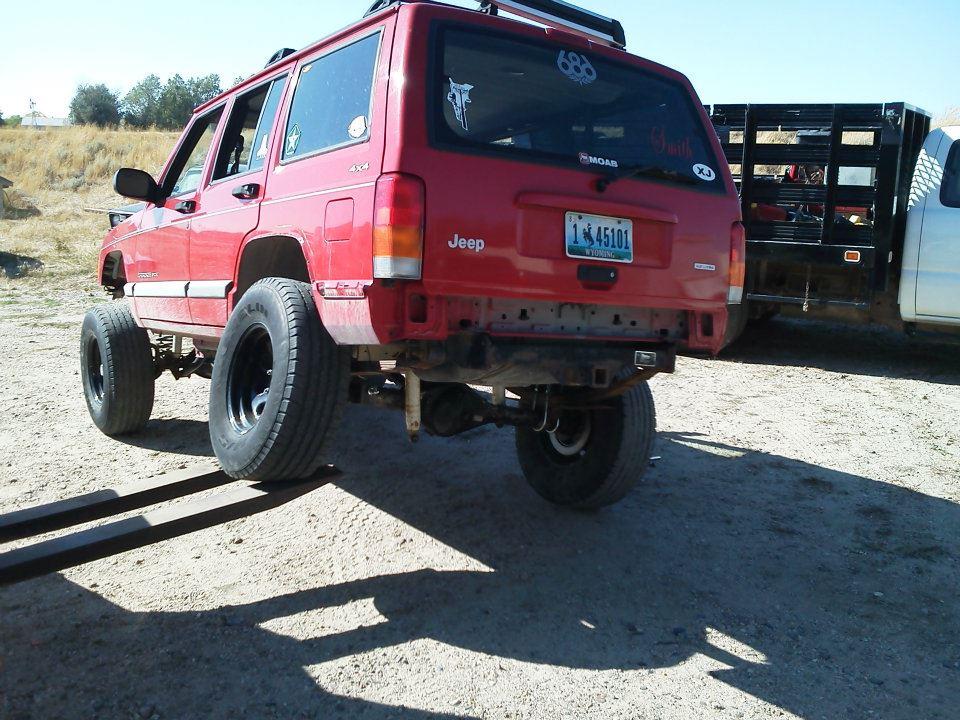
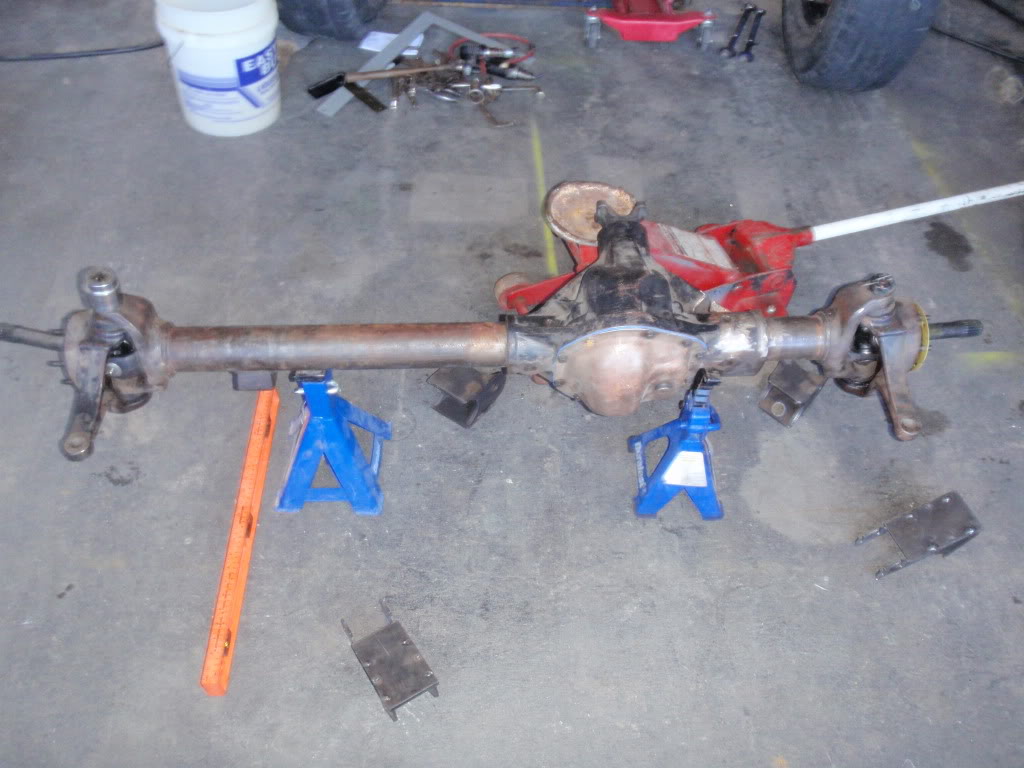
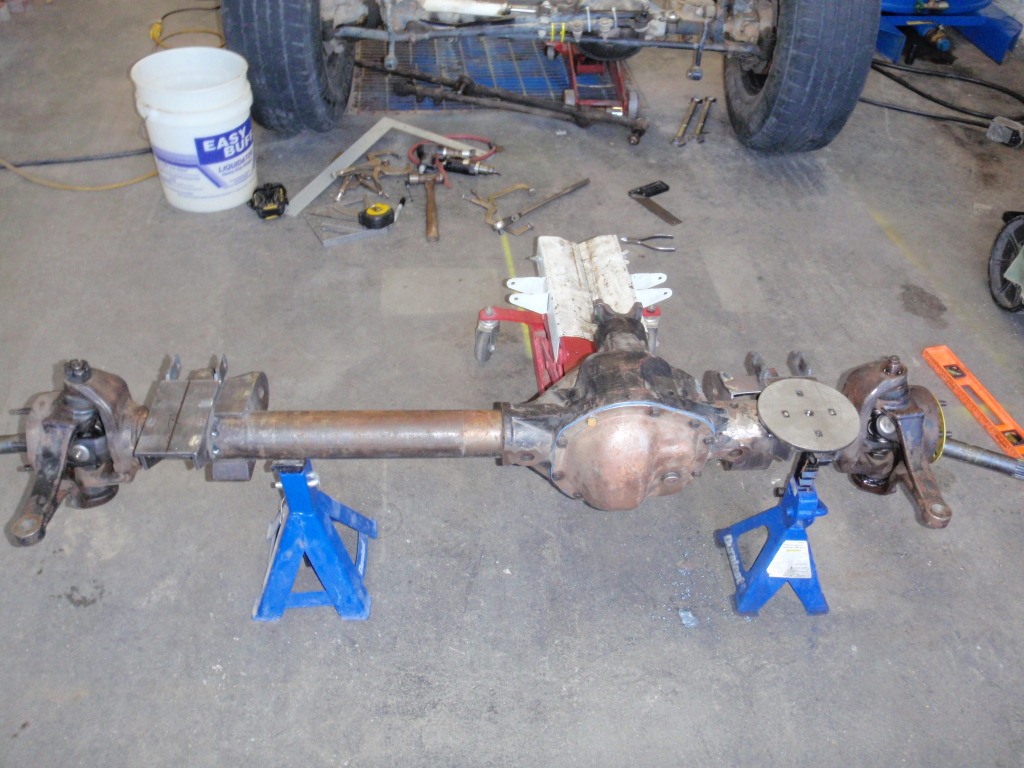
The pictures of me measuring for shocks were after I swapped the xterra rear end for a toyota 8 inch w/ E-locker and 4.3 gearing. Also after I put a new transfer case in it. I bought the jeep with a 4.5 inch lift it also had an SYE and a magnaflow on it.
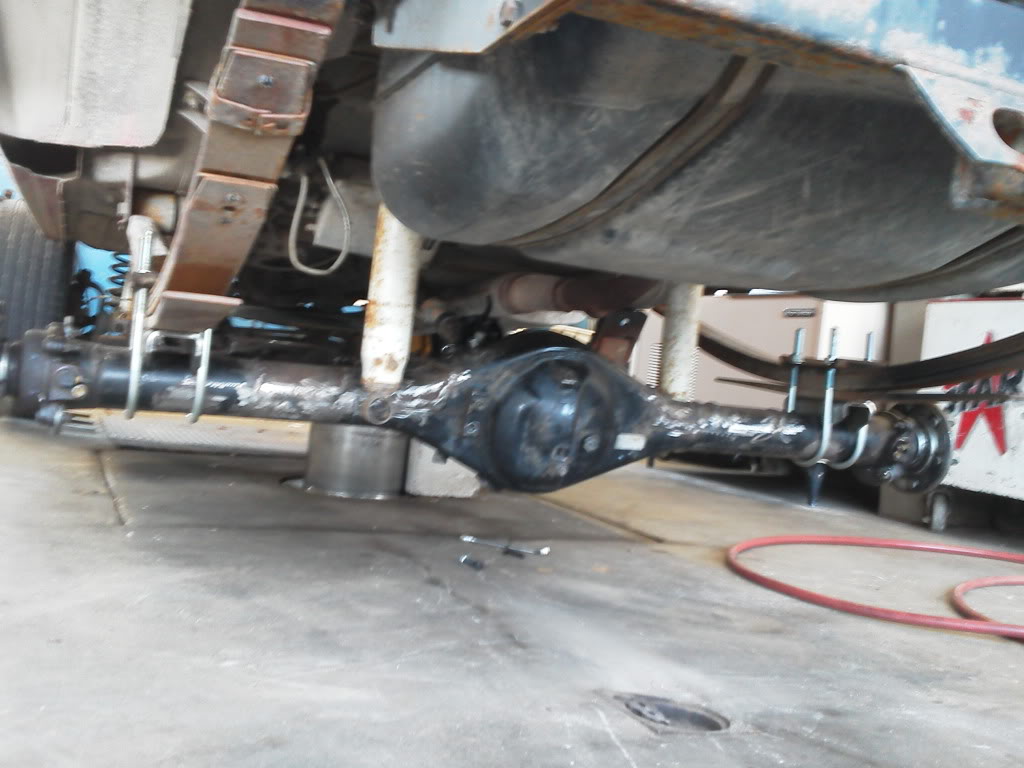
The rear axle swap was fairly simple (at least compared to the waggy 44 that came afterwards). The hard part was switching from drums to disk. I had to use 1993 pathfinder rear rotors and calipers, the rotors centers had to be machined out to fit the hubs which I got a pretty good deal on. the hardest part was the brackets which I had to custom design in solidworks and was able to cut out of 1/4 inch steel on my colleges plasma table. I still have to assemble the whole thing but everything mocked up nicely.
I also cut out different rear shock mounts on the plasma table
04-17-2012, 09:48 PM
#5
Newbie
Thread Starter
Join Date: Apr 2012
Location: Casper, WY
Posts: 12
Likes: 0
Received 0 Likes
on
0 Posts
Year: 2001
Model: Cherokee
Engine: 4.0 L H.O.
thanks and sorry sean I guess I should have searched it first. Do you know if theres a way to change the title?
The xterra axle was nice, it had a locker but it was impossible to match the gear ratio up front, thats why I swapped the toyota 8 inch E-locker in it has 4.3 gearing and the waggy 44 i swapped in was regeared to 4.27, that way the rear doesn't wash out unless you want it to in 4 wheel drive.
The xterra axle was nice, it had a locker but it was impossible to match the gear ratio up front, thats why I swapped the toyota 8 inch E-locker in it has 4.3 gearing and the waggy 44 i swapped in was regeared to 4.27, that way the rear doesn't wash out unless you want it to in 4 wheel drive.
04-17-2012, 09:53 PM
#6
Newbie
Thread Starter
Join Date: Apr 2012
Location: Casper, WY
Posts: 12
Likes: 0
Received 0 Likes
on
0 Posts
Year: 2001
Model: Cherokee
Engine: 4.0 L H.O.
The biggest perk of a japanese axle like the xterra or tacoma is the third member design, which means you can remove the entire differential by taking out the shafts and 10 bolts, also the axle shafts are semi floating which means they have four bolts holding them into the axle instead of c clips, way easier to swap out shafts. Plus I'm a pretty big toyota guy since I used to have a 4runner I put through hell and I know they're pretty bulletproof. Bigger axle shaft diameter than a dana 44 too!
Trending Topics
04-17-2012, 09:58 PM
#8
Member
Join Date: Jan 2012
Location: Daytona Beach, FL
Posts: 171
Likes: 0
Received 1 Like
on
1 Post
Year: 1998
Model: Cherokee
Engine: 4.0 I6
thanks and sorry sean I guess I should have searched it first. Do you know if theres a way to change the title?
The xterra axle was nice, it had a locker but it was impossible to match the gear ratio up front, thats why I swapped the toyota 8 inch E-locker in it has 4.3 gearing and the waggy 44 i swapped in was regeared to 4.27, that way the rear doesn't wash out unless you want it to in 4 wheel drive.
The xterra axle was nice, it had a locker but it was impossible to match the gear ratio up front, thats why I swapped the toyota 8 inch E-locker in it has 4.3 gearing and the waggy 44 i swapped in was regeared to 4.27, that way the rear doesn't wash out unless you want it to in 4 wheel drive.
04-17-2012, 10:07 PM
#9
Junior Member

Join Date: Jul 2010
Location: St Louis
Posts: 75
Likes: 0
Received 0 Likes
on
0 Posts
Year: 1998
Model: Cherokee
Engine: 4.0
The biggest perk of a japanese axle like the xterra or tacoma is the third member design, which means you can remove the entire differential by taking out the shafts and 10 bolts, also the axle shafts are semi floating which means they have four bolts holding them into the axle instead of c clips, way easier to swap out shafts. Plus I'm a pretty big toyota guy since I used to have a 4runner I put through hell and I know they're pretty bulletproof. Bigger axle shaft diameter than a dana 44 too!
Gotcha, I get you on the re-gearing issues, and I have frequently heard of 'yota rear axel swaps on a wide range of vehicles, XJ and other vehicles included, really haven't heard anything on the Nissans.
Reason it perked my ears is because my other ride is a Nissan and I love the brand as a whole. I would imagine that older Pathy rears would be just as easy, if not easier to find than the Toyotas, and you never hear about it.
Just curious why you hear so much more about the Toyota's axel swaps as opposed to the Nissans...... or Honda's (passports) Izuzu's (troopers, rodeo's) or other Japanese rears..
There are some others I can think of but I was just curious as to why out of all the Japanese brands that Toyota seems to have the only axel worth swapping.
04-17-2012, 10:29 PM
#10
Newbie
Thread Starter
Join Date: Apr 2012
Location: Casper, WY
Posts: 12
Likes: 0
Received 0 Likes
on
0 Posts
Year: 2001
Model: Cherokee
Engine: 4.0 L H.O.
My favorite thing about the toyota was the factory electric locker, also I think the gears are easier to match dana's to than other brands. but nissans are awesome if you can find gears, h233b's have a 9 1/4 inch ring gear!, but I noticed the axle tube diameter is smaller than my toyota.
04-17-2012, 10:51 PM
#11
Newbie
Thread Starter
Join Date: Apr 2012
Location: Casper, WY
Posts: 12
Likes: 0
Received 0 Likes
on
0 Posts
Year: 2001
Model: Cherokee
Engine: 4.0 L H.O.
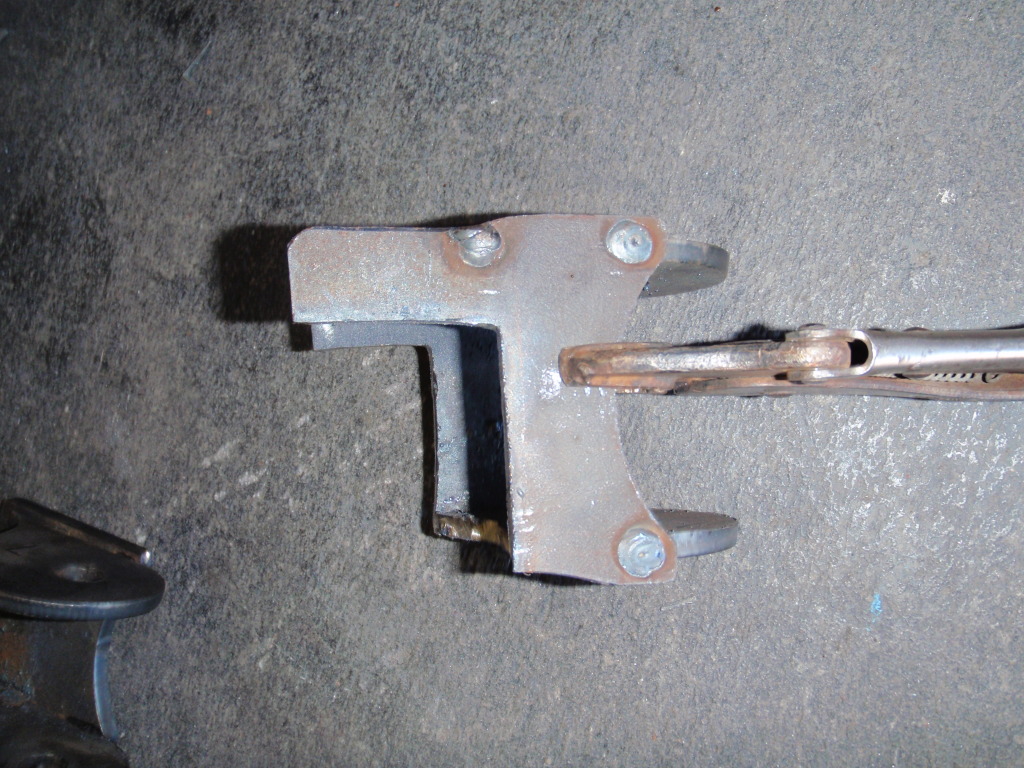
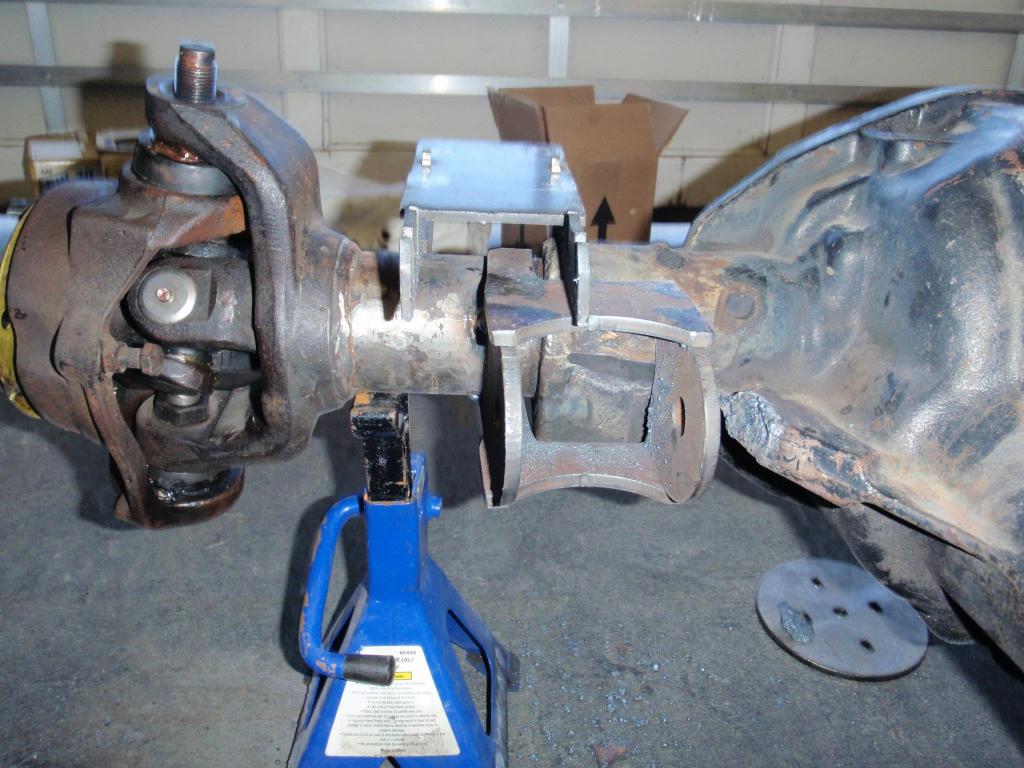
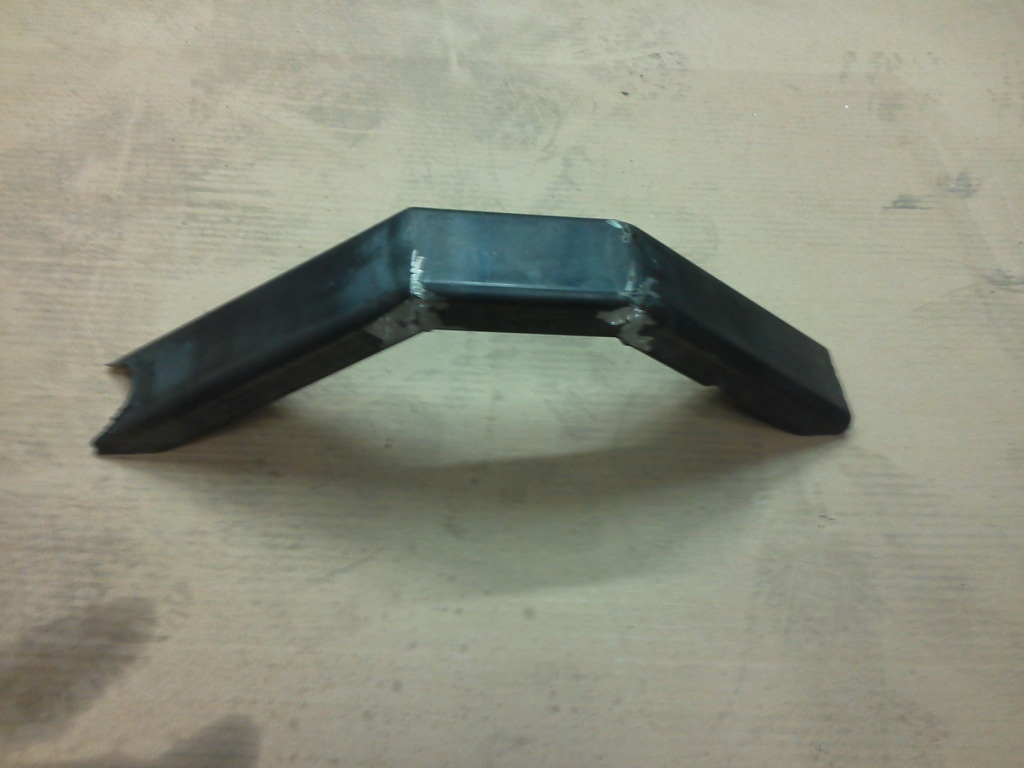
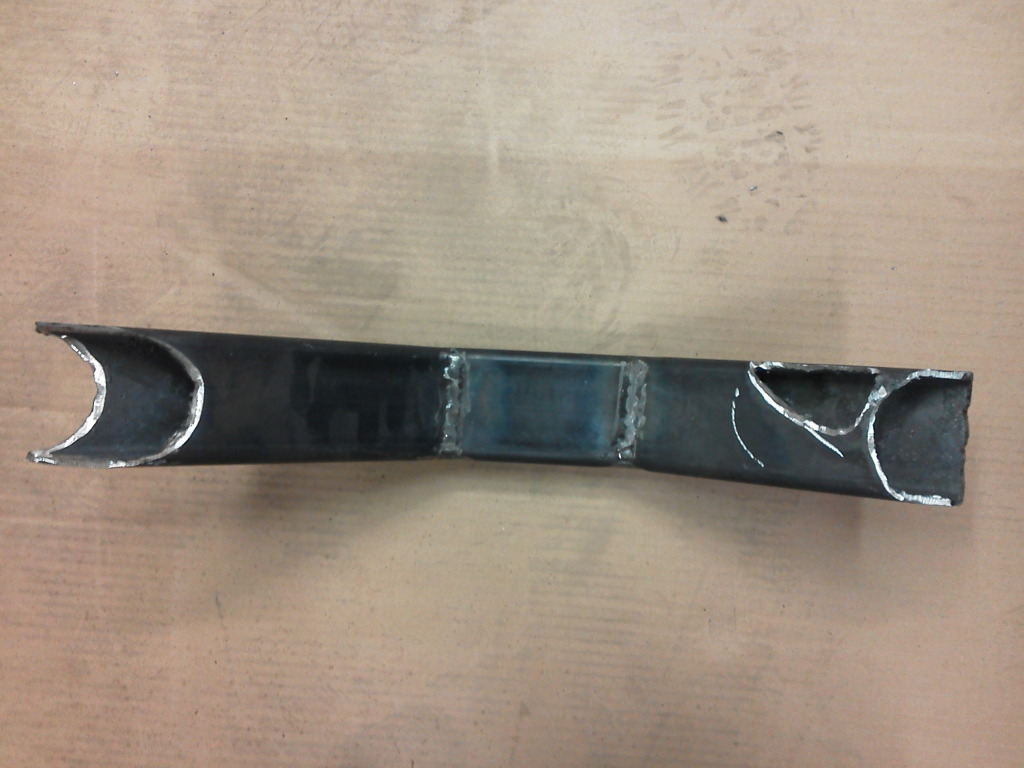
These are the brackets I designed and cut out at school on the plasma table. The first two are for my rear axle and the second two I used for my waggy 44 front swap (more to come on that). They all worked as pretty good. If anybody wants the solidworks files or measurements let me know and I can email them to you.
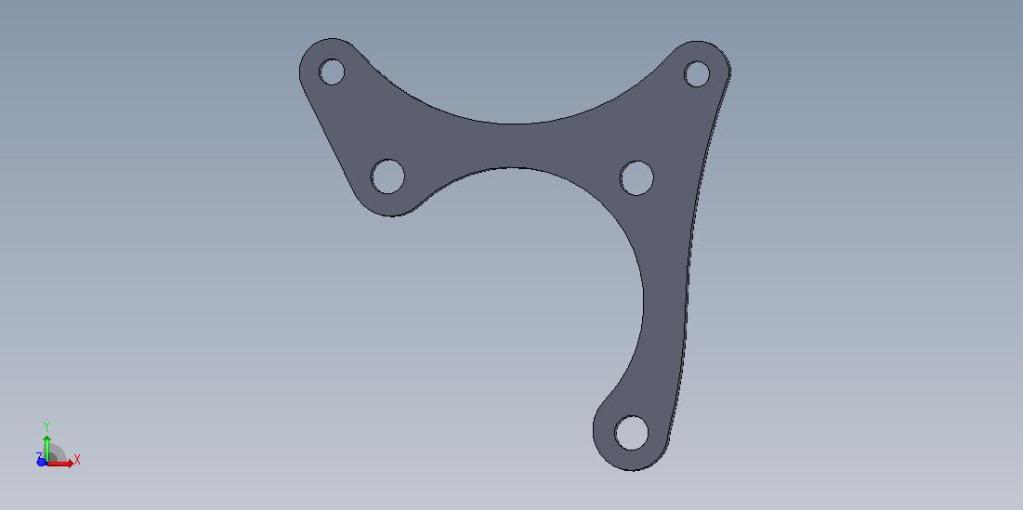
Rear Nissan disk brake conversion bracket
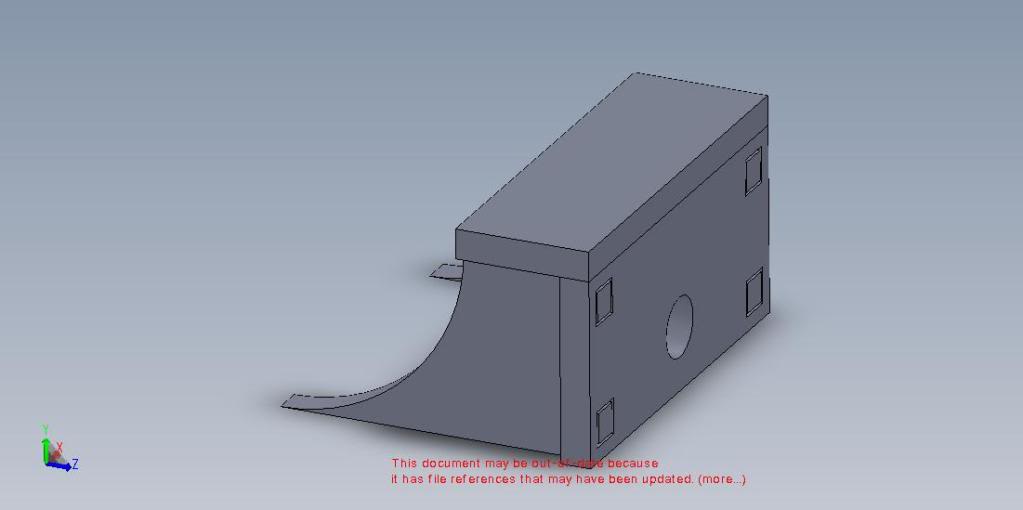
Rear high clearance shock mounts
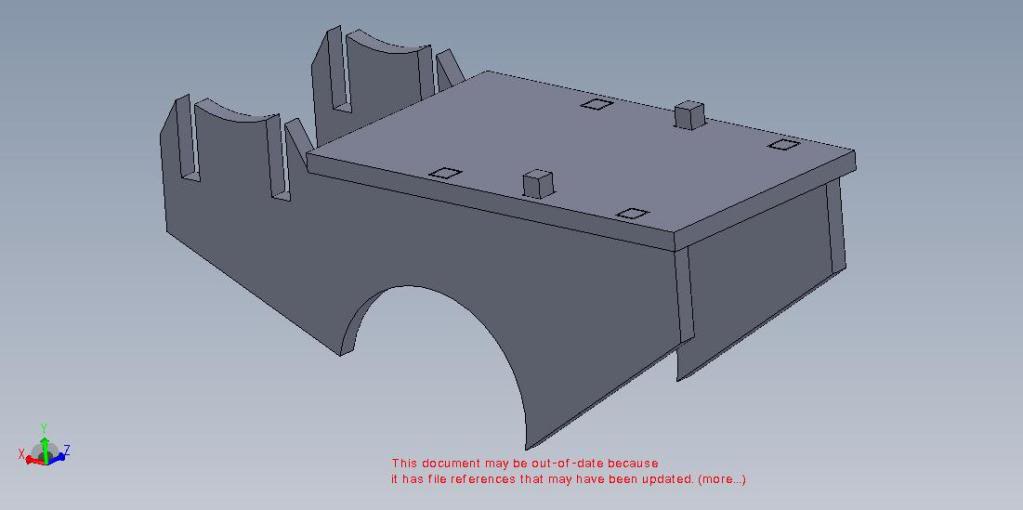
Front spring perches and shock mount
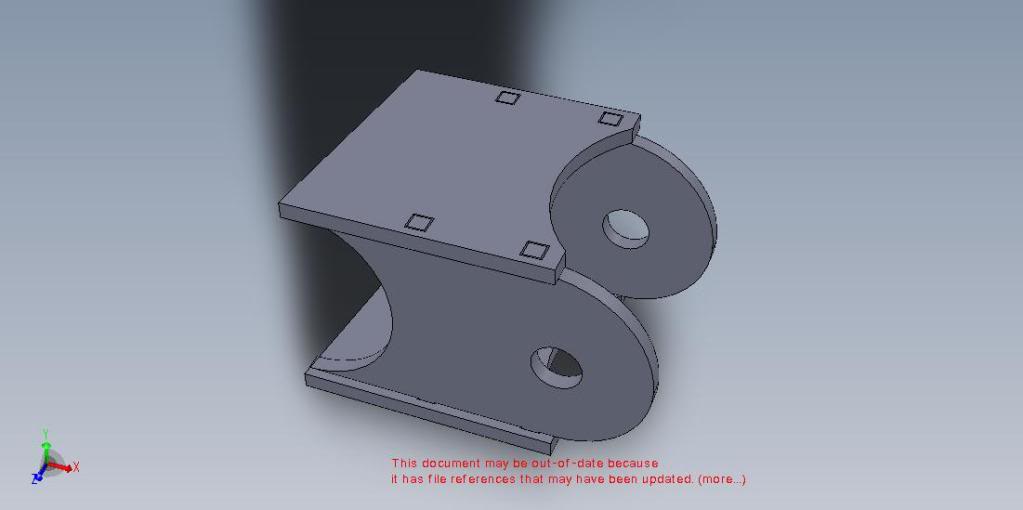
Front lower control arm mount with built in 5 degree offset of perpendicular to the axle tube
Rear Nissan disk brake conversion bracket
Rear high clearance shock mounts
Front spring perches and shock mount
Front lower control arm mount with built in 5 degree offset of perpendicular to the axle tube
04-23-2012, 08:23 PM
#12
Newbie
Thread Starter
Join Date: Apr 2012
Location: Casper, WY
Posts: 12
Likes: 0
Received 0 Likes
on
0 Posts
Year: 2001
Model: Cherokee
Engine: 4.0 L H.O.
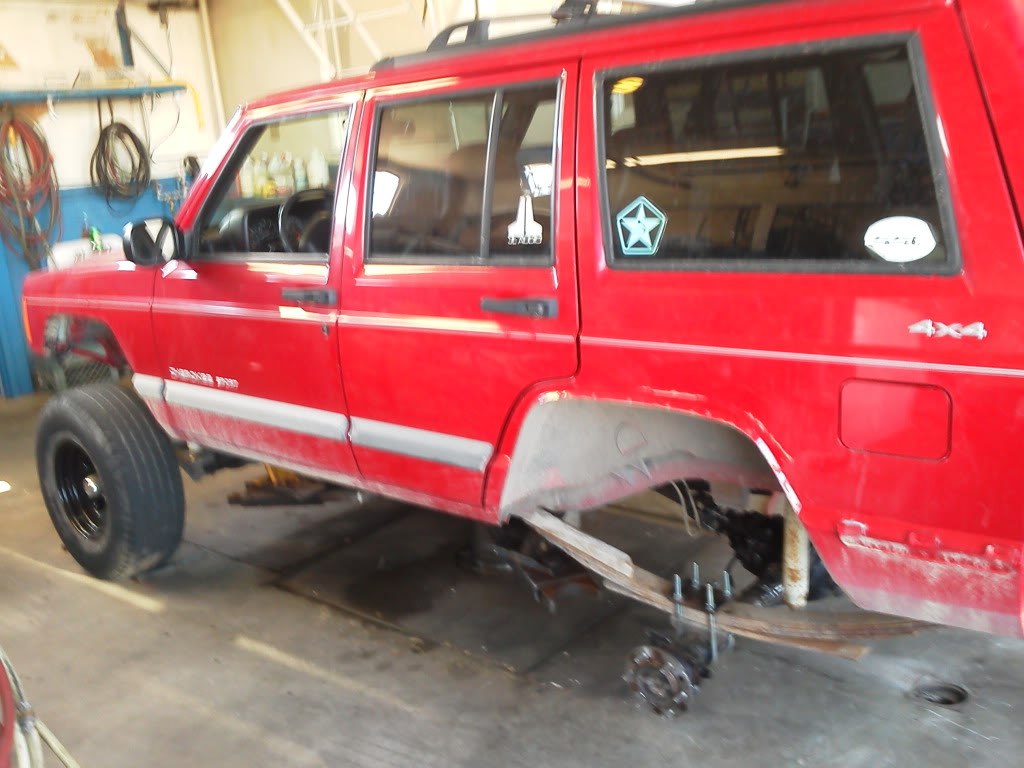
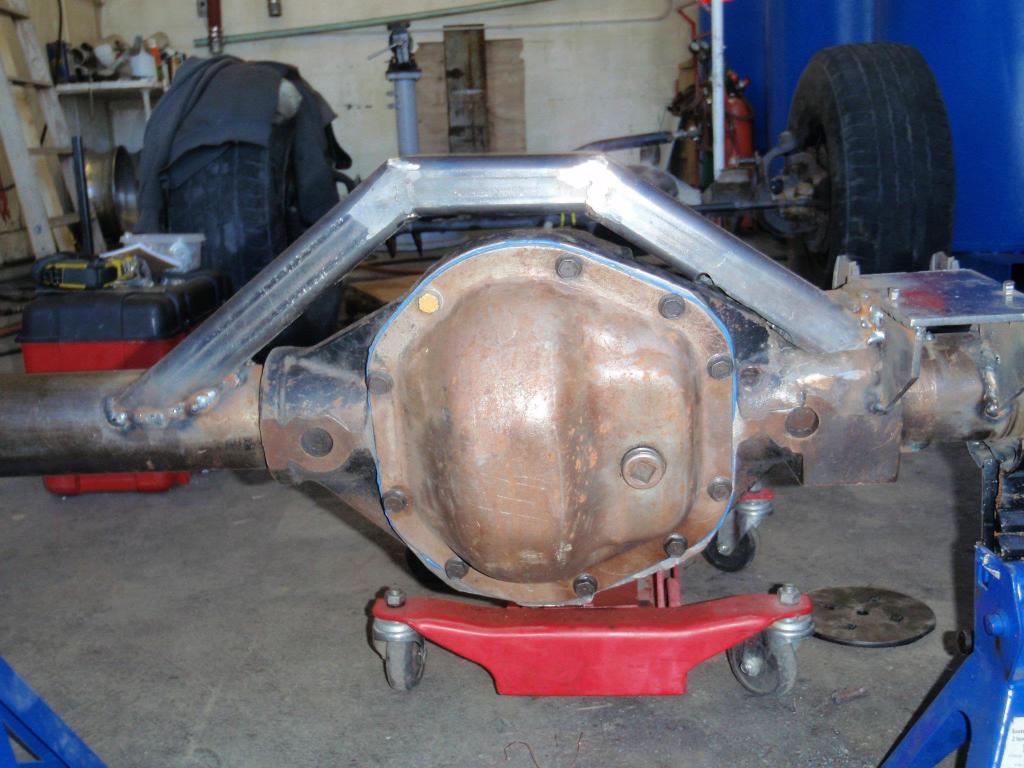
After I got my rear axle in I started on my waggy dana 44 swap. I started with a 1984 wagoneer with vacuum disconnect.
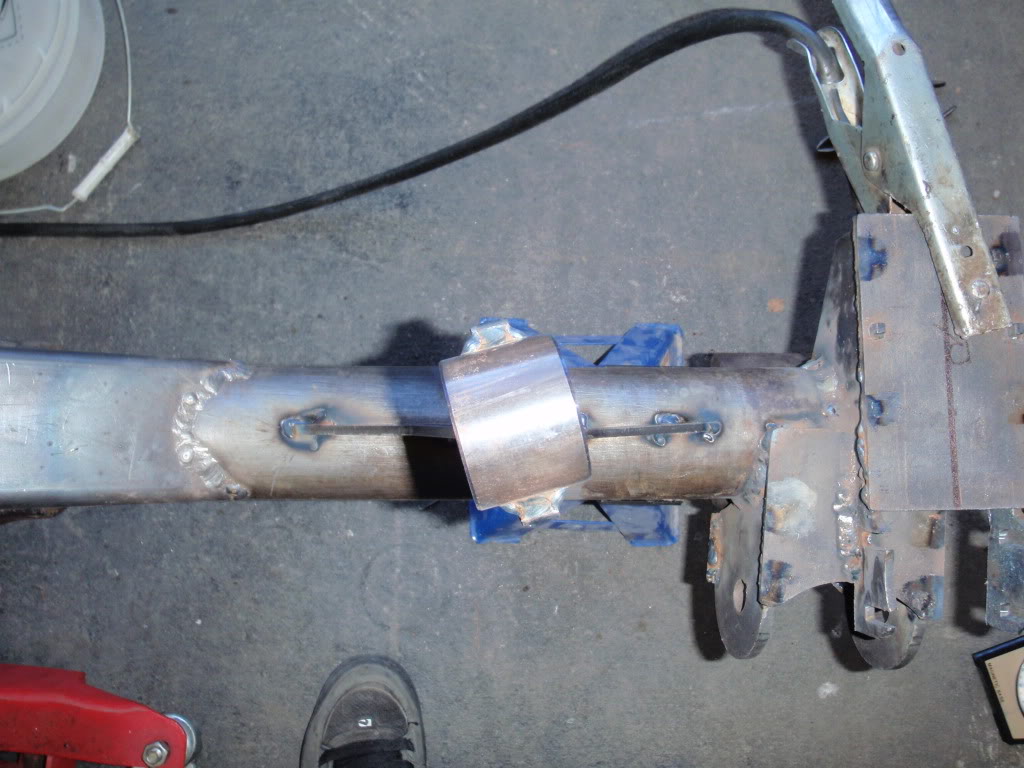
I cut off all of the brackets on the tube
I also regeared to 4.27, installed warn locking hubs, replaced all of the bearings and seals, and bought new calipers.
Before
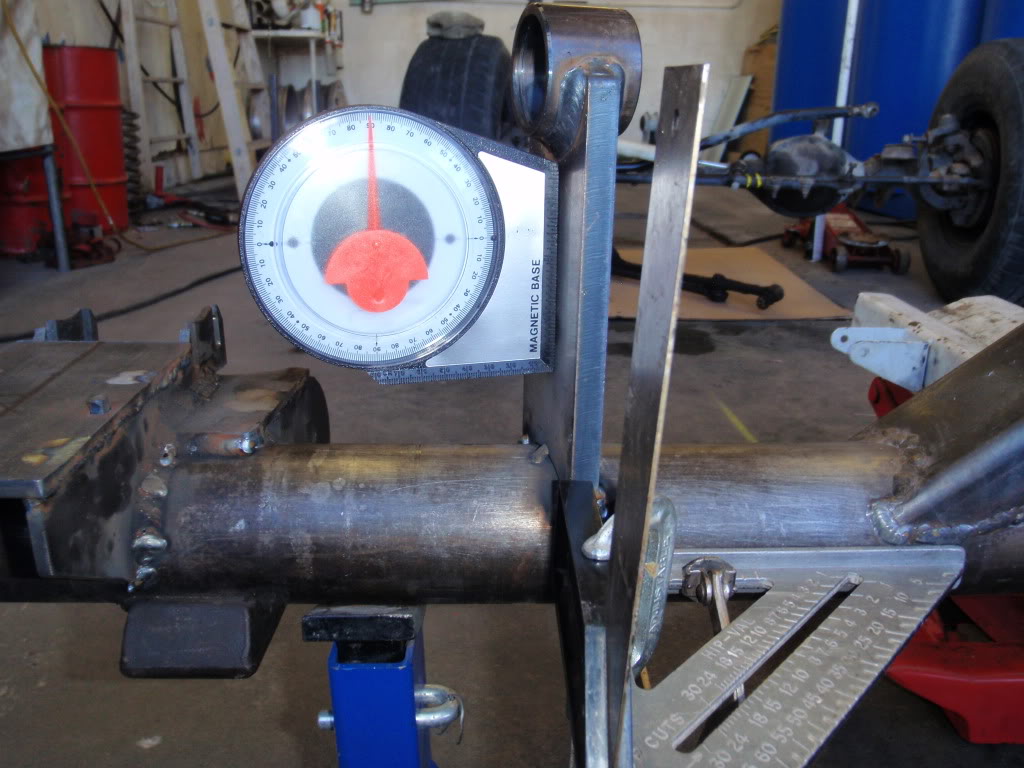
I measured my castor angle to about 6 degrees, then welded on the spring perches. I used Clayton offroad's axle bracket installation instructions because they had a good drawing that gives the dimensions of where all of the brackets should be located, this way I didn't have to mock the brackets up under the jeep.
I had to do some trimming on my lower control arm brackets to get around the cast iron leaf perches.
I ran into some space issues on the driverside because the cast iron pumpkin has a leaf perch cast into that side, I wasn't comfortable welding to the cast with my equipment but needed some support so I heated gently with a torch and made small spot welds wherever I could, I was also able to tie my truss into this side for added strength.
I cut off all of the brackets on the tube
I also regeared to 4.27, installed warn locking hubs, replaced all of the bearings and seals, and bought new calipers.
Before
I measured my castor angle to about 6 degrees, then welded on the spring perches. I used Clayton offroad's axle bracket installation instructions because they had a good drawing that gives the dimensions of where all of the brackets should be located, this way I didn't have to mock the brackets up under the jeep.
I had to do some trimming on my lower control arm brackets to get around the cast iron leaf perches.
I ran into some space issues on the driverside because the cast iron pumpkin has a leaf perch cast into that side, I wasn't comfortable welding to the cast with my equipment but needed some support so I heated gently with a torch and made small spot welds wherever I could, I was also able to tie my truss into this side for added strength.
04-24-2012, 12:34 AM
#13
Newbie
Thread Starter
Join Date: Apr 2012
Location: Casper, WY
Posts: 12
Likes: 0
Received 0 Likes
on
0 Posts
Year: 2001
Model: Cherokee
Engine: 4.0 L H.O.
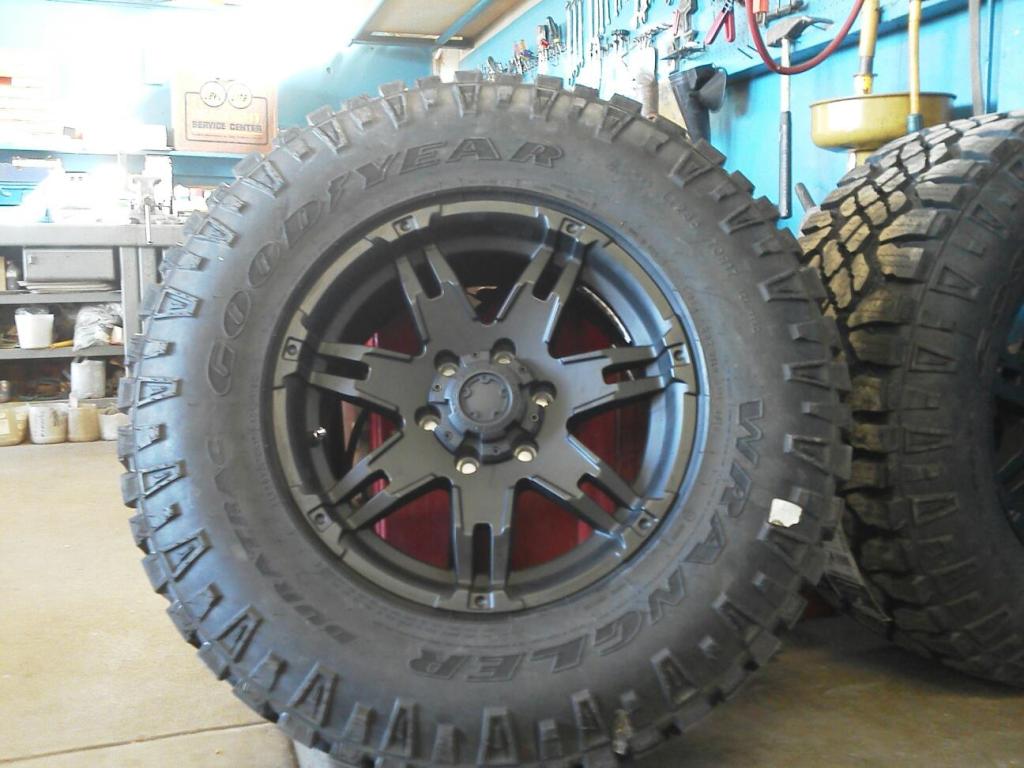
New wheels and tires to match my new bolt pattern.
17" ultra gauntlet flat black wheels
Goodyear Wrangler Duratrac
285/70 r 17 about 33 inches
17" ultra gauntlet flat black wheels
Goodyear Wrangler Duratrac
285/70 r 17 about 33 inches
04-29-2012, 04:33 PM
#14
Newbie
Thread Starter
Join Date: Apr 2012
Location: Casper, WY
Posts: 12
Likes: 0
Received 0 Likes
on
0 Posts
Year: 2001
Model: Cherokee
Engine: 4.0 L H.O.
The next step was building a bridge that goes over the top of the pumpkin to weld the drivers upper control arm mount to.
I used 3x1.5x.25" box tubing. I trimmed one end to fit snugly against the coil perch then measured to where I wanted the bend and cut an upside down v shaped notch in the bottom of the tubing. Then I heated the top while I bent the two sides of the v together. I did this twice then welded the seams.
I also had to trim the other side to fit the axle tube.
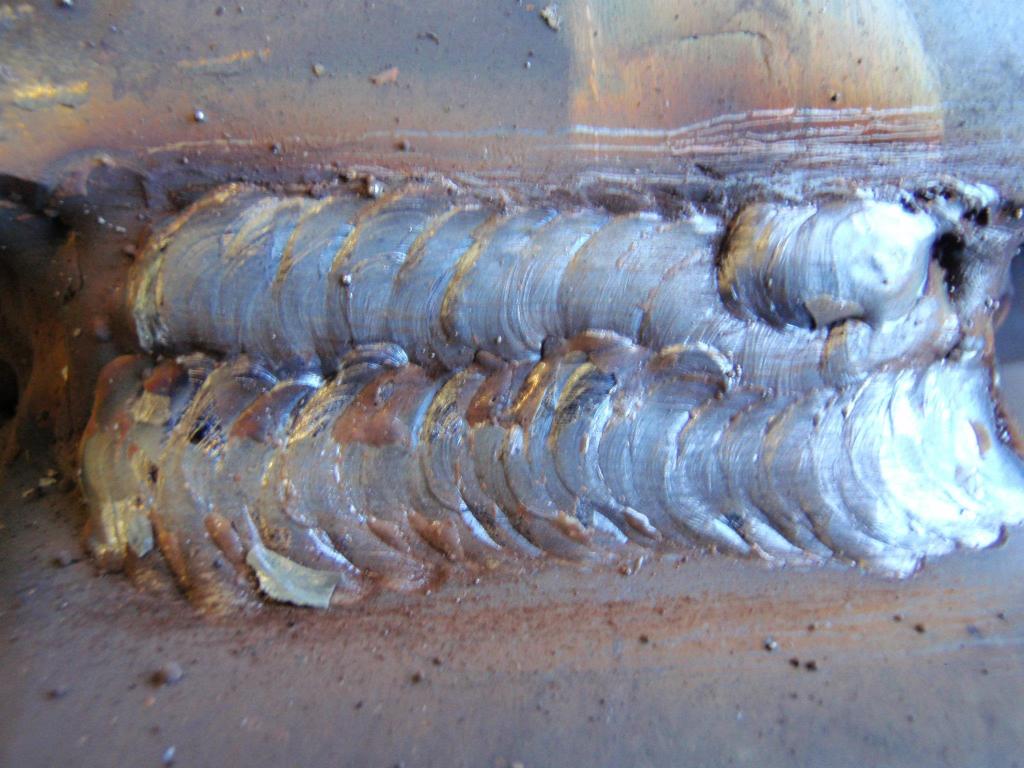
Getting better at welding
I used 3x1.5x.25" box tubing. I trimmed one end to fit snugly against the coil perch then measured to where I wanted the bend and cut an upside down v shaped notch in the bottom of the tubing. Then I heated the top while I bent the two sides of the v together. I did this twice then welded the seams.
I also had to trim the other side to fit the axle tube.
Getting better at welding
07-26-2012, 12:47 AM
#15
Newbie
Thread Starter
Join Date: Apr 2012
Location: Casper, WY
Posts: 12
Likes: 0
Received 0 Likes
on
0 Posts
Year: 2001
Model: Cherokee
Engine: 4.0 L H.O.
After the bridge was built I used an angle grinder to cut a notch in the top of the bridge for the upper control arm mount. The mount has to be angled 11 degrees off perpendicular away from the center of the axle.
Once the drivers side upper control arm mount was in place I moved to the passenger side. I bought premade UCA mounts from Clayton offroad. These are definately worth the money the save a lot of work, these are the only brackets that I actually bought. These are very nice and had johnny joints instead of the normal bushings which allows for more articulation and a little tolerance when building. The passenger side UCA mount has to be offset 11 degrees from perpendicular as well. I bought two premade right angle gussets from ballistic fab in order to give the passenger UCA mount more support (and they look pretty badass too).


Once the drivers side upper control arm mount was in place I moved to the passenger side. I bought premade UCA mounts from Clayton offroad. These are definately worth the money the save a lot of work, these are the only brackets that I actually bought. These are very nice and had johnny joints instead of the normal bushings which allows for more articulation and a little tolerance when building. The passenger side UCA mount has to be offset 11 degrees from perpendicular as well. I bought two premade right angle gussets from ballistic fab in order to give the passenger UCA mount more support (and they look pretty badass too).

Thread
Thread Starter
Forum
Replies
Last Post
Currently Active Users Viewing This Thread: 1 (0 members and 1 guests)

