Another DD XJ Build
 07-29-2018, 09:18 PM
#76
Member
Thread Starter

Join Date: Jun 2017
Posts: 107
Likes: 0
Received 0 Likes
on
0 Posts
Year: 2001
Model: Cherokee(XJ)
Engine: 4.0
Now that street car takeover is over I finally got back to jeeping. Now just seam sealer and bed lining away from actually being done with the driver's side.


 honestly one of my favorite builds
07-30-2018, 08:52 AM
honestly one of my favorite builds
07-30-2018, 08:52 AM
#78
Seasoned Member

Looks like it's going really well! Hope you're taking a minute to appreciate your hard work, you've been non-stop! Cheers
07-31-2018, 12:11 PM
#80
Member
Thread Starter
Join Date: Jun 2017
Posts: 107
Likes: 0
Received 0 Likes
on
0 Posts
Year: 2001
Model: Cherokee(XJ)
Engine: 4.0
I'll appreciate it a lot more once it is finished. It should look familiar, yours is one of several builds I looked at for inspiration for how to pull this off.
Lunch time update. Got the top side of the floor pan seam sealed and greeted the UPS guy who brought the next piece.
I'll get back out there after work and seam seal the underside and then move on to the passenger side.
Lunch time update. Got the top side of the floor pan seam sealed and greeted the UPS guy who brought the next piece.


I'll get back out there after work and seam seal the underside and then move on to the passenger side.
07-31-2018, 03:40 PM
#81
Member
Thread Starter
Join Date: Jun 2017
Posts: 107
Likes: 0
Received 0 Likes
on
0 Posts
Year: 2001
Model: Cherokee(XJ)
Engine: 4.0
Post work, pre-dinner update.
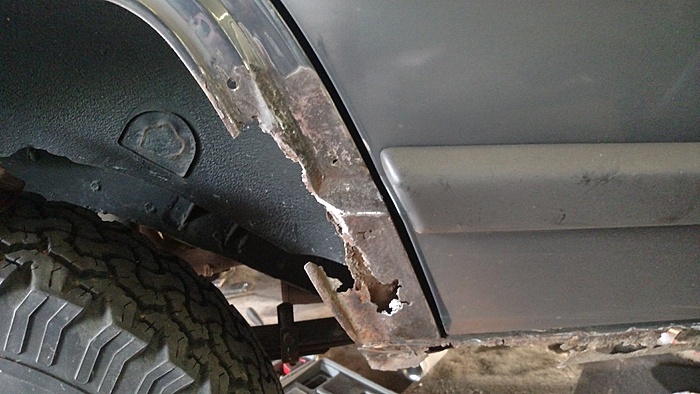
I'm officially swearing off rusty vehicles from this point on. That panel is going to be a pita to make.

I'm officially swearing off rusty vehicles from this point on. That panel is going to be a pita to make.
08-01-2018, 07:35 AM
#83
Member
Thread Starter
Join Date: Jun 2017
Posts: 107
Likes: 0
Received 0 Likes
on
0 Posts
Year: 2001
Model: Cherokee(XJ)
Engine: 4.0
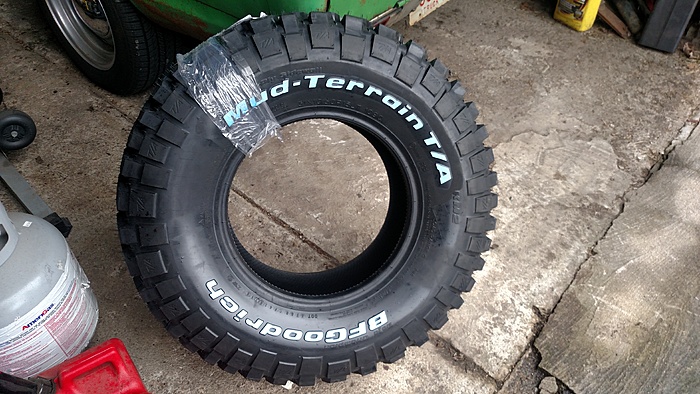
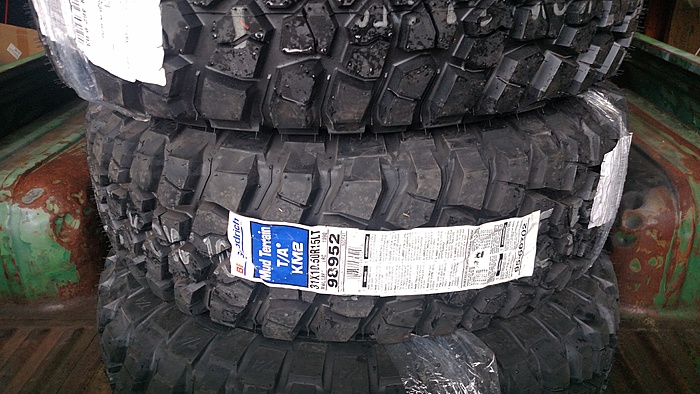
I considered going up to 33s, but since I'm not regearing anytime soon, I've already setup the bump stops for 31s and the fact that these were $300 cheaper I decided to stick with the plan.
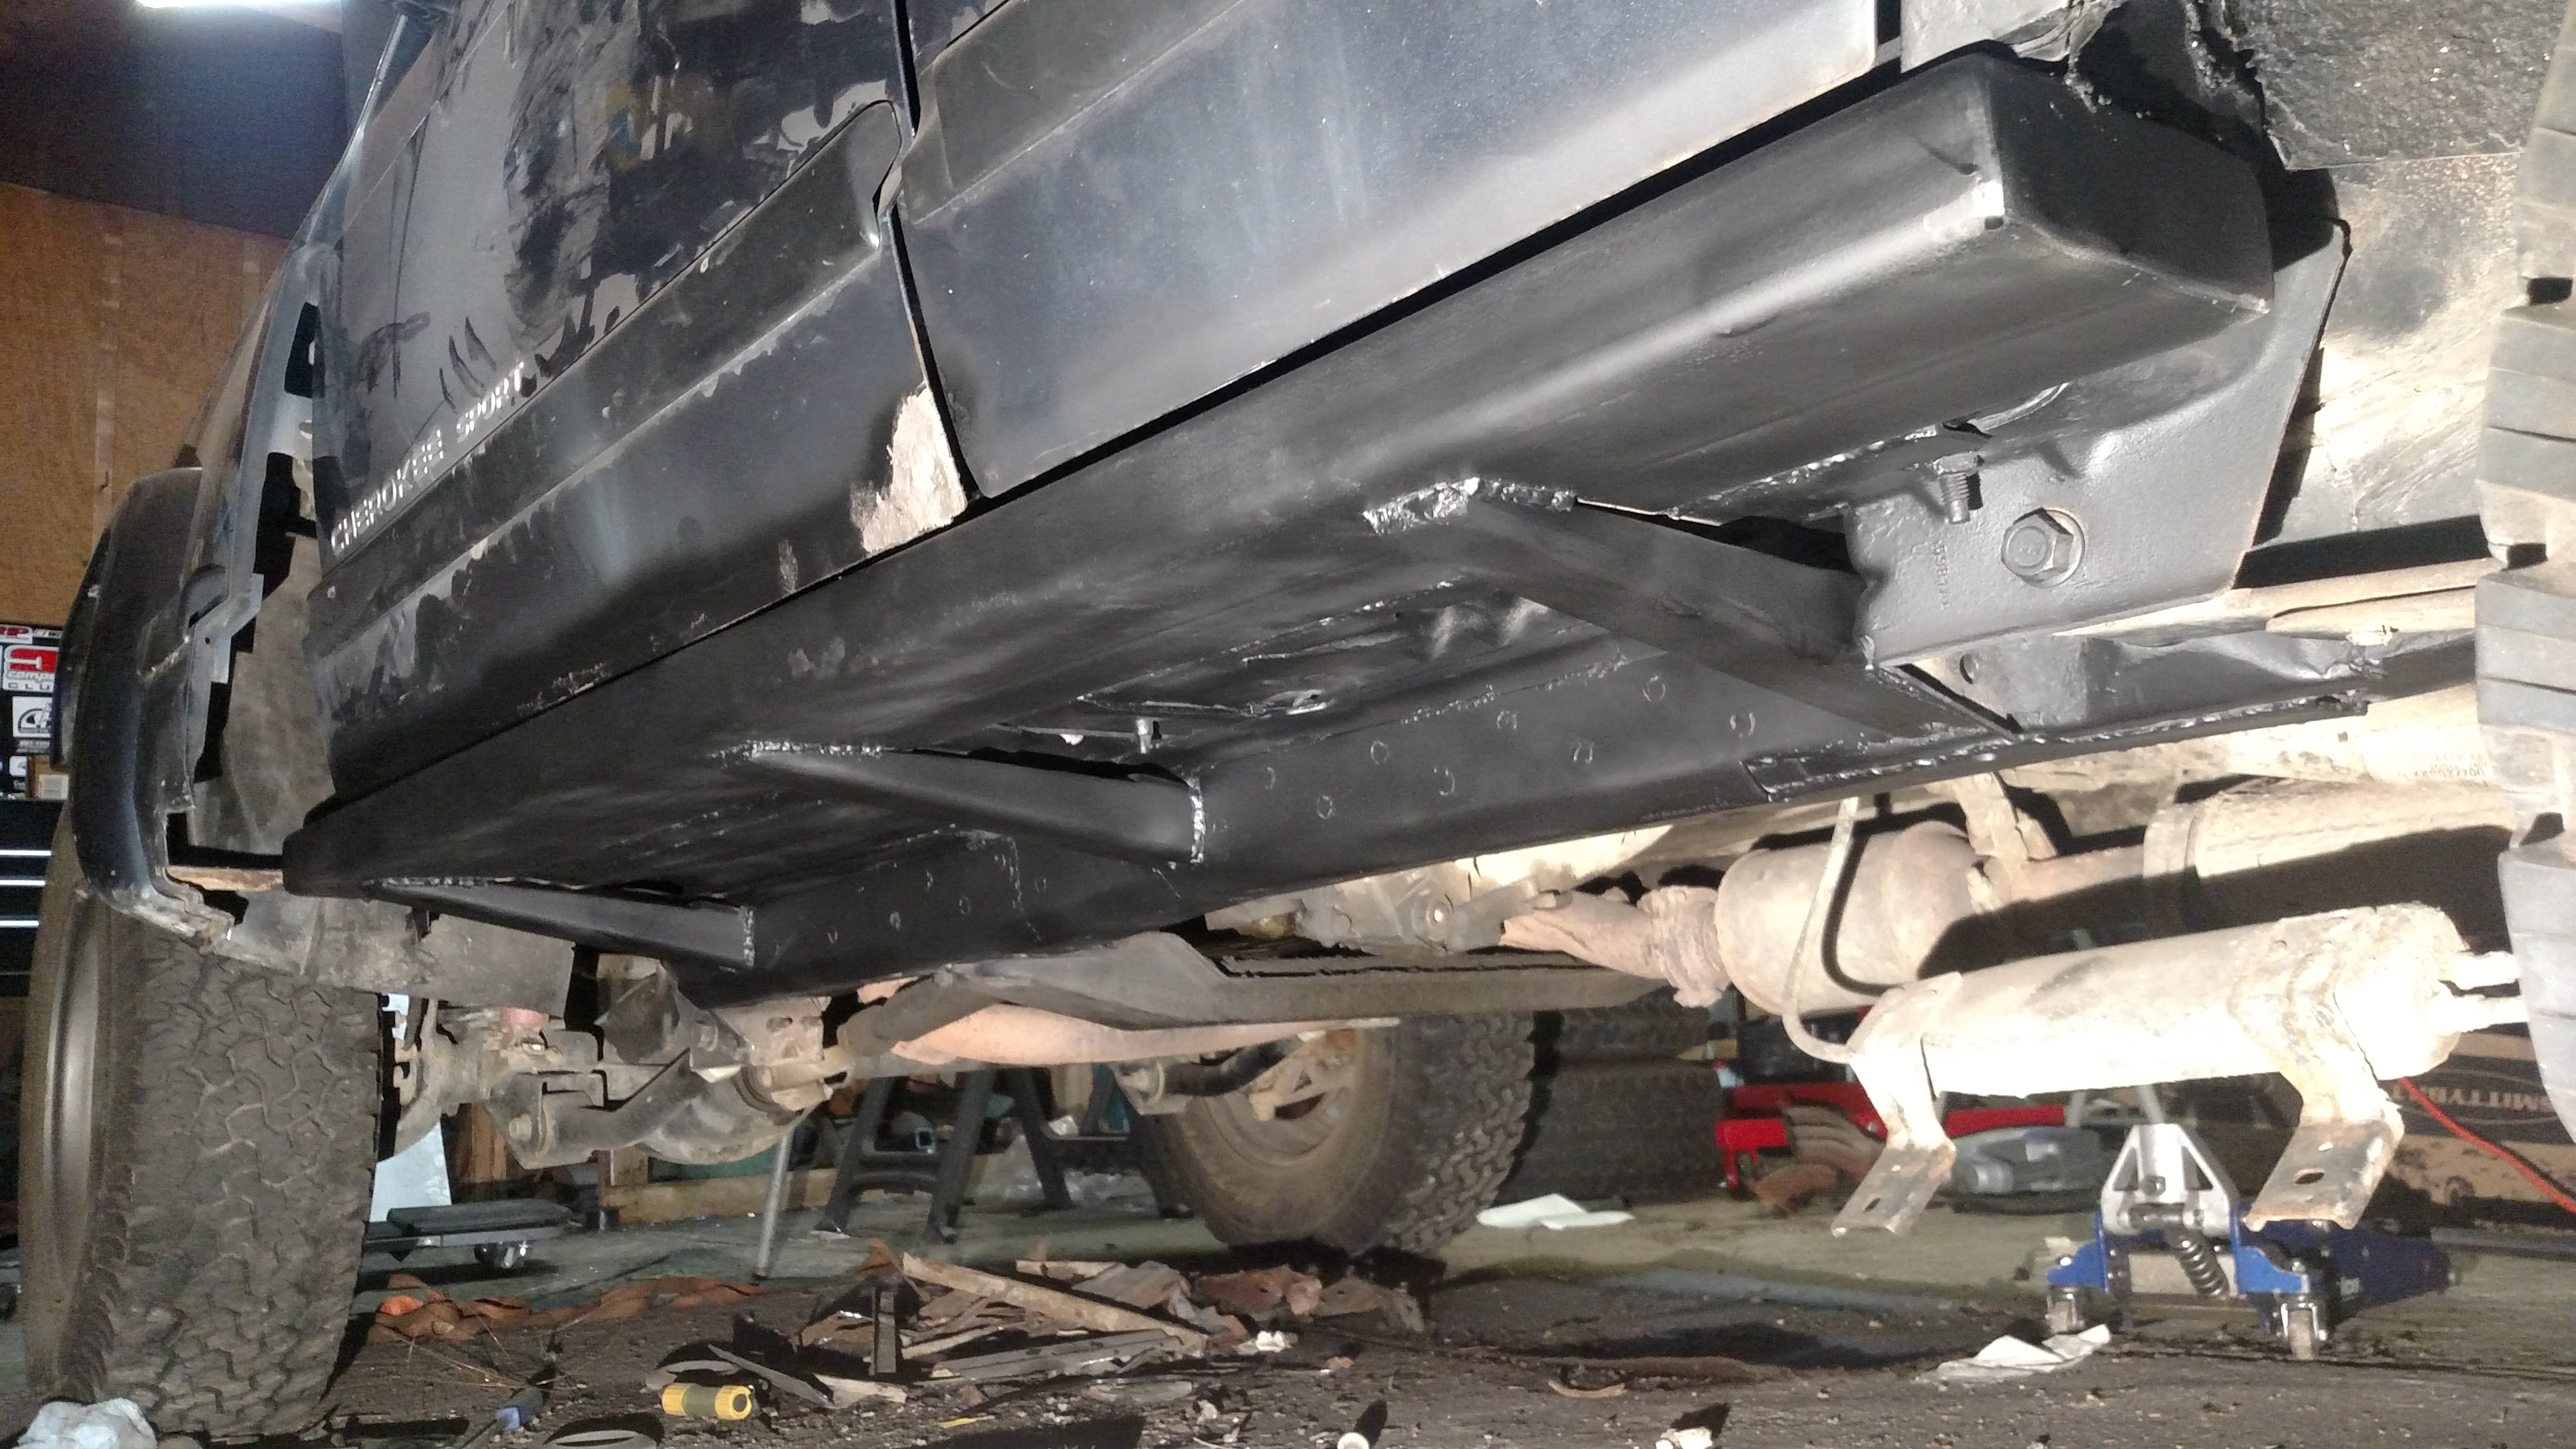
Aside from being an unholy mess the driver's side seam sealing is finished.
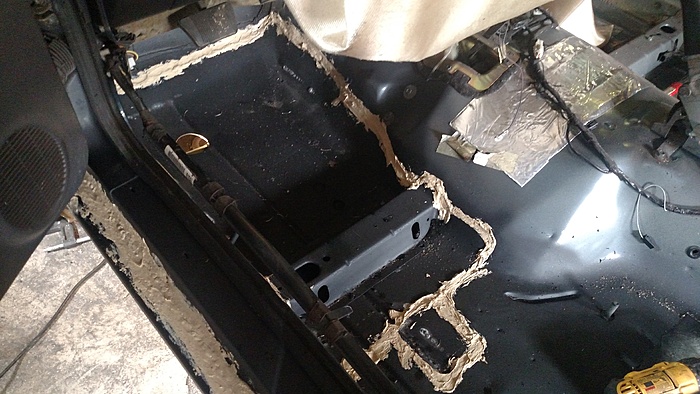
Then I got most of the passenger side cut away, and whipped up some templates for the sections I have to replace.
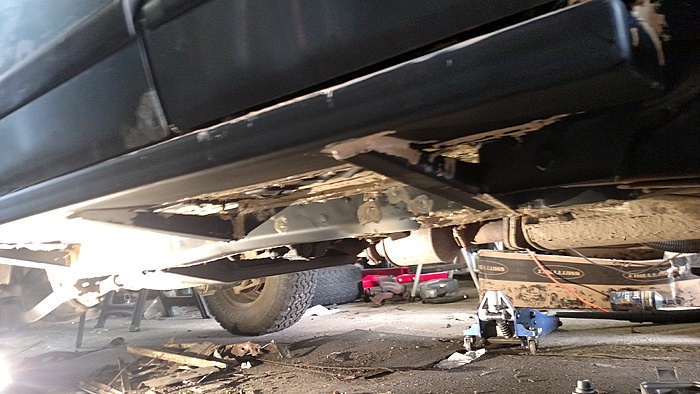
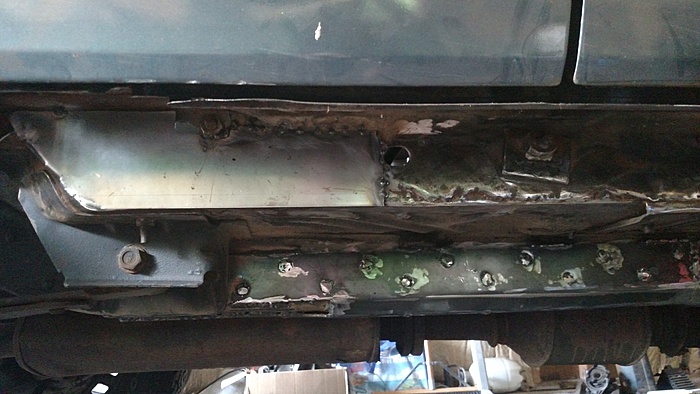
Frame rail is also stripped and ready for stiffening. I opted to use the blow torch and scraper method for getting the undercoat off and it did a great job. Not sure if it is any faster than just going at it with a grinder, but it is a heck of a lot less messy.
Aside from being an unholy mess the driver's side seam sealing is finished.


Then I got most of the passenger side cut away, and whipped up some templates for the sections I have to replace.

Frame rail is also stripped and ready for stiffening. I opted to use the blow torch and scraper method for getting the undercoat off and it did a great job. Not sure if it is any faster than just going at it with a grinder, but it is a heck of a lot less messy.
08-01-2018, 08:44 AM
#84
Newbie

Join Date: Apr 2014
Location: St. Louis, MO
Posts: 7
Likes: 0
Received 0 Likes
on
0 Posts
Year: 1987
Model: Cherokee
Engine: 4.0
 08-01-2018, 08:48 AM
#85
Member
Thread Starter
Join Date: Jun 2017
Posts: 107
Likes: 0
Received 0 Likes
on
0 Posts
Year: 2001
Model: Cherokee(XJ)
Engine: 4.0
 08-05-2018, 10:15 PM
#88
Member
Thread Starter
Join Date: Jun 2017
Posts: 107
Likes: 0
Received 0 Likes
on
0 Posts
Year: 2001
Model: Cherokee(XJ)
Engine: 4.0
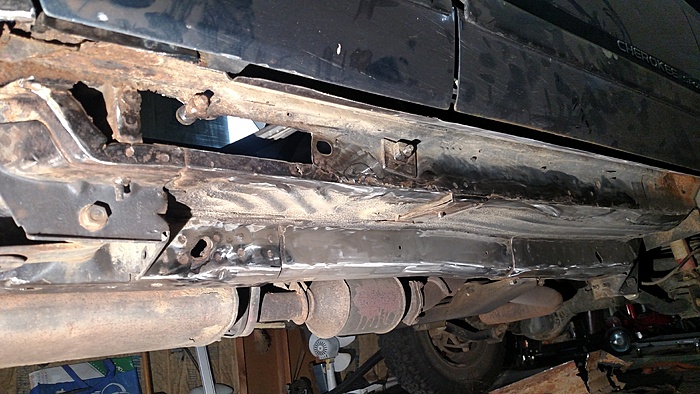
On tonight's episode of "I'm spending too much time on this project", I install the last of the frame rail stiffeners and put finishing touches on the side pan patch panle before once again running out of wire for the welder.
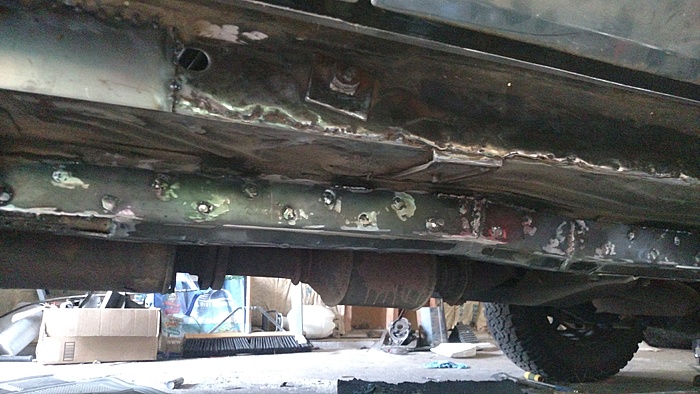
I also have 3 of likely 5 of the panels that will be used to fix the behind the door, under the flare bit if the passenger rear made and ready to get burned in after I finish the 2x6.


I also have 3 of likely 5 of the panels that will be used to fix the behind the door, under the flare bit if the passenger rear made and ready to get burned in after I finish the 2x6.
Last edited by indianaXJones; 08-05-2018 at 10:21 PM.
 08-07-2018, 06:29 AM
#90
Seasoned Member
Surprised you can even stand up straight after all that work hunched over underneath let alone lug that rack aroun lol. Looks sweet tho, Craigslist find? I'd like to get me one of them but I need to stop breaking stuff first.