Another DD XJ Build
 Yeah that's definitely a good thing he isn't doing electrical for a job

 06-15-2018, 05:57 AM
#47
Newbie

Join Date: Apr 2014
Location: St. Louis, MO
Posts: 7
Likes: 0
Received 0 Likes
on
0 Posts
Year: 1987
Model: Cherokee
Engine: 4.0
Clean electrical work is something drilled into me by my electrical engineer father... It's worth every minute you spend to keep it clean organized and labeled when you have to find a problem down the road 
06-20-2018, 12:02 PM
#48
Member
Thread Starter

Join Date: Jun 2017
Posts: 107
Likes: 0
Received 0 Likes
on
0 Posts
Year: 2001
Model: Cherokee(XJ)
Engine: 4.0
Picked up my new roof rails the other day.

Some assembly required.
Then the next day I got to replace my starter.
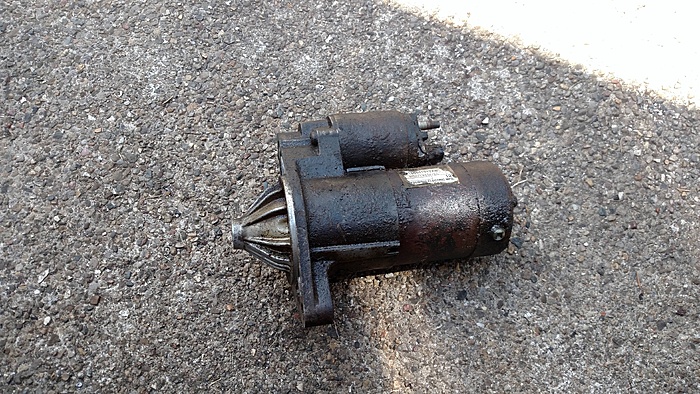
The old girl had seen some stuff, mostly oil from the filter housing.
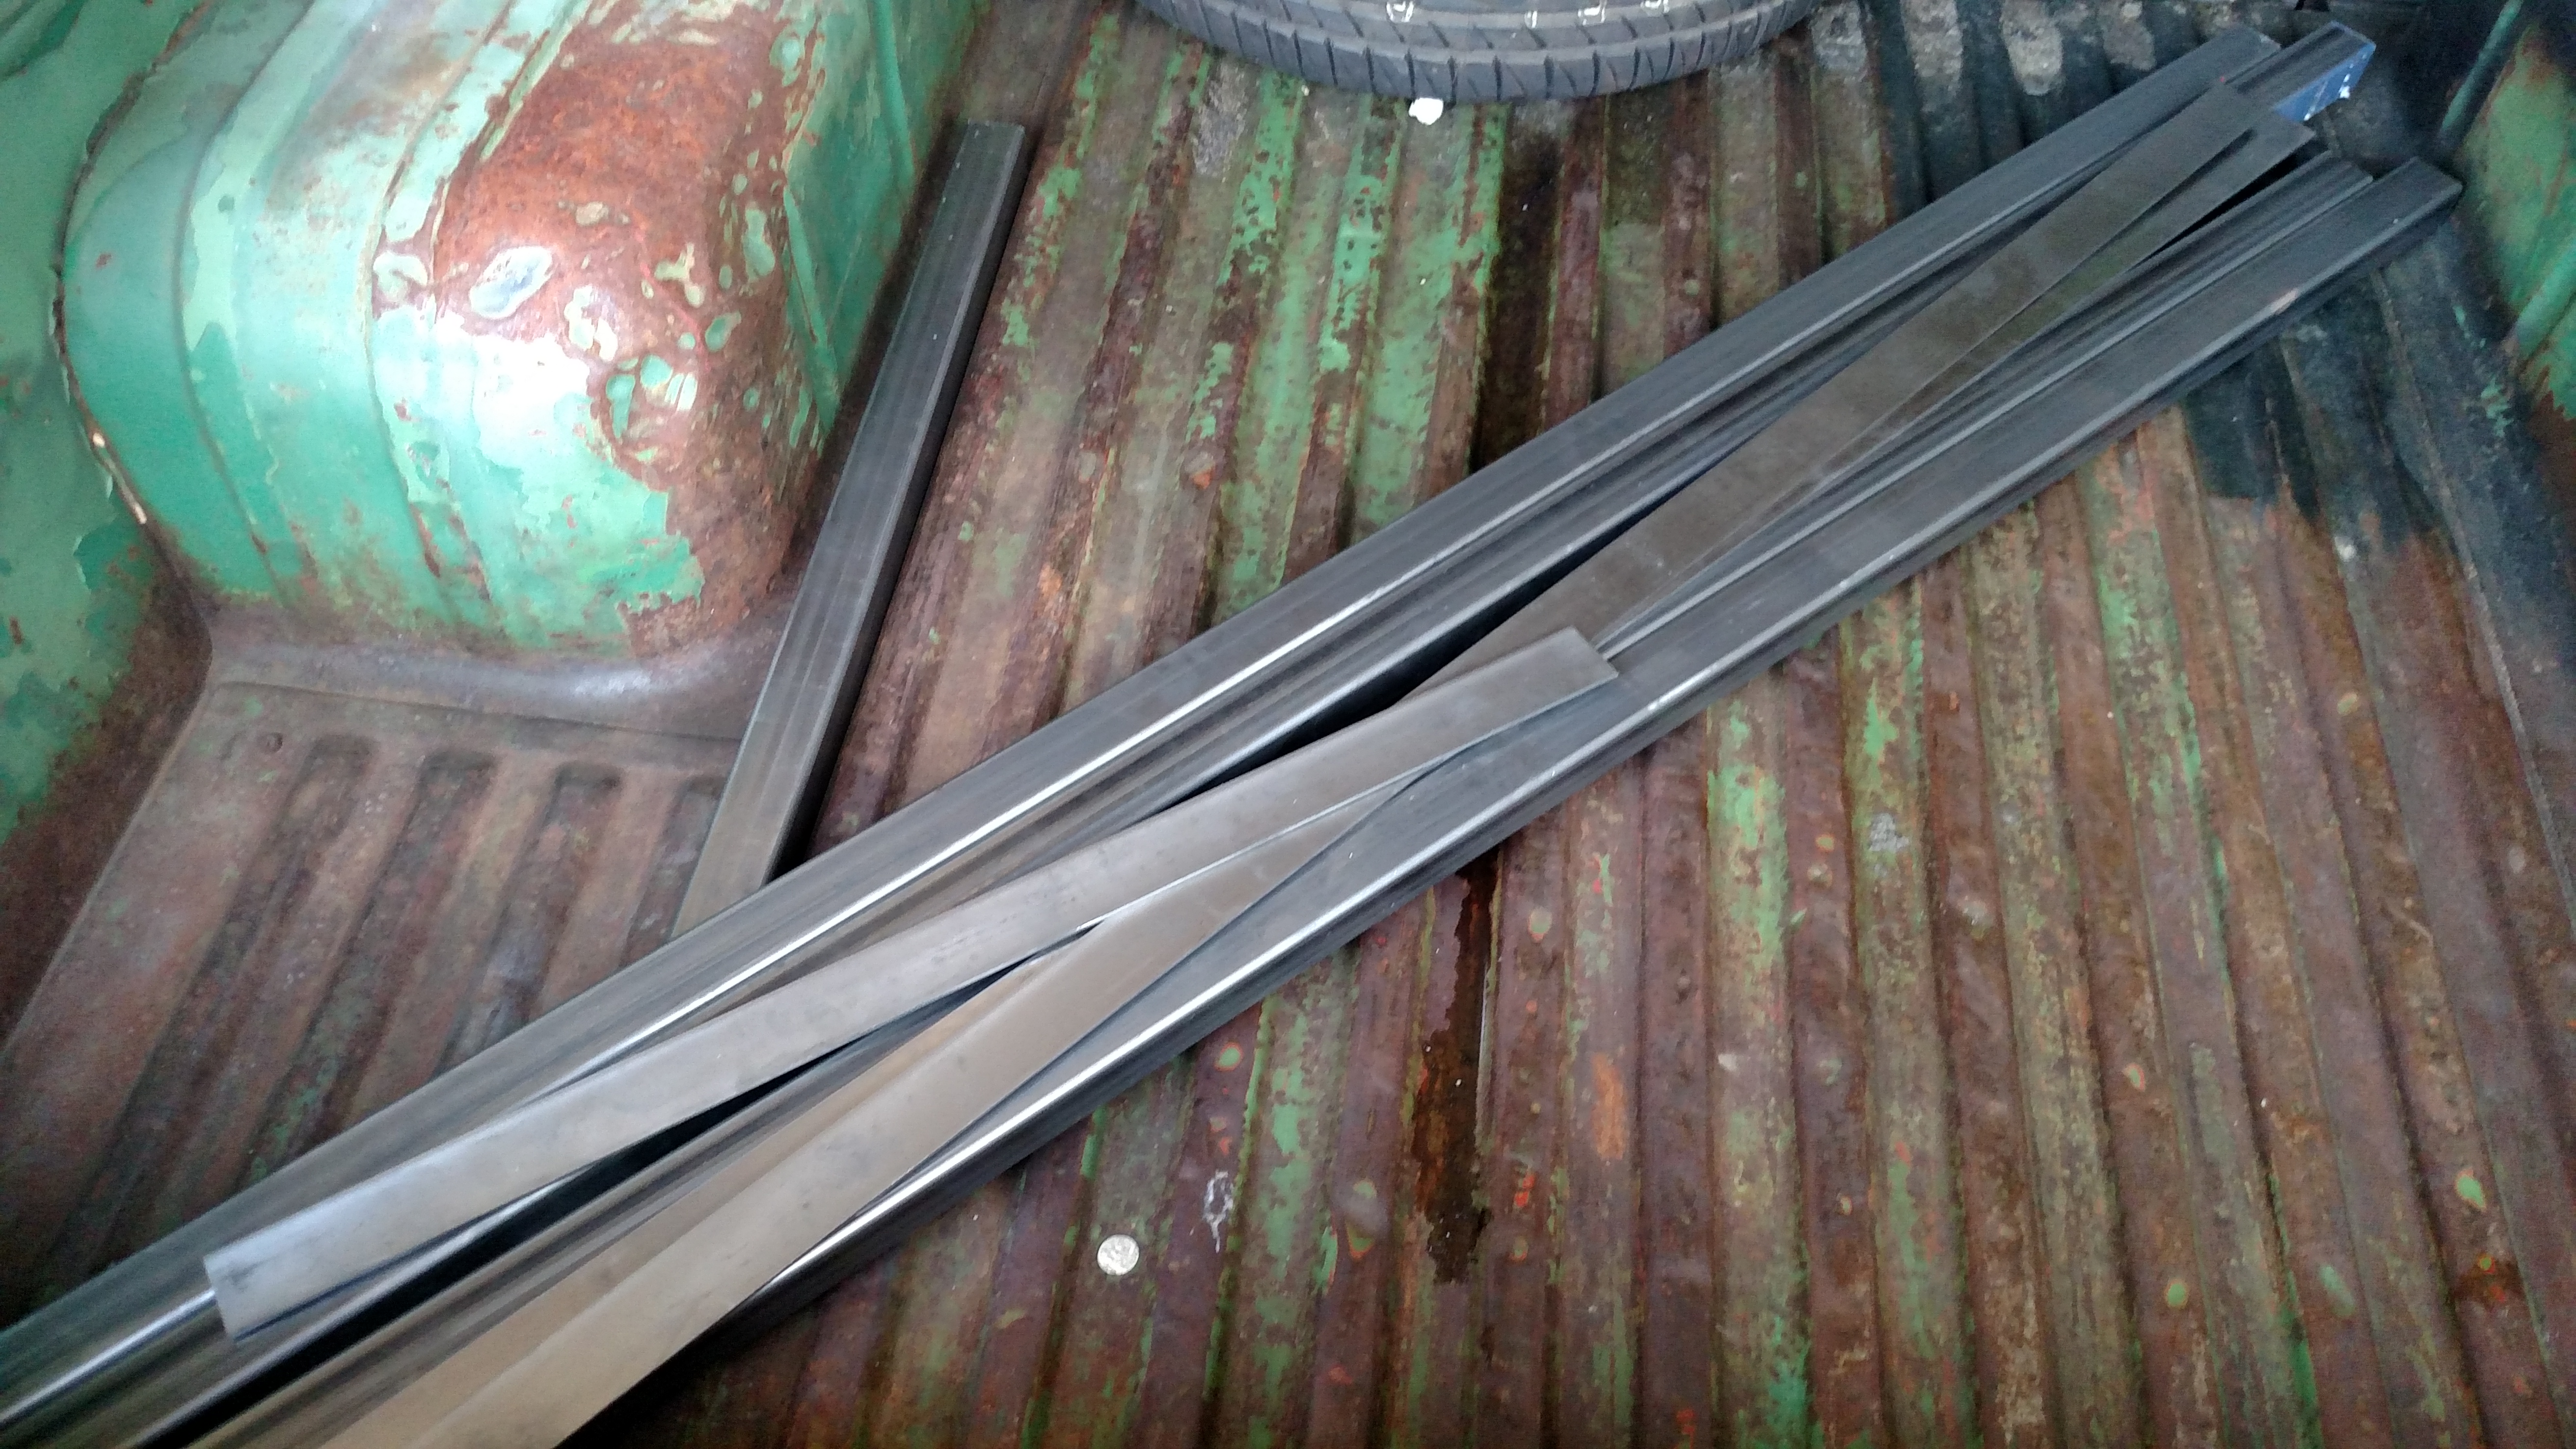
Some assembly required.
Then the next day I got to replace my starter.

The old girl had seen some stuff, mostly oil from the filter housing.
 07-05-2018, 06:54 PM
#51
Member
Thread Starter
Join Date: Jun 2017
Posts: 107
Likes: 0
Received 0 Likes
on
0 Posts
Year: 2001
Model: Cherokee(XJ)
Engine: 4.0
Well, it has begun and you can guess how it is going to go.
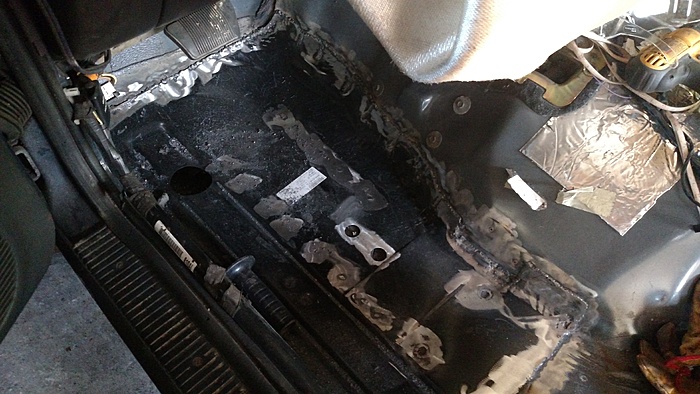
Got my first top side look at the floors, and only broke one seat bolt in the process.
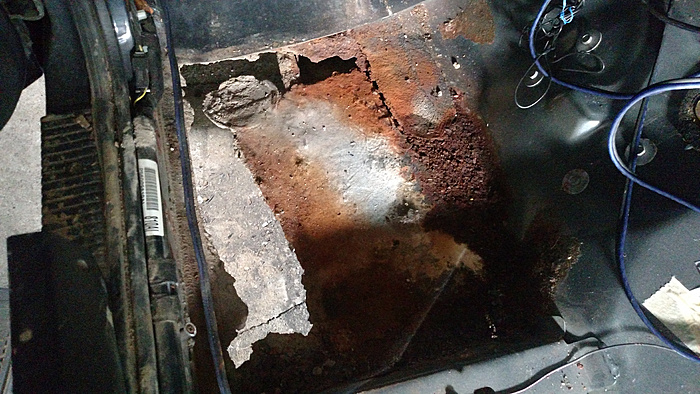
The sound deadening was structural.
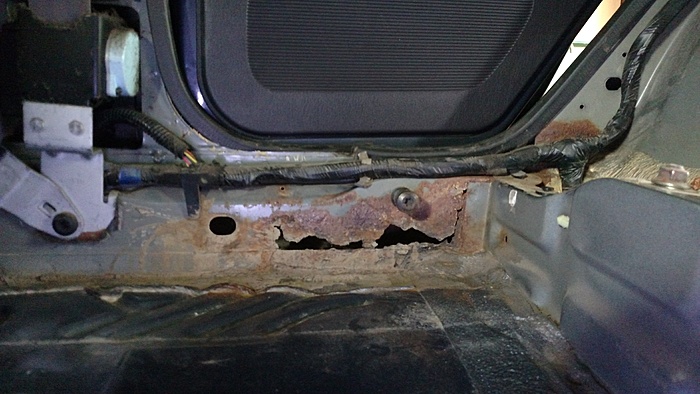
Passenger side pan has seen better days.

Driver side is better at least.
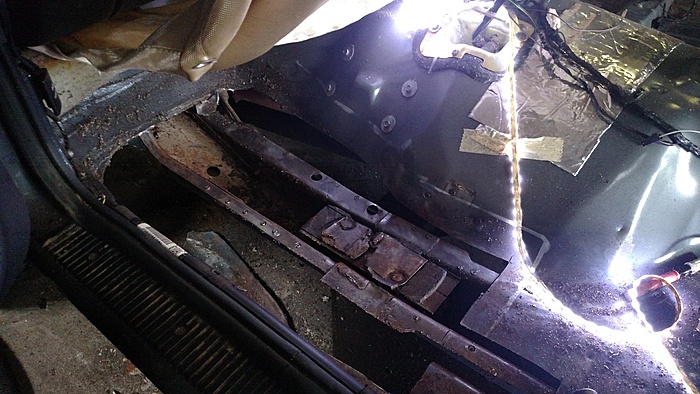
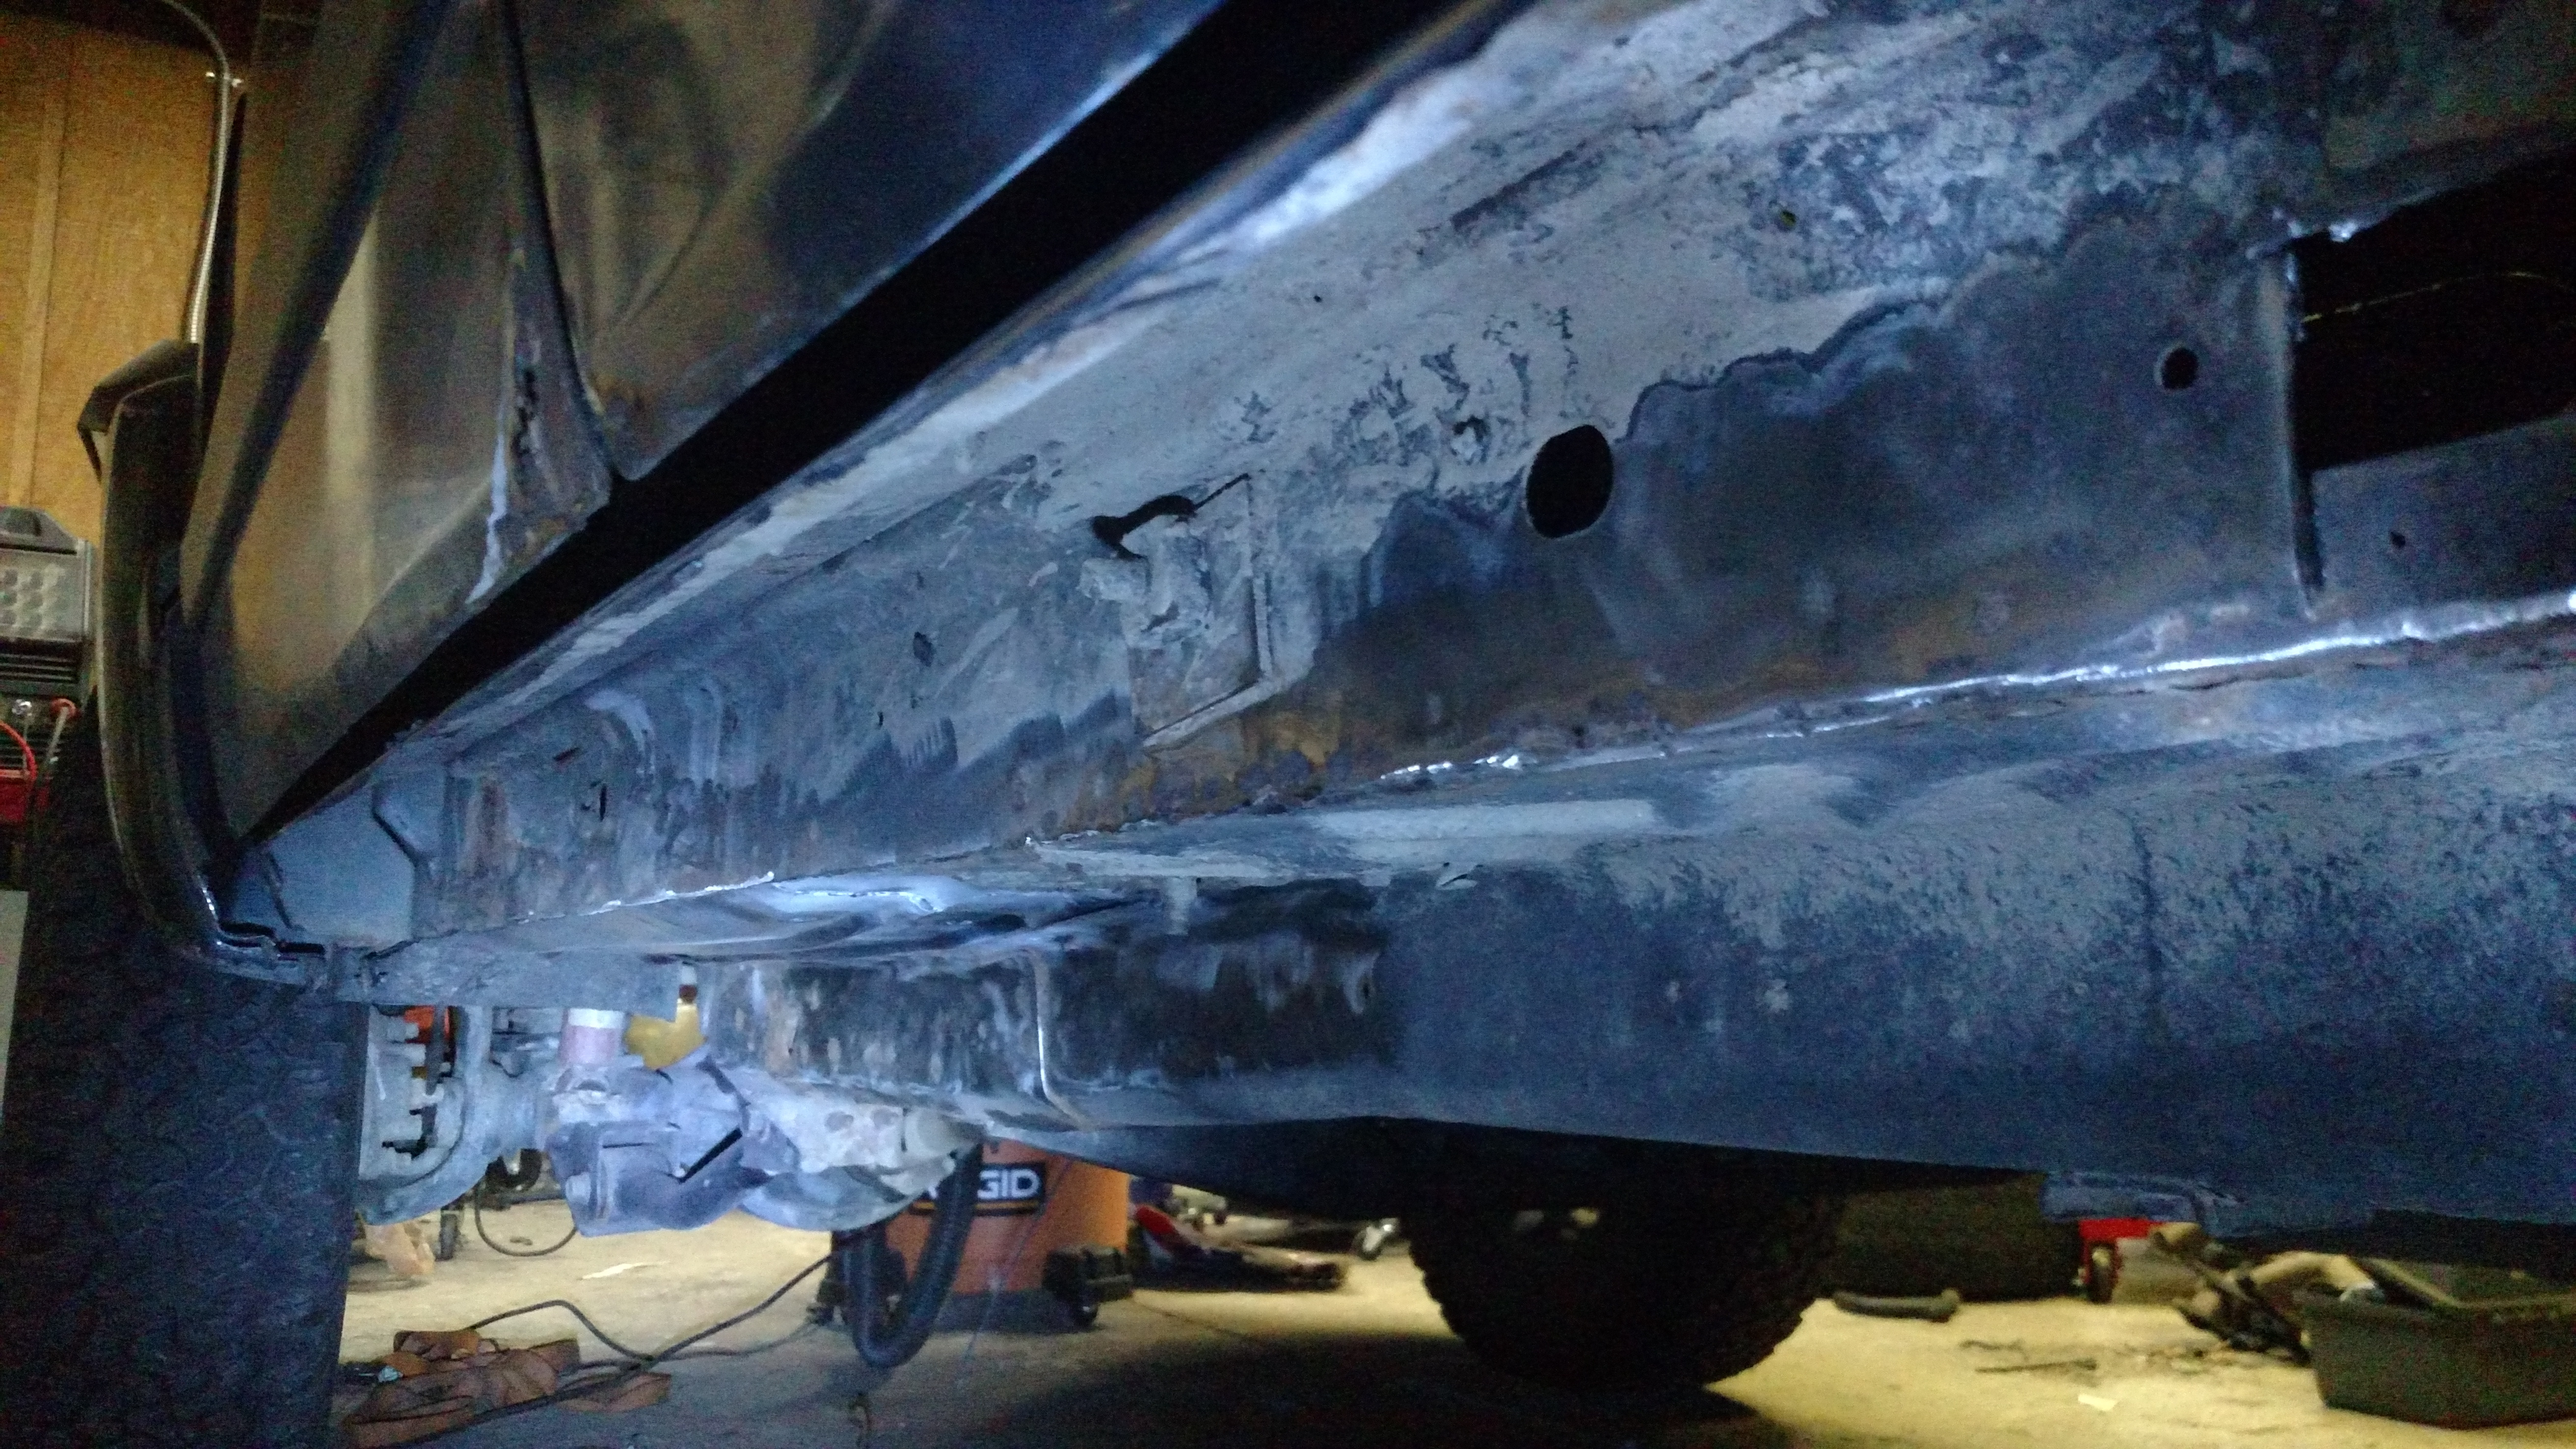
Rough cut done and frame rail spot welds cut out. Still have some trimming, grinding and cleaning to do before i can do a proper test of the floor pan and welding.
The hazard fraught spot weld cutter did the trick, and for $5. I hope to never need it again. Have I mentioned I don't like doing body work?
More to follow when I quit being lazy.

Got my first top side look at the floors, and only broke one seat bolt in the process.

The sound deadening was structural.

Passenger side pan has seen better days.

Driver side is better at least.

Rough cut done and frame rail spot welds cut out. Still have some trimming, grinding and cleaning to do before i can do a proper test of the floor pan and welding.
The hazard fraught spot weld cutter did the trick, and for $5. I hope to never need it again. Have I mentioned I don't like doing body work?
More to follow when I quit being lazy.
Last edited by indianaXJones; 07-05-2018 at 06:59 PM.
07-05-2018, 10:43 PM
#52
Member
Thread Starter
Join Date: Jun 2017
Posts: 107
Likes: 0
Received 0 Likes
on
0 Posts
Year: 2001
Model: Cherokee(XJ)
Engine: 4.0
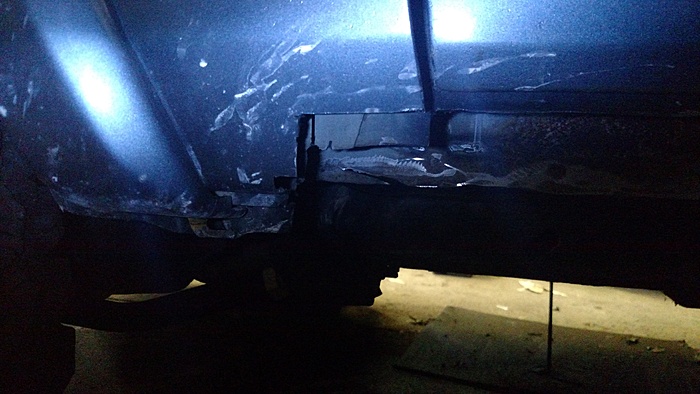
Well, I figured 11pm was late enough that I should put down the grinder.

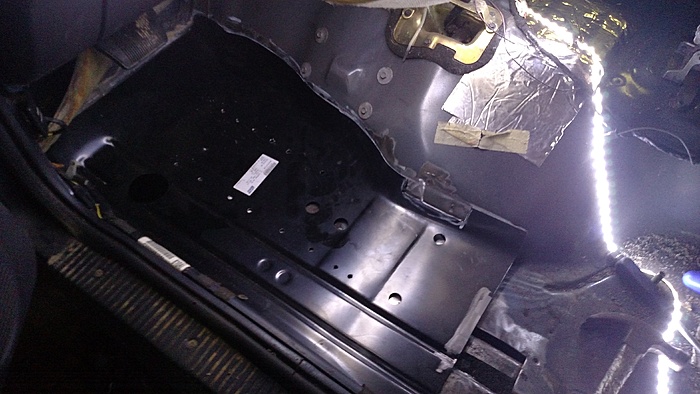
Still needs some work, but fits pretty well.
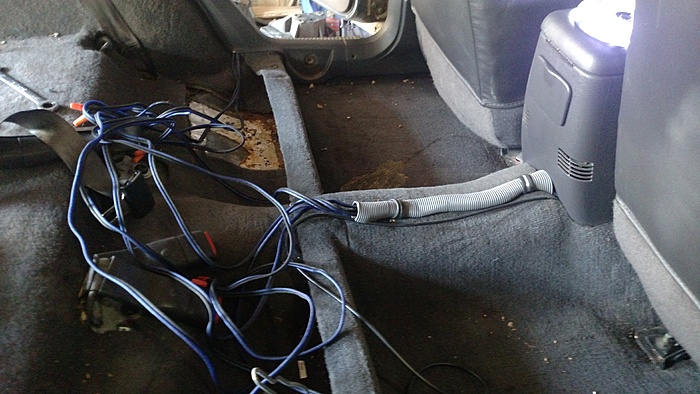
Forgot to post earlier. The PO's amp/speaker wire rooting.


Still needs some work, but fits pretty well.
Forgot to post earlier. The PO's amp/speaker wire rooting.

07-06-2018, 09:28 PM
#53
Member
Thread Starter
Join Date: Jun 2017
Posts: 107
Likes: 0
Received 0 Likes
on
0 Posts
Year: 2001
Model: Cherokee(XJ)
Engine: 4.0
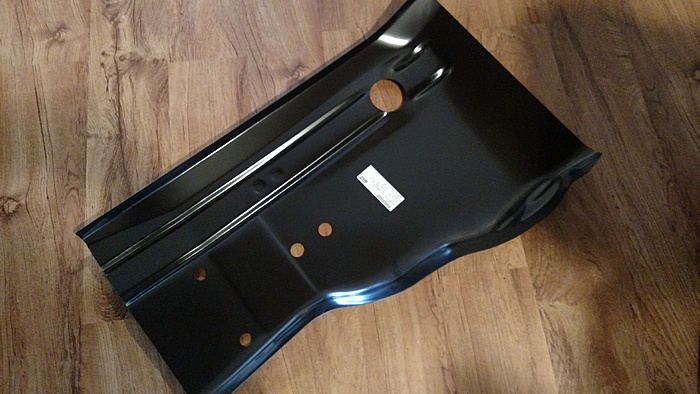
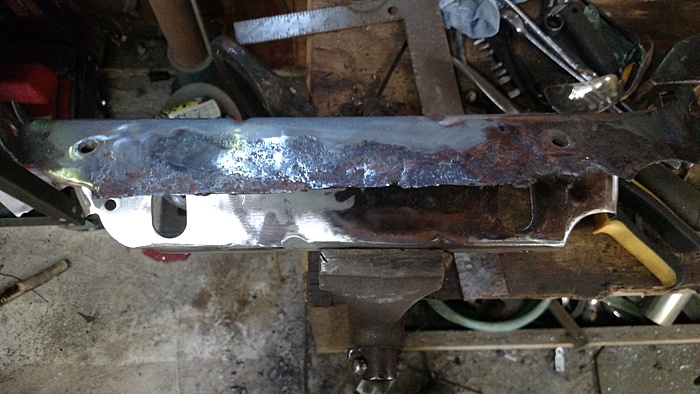
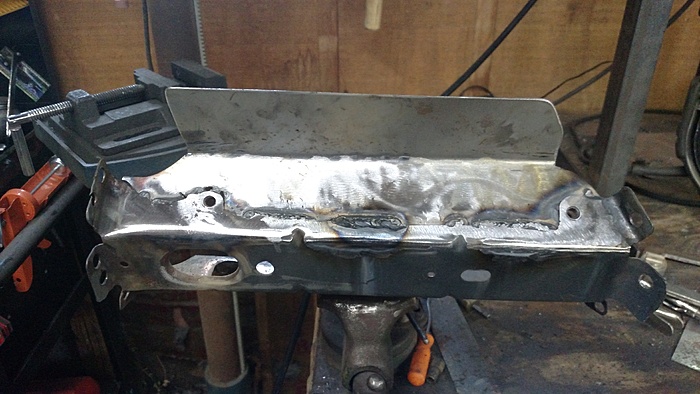
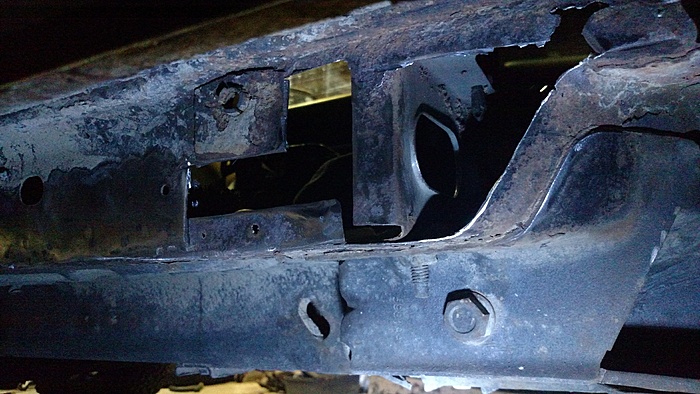
All welded up and a light smack with the flap disc.
Also got the little square behind that pan patched up as well. With that out of the way I turned my attention to the driver seat mount.
Not in great shape, but raided my scrap pile and came up with something that should get the job done.

Also got the little square behind that pan patched up as well. With that out of the way I turned my attention to the driver seat mount.

Not in great shape, but raided my scrap pile and came up with something that should get the job done.
 07-10-2018, 06:22 PM
#54
Member
Thread Starter
Join Date: Jun 2017
Posts: 107
Likes: 0
Received 0 Likes
on
0 Posts
Year: 2001
Model: Cherokee(XJ)
Engine: 4.0
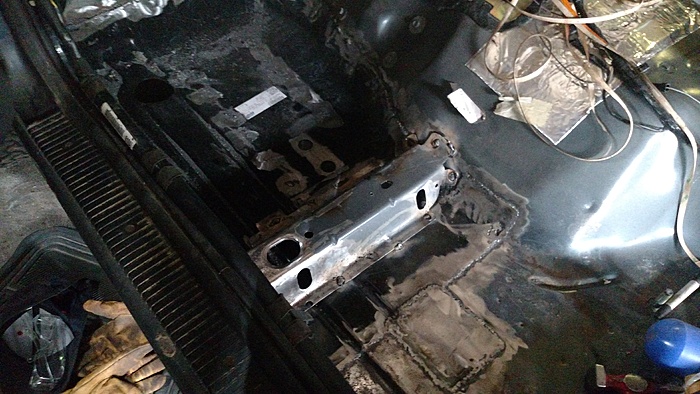
Seat mount is back in.
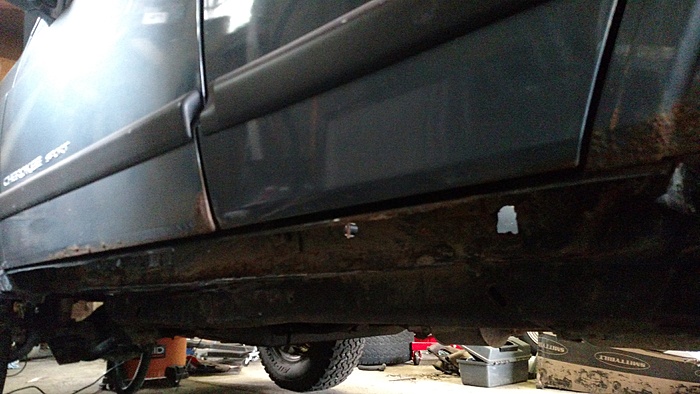
Driver's side rocker is cut out.
Pulled the rear flare off and unsurprisingly managed to snap every bolt holding the brackets on. Also came up with another reason to project scope creep.
I'll likely now also be doing a bit of cutting and folding before figuring how to reattach the flares.

Driver's side rocker is cut out.

Pulled the rear flare off and unsurprisingly managed to snap every bolt holding the brackets on. Also came up with another reason to project scope creep.

I'll likely now also be doing a bit of cutting and folding before figuring how to reattach the flares.
07-12-2018, 08:12 AM
#55
Seasoned Member

Nice Jeep, subbed. Looking at installing those shackle brackets myself at some point. Keep up the good work, these Jeeps don't save themselves!
07-12-2018, 03:01 PM
#56
Member
Thread Starter
Join Date: Jun 2017
Posts: 107
Likes: 0
Received 0 Likes
on
0 Posts
Year: 2001
Model: Cherokee(XJ)
Engine: 4.0
Thanks, I'll keep plugging away at it, but I'd be lying if I said I weren't getting a little tired of trying to save this thing. To that end, I got a little more done last night, not as far as I'd like to be at this point, but not far off.
Got the rocker ground back. I'll be going the angle iron route for side pan tie in with the 2x6s

Roughly the patch I need to make for the driver's side side pan.
I have decided to end the new rockers at the front edge of the originals. Plus side is that I get to keep the forward of the two lower fender mounting bolts.
That was really as far as I got other than cleaning out a bunch of seam sealer. I'm beginning to understand why there is so much seam sealer everywhere.

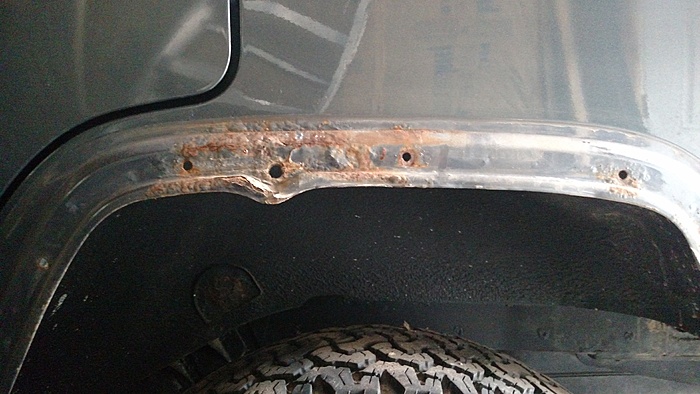
That is not a rust hole, but actually a factory panel gap. Granted from the factory that just opened up into the rocker and not to the ground, but still.
Got the rocker ground back. I'll be going the angle iron route for side pan tie in with the 2x6s
Roughly the patch I need to make for the driver's side side pan.

I have decided to end the new rockers at the front edge of the originals. Plus side is that I get to keep the forward of the two lower fender mounting bolts.

That was really as far as I got other than cleaning out a bunch of seam sealer. I'm beginning to understand why there is so much seam sealer everywhere.
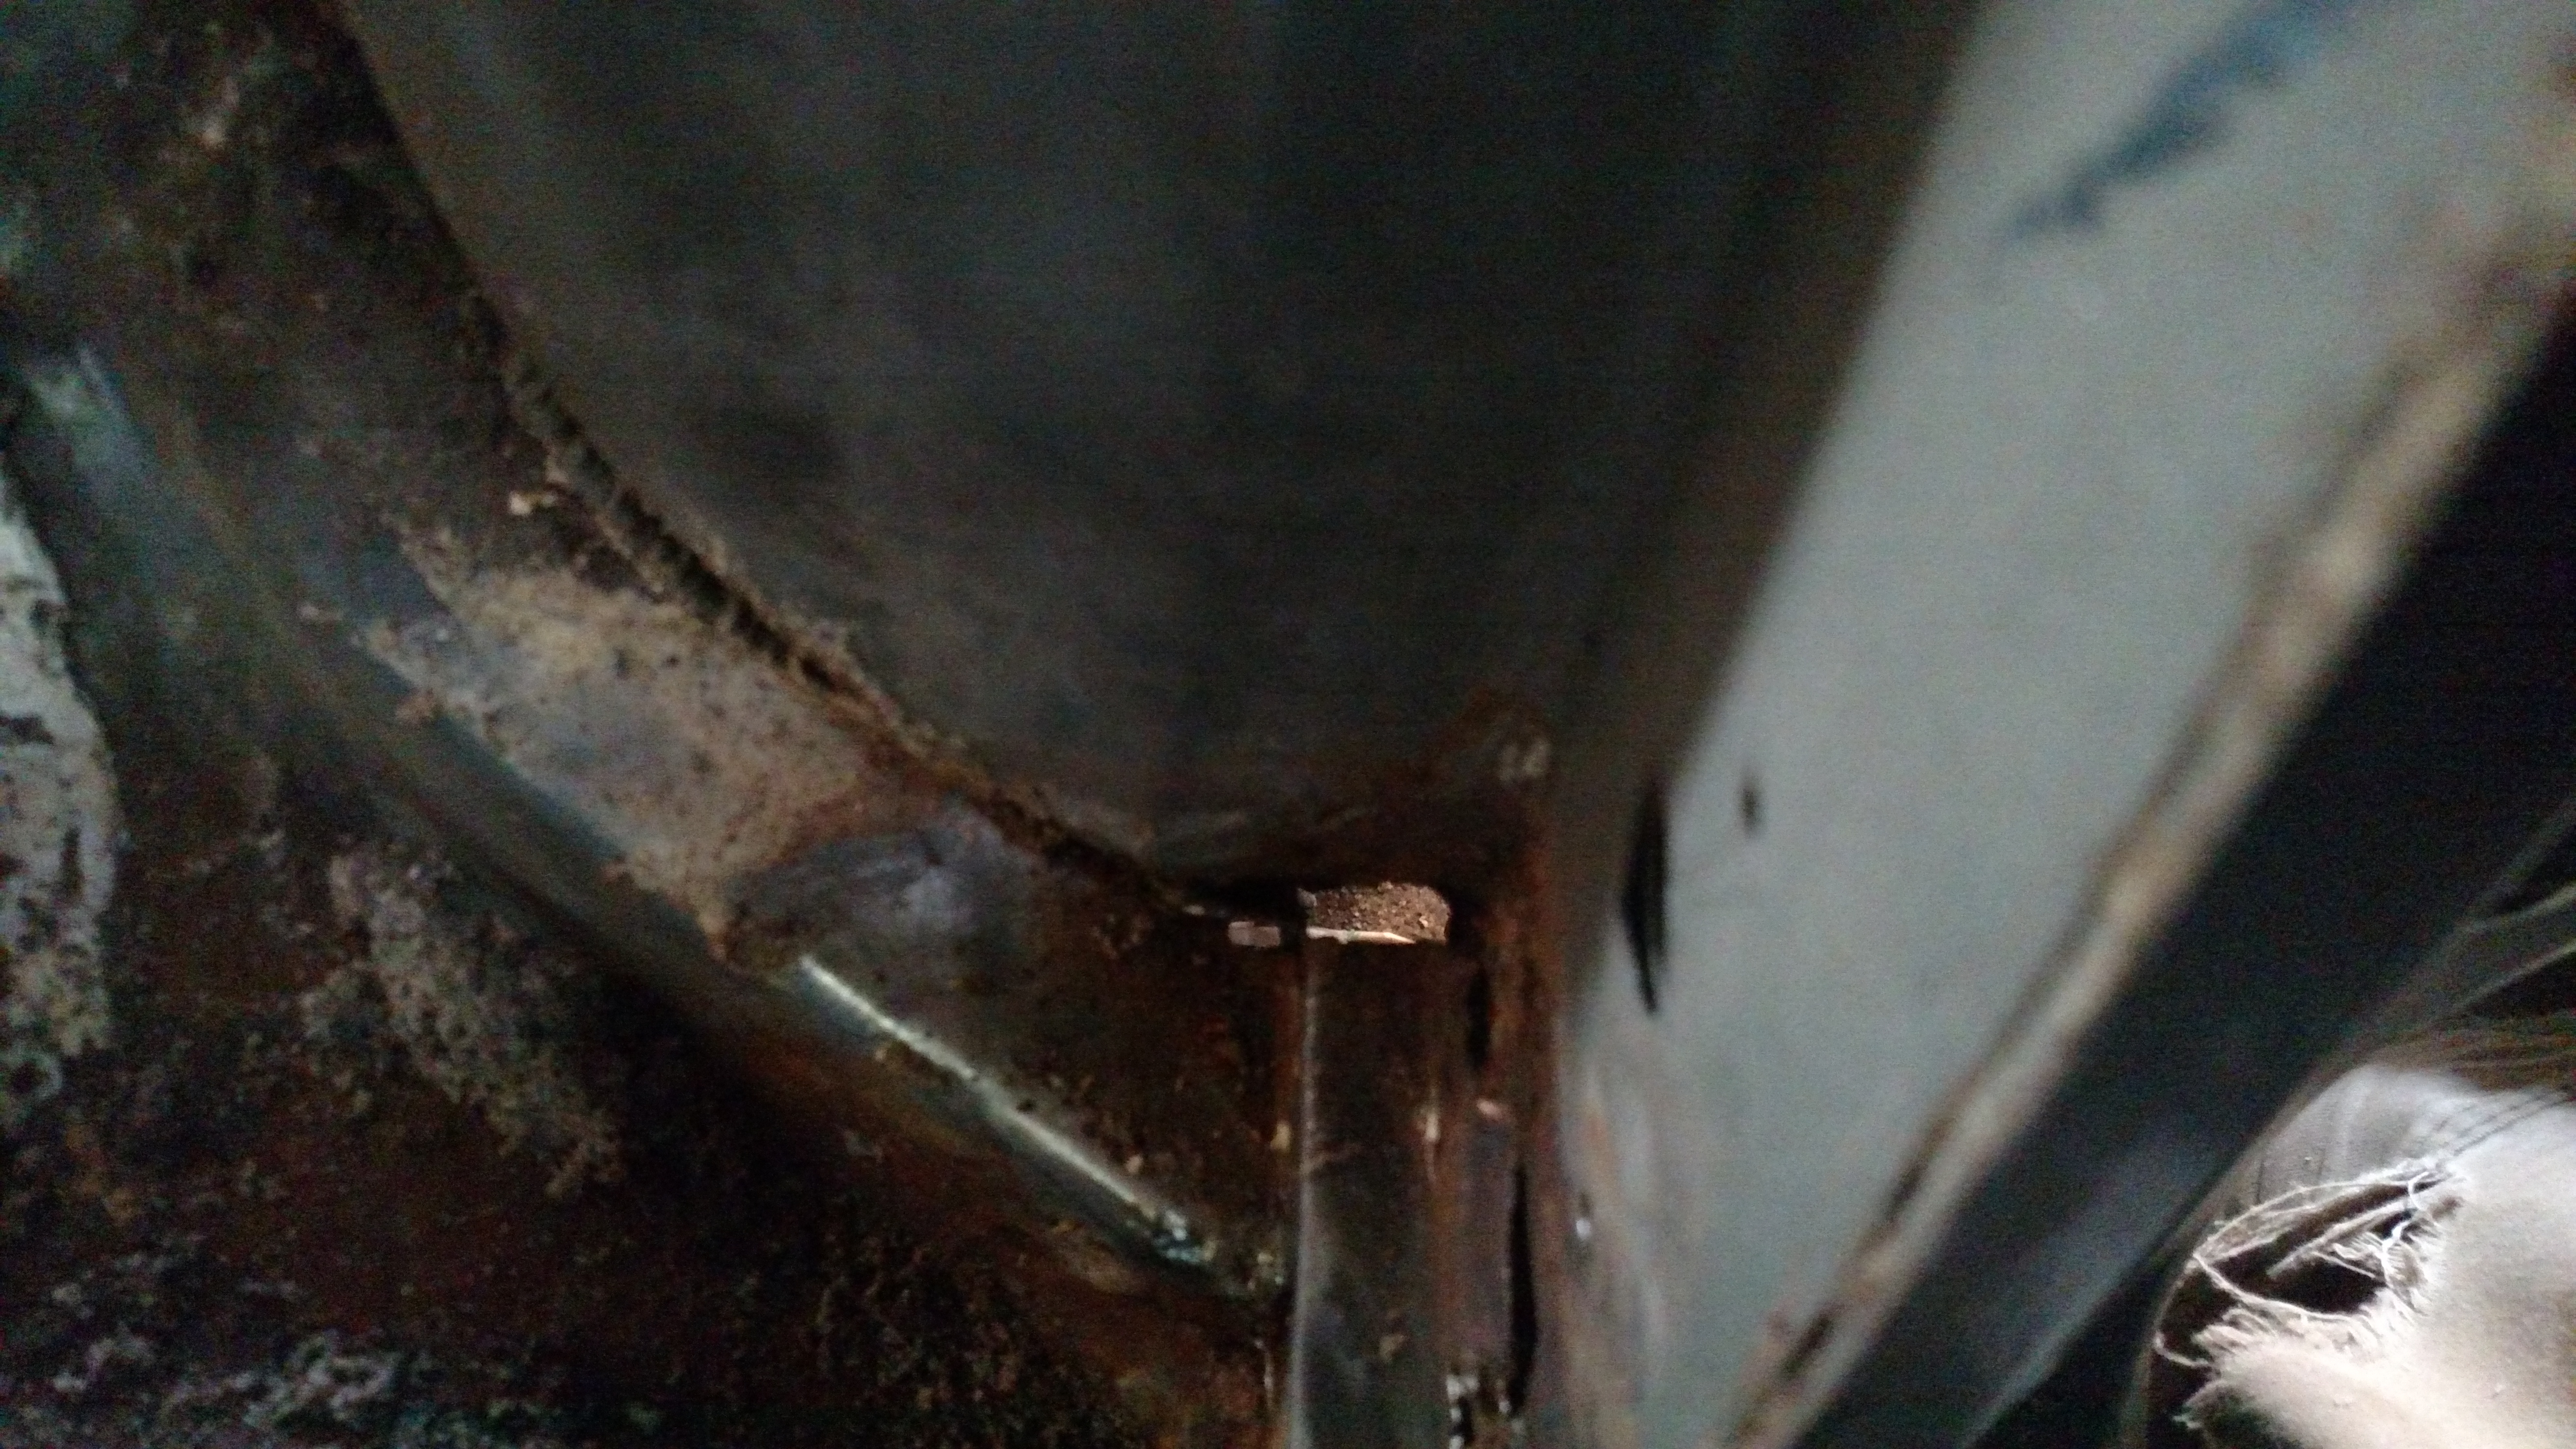
That is not a rust hole, but actually a factory panel gap. Granted from the factory that just opened up into the rocker and not to the ground, but still.
07-12-2018, 04:13 PM
#57
Member
Join Date: Feb 2010
Location: Tacoma, Washington
Posts: 199
Likes: 0
Received 2 Likes
on
2 Posts
Year: 1995
Model: Cherokee
Engine: 4.0 inline 6
Also had some reflective insulation laying around from another project so added some to the rail and #3 and #4 injectors.
If I may ask.. "Why did you do that? what purpose does it serve to wrap the fuel rail and #3 and #4 injectors?
If I may ask.. "Why did you do that? what purpose does it serve to wrap the fuel rail and #3 and #4 injectors?
07-12-2018, 05:45 PM
#58
CF Veteran
For the angle iron I rotated them to face toward the backing black like a mini stiffener. More penetration to spread the load of the sliders versus having one side on the body. Keep up the good work!
07-12-2018, 06:17 PM
#59
Member
Thread Starter
Join Date: Jun 2017
Posts: 107
Likes: 0
Received 0 Likes
on
0 Posts
Year: 2001
Model: Cherokee(XJ)
Engine: 4.0
I had been planning to do the shelf style myself, but will have to take a look when u actually get to test fitting.
07-12-2018, 08:05 PM
#60
CF Veteran
To help the common misfire from heat soak, which is most notible in those two holes. The combination of hear shielding and swapping to newer style injectors has made it very rare for me.
I had been planning to do the shelf style myself, but will have to take a look when u actually get to test fitting.
I had been planning to do the shelf style myself, but will have to take a look when u actually get to test fitting.