The Battle Wagon
 03-09-2011, 11:12 PM
#1
Resident Zombie Hunter
Thread Starter
Join Date: Aug 2010
Location: Virginia
Posts: 3,542
Likes: 0
Received 2 Likes
on
2 Posts
Year: 1997
Model: Cherokee
Engine: 4.0L
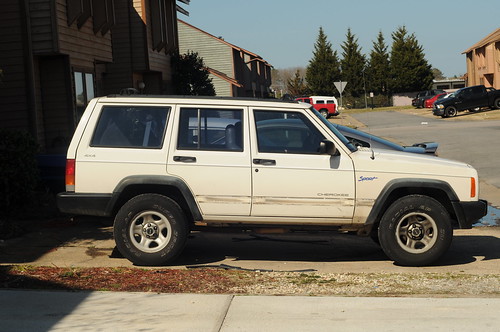
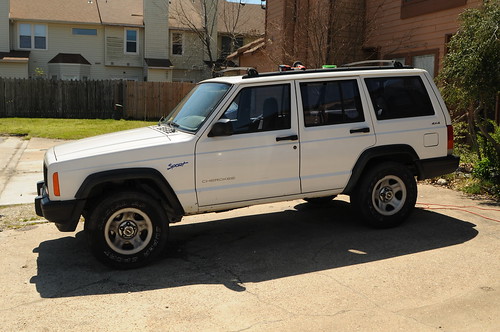
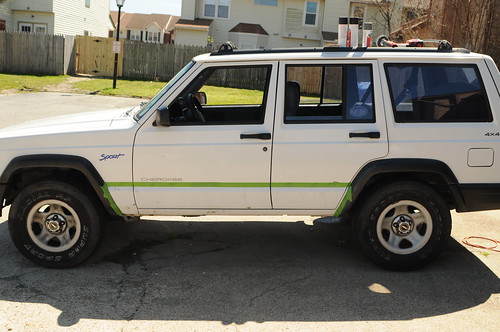
Well I'm starting to build up my Jeep. Very slowly but surely. I've had it for like 8 years and the only thing I've done is the CD player. So here she is in pure stock form.
Last edited by Red82; 08-25-2012 at 04:58 PM.
 03-09-2011, 11:30 PM
#2
Resident Zombie Hunter
Thread Starter
Join Date: Aug 2010
Location: Virginia
Posts: 3,542
Likes: 0
Received 2 Likes
on
2 Posts
Year: 1997
Model: Cherokee
Engine: 4.0L
Alright so I'm starting my build by removing the black molding. It was fading a bit and was already starting to come off on the ends anyways so I thought I'd ditch it and then bedline the rockers.
So here are the things that I've used to remove the molding.
First off... a hair dryer...
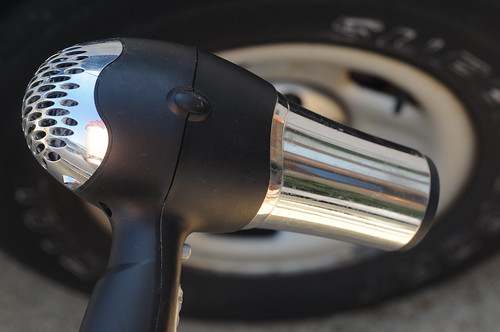
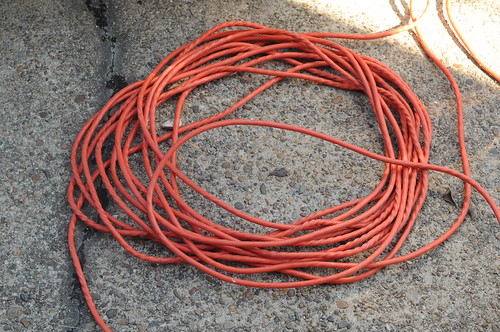
...and to use that hair dryer you'll need power!
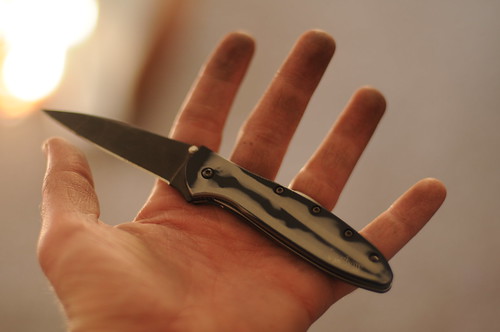
And a knife or small prying tool... maybe a screwdriver...
So once I got everything together I started using the hair dryer on the ends of the molding that were already coming up.
And basically just started pullin' on the molding. Pretty simply really. Once it starts going it goes pretty good. Once it slows down when you're pulling just apply heat with the blow dryer.
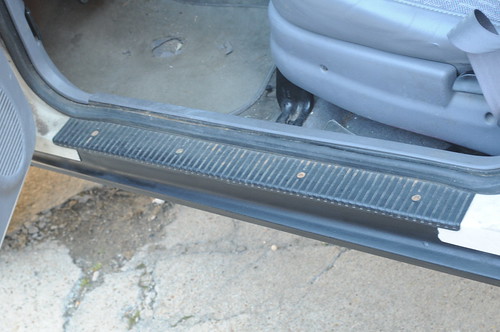
The little molding pieces on the front fenders between the wheel well and front doors were a pain because they weren't really loose already. That's where the knife came in to play. I was careful not to get too fresh with it and the paint. While I'm going to paint it I may not do it right away. So with some patience and just a little work you're left with this:
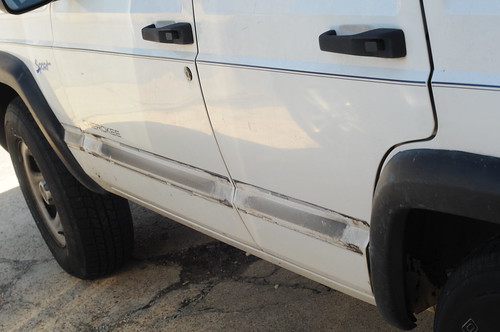
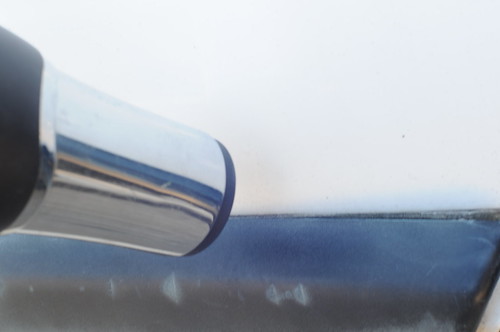
You can see close up that there will be a bunch of the double sided tape left over.
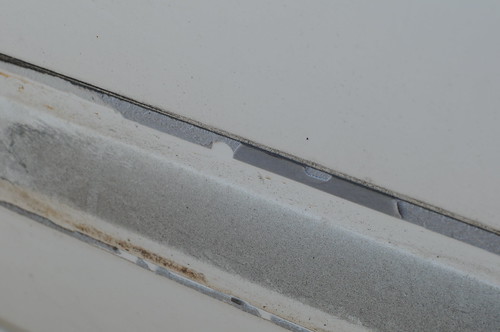
I used the blow dryer again and warmed it up. When its really thick you can roll it up with your thumbs/fingers. I also used a little goo gone to get rid of some of the smaller pieces that didn't want to come up.
This part sucks. So just suck it up. Once you do that you're good to go. I've still got some dirt that needs to be cleaned up but that'll work itself out when I paint it.
So here are the things that I've used to remove the molding.
First off... a hair dryer...
...and to use that hair dryer you'll need power!
And a knife or small prying tool... maybe a screwdriver...
So once I got everything together I started using the hair dryer on the ends of the molding that were already coming up.
And basically just started pullin' on the molding. Pretty simply really. Once it starts going it goes pretty good. Once it slows down when you're pulling just apply heat with the blow dryer.
The little molding pieces on the front fenders between the wheel well and front doors were a pain because they weren't really loose already. That's where the knife came in to play. I was careful not to get too fresh with it and the paint. While I'm going to paint it I may not do it right away. So with some patience and just a little work you're left with this:
You can see close up that there will be a bunch of the double sided tape left over.
I used the blow dryer again and warmed it up. When its really thick you can roll it up with your thumbs/fingers. I also used a little goo gone to get rid of some of the smaller pieces that didn't want to come up.
This part sucks.
03-10-2011, 08:18 AM
#3
Senior Member
Join Date: Jan 2009
Location: Redford MI
Posts: 836
Likes: 0
Received 3 Likes
on
3 Posts
Year: 1999
Model: Grand Cherokee
Engine: 4.0
Xjs look so much better w/o the door molding. With a piece of fishing line you dont even need to heat it up. There is also a product out there call Karnack tar remover. I use it to remove scuff marks from customers siding after a roofing job. If I accidentally do so. Worked great on the rig too.
03-11-2011, 03:39 PM
#4
Resident Zombie Hunter
Thread Starter
Join Date: Aug 2010
Location: Virginia
Posts: 3,542
Likes: 0
Received 2 Likes
on
2 Posts
Year: 1997
Model: Cherokee
Engine: 4.0L
I'm gonna check out that Karnack! Thanks a ton! I'll try the fishing line on the other side I haven't finished yet.
03-19-2011, 08:51 PM
#6
Newbie
Join Date: Jan 2011
Posts: 24
Likes: 0
Received 0 Likes
on
0 Posts
Model: Cherokee (XJ)
I just took the molding off of mine, looks way better. I used a heat gun and then rubbing alcohol to clean off the line it left and now you can't even tell it was ever there.
03-19-2011, 10:01 PM
#7
Resident Zombie Hunter
Thread Starter
Join Date: Aug 2010
Location: Virginia
Posts: 3,542
Likes: 0
Received 2 Likes
on
2 Posts
Year: 1997
Model: Cherokee
Engine: 4.0L
Removing the molding looks awesome. I'm going to bedline the rockers here as I just bedlined the lower half of my rear tailgate due to some rust issues. I hear that it can fade but if it does I'll just spray paint it.
I'm thinking of getting smoked turn signals up front. I thought it would go well with the whole black and white thing going on.
Trending Topics
03-29-2011, 07:12 PM
#8
Resident Zombie Hunter
Thread Starter
Join Date: Aug 2010
Location: Virginia
Posts: 3,542
Likes: 0
Received 2 Likes
on
2 Posts
Year: 1997
Model: Cherokee
Engine: 4.0L
Well I've got all of the pin striping off but I still haven't gotten rid of that dirt line the molding left behind. I need to grab a heat gun I think to do it.
I changed the brake pads today 'cause the banshee that screamed everytime I hit the brakes was driving me NUTS! The build might take a little longer to really get started than I was anticipating. A buddy of mine is going to sell his ZJ to me for 200 smackers. It needs some work but I think I can probably get 800-1000 for it once I do the work to it. That'll probably get me an extra 400. That'll be my lift and a few other goodies.
I changed the brake pads today 'cause the banshee that screamed everytime I hit the brakes was driving me NUTS! The build might take a little longer to really get started than I was anticipating. A buddy of mine is going to sell his ZJ to me for 200 smackers. It needs some work but I think I can probably get 800-1000 for it once I do the work to it. That'll probably get me an extra 400. That'll be my lift and a few other goodies.
04-07-2011, 09:50 PM
#9
Resident Zombie Hunter
Thread Starter
Join Date: Aug 2010
Location: Virginia
Posts: 3,542
Likes: 0
Received 2 Likes
on
2 Posts
Year: 1997
Model: Cherokee
Engine: 4.0L
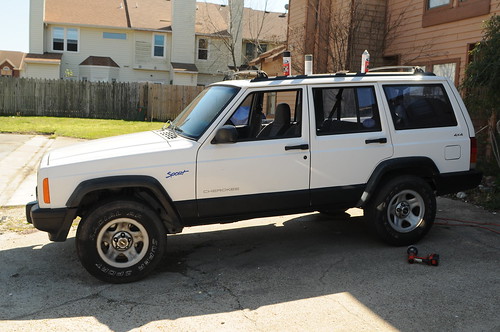
Alright got most of the dirt removed. I cannot talk good enough about Turtle Wax Bug & Tar Remover. Worked wonders on the dirt line left after I got the double sided tape off. I ended up washing the whole Jeep in it and made it look practically NEW! Here she is all washed up ready to be prepped and painted.
These are the products I used plus Frog Painters Tape and newspaper, and a sanding block and sandpaper. All available at Walmart. Spray on bedliner, rust and paint stripper is on the drill, and self etching primer.
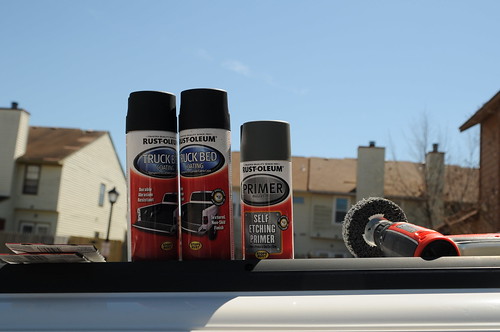
All taped up and then added a crap ton of newspaper to protect the rest of the rig
And here's the final product
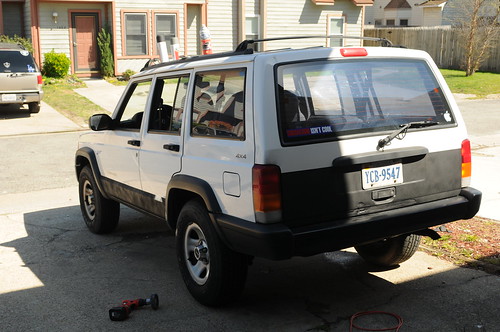
That one light spot up above is just sunlight not a missed spot incase you can't tell
I even did jambs so if I ever go doorless it'll look nice.
It still needs a little touch up on the lines but I'm happy overall. The back had some rust so I had to do it and decided that was the best line to run with. But that's the only rust I had so I'm happy. I still need to do the flares... which now REALLY need to be done. This build might slow a little as I'm getting ready to buy a ZJ to do some repairs and flip to finance this project.
Anybody want a 93 ZJ for $800?
These are the products I used plus Frog Painters Tape and newspaper, and a sanding block and sandpaper. All available at Walmart. Spray on bedliner, rust and paint stripper is on the drill, and self etching primer.
All taped up and then added a crap ton of newspaper to protect the rest of the rig
And here's the final product
That one light spot up above is just sunlight not a missed spot incase you can't tell
I even did jambs so if I ever go doorless it'll look nice.
It still needs a little touch up on the lines but I'm happy overall. The back had some rust so I had to do it and decided that was the best line to run with. But that's the only rust I had so I'm happy. I still need to do the flares... which now REALLY need to be done. This build might slow a little as I'm getting ready to buy a ZJ to do some repairs and flip to finance this project.
Anybody want a 93 ZJ for $800?
05-19-2011, 08:18 PM
#11
Senior Member
Join Date: Apr 2009
Location: New Waverly, Tx
Posts: 954
Likes: 0
Received 2 Likes
on
2 Posts
Year: 1997
Model: Cherokee
Engine: Used engine just put in less than 79kmiles onit jeepersCreepers 60mm TB, '99-'01 intake, BorlaHeader
Looks good. I definitely like the moldings off and bedliner on it. I had my 1997 for 9 years before I started modifing mine. So your starting way ahead of me.
06-24-2011, 12:26 PM
#12
Resident Zombie Hunter
Thread Starter
Join Date: Aug 2010
Location: Virginia
Posts: 3,542
Likes: 0
Received 2 Likes
on
2 Posts
Year: 1997
Model: Cherokee
Engine: 4.0L
Well not a whole lot has been done lately. I bought a grand Cherokee for two hundred and traded it for a lifted xj but its a 2wd. So next month I'm swapping the suspensions out.
06-24-2011, 12:35 PM
#13
Resident Zombie Hunter
Thread Starter
Join Date: Aug 2010
Location: Virginia
Posts: 3,542
Likes: 0
Received 2 Likes
on
2 Posts
Year: 1997
Model: Cherokee
Engine: 4.0L
I did change the rims out between the two. The white jeep's tires wouldn't pass inspection so I put my 31s on the red one and the black ones off the red onto he white one.
Thanks no rdplz for your tools and space!
Thanks no rdplz for your tools and space!
07-06-2011, 04:18 PM
#15
Senior Member
Join Date: Dec 2009
Posts: 634
Likes: 0
Received 0 Likes
on
0 Posts
Model: Cherokee
Engine: i6 4.0L High Output
A word of advice on how to fix it: Find a big tree and link up some chains
