88 Cherokee Quick Resto
 11-01-2011, 02:31 PM
#1
Seasoned Member
Thread Starter
Join Date: Oct 2010
Location: cny
Posts: 270
Likes: 0
Received 0 Likes
on
0 Posts
Year: 87-99
Model: Cherokee
Engine: 4.0
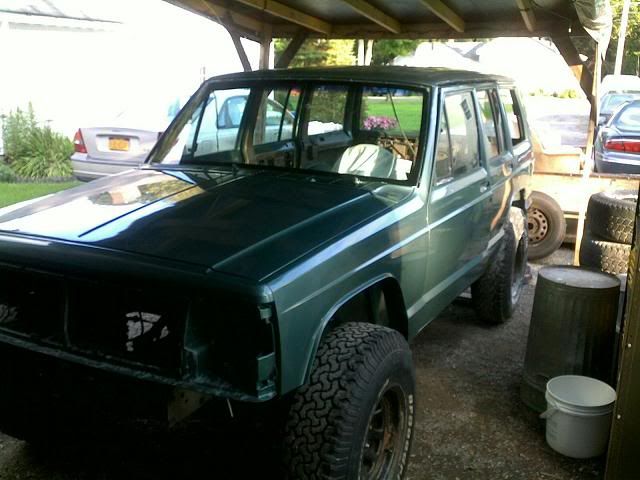
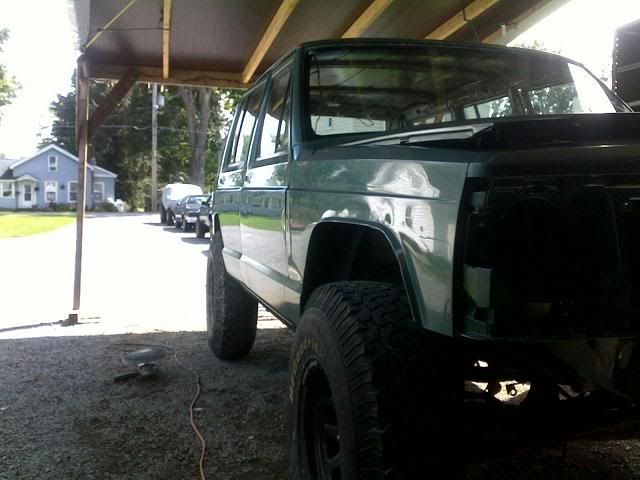
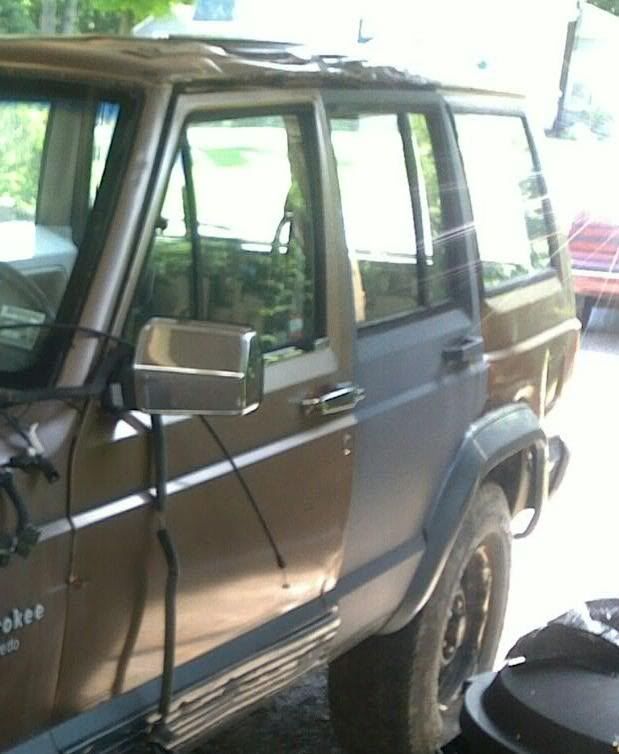
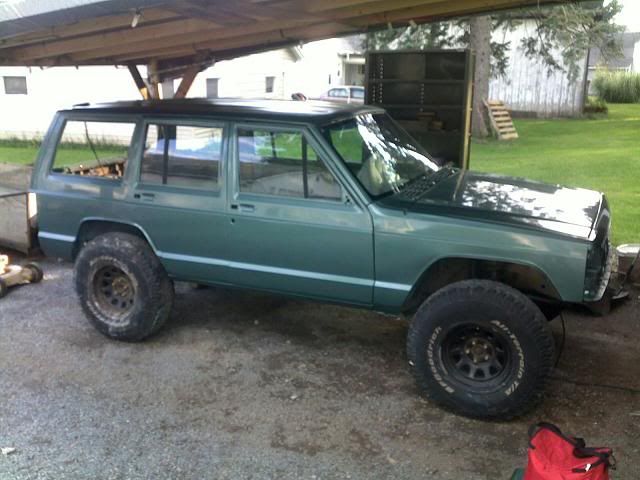
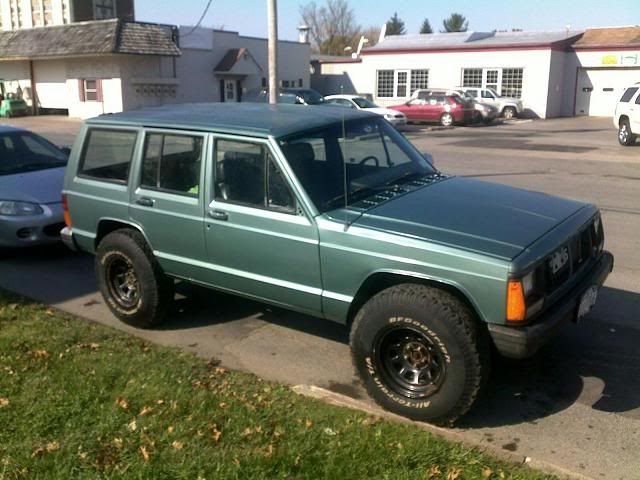
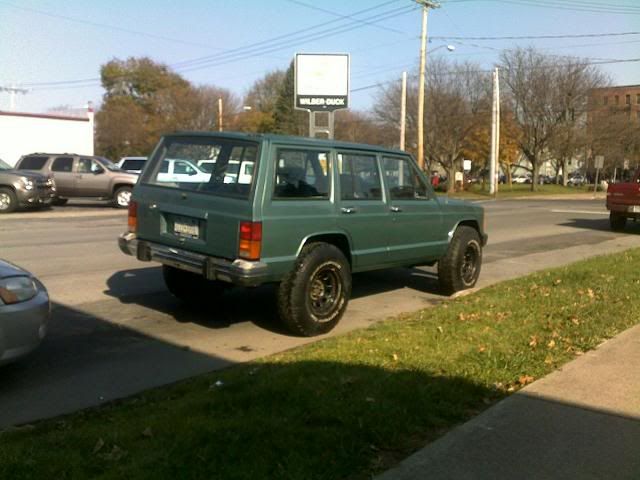
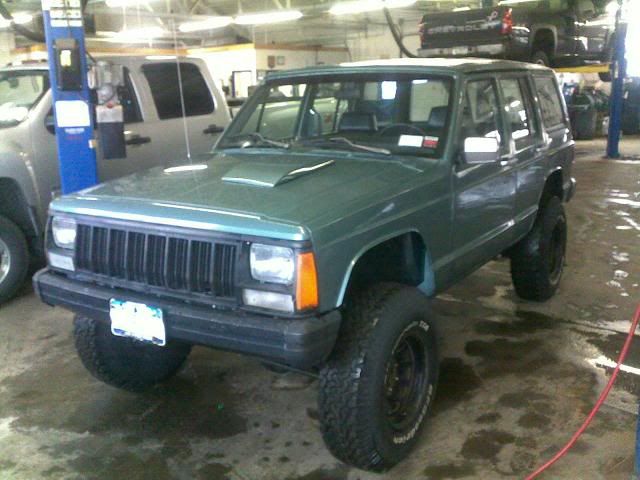
 Hello all!! Meet the Freekee...... My new daily driver/wheeler/beater
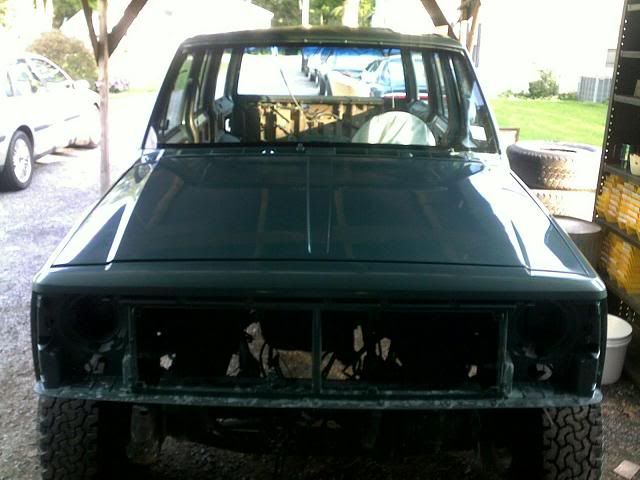
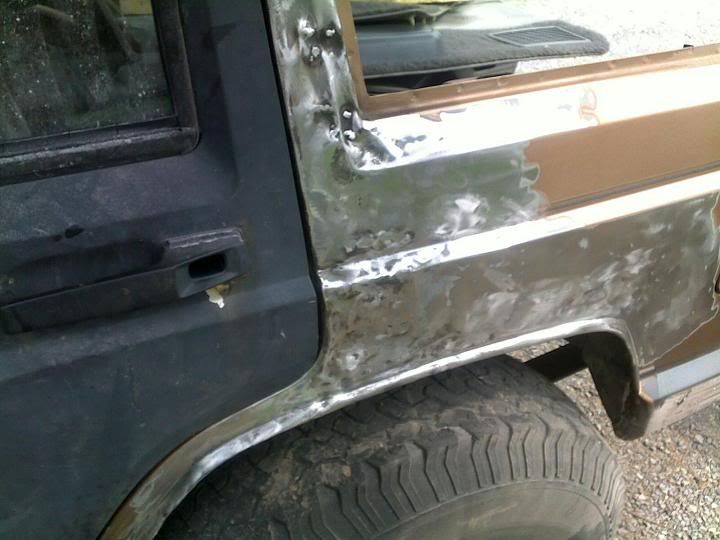
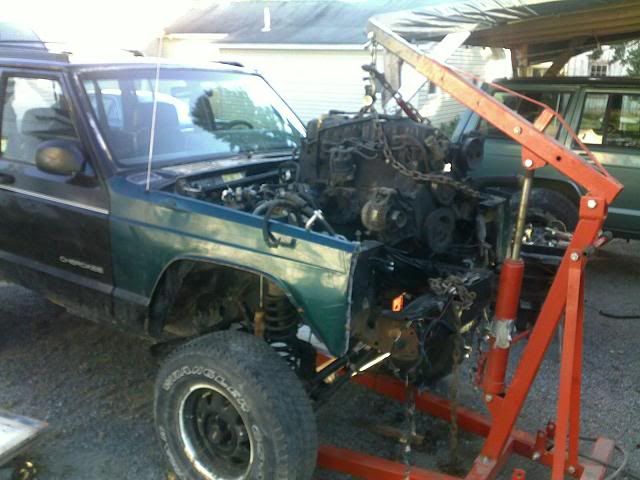
Ok, so I've been holding out on you all, lol. This jeep was rescued from going to the scrapyard 4 months ago (July 2nd). No it didn't quite look like this, so no need to ask why someone would send it there, hahaha. A good friend of mine was using it for a parts jeep for his manche, he needed to get rid of it, and asked me if I wanted any parts off it before it went. When I took at it, I couldn't let it go for scrap, so I asked him how much for the whole thing, he asks, what I wanted it for. My 97 pretty much was a rolling deathtrap, rotted out, and had a smoked transmission, to my suprise he said take it, said if you can use it you can have it, lol. There's a bit more to it than that, he and I trade parts back and forth everynow and again, so it all washes in the end, lol. The jeep was virtually rust free, minus a few small spots in the floor, but it did have a bit of body damage. From what I'm told, the jeep had an incident with a few trees, lol, it took one hard in the rh front, which I guess spun it into another resulting in a flop light roll into another. Roof was pretty mangled, and had some quarter damage. It was missing quite a few things, engine, door, hood, header panel, some interior, yadda yadda yadda, lol.
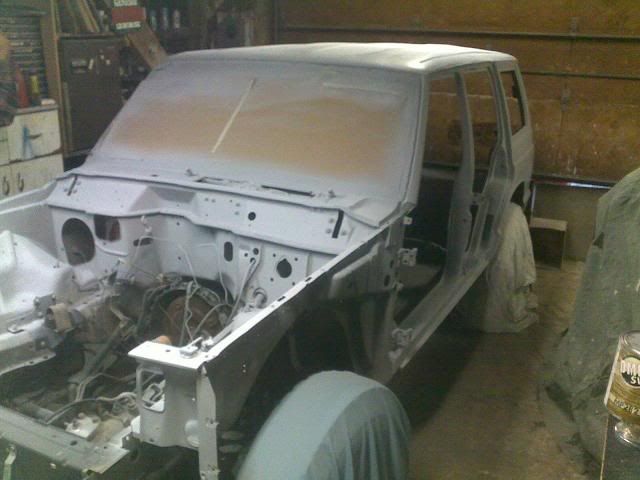
So needless to say, but I've been very busy taking this POS pictured below, and transforming it into the jeep you saw above in 4 months time.

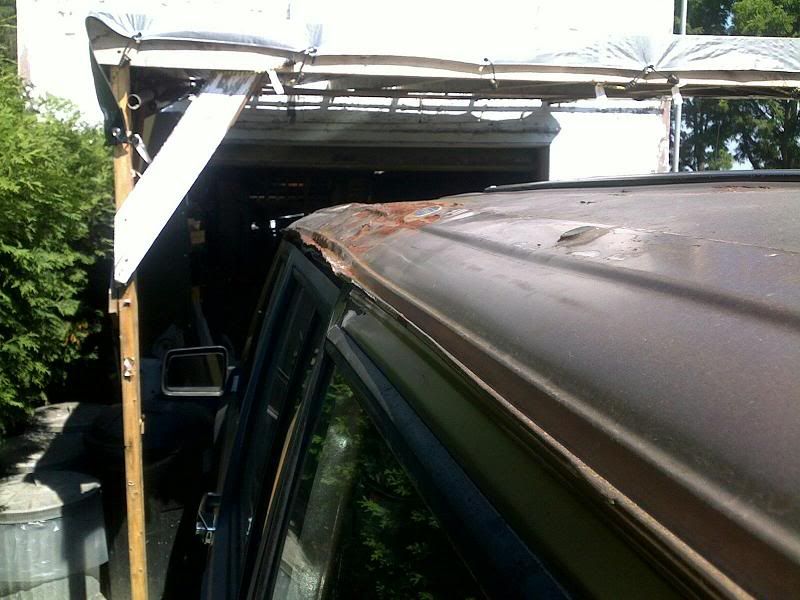
Pictured above is after a bit of straightening, lol.
It doubled as a mouse castle for a while, so, the interior had to go, the smell was unbearable, everything was removed for cleaning, well, except the steering column, hahaha.
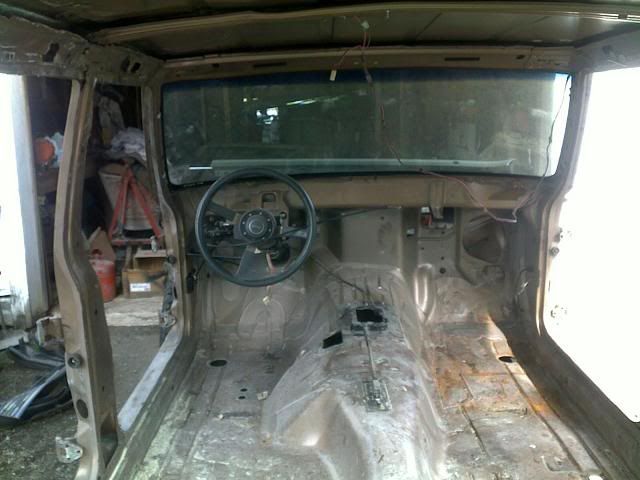
I stripped the jeep down to rolling chassis per say, buzzed it off with the d/a, fixed the roof (where visable anyway), fixed the quarter, rolled the lips, stretched the fender opening and inch or two along with the roll and put it in primer.

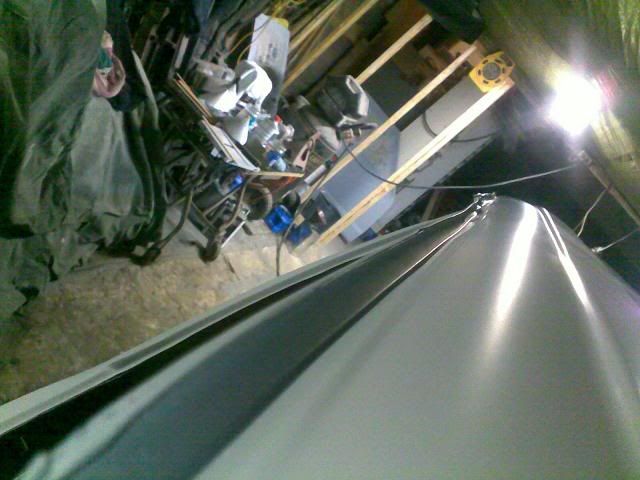
Labor day weekend marked the painting days
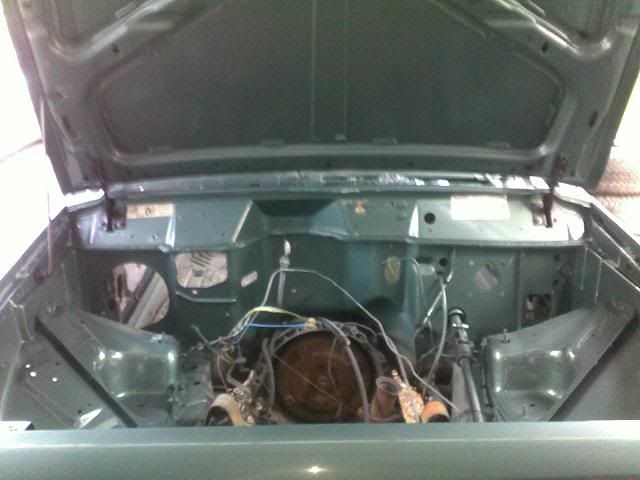
Which brings us to the engine........4.0 extracted from the 97, cleaned, re sealed, and painted
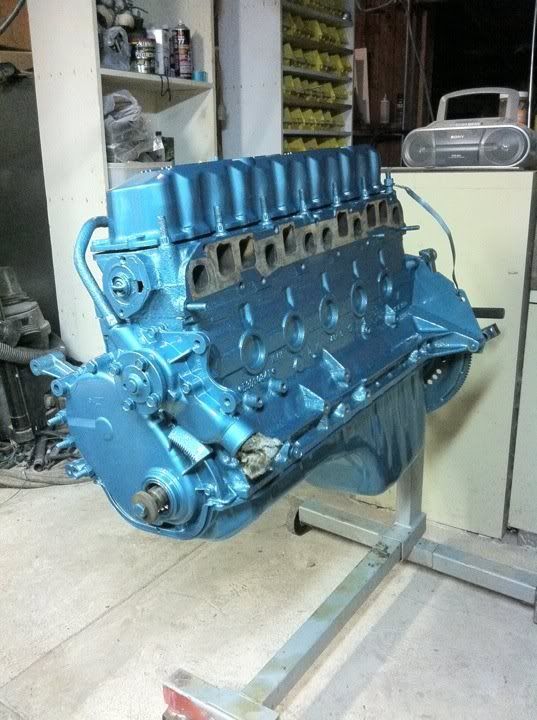
You amc'ers should recognize the color, Alamosa Aqua or amc engine metallic blue (pretty close anyway, lol).
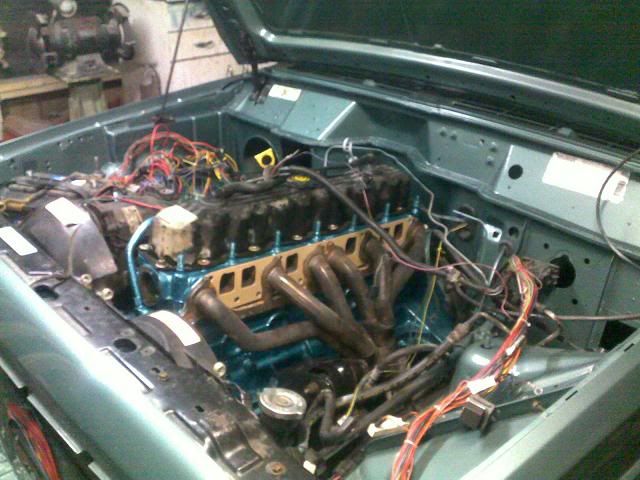
Got it all dropped in and proceded to give it the new fuel management system, which, per forum rules, I'm not allowed to get into, so I'll leave it at that, but lets just say... I put it on the ANTI-Atkins diet....
There you have it, a short rundown of my summer into fall project, eventually it will get the lift from the 97, along with the 34 10.50 ltb's, it has already recieved the limited slip dana 44 rear (also pirated from the 97, lol). Just started driving it around on friday, just to see how it ran and such, 75% of the interior is back into place, I have yet to completely assemble the dash, and of course no carpet will be put back in. I may add some body armor to this jeep, but I'm undecided as of now, though I probably should at least do some form of rocker protection, lol.
Oh here's a link to my photobucket, which has many more pictures.
http://s813.photobucket.com/albums/z...cpZZ4QQtppZZ16
Enjoy!
 11-10-2011, 03:23 PM
#2
Seasoned Member
Thread Starter
Join Date: Oct 2010
Location: cny
Posts: 270
Likes: 0
Received 0 Likes
on
0 Posts
Year: 87-99
Model: Cherokee
Engine: 4.0
Had a couple driveability problems due to my air intake set up I had made, hesitation, bogging, stalling, etc, to rectify this issue a couple changes were made.
Iwent from this thing.
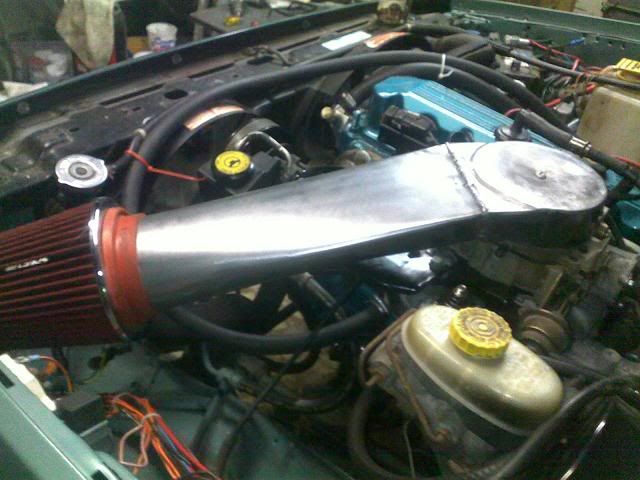
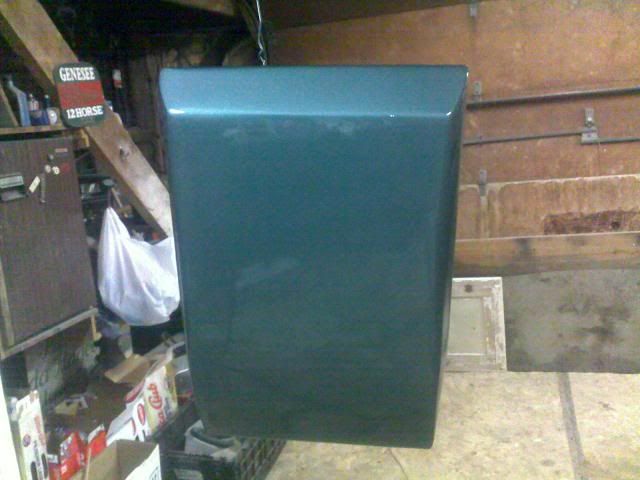
To making this.
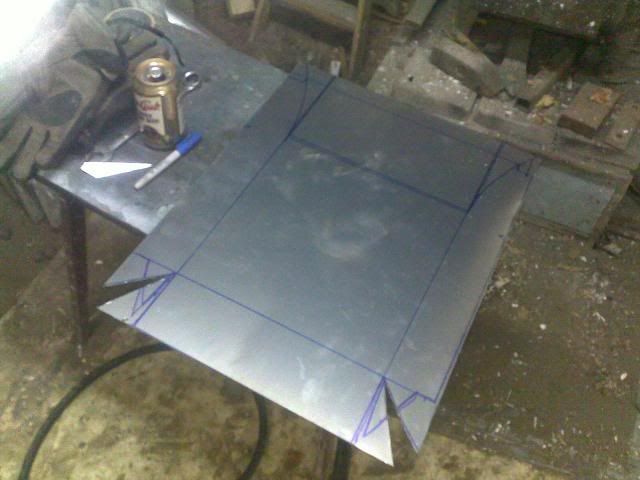
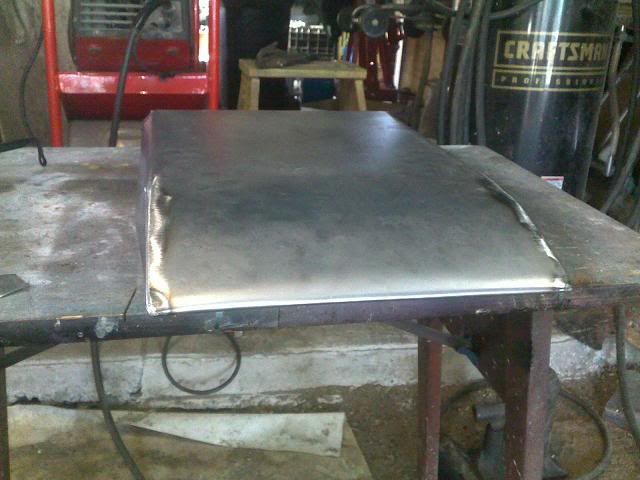
Starting with a flat piece of sheetmetal
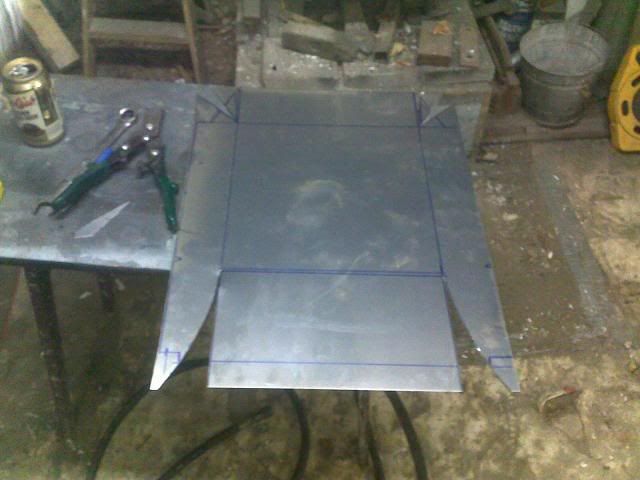
With the help of a few strategically placed cuts, a couple 2 x 4's, C-clamps, vise grips, hammer, welder, and grinder, that flat piece turns into this....
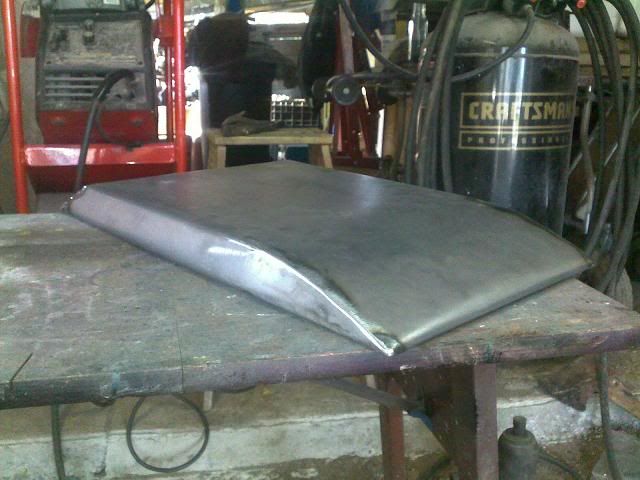
Little skim coat of body filler to hide a couple dimples left by the hammer (I need a sheetmetal brake).
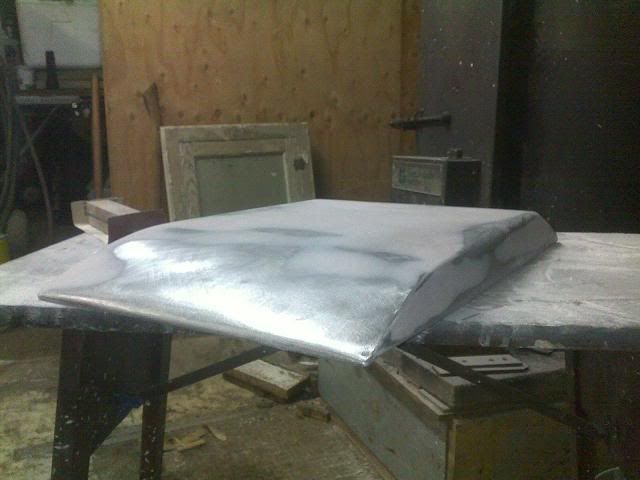
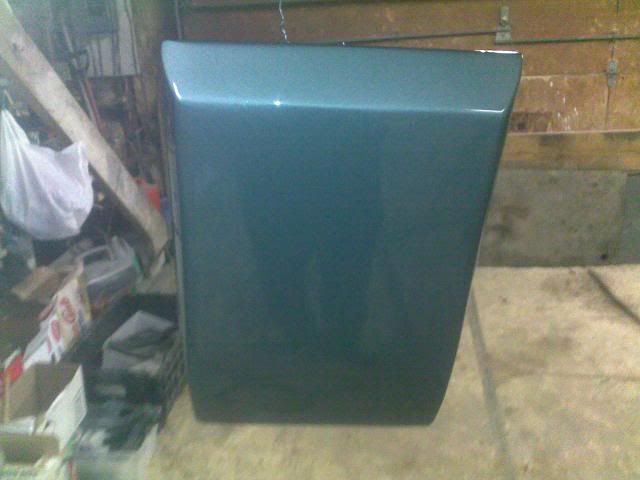
All primered up.
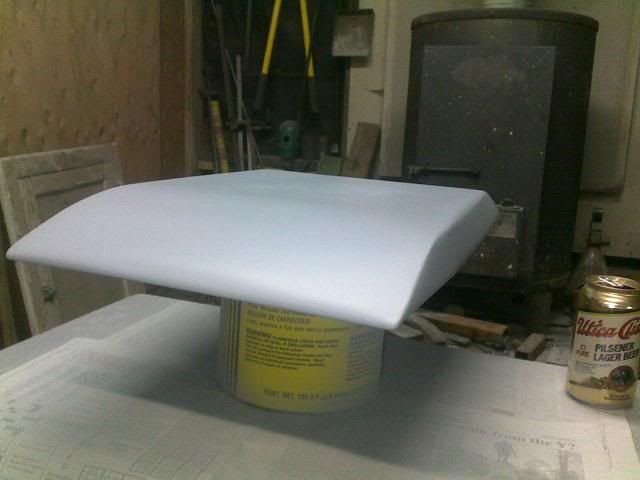
Painted up, and ready for install.
Then, enter jeep, I hated to do it, and it was nerve racking, but it had to be done, I took a cut off wheel to the hood, lol.
My area marked, and the surrounding areas protected from sparks.
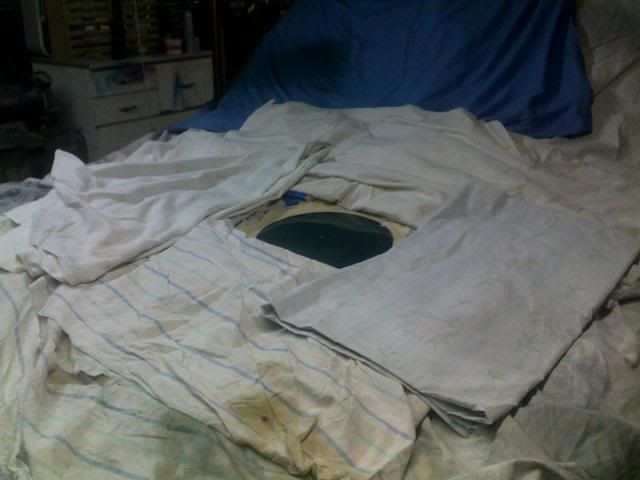
No turning back now, hahaha
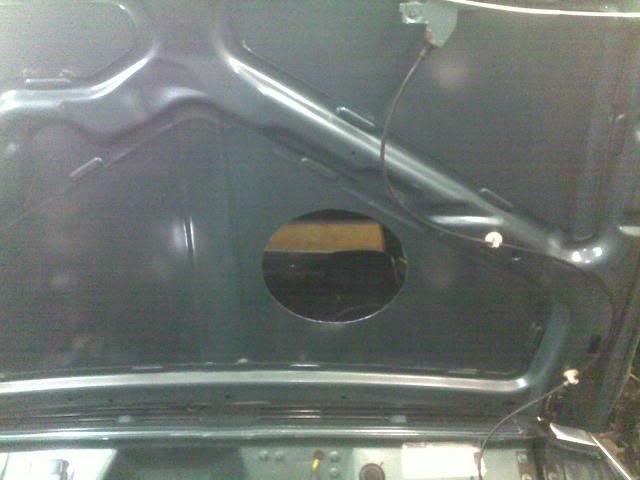
Yup it fits, lol, and yes I'll be running a taller filter maybe and inch taller or so.

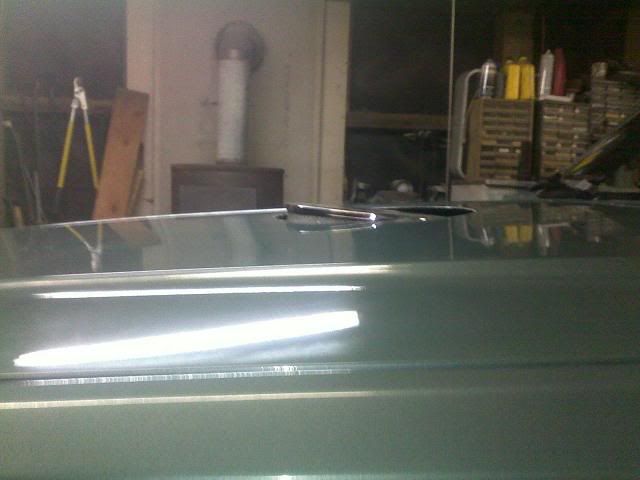
Finally, the jeep with its newest addition.
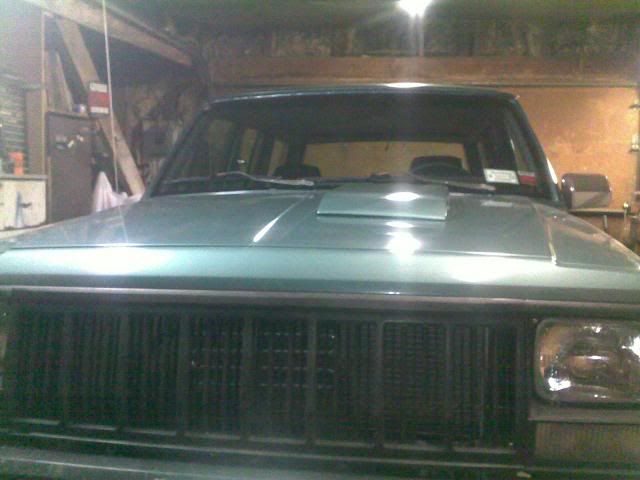

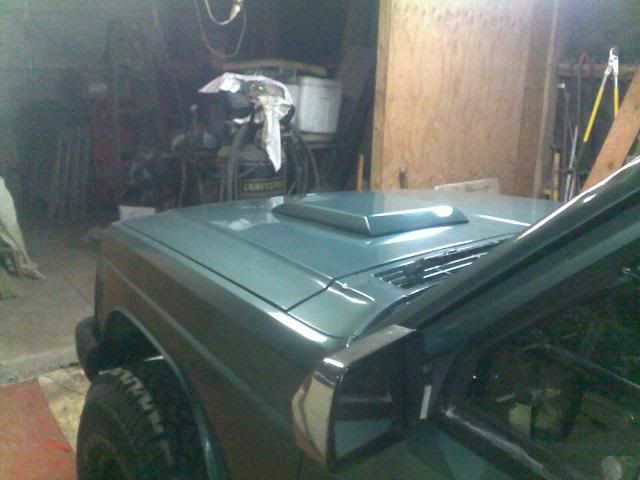

As seen above, the bulge is fastened to the hood via rivits (can't really call it a "scoop" cause it doesn't scoop, hahaha).
This did actually work to solve the driveability issues I was having, even though it does fall into the realm of woodchuck, oh well it'll do for now.
Iwent from this thing.
To making this.
Starting with a flat piece of sheetmetal
With the help of a few strategically placed cuts, a couple 2 x 4's, C-clamps, vise grips, hammer, welder, and grinder, that flat piece turns into this....
Little skim coat of body filler to hide a couple dimples left by the hammer (I need a sheetmetal brake).
All primered up.
Painted up, and ready for install.
Then, enter jeep, I hated to do it, and it was nerve racking, but it had to be done, I took a cut off wheel to the hood, lol.
My area marked, and the surrounding areas protected from sparks.
No turning back now, hahaha
Yup it fits, lol, and yes I'll be running a taller filter maybe and inch taller or so.
Finally, the jeep with its newest addition.
As seen above, the bulge is fastened to the hood via rivits (can't really call it a "scoop" cause it doesn't scoop, hahaha).
This did actually work to solve the driveability issues I was having, even though it does fall into the realm of woodchuck, oh well it'll do for now.
11-28-2011, 12:50 PM
#3
Seasoned Member
Thread Starter
Join Date: Oct 2010
Location: cny
Posts: 270
Likes: 0
Received 0 Likes
on
0 Posts
Year: 87-99
Model: Cherokee
Engine: 4.0
So I finally put the jeep up in the air over the weekend. Up front I used 4 1/2 BDS coils, modified stock upper and lower control arms, WJ track bar with a modified xj mount, and ZJ pitman arm. Out back, I use the BDS 3 1/2 spring packs, along with slightly trimmed shackles from a chevy k1500 (late 80's-late 90's style). Along with the prior trimming, clears the 33's nicely, lol.
Now I just have to decide what to do about the CAD (whether I cable it, hose clamp it, or just put the axleshafts from my 97 in), add a couple recovery points, and it's ready to wheel.
Now I just have to decide what to do about the CAD (whether I cable it, hose clamp it, or just put the axleshafts from my 97 in), add a couple recovery points, and it's ready to wheel.
11-28-2011, 03:13 PM
#5
Seasoned Member
Thread Starter
Join Date: Oct 2010
Location: cny
Posts: 270
Likes: 0
Received 0 Likes
on
0 Posts
Year: 87-99
Model: Cherokee
Engine: 4.0
Thanks! It all takes time, best way I've found to learn, just go for it and see what happens, but make sure you know someone who can fix it if you get in over your head, lol, made that mistake before too  .
.
It all takes time, best way I've found to learn, just go for it and see what happens, but make sure you know someone who can fix it if you get in over your head, lol, made that mistake before too .
11-28-2011, 05:39 PM
#6
CF Veteran
Join Date: May 2011
Location: Santa Rosa, California
Posts: 2,135
Likes: 0
Received 1 Like
on
1 Post
Year: 1987 Comanche,1990
Model: Cherokee
Engine: 4.0L Renix
i was thinking of buying another jeep just so i can experiment, and not mess my DD up. But that's why i got my brothers XJ. Do you fabricate for living?
. Do you fabricate for living?
Trending Topics
11-28-2011, 06:49 PM
#9
Registered Users

Join Date: Jul 2011
Location: 92392
Posts: 618
Likes: 0
Received 0 Likes
on
0 Posts
Model: Cherokee
Also how much do you have into paint, how did you prep?
My paint has no clear coat left..and I just keep buffing and waxing it but its getting old..paint won't keep a shine.
I'm thinking it might be time to paint mine..I really like the solid body and no roof rails though. Its so clean looking!
My paint has no clear coat left..and I just keep buffing and waxing it but its getting old..paint won't keep a shine.
I'm thinking it might be time to paint mine..I really like the solid body and no roof rails though. Its so clean looking!
11-29-2011, 07:29 AM
#10
Seasoned Member
Thread Starter
Join Date: Oct 2010
Location: cny
Posts: 270
Likes: 0
Received 0 Likes
on
0 Posts
Year: 87-99
Model: Cherokee
Engine: 4.0
11-29-2011, 07:45 AM
#11
Seasoned Member
Thread Starter
Join Date: Oct 2010
Location: cny
Posts: 270
Likes: 0
Received 0 Likes
on
0 Posts
Year: 87-99
Model: Cherokee
Engine: 4.0
Thanks! The paint color, lol, that's just mixture of the old stuff I had laying around. I had 5 quarts of light metallic green, about a quart of dark Jadestone Poly (also a green metallic), and about a quart or so of Stealth gray metallic. I wanted use my old stuff up somehow so it didn't go to waste, the jeep being a wheeler/dd was a perfect use for it, lol.
11-29-2011, 09:22 AM
#12
Seasoned Member
Thread Starter
Join Date: Oct 2010
Location: cny
Posts: 270
Likes: 0
Received 0 Likes
on
0 Posts
Year: 87-99
Model: Cherokee
Engine: 4.0
Also how much do you have into paint, how did you prep?
My paint has no clear coat left..and I just keep buffing and waxing it but its getting old..paint won't keep a shine.
I'm thinking it might be time to paint mine..I really like the solid body and no roof rails though. Its so clean looking!
My paint has no clear coat left..and I just keep buffing and waxing it but its getting old..paint won't keep a shine.
I'm thinking it might be time to paint mine..I really like the solid body and no roof rails though. Its so clean looking!
As far as prep work goes, first I remove anything that will not be going back on the vehicle, whether it be the bodyside molding, roof rack, emblems, etc. I then give it a good bath, usually with purple power, just to get any wax, grease, oil, or any other dirt off before even starting the body work. This step is very important, failure to clean before sanding can cause dirt or grease to get worked into the surface below, even if you strip down to bare metal, it can cause peeling, fish eye, or any other poor paint adhesion. Once it's clean, I remove any sticker or adhesive gunk left behind.
Before I start sanding, I take care any welding that needs to be done, along with straightening, and grinding. Then I clean the vehicle again. After its dry I then start my body work, filler if needed, and sanding. The way I do it is not for everyone, but I hate masking, I pretty much dismantle most of the vehicle, on this one I left the windshield in, and the door windows (as they were easily taped off with little to no evidence of tape lines). If you were to choose this method, keep in mind you will have to clean under every thing you remove, door handles, lock cylinders, etc. Anyway, once it's all sanded down to satisfactory (usually 180g with a D/A sander), bodywork done (Iusually go 220g but all by block, not machine), it's time to dust it off, and clean it for primer. This time use no water, paint supply stores carry a product called either final wash, or prep wash, wipe the whole area you are working on down with it, dry it off, and do it again with clean lintless rags. Before I lay down the primer, I wipe the vehicle over quick with a tack cloth just be certain nothing was left behind. Primer I wet sand (via block by hand, with 400-600g, poor adhesion can occur if you go too fine, 600 is pushing it, I try to stay at 400 if possible.
Once the primer is to your liking, you're ready to clean again, same deal, use the final wash at least twice, be sure to dry it, then tack it, then paint. Keep in mind work environment has a big role, it's temp, humidity, cleanliness (I painted in a dirty barn, but the jeep was high enough that the dirt on floor didn't bother, a low to the ground car would be a different story), the dust/dirt on the ceiling and walls are what you want to get rid of, the cleaner the better. Obviously painting outside will be a bit different, wetting the ground around the vehicle can help with dust control.
If you choose to paints yours, main thing to remember is clean, if you don't want to dismantle the whole jeep, use good quality masking tape made for the specific purpose, not the cheesy crap you get at the dollar store, (though that cheesy stuf works fine for areas that won't have an actual tape line, such as wheel wells, or the bulk of the windows). Oh and make sure you sand your flaking clear coat very well, meaning it may all have to go, you can tell f it's feathering in nicely or just flaking as you sand. Good luck, let me know if have any other questions.
Last edited by Shaggimo; 11-29-2011 at 09:29 AM.
11-29-2011, 09:44 AM
#13
Registered Users
Join Date: Jul 2011
Location: 92392
Posts: 618
Likes: 0
Received 0 Likes
on
0 Posts
Model: Cherokee
Wanna come paint my jeep
 hahah.
 Great advice man.
Edit: What did you do for the door jam area and such..Like the cowl and door jam area? Thats one of my biggest concerns is that I want my jeep to look 100% the same color. Also what did you do for clear coat?
I actually think I'm gonna start slowly buying the stuff I need to paint my jeep. I mean I've spent about 100 bucks in polish, rubbing compound & wax trying to save my old paint anyway..plus I'd rather have 1 solid color..mines a laredo so its got the grey rockers which I resent greatly.
Last edited by Kamaran; 11-29-2011 at 09:52 AM.
11-29-2011, 12:51 PM
#14
Seasoned Member
Thread Starter
Join Date: Oct 2010
Location: cny
Posts: 270
Likes: 0
Received 0 Likes
on
0 Posts
Year: 87-99
Model: Cherokee
Engine: 4.0
For the door jambs, cowel, underhood, under hatch areas: There's a few different ways to go about this. Many paint jobs I've seen do adress these at all, they'll do a color change and leave the jambs the original color (taxi cabs and copcars are notorious for this too, anything to save a buck or two). The biggest thing, it's a royal PITA to prep these areas to get the paint to stick, not to mention time consuming.
What I do I remove everything I can that's in the way, hood, fenders, doors, strikers, etc, etc. I then scuff everything I can down with scotch brite pads (3m makes different grades, course through fine), I start with a red pad then follow with a green pad, very time consuming but I have yet to have adhesion problems in these areas, so I'd say it works. I do this to the backsides of the doors, under hood, inner fenders, and backside of the fenders as well.
After all that is done, I use an etching primer before going over it with my regular, this helps adhesion further. Normally I spend the dough and get the good stuff, called DPX, runs about $100 a quart last I knew, this time I cheaped out and tried an experiment, I bought the rattle can stuff from advance auto, I can't say anything on longevity yet, but so far so good. As long as you shoott your primer within I believe 24 hours to spraying the etch, you will not have to sand the etch. You use the green scotch brite pad to scuff the primer to prep for paint.
For painting these areas, do it while it's all apart, it comes out much nicer, I tried the assembling then painting around everything, and I wasn't happy with the results. You can mask around the door jambs to avoid overspray on the body. After dry you can feater your tape line, assemble, tape off the areas already painted if you wish, and carry on with the paint.
For the jeep I did not use a clear coat, it's a single stage paint like what AMC used in the 80's. The vehicles I did use clear on I used the same type of paint, acrylic enamel with a catylist (hardener) along with what they called production clear, this stuff runs some where in the range of $125-$250 a gallon. I chose not to clear the jeep because of cost, it's just my beater/dd/wheeler/winter rat any way so I couldn't justify the extra cost on that. A real basecoat clear coat system will be a bit more expensive than doing a single stage with clear though, better paint, yeah, but it all depends on what you're going for.
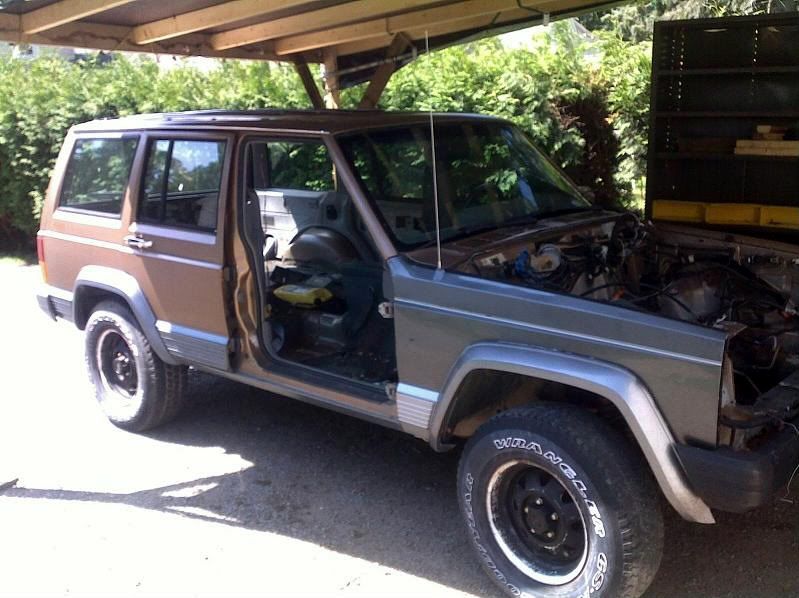
This car was Painted Acrylic enamel with a clear coat on top. Of course they was a lot more care taken in the prep stages with car, and I was a lot pickier for what passed as ready to paint, but this will never see offroad use like the jeep.


Makes quite a difference in shine, I don't have too much time wrapped up in wetsanding/buffing this car in comparison with the cherokee.
Oh one more thing, if you want to start buying stuff, start with your paint gun, sand paper, sander, scotch brites, and stuff like that, they won't go bad sitting around for an extended period of time (**** happens and projects always seemed to get delayed, lol). Don't buy any fillers, primers, reducers, hardeners, or paint until you are ready to use it, they have a shelf life, the fresher the product is, the better your results will be and the easier it is to work with (the old leftover paint I used on the jeep, was the most miserable stuff I've ever used).
What I do I remove everything I can that's in the way, hood, fenders, doors, strikers, etc, etc. I then scuff everything I can down with scotch brite pads (3m makes different grades, course through fine), I start with a red pad then follow with a green pad, very time consuming but I have yet to have adhesion problems in these areas, so I'd say it works. I do this to the backsides of the doors, under hood, inner fenders, and backside of the fenders as well.
After all that is done, I use an etching primer before going over it with my regular, this helps adhesion further. Normally I spend the dough and get the good stuff, called DPX, runs about $100 a quart last I knew, this time I cheaped out and tried an experiment, I bought the rattle can stuff from advance auto, I can't say anything on longevity yet, but so far so good. As long as you shoott your primer within I believe 24 hours to spraying the etch, you will not have to sand the etch. You use the green scotch brite pad to scuff the primer to prep for paint.
For painting these areas, do it while it's all apart, it comes out much nicer, I tried the assembling then painting around everything, and I wasn't happy with the results. You can mask around the door jambs to avoid overspray on the body. After dry you can feater your tape line, assemble, tape off the areas already painted if you wish, and carry on with the paint.
For the jeep I did not use a clear coat, it's a single stage paint like what AMC used in the 80's. The vehicles I did use clear on I used the same type of paint, acrylic enamel with a catylist (hardener) along with what they called production clear, this stuff runs some where in the range of $125-$250 a gallon. I chose not to clear the jeep because of cost, it's just my beater/dd/wheeler/winter rat any way so I couldn't justify the extra cost on that. A real basecoat clear coat system will be a bit more expensive than doing a single stage with clear though, better paint, yeah, but it all depends on what you're going for.
This car was Painted Acrylic enamel with a clear coat on top. Of course they was a lot more care taken in the prep stages with car, and I was a lot pickier for what passed as ready to paint, but this will never see offroad use like the jeep.
Makes quite a difference in shine, I don't have too much time wrapped up in wetsanding/buffing this car in comparison with the cherokee.
Oh one more thing, if you want to start buying stuff, start with your paint gun, sand paper, sander, scotch brites, and stuff like that, they won't go bad sitting around for an extended period of time (**** happens and projects always seemed to get delayed, lol). Don't buy any fillers, primers, reducers, hardeners, or paint until you are ready to use it, they have a shelf life, the fresher the product is, the better your results will be and the easier it is to work with (the old leftover paint I used on the jeep, was the most miserable stuff I've ever used).
11-29-2011, 08:50 PM
#15
Registered Users
Join Date: Jul 2011
Location: 92392
Posts: 618
Likes: 0
Received 0 Likes
on
0 Posts
Model: Cherokee
Dude your a god send for me!!
I like the idea of no clear, because at any point in time, I can just respray the jeep after trail damage. I plan to follow what you did, remove all handles, locks and everything. Motor and everything will come out, cause I can't stand mismatch paint, I'll leave all the windows in and just spend time masking it off really good.
Do you think you could help me with colors and possibly a list of stuff needed? I'll be honest, I've been reading all day about painting now..otherwise I know nothing other than I'm really good with a rattle can. I have no issue with spending a few days to a week prepping. I'm 19 and this is my first car and you should see what I've gone through already.
I have an idea of what color I want but I can't find any color samples online. I really like how yours looks, and wouldn't mind something similar, but I'm also looking at metallic gun metal or charcoals and medium silvers.
Singe stage is what I'll do. Prep work seems to make all the difference, so I'll take my time with that and make sure I do my absolute best.
I have concerns with wet sanding the metallic paint..everyone says when you sand/buff it you'll take the metallic flake out.
This was the paint I've found so far, couple fox body guys recommended it..Said urethane or enamel, especially if it sees offroad use. I guess because urethane is harder therefor more scratch/chip resistant & its easier to buff. Everything I read online seems to say the same, only issue is, is that it cost more.
http://www.paintforcars.com/urethane...its_5star.html Any good, what should I be looking for in paint?
I really want a nice deep metallic gunmetal color, but everything I read online says buffing out scratches can also buff out the metallic which is obviously very bad!
Any advice, should I do metallic or non metallic? How hard is it to sand metallic paint?
Last edited by Kamaran; 11-30-2011 at 02:01 AM.