'01 XJ Driver/Crawler
 05-13-2017, 10:43 PM
#16
Member
Thread Starter

Join Date: Jan 2017
Location: Anthem, AZ
Posts: 125
Likes: 0
Received 2 Likes
on
2 Posts
Year: 2001
Model: Cherokee
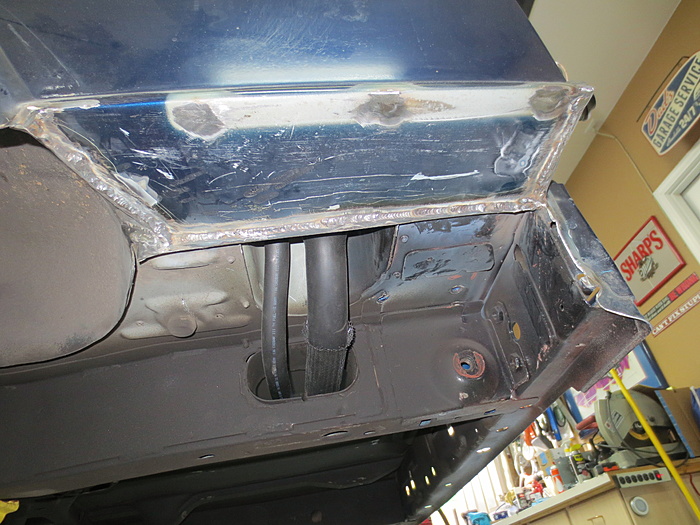
I did the rear quarter cut and fold today, again, BleepinJeep has a good video on the basics of it. There are a couple good write ups on various forums too, just search and go with whatever one looks good to you. I cut the sides longer than the BleepinJeep video as I planned on welding and it worked out pretty well.
I'm cutting more off as I'm welding the seams
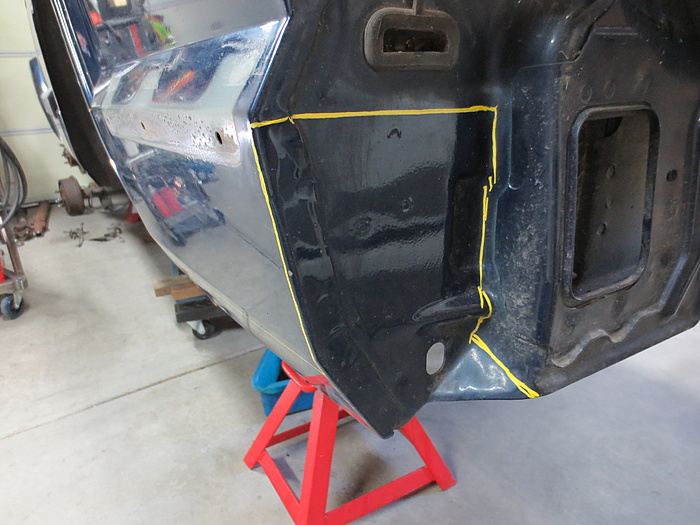
The line is at about 5-1/4" front and 4-1/2" rear, this puts it tight against the inside flap when it's folded in
Inner flap will be cut off after welding
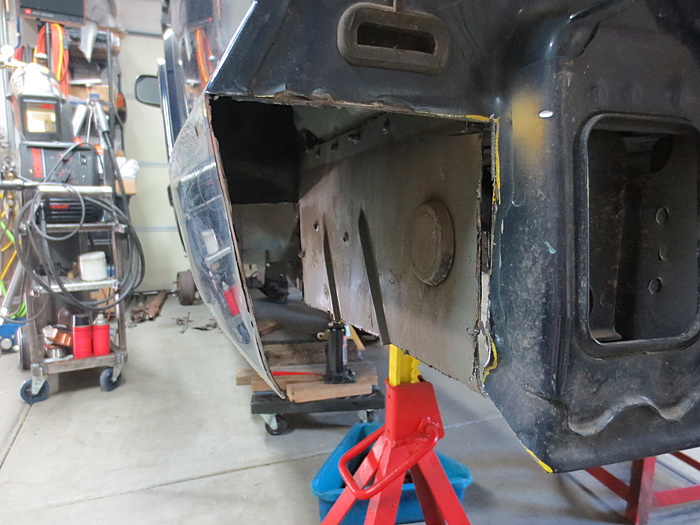
Holes filled in and edges cleaned where they will be welded. Be sure to get as much paint off as you can, I couldn't get to some areas of the inner flap and they really made welding much harder.
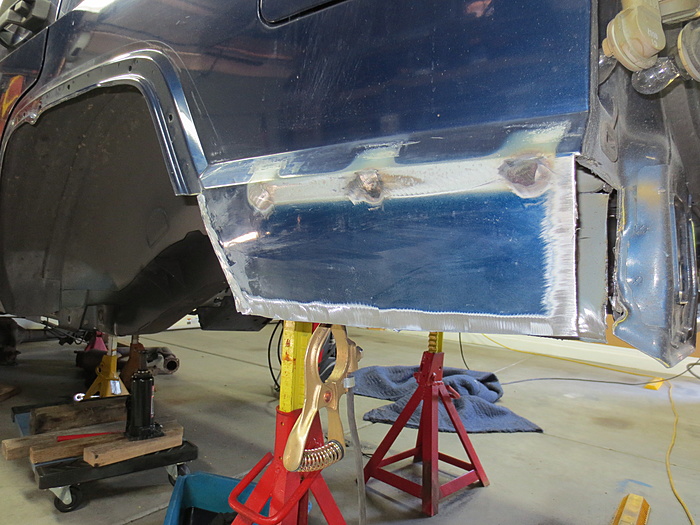
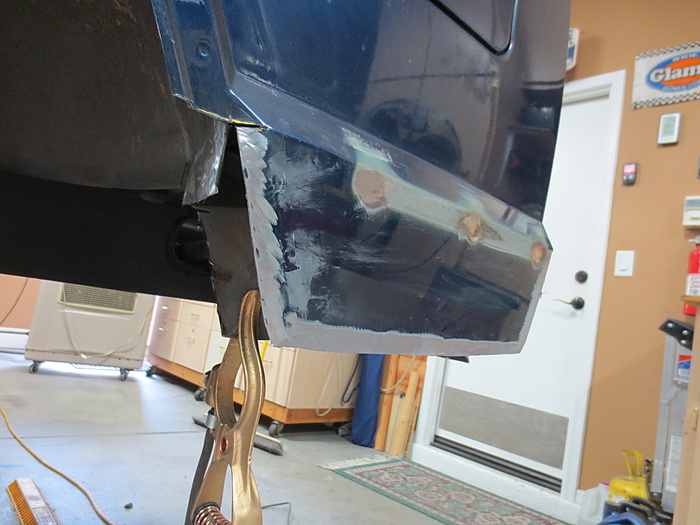
Main flap folded, it was tight, I had to cut more off, but it made welding easier as there was zero gap. Rear edge had a big gap on one side, made it more difficult to weld of course
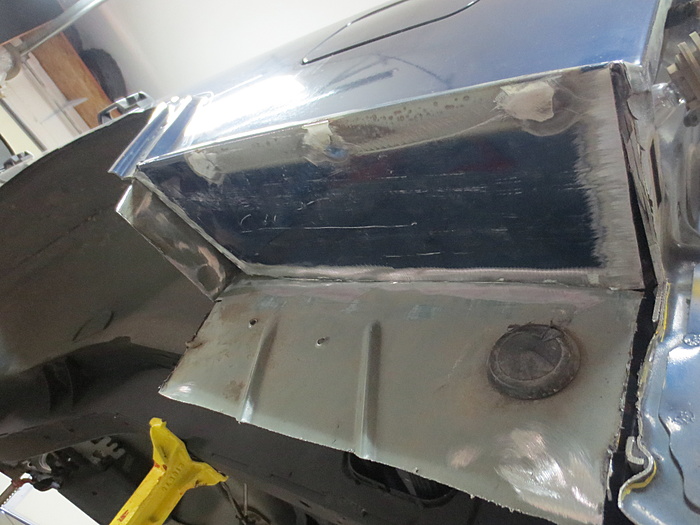
Main area done, the areas where I didn't get all the crap off was hard to weld, otherwise, not so bad. I used .025 wire and ran my Hobart 210 on 120v.
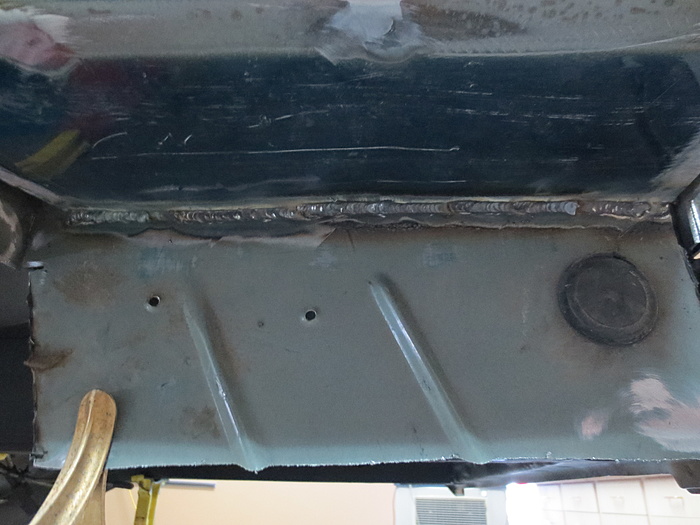
Pretty much done, just a little clean up and I will run a bead of seam sealer just to be safe. I did check best I could with a flashlight and found a few areas that needed to be welded again, it's pretty well sealed though as is
I still have to modify the fuel hose cover, but the main part is done.
I'm cutting more off as I'm welding the seams

The line is at about 5-1/4" front and 4-1/2" rear, this puts it tight against the inside flap when it's folded in


Inner flap will be cut off after welding

Holes filled in and edges cleaned where they will be welded. Be sure to get as much paint off as you can, I couldn't get to some areas of the inner flap and they really made welding much harder.


Main flap folded, it was tight, I had to cut more off, but it made welding easier as there was zero gap. Rear edge had a big gap on one side, made it more difficult to weld of course

Main area done, the areas where I didn't get all the crap off was hard to weld, otherwise, not so bad. I used .025 wire and ran my Hobart 210 on 120v.

Pretty much done, just a little clean up and I will run a bead of seam sealer just to be safe. I did check best I could with a flashlight and found a few areas that needed to be welded again, it's pretty well sealed though as is

I still have to modify the fuel hose cover, but the main part is done.
 06-03-2017, 06:18 PM
#17
Member
Thread Starter
Join Date: Jan 2017
Location: Anthem, AZ
Posts: 125
Likes: 0
Received 2 Likes
on
2 Posts
Year: 2001
Model: Cherokee
It's been a little while since I've updated this thread, mainly been working on the rear fenders and preparing for rear axle install.
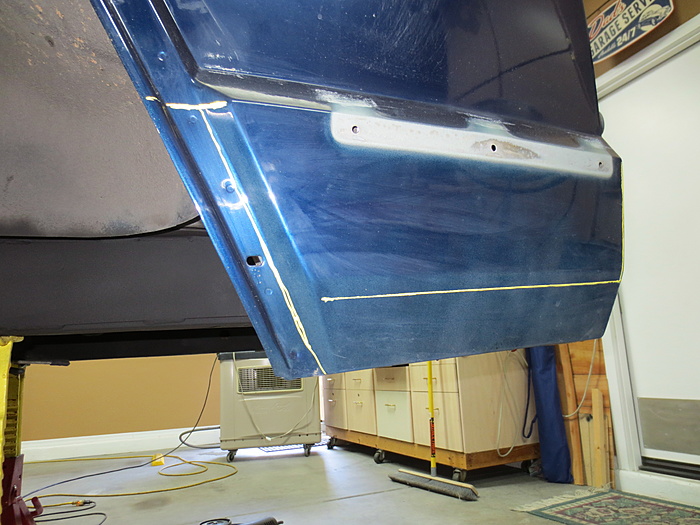
Taped off where I want to cut

Used 4-1/2" angle grinder to cut, it worked very well
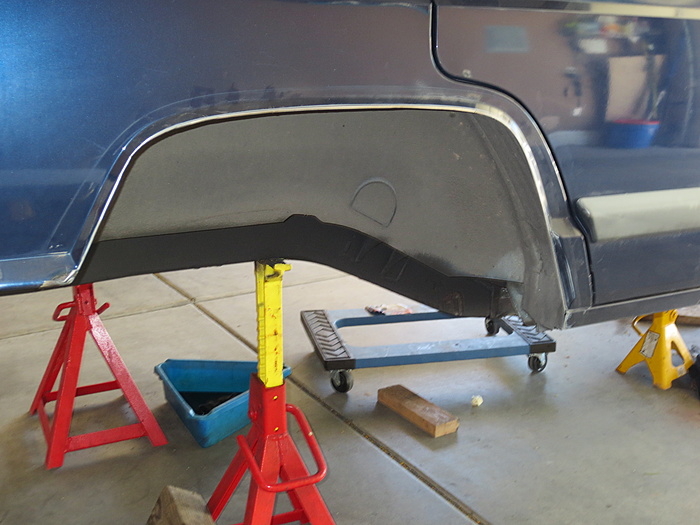
Decent size gap to fill


Used welding rod to fill the gaps
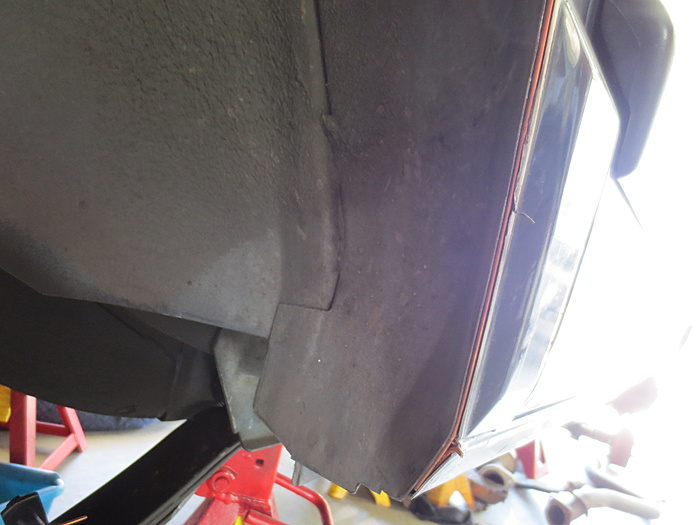
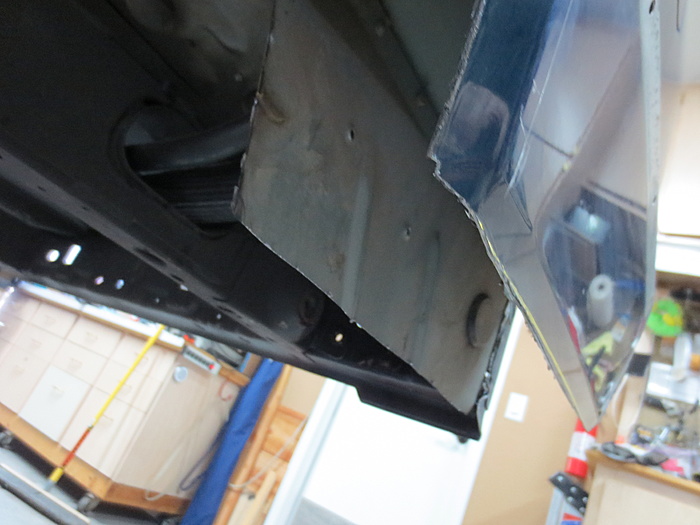
Started tack welding


Really couldn't run a bead, just had to do hundreds of tacks!! Stopped taking pictures at this point, just basically added rod where the big gaps were, tacked and moved on. Ground the welds down and checked for any holes, welded them, ground and checked again. Wanted it sealed from welding, didn't want to rely on the seam sealer.
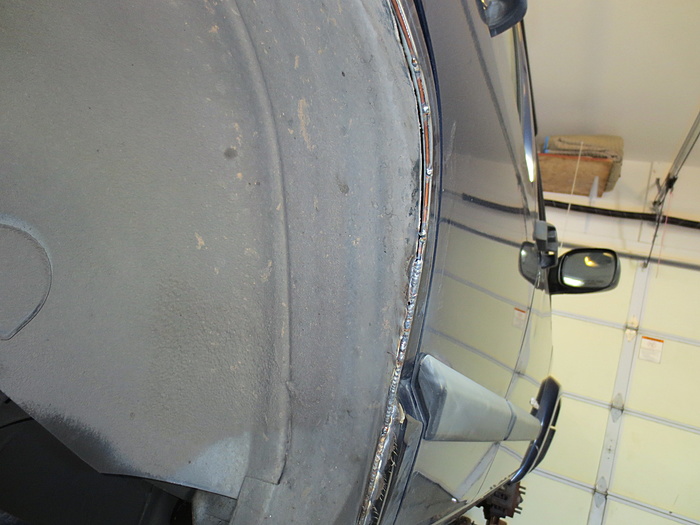
Ran seam sealer along the joints, first time using, didn't realize you can't sand it very well. Oh well, I can bondo it if I need to shape it at all, but it actually came out pretty well without it.

Drivers side done. Drivers side actually had less of a gap, so I didn't add filler rod. Turns out it was harder to weld without it. I'd rather have the gap and add the rod, it gives more area to weld and doesn't burn through as easily.
Taped off where I want to cut

Used 4-1/2" angle grinder to cut, it worked very well

Decent size gap to fill


Used welding rod to fill the gaps

Started tack welding


Really couldn't run a bead, just had to do hundreds of tacks!! Stopped taking pictures at this point, just basically added rod where the big gaps were, tacked and moved on. Ground the welds down and checked for any holes, welded them, ground and checked again. Wanted it sealed from welding, didn't want to rely on the seam sealer.

Ran seam sealer along the joints, first time using, didn't realize you can't sand it very well. Oh well, I can bondo it if I need to shape it at all, but it actually came out pretty well without it.


Drivers side done. Drivers side actually had less of a gap, so I didn't add filler rod. Turns out it was harder to weld without it. I'd rather have the gap and add the rod, it gives more area to weld and doesn't burn through as easily.
 06-03-2017, 06:45 PM
#18
Seasoned Member
Join Date: Nov 2014
Location: Isanti Minnesota
Posts: 433
Likes: 0
Received 0 Likes
on
0 Posts
Year: 1994
Model: Cherokee
Engine: 4.0 I6
Subbed! Making me jealous of how clean this is. Cool that you're taking it slow and doing it right instead of being cheap and getting a T-case drop and so on.
06-03-2017, 06:48 PM
#19
Member
Thread Starter
Join Date: Jan 2017
Location: Anthem, AZ
Posts: 125
Likes: 0
Received 2 Likes
on
2 Posts
Year: 2001
Model: Cherokee
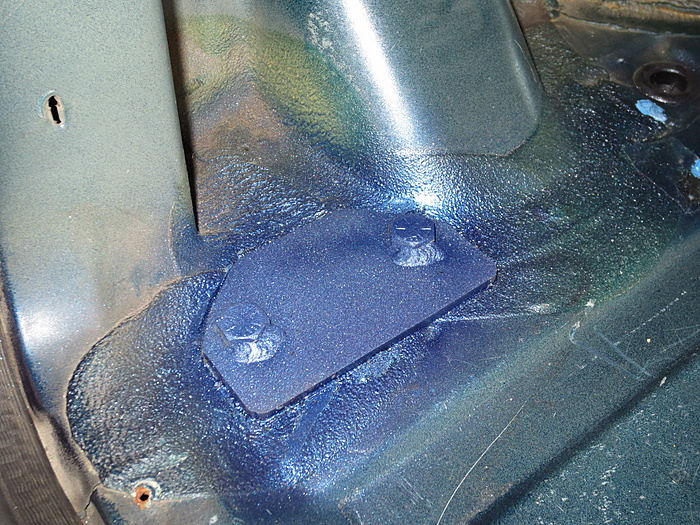
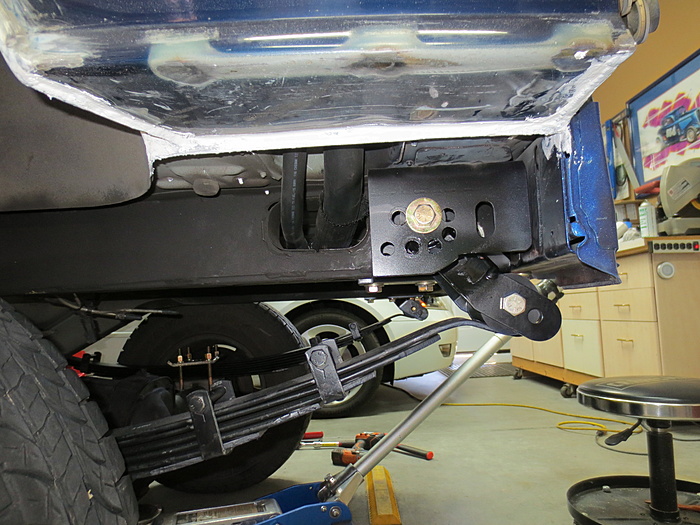
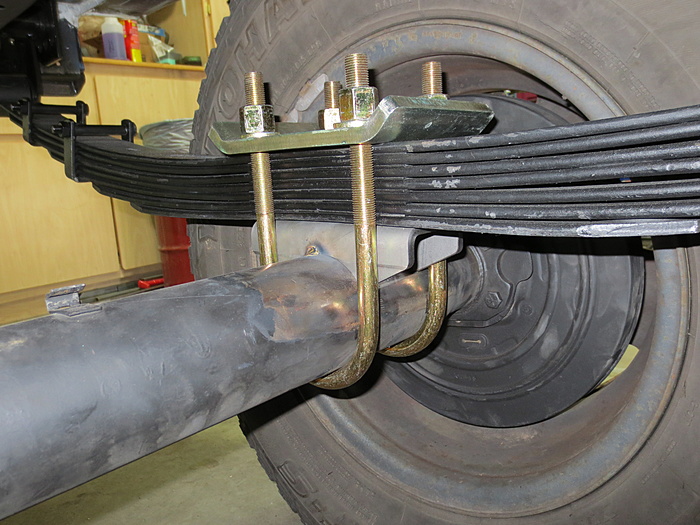
I had the rear carpet out to do some sound deadening and figured I'd tack weld the shackle plate bolts so it's easier to tighten the nuts when I need to.
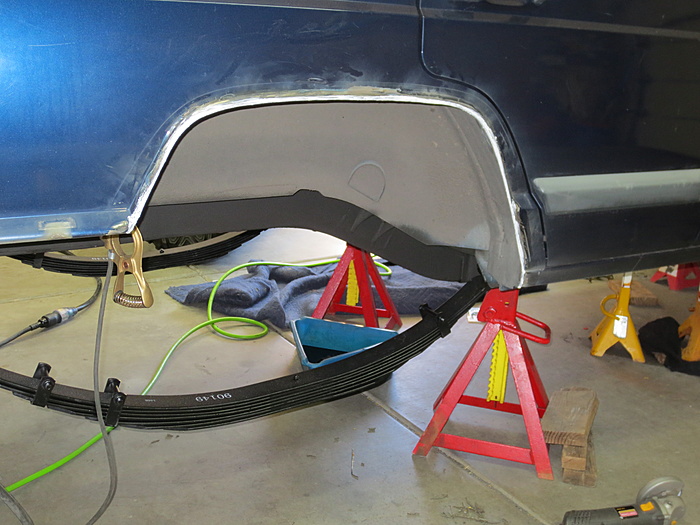
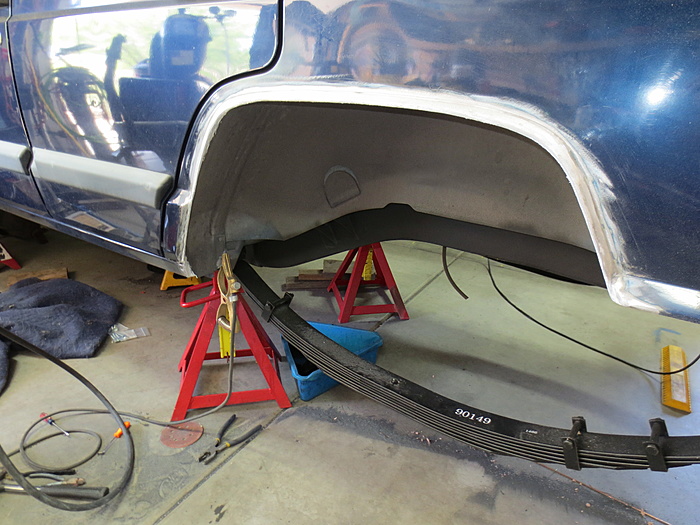
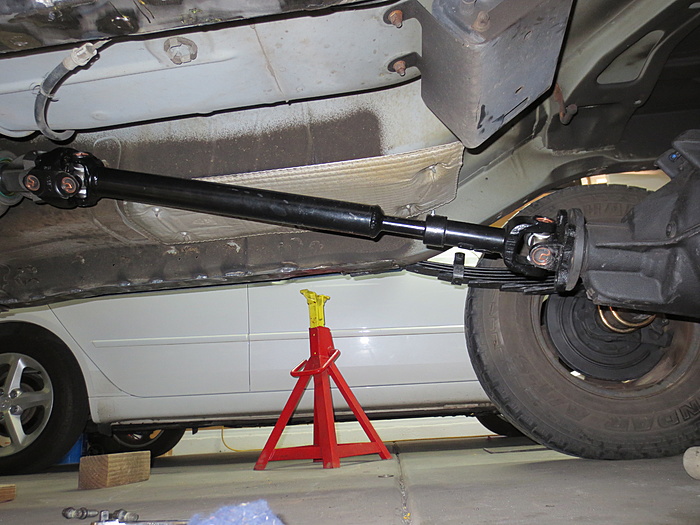
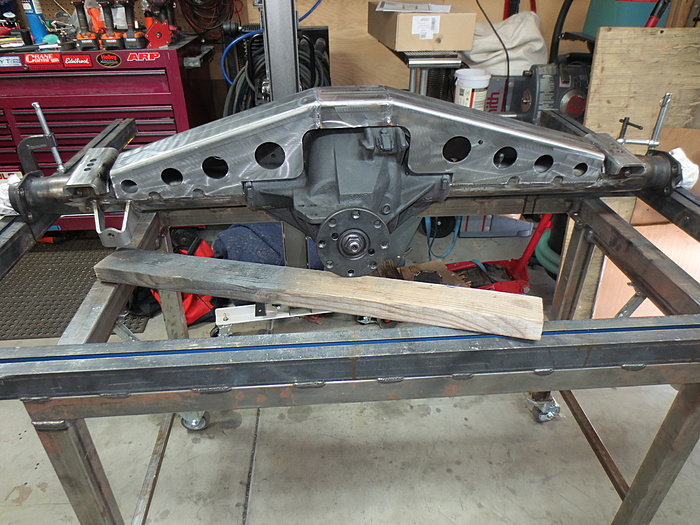
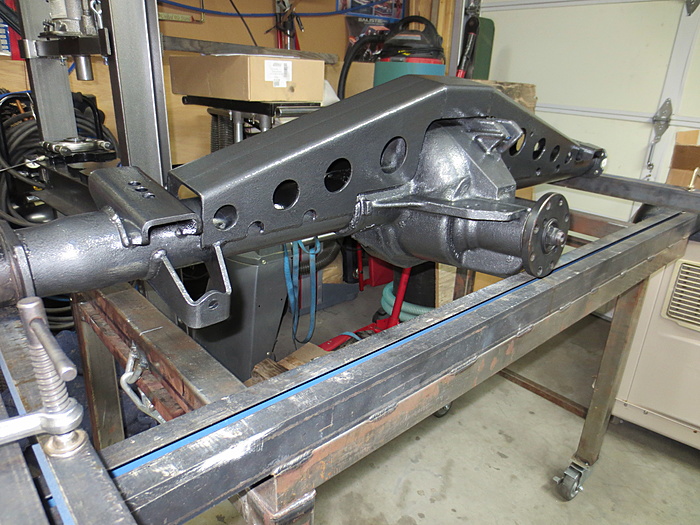
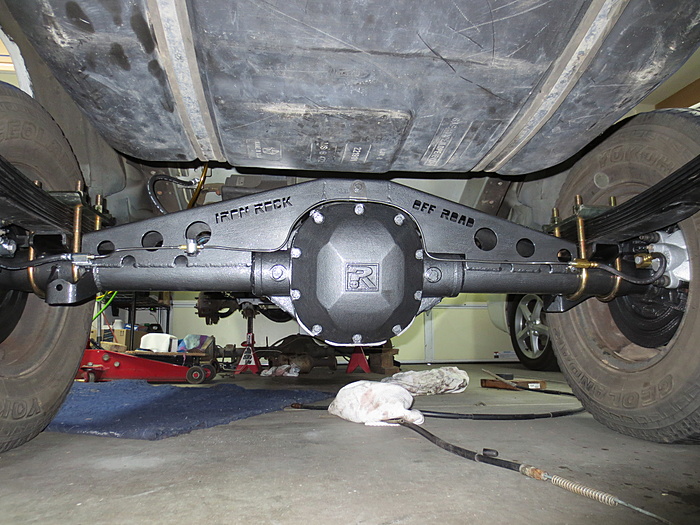
8.8 mocked up to locate the leaf spring mounts
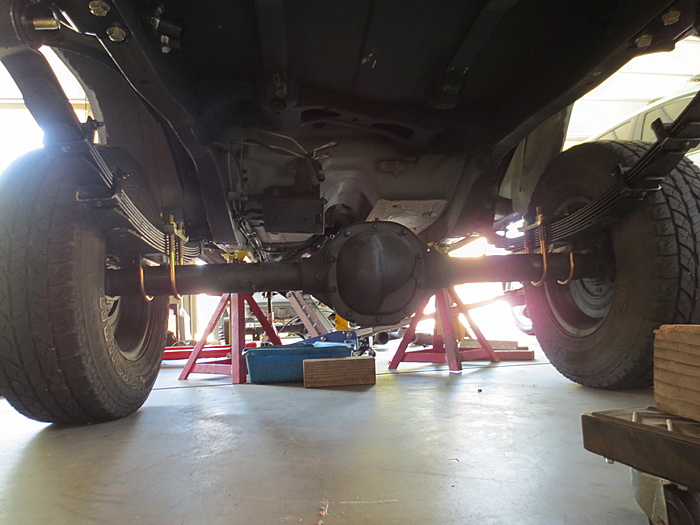
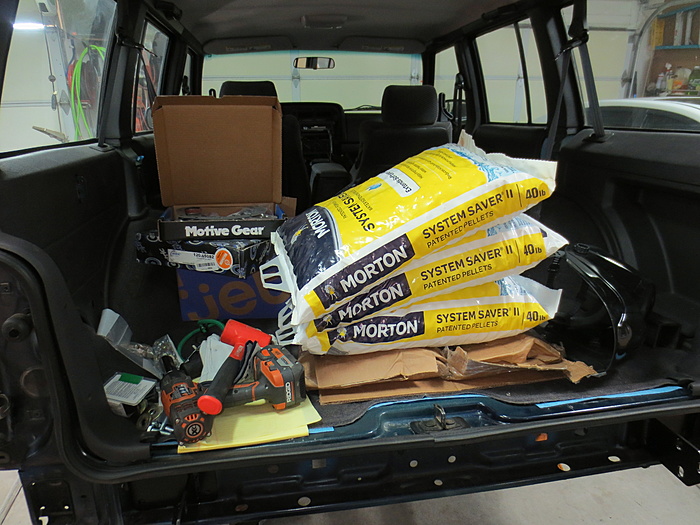
Put two DIY bumper kits that weigh about 110lbs with 120lbs of salt and some misc junk in the rear, probably about 250lbs total to hopefully get close to ride height
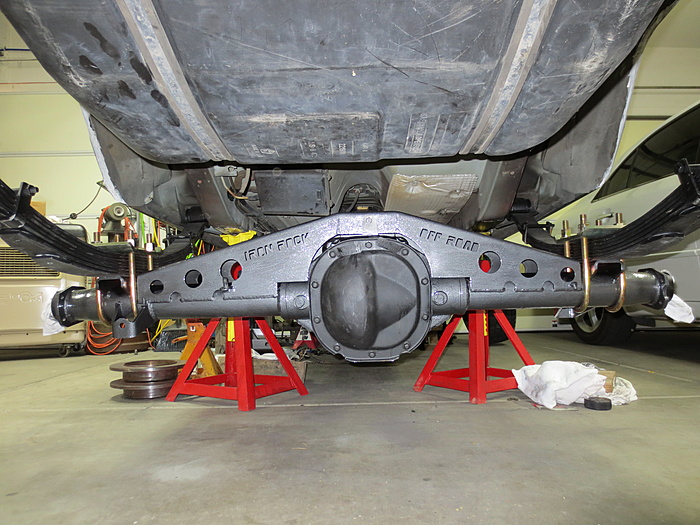
Ironrock 3.5" leafs and 1" shackle with all the weight in the back, I'm at about 4" lift if I'm measuring correctly. I'm trying to get as close to 4" as I can
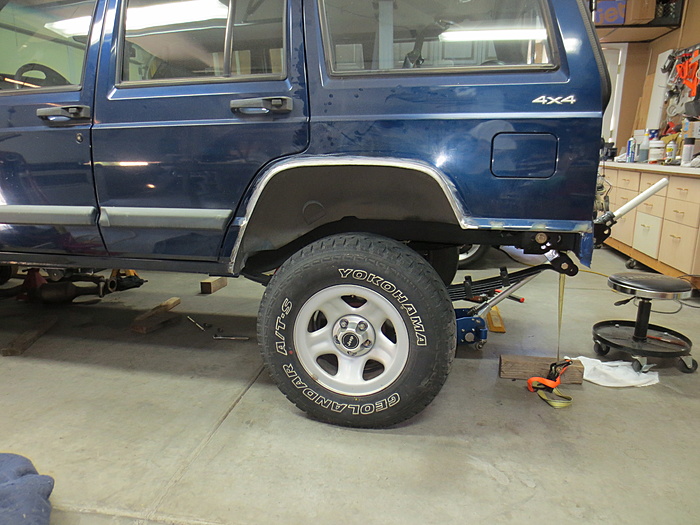
Shackle angle is near perfect here, but there is barely any compression before the shackle binds on the shackle mount. I already clearanced it as much as I can, I may need to get a different shackle, any suggestions?
Driveshaft angle is about 14 degrees and pinion is 12 degrees, I think I got it near perfect as I was going for 2 degree lower pinion angle
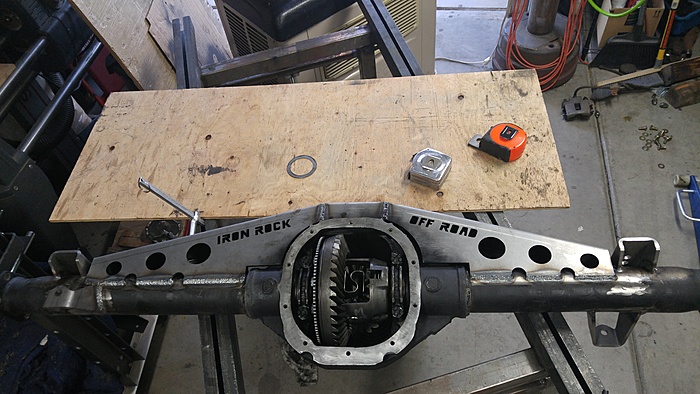
Just tack welded spring perches for now, time to decide whether I strip the axle completely and put new bearings and seals. I also have an Ironrock truss to install and rebuild the limited slip clutch pack
8.8 install is far from complete, but at least I have the spring perches located, hopefully my ride height is about the same as I estimated when it's all done.

8.8 mocked up to locate the leaf spring mounts

Put two DIY bumper kits that weigh about 110lbs with 120lbs of salt and some misc junk in the rear, probably about 250lbs total to hopefully get close to ride height

Ironrock 3.5" leafs and 1" shackle with all the weight in the back, I'm at about 4" lift if I'm measuring correctly. I'm trying to get as close to 4" as I can

Shackle angle is near perfect here, but there is barely any compression before the shackle binds on the shackle mount. I already clearanced it as much as I can, I may need to get a different shackle, any suggestions?

Driveshaft angle is about 14 degrees and pinion is 12 degrees, I think I got it near perfect as I was going for 2 degree lower pinion angle

Just tack welded spring perches for now, time to decide whether I strip the axle completely and put new bearings and seals. I also have an Ironrock truss to install and rebuild the limited slip clutch pack

8.8 install is far from complete, but at least I have the spring perches located, hopefully my ride height is about the same as I estimated when it's all done.
06-03-2017, 06:51 PM
#20
Member
Thread Starter
Join Date: Jan 2017
Location: Anthem, AZ
Posts: 125
Likes: 0
Received 2 Likes
on
2 Posts
Year: 2001
Model: Cherokee
Thanks, I'm spending a little more than I planned on originally, but I just can't justify cutting corners on most parts of the build. One area I went cheap are the driveshafts. I'm planning on using a stock front in the rear, but I did at least rebuild it completely, we'll see how it holds up, should be fine since I'm trying to stay around 4" lift.
07-02-2017, 09:11 PM
#21
Member
Thread Starter
Join Date: Jan 2017
Location: Anthem, AZ
Posts: 125
Likes: 0
Received 2 Likes
on
2 Posts
Year: 2001
Model: Cherokee
Time for an update, mainly been working on the rear axle and finally got my crossmember tie ins and was able to work on those. Been busy lately and it's been pretty hot here, not too fun working on it in the evenings!
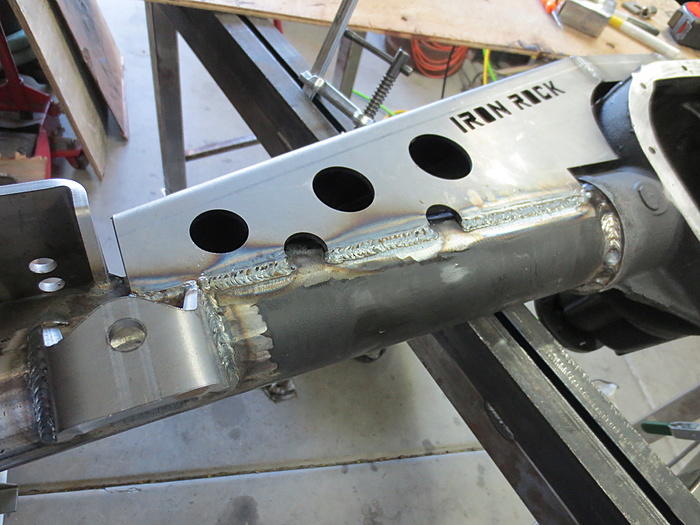
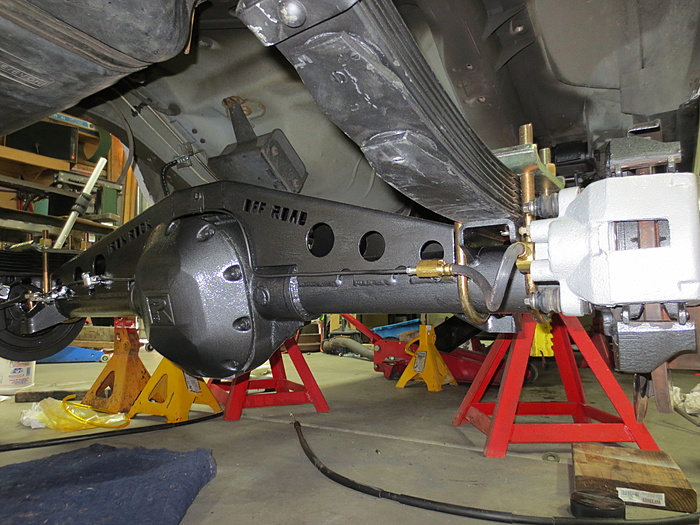
I was debating whether or not to use the truss I bought, honestly don't think it's necessary for my build, but ended up installing it and actually like the way it looks. Of course it adds strength as well, happy with the way it turned out overall.
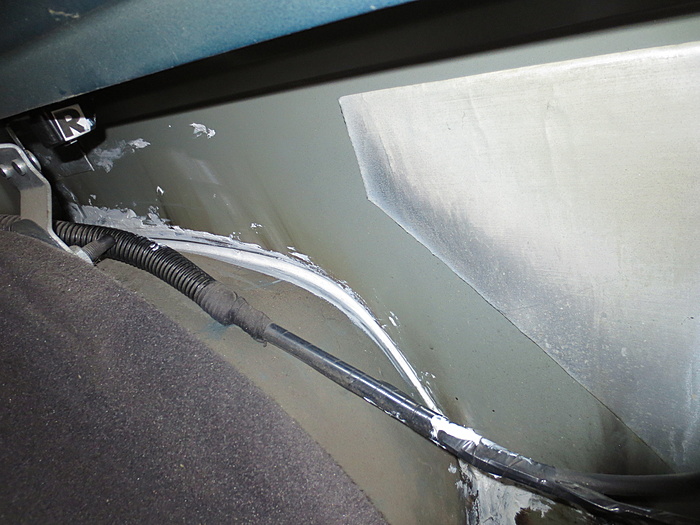
I wasn't sure where to run the brake lines and how long I needed. Ended up with 8" on drivers and 40" passenger. Really could've used around 34-36" max for passenger, but couldn't find that length. Had to do a couple extra bends over the diff since I didn't have a flaring tool. I might still change it at some point, but for now it will work.
If anyone is wondering, the brake line is 3/16, 3/8-24 double flare both ends. I'm using the stock 8.8 passenger soft line for both sides and Raybestos BH380729 rear hose, it's 21" long, seems like it will work perfect the way I routed it.
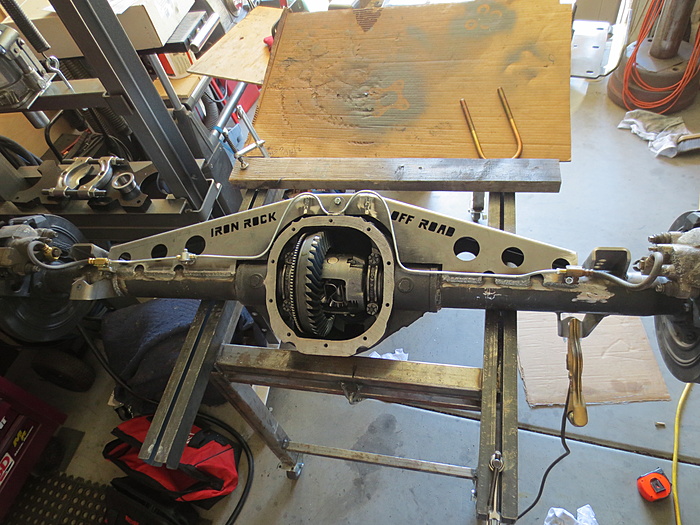
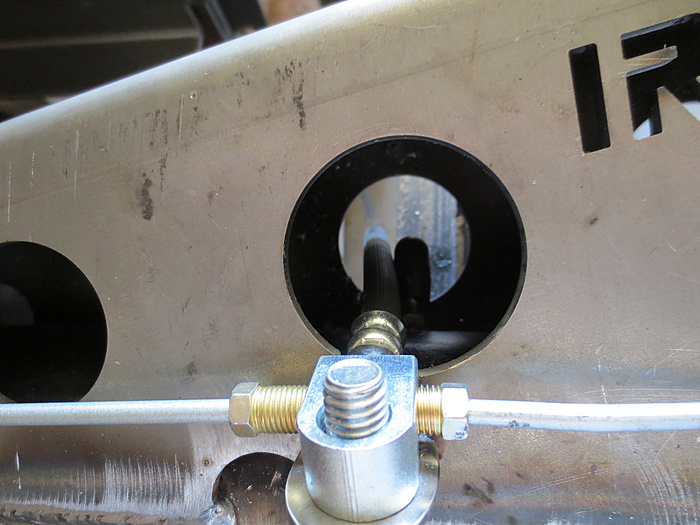
Welded a bolt to mount the soft line and welded a large washer to a bolt, then welded the washer to the truss for the junction.
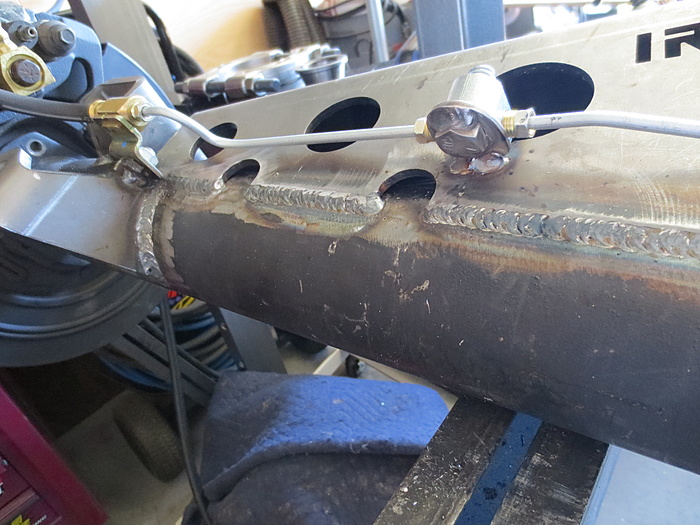
Rear hose is going through the truss and seems like it will work well.
All cleaned up and ready for paint.
Painted with Rustoleum Hammered Black. First time I've used it and I like it so far. It isn't black though, it's more of a charcoal which is what I wanted, so that works for me. It was a little too hot when I painted it, about 90-95 degrees. It was drying a little too fast and isn't perfect, but still really happy with it.
Diff cover is flat black for comparison. Ordered a new diff cover, I'm not running the stock one.
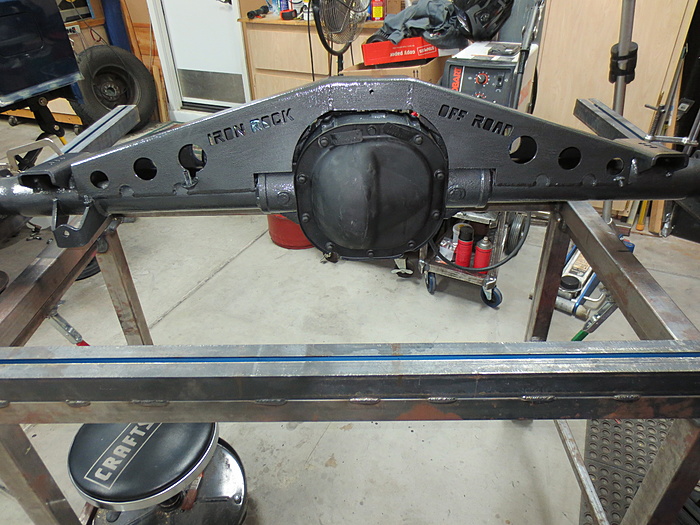
Still need to figure out the parking brake cables, other than that, rear axle is pretty much done.
I was debating whether or not to use the truss I bought, honestly don't think it's necessary for my build, but ended up installing it and actually like the way it looks. Of course it adds strength as well, happy with the way it turned out overall.


I wasn't sure where to run the brake lines and how long I needed. Ended up with 8" on drivers and 40" passenger. Really could've used around 34-36" max for passenger, but couldn't find that length. Had to do a couple extra bends over the diff since I didn't have a flaring tool. I might still change it at some point, but for now it will work.
If anyone is wondering, the brake line is 3/16, 3/8-24 double flare both ends. I'm using the stock 8.8 passenger soft line for both sides and Raybestos BH380729 rear hose, it's 21" long, seems like it will work perfect the way I routed it.

Welded a bolt to mount the soft line and welded a large washer to a bolt, then welded the washer to the truss for the junction.

Rear hose is going through the truss and seems like it will work well.

All cleaned up and ready for paint.

Painted with Rustoleum Hammered Black. First time I've used it and I like it so far. It isn't black though, it's more of a charcoal which is what I wanted, so that works for me. It was a little too hot when I painted it, about 90-95 degrees. It was drying a little too fast and isn't perfect, but still really happy with it.

Diff cover is flat black for comparison. Ordered a new diff cover, I'm not running the stock one.

Still need to figure out the parking brake cables, other than that, rear axle is pretty much done.
 07-02-2017, 09:36 PM
#22
Member
Thread Starter
Join Date: Jan 2017
Location: Anthem, AZ
Posts: 125
Likes: 0
Received 2 Likes
on
2 Posts
Year: 2001
Model: Cherokee
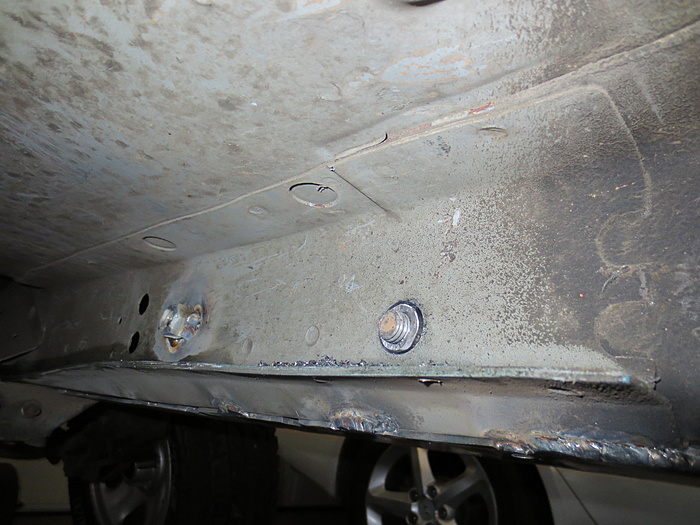
I finally got the crossmember tie ins from CavFab, really upset with how long it took to get everything, but in the end, I'm pretty happy with the kit so far.
I went ahead and modified the tie ins as I didn't like the look of them mounted under the crossmember and just wanted a cleaner look.
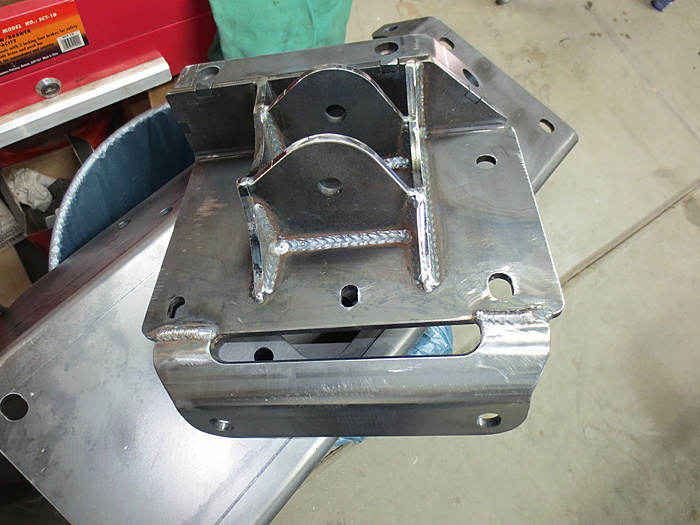
Cut the ends off and tack welded to crossmember.
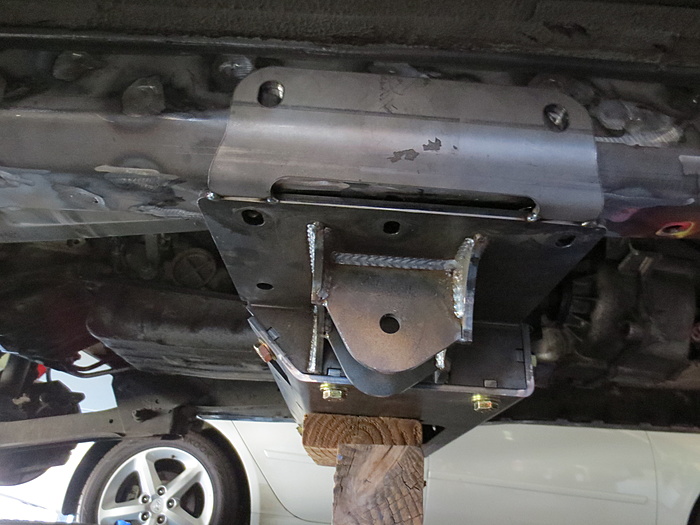
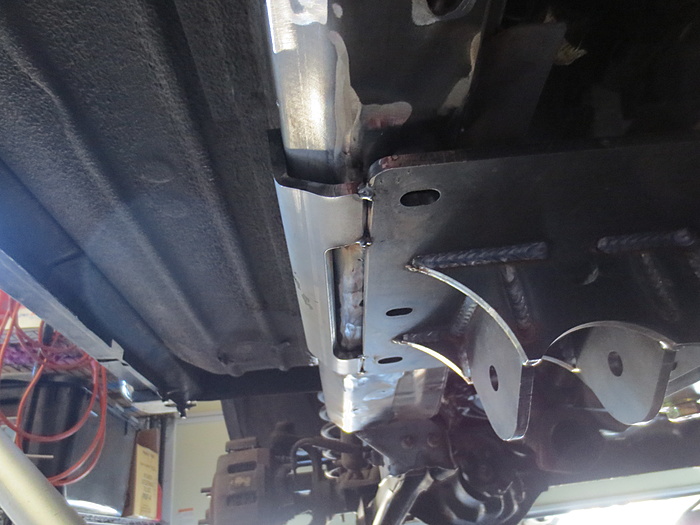
All welded and plan on putting crush sleeves front and rear since my mid stiffeners cover the hole for the flag nut.
CavFab sent me some extra sleeves, but they are too short as the "frame" gets wider toward the front. I ended up welding the sleeve to the "frame" and welding a nut to make it easier to assemble/disassemble.
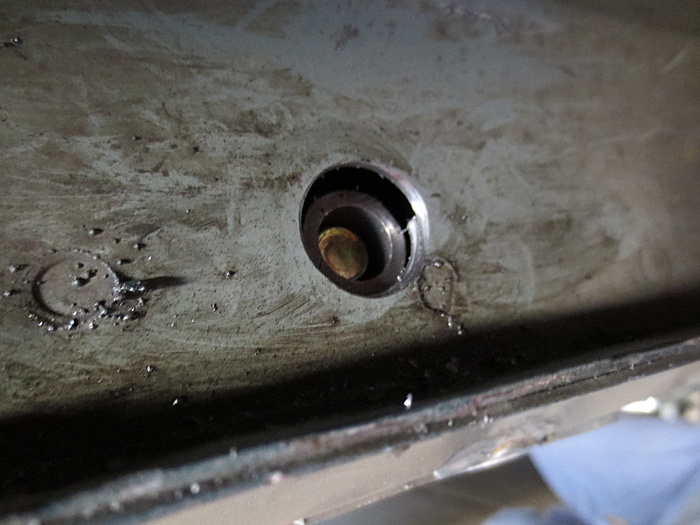
I was using a unibit to drill the holes and the rear hole has some extra wall or something inside, I didn't have a large enough bit to get through it, so just had to grind it with a burr bit. It worked out ok, just made the job more difficult.
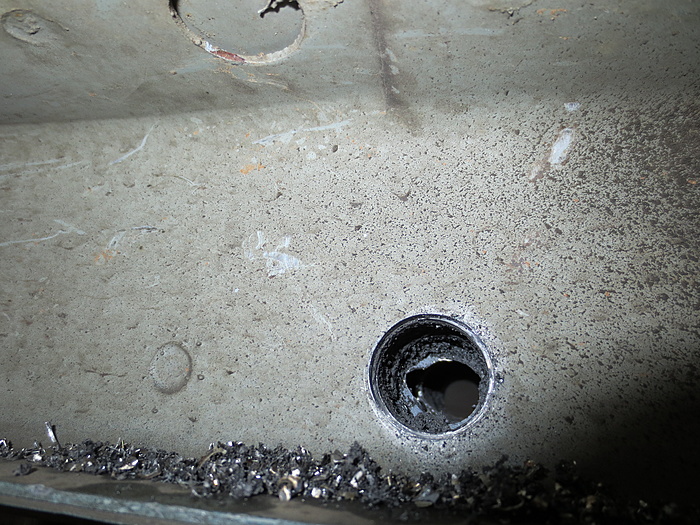
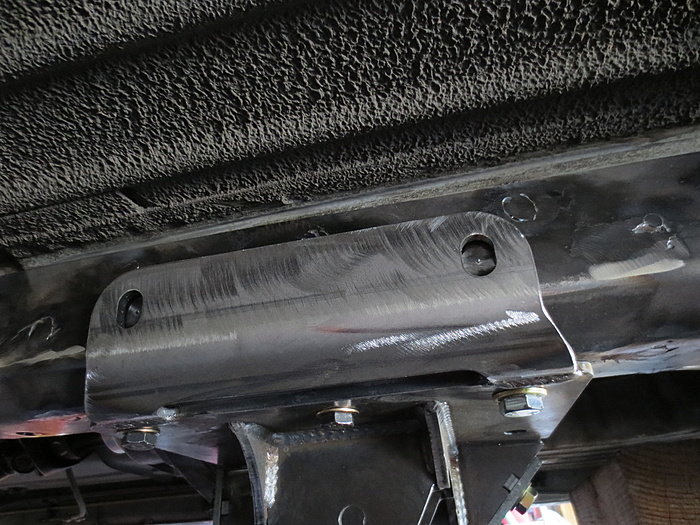
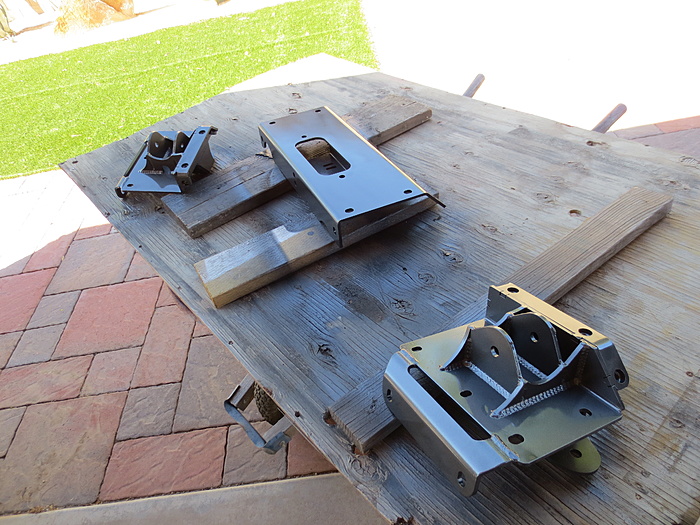
Rear sleeve fits much better, welded a nut to the rear just like the front.
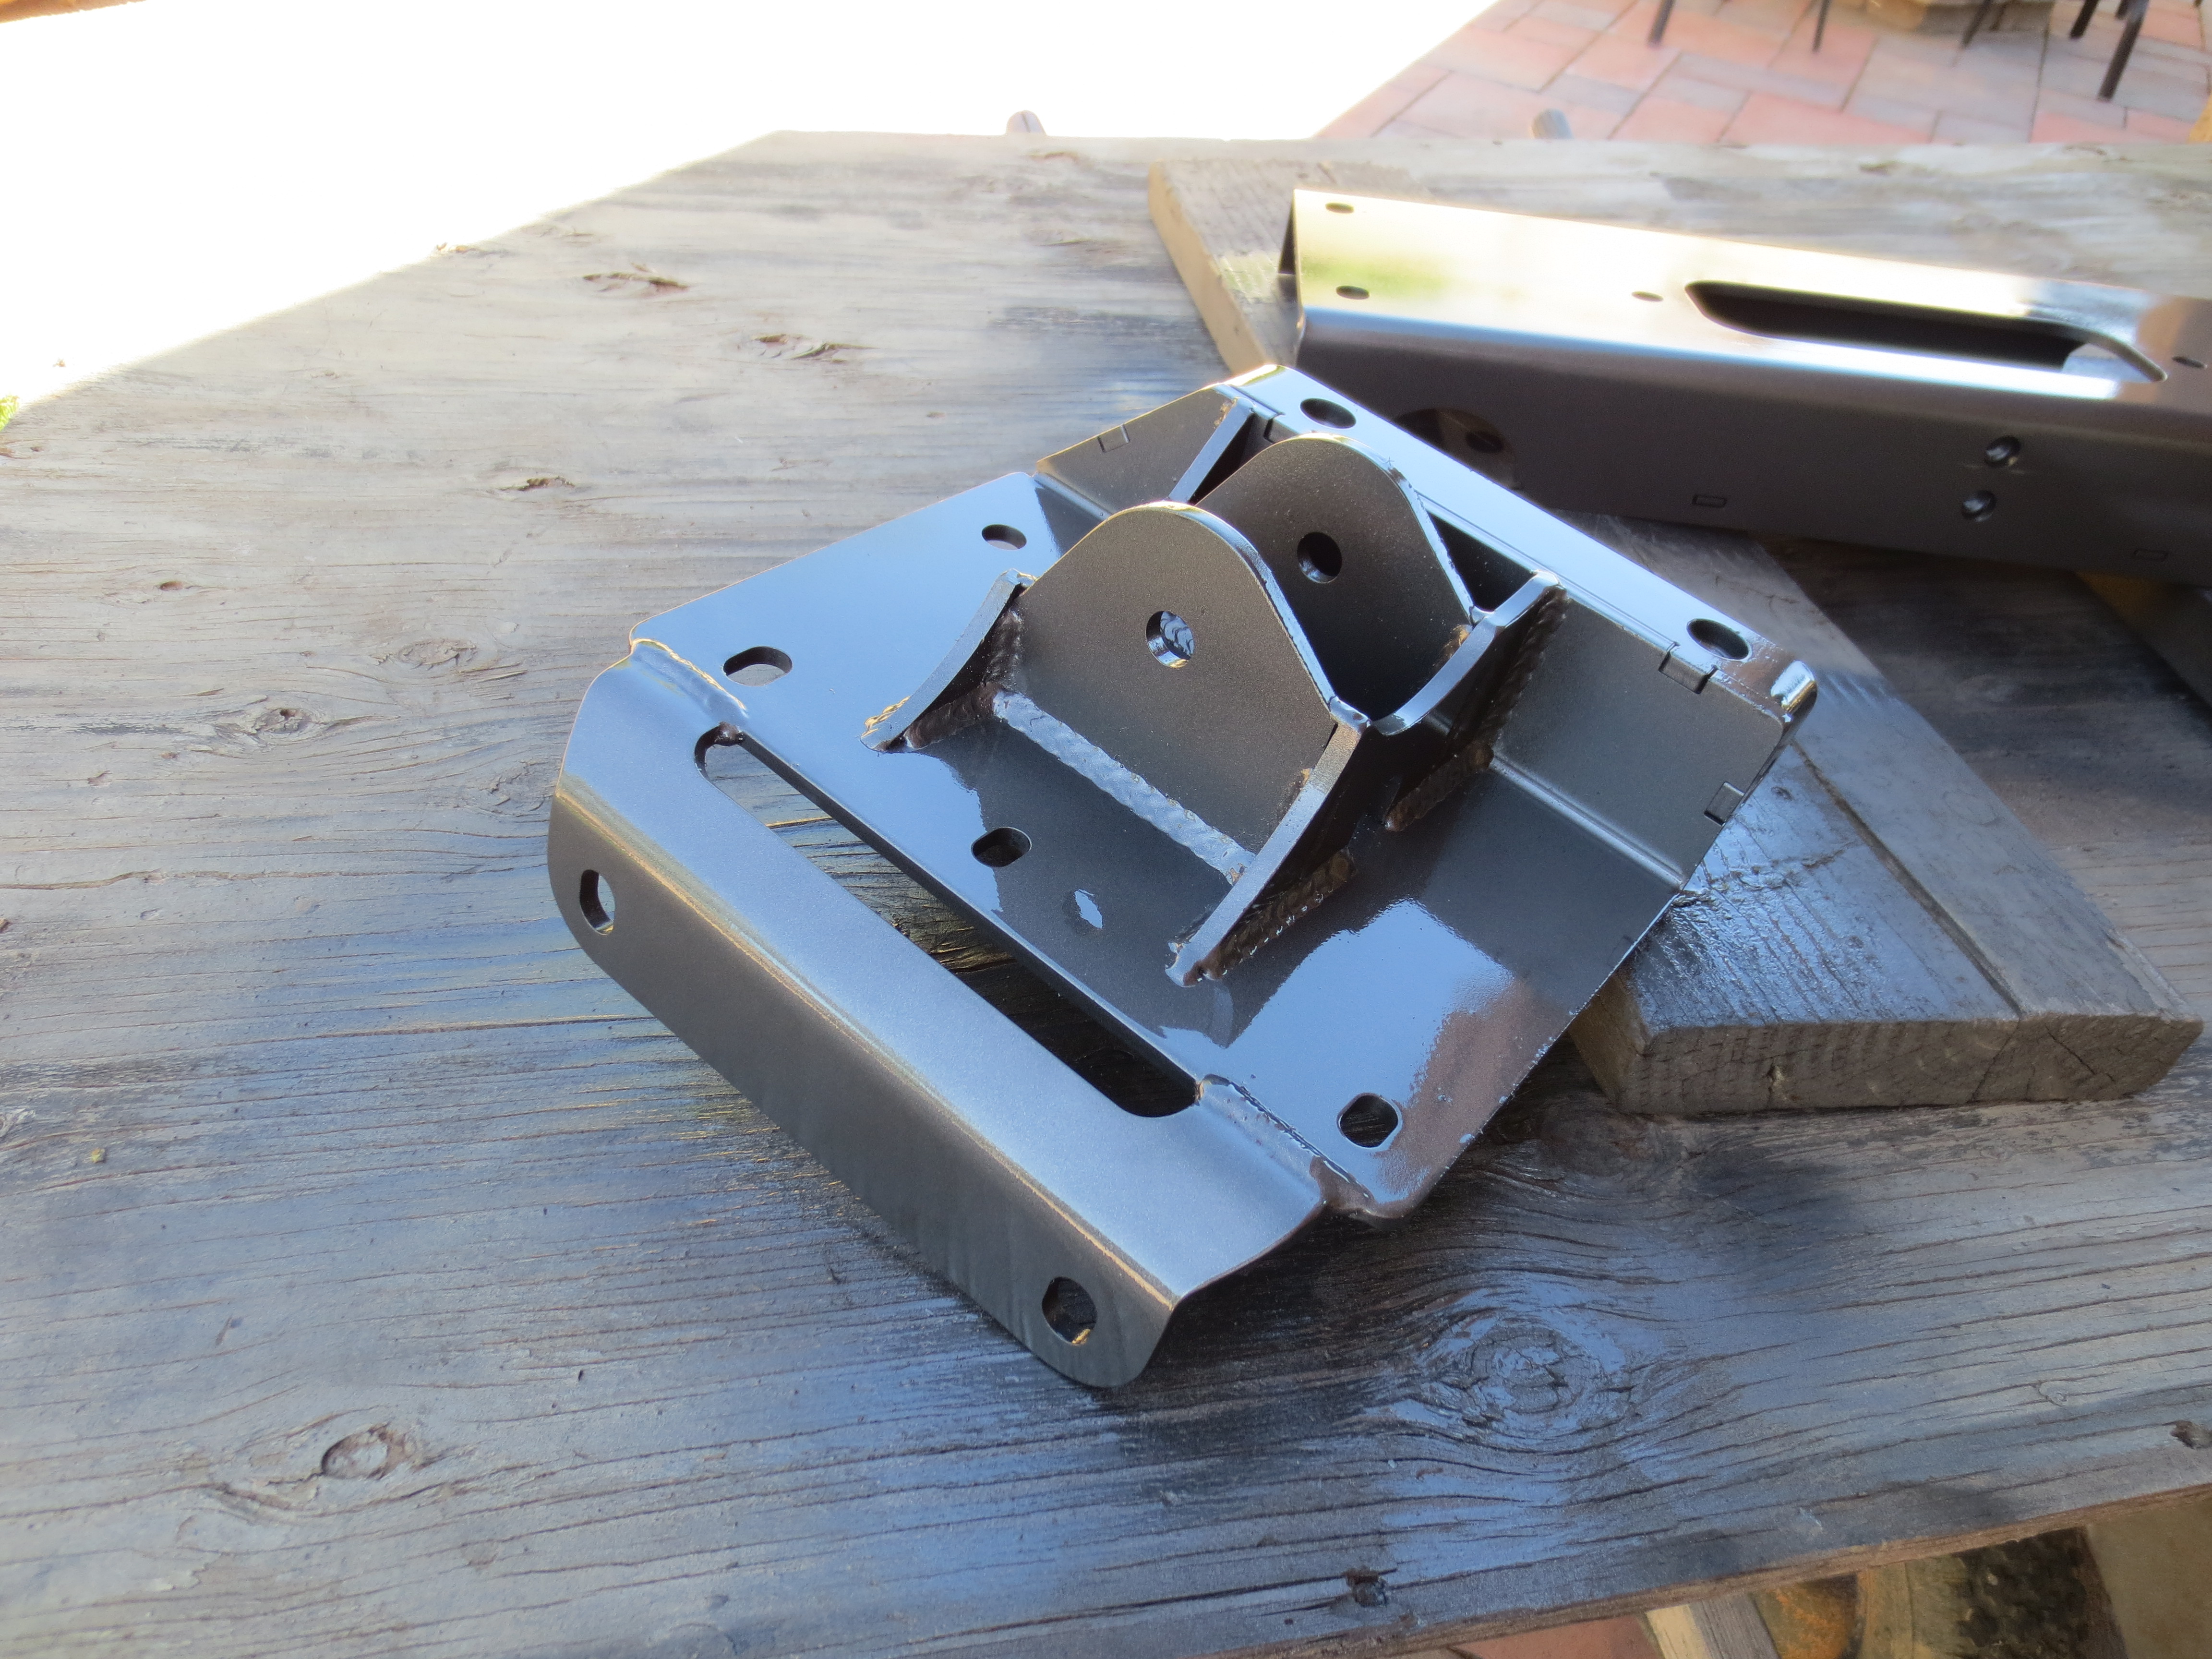
Welded and ready for paint.

All painted, didn't install yet, I want to change the trans filter first, then I'll install the crossmember and hopefully won't have to remove it again.
I went ahead and modified the tie ins as I didn't like the look of them mounted under the crossmember and just wanted a cleaner look.
Cut the ends off and tack welded to crossmember.


All welded and plan on putting crush sleeves front and rear since my mid stiffeners cover the hole for the flag nut.

CavFab sent me some extra sleeves, but they are too short as the "frame" gets wider toward the front. I ended up welding the sleeve to the "frame" and welding a nut to make it easier to assemble/disassemble.

I was using a unibit to drill the holes and the rear hole has some extra wall or something inside, I didn't have a large enough bit to get through it, so just had to grind it with a burr bit. It worked out ok, just made the job more difficult.

Rear sleeve fits much better, welded a nut to the rear just like the front.

Welded and ready for paint.

All painted, didn't install yet, I want to change the trans filter first, then I'll install the crossmember and hopefully won't have to remove it again.
 07-02-2017, 09:44 PM
#23
Member
Thread Starter
Join Date: Jan 2017
Location: Anthem, AZ
Posts: 125
Likes: 0
Received 2 Likes
on
2 Posts
Year: 2001
Model: Cherokee
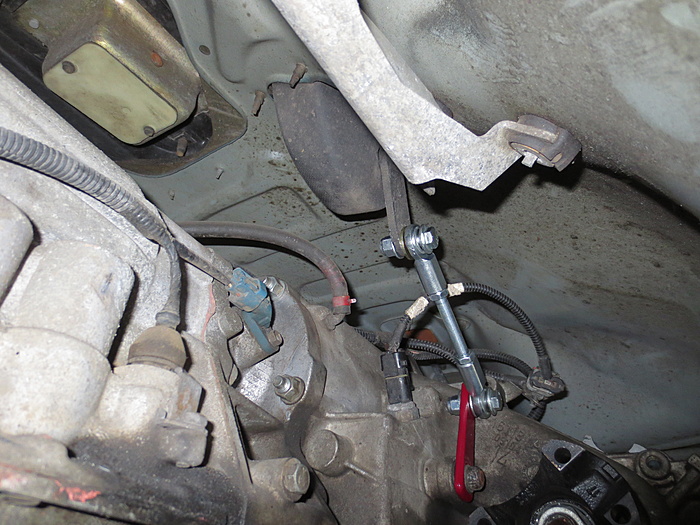
My old XJ had worn shift linkage and was nearly impossible to get into 4-low, so I made some custom linkage that made shifting solid. Went ahead and copied it before I sold it and installed it on my new XJ. Nice tight, solid shifts now.
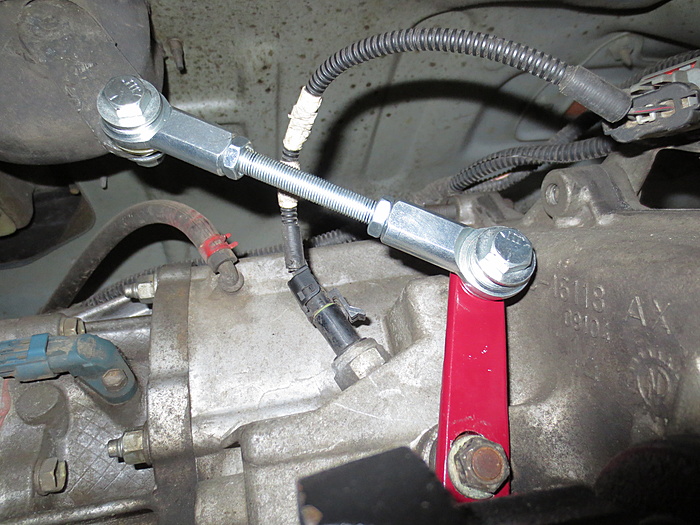
Pretty simple design, just had to make a few different lengths at first to get the proper amount of throw. The adjustment has to be perfect to get it working right, but once set, there is no play, should hold up much better than stock.

Pretty simple design, just had to make a few different lengths at first to get the proper amount of throw. The adjustment has to be perfect to get it working right, but once set, there is no play, should hold up much better than stock.
 07-10-2017, 08:34 PM
#24
Member
Thread Starter
Join Date: Jan 2017
Location: Anthem, AZ
Posts: 125
Likes: 0
Received 2 Likes
on
2 Posts
Year: 2001
Model: Cherokee
Rear axle is done except for the parking brake cables which I can't install until I get new wheels, stock are offset too much and get in the way of the cable.
I'm going to try and use the stock explorer cables, I read that some people have problems getting them to hold well so I extended the arm to get a little more leverage. Not sure how it will work, it will be a while before I can even test it out.
Installed a Riddler diff cover and fixed the brake line. Borrowed a tube flaring tool and cut it the right length and re-bent it, much happier with it now.
Painted the calipers silver.
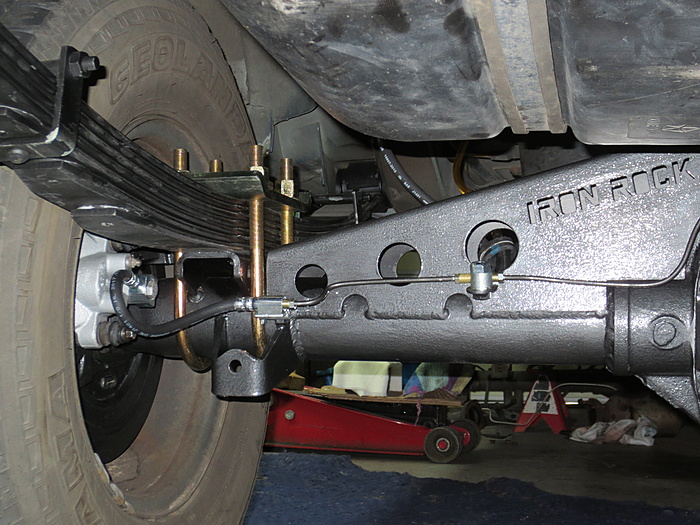
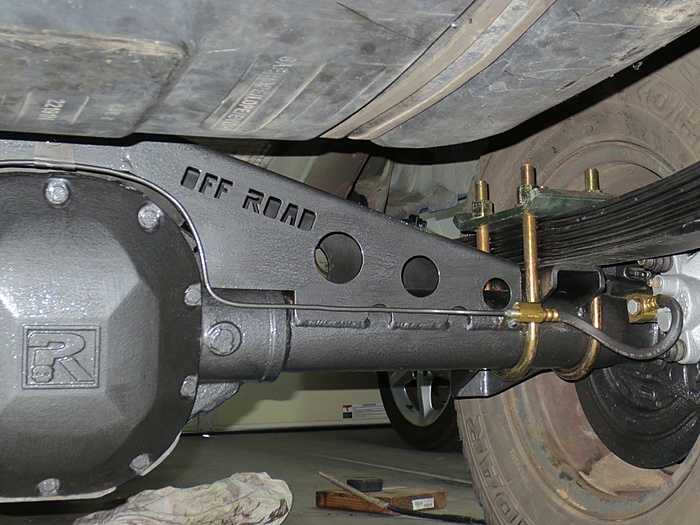
Brake hose and breather come through the truss and hard mounted them so they can't rub through.

I'm going to try and use the stock explorer cables, I read that some people have problems getting them to hold well so I extended the arm to get a little more leverage. Not sure how it will work, it will be a while before I can even test it out.

Installed a Riddler diff cover and fixed the brake line. Borrowed a tube flaring tool and cut it the right length and re-bent it, much happier with it now.

Painted the calipers silver.


Brake hose and breather come through the truss and hard mounted them so they can't rub through.
 07-10-2017, 08:43 PM
#25
Member
Thread Starter
Join Date: Jan 2017
Location: Anthem, AZ
Posts: 125
Likes: 0
Received 2 Likes
on
2 Posts
Year: 2001
Model: Cherokee
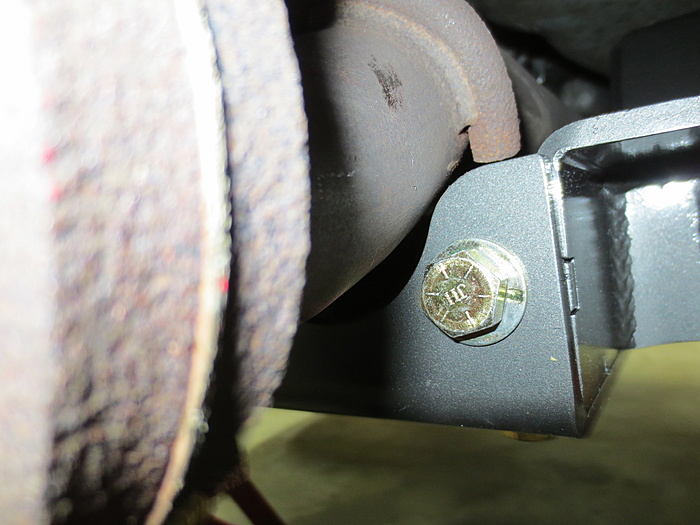
I changed the trans filter/screen and finally installed the crossmember. The tie ins work well being welded and I like how clean they look overall.
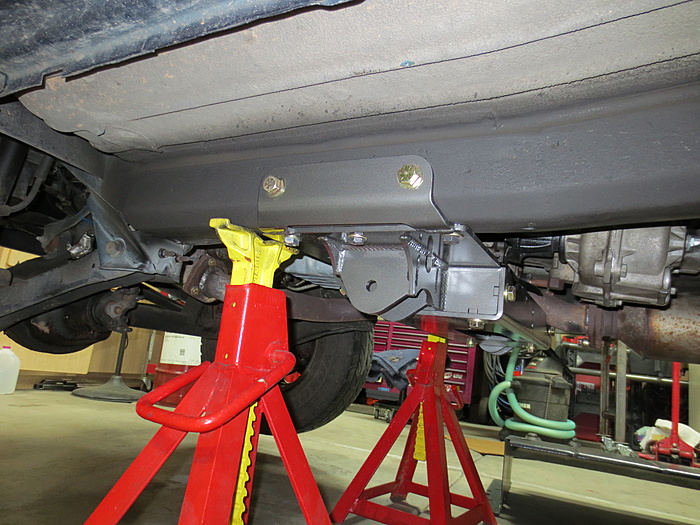
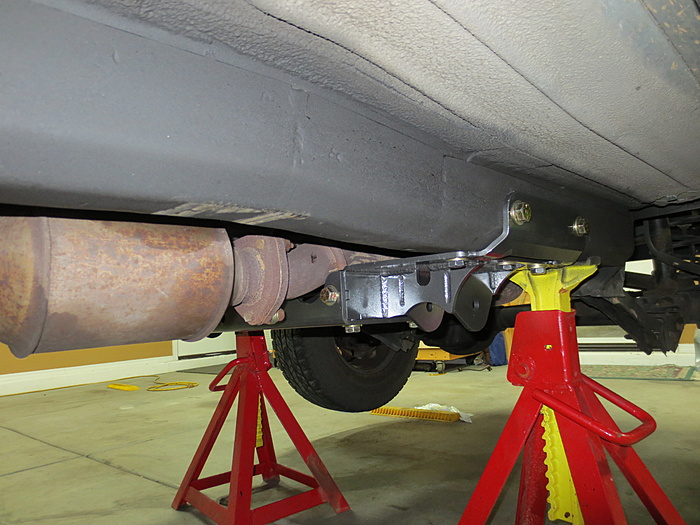
One problem I ran into is the exhaust has about 1/16" clearance from the crossmember. I'll need to remove the center section and clearance it some more. Not a big deal, just wish I had the exhaust mounted when I test fit the crossmember and fixed it before I painted it.
Finally time to work on the front end. Not even sure where to start! Guess I'll just start removing parts and figure out what I need to buy. It's been so long, I don't even know what parts I've already bought!


One problem I ran into is the exhaust has about 1/16" clearance from the crossmember. I'll need to remove the center section and clearance it some more. Not a big deal, just wish I had the exhaust mounted when I test fit the crossmember and fixed it before I painted it.

Finally time to work on the front end. Not even sure where to start! Guess I'll just start removing parts and figure out what I need to buy. It's been so long, I don't even know what parts I've already bought!
07-11-2017, 07:46 PM
#26
Member
Thread Starter
Join Date: Jan 2017
Location: Anthem, AZ
Posts: 125
Likes: 0
Received 2 Likes
on
2 Posts
Year: 2001
Model: Cherokee
Originally I had planned to use Rubicon Express 4.5" coils up front. Plans have changed though, I want to keep the front right around 4-4.5" and the truss/coil buckets I'm using for the D30 supposedly relocate the coils a little higher, maybe up to an inch, not really sure.
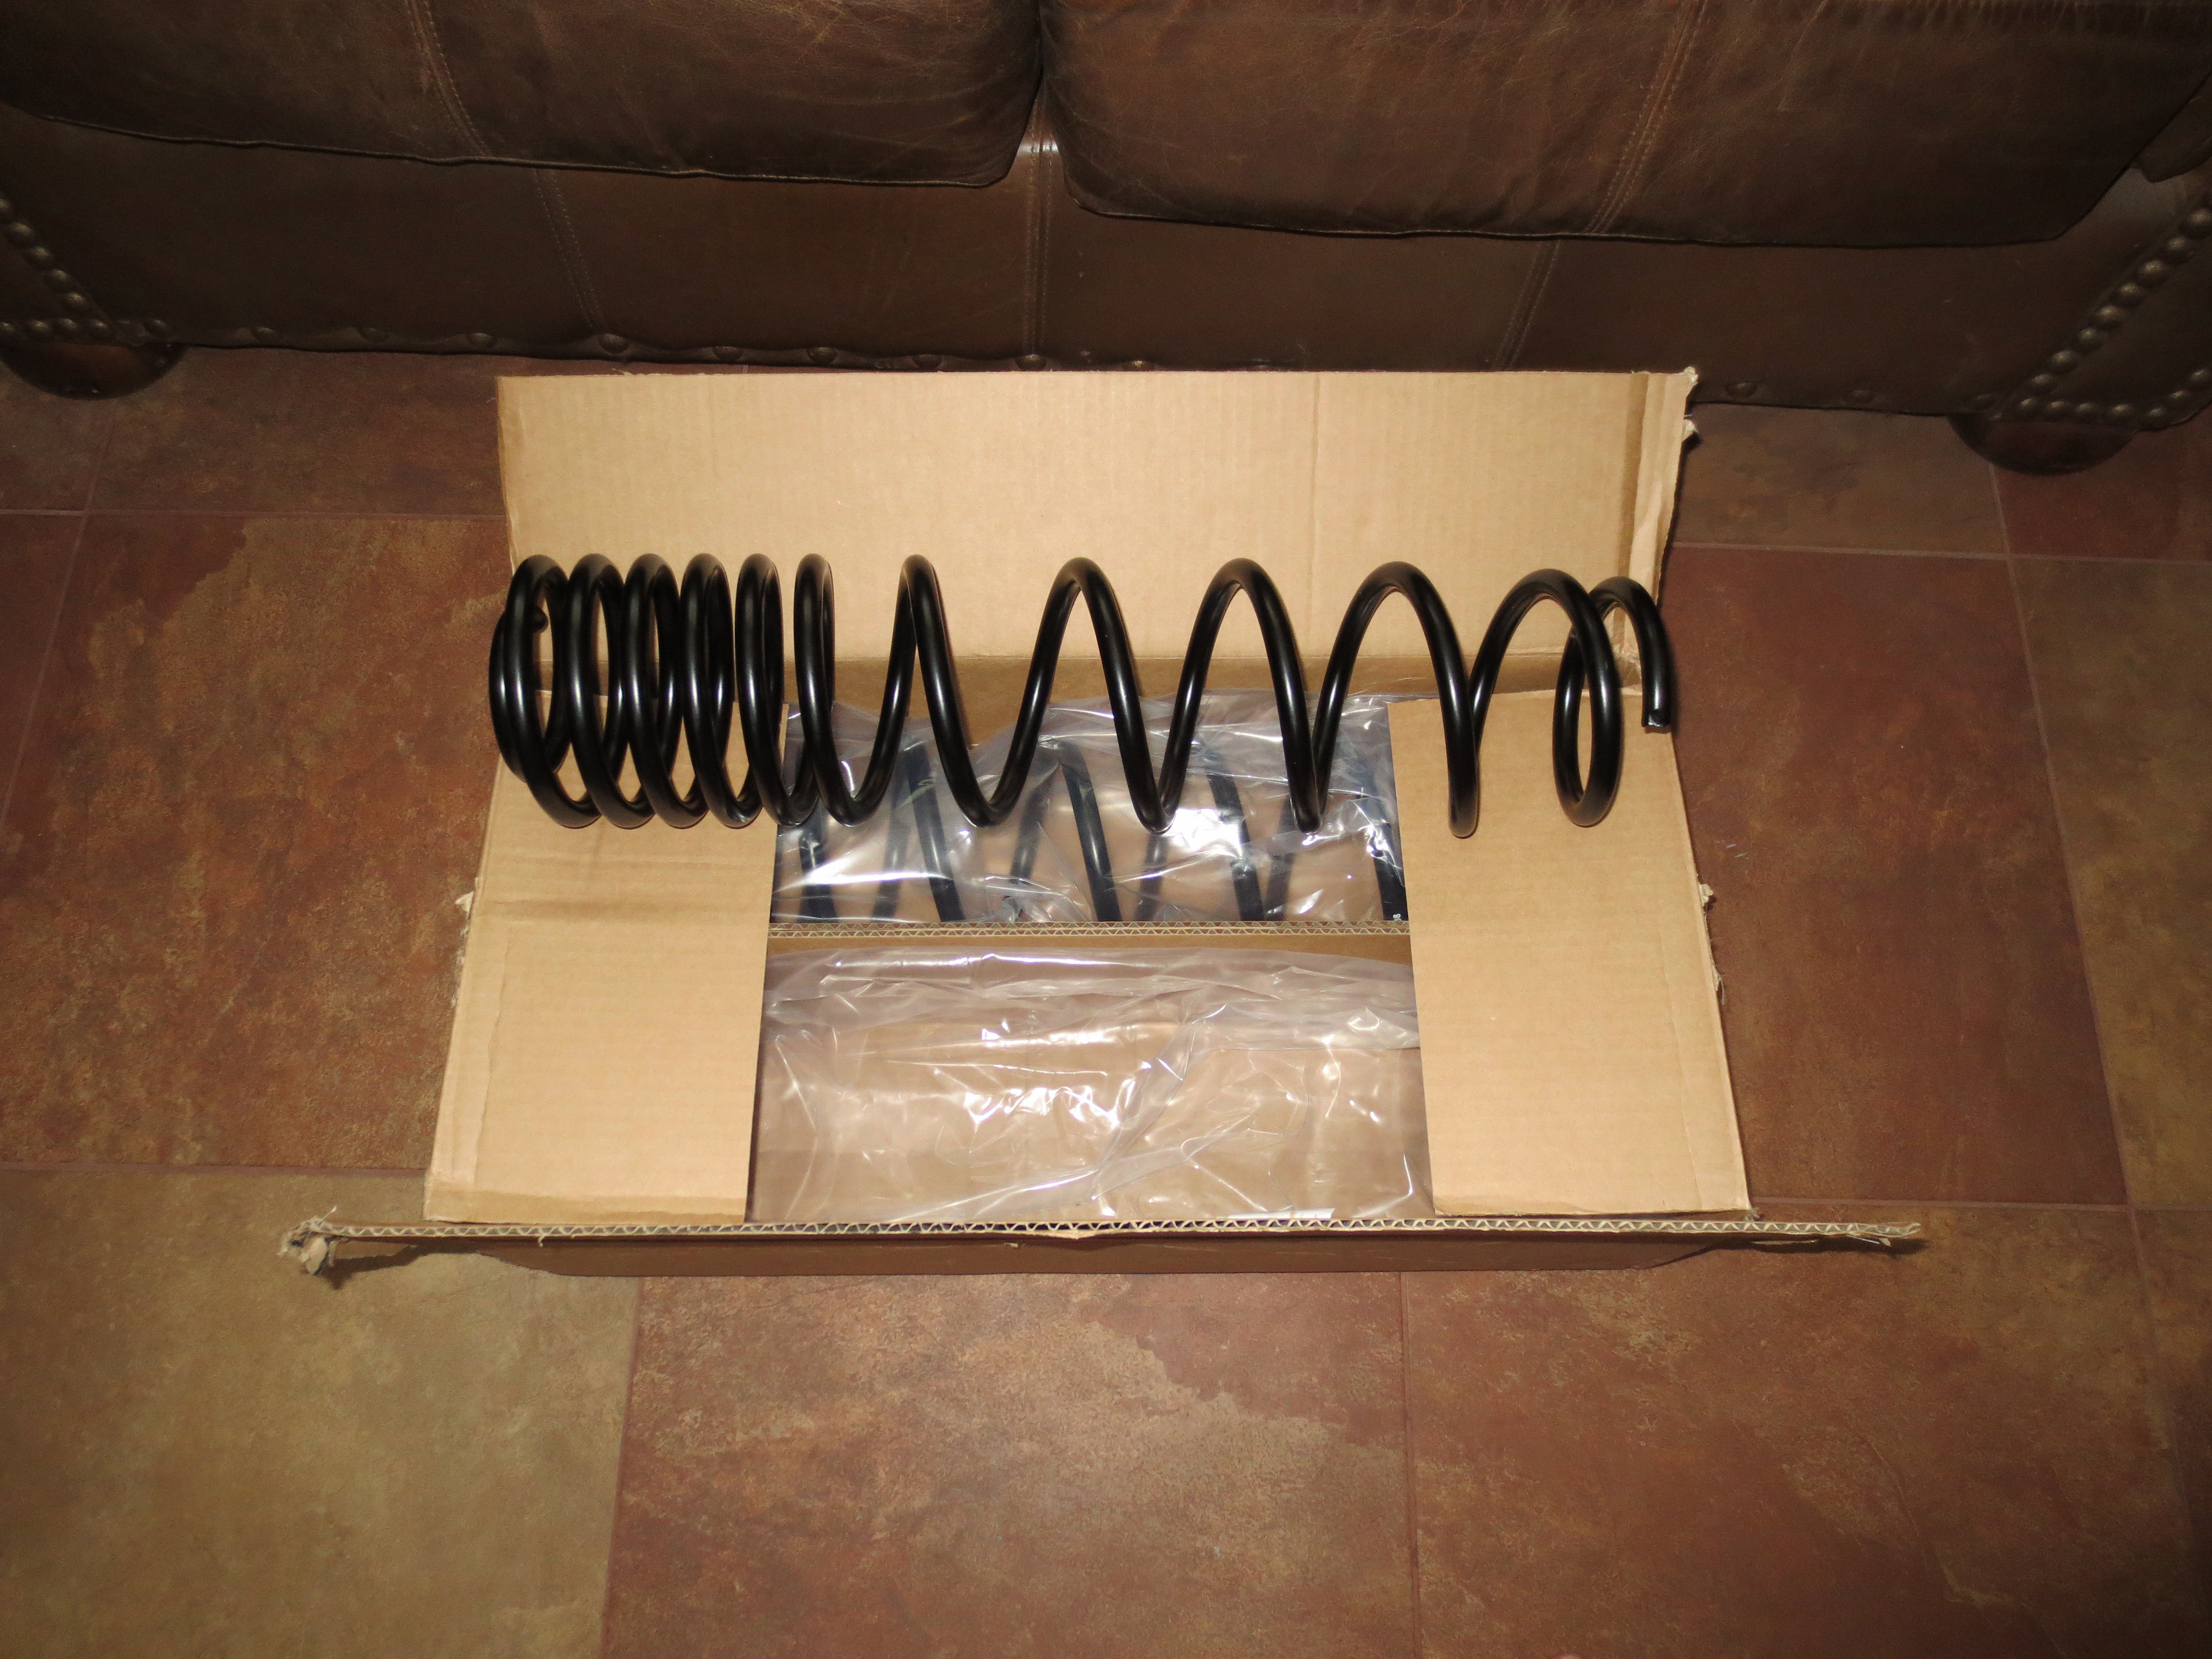
I've been interested in the Metal Cloak coils, but haven't heard too much about them. Everything I have read seems to be positive though. Went ahead and pulled the trigger on their 3.5" coils and they arrived today.

Got my truss a while ago, curious to see how it works with everything I plan on doing up front.
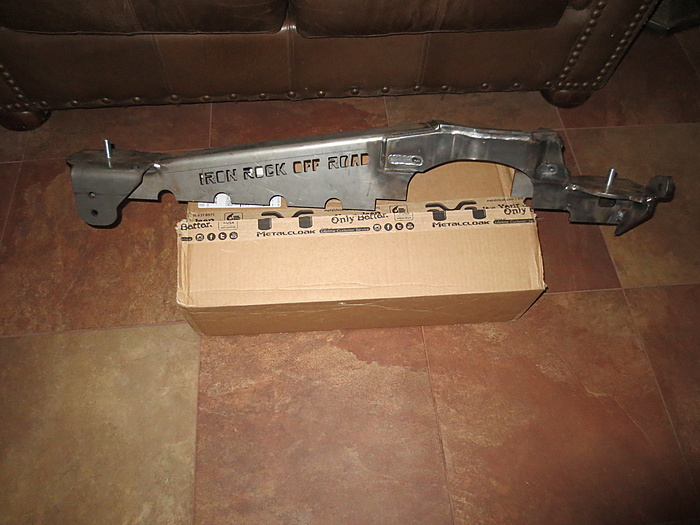
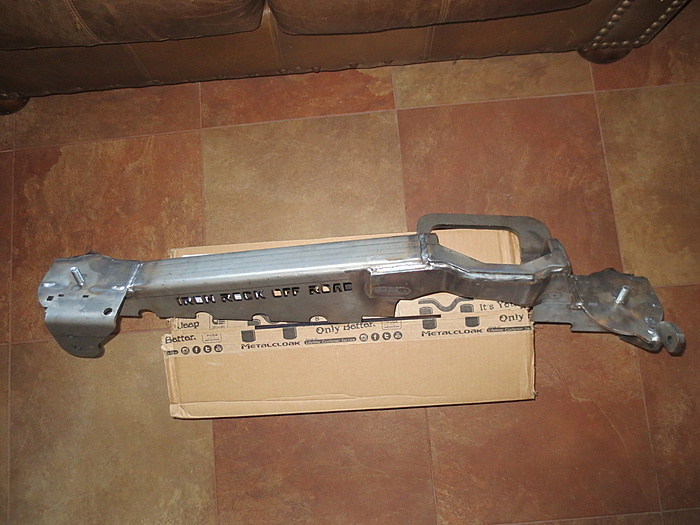
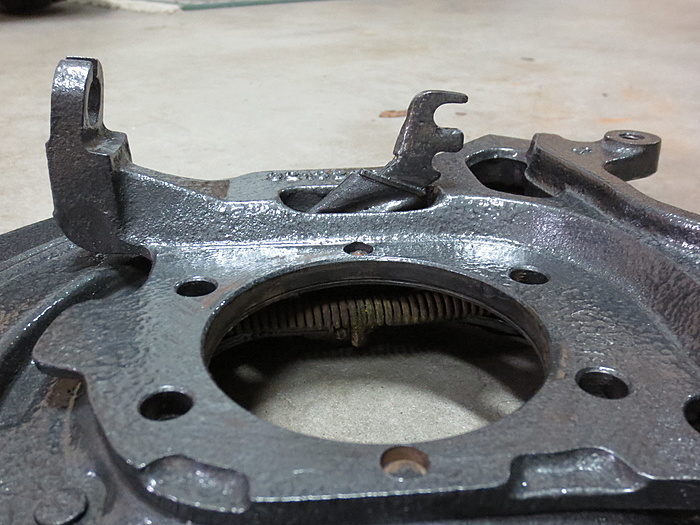
It will be a while before I start installing this, first need to tear down and decide whether I'm doing WJ knuckles or not. Most likely will, just need to find some and it's not a good time to be walking the junk yards here in AZ!!
I've been interested in the Metal Cloak coils, but haven't heard too much about them. Everything I have read seems to be positive though. Went ahead and pulled the trigger on their 3.5" coils and they arrived today.

Got my truss a while ago, curious to see how it works with everything I plan on doing up front.


It will be a while before I start installing this, first need to tear down and decide whether I'm doing WJ knuckles or not. Most likely will, just need to find some and it's not a good time to be walking the junk yards here in AZ!!

 07-13-2017, 10:49 PM
#30
CF Veteran

Join Date: Apr 2016
Location: Pasquotank, NC
Posts: 1,679
Likes: 0
Received 15 Likes
on
13 Posts
Year: 1990
Model: Cherokee
Engine: 4.0
Excellent build. I think your shackle angle is too steep. I had issue with my shackle smacking up against the body and getting stuck. I run a bit steeper angle and haven't had the problem again.