When you click on links to various merchants on this site and make a purchase, this can result in this site earning a commission. Affiliate programs and affiliations include, but are not limited to, the eBay Partner Network.
APN Header Swap Disaster - Help needed *LOTS OF PICS*
Stock XJ Cherokee Tech. All XJ Non-modified/stock questions go hereXJ (84-01)
All OEM related XJ specific tech. Examples, no start, general maintenance or anything that's stock.
APN Header Swap Disaster - Help needed *LOTS OF PICS*
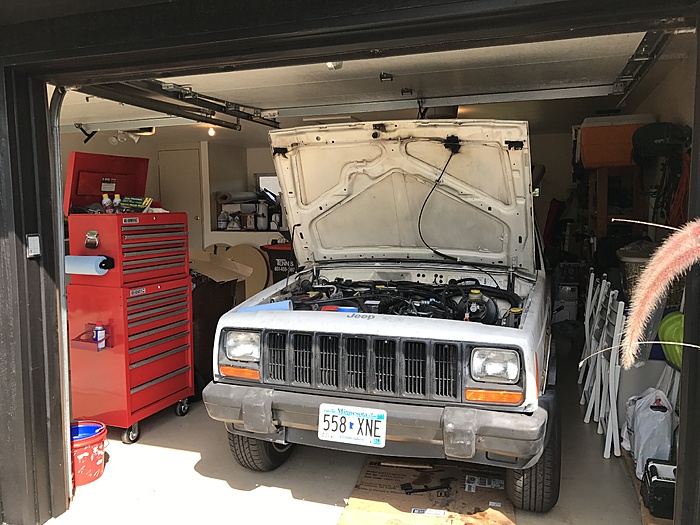
Hi all - I have a bit of an issue on my hands. Disclaimer: this is by far the biggest mechanical undertaking I have ever attempted.
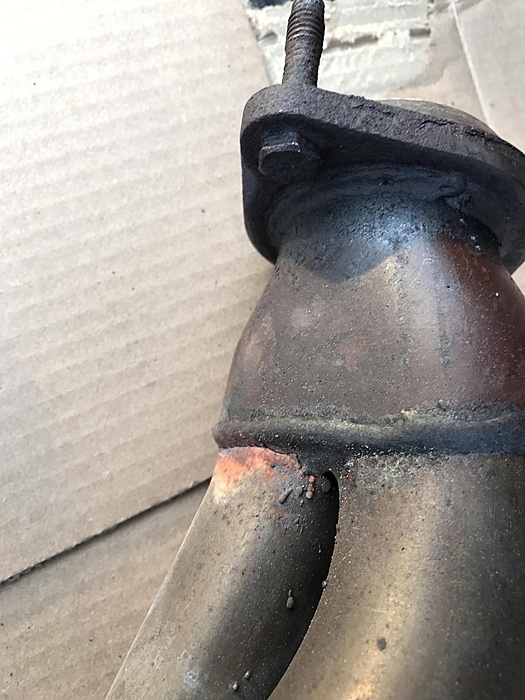
Like many others I have a cracked exhaust manifold. Purchased the APN header and Fel Pro gasket and went to town...
work area
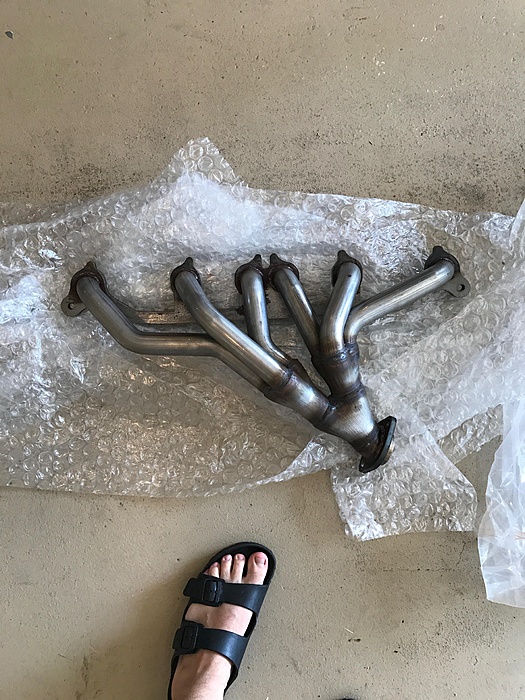
here's the new APN header
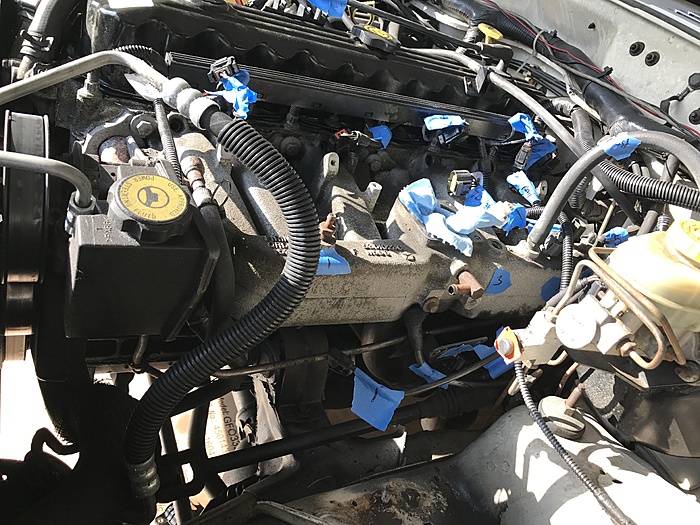
labeled up fam
intake out
manifold crack(s)
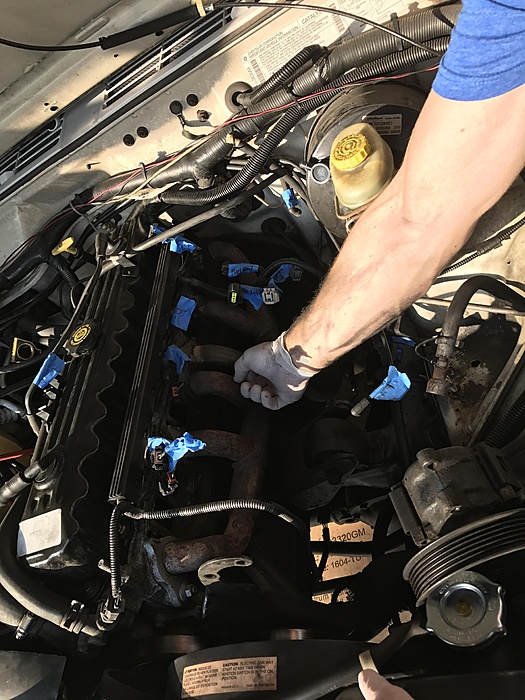
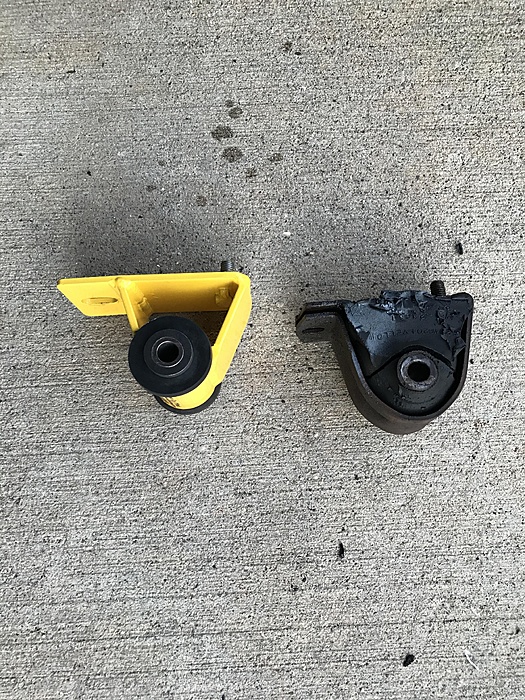
did motor mounts while i had 'er apart
TROUBLE ARISES
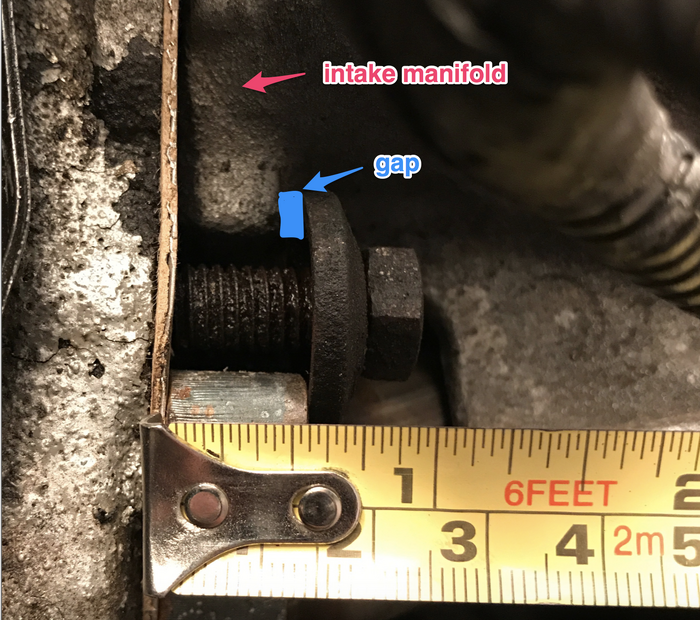
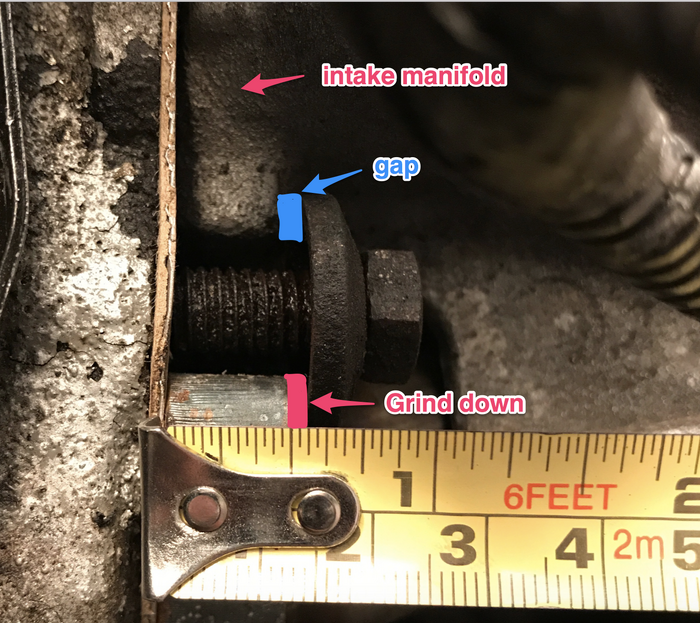
When we were bolting it all back up we could NOT get some of the bolts to catch or the exhaust to sit flush with the intake. there were weird gaps abound and we had no idea what to do.
We finally figured out that the APN header flange was thicker than the original manifold. See below:
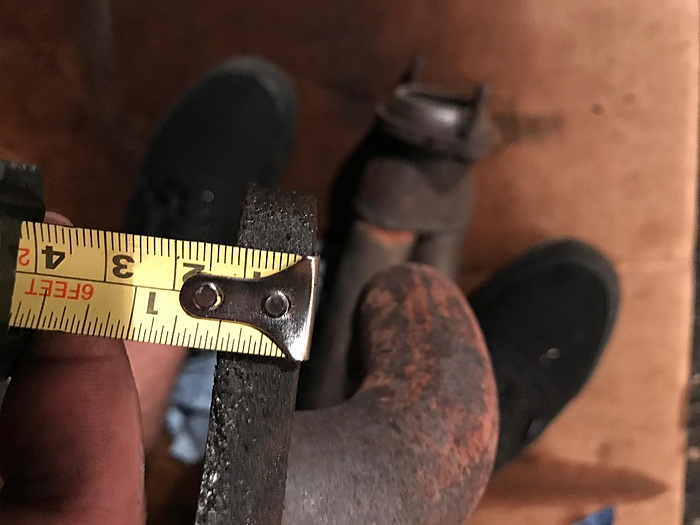
original manifold thickness
APN manifold thickness, with illustrated gap causing said problems.
We called it a night and gave up...
Fast forward to today. The only thing I can think of to do is to grind down into the APN manifold where the washers will make contact. I reckon I could mock it up using the bolts and gasket in the driveway and draw with a Sharpie where the contact points are. I'd measure the original manifold with calipers and grind down the same amount.
Like so:
Does anyone have any experience with this? Am I screwed? If i have to unbolt the manifold and send it back to APN I will lose my SH*T!
what year is your XJ? there is a notice on their site that there is some issues with 99+ intakes. i'm willing to be that it might be because of this. if not, then either contact them or since the header is relatively cheap, try to grind it down like you said. if you don't think you can do it yourself there's probably machine shops that won't charge too much to do it for you. hope it helps a little.
edit: checked your post history and it seems to be a 98, so unless you have a 99+ intake manifold swap, either contact them and try to sort it out or just go ahead and make it fit. there are a couple of threads around of people saying they have issues and needed to grind it down, so it's not uncommon I think.
i have an apn header sitting at home, i'll try to take measurements later when I get back to see if I have the same thickness as you.
thanks man, that would be great. I wonder if they just made mine xtra thicc!
you're right it is indeed a 98 so I was hoping to avoid the fitment issues with different years.
And yeah I read about others having to grind or alter the part but I hadn't noticed anything that similar to this.
Going to call APN now and give them a piece of my mind!
ok so i was busy yesterday and forgot, but just got home and measured, mine is exactly 1/2" thick, like the oem one you posted. so your apn header seems to have 1/16" coming out of nowhere. manufacturer defect or something, definitely contact them i'd say, this should be warrantied if you haven't installed it / grinded it yet.
I encountered this too, but mine may have been a different case. My APN was contacting the intake manifold and wouldn't seat properly at the top. Once I ground the contact point down both manifolds set flush on the cylinder head. The difference in flange thickness was still there but the washers tightened down enough to seal it- they're just not sitting flat. I think the conical shape of the washers on those bolts helps take up the slack. Either way, you might make sure you're not getting interference elsewhere.
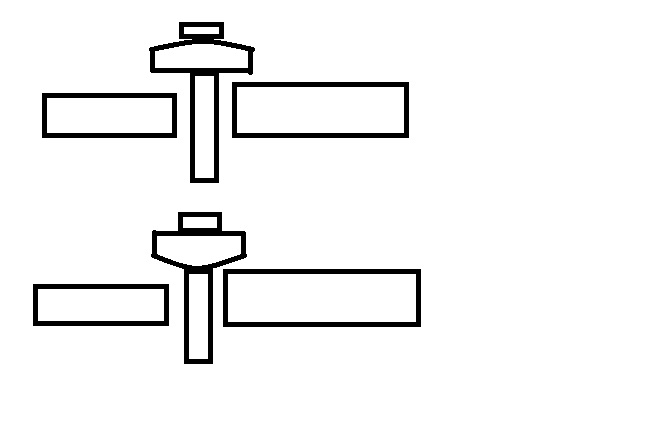
Cone side towards the block puts the washer so the angled portion contacts both the intake and exhaust manifold, it will look a little wonky at first, but once you tighten it down, the cone portion of the washer will push down evenly on both sides, and the bolt will contact the flat side, pushing it to spread evenly...the cone portion goes towards the intake on one side, and the exhaust on the other, centering it. Needs to happen since the intake and exhaust share a gasket. Yes it seems backwards. But it works great.
So...since I posted this, I asked the question to some other guys who have more knowledge than me on the subject and was told I am wrong...that said, I know what I did, in the same situation, and I can tell you it worked for me, zero issues to this day. Lee AKA OutlawStar, said any aftermarket header should have it's own washers stepped for the application. Well, mine did not. And I got a high dollar header. Had the same issue. Flipped it, and it worked out for me. Second disclaimer, all work was done on an engine stand, and I was able to torque all bolts in sequence, and before install, I re-torqued them two times...after sitting for a spell, then after install and a few engine fire ups and about 500 miles, did it again.
So at this point, I will post a disclaimer...it worked in MY APPLICATION. Take it for WIW.
I did what made complete sense to me, at the time. So far it has worked. BUT, in good faith I can't tell you this is the way it SHOULD be done.
I'll take my lumps if that's what it is... I just know what I did, and that it worked for me. BUT, THAT SAID, I may be wrong...I'm human, I admit it, and shame on me if I'm an idjit.
Proceed at your own risk.
I do feel it is a better option than grinding down spots on your brand new header you just spent a bunch of money on, HAHA
I am very curious about what aftermarket header is Best for the 2001 XJ?
I am ready to ditch the stock exhaust header and running a performance muffler
ok so i was busy yesterday and forgot, but just got home and measured, mine is exactly 1/2" thick, like the oem one you posted. so your apn header seems to have 1/16" coming out of nowhere. manufacturer defect or something, definitely contact them i'd say, this should be warrantied if you haven't installed it / grinded it yet.
got it thanks
Originally Posted by alpine.adrenaline
I encountered this too, but mine may have been a different case. My APN was contacting the intake manifold and wouldn't seat properly at the top. Once I ground the contact point down both manifolds set flush on the cylinder head. The difference in flange thickness was still there but the washers tightened down enough to seal it- they're just not sitting flat. I think the conical shape of the washers on those bolts helps take up the slack. Either way, you might make sure you're not getting interference elsewhere.
Originally Posted by roninofako
Flip the washer over. Notice now it will fit with the cone side towards the block.
this is a brilliant idea...
Originally Posted by roninofako
Crude paint drawing to show...which one looks like it would work better?
i think this is the answer, i measured them more accurately yesterday and I may only need to grind 1 or 2 points. will flip the washers on the other
So...since I posted this, I asked the question to some other guys who have more knowledge than me on the subject and was told I am wrong...that said, I know what I did, in the same situation, and I can tell you it worked for me, zero issues to this day. Lee AKA OutlawStar, said any aftermarket header should have it's own washers stepped for the application. Well, mine did not. And I got a high dollar header. Had the same issue. Flipped it, and it worked out for me. Second disclaimer, all work was done on an engine stand, and I was able to torque all bolts in sequence, and before install, I re-torqued them two times...after sitting for a spell, then after install and a few engine fire ups and about 500 miles, did it again.
So at this point, I will post a disclaimer...it worked in MY APPLICATION. Take it for WIW.
I did what made complete sense to me, at the time. So far it has worked. BUT, in good faith I can't tell you this is the way it SHOULD be done.
I'll take my lumps if that's what it is... I just know what I did, and that it worked for me. BUT, THAT SAID, I may be wrong...I'm human, I admit it, and shame on me if I'm an idjit.
Proceed at your own risk.
I do feel it is a better option than grinding down spots on your brand new header you just spent a bunch of money on, HAHA
I had the same thing happen to me but it was not an issue. I bought new bolts and cleaned the washers really well.
I am just wondering, when you had the bolt/washers out were the washers seized to the bolt? They look pretty rough. If they were seized to the bolt they might not be able to move and go flush against the intake.
 09-14-2017, 03:21 PM