Jeep Grand Cherokee 1999-2004: Computer Problems Diagnostic Guide
Brain surgery requires a skilled surgeon, and troubleshooting an engine computer is not too far behind. Despite the complexity, there are some simple troubleshooting steps to got through before shelling out the big bucks for a new Jeep Grand Cherokee PCM.
This article applies to the Jeep Grand Cherokee WJ (1999-2004).
The computer in any vehicle controls so many of the functions these days, that a computer problem could literally shut it down or prevent it from starting. It goes by many names—ECU, ECM and PCM just to name a few. In the Jeep Grand Cherokee it's known as the PCM or Powertrain Control Module. Troubleshooting this computer can be challenging because it's not as easy to pinpoint the source of the problem, as it is with other components. There are a few things you can check, and this article will take you through the steps.

Materials Needed
- Voltmeter
- Multimeter and continuity tester
- Flat head screwdriver (optional)
- 10mm wrench or socket
- Zip ties (optional)
Step 1 – Check the connectors and wiring
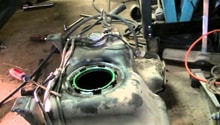
A new PCM can run anywhere from $200 to $400, so it pays to do some thorough detective work. The first step is to inspect the PCM for corrosion, broken wires, or loose connectors. You need to get to it first, so start by disconnecting the negative (black) terminal of the battery and removing the coolant reservoir as shown in Figure 1. Use your 10mm on the battery terminal. Be sure to disconnect the sensor to the reservoir prior to removing it.

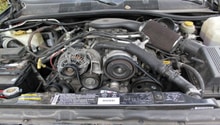
This will reveal the PCM toward the back of the engine compartment. Remove the three main harness connectors as shown in Figure 2. You will also need to disconnect some of the other harnesses to unbolt the mounting frame and remove the module. It would be a good idea to snap a photo as a reference when reconnecting everything after you're done.

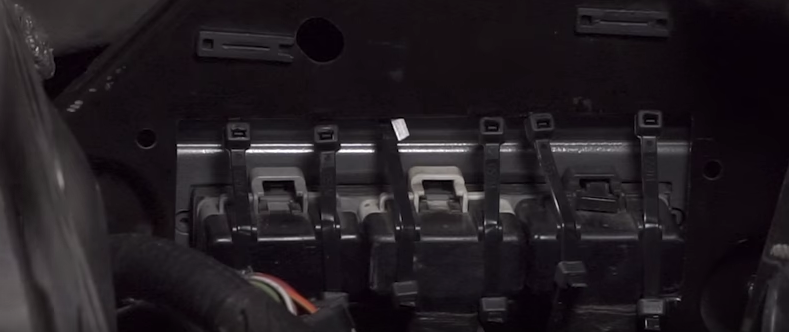
With the module removed, take a good look at the connectors and the wiring, especially at the main harness connectors. Are there cut or frayed wires, excessive corrosion or broken tabs? You may have something as simple as a loose connector, and this can be fixed by re-seating the connectors. If the tabs are broken, use zip ties creatively as shown in Figure 3. This will hold the connectors in place and assure they won't come loose with all the engine vibration going on around them.
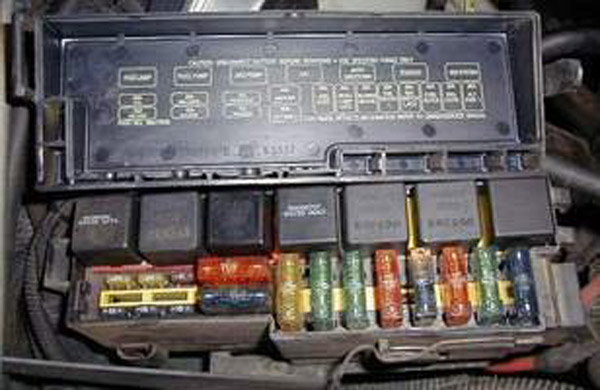
Step 2 – Check all fuses
Whatever symptoms are leading you to believe it's the PCM, be sure to check any associated fuses or relays first. Engine computers are sealed tight and built to last. Chances are, the problems may be with one of the related electrical subsystems. Consult a wiring diagram for your vehicle if you are unsure of the exact fuse and relay locations.
Step 3 – Check power and ground to PCM
Take a voltage reading from the power and ground inputs to the PCM. Verify that you are getting the correct voltages. If not, trace the wires back to the battery and check for loose connections or broken wires. A bad power or ground source can cause all kinds of issues with the PCM.
Step 4 – Take the PCM apart
This is not for the faint of heart. Opening up the PCM is a last resort if you've exhausted all the options above and plan on purchasing a new one anyway. Inspect the module's exterior for corrosion or loose seals. Where there's smoke, there's usually fire, so opening up the module may reveal some corrosion to a board that can be cleaned off and possibly solve the issue.

Also, check for broken solder joints along connector rails where the rail may have some slight movement. Use a multimeter with a continuity tester to check your connections from the top of the rail to the circuit board down below. Test it without applying some pressure to the rail to see if it changes the results. If you lose continuity when the rail moves, a drop of solder might be all you need.
Step 5 – Replace the PCM
When all else fails, replacing the module is often the best way to test if it is in fact the source of your problem. It's a very expensive test though, and one you only want to do when you've exhausted all of the previous options. Since a PCM replacement also requires re-progamming to match your VIN, it is best done by your dealer or a service station.
Featured Video: 1999-2004 Jeep Grand Cherokee PCM Swap
Related Discussions
- Computer Problems - CherokeeForum.com
- Won't Stay Running Unless You Press Throttle - CherokeeForum.com
- Map Problems - CherokeeForum.com