Jeep Cherokee 1997-2001: How to Replace Master Cylinder
A faulty master cylinder could lead to brake malfunction and it must be replaced as soon as possible. Learn how to remove and replace it with the help of this article.
This article applies to the Jeep Cherokee XJ (1997-2001).
Your Jeep's master cylinder plays a vital role in making sure your Jeep comes to a stop when you activate the brakes. The master cylinder manages the hydraulic pressure necessary to make the brake fluid travel through the brake lines and ultimately make the caliper engage the brake pads. A leaky or damaged master cylinder that allows air into the brake system should be replaced because it could cause catastrophic brake failure and even a major accident. Follow this step-by-step guide to remove and replace your Jeep's master cylinder.

Materials Needed
- Drip pan
- 12mm wrench
- Crescent wrench
- Paper towels
- DOT 3 brake fluid
Step 1 – Disconnect brake lines
The brake lines that are directly connected to the master cylinder are made out of copper or aluminum. Make sure to remove these carefully before proceeding to undo the master cylinder. Follow these steps:
- Locate both brake lines.
- Use the 12mm wrench to carefully undo the nut at the junction.
- Disconnect the brake lines from the master cylinder.
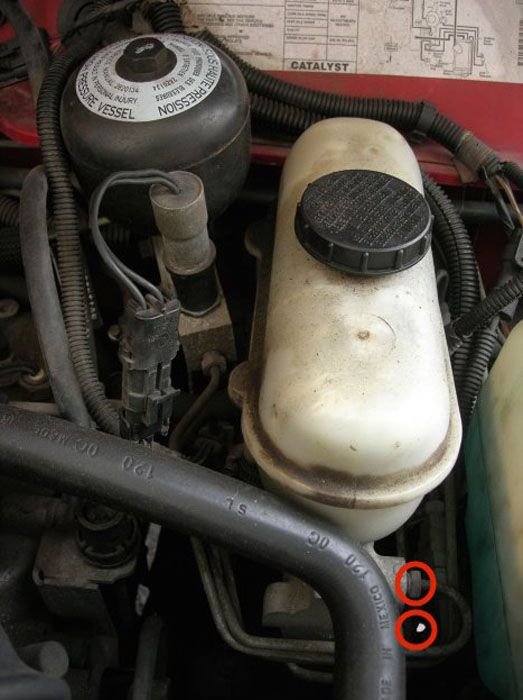
Figure 1. Disconnect brake lines. 
Figure 2. Exposed brake lines once master cylinder has been removed.
Pro Tip
Make sure to have your drip pan located below the Jeep, and have some paper towels handy. Some brake fluid may leak and it's corrosive.
Step 2 – Remove master cylinder
With the brake lines disconnected from the master cylinder, it's time to pull out the entire master cylinder assembly. Follow these steps:
- Locate the three anchor screws that support the master cylinder assembly.
- Use the 12mm wrench to undo the far left and far right nuts.
- Use the Crescent wrench to remove the middle screw-like cap.
- Safely pull out master cylinder assembly without damaging any other components.
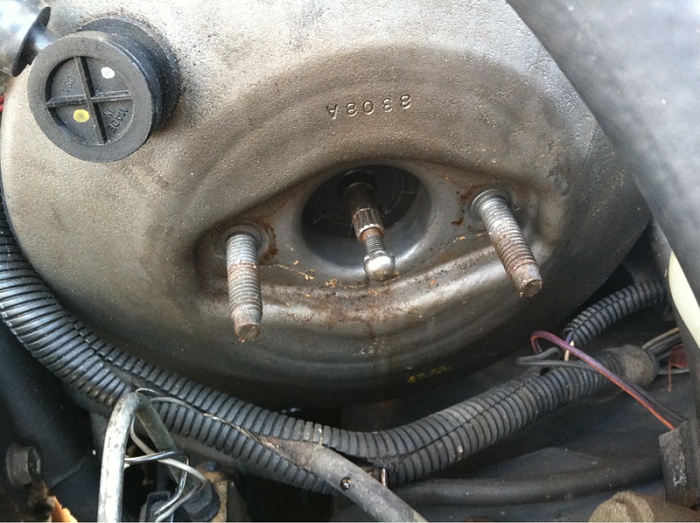
Figure 3. Anchor screws. 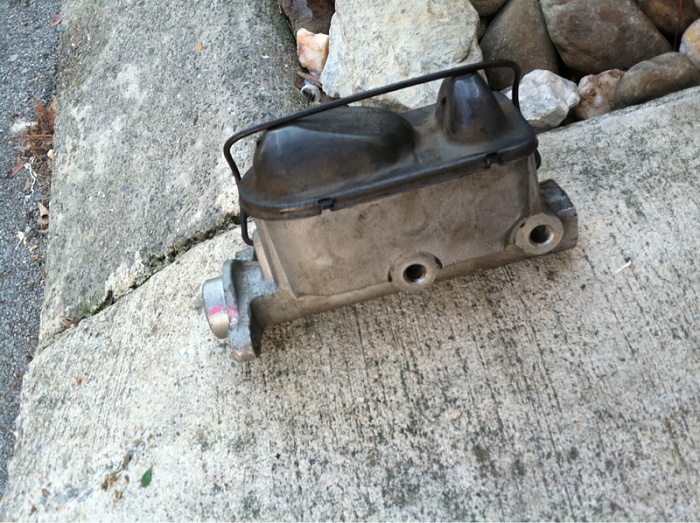
Figure 4. Fully removed master cylinder.
Step 3 – Install new master cylinder
Installing the new master cylinder works in reverse order as it was removed. Follow these steps:
- Position the new master cylinder.
- Tighten the bolts and middle screw cap.
- Attach and tighten brake lines.
- Fill with brake fluid.
- Bleed the brake system.
- Finally, test the brakes.

Pro Tip
Bleeding the brake is necessary to purge the system of any air bubbles. Make sure to test the brakes in a safe area before achieving any high speeds on public roads.
Featured Video: Master Cylinder Replacement
Related Discussion
- Replacing Master Cylinder - CherokeeForum.com