Jeep Cherokee 1997-2001: How to Replace Fuel Pump
The fuel pump creates pressure throughout the fuel system. When the fuel injector opens, fuel bursts into the combustion chamber. The pump must keep pressure high enough for quick throttle response and full engine power output.
This article applies to the Jeep Cherokee XJ (1997-2001).
The fuel pump is electrically operated and electronically controlled. Fuel flows through the pump and makes its way to the fuel rail. Fuel pumps use a "sock" at the pump inlet to filter out dirt. The sock promotes longer fuel pump life. Once a fuel pumps power decreases, many problems will develop. Depending on the severity of the problem, the result may be lack of power during wide open throttle or an engine no-start. Fuel pump replacement requires removal of the fuel tank. The fuel tanks large size make it hard to move, but once the fuel pump is accessible, replacement is straightforward.

Materials Needed
- Socket set (5/16"-3/4")
- Wrench set
- 1/2" ratchet
- Flat head screwdriver
- 1/4" ratchet
- Metal cutters
- Hammer
- Pry bar
- Flat head screwdriver
- Floor jack with large platform
- Safety glasses
- Rubber gloves
- Fuel pump
- Siphon pump
The lower your fuel level is, the better. This will make lowering the tank much easier. A siphon pump can be used to remove the fuel from the tank.
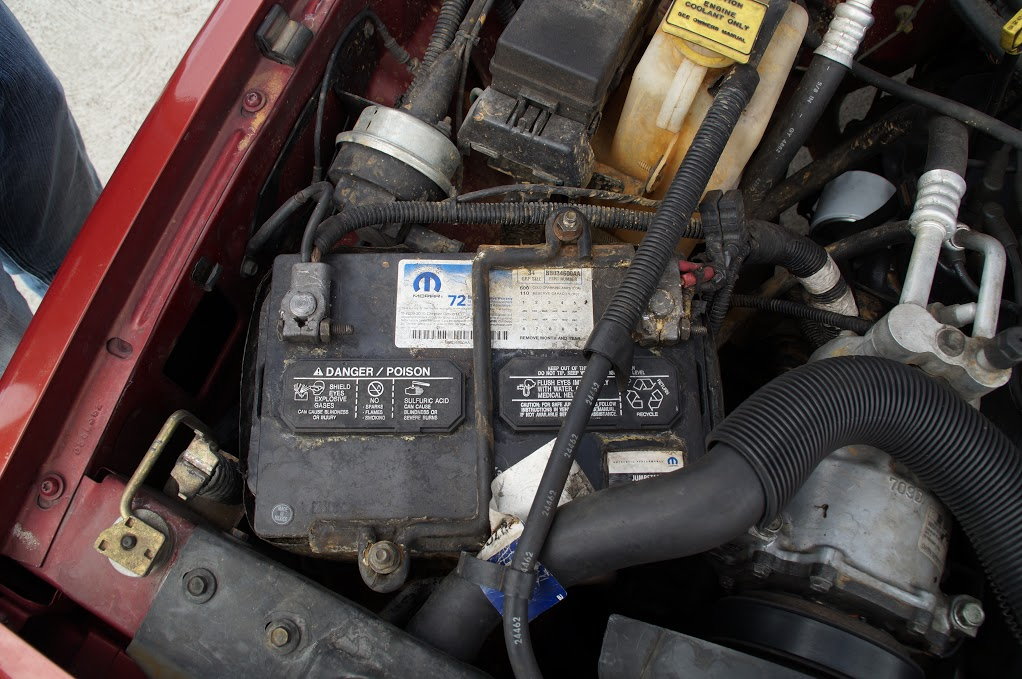
Step 1 – Disconnect the negative battery cable
Loosen the negative (black) battery cable nut and wiggle/pull the cable off the terminal. Place the cable in an area where it cannot come into accidental contact with the terminal. You can wrap the cable with electrical tape as well.
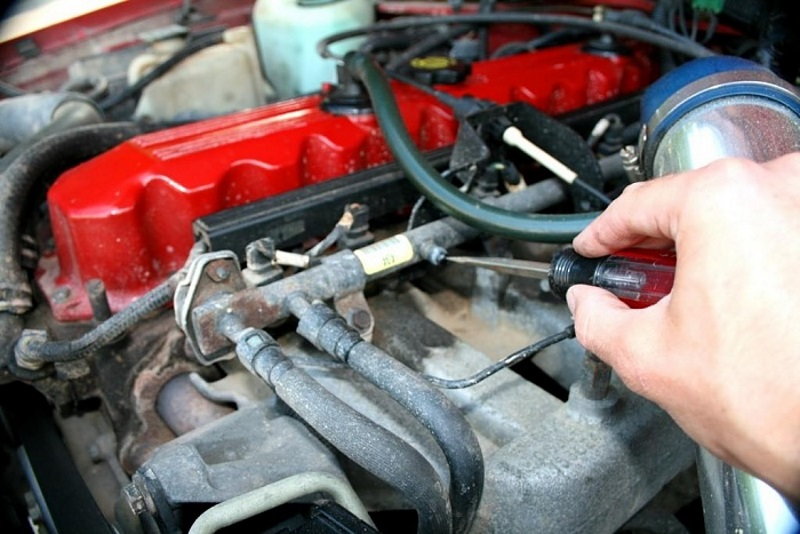
Step 2 – Relieve fuel system pressure
Locate the Schrader valve on the driver's side fuel rail. Remove the plastic cap from the valve. Place some rags/towels around the valve and a bin below it. Fuel is volatile so make sure your wearing safety glasses and rubber gloves. Using a flat head screwdriver, apply pressure to the Schrader valve pintle until pressure is removed from the system.
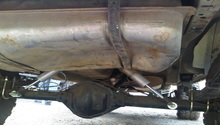
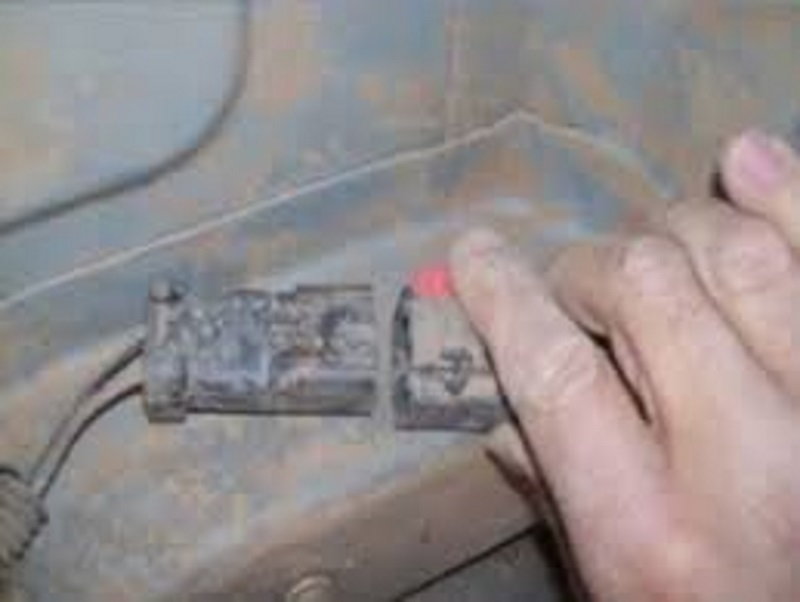
Step 3 – Disconnect the fuel pump wiring harness
Locate the fuel pump wiring connector underneath the fuel tank. Pull the connector towards the tag on the fuel line that reads "FUEL." This will remove the connector from the mounting tab. Open the red locking tab by pushing against the side that is more exposed. Squeeze the black flexible tab on the connector while pulling the connectors apart.
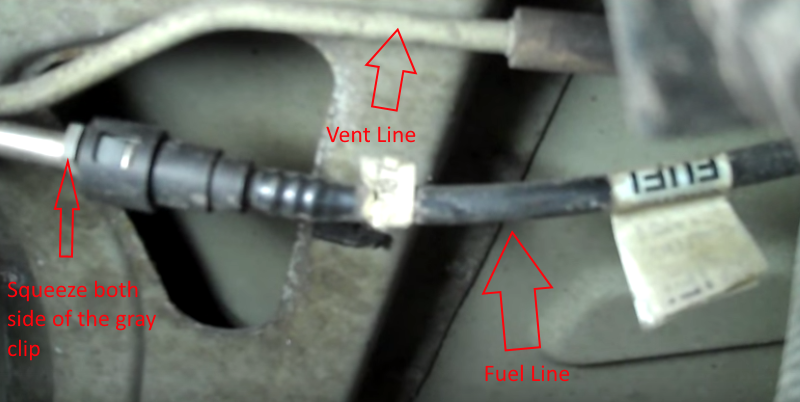
Step 4 – Disconnect fuel line and vent line from the tank
Using a pair of pliers, twist/pull the rubber vent hose from the metal hard line. Squeeze both sides of the gray plastic clip on the fuel line quick disconnect and pull the black line away from the metal line.
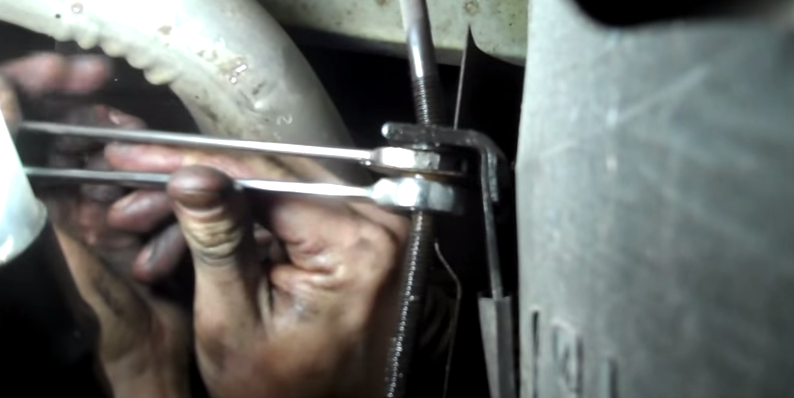
Step 5 – Remove the fuel tank strap nuts
Use a 9/16" wrench to hold the upper nut and another wrench to turn the lower nut. A ratcheting wrench will ease the process. Do not fully remove the nuts, otherwise the tank will fall. On the passenger's side of the tank you will see a heat shield. To create enough room for fuel tank removal, the heat shield can be cut where it connects at the fuel tank nut. If you choose not to cut the shield, you'll have to move the trailer hitch assembly.
Pro Tip
PB Blaster or a comparable type of penetrating oil helps with tank strap nut removal.
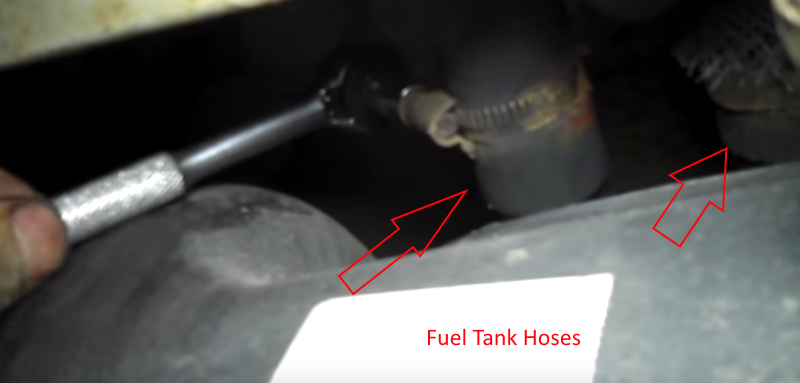
Step 6 – Remove the fuel filler hose and vent hose
These hoses are on the fuel door side of the tank. Look up and you will see where they are attached with hose clamps. These clamps can be loosened with a flat head screwdriver or socket. If the clamps are hard to reach, the hose can be rotated until the clamp is accessible. Use a screwdriver to pry the hose off the fuel tank once the clamp is loose.
Pro Tip
If you find rubber hoses that are soft/spongy, replace these before a leak develops.
Step 7 – Lower the fuel tank
Using one or two floor jacks and a stable platform, raise the floor jacks until they make contact with the bottom of the fuel tank. The top of the straps hook into the frame. Lift up on the straps and remove them from the frame. You can now lower the tank to the ground.
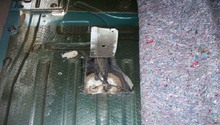
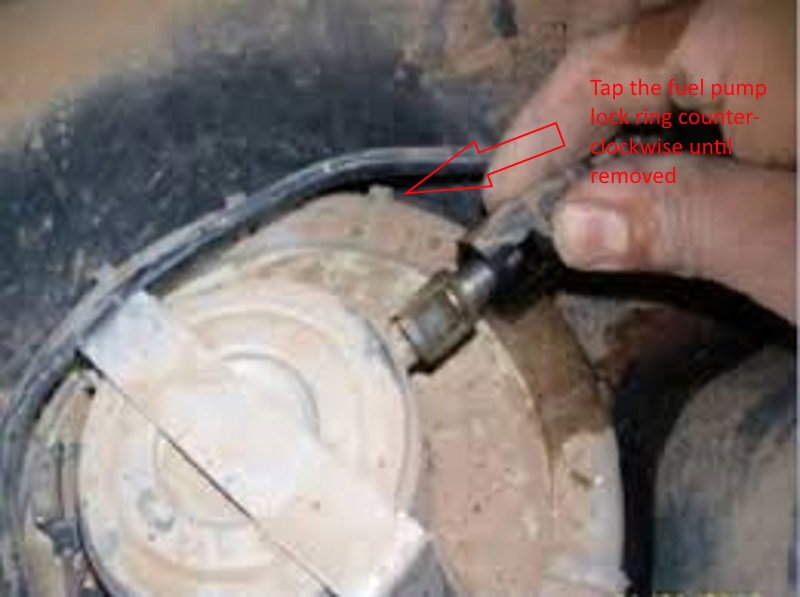
Step 8 – Remove the fuel pump from fuel tank
Using a hammer and a pry bar or flat head screwdriver, turn the plastic fuel pump lock ring counterclockwise. Once it's removed, the fuel pump assembly can be lifted out of the tank. Disconnect the fuel line from the fuel pump. It uses a plastic quick disconnect clip similar to the fuel line underneath the tank. Once it's removed, the fuel pump assembly can be lifted out of the tank.
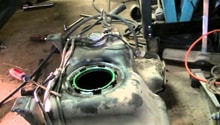
Step 9 – Install the new fuel pump
Clean the fuel tank around the fuel tank assembly opening. Install the new rubber gasket ring around the fuel pump assembly opening. You will see a lip on the gasket that slides against the tank. Lower the pump into the tank, being careful not to damage the float. The fuel line opening will face towards the front of the tank. The fuel pump assembly may be spring loaded. If this is the case, press downward on the fuel pump assembly and match the threads on the plastic ring with the fuel tank. Tighten the fuel tank plastic ring until it's snug.
Install all the fuel lines onto the new fuel pump. Follow the reversal of the removal instructions to finish the installation.
- Lift up the fuel tank into place and tighten up the fuel tank straps.
- Attach the fuel tank hoses into place.
- Connect the fuel line and vent line.
- Reconnect the fuel pump wiring harness.
- Tighten up the fuel pressure Schrader valve and reconnect the battery.
Featured Video: Fuel Pump Module Replacement
Related Discussions
- Fuel Pump Not Working - CherokeeForum.com
- Fuel Pump for '90 XJ - CherokeeForum.com
- Fuel Pump Replacement Warning - CherokeeForum.com