Jeep Cherokee 1984-2001: How to Replace Brake Pads, Calipers, and Rotors
Achieve full braking performance by making sure that brake pads, calipers and rotors are in good condition. Follow the steps below to replace the parts needed.
This article applies to the Jeep Cherokee XJ (1984-2001).
It is advisable to check the wear of your Jeep Cherokee's front brake pads regularly, or at least once a year. If the pads are one to two millimeters thick or less, it is time to replace them. If you are experiencing squeaking when touching the brake pedal, or if the rotors are looking worn (thin) or have deep grooves in them, you also have to consider replacing the rotors. To find out if your calipers need replacement or not, you probably need to test them when removed. More about that later. Here's how to replace your brake pads, calipers, and rotors in your Cherokee.

Materials Needed
- Floor jack
- Jack stands
- Ratchet
- Sockets for the lug nuts and the calipers (14mm)
- Steel brush (optional)
- Brake cleaner (optional)
- Equipment to bleed the brakes (needed only if one or both calipers are replaced)
- C-clamp
Step 1 – Jack up vehicle and remove wheels
Loosen the lug nuts on your wheels, but don't remove them yet. Using the suggested jacking points of your Cherokee, use the jack to elevate the front wheels of your car and support it with sturdy jack stands.
Then unscrew the lug nuts and remove the front wheels to gain access to the brakes. Be careful when removing the wheels to avoid damaging the brakes or rims.

(Related Article: How to Jack up Your Car - CherokeeForum.com)
Step 2 – Remove brake calipers
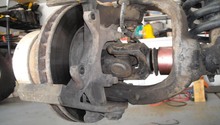
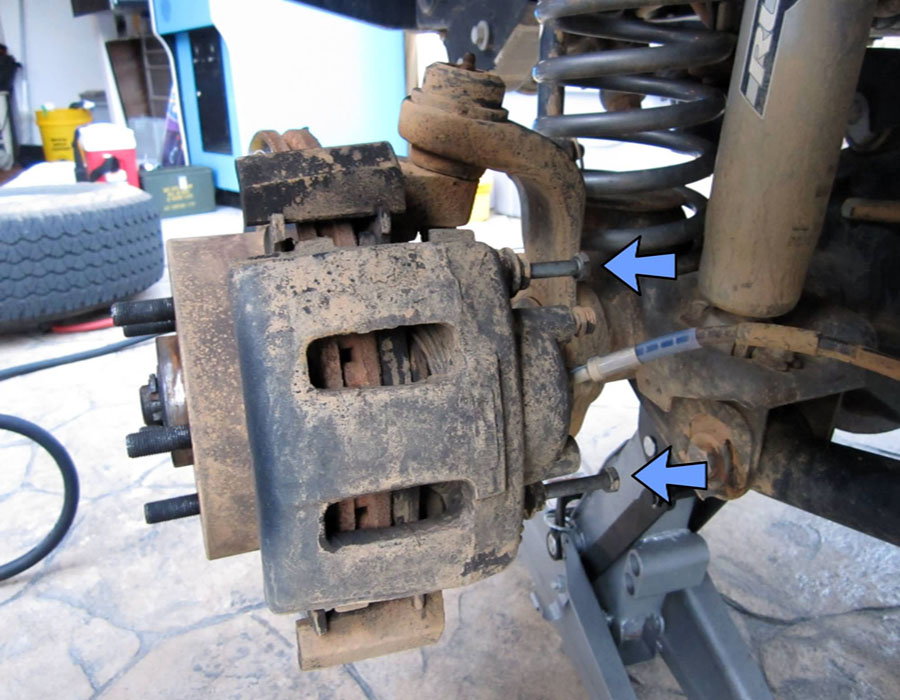
The brake calipers are held in place by two 14mm bolts on the back side of the caliper. Figure 1 shows the location of the bolts (blue arrows).
When the two bolts are removed, it is possible to slide the caliper off from the rotor towards the rear of the car. When the caliper is removed, be careful not to damage the brake line. DO NOT let the caliper hang from the brake line. Instead, put something like a couple of old shoe boxes just under the rotor and let the caliper rest on that.
Step 3 – Check condition of calipers
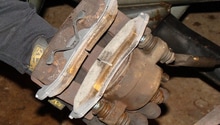
When the caliper is out, it is easy to remove the outer brake pad. Before removing the inner brake pad, the piston in the caliper should be pressed back. This can be done using a C-clamp. When pressing back the piston, make sure that the piston slides back relatively easy. If it is hard to press the piston back, the entire caliper probably needs to be replaced. When the piston is pressed back, remove the brake pad. The reason for pressing back the piston is to make sure that the new, thicker brake pad fits in the caliper.

Step 4 – Replace calipers (optional)
If the piston in the caliper is hard to press back, the caliper needs to be replaced. To replace the caliper, simply unscrew the brake line and screw on a new caliper.
When one or both calipers have been replaced, the brake fluid has to be thoroughly bled. This is absolutely necessary for safety reasons since air is introduced in the brake system when a brake line is removed from a caliper.
(Related Article: How to Replace Brake Fluid - CherokeeForum.com)
Step 5 – Replace rotors (optional)
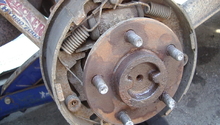
Inspect the rotors for damage. The surface of the rotors should be relatively smooth. If the rotors are full of grooves or if they are rusty or worn thin, they need to be replaced. An authorized workshop should be able to specify the minimum thickness of the rotors.
It is very easy to replace the rotors once the calipers are off. Simply pull off the old rotor and put on the new.
Step 6 – Assemble back together
Now it is time to assemble everything again in the reverse order. If you are using the old calipers, it is a good idea to clean them using a generous amount of brake cleaner. Simply spray on the brake cleaner and let the calipers dry. If they are rusty, it could also be a good idea to brush them with a steel brush.
Make sure to put the brake pads with the two prongs facing down when the caliper is re-installed (see Figure 4).

Featured Video: Installing Front Disc Brakes and Calipers
Related Discussions and Video
- Brake Pad Install - CherokeeForum.com
- Brake Pad Replacement - CherokeeForum.com
- Front Brake Calipers - CherokeeForum.com
- Front Brake Calipers - CherokeeForum.com
- Change Brake Pads - YouTube.com