Jeep Cherokee 1984-2001: How to Change Transmission Fluid
The transmission fluid is a piece of maintenance that is often overlooked. Here's how to replace the transmission fluid on the Jeep Cherokee XJ.
This article applies to the Jeep Cherokee XJ (1984-2001).
The transmission fluid does several jobs inside the transmission. First, it works as a bearing between the meshing gear teeth. There can be high torque transferred between the contact area of meshing gears, and the transmission fluid acts as a bearing to protect the gears. Second, transmission fluid also acts as a friction modifier for the synchronizer assemblies inside a manual transmission. Third, transmission fluid acts as a heat transfer media to remove heat from bearings, gears, and the synchronizers. Over time and with use, the fluid breaks down and loses much of its efficiency. It's recommended that the fluid is changed at constant intervals. Jeep Cherokee recommends 30,000 miles fluid changes. Here's how to replace the transmission yourself.
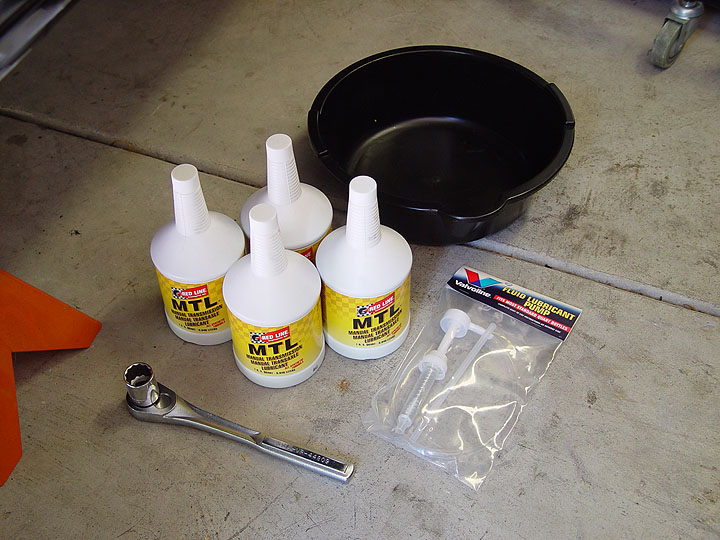
Materials Needed
- 24mm socket and ratchet
- Fluid pump
- Four quarts of transmission oil (Redline MTL for example)
- Drain pan
Step 1 – Level car and access space under transmission
In order to ensure the transmission is filled to the proper level, the car must be leveled. Also, you will need access to the transmission; you will need enough space for yourself, your tools, and a drain pan. Safely raise the car and support with jack stands. Never rely on a hydraulic jack to support the car.
Step 2 – Remove fill bolt and drain fluid
Use the 24mm socket and ratchet to remove the transmission fill bolt. This bolt is located on the driver's side of the transmission. Then loosen the 24mm drain bolt on the bottom of the transmission. Before you completely remove the drain bolt, place the large drain pan under the transmission. Remove the bolt and allow the fluid to drain into the pan. Have a few rags handy, as this part of the DIY can be a little bit messy.
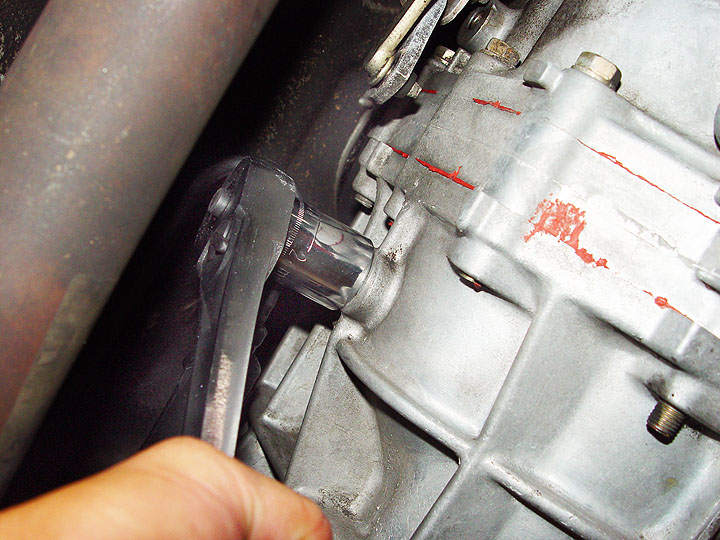
Figure 2. Fill bolt location. 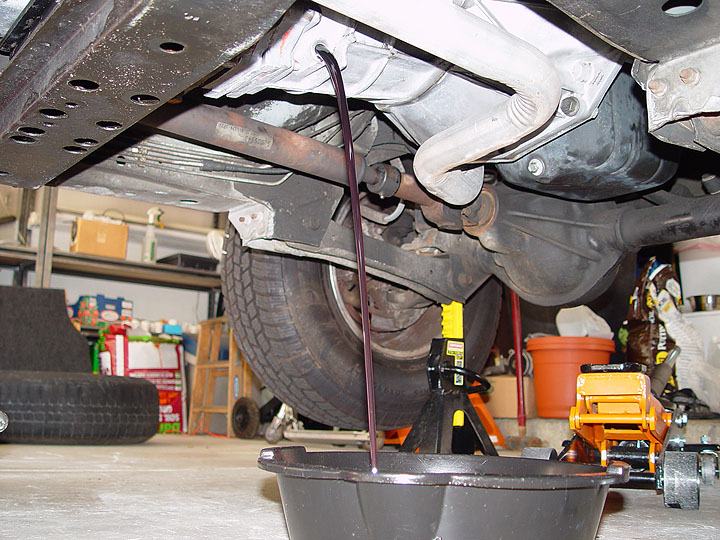
Figure 3. Fluid draining.
Pro Tip
The reason you need to remove the fill bolt before the drain bolt is simple: You don't want to drain the fluid from the transmission only to have a problem removing the fill bolt. Removing the fill bolt first ensures you can fill the transmission without problem after you have drained the transmission.
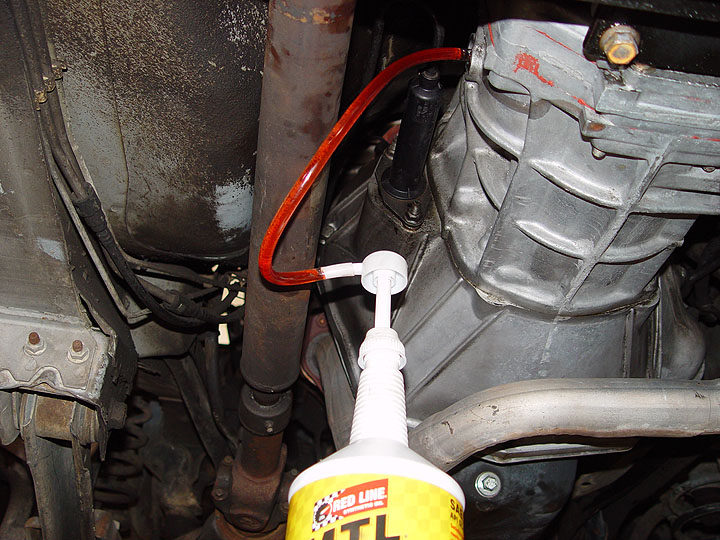
Step 3 – Refill the transmission
Replace the drain bolt using the 24mm socket and ratchet. Torque the bolt to 20 ft/lbs. Do not over-torque the bolt. Too much torque on the bolt can damage the bolt's threads and it can make it harder to remove the next time you service the transmission. After the bolt is properly torqued, it's time to fill the transmission. Install the fluid pump's tube into the fill hole. Insert the pump into a transmission fluid container. Start pumping the fluid from the container and into the transmission. This can take quite some time. It will take at least 150 pumps to put all the fluid into the transmission. Continue pumping fluid into the transmission until fluid begins to leak out of the bottom of the fill hole. The transmission is now filled to the proper level. Remove the fluid pump tube and install the fill bolt. Torque this bolt to 15 ft/lbs of torque.
Related Discussions and Site
- Jeep Cherokee Tranmission Fluid Change - 4x4Xplor
- Burnt Transmission Fluid - CherokeeForum.com
- Best Transmission Fluid - CherokeeForum.com