Jeep Cherokee 1984-2001: How to Change Differential Fluid
Changing the differential fluid in any car or truck can be a daunting task for the DIY'er. Am I using the correct fluid? Where do I recycle the old fluid? Do I need any special tools? Isn't it going to make an oily mess all over my driveway? With a little bit of preparation and knowledge, it's simple to drain and refill the fluid in your truck's differential.
This article applies to the Jeep Cherokee XJ (1984-2001).
The oil inside the differential takes a lot of abuse in a Jeep. The oil acts as a friction modifier for the limited slip (if installed) components. Over time, the friction modifier breaks down and the limited slip components can be exposed to excessive abuse. The oil also acts a bearing to prevent wear and dissipate heat between the hypoid gears of the ring and pinion. Again, with use and age, the oil lose some of its effectiveness as a bearing. As a result, it's recommended that the fluid in the differential be changed every 30,000 miles depending on usage.

Materials Needed
- 1/2 socket and ratchet
- Fluid hand pump
- Flat head screwdriver and rubber mallet
- 1 liter of GL5 gear oil and friction modifier for limited slip differential (if applicable)
- Large pan to collect and store drained oil for proper disposal/recycling
- Blue RTV gasket material
- Light abrasive pad (sink sponge with abrasive side) and brake cleaner
Step 1 – Loosen and remove all differential cover bolts
Ensure your Jeep is parked on a level surface, and if you're using some type of lifting device, ensure the truck is safe and secure from falling. Using the socket as well as ratchet, loosen and remove all of the bolts holding the cover to the housing. Then, put one bolt back into a hole on top of the differential housing and leave it loose. This will prevent the cover from falling when you break loose the RTV seal.
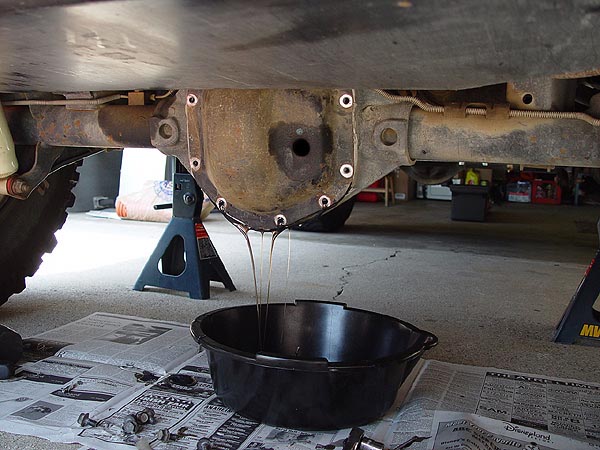
Step 2 – Tap the sides of differential cover with mallet
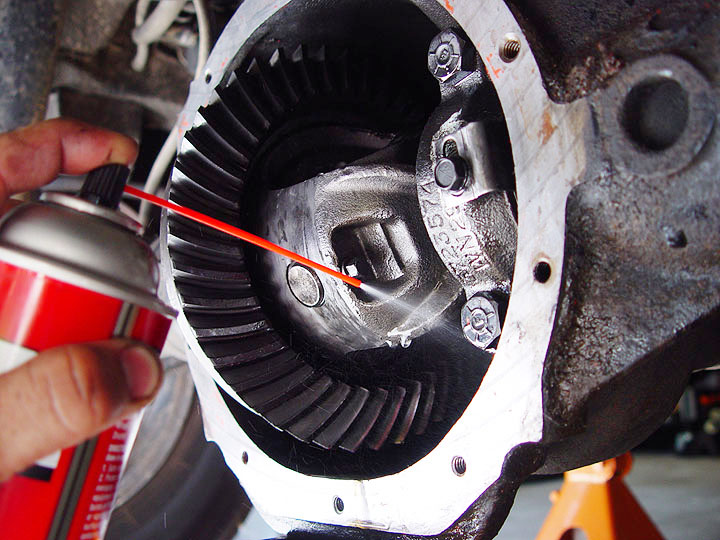
Use the rubber mallet and lightly tap the sides of the differential cover. The intent is to break the existing RTV and allow the fluid the spill out. Once the cover is loose and most of the fluid has drained out, remove the top bolt and take off the differential cover. When the cover is removed, you will be able to see the large ring gear on the differential. Spray the ring gear and inside the differential with brake cleaner to remove any debris that may be inside the differential housing.
Step 3 – Clean cover and housing sealing surfaces
In order to have a very good seal between the cover and housing, all RTV (or sealant) must be removed from the mating surfaces. Use light scouring pad and brake cleaner (or other cleaner) to remove and thoroughly clean the mating surfaces of the differential housing as well as differential cover. Once all of the sealant is removed, wipe clean the entire cover and surrounding area on the differential housing. Now is also a good time to gently pry the rubber fill plug from the differential cover. This is the hole that will be used to refill the fluid once the cover is re-installed.
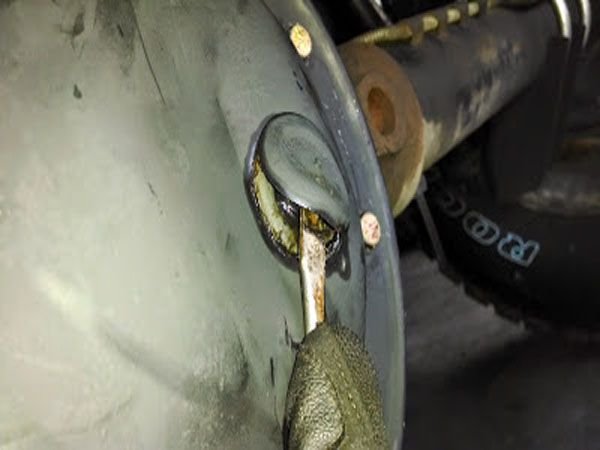
Figure 3. Fill plug cover. 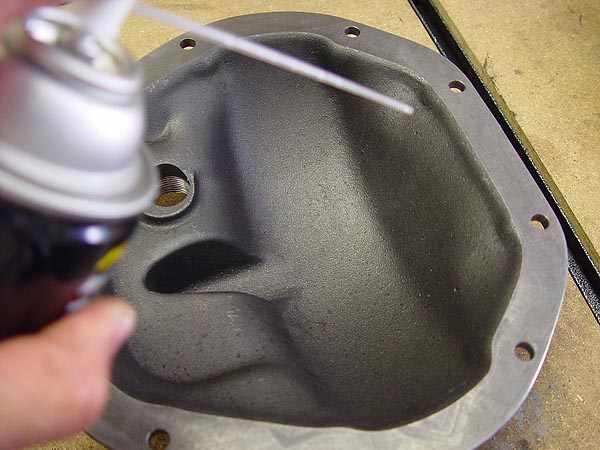
Figure 4. Cleaning the differential cover.
Pro Tip
It is very important to not scratch or score the mating surfaces of the cover or housing. Although the RTV sealant will fill in most scratches, a large gouge can be the cause of oil leakage over time.
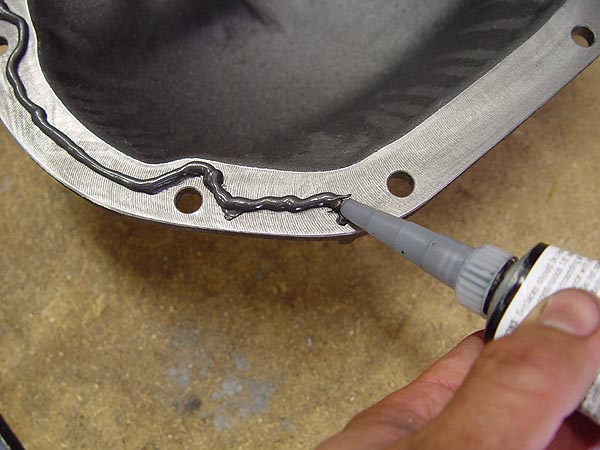
Step 4 – Apply RTV and install the cover onto the housing
Using a "blue" type of RTV, apply a bead around the entire perimeter of both the differential cover and housing mating surfaces. It is not necessary to smooth out the bead with your finger, but it is necessary to have a complete and clean bead on both surfaces. Install the cover onto the housing and gently screw two or three bolts to hold the cover in place. Finish screwing in the rest of the bolts and torque each bolt to approximately 30 in-lbs. This ensures a good gasket is created to prevent leaks.
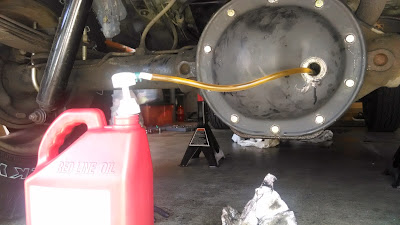
Step 5 – Fill the differential with appropriate oil
Insert the end of the fluid pump's tube into the differential housing through the fill hole. Insert the tube far enough in that the fluid will not spill out the fill hole as you pump in the fluid. Insert fluid pump into a new bottle of differential gear oil and begin to pump. Continue pumping until oil begins to leak out of the fill hole and remove the tube. Allow the oil to leak until it stops; this is the proper fill level. Don't forget to replace the rubber fill hole cap. Finally, clean up.
Featured Video: How to Change Your Differential Fluid
Related Discussions
- Differential Fluid Service Change - CherokeeForum.com
- Changing Rear Diff Fluid - CherokeeForum.com
- Diff Fluid Change - CherokeeForum.com
- Changing Diff Fluid - CherokeeForum.com
- Rear Diff Fluid Change - CherokeeForum.com


