Jeep Cherokee 1984-1996: How to Replace PCM
PCMs are important and when they fail, they're expensive to replace. There's no reason to pay even more just to have the dealer install it for you.
This article applies to the Jeep Cherokee XJ (1984-1996).
The PCM is the computer that receives signals from all the sensors in your Jeep. It's essentially the brain of the car, and when the brain stops working, not much else is going to work without it. The PCM will fail whenever there's a meltdown or corrosion in the circuit board. Sometimes the cases for the PCM aren't built well enough to protect the circuit board inside. Before you replace your PCM, make sure that it's actually the problem. Sometimes electrical failures will be misdiagnosed as being a PCM failure, when actually there are other parts that could cause the same problems, such as a bad ignition coil or fuel pump.
The only way to know for sure is to open up the PCM cover and take a quick look at the circuit board. One quick fix is to look for cracks in the socket connections and adding a bit of solder to complete the connection. However, if your circuit board is melted or corroded, there's nothing to do but to replace the entire PCM. If you want to save some money, look for a replacement at a junk yard. So long as it shares the same part number as your own and it comes from a Cherokee with the same emissions controls, it should work without needing to be reprogrammed. Avoid purchasing re-manufactured PCMs online, as these are unreliable and often fail only a year after installation.

Materials Needed
- Replacement PCM
- Ratchet with socket set
- Torx screwdriver
Step 1 – Remove old PCM
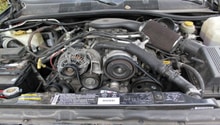
Start by disconnecting the battery. For older models, you'll find the PCM attached to the driver's side fender, but in newer models you'll find it on the passenger's side behind the battery and coolant tank. It has three electrical connectors running to it (one on older models). Unbolt the harness for the PCM and unplug the electrical connectors. Then remove the screws on the back of the harness. After that, you should be able to pull it from the engine compartment.

Pro Tip
In newer models you may want to remove the coolant tank to access the PCM. Just remove the two bolts holding the tank to the fender, and then move it out of the way.
Step 2 – Install replacement PCM
Installing the replacement PCM is simple. Just plug in the electrical connectors, set it in the engine compartment, and secure it back to the harness. Bolt the harness to the chassis. Then wait ten minutes before reconnecting your battery.

Featured Video:How to Replace PCM
Related Discussions
- Replacing the PCM - CherokeeForum.com
- Second Mechanic Says it's the PCM - CherokeeForum.com
- Wierd Stalling Problem PCM? - CherokeeForum.com
- PCM Swap - CherokeeForum.com