Need relay/switch advice for interior accessories
 12-21-2016, 02:19 PM
#1
CF Veteran
Thread Starter
Join Date: Oct 2013
Location: Tarpon Springs, FL / Denver, CO
Posts: 2,097
Likes: 0
Received 8 Likes
on
7 Posts
Year: '98
Engine: 4.0 I6
Hi folks
So I want to hard wire up a bunch of interior accessories, but simplify wiring and expandability in the future.
I am thinking a single "master" power switch would work best for me, and I can wire all my interior accessories to run straight off the battery if I want to charge my phones or something without the key in the Jeep.
What I am going to be running;
2 x seat heaters (5 amps each (on high) according to the specs)
4 x USB charger (roughly 5 amps MAX charging 4 tablets)
1 x CB Radio (about 6 amps)
1 x Bluetooth adapter for my stereo (really low power)
1 x Camping LED light (low power, not even worth noting its amp draw, but less than .25A)
1 x GPS unit (also low power)
Possibly other stuff, but thats what I have for now. Roughly 25 Amps at full draw.
A lot of these accessories will be low enough current for me to not need a relay if I run some sort of fuse box inside the cab like this. I am planning on grounding the accessories "locally", or as lose to the component location so I only need to run 1 long-run power wire.
https://www.amazon.com/MMdex-Holder-...ve+fuse+box+10
Will that work for my intended purpose? Basically wire up the output of the relay to the fuse box, and have the fuse-box powered from the battery, to the relay, to the fusebox? It says "40 amps" so I assume I should be good for roughly half that draw?
 12-21-2016, 08:46 PM
#2
CF Veteran
Thread Starter
Join Date: Oct 2013
Location: Tarpon Springs, FL / Denver, CO
Posts: 2,097
Likes: 0
Received 8 Likes
on
7 Posts
Year: '98
Engine: 4.0 I6
This is the harness I think I am going to pull the trigger on (and the fuse box)
https://www.amazon.com/gp/aw/d/B00VG3PZ78/ref=mp_s_a_1_3?ie=UTF8&qid=1482374657&sr=8-3&pi=SY200_QL40&keywords=Light+harness+14&dpPl=1&d pID=51Zd0VgG-yL&ref=plSrch
Should fit my intended purpose, I'll let you all know how it turns out!
https://www.amazon.com/gp/aw/d/B00VG3PZ78/ref=mp_s_a_1_3?ie=UTF8&qid=1482374657&sr=8-3&pi=SY200_QL40&keywords=Light+harness+14&dpPl=1&d pID=51Zd0VgG-yL&ref=plSrch
Should fit my intended purpose, I'll let you all know how it turns out!
Last edited by investinwaffles; 12-21-2016 at 11:57 PM.
12-24-2016, 07:12 AM
#3
CF Veteran

Join Date: May 2012
Location: Lost in the wilds of Virginia
Posts: 7,964
Received 951 Likes
on
767 Posts
Year: 1998 Classic (I'll get it running soon....) and 02 Grand
Model: Cherokee (XJ)
Engine: 4.0
Looks good, waffles. At 25 amp total draw, a 40 amp relay is a good choice. You might want to fuse it at 30.
For the fuse block itself, you can't go wrong with anything by Blue Sea Systems. Quality stuff.
For the fuse block itself, you can't go wrong with anything by Blue Sea Systems. Quality stuff.
01-31-2017, 01:35 PM
#4
CF Veteran
Thread Starter
Join Date: Oct 2013
Location: Tarpon Springs, FL / Denver, CO
Posts: 2,097
Likes: 0
Received 8 Likes
on
7 Posts
Year: '98
Engine: 4.0 I6
So i just wanted to share what I ended up with.
So I have several interior accessories I want to wire up. Fuse taps wouldn't cut it, nor did I want to wire everything to the battery directly or piggyback off other interior fuses.
I wanted to wire it up so I could have the option of having the relay trigger manually when the vehichle was off (with a switch), or automatically with the key. Unfortunately I forgot that I needed a 3-way "on-off-on" switch to accomplish this and forgot to order it.
So my current interior accessories include;
Seat Heaters (x2)
Bluetooth Adapter
Navigation Unit
USB chargers (single 3-port charger)
CB Radio (soon to be a UHF radio)
I bought;
Here is how I wired it all up;
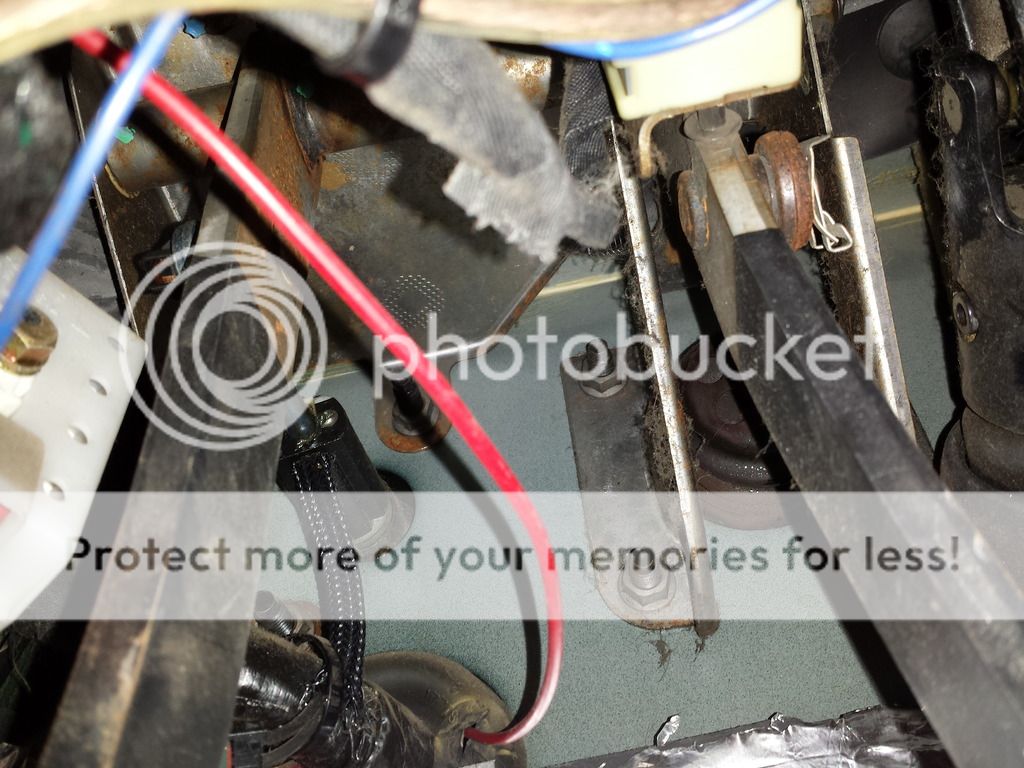
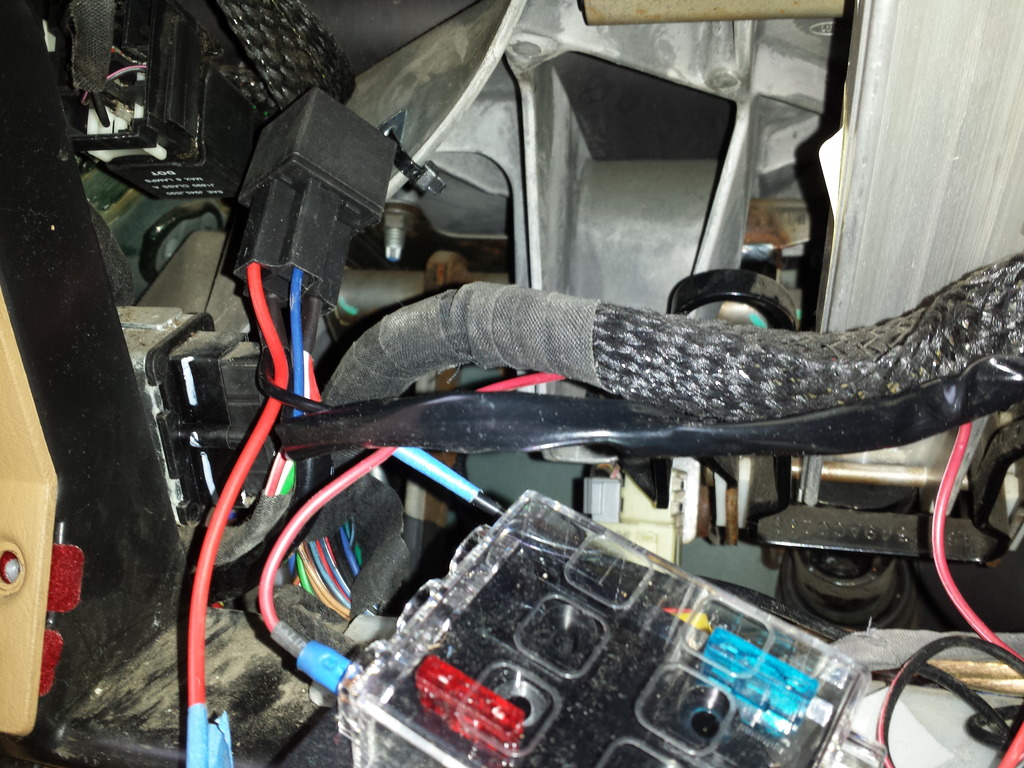
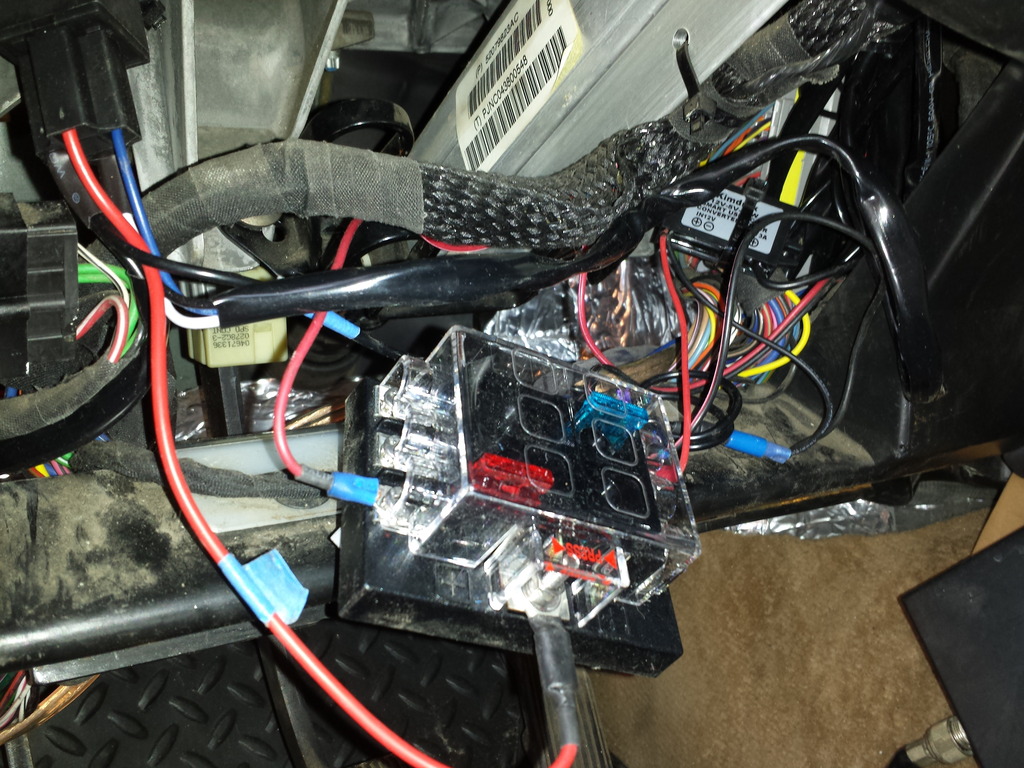
I first pulled a 12v power wire from the battery to the compartment under the steering wheel. Then, I wired up my relay and fuse-boxes and tested for functionality.
Better view of the fuse box:
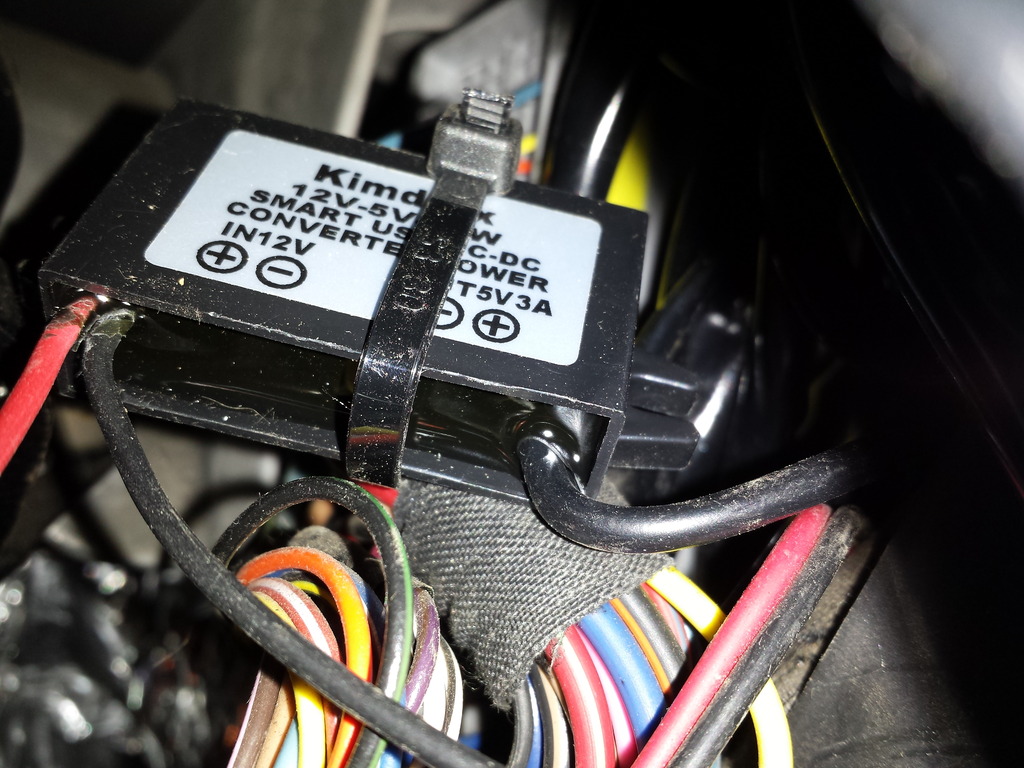
Hardwire USB adapter. Powers my bluetooth module and my GPS
Bluetooth receiver (mic/buttons), and relay power switch (illuminated to prevent me from leaving it on overnight).

CB Radio mounting
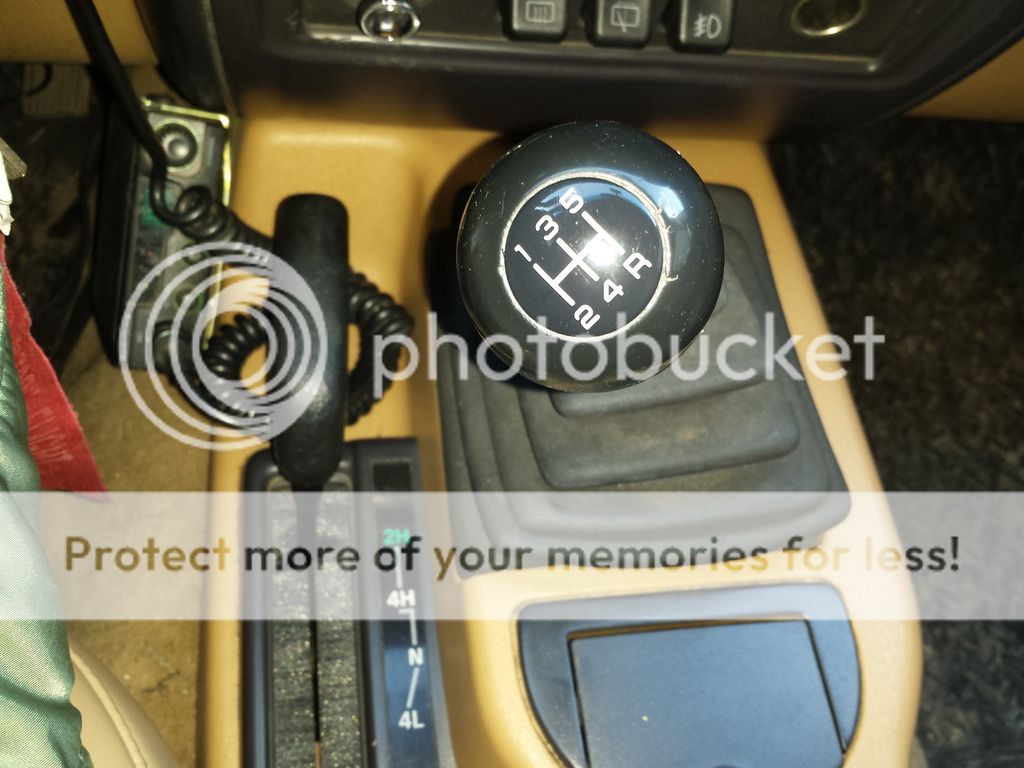
I then pulled a bunch of power to the center console (2 x for seat heaters, 1x for USB, 1 x for power seats, and 1x for future expansion). You can see the USB charger here, but this was before I wired up the heated seats (the heated seat modules are two small black boxes, tons of room for accessory wiring in the center console)
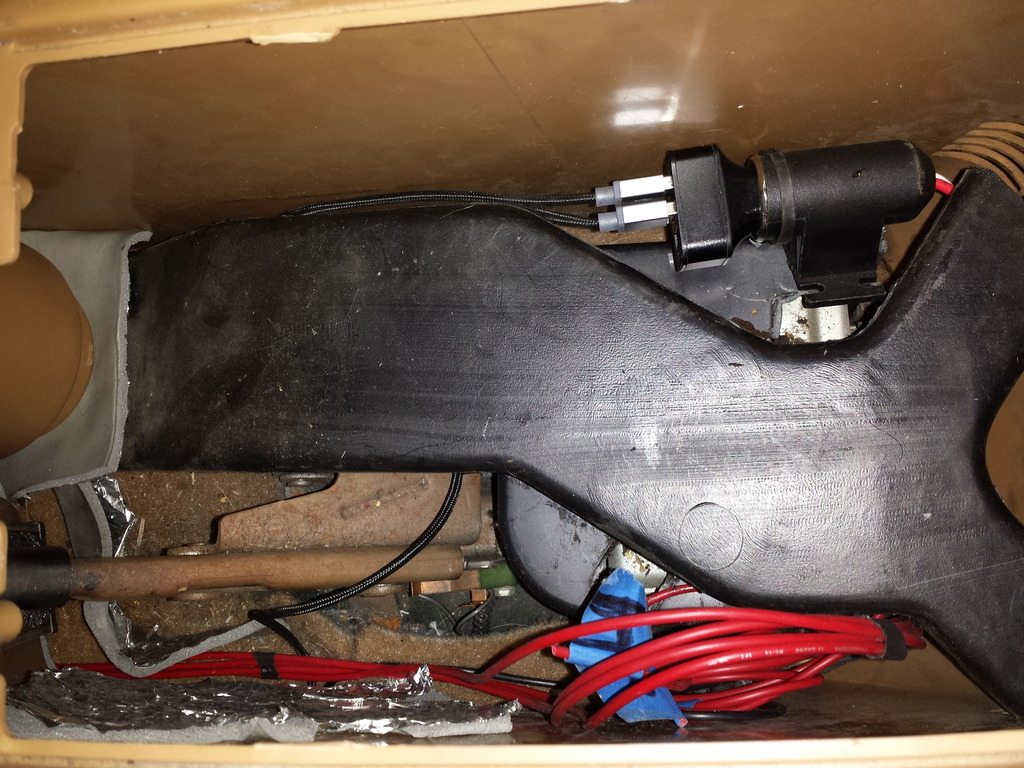
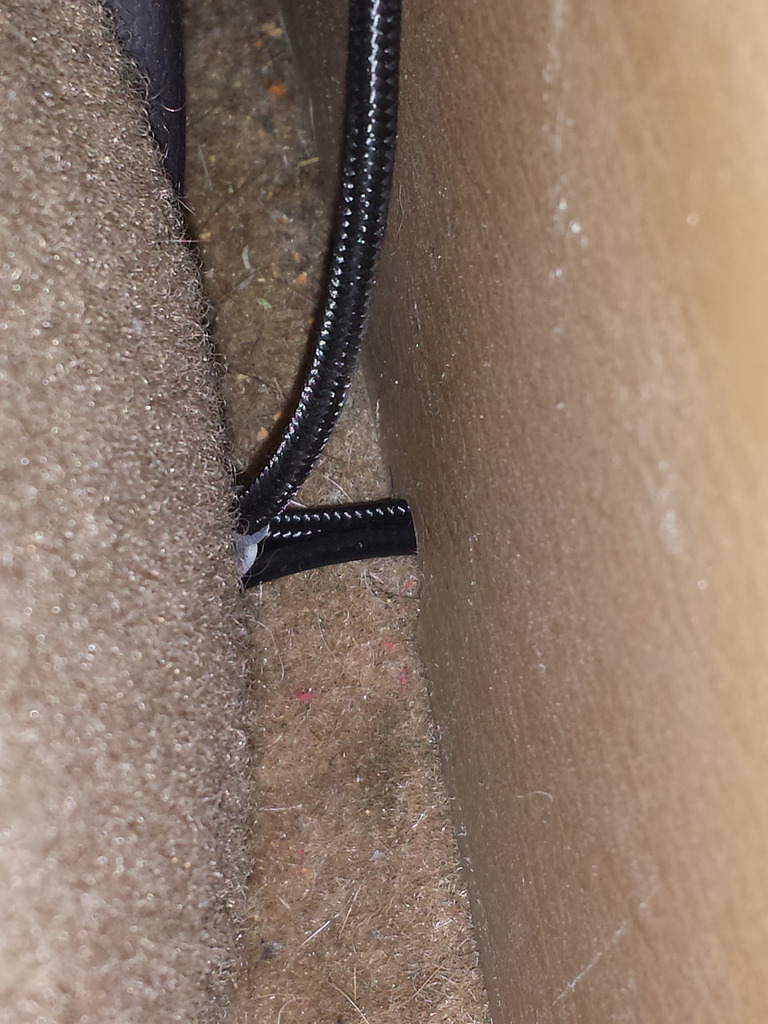
I melted the center console with a soldering iron to make these nice rounded access ports, so no grommets needed and no wires chafing.
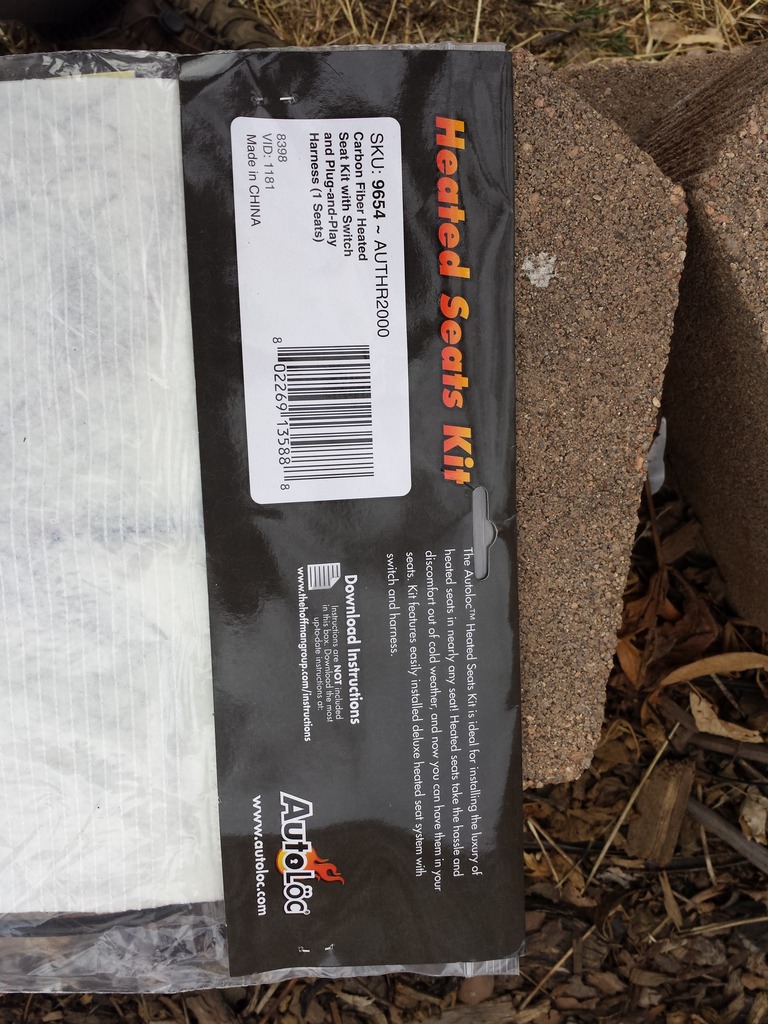
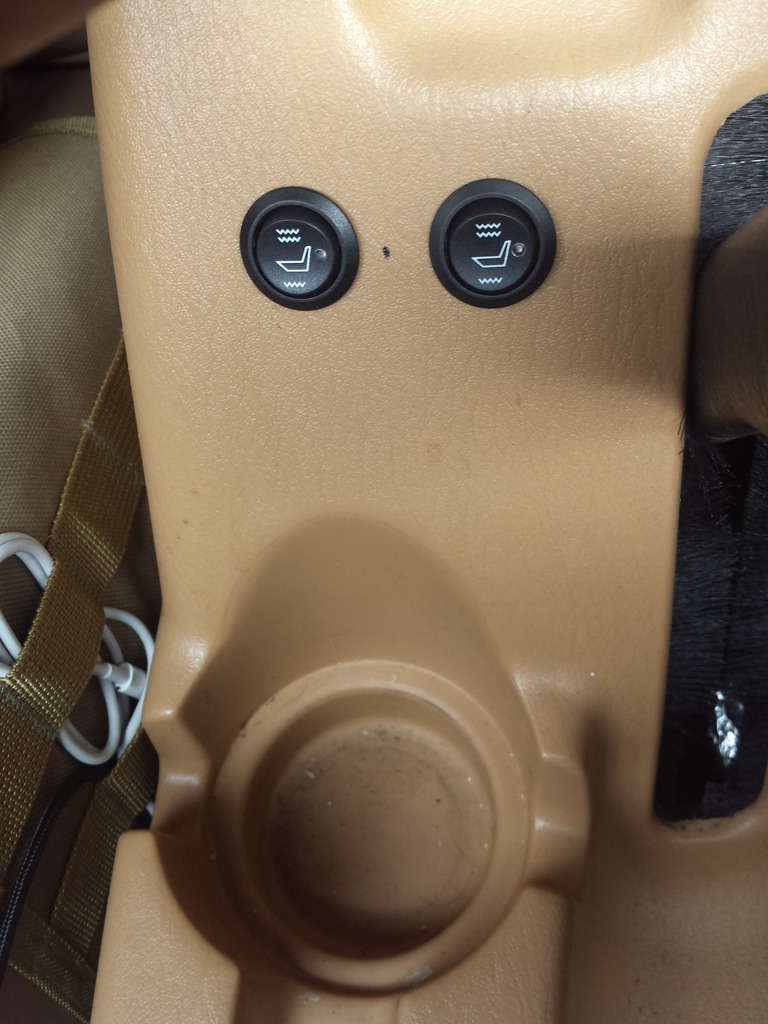
And finally, the heated seat switches
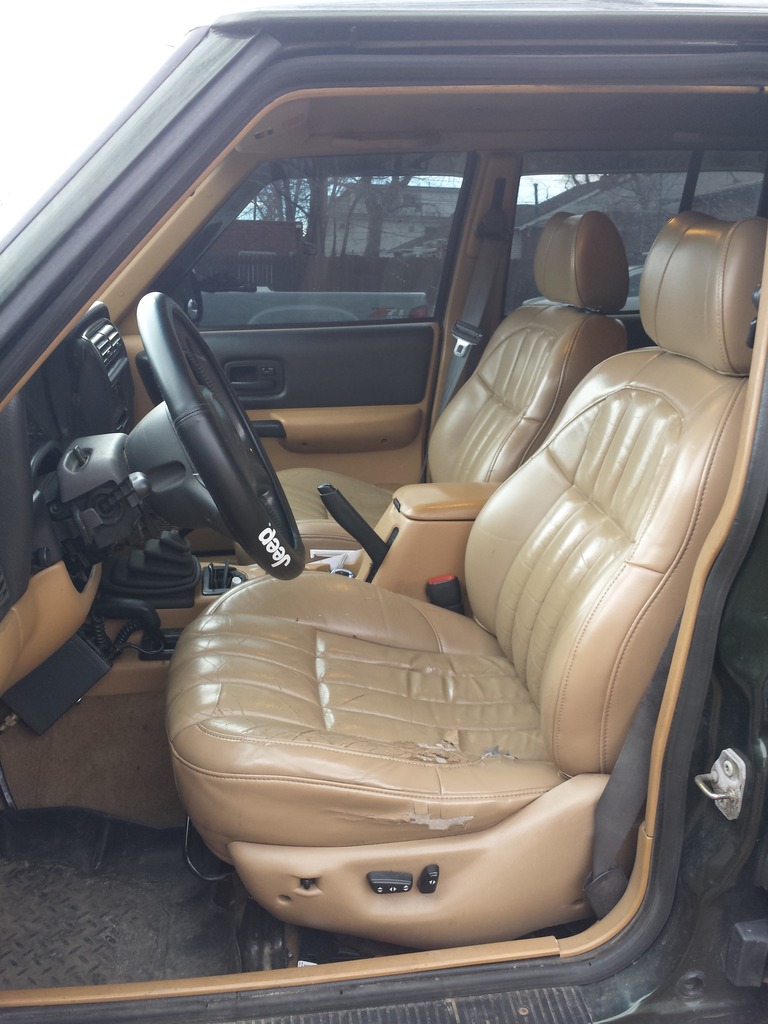
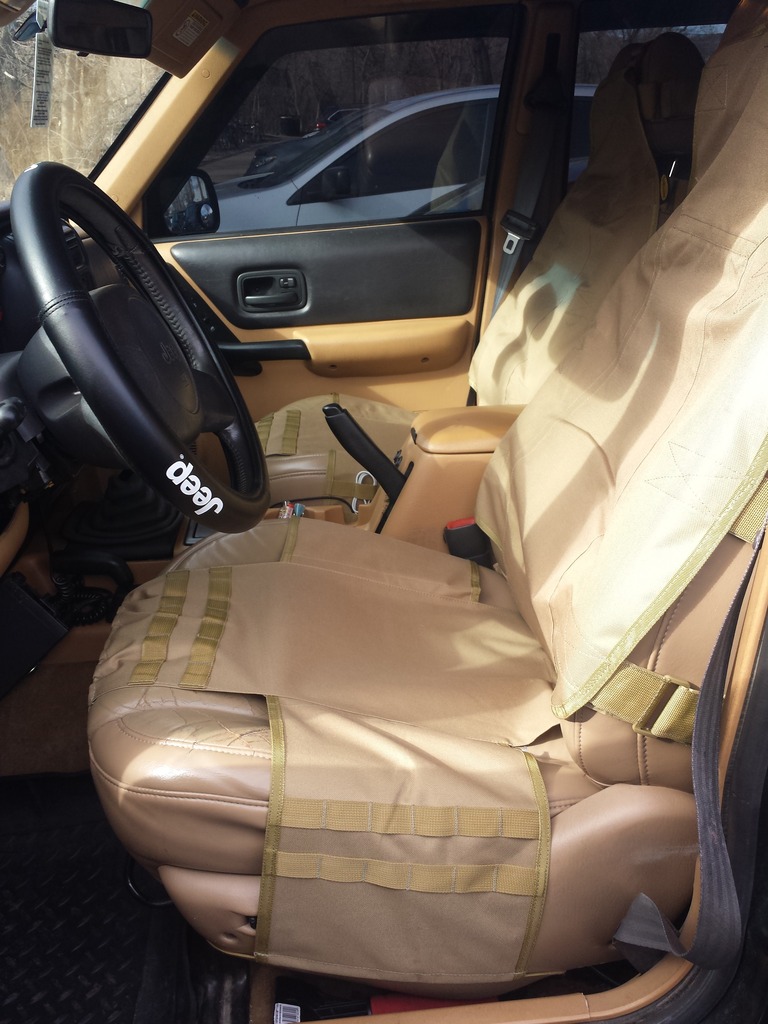
I also installed some seat covers because my driver's seat was tearing more and more. I went with Smittybilt GEAR seat covers that match the "Spice" interior (darker tan option) pretty well.
Before (note the tear on the drivers seat)
After!
It looks a bit more cluttered, and the seat heaters are slightly diminished because of the thick seat covers - but I like em enough to keep them (for now)
So I have several interior accessories I want to wire up. Fuse taps wouldn't cut it, nor did I want to wire everything to the battery directly or piggyback off other interior fuses.
I wanted to wire it up so I could have the option of having the relay trigger manually when the vehichle was off (with a switch), or automatically with the key. Unfortunately I forgot that I needed a 3-way "on-off-on" switch to accomplish this and forgot to order it.
So my current interior accessories include;
Seat Heaters (x2)
Bluetooth Adapter
Navigation Unit
USB chargers (single 3-port charger)
CB Radio (soon to be a UHF radio)
I bought;
Here is how I wired it all up;
I first pulled a 12v power wire from the battery to the compartment under the steering wheel. Then, I wired up my relay and fuse-boxes and tested for functionality.
Better view of the fuse box:
Hardwire USB adapter. Powers my bluetooth module and my GPS
Bluetooth receiver (mic/buttons), and relay power switch (illuminated to prevent me from leaving it on overnight).
CB Radio mounting
I then pulled a bunch of power to the center console (2 x for seat heaters, 1x for USB, 1 x for power seats, and 1x for future expansion). You can see the USB charger here, but this was before I wired up the heated seats (the heated seat modules are two small black boxes, tons of room for accessory wiring in the center console)
I melted the center console with a soldering iron to make these nice rounded access ports, so no grommets needed and no wires chafing.
And finally, the heated seat switches
I also installed some seat covers because my driver's seat was tearing more and more. I went with Smittybilt GEAR seat covers that match the "Spice" interior (darker tan option) pretty well.
Before (note the tear on the drivers seat)
After!
It looks a bit more cluttered, and the seat heaters are slightly diminished because of the thick seat covers - but I like em enough to keep them (for now)
02-02-2017, 09:15 AM
#5
CF Veteran
Join Date: Jul 2013
Location: Monett, MO.
Posts: 7,554
Likes: 0
Received 14 Likes
on
14 Posts
Year: 1999
Model: Cherokee
Engine: 4.0
Looks good I hope you did solder those crimp connections also always a good idea with electrical items like your running and no worry about corrosion or a poor connection.
I like the kit you ordered as well they do make quality items from what I have used of them.
Your leather seats are to nice to cover that way have you taken it to an upholstery shop for an estimate to repair those 2 rips on that seat, you may be surprised at what it will cost. I had one fixed on my WJ on the drivers side of the seat cost to remove bottom cover and repair was $68.
02-05-2017, 02:31 AM
#6
CF Veteran
Thread Starter
Join Date: Oct 2013
Location: Tarpon Springs, FL / Denver, CO
Posts: 2,097
Likes: 0
Received 8 Likes
on
7 Posts
Year: '98
Engine: 4.0 I6
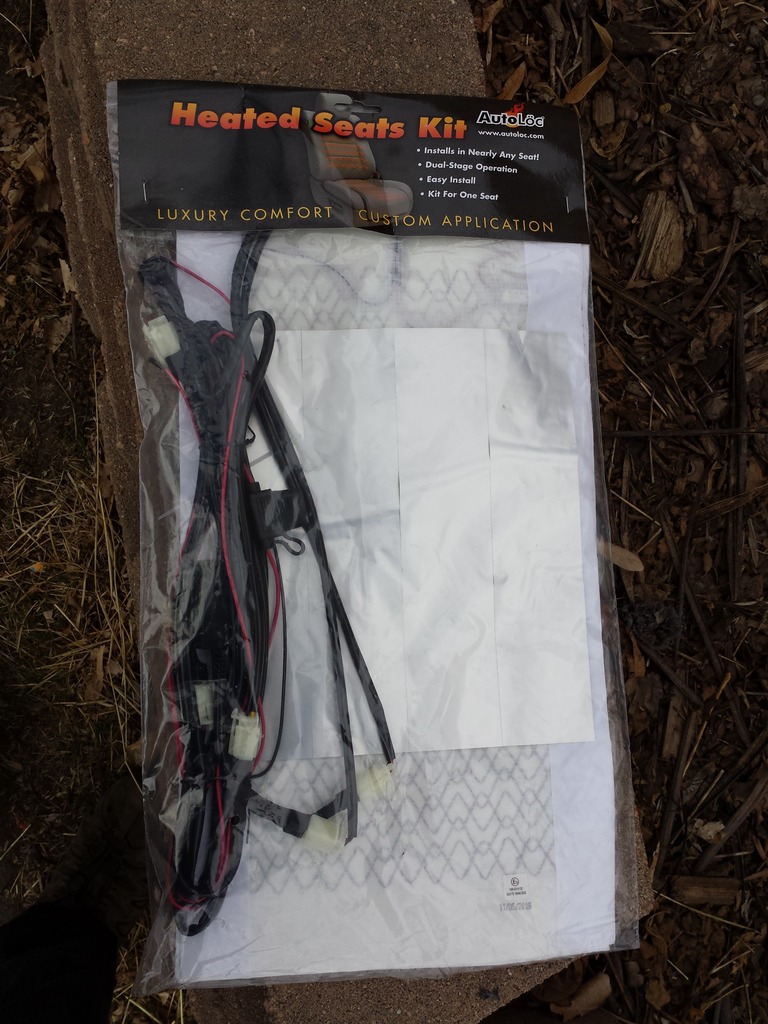
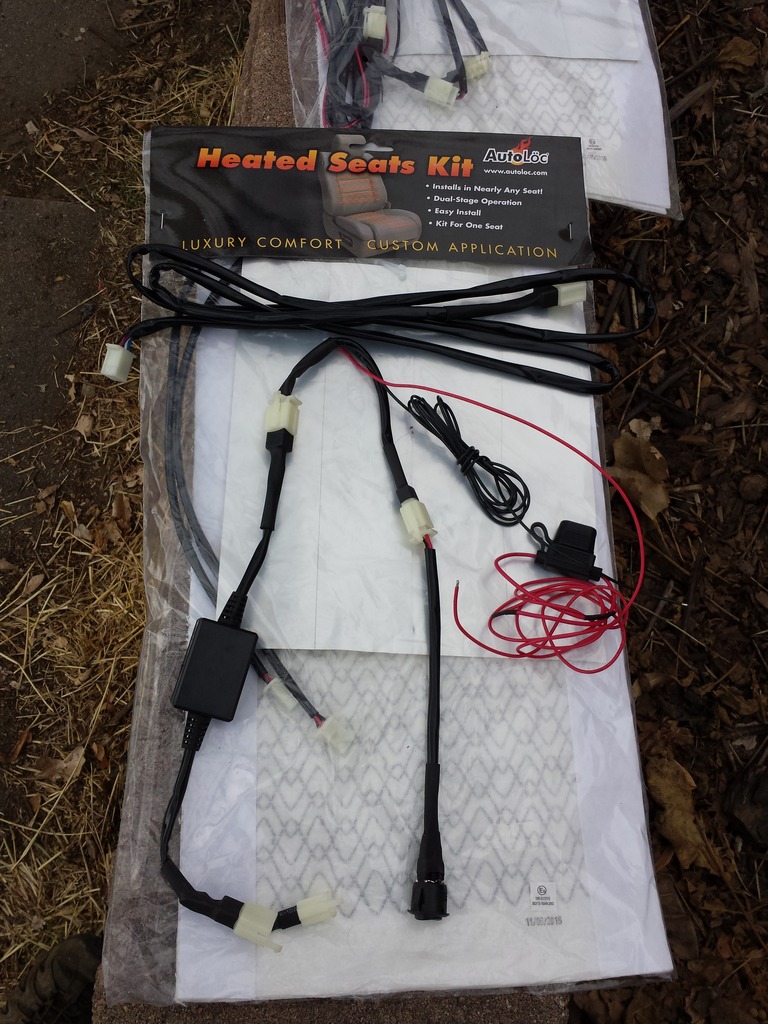
Yeah, the AutoLoc kit was really nice. Felt very quality and I got them for SUPER CHEAP on ebay (new old stock probably). Think I spend $32 for both of em which is a steal.
After a week, I can't believe I waited this long to install heated seats. What a freaking luxury - and I think they are more powerful than OEM because they heat up really fast in the morning and I have to turn them down after about 10 mins or so. Seat covers diminish that bit but they still work great.
I switched from soldering to crimp connectors because I constantly have issues with the solder corroding (even when I like triple wrap it in heat shrink). Usually on exterior connections but I switched completely and haven't had issues any more.
The aluminum crimp connectors are alot more robust and seem to hold up even better to vibrations. I have a really good crimper which helps me get really solid crimps on everything, not much worry of the wire coming loose unless the wire is snagging or under tension (which I always avoid and include strain relief when wiring up stuff)
I always figured solder was better but I have never had good luck in automotive applications (and I do have quite a bit of experience soldering electronics)
And I really really love the WJ seats - they look super plush and match my interior really well. Problem is I am always tearing them up, getting them muddy/dirty, etc. The pic without the seat covers is after I spent 1+ hours cleaning and conditioning them while installing the seat heater pads inside which is why they look exceptionally clean.
Figure this way I can get the seat fixed in time, and they will look great once I am finally done wrenching on the thing every day (if that ever happens)
edit:
I do have a ground loop issue that has persisted (thought it would go away after I hard-wired my bluetooth adapter but it seems to be linked to the amp and head unit). Going to be wiring my head unit ground to the 4-channel amplifier ground under the rear bench, so stay tuned for that.
At some point in the future I will need to pull a 10 gauge power wire for the fusebox, but the relay is only 14 gauge so I would have had to custom wire that and didn't think I needed the power overhead in the short term. Everything is using 14 gauge copper stranded wire which is more than enough for the accessories, but I will have some voltage drop to the fuse box if I don't go to 10 gauge wire for the primary power. I am probably only using 10 amps max right now though so not really a big concern right now
Last edited by investinwaffles; 02-05-2017 at 02:41 AM.
02-05-2017, 05:41 AM
#7
Beach Bum
When a solder connection corrodes quickly it is usually due to flux being used and left on connection. Flux is an acid and should be cleaned off after soldering. The other issue with soldered connections is when the 'plug' of solder abruptly ends on the wire, this creates a weak point. Best to taper the solder plug.
Trending Topics
02-15-2017, 10:40 PM
#8
CF Veteran
Thread Starter
Join Date: Oct 2013
Location: Tarpon Springs, FL / Denver, CO
Posts: 2,097
Likes: 0
Received 8 Likes
on
7 Posts
Year: '98
Engine: 4.0 I6
IDK, I used to always solder until I realized that NASA only uses crimp connections, and its not like they encounter water or anything.
Hell, my Jeep probably has about the same amount of vibrations as lift-off and re-entry for the orbiter
To each his own I guess - never had a solid crimp fail on me and they can always be grease-packed if they are going to be exposed to alot of salt + moisture
Hell, my Jeep probably has about the same amount of vibrations as lift-off and re-entry for the orbiter
To each his own I guess - never had a solid crimp fail on me and they can always be grease-packed if they are going to be exposed to alot of salt + moisture
02-19-2017, 07:51 PM
#9
CF Veteran
Join Date: May 2012
Location: Lost in the wilds of Virginia
Posts: 7,964
Received 951 Likes
on
767 Posts
Year: 1998 Classic (I'll get it running soon....) and 02 Grand
Model: Cherokee (XJ)
Engine: 4.0
Crimps are also mil-spec in places where soldering is prohibited.
Soldering is for circuit boards, not wiring.