Zebvance's Comanche build
 02-13-2015, 02:53 PM
#196
CF Veteran
Thread Starter
Join Date: Feb 2012
Location: college station
Posts: 1,116
Likes: 0
Received 0 Likes
on
0 Posts
Year: 1988
Model: Comanche
Engine: 4.0
A bit of a quick update, trying to really give the mj the attention it needs. Dropped off the truck at the shop and had them put a new rear main seal in, along with a new oil pan and oil pan gaskets. Buttoned up a few things here and there and then I told them it has started to lose power over the last year but I figured it had to do with the TPS acting up. Just haven�t got around to replacing it. Well here is the bad news. They did a compression test and here are the results.
Dry Test
Cylinder 1 - 125 psi
Cylinder 2 - 100-105 psi
Cylinder 3 - 145 psi
Cylinder 4 - 130-135 psi
Cylinder 5 - 140-145 psi
Cylinder 6 -140 psi
Then they did a wet test on #2 by putting a few drops of oil in first and it jumped to 150 psi. So that confirms bad ring in #2. He suggested putting some stuff called CRL Restore in it and rocking it. They have used that stuff before and said it really works. They did a compression test after the put it in and #2 read 155-160 psi� Considering the rate at which I drive this thing ( 2000 miles a year),I�m going to rock it with the CRL restore every oil change. The plan is to get a craigslist 4.0 and start building a 4.7 stoker in the garage over a length of time as funds allow.
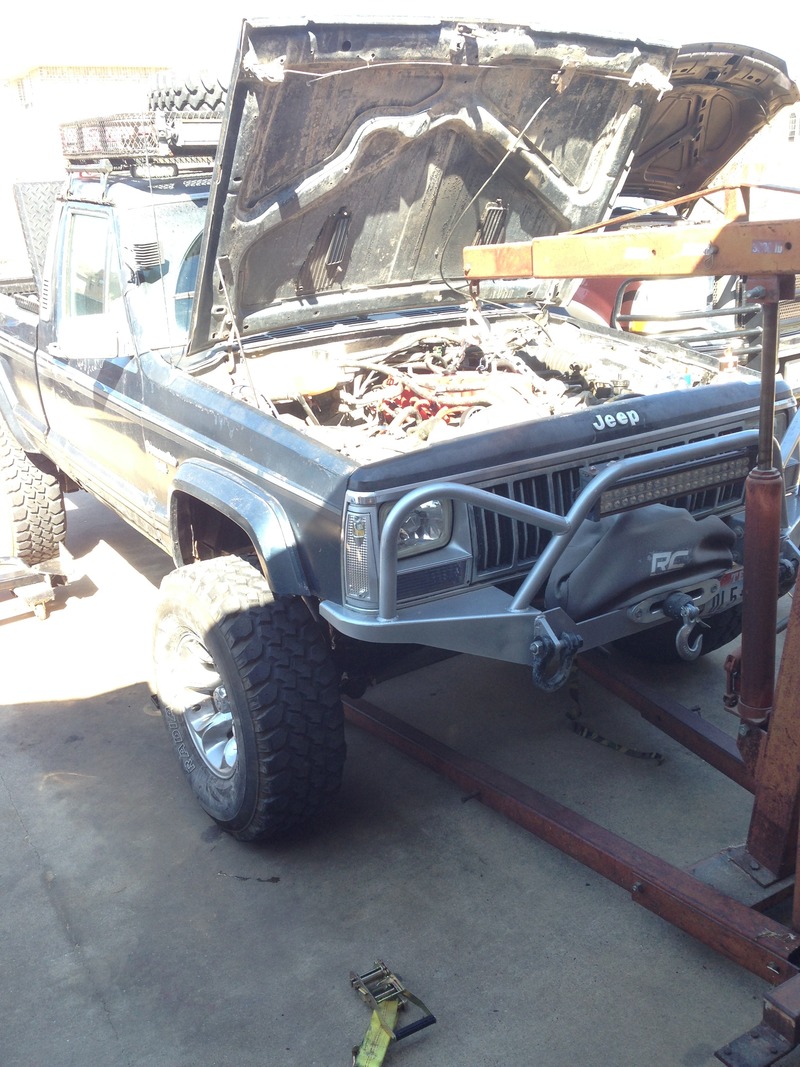
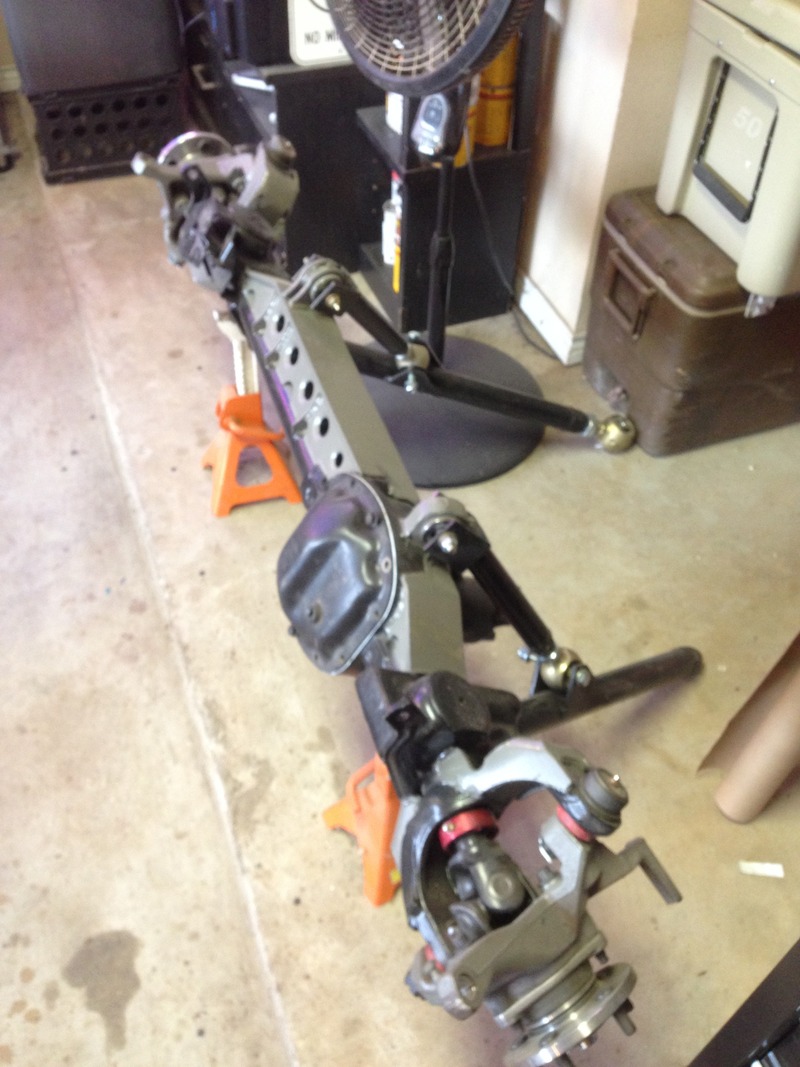
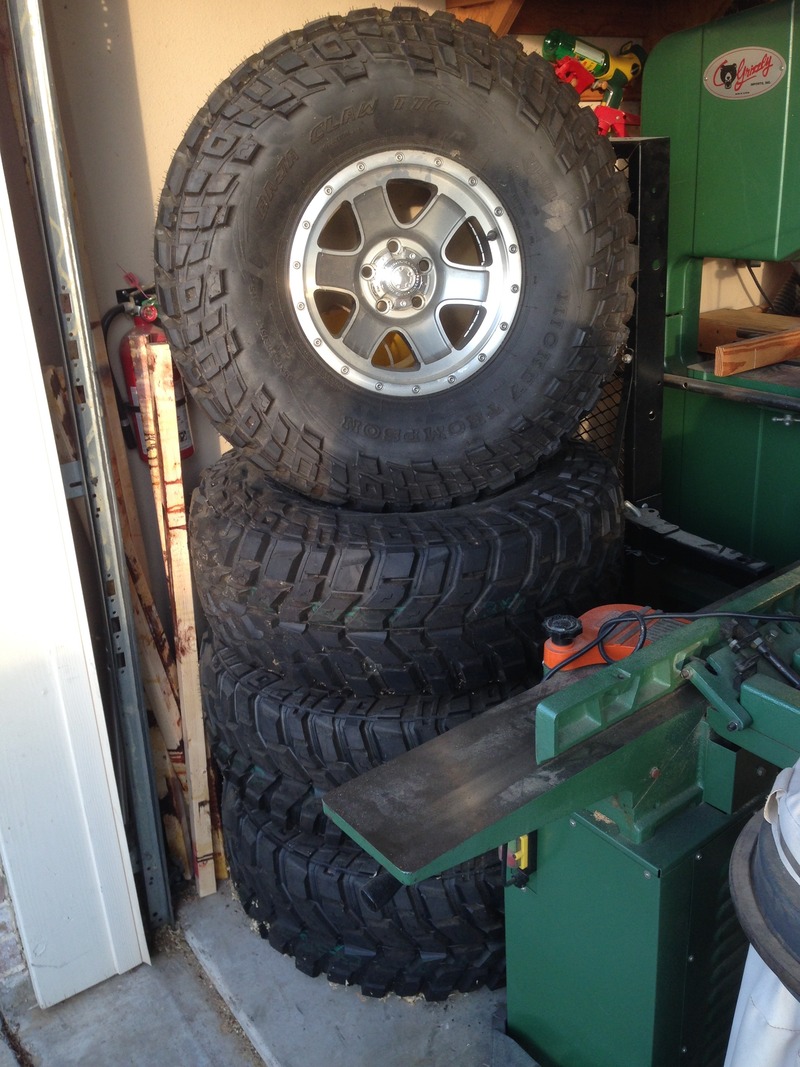
Enough with the bad news and on to the good news. This weekend I have a couple buddies coming to help get the long arms, new dana 30, and 35s on. There is some fabrication that will need to be done to the cross member before we can install it and the motor has shifted sideways a bit from the sketchy trans drop that�s on the truck, so it will need to be man handled some to get it lined up right. Then its bolt on time. There is a lot of work to be done. My goal for the weekend is to have the cross member fabed up and bolted on by the end Sunday. My buddies seem to think we can get the whole lift on. Regardless, progress will be made which Ill be happy with!
Dry Test
Cylinder 1 - 125 psi
Cylinder 2 - 100-105 psi
Cylinder 3 - 145 psi
Cylinder 4 - 130-135 psi
Cylinder 5 - 140-145 psi
Cylinder 6 -140 psi
Then they did a wet test on #2 by putting a few drops of oil in first and it jumped to 150 psi. So that confirms bad ring in #2. He suggested putting some stuff called CRL Restore in it and rocking it. They have used that stuff before and said it really works. They did a compression test after the put it in and #2 read 155-160 psi� Considering the rate at which I drive this thing ( 2000 miles a year),I�m going to rock it with the CRL restore every oil change. The plan is to get a craigslist 4.0 and start building a 4.7 stoker in the garage over a length of time as funds allow.
Enough with the bad news and on to the good news. This weekend I have a couple buddies coming to help get the long arms, new dana 30, and 35s on. There is some fabrication that will need to be done to the cross member before we can install it and the motor has shifted sideways a bit from the sketchy trans drop that�s on the truck, so it will need to be man handled some to get it lined up right. Then its bolt on time. There is a lot of work to be done. My goal for the weekend is to have the cross member fabed up and bolted on by the end Sunday. My buddies seem to think we can get the whole lift on. Regardless, progress will be made which Ill be happy with!
 02-17-2015, 10:49 AM
#197
Member

Join Date: Feb 2014
Location: Victoria Texas
Posts: 120
Likes: 0
Received 0 Likes
on
0 Posts
So we didnt get as far as we thought but I think you should be able to get the cross member fully up by the end of the week if it stops raining, doing all this work on everybodys stuff and talking about work on trucks has got me to the point I cant wait for the weekend haha
03-13-2015, 09:38 AM
#198
CF Veteran
Thread Starter
Join Date: Feb 2012
Location: college station
Posts: 1,116
Likes: 0
Received 0 Likes
on
0 Posts
Year: 1988
Model: Comanche
Engine: 4.0
Update!
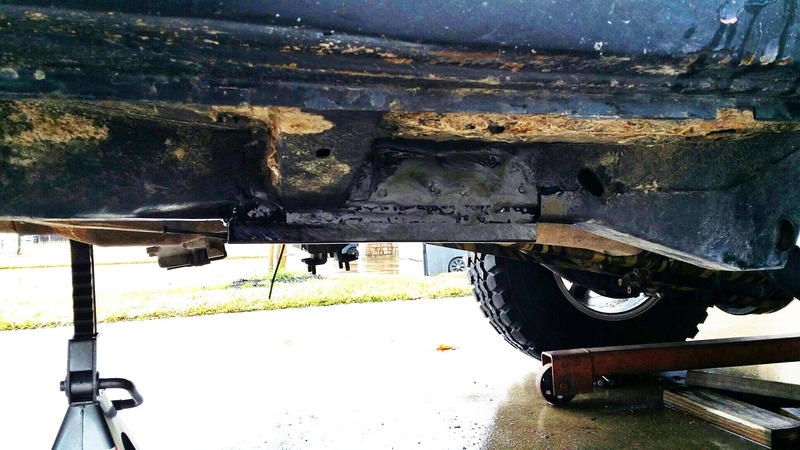
Well the cross member for the long arm lift is finally in place. First things first I had to move the engine back in place from where it had sagged back and at a angle because of the sketch trans drop that was on it before.
With that done I test fit the serious off road cross member and started cutting into it so that it would fit appropriately. I had to trim the front side and back side of where it hugs the frame. This was so it would not come in contact with the Comanche cab frame supports.
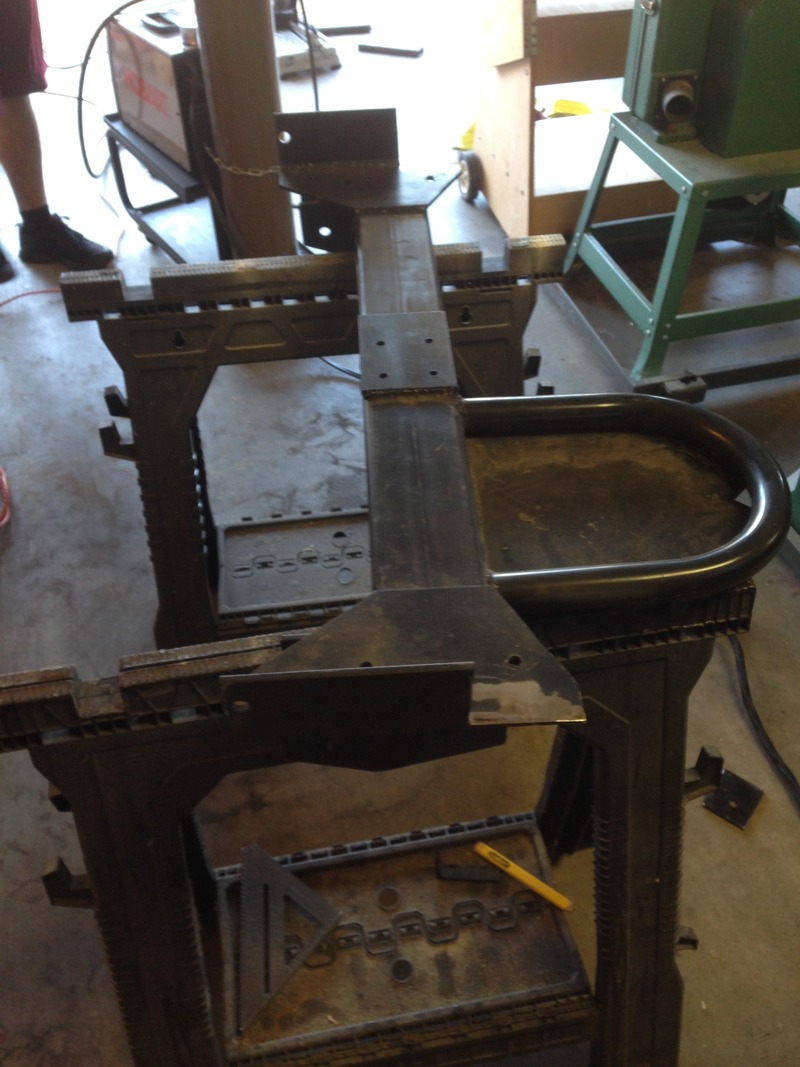
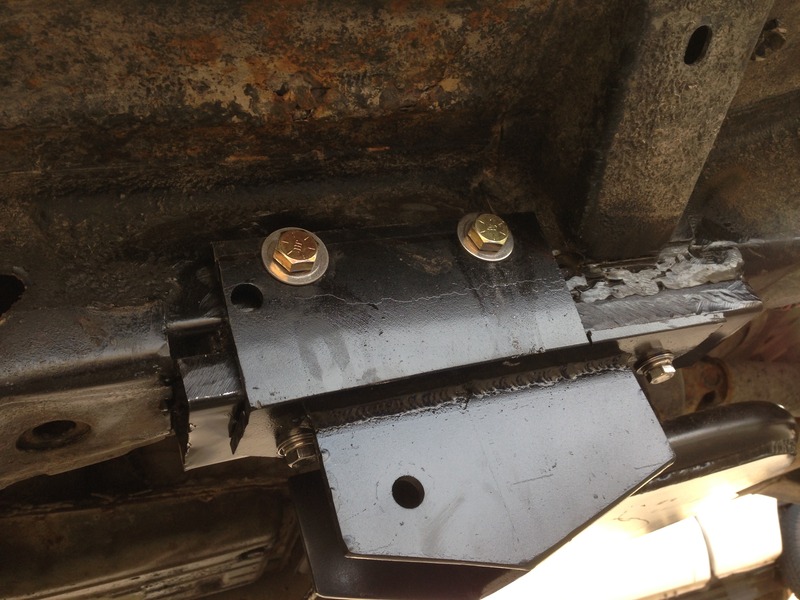
In my particular case being that I’m lifting around 8 inches with a low pinion dana 30 I added a permanent 1 inch trans drop. I did this using 1x4 tube, welding it to the frame, and them making nut strips to slide in the tube to bolt the cross member to.
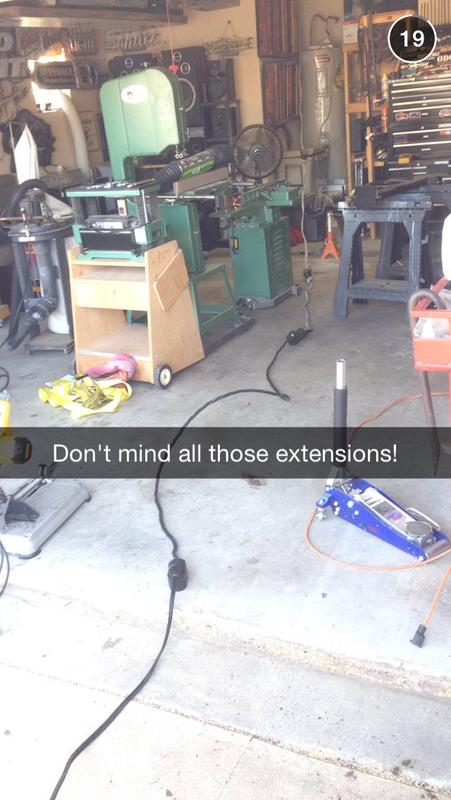
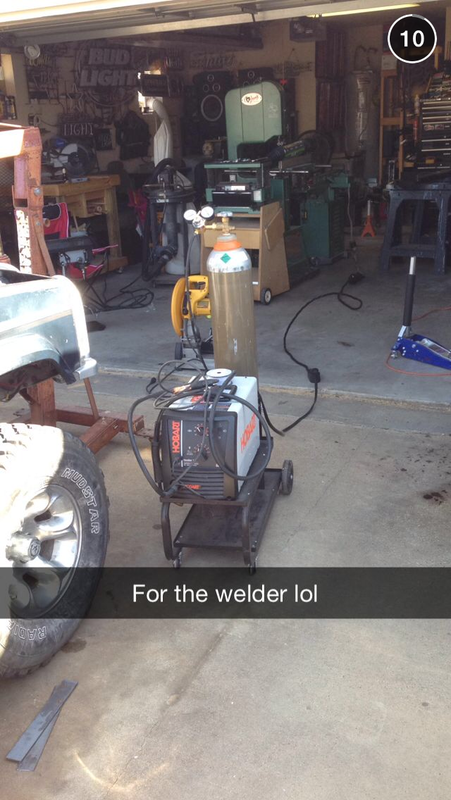
Had to get real creative when I realized the welder wouldn’t reach the truck…..
Here is the almost finished product. I still need to drill to mounting holes on each side of the cross member and through the frame to put horizontal mounting points. I’ll do that with a 5 inch bolt going though the cross member, frame and a piece of 2 inch flat bar on the inside of the frame and. essentially sandwiching the frame.
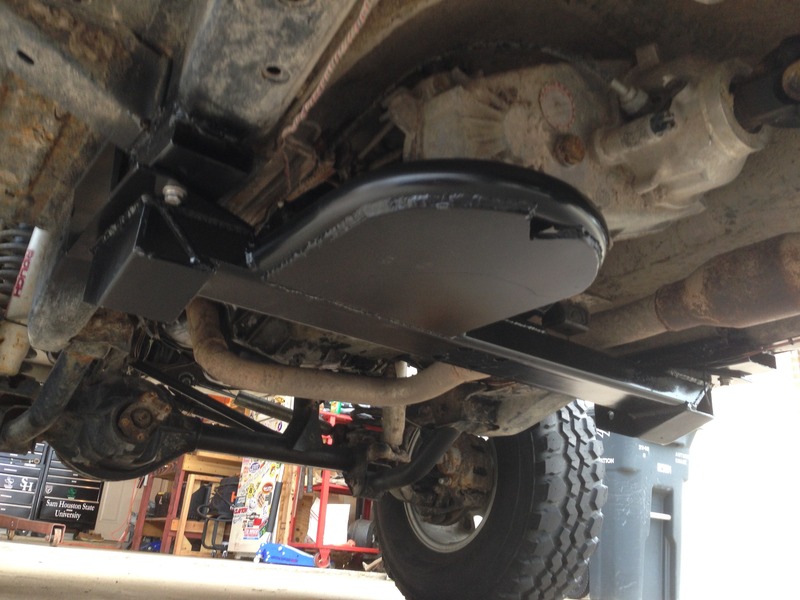
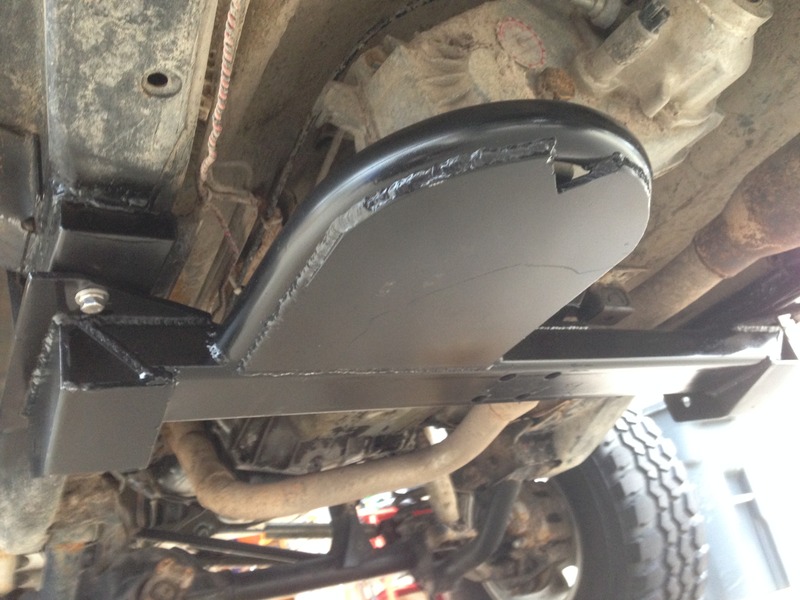
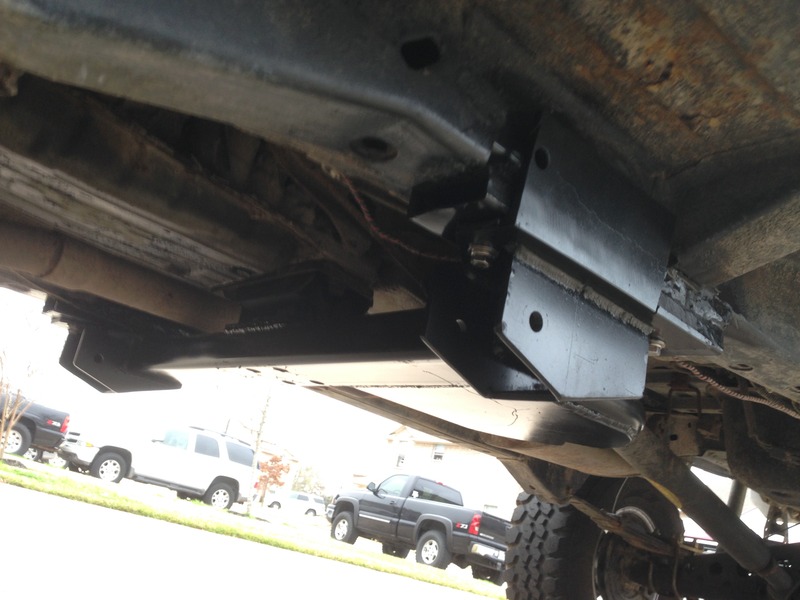
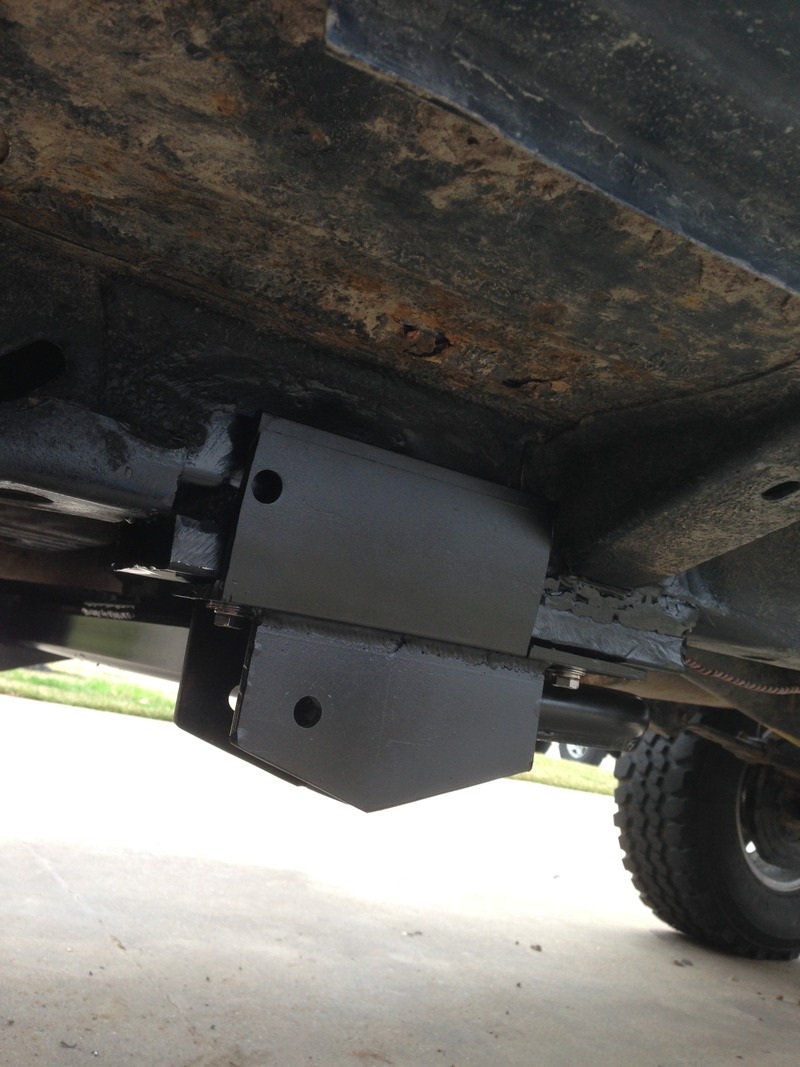
So I am just about ready to install the new axle and long arms along with all new lift components for the front. Just have to drill the 4 last holes through the frame. But I couldn’t have got any of it done without the help form a couple of buddies. I will also have to cut the old control arm mounts off the frame so the long arms have the clearance to flex. I hope to get all that done and on the new tires in the next couple of weeks or so. Really trying to get this thing ready for the beach this summer.
Well the cross member for the long arm lift is finally in place. First things first I had to move the engine back in place from where it had sagged back and at a angle because of the sketch trans drop that was on it before.

With that done I test fit the serious off road cross member and started cutting into it so that it would fit appropriately. I had to trim the front side and back side of where it hugs the frame. This was so it would not come in contact with the Comanche cab frame supports.

In my particular case being that I’m lifting around 8 inches with a low pinion dana 30 I added a permanent 1 inch trans drop. I did this using 1x4 tube, welding it to the frame, and them making nut strips to slide in the tube to bolt the cross member to.


Had to get real creative when I realized the welder wouldn’t reach the truck…..


Here is the almost finished product. I still need to drill to mounting holes on each side of the cross member and through the frame to put horizontal mounting points. I’ll do that with a 5 inch bolt going though the cross member, frame and a piece of 2 inch flat bar on the inside of the frame and. essentially sandwiching the frame.


So I am just about ready to install the new axle and long arms along with all new lift components for the front. Just have to drill the 4 last holes through the frame. But I couldn’t have got any of it done without the help form a couple of buddies. I will also have to cut the old control arm mounts off the frame so the long arms have the clearance to flex. I hope to get all that done and on the new tires in the next couple of weeks or so. Really trying to get this thing ready for the beach this summer.
03-16-2015, 02:08 PM
#199
CF Veteran
Thread Starter
Join Date: Feb 2012
Location: college station
Posts: 1,116
Likes: 0
Received 0 Likes
on
0 Posts
Year: 1988
Model: Comanche
Engine: 4.0
This past weekend I was able to get the side frame bolts drilled and in. It was a pain in the ***. 8 drill bits later everything was bolted up. I don’t have pictures but I put a piece of flat bar on the inside of the frame rail and drilled two holes though it to sandwich the fame in between. Figured that would keep the nut from possibly punching through the unibody.
I also was able to get my Hazards working again (which have never worked since I have owned the truck. While at it I mounted two new horns but haven’t wired them yet. The old horn is busted. This was all done in the attempt to get it back street legal to get it inspected. However I still have to tighten up my e-brake cable, as it has loosened up since I installed the 8.8.
Since it is going to rain this weekend I I’m going to work on replacing dash bulbs with LEDs and wiring up a few other things.
Next weekend we are going camping at Llano State Park right outside of junction. I am seriously thinking about taking the Comanche on this road trip. I have made plenty of trips in it to Huntsville, and Matagorda (2.5 hours) but this makes me kind of nervous because it’s a 4.5 hour drive…I also haven’t driven the truck that much over the past year ( maybe 500-1000 miles) but I have replaced a TON of parts…
So the plan is try to get all the little things buttoned up this week and next. Insurance, Inspection, registration, Alignment, Washed and probably take it on its first long road trip. After that the next clear weekend I can get some extra hands the new Long arms, axle, trac bar, coils, and shocks, and 35’s are all going on it.
I am really excited about getting this thing going this summer. The hardest part (cross member fabrication) is over.
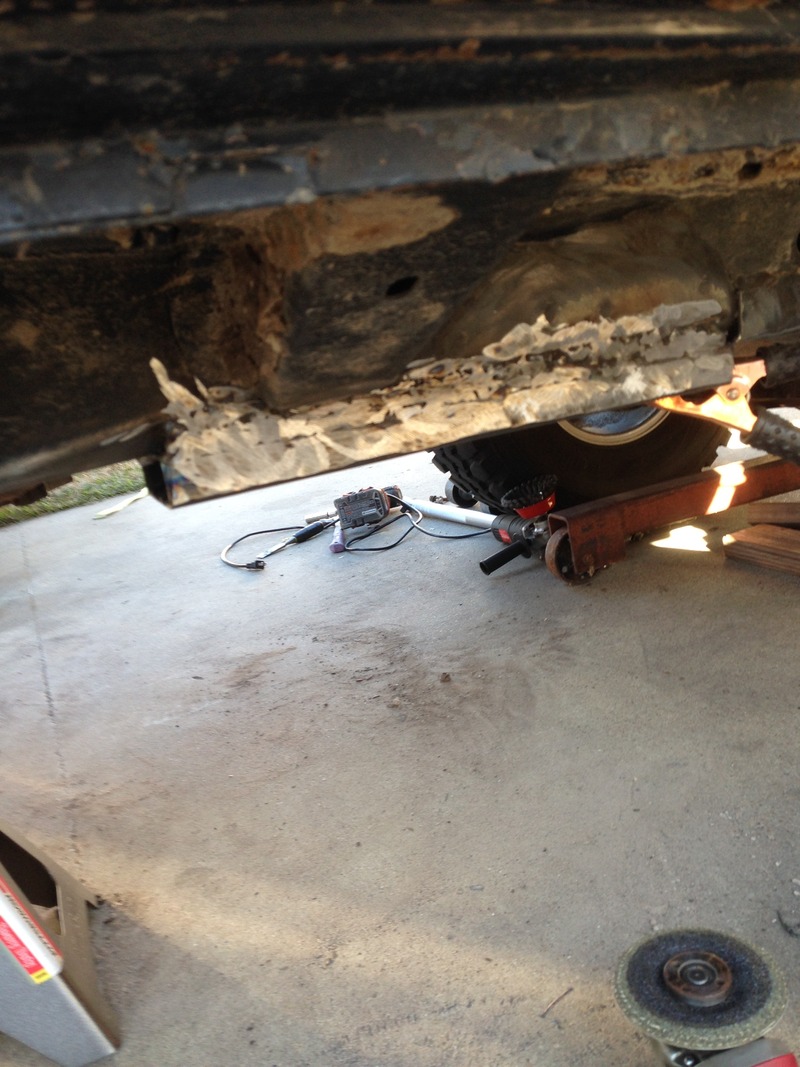
Side note: This weekend I noticed the rockers are getting some rot. So I’ll be doing some research on doing some boat sides or 2x6 sliders. I would like to tastefully incorporate a step on them or something. The old lady already complains that it is too tall for her to get into, so when this thing goes up another 4-6 inches she will really be fussy then lol.
I also was able to get my Hazards working again (which have never worked since I have owned the truck. While at it I mounted two new horns but haven’t wired them yet. The old horn is busted. This was all done in the attempt to get it back street legal to get it inspected. However I still have to tighten up my e-brake cable, as it has loosened up since I installed the 8.8.
Since it is going to rain this weekend I I’m going to work on replacing dash bulbs with LEDs and wiring up a few other things.
Next weekend we are going camping at Llano State Park right outside of junction. I am seriously thinking about taking the Comanche on this road trip. I have made plenty of trips in it to Huntsville, and Matagorda (2.5 hours) but this makes me kind of nervous because it’s a 4.5 hour drive…I also haven’t driven the truck that much over the past year ( maybe 500-1000 miles) but I have replaced a TON of parts…
So the plan is try to get all the little things buttoned up this week and next. Insurance, Inspection, registration, Alignment, Washed and probably take it on its first long road trip. After that the next clear weekend I can get some extra hands the new Long arms, axle, trac bar, coils, and shocks, and 35’s are all going on it.
I am really excited about getting this thing going this summer. The hardest part (cross member fabrication) is over.
Side note: This weekend I noticed the rockers are getting some rot. So I’ll be doing some research on doing some boat sides or 2x6 sliders. I would like to tastefully incorporate a step on them or something. The old lady already complains that it is too tall for her to get into, so when this thing goes up another 4-6 inches she will really be fussy then lol.


 03-17-2015, 03:34 PM
#200
CF Veteran
03-17-2015, 04:10 PM
#201
CF Veteran
Thread Starter
Join Date: Feb 2012
Location: college station
Posts: 1,116
Likes: 0
Received 0 Likes
on
0 Posts
Year: 1988
Model: Comanche
Engine: 4.0
Thanks! That was a typo, it is CSL restore. you can get it from auto zone and advance for sure... It really has worked. Its not a permanent solution but im going to keep rocking it till the motor completely takes a crap then throw a stroker in it.
03-23-2015, 02:49 PM
#202
CF Veteran
Thread Starter
Join Date: Feb 2012
Location: college station
Posts: 1,116
Likes: 0
Received 0 Likes
on
0 Posts
Year: 1988
Model: Comanche
Engine: 4.0
I�m currently working on a lot of wiring in the cab of the truck which I will post a update of when I�m done. This weekend I plan on taking the truck to Llano State park to go camping for the weekend. This past week I got it inspected, insured, and registered. It�s about a 4.5 hour trip, the longest trip I have ever attempted to take with the truck. Kind of nervous.
As soon as I get back I�m ripping the front axle and suspension and going to start on the lift. However, until then I still have some things that I have done over the past few weeks to get this tread 100% up to date.
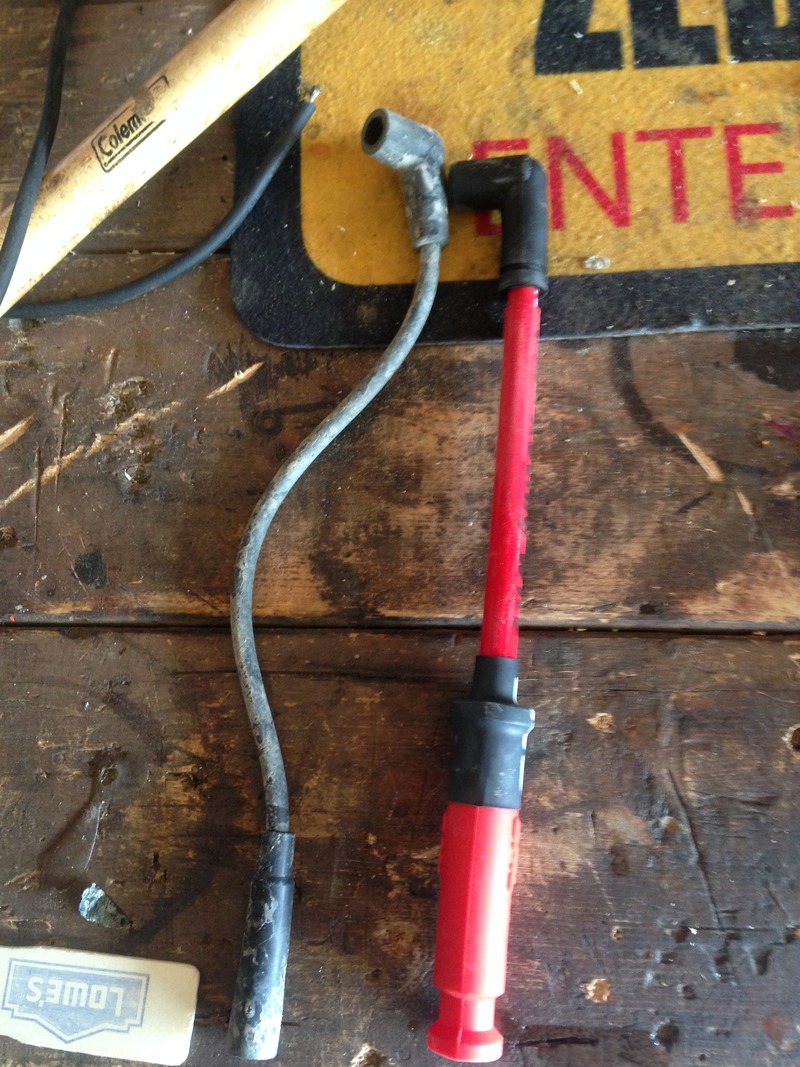
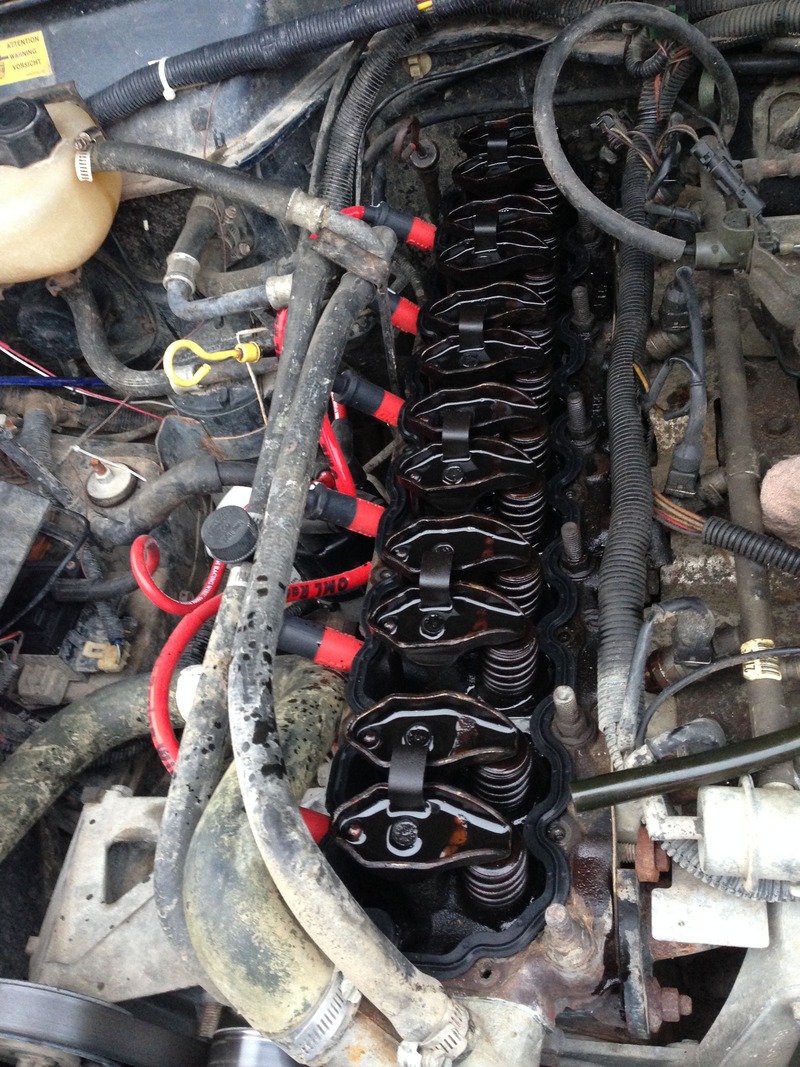
I went ahead and gave the truck a FULL tune up. New plugs, wires, rotor, distributer, cap, and coil. Went a bit overboard on the wires, but I got a good deal on them. They are OML 10mm racing wires.
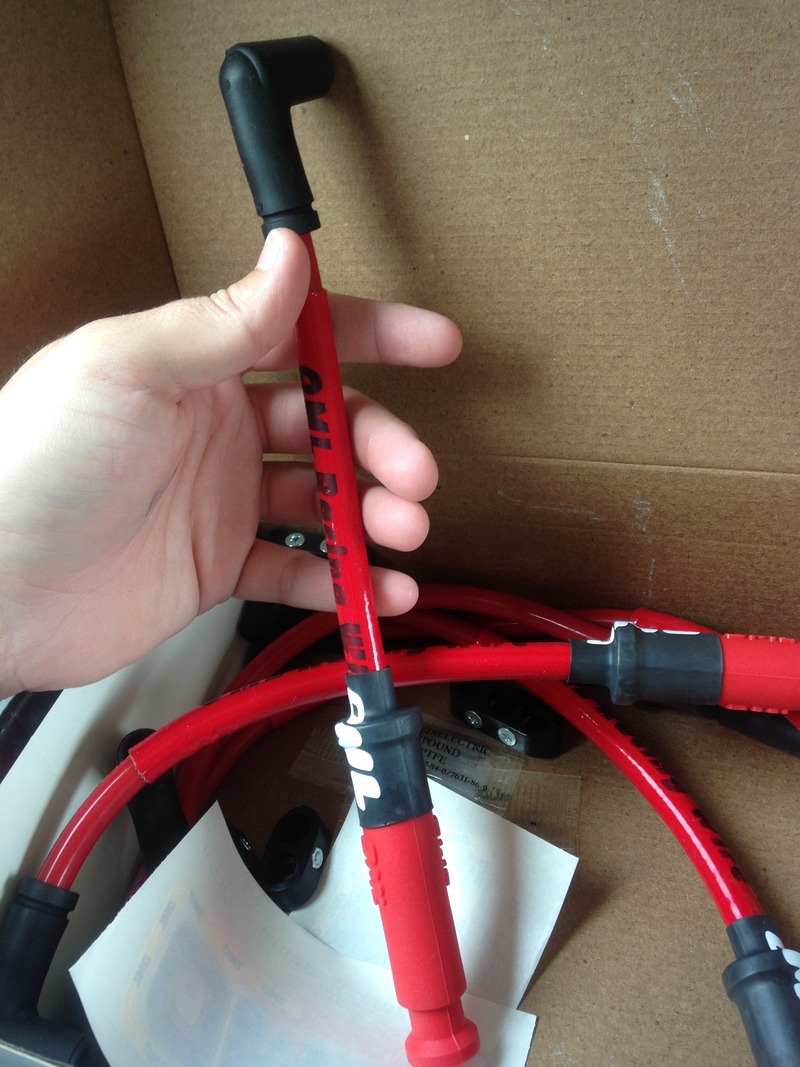
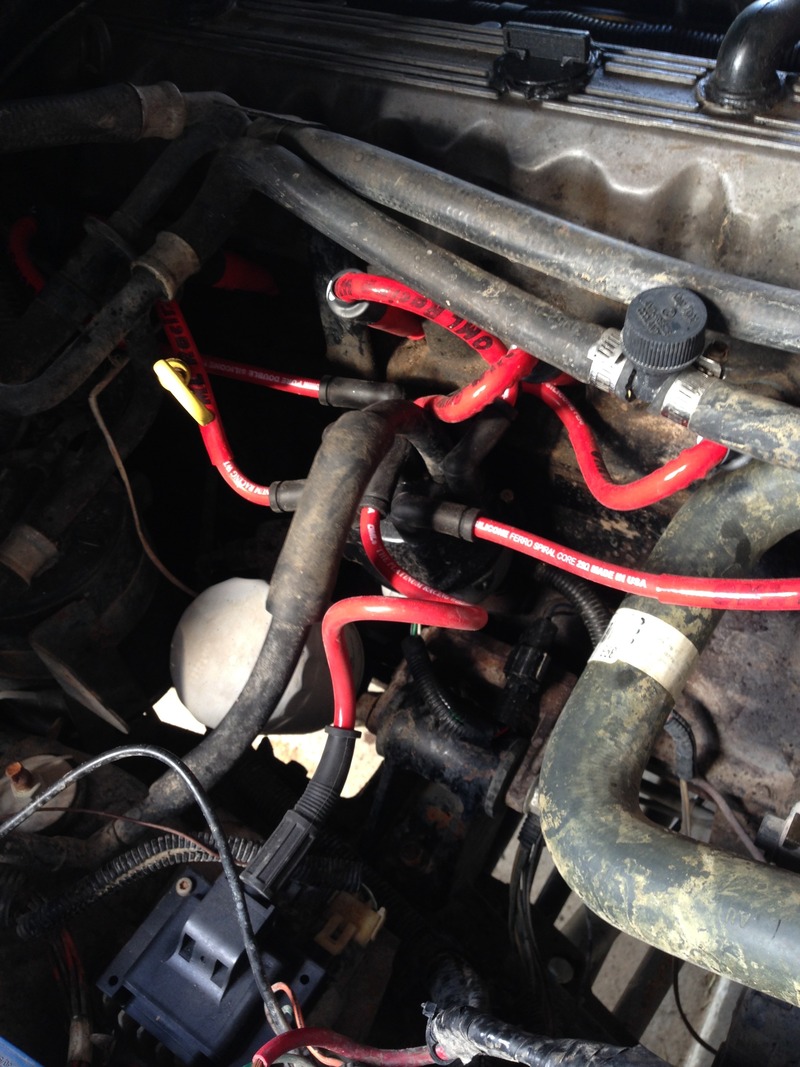
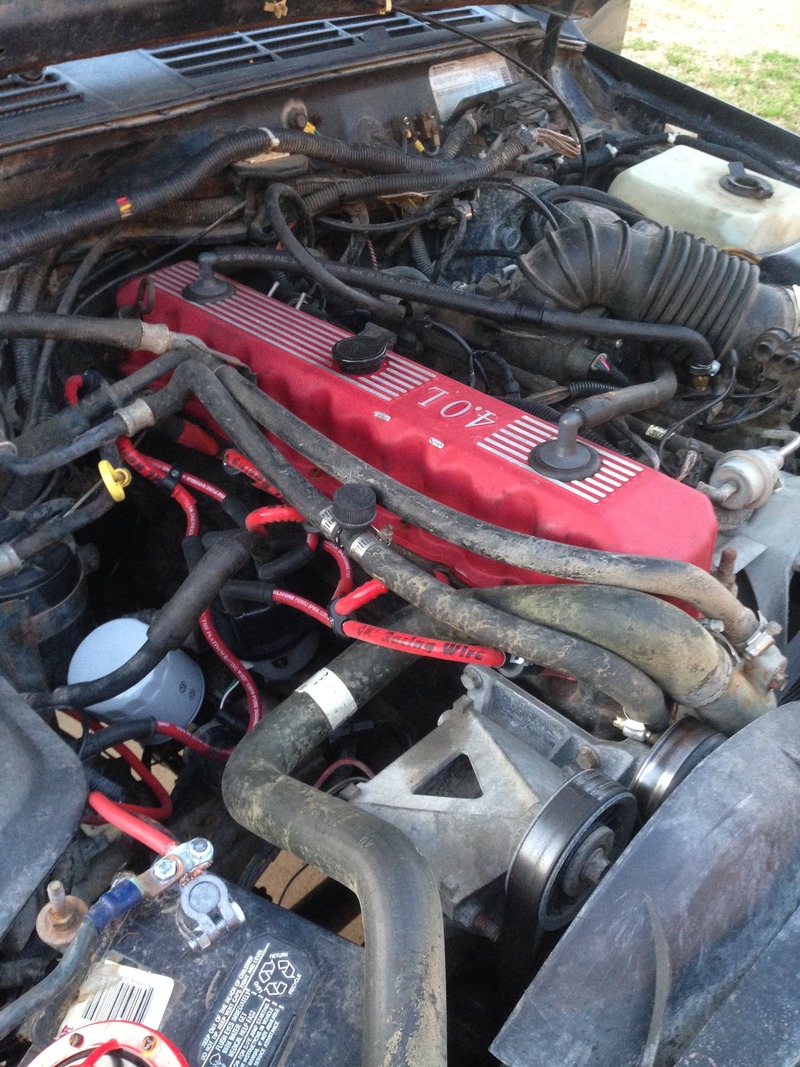
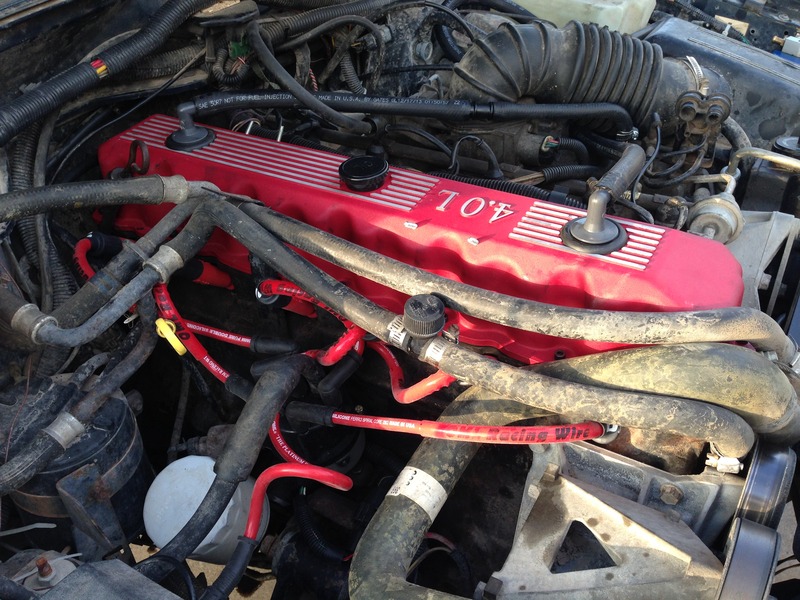
After some research, I realized why I had such bad blow by. The flute stems in the valve cover of the stock renix 4.0 sat way to low, sucking up oil and dumping it into the oil filter, just a bad design. Now, since I recently found I have a bad ring in piston #2 I knew that this would not fix the problem but hopefully help to contain the oil enough to get me by until the stoker build. So I ordered a newer style aftermarket cover that did not have the flutes in it. I have since put about 100 miles on the truck and NO BLOW BY!

And here it is all done!
As soon as I get back I�m ripping the front axle and suspension and going to start on the lift. However, until then I still have some things that I have done over the past few weeks to get this tread 100% up to date.
I went ahead and gave the truck a FULL tune up. New plugs, wires, rotor, distributer, cap, and coil. Went a bit overboard on the wires, but I got a good deal on them. They are OML 10mm racing wires.


After some research, I realized why I had such bad blow by. The flute stems in the valve cover of the stock renix 4.0 sat way to low, sucking up oil and dumping it into the oil filter, just a bad design. Now, since I recently found I have a bad ring in piston #2 I knew that this would not fix the problem but hopefully help to contain the oil enough to get me by until the stoker build. So I ordered a newer style aftermarket cover that did not have the flutes in it. I have since put about 100 miles on the truck and NO BLOW BY!


And here it is all done!

 03-23-2015, 03:21 PM
#203
CF Veteran
Thread Starter
Join Date: Feb 2012
Location: college station
Posts: 1,116
Likes: 0
Received 0 Likes
on
0 Posts
Year: 1988
Model: Comanche
Engine: 4.0
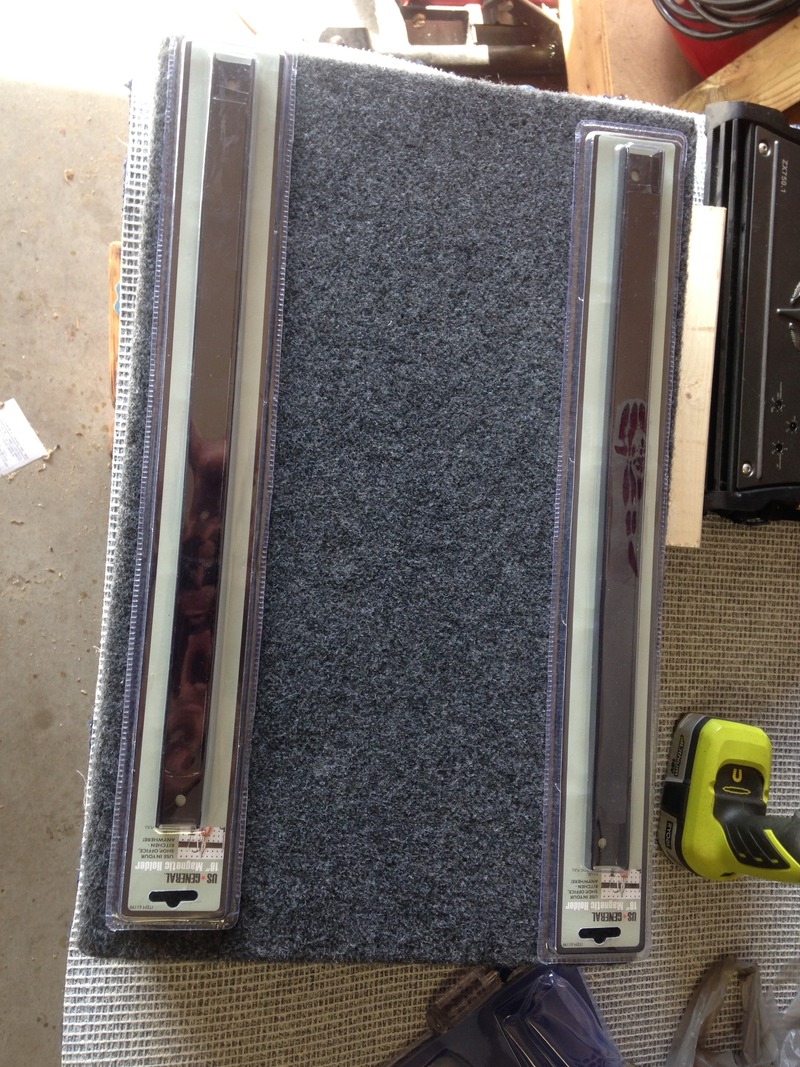
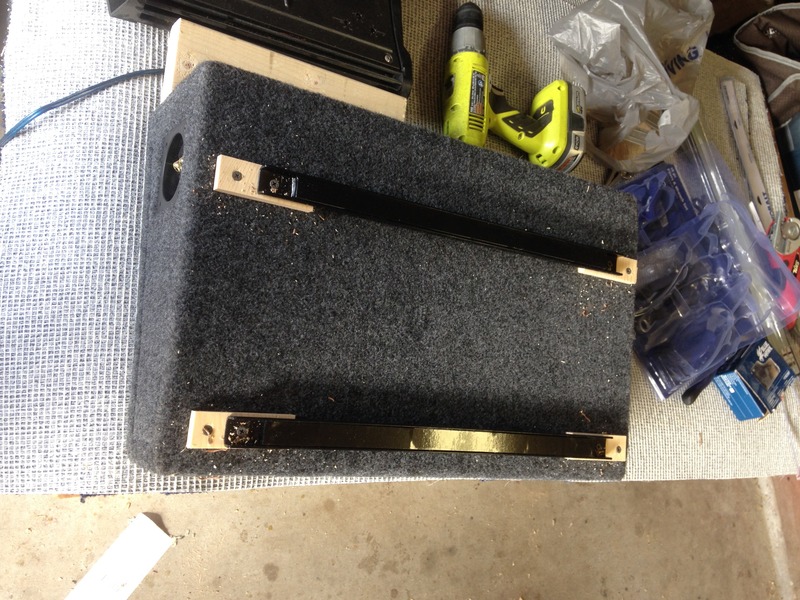
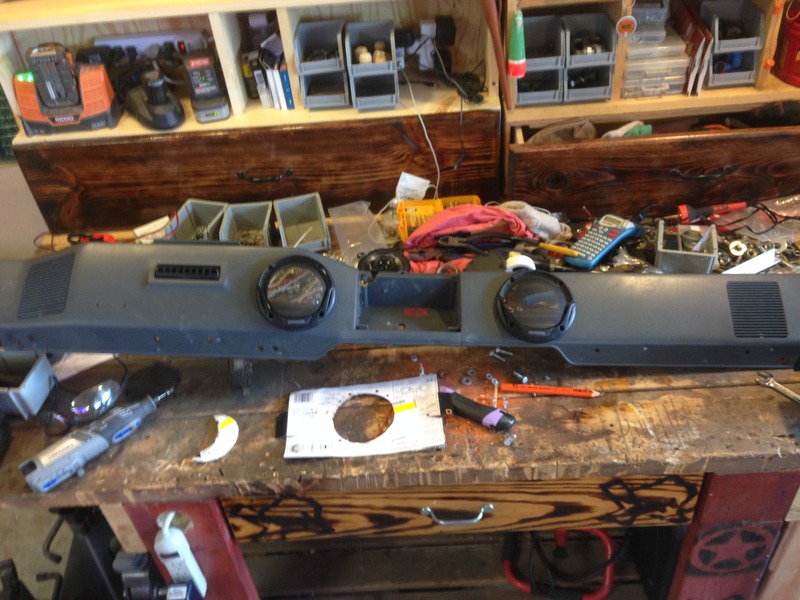
Next up, I wired up a little boom boom for the trails. I had a hard time finding a subwoofer enclosure small enough to fix behind the seats of the cab. After I finally found one what should fit I had to add some wood to the bottom of the box for it to sit level in the cab. I had a real problem trying to figure out how I was going to secure it and the amp in place without it rolling around. I was tiring to avoid screwing in to the back wall of the cab at all cost. So with some brain storming I came up with a idea. I went to harbor friend and got some of their bar magnets and screwed them to the back of the box. PERFECT! They stick to the wall of the cab and don’t move a inch! I also did the same set up for the amp and put it to the left of the sub. I don’t have any pictures of the amp right now but I’ll try to t get some tonight.
That’s not the end though… I have never been a fan of no name cheap electronics but this time I was forced into buying a no name brand because It came with a box that would fit the cab. Well once again I learned my lesson. 3 Days after I installed the 600 watt max “audio pipe” sub on an OLD 300 watt pioneer amp (not bridged), I blew it. Started smelling and them made some god awful racket. I just bought a 1500 watt max Pioneer shallow sub to replace it which I hope to get to tonight.
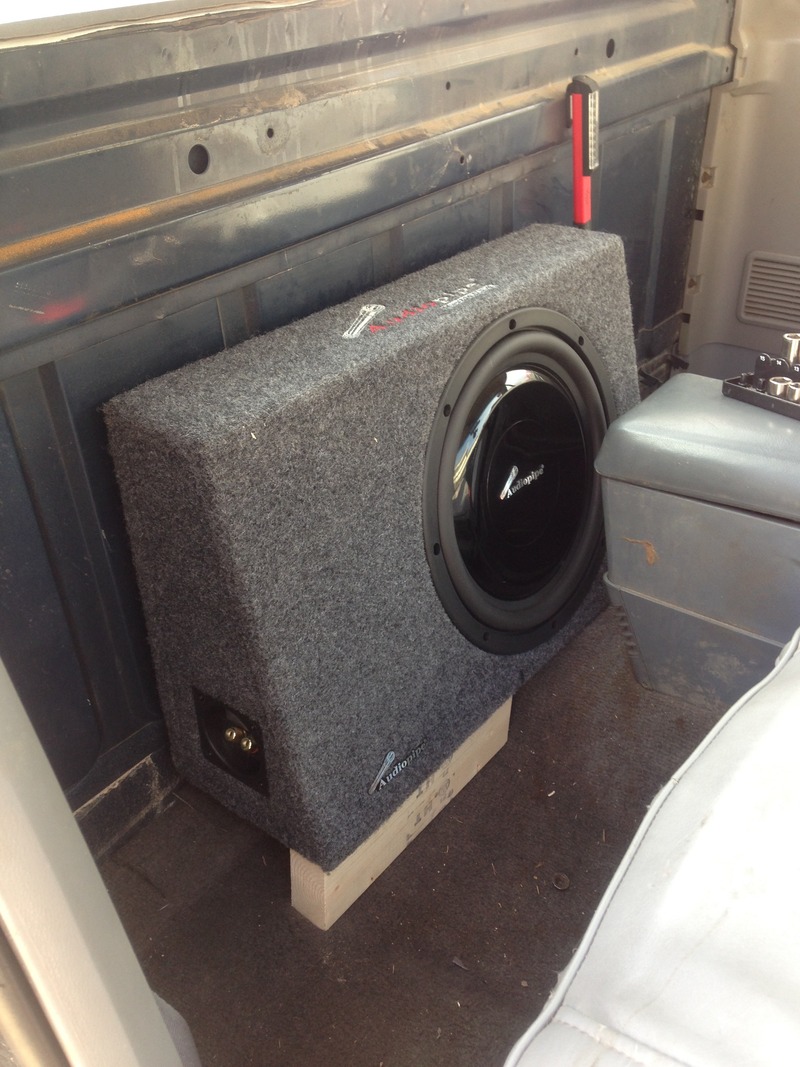
That’s not the end though… I have never been a fan of no name cheap electronics but this time I was forced into buying a no name brand because It came with a box that would fit the cab. Well once again I learned my lesson. 3 Days after I installed the 600 watt max “audio pipe” sub on an OLD 300 watt pioneer amp (not bridged), I blew it. Started smelling and them made some god awful racket. I just bought a 1500 watt max Pioneer shallow sub to replace it which I hope to get to tonight.


 04-08-2015, 09:47 AM
#204
CF Veteran
Thread Starter
Join Date: Feb 2012
Location: college station
Posts: 1,116
Likes: 0
Received 0 Likes
on
0 Posts
Year: 1988
Model: Comanche
Engine: 4.0
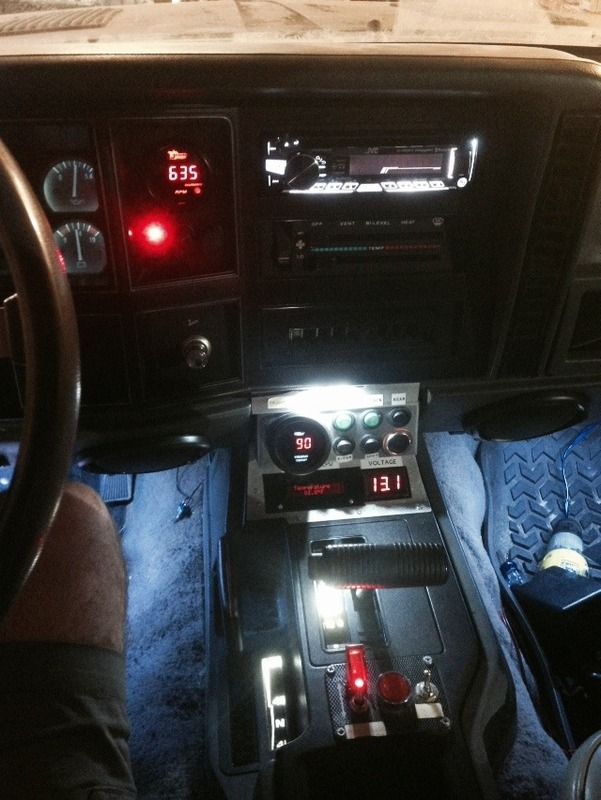
Time to update some more.
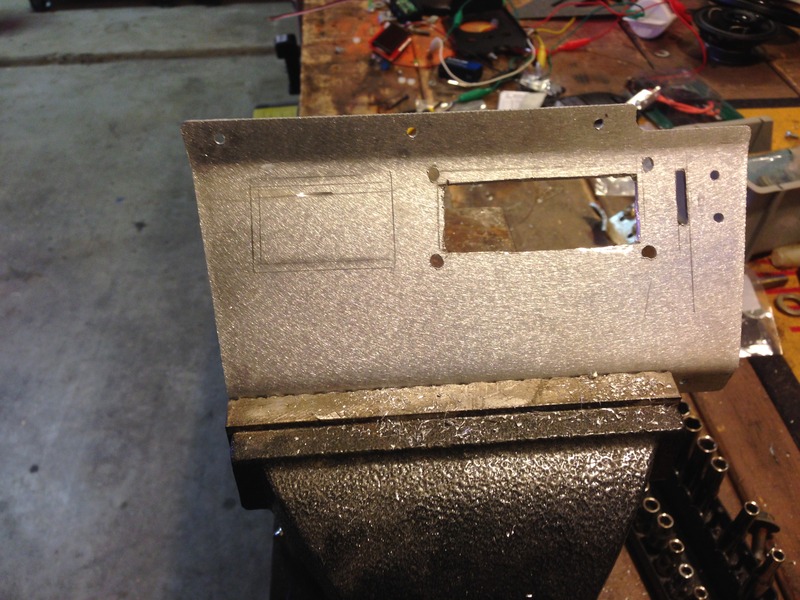
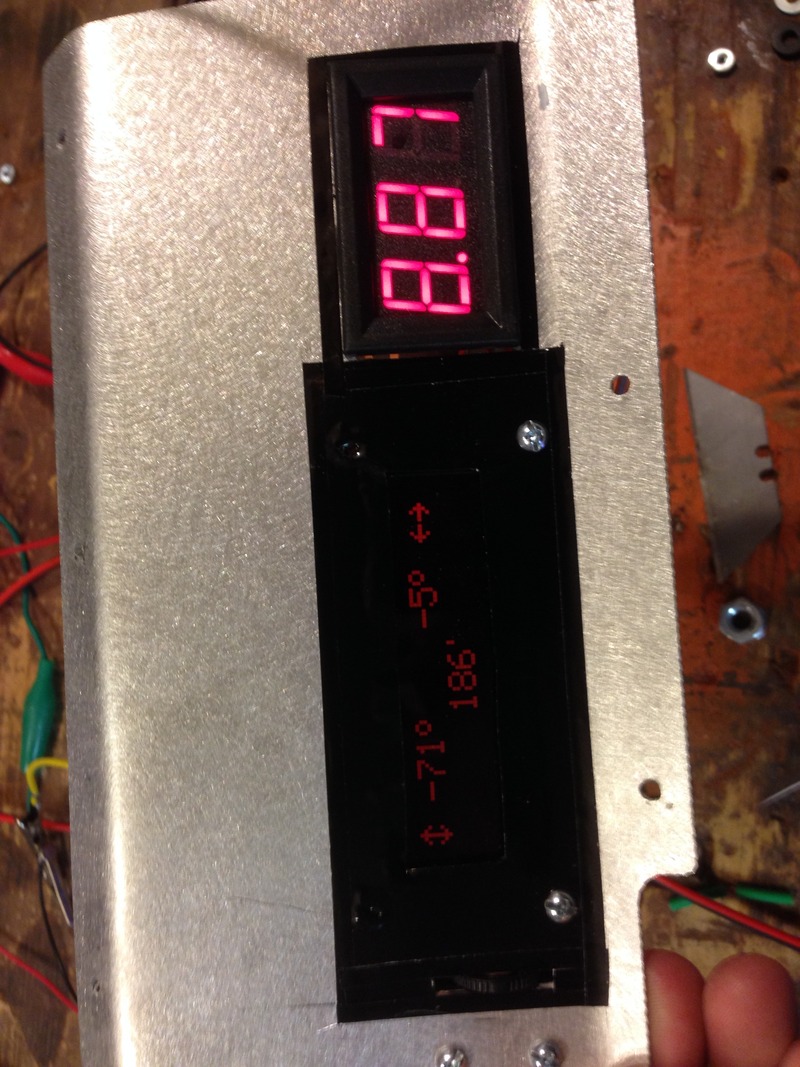
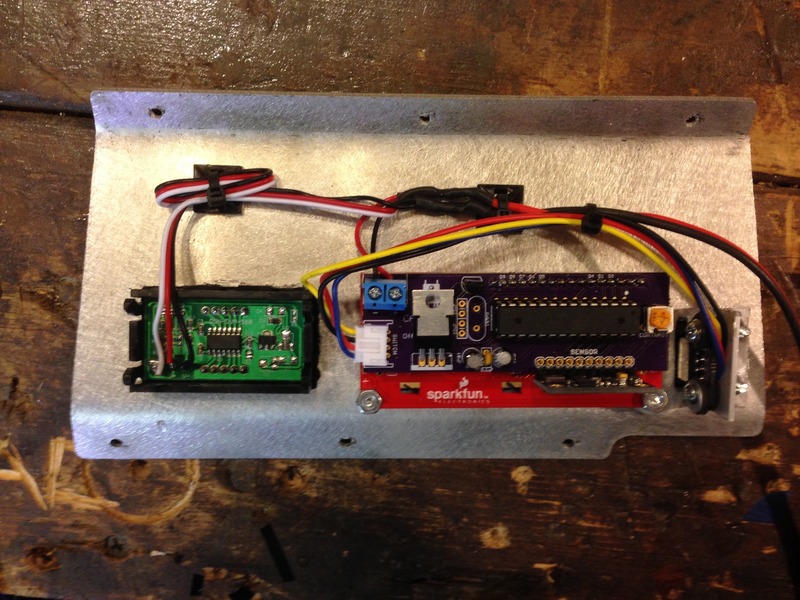
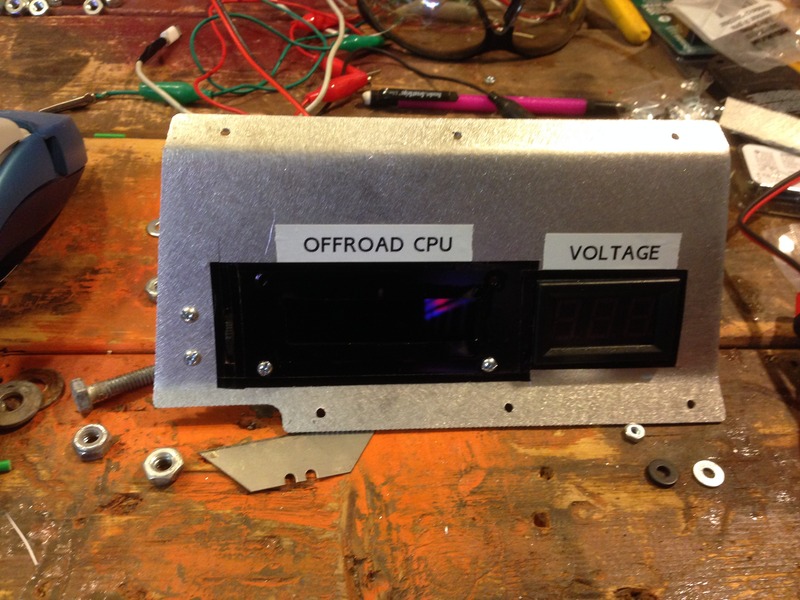
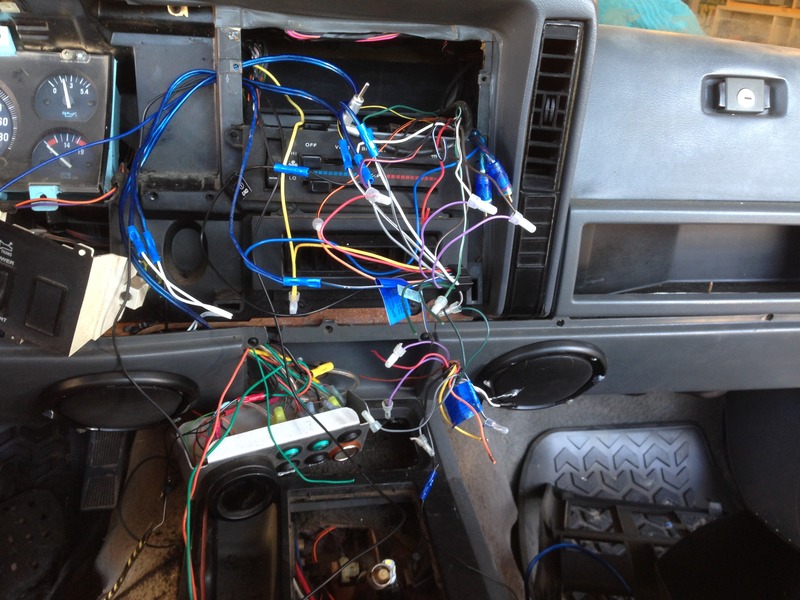
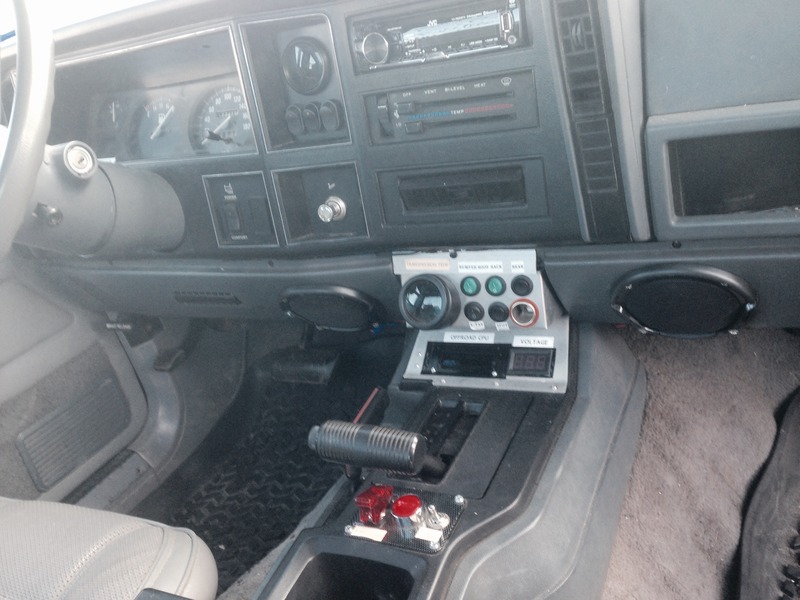
I was able in finally install my altimeter/offroad cpu and a few other things like a volt meter. I ordered a blank switch panel change hole plate from dirt bout offroad and installed the Cpu in it with a digital voltmeter. The Camron Offroad CPU is pretty much just a neat factor. It tells you your tilt and roll, along with Temperature and Attitude. It also Tracks your total altitude. I wish I would have got the White LED display though, the red one I got is not the brightest.
The mounting holes in the panel were pretty hard to get looking nice and straight. To cover up the rough edges I just cut some vinyl decal material and stuck it on there. I plan on making a nice face plate soon not sure yet on what the game plan for that though. I will probably make it out of wood and fiberglass over it.
While I was doing that I also installed two 3.5” speakers in the dash for better sound. I am really happy with the turn out and the sound in the cab now.
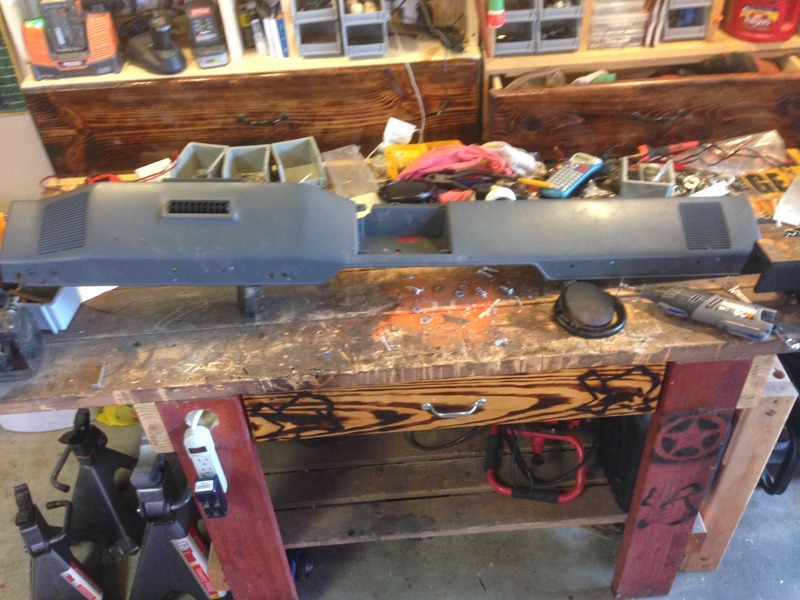
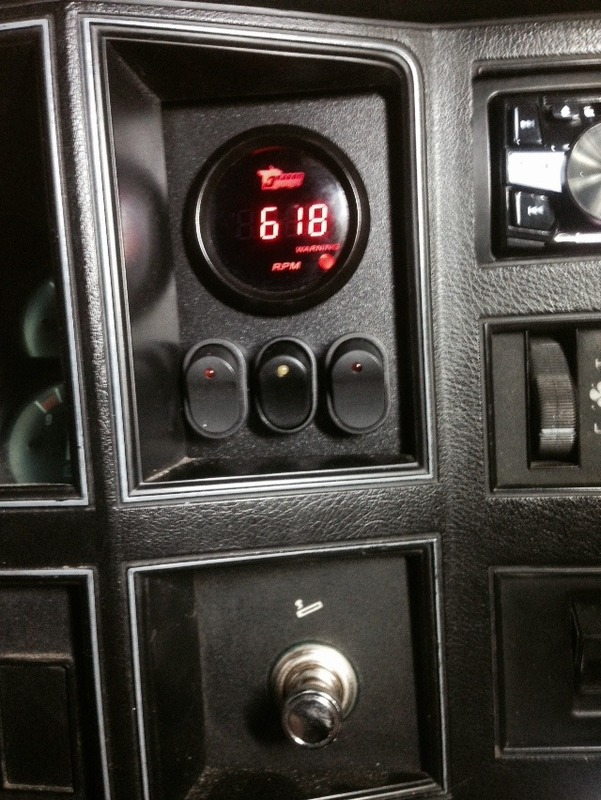
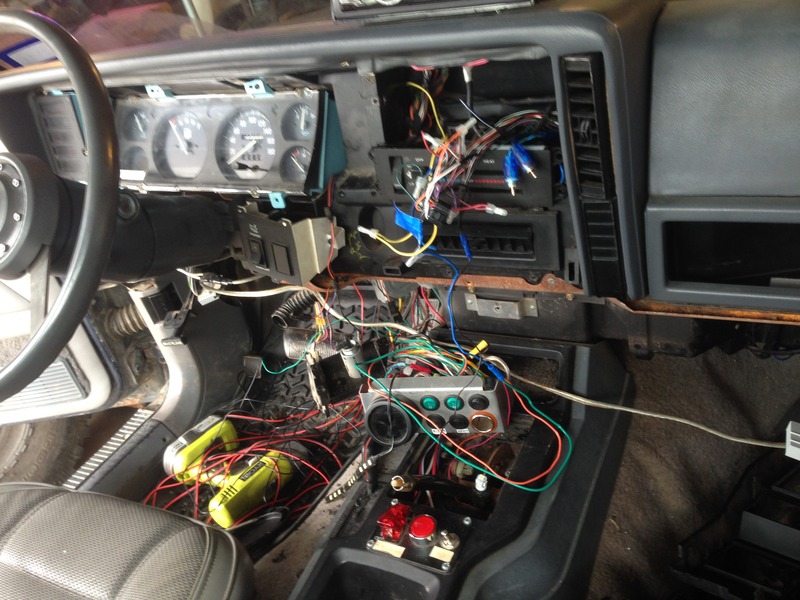
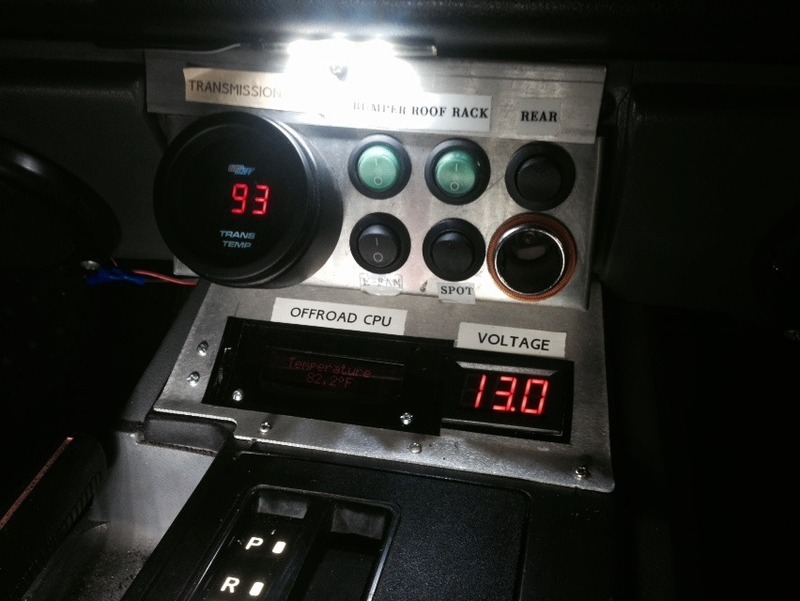
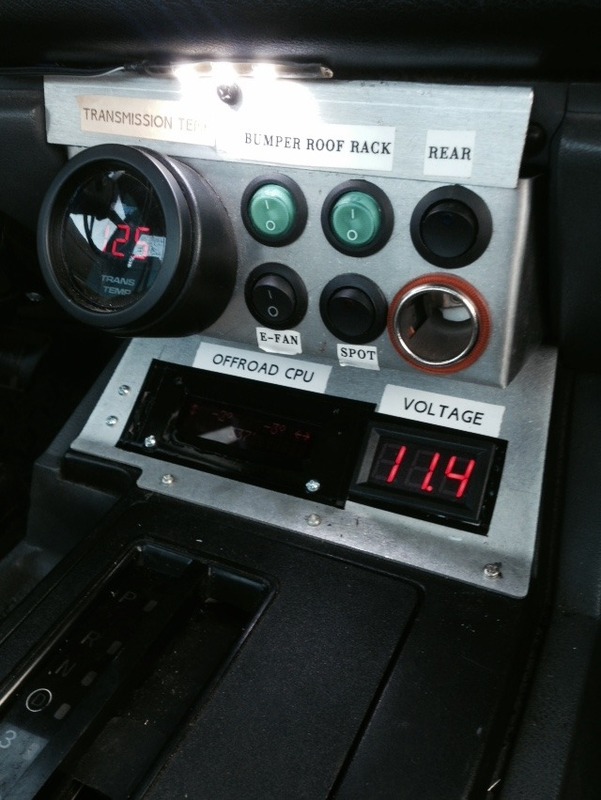
I also Installed a gauge/switch panel where the factory clock was, to put an Rpm gauge (which I had already mounted there, just drilled through the factory clock though.) One of the switches I wired up to more Courtesy/ Cab lighting so I could see better when looking for something in the dark. The other two switches will be for rock lights and cargo bed lighting whenever I get around installing them.
I also installed a new subwoofer because I blew the other one, along with a new radio and wired up sirius XM radio. Oh, and I replaced all dash light, center console lights with LED bulbs (Much better lighting!) Anyway here is the end result!!!!

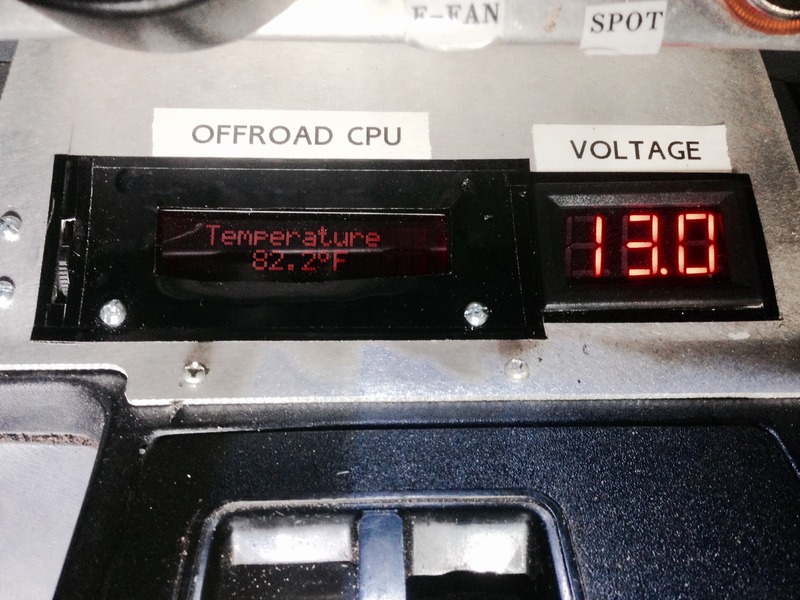
I was able in finally install my altimeter/offroad cpu and a few other things like a volt meter. I ordered a blank switch panel change hole plate from dirt bout offroad and installed the Cpu in it with a digital voltmeter. The Camron Offroad CPU is pretty much just a neat factor. It tells you your tilt and roll, along with Temperature and Attitude. It also Tracks your total altitude. I wish I would have got the White LED display though, the red one I got is not the brightest.
The mounting holes in the panel were pretty hard to get looking nice and straight. To cover up the rough edges I just cut some vinyl decal material and stuck it on there. I plan on making a nice face plate soon not sure yet on what the game plan for that though. I will probably make it out of wood and fiberglass over it.


While I was doing that I also installed two 3.5” speakers in the dash for better sound. I am really happy with the turn out and the sound in the cab now.


I also Installed a gauge/switch panel where the factory clock was, to put an Rpm gauge (which I had already mounted there, just drilled through the factory clock though.) One of the switches I wired up to more Courtesy/ Cab lighting so I could see better when looking for something in the dark. The other two switches will be for rock lights and cargo bed lighting whenever I get around installing them.

I also installed a new subwoofer because I blew the other one, along with a new radio and wired up sirius XM radio. Oh, and I replaced all dash light, center console lights with LED bulbs (Much better lighting!) Anyway here is the end result!!!!


 04-08-2015, 11:51 AM
#205
CF Veteran
Thread Starter
Join Date: Feb 2012
Location: college station
Posts: 1,116
Likes: 0
Received 0 Likes
on
0 Posts
Year: 1988
Model: Comanche
Engine: 4.0
Now on to the bad news.
I did all that work in preparation to take the truck camping at Llano State Park in Junction, Texas about 5 hours away. I got done with all the work on Wednesday and planned on driving the truck around for a couple of days to give it a shake down before I took it on the trip. With all the work that had just been done to it I thought I needed to. New rear main seal, distributor, engine ground, ground and power cables to the starter and alternator, and then of course all the upgrades I did inside. Well the thing was finally not leaking a drop of oil.
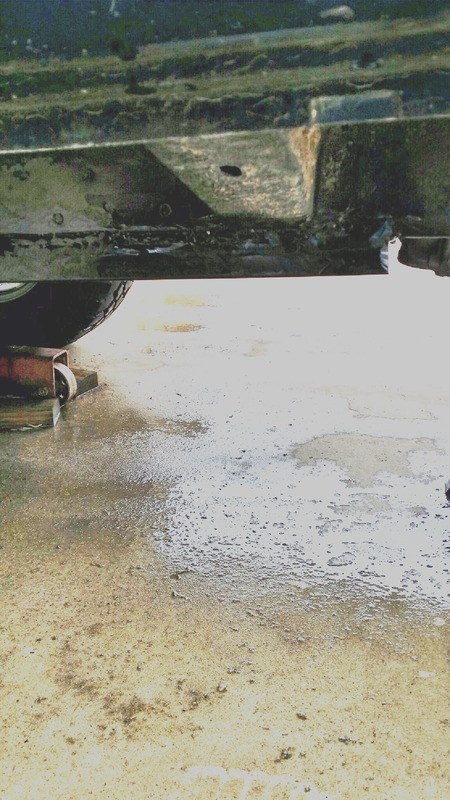
Sure enough, drove the truck to work Thursday morning, came out to it to go to lunch and noticed a oil leak. I immediately took it back to Car Docs hoping that they just didn�t do a good job installing the rear main seal and it would be covered under warranty. They called me back and said that both the rear main seal and distributer gasket was leaking again. He said the remembered about the low compression in cylinder #2 and decided to do what they called a �pressure� test and run it up the road. They told me that before he hit 30mph the crank case pressure was up to 3 PSI. They said they won�t replace the rear main seal again because the crank case pressure build up from the worn cylinder rings was the cause of blowing out the seals again.
To me it adds up when I think about it. Over the past two years every time I would replace a leaky gasket or seal and new leak would pop up from a place that was not previously leaking.
I ended up not risking taking the truck on the trip. But this past weekend I did attempt to see how bad the issue really was. I drove it to my buddies deer lease 100 miles away in Sheridan, Texas. On the way there the rear main seal and distributor gasket leaks got worse and worse, I also believe I developed another leak at the oil pan. From the trip there and back I lost well over a quart of oil. Not to mention I averaged 11.8 MPG on the highway�
I hate to say it but I have to call it. The engine is done for. No more Band-Aids. I still plain on getting the lift done to finish that project. After that I am going to start looking for a 96+ motor to build a stroker. I will buy the parts as funds allow and then drop the donor motor and parts off to a very reputable machinist that I trust doing the machining and assembly in my home town. I plan on leaving the current engine in the truck until the stroker is built and ready to drop in. Since it still can move under its own power I feel it�s best to do that if I need to move the truck from time to time.
I did consider a V8 swap also, but there are a lot things that offset the benefits of how cheaply I can get a SBC. Here is a list of major concerns with that.
- Keeping it cool.
I have seen plenty of these swaps done on Cherokees and I always hear the frustrating stories of trying to keep it cool in the small engine bay. The only way I have seen it work is with a $1000+ custom cooling set up. Which I don�t want to have to deal with
- Firewall Modifications
A good bit of fabrication will have to be done to the firewall to make the V8 fit.
- Mounting the Motor
It will take custom motor mounts not to mention I would need to plate the unibody around the motor to deal with the additional weight.
- Transmission set up
2 options, buy a high dollar adapter plated to keep my current transmission or buy a TH350 and a adapter plate to mount it to the NP231
- Computer Compatibility
I don�t want to even look into what it�s going to take to make the renix computer and SBC computer talk to each other.
- The want for a fresh engine
At the end of the day I want a fresh rebuild. So that will mean I will get the SBC rebuilt regardless.
All of these reasons add up to me not perusing it. I think It will end up taking longer to get the truck back running again, cost more than a stroker when it�s all said and done, and be more of a headache. All for what? When the stroker will be putting out the same numbers maybe even better than a stock vortec 5.3 or something.
I have started doing research on the renix 4.0 to the 96+ 4.0 HO motor swap and it doesn�t look that bad. The plan is to go with a 96+ because of the better flowing head, intake, exhaust, and bigger throttle body. I will probably get work done on the head or buy one that has already been ported and polished along with a better valve train. They run about $600-750. Or get the new all aluminum head that edelbrock just released for the 4.0, but it runs about $1500.00. In addition I will also have to buy a new header to match up with the 96+ exhaust ports. Also I pain on getting a bored 68mm Throttle body. I want this thing to have plenty of air.
As far as fuel goes, I�m going to need to get a better fuel pump and the hesco adjustable fuel pressure regulator along with ford #24lb+ fuel injectors depending on the size of the stroker. I will also like to get an air to fuel ratio gauge to dial it in, but I know they are pricy, if I have that though I should be able to get the mixture right by adjusting the resistance on the MAP sensor.
As for the build in all I would really like to stay under $3000.00 in just the motor. I know I can probably add another $1000 in injectors, fuel pressure regulator, fuel pump, header, and Throttle body. I think these are realistic numbers and might even come out under 4k total.
I would love to do a 4.9 stroker but I feel it will be more costly and problematic, so I will most likely just go the route of a 4.7. I haven�t picked out the recipe of the build yet because I want to get deep into some more research. However, I did talk to the person that will be doing the assembly and he said to stay away from Keith Black Pistons and Eagle cranks. Both of their quality has really fallen off. He said his experience with SCAT over the past few years has gotten better and better. I trust this guy because he has been doing this for over 30 years and has built hundreds of motors. Furthermore, from the research I have done I should at minimum be looking at 270HP and 300Tq with a stock 96+ 4.0HO head. I am hoping for more like 300Hp and 330Tq though. Which I think are possible numbers.
I�m sure I could attempt to throw this thing together myself and probably save a grand but at the end of the day I am willing to pay more to know it was built right by someone that has a good rep and a tremendous amount of experience.
With all that said�.
LET THE FUN BEGIN!

I did all that work in preparation to take the truck camping at Llano State Park in Junction, Texas about 5 hours away. I got done with all the work on Wednesday and planned on driving the truck around for a couple of days to give it a shake down before I took it on the trip. With all the work that had just been done to it I thought I needed to. New rear main seal, distributor, engine ground, ground and power cables to the starter and alternator, and then of course all the upgrades I did inside. Well the thing was finally not leaking a drop of oil.
Sure enough, drove the truck to work Thursday morning, came out to it to go to lunch and noticed a oil leak. I immediately took it back to Car Docs hoping that they just didn�t do a good job installing the rear main seal and it would be covered under warranty. They called me back and said that both the rear main seal and distributer gasket was leaking again. He said the remembered about the low compression in cylinder #2 and decided to do what they called a �pressure� test and run it up the road. They told me that before he hit 30mph the crank case pressure was up to 3 PSI. They said they won�t replace the rear main seal again because the crank case pressure build up from the worn cylinder rings was the cause of blowing out the seals again.
To me it adds up when I think about it. Over the past two years every time I would replace a leaky gasket or seal and new leak would pop up from a place that was not previously leaking.
I ended up not risking taking the truck on the trip. But this past weekend I did attempt to see how bad the issue really was. I drove it to my buddies deer lease 100 miles away in Sheridan, Texas. On the way there the rear main seal and distributor gasket leaks got worse and worse, I also believe I developed another leak at the oil pan. From the trip there and back I lost well over a quart of oil. Not to mention I averaged 11.8 MPG on the highway�
I hate to say it but I have to call it. The engine is done for. No more Band-Aids. I still plain on getting the lift done to finish that project. After that I am going to start looking for a 96+ motor to build a stroker. I will buy the parts as funds allow and then drop the donor motor and parts off to a very reputable machinist that I trust doing the machining and assembly in my home town. I plan on leaving the current engine in the truck until the stroker is built and ready to drop in. Since it still can move under its own power I feel it�s best to do that if I need to move the truck from time to time.
I did consider a V8 swap also, but there are a lot things that offset the benefits of how cheaply I can get a SBC. Here is a list of major concerns with that.
- Keeping it cool.
I have seen plenty of these swaps done on Cherokees and I always hear the frustrating stories of trying to keep it cool in the small engine bay. The only way I have seen it work is with a $1000+ custom cooling set up. Which I don�t want to have to deal with
- Firewall Modifications
A good bit of fabrication will have to be done to the firewall to make the V8 fit.
- Mounting the Motor
It will take custom motor mounts not to mention I would need to plate the unibody around the motor to deal with the additional weight.
- Transmission set up
2 options, buy a high dollar adapter plated to keep my current transmission or buy a TH350 and a adapter plate to mount it to the NP231
- Computer Compatibility
I don�t want to even look into what it�s going to take to make the renix computer and SBC computer talk to each other.
- The want for a fresh engine
At the end of the day I want a fresh rebuild. So that will mean I will get the SBC rebuilt regardless.
All of these reasons add up to me not perusing it. I think It will end up taking longer to get the truck back running again, cost more than a stroker when it�s all said and done, and be more of a headache. All for what? When the stroker will be putting out the same numbers maybe even better than a stock vortec 5.3 or something.
I have started doing research on the renix 4.0 to the 96+ 4.0 HO motor swap and it doesn�t look that bad. The plan is to go with a 96+ because of the better flowing head, intake, exhaust, and bigger throttle body. I will probably get work done on the head or buy one that has already been ported and polished along with a better valve train. They run about $600-750. Or get the new all aluminum head that edelbrock just released for the 4.0, but it runs about $1500.00. In addition I will also have to buy a new header to match up with the 96+ exhaust ports. Also I pain on getting a bored 68mm Throttle body. I want this thing to have plenty of air.
As far as fuel goes, I�m going to need to get a better fuel pump and the hesco adjustable fuel pressure regulator along with ford #24lb+ fuel injectors depending on the size of the stroker. I will also like to get an air to fuel ratio gauge to dial it in, but I know they are pricy, if I have that though I should be able to get the mixture right by adjusting the resistance on the MAP sensor.
As for the build in all I would really like to stay under $3000.00 in just the motor. I know I can probably add another $1000 in injectors, fuel pressure regulator, fuel pump, header, and Throttle body. I think these are realistic numbers and might even come out under 4k total.
I would love to do a 4.9 stroker but I feel it will be more costly and problematic, so I will most likely just go the route of a 4.7. I haven�t picked out the recipe of the build yet because I want to get deep into some more research. However, I did talk to the person that will be doing the assembly and he said to stay away from Keith Black Pistons and Eagle cranks. Both of their quality has really fallen off. He said his experience with SCAT over the past few years has gotten better and better. I trust this guy because he has been doing this for over 30 years and has built hundreds of motors. Furthermore, from the research I have done I should at minimum be looking at 270HP and 300Tq with a stock 96+ 4.0HO head. I am hoping for more like 300Hp and 330Tq though. Which I think are possible numbers.
I�m sure I could attempt to throw this thing together myself and probably save a grand but at the end of the day I am willing to pay more to know it was built right by someone that has a good rep and a tremendous amount of experience.
With all that said�.
LET THE FUN BEGIN!
04-08-2015, 12:59 PM
#206
CF Veteran
Join Date: Jul 2012
Location: San Antonio, TX
Posts: 4,104
Likes: 0
Received 2 Likes
on
2 Posts
Year: 1996
Model: Cherokee
Engine: 4.0L
-keeping it cool can be frustrating novakx radiator seems to do the trick in most case ive read
-you wont need to mod the fire wall if you go with a 5.3 and novak mounts plus the 5.3 is lighter than the 4.0
i seriously doubt the strocker will put down near what a stock 5.3 will and youll have more room to grow with the 5.3, with the stroker youll be pretty much tapped out already
-you can find a 5.3/4l60e for 1k$ or so with 100k on them and the motor are well know to go past 250k
- just use a 4l60e with a bastard np231c/np231j case
- you no longer need the renix computer just splice the harnesses and needed and the senders can be adapted to the 5.3
the stroker will be a quicker turn around but v8
that all being said im planning on a 5.3 im my xj hopefully next year and realisticly i think i can do it for realitivly cheep(for an engine swap that is)
just my .02
04-08-2015, 02:00 PM
#207
CF Veteran
Thread Starter
Join Date: Feb 2012
Location: college station
Posts: 1,116
Likes: 0
Received 0 Likes
on
0 Posts
Year: 1988
Model: Comanche
Engine: 4.0
-keeping it cool can be frustrating novakx radiator seems to do the trick in most case ive read
-you wont need to mod the fire wall if you go with a 5.3 and novak mounts plus the 5.3 is lighter than the 4.0
i seriously doubt the strocker will put down near what a stock 5.3 will and youll have more room to grow with the 5.3, with the stroker youll be pretty much tapped out already
-you can find a 5.3/4l60e for 1k$ or so with 100k on them and the motor are well know to go past 250k
- just use a 4l60e with a bastard np231c/np231j case
- you no longer need the renix computer just splice the harnesses and needed and the senders can be adapted to the 5.3
the stroker will be a quicker turn around but v8
that all being said im planning on a 5.3 im my xj hopefully next year and realisticly i think i can do it for realitivly cheep(for an engine swap that is)
just my .02
-you wont need to mod the fire wall if you go with a 5.3 and novak mounts plus the 5.3 is lighter than the 4.0
i seriously doubt the strocker will put down near what a stock 5.3 will and youll have more room to grow with the 5.3, with the stroker youll be pretty much tapped out already
-you can find a 5.3/4l60e for 1k$ or so with 100k on them and the motor are well know to go past 250k
- just use a 4l60e with a bastard np231c/np231j case
- you no longer need the renix computer just splice the harnesses and needed and the senders can be adapted to the 5.3
the stroker will be a quicker turn around but v8
that all being said im planning on a 5.3 im my xj hopefully next year and realisticly i think i can do it for realitivly cheep(for an engine swap that is)
just my .02
Thanks for your input. I would still want a fresh engine though. I know they are good for that many miles. My family has had two Chevys with 5.3s that went to the 300k mark before the blew head gaskets and toasted the heads. But the 4.0 is suppose to be good for 300k also. Mine has 108k on it and its done for. There is still that chance that I could get a 5.3 that was not taken care of and it **** out on me also. While I see your points about the benefits of a v8 and don't not agree with you, I just don't think it is a task I want to tackle.
04-08-2015, 09:30 PM
#208
Seasoned Member
Join Date: Jul 2012
Location: Fort Worth
Posts: 417
Likes: 0
Received 0 Likes
on
0 Posts
Year: 1999
Model: Cherokee
Engine: 4.0
Time to update some more.
I was able in finally install my altimeter/offroad cpu and a few other things like a volt meter. I ordered a blank switch panel change hole plate from dirt bout offroad and installed the Cpu in it with a digital voltmeter. The Camron Offroad CPU is pretty much just a neat factor. It tells you your tilt and roll, along with Temperature and Attitude. It also Tracks your total altitude. I wish I would have got the White LED display though, the red one I got is not the brightest.
The mounting holes in the panel were pretty hard to get looking nice and straight. To cover up the rough edges I just cut some vinyl decal material and stuck it on there. I plan on making a nice face plate soon not sure yet on what the game plan for that though. I will probably make it out of wood and fiberglass over it.
 04-20-2015, 10:00 AM
#209
THE Admin

Join Date: Sep 2010
Location: Lantana, Fl
Posts: 34,036
Received 231 Likes
on
187 Posts
Year: 1996
Model: Cherokee (XJ)
Engine: 4.Slow
The 4.9 didn't really run any hotter than a regular motor. Just make sure your radiator and cooling system is fully functional and in good condition.
It also helps that I didn't have a A/C condenser anymore and a hood scoop.
It also helps that I didn't have a A/C condenser anymore and a hood scoop.
04-22-2015, 11:28 AM
#210
CF Veteran
Thread Starter
Join Date: Feb 2012
Location: college station
Posts: 1,116
Likes: 0
Received 0 Likes
on
0 Posts
Year: 1988
Model: Comanche
Engine: 4.0
You have one? This is a non A/C truck and I have hood lovers but no scoop. Also a New 3 row CFS radiator, HD grand cherokee fan clutch, trans cooler, and 97+ e fan on manual switch. all less than 3000 miles on them.

